Search the Community
Showing results for tags 'conversion'.
-
Hi everyone, Got a brake question. Since getting my 1973 240z on the road and running after an intensive tear down and rebuild, all has been good except for the brakes. For some reason, with even the slight amount of pressure, the brakes grab really hard. So when I drive I have to barely feather the pedal to brake normally. When I pull the vaccum line off of the booster, the opposite happens, the brakes take a LOT of effort to decelerate normally. So I am thinking the booster may be providing too much assistance. Wondering if you guys have ever experienced something like this in your builds? Brake system "brake-down" -240z Original booster (tested and working) -Aftermarket check valve installed in vacuum line (the correct direction) -Vacuum line connected to the crossover tube on the intake manifold (SU carbs). OEM has the vacuum connection on one of the runners. -1981 280zx master cylinder 15/16" -wilwood proportioning valve (for rear brakes) with built in splitter for front brakes L and R. -toyota 4-piston front calipers with vented Z31 rotors -maxima rear disc brake conversion -All new hard lines and brake hoses. Any feedback is welcome. I will be repairing a very minor leak in one of the inverted flare hard line connections soon and can use the opportunity to try to solve this issue. Thank you! -Aaron
-
So I purchased these rear brackets from MSA, I installed everything they said to use , 85’ maxima calipers/pads(rear) , 82’ 280zx rotors(rear). It all mounts up fine, but the pads are only using about half, they don’t seem to fit all the all the way down using up all the rotor surface?? Has anyone else experienced this issue?
-
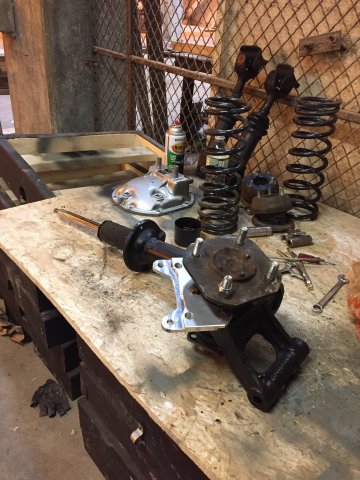
I have FINALLY finished just about everything for my coilover conversion in my 1978 280z with Stance coilovers. I also have TTT control arms. I am at the point of dialing-in the ride height. Stance gave me four 6" threaded sleeves. I had them welded right to the hubs in the front and 3" above the hubs in the back. I was hoping to maintain stock height or maybe 1" lower than stock. Well after getting everything on and lowering the car, it looks like the front was lowered around 1" and the back was lowered around 2". I would like to crank the rear up another inch. The problem is, the threaded sleeve is currently only on by about 5 threads in both front/rear. I am afraid to crank it up in the back because I feel like the coilover will sheer off if I go any higher with so few threads holding. So my questions are... How many threads are "safe" when screwing the sleeve into the coilover? I have not done anything with alignment, track width, etc. Will any of these affect my ride height? What are my options for raising the car if I can't unthread the sleeves anymore? Can I use a top-plate spacer or something?
- 5 replies
-
- coilover
- ride height
-
(and 3 more)
Tagged with:
-
hello everyone! im new here but ive had my 280 for 2 years now. the engine turns over but it will never fire up. ive switched out plenty of relays and electrical components, cleaned out the fuel lines and installed new fuel pump. ive just decided to scrap the EFI system and switch to carburators. i was wondering if this would be the right place to ask the right person for some good but affordable carbs that will fit onto my 280z (cali model) thanks
-
- carbs
- carburaors
-
(and 3 more)
Tagged with:
-
Been working on power steering. I decided on a 2004 Subaru WRX steering rack. I did some measuring to make sure everything would work. First I needed to figure out how much to cut off the steering rod. In steering, the pivots are the key to getting it to handle correctly. The stock pivots on the 240z steering rack is 616mm. The WRX rack is about 634mm. Some individuals use older Celica inner tie rods with the stock Subi outers to get everything to fit, but my rack is the "late" Subi rack. The threads are larger, M16 x 1.5, on the "late" Subi rack and the Celica rods didn't fit. I did some online research and found that 2000 Hyundai Sonata rods had the correct length and thread. The added bonus is that the inside of the Hyundai rods are vented and stepped to allow for more steering angle without shortening the outer tube of the steering rack. The step did have a lip that had to be ground down though. The step on the Hyundai rod is 5mm which adds 10mm on the travel on the steering. So, while I cut 18mm of the rod, it reduced the travel by 8mm. Stock 240z travel is 120mm, Subi is 132mm. Now the travel is around 124mm because the measurements are not perfect. So I added a little travel, hopefully it doesn't bind the steering knuckles. Here is a picture comparing the shortened Subi rod vs. the 240z rack. The final measurement was 576mm for the steering rod. Then I mounted the subframe on the engine to check clearances . In this swap, the engine mount perch has to be clearanced to make room for the angle of the Subi steering shaft. Also, the subframe has to be clearanced for the rotary valve and lines. Also checked the clearances with the A/C compressor mounted and to plan the pressure line. I cut the end of the steering shaft off to weld the Subi U-joint to the 240z steering shaft. I just shaved the weld and pulled the shaft out the Subi joint and the 240z shaft diameter was exactly the correct diameter to push inside and weld. I think it looks better that the stock Nissan weld, and that lasted 45 years. Hope I didn't cook the grease out of the joint when I welded it. There wasn't much smoke, so I think I am good. The stock Subaru rod ends ended up only having about 12mm of thread engagement when the alignment was roughed in and I wanted more. I did some research and figured out that 2003-2009 Mazda 6 tie rod ends are 7mm longer than the WRX ends. They are curve and have a left and right though. The taper on the stud seemed to match the original Datsun rods as well. Now I have plenty of thread engagement. I used compression fittings to move the hydraulic lines to where they would fit around the subframe. They worked out well and only one needed to be tightened up. They are 1/4 inch fittings. This is how much I had to cut out of the subframe. Metal was added to strengthen the subframe. If the engine mount becomes a problem, then I will gusset it. I used the RB25 (R33 non HICAS) pump, which is the same as most 240sx pumps. I built the pressure line out of -6AN Fragola PTFE hose with a M16 x 1.5 banjo metric adapter and the M14 x 1.5 power steering fitting for the rack. I did kinda skimp on the reservoir though and will switch it with an OEM style later. I used a 120 degree end on the rack side so it will clear the A/C pump later. Should have used a 150 degree though. The feel is great and feels about as a power steering car should. I dont have too many bumpy roads around here, so I cant fully test for bump steer. Havent felt any yet and we do have some railroad crossings that I have tried. There arent too many curvy roads either, but parking lots seem to be way more tolerable. The steering ratio seemed to stay about 2.7 and without a degree wheel to measure it, will stay "about". If there are any questions, let me know and I will ad them in the first post to help keep everything together.
-
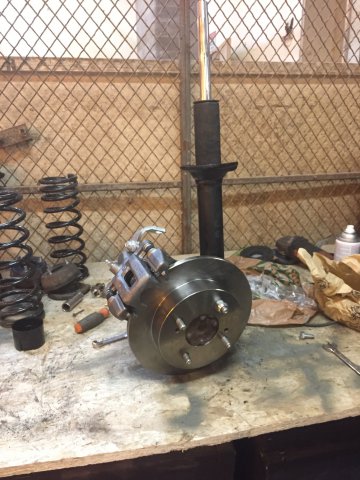
Hey HybridZ crew! So I finally decided that after upgrading nearly every other component on the chassis of my Datsun, and a couple really lack luster performances, it was time to do the brakes! I was suitably frustrated with their lack of grab that I started to look into other options. Since this is primarily an auto-x car, I wasn't too concerned with heat dissipation and brake fade like on a serious wheel to wheel machine, and I was more concerned with keeping my weight down. Here's the car, zooming around at Nissanfest this year at Evergreen Speedway. With those factors in mine I went shopping and settled on the Silvermine Motors "Small" wilwood kit. It has the forged 4 piston Dynalite calipers up front and the billet 2 piston dynalite in the rear and traditional drilled and slotted rotors, rather than 2 piece rotors The kit also comes with all the lines needed to connect to the factory fittings. It even has the little retaining clips that always shoot off and get lost under work benches when you pull the stock lines! Edan at Silvermine was excellent to work with and guided me in the right direction on a couple things. Fastest shipping I've ever had on a part. Think he put them in the mail Thursday afternoon, and I had them in my hands on a Monday! Boxes contents all laid out! Well packaged, and everything in its place! Comes with some awesome 10.9 grade hardware, the only bolts you reuse are the front brake caliper bolts, which hold on the new brackets. Really well made and well thought out kit. The rear install is a breeze, once the drum backing plates are out of the way, and the ebrake cables are gone! Hey, its dead weight right? Since the Silvermine kit uses a 3 bolt rear bracket, I didn't need to pull the whole rear assembly apart, so I just turned the rear drum plates into pizzas! Just cut to the bolt holes and then flex them a few times, and they snap right out. The whole rear install probably took about 40 minutes start to finish. For my method, you don't need any really crazy tools or huge breaker bars, just a reasonable quality angle grinder! You could absolutely take the stub axles out (and it would be a perfect time to do rear wheel bearings) if you wanted to keep sparks to a minimum. Part of me wanted thought to see if it was possible without removing the axles, which makes this job MUCH less of an endeavor. The caliper mounts at the 10 o'clock position, keeping its minimal weight inside the axle line of the car. The front kit goes on super nicely. Remove and save the caliper bolts, and then remove the hub/rotor assembly. Why Datsun did it this way is a mystery to me, but oh well. I wire wheeled the mounting surface on the hub and the rotor, as well as chamfered the mounting edge of the bore on the rotor to ensure a solid mount. Bolt the hub back together and then put your new rotor on! Bleed and you're done! Overall impressions, these were really well made, I give them 2 wrenches out of 5 for installing. Depending on how you decide to remove your drum backing plates, it goes up to a 3 or 4 out of 5, particularly for a new to Datsun mechanic. I'm racing the car this weekend, so hopefully I'll have developed an opinion about the brakes this time next week!
- 12 replies
-
I love V10's so I'd really like to try this conversion in my 260Z, just trying to work out if it would be possible. Engine is a BMW S85 5L V10 from the E60 M5, makes 507hp is stock form, with less restrictive exhaust system and remap up to 550HP is possible, Its not all that heavy an engine, an RB26DETT weighs 255 - 260kg and the S85 weighs around 240kg so it certainly not to heavy to put in a Z. The engine will definitly fit lengthwise but it may be a bit tight widthwise and I'm not sure if the E92 M3 6 speed gearbox will fit in the transmission tunel and the gearstick position looks like it could be quite far back. Only other concerns are clearance of the front crossmember and steering arm. What do you guys think? Heres some photos of the engine in question:
- 34 replies
-
- V10
- Conversion
-
(and 3 more)
Tagged with:
-
Hey I have a 1970 datsun 240z and I've been thinking about a 2jz conversion for a while now, due to some recent circumstances I've really started to think about the swap very seriously. I was wondering how much it would cost to get everything I need for the build, wiring harness, mounts, engine, drivetrain, ect. I realize that cost depends on a lot of things but I was hoping to get some estimates, I plan on getting brakes/ suspension/strut braces already so you can subtract that from total cost. Something else I may have to consider is taking it to a shop as i don't have room to work on it where I live and I cant say they would even let me. Any help is greatly appreciated, thanks. My estimate: engines $2,500-3,000 350z trans $400-700 engine mounts $300 plug 'n' play wiring harness $799 BC coilovers $1,200 strut braces $240 wilwood stages 3's $2,000 350z trans adapter plate $400 exhaust (?) differential (?) driveshaft (?) ------------------------------------------------------------------------------------- Total: $8,990-9,790 no tax... $9,889-10,769 after adding 10% for tax.
-
Hi guys I've seen weight for the engines and weights for cars and various pieces but just wondering if anyone has actually ever weighed their car post RB conversion with all of the other changes like exhaust, brakes etc that usually go along with a swap. Ideally would love to see independent wheel weights but I know that might be pushing it. If you have can you post weights and general idea of aftermarket parts. Thanks


