-
Member Statistics
33408
Total Members5167
Most Online
All Activity
- Today
-
 flatout changed their profile photo
 -
Best ways to prevent chassis /frame warping
flatout replied to Joe0690's topic in Brakes, Wheels, Suspension and Chassis
having just completed my first HPDE track day in my Z a couple weeks ago. I 10000% recommend at least trying one. Local clubs vary but cost to seat time to fun ratio is quite high. you dont need to have a track weapon. you don't need to be a professional driver. you just need to have fun. -

Firewall replacement - what is the order for removal
aircobra replied to aircobra's topic in Fabrication / Welding
super helpful, thank you luckily I only need replace about a 3rd of it, under the battery area ( its a RHD var), where the battery acid had got to you and it had a shunt at some point in time you can see it here https://photos.app.goo.gl/RXs2n6Hb6L7dRYRM7 and this view https://photos.app.goo.gl/LFhiBtxB9jTCcckn8 #1 step i get, #2. i was going to do the following a. take off the top reinforcement completely to expose the welds b. take off the rail and the wheel house c. then chop out a section of the f.wall and replace it with this FIREWALL REPAIR SECTION FULL HEIGHT RHD (BEHIND BATTERY TRAY) DATSUN240Z – KF Vintage d. then weldon the wheelhouse followed by the top reinforcement have i got it right? -
Best ways to prevent chassis /frame warping
Michael replied to Joe0690's topic in Brakes, Wheels, Suspension and Chassis
In bygone days, the cognoscenti would note, that suspension loads passed through the chassis are much higher than loads associated with engine torque. Thus, chasing stiffness is more of a concern for precision cornering than for surviving high power/torque. Cary has an excellent synopsis above. I would add the possibility of a "Herb Adams bar" (his book, "Chassis Engineering", details it), which is a sort of spine, that is parallel to the transmission tunnel but sits above it. It connects to the dash bar and to the harness bar behind the seats. Each of these connections is triangulated... in the rear, to the rear strut towers. In the front, through the firewall to the front strut towers. -
Firewall replacement - what is the order for removal
Michael replied to aircobra's topic in Fabrication / Welding
On my S30, the firewall was set back. Steps: 1. Weld the whole car to a chassis jig. By this one means 1"x1" uprights to the rocker panels etc, welded to the jig frame (big I-beams). 2. Cut off the front clip, just ahead of the firewall. 3. Cut out the firewall and the floor (area behind seats) in one piece; cut the floor at the rocker panels (which, as we recall, are welded to the chassis jig). 4. Build the roll cage on another jig. 5. Weld the roll cage into the rocker panels and the C-pillars. 6. Cut the floor-pan at the rear seats. Then weld it, and the firewall, back in. 7. Weld-in the rest of the roll cage. 8. Weld-in the front clip. 9. Weld-in diagonals etc. from the roll cage through the firewall to the front strut towers etc. -
 30 years ago I disassembled a 1970 240Z. No photos taken and all plastic bags with parts have deteriorated. This vehicle's Fuse box has a long pig tail. I can not find a clear depiction of exactly where this box is mounted. My memory is under the front console, but there are no obvious mounting locations. I have the Datsun Service manuals; but, they are not clear. Does anyone have a photo or can direct me to one. ZGEEZER
 - Yesterday
-

Best ways to prevent chassis /frame warping
Joe0690 replied to Joe0690's topic in Brakes, Wheels, Suspension and Chassis
Thanks, to answer your question when orignally starting this resto mod build . It was more for car that could potentially track look very good but I wasn’t necessarily planning on tracking it . More to show at car shows . but I think I let everything get away from me because as I started getting into it and buying things I would talk myself up into the better / cooler (to me) options . i really want to make sure the car is reliable and doesn’t break making the whole build a waste. but since I’ve been upgrading it I’m starting to think maybe I should track it as a little side hobby (lessons and what not) since I’m building it I should use it that way. but I’m new to this so if my posts sound stupid I apologize. -

Nissan L-Series Cylinder Head Flow Bench Testing and Development
DuffyMahoney replied to MONZTER's topic in Nissan L6 Forum
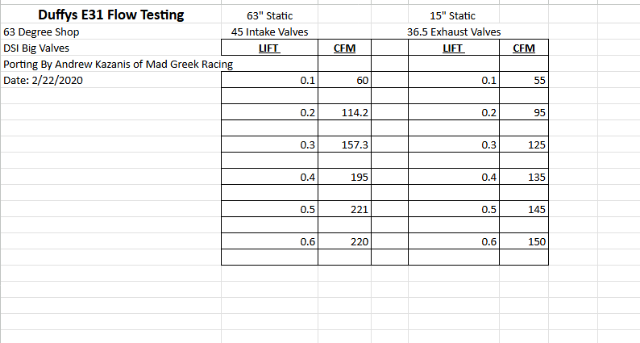
No PAMS head for me. I am pretty proud to own one of Andy Kazanis's heads. I believe he and a few others think the E31 flows the best of any of the heads, with enough effort. -

Nissan L-Series Cylinder Head Flow Bench Testing and Development
jeffer949 replied to MONZTER's topic in Nissan L6 Forum
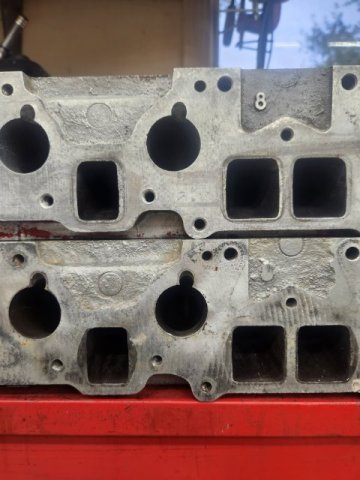
Very cool. Are you getting a pamz head? I forget if that was you or not. Be interesting to see how it does. One thing ive always been curious on is the difference between the runner size on the exhaist on a n42 p90. The middle two are much wider than the outer 4. Picture is of an n42 and a p90 im rebuilding. Im starting a cylinder head rebuilding buisness and while im not going after the high performance market its amazing the difference a valve job can make. We have come along way since the 30/45/60 valve job. I have seat cutters with 6 or more angles and radius exhaust and so o. Im not flowing heads but thankfully there are guys online doing so. Its amazing the flow they get by a little tweaking hear and there
-

Best ways to prevent chassis /frame warping
tube80z replied to Joe0690's topic in Brakes, Wheels, Suspension and Chassis
@Joe0690 you don't mention if this is a race car or a street car. I'm guessing since you're talking about a 8-point cage this is more race car or dual purpose with a heavy emphasis on the track part. A friend had a 550 HP LS-2 powered 240 that we made a lot of changes to to stiffen. The normal cage will need some additions to really help make the car stiffer. Frame rails that everyone adds are fine for street cars but are not going to give you much in the way of gains compared to adding additional tubing to the base cage. The triangulated strut bar needs to connect to an additional cross bar that hooks into your cage and is sandwiched under the wiper cowl are where all the metal comes together. This can then be plug welded through the firewall and is triangulated into the existing cage's cross bar. The next big change would be to add X bracing on the floor between the roll hoop and front cage legs. The floor of a 240 is very week compared to a modern car. This weighs about the same the frame rail mods but will add more in stiffness. There are a number of other areas you can add if you need more stiffness. In the stickies there are some examples of how most of these were done on various members cars. Cary - Last week
-
nkdong joined the community
-
Best ways to prevent chassis /frame warping
Joe0690 replied to Joe0690's topic in Brakes, Wheels, Suspension and Chassis
Hi It’s 8 point roll custom roll cage for 240z. I got it from the uk. the front strut is the apex engineered triangulated one the goes to the firewall. Do you think stick welding it is needed? -
Yeah -when someone says get a better ECU - I think about all that work and say it works . Ive put 15k miles on my 3.2 and going strong . I’m enjoying it
-
I am tired of working on it, it goes in for a new harness next week. I am going to be lazy and pay someone for it
-
Best ways to prevent chassis /frame warping
flatout replied to Joe0690's topic in Brakes, Wheels, Suspension and Chassis
I did full length frame rails, stitched the front towers, and a pretty involved cage in my 280. I know the 240s are a bit more known for issues but i think similar would be sufficient. Some guys add the inner fender braces, I didn't but they seem popular. Is your front strut tower brace triangulated or just straight across? Triangulated off the firewall would add a bit more structure. What is the design of your cage? -
I just installed my dealer AC and I can attest to the tight quarters on the passenger side . I’m running Datsunworks kick panel speakers and there isn’t 2mm between the evaporator and the speaker panel . I do like that set up but I’m too lazy to rewire everything and my MS is working fine now . I bet you’re about ready to be driving that gorgeous machine instead of doing all that wiring
-
Hi, hopefully this is the right spot to post this question. i have a 71 240z that I am restomoding. I also have a close to 600hp ls3 dry sump engine . if anyone has experience with that much hp in the 240z, what would you recommend to stop it from twisting? I have a full roll historic roll cage. Front and rear strut braces. what else should I look to do?
-
 Joe1971 joined the community
 -
I am building a 240z 1971 - as a restomod. I’m am basically redoing everything . I have a ls3 with cams the dyno’d around 550hp/tq . That was without the dry sump . So potentially slightly higher with the dry sump. does anyone have experience with a hp engine and what needs to be done to prevent the chassis from warping. i will have a full historic roll cage . Front strut brace and am using the track attack apex suspension with the rear strut brace. is there any other steps that will ensure the frame/ chassis doesn’t twist? thanks for any input
-
Looking to do the same as this guy what do i need to remove and in what order i can see he has taken the outer reinforcement off at some point
-
 __zuperair__ changed their profile photo
 -
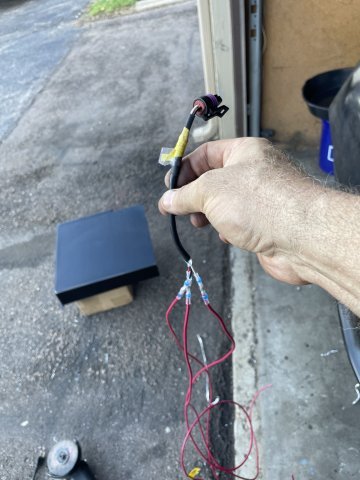
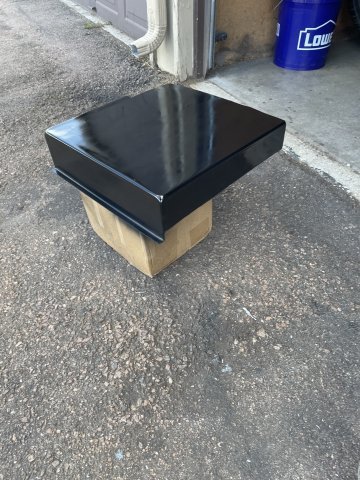
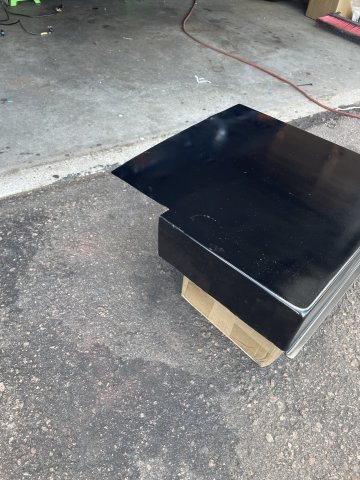
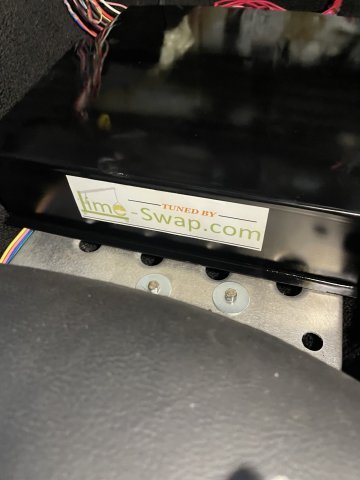
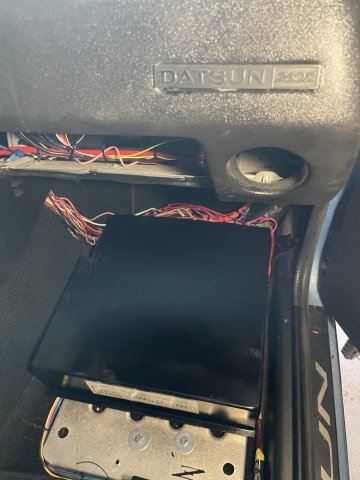
09-20-2026 ATLAS Z UPDATE: I spent most of the day going around fixing connections and getting lights that weren't working.....working. I managed to get it about 99% done. I then cut up and modified the 16X16X4" deep aluminum cake pan I bought to work as a cover for the electrical, and once fitted, I painted it gloss black and added some clear coats. In the pics the wires behind it can be seen....because I have to zip tie them back up after doing my splice repairs, but it fits well. Lastly I started on the 3 gauge sensors in the engine compartment that need to be lengthened to work. I also tried to start the engine.....have plenty of fuel there, so more tracing of wires to find out what is keeping it from starting. PICS
-
 Jsaenph joined the community
 -
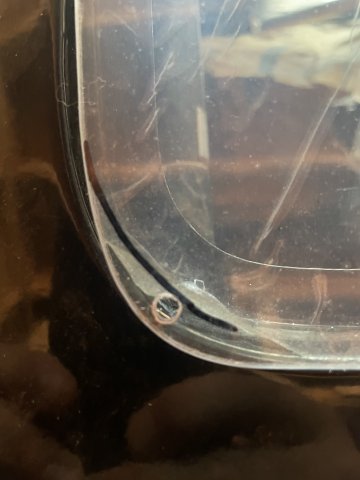
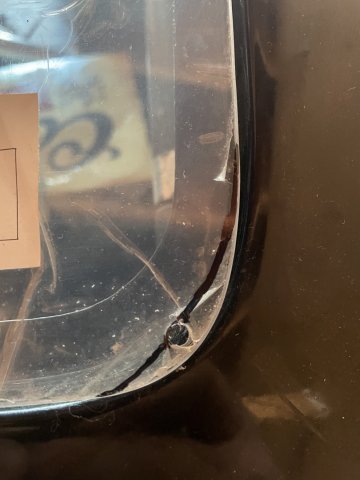
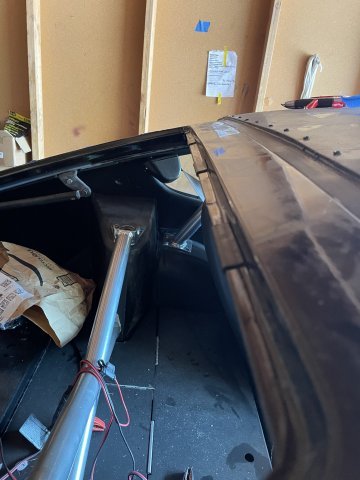
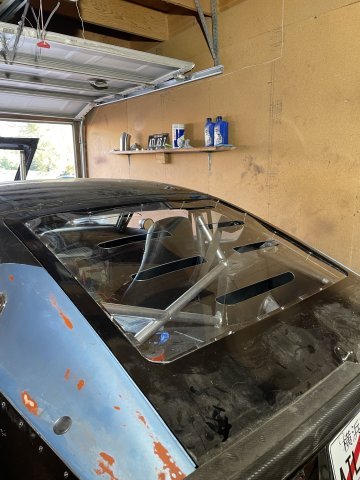
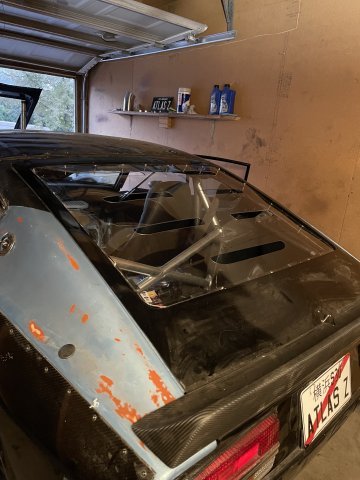
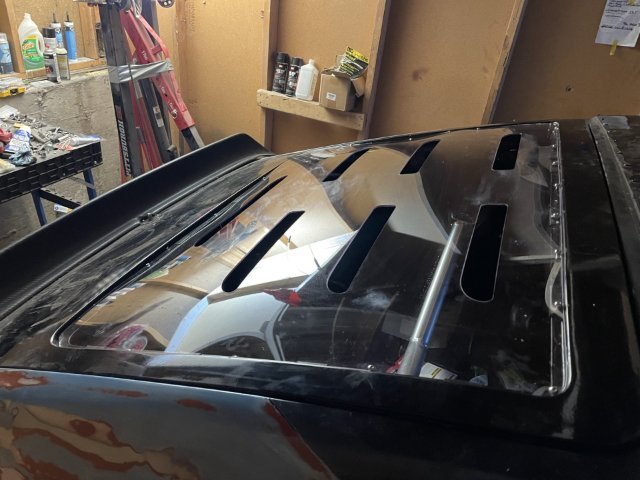
09-19-2026 ATLAS Z UPDATE: I had to replace the O ring around the thermostat, so I got that fixed and got the antifreeze poured back in. Then I did some preliminary electrical checks. a few little things not quite working, so I have to work my way through connections, but 90% is working!! Charging the battery back up to 100% and will try for a start tomorrow hopefully. Then I worked on installing my rear polycarbonate wear "window". I had to trim here and there, and then by trial and error had to keep playing with it and modding here and there but got in finished. in the pics, you can see the small pieces of rubber I installed as a cushion for the window. I got the rubber from Amazon....I can provide a link if you want, jsut ask. God willing I can get out there tomorrow and do some more. PICS
-
 zwhore joined the community
 - Earlier
-
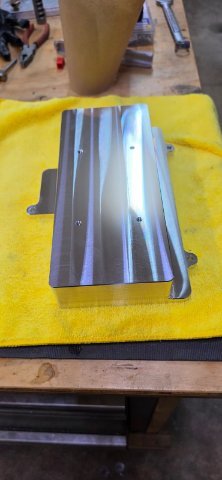
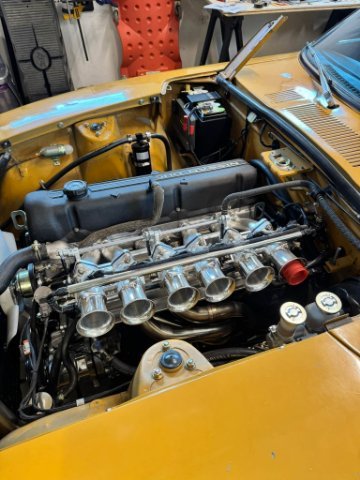
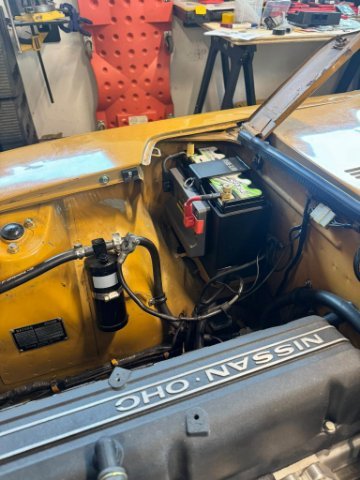
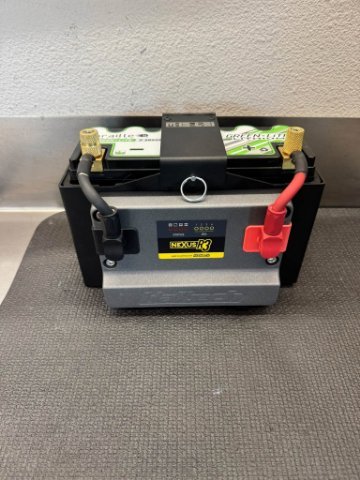
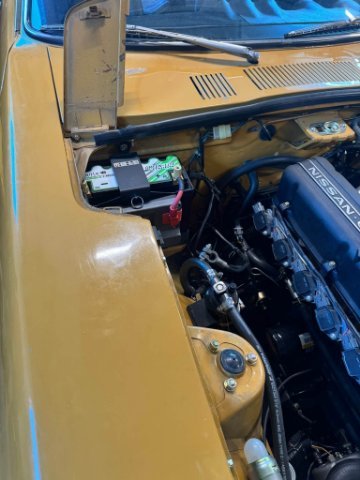
Why would I put my Haltech R3 in my engine bay? Well I’m doing the opposite of most people and going with my ecu in my engine bay. My 240z has dealer AC (it’s huge) and I hate having my ecu on my passenger kick panel. I have so little room there and I currently have a 5v short I cannot find. My harness is a mess from multiple ecu changes and wiring changes and it’s time to start over. The R3 is a 4 channel PDM with an internal 150amp fuse. So it can power my injectors, coils and fuel pump and leave me with 1-2 extra circuits for later down the line. Having it here will allow me to make a sexy harness that is fully serviceable and the whole thing will basically drop in. The mount will be getting cnc cut this week. The goal is a no holes drilled mount and no holes drilled in my car install, using a Braille battery. It will attach with dual J/V bolts.
-
Share anywhere you want!
-
This is awesome! Do you mind if we share other places?
-
Nissan L-Series Cylinder Head Flow Bench Testing and Development
DuffyMahoney replied to MONZTER's topic in Nissan L6 Forum
My E31
-

Fast Floridian's 240Z Track Build
FastFloridian replied to FastFloridian's topic in S30 Series - 240z, 260z, 280z
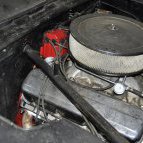
It’s a 302. I replaced the cam and got aluminum heads, also going with sniper EFI, should be north of 300hp to the wheels. I’ll get it on a dyno to dial in the tune. Yep, got a brand new TREMEC tkx 5 speed manual transmission waiting to go in once I get this engine mount finished. It’ll see some street time 😁, but primarily building it for the track -
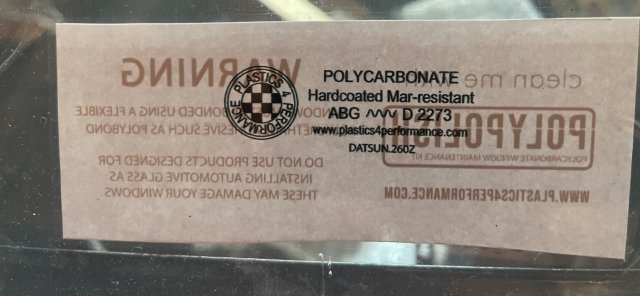
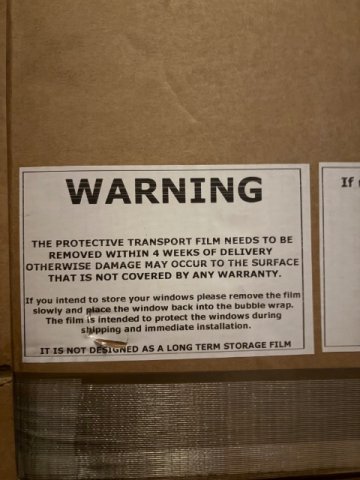
Yep, same place. Thanks for finding them, was wondering where to buy some. Here is the warning label.



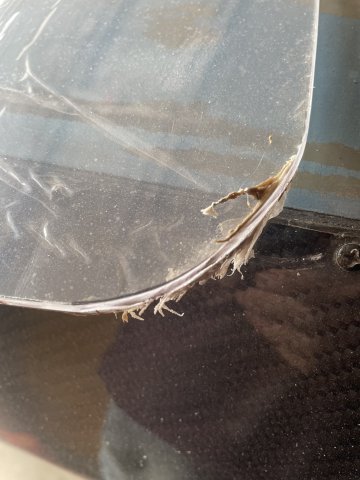
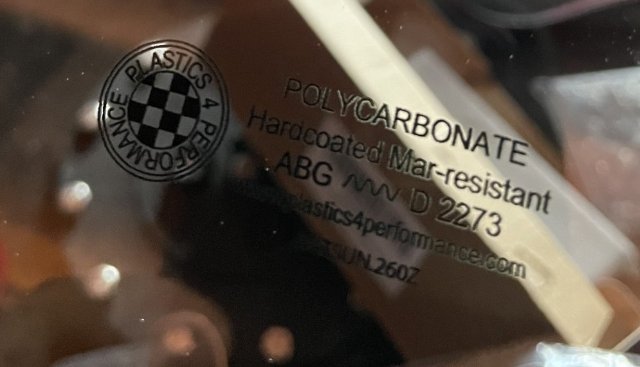
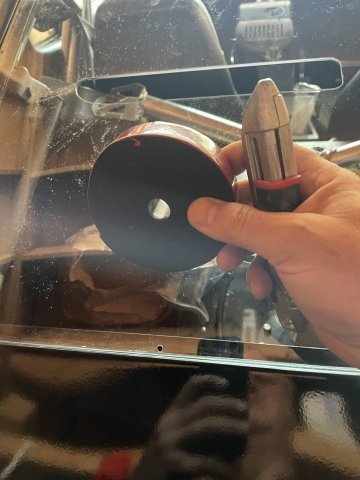
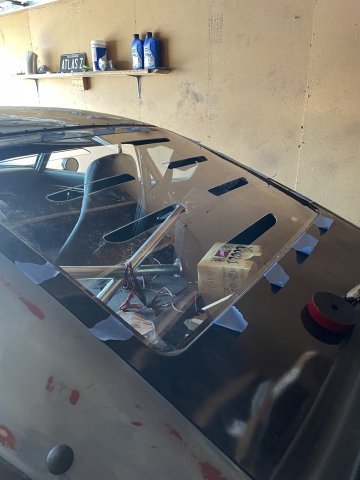


-
Who's Online 0 Members, 0 Anonymous, 1315 Guests (See full list)
- There are no registered users currently online