-
Member Statistics
33249
Total Members5167
Most Online
All Activity
- Today
-
On a random visit back to Hybrid-Z. I kept the rolling diameter and back spacing, etc. as close to OEM. Today there are SOOO many more options for suspension setups. I bought my 240z back in 2005 before they were popular. Ebay listing was under 1,000 and they were all true Datsun parts. Glad to see this community is still alive.
-

280z 1jz track build from a pile of parts
flatout replied to flatout's topic in S30 Series - 240z, 260z, 280z
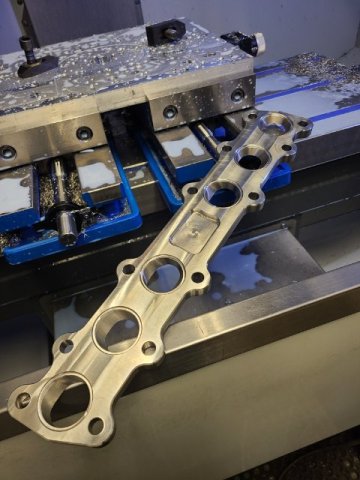
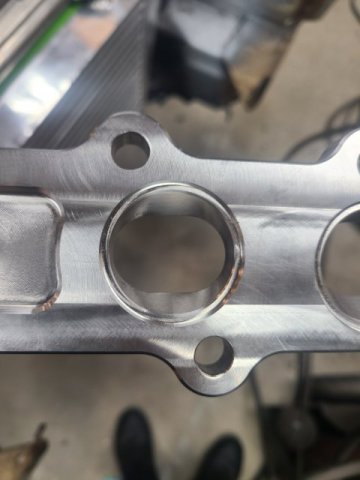
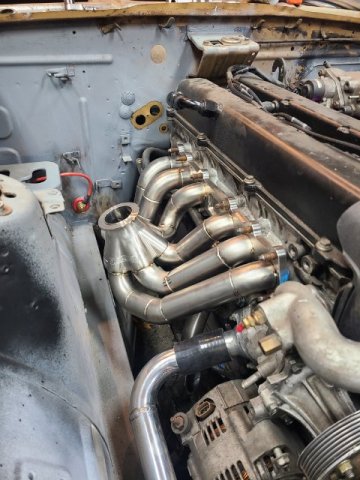
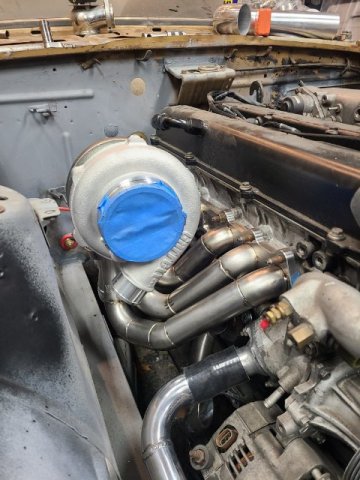
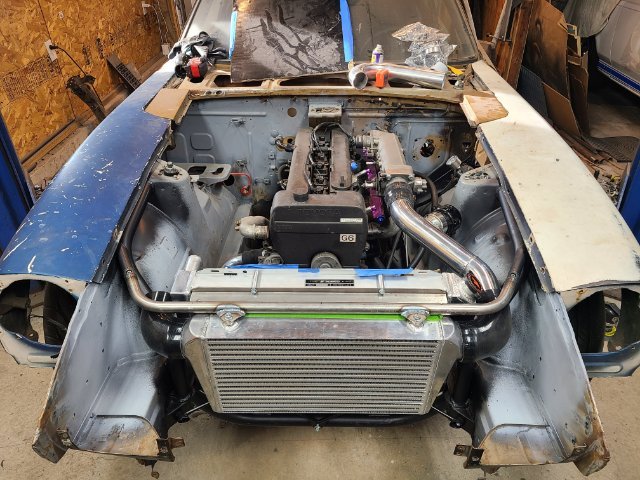
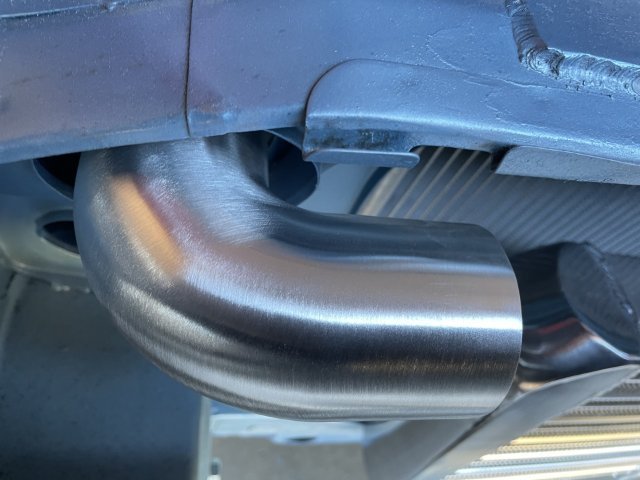
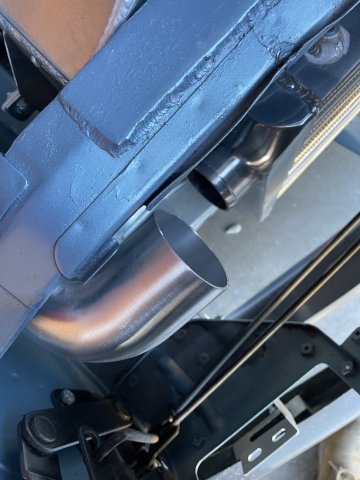
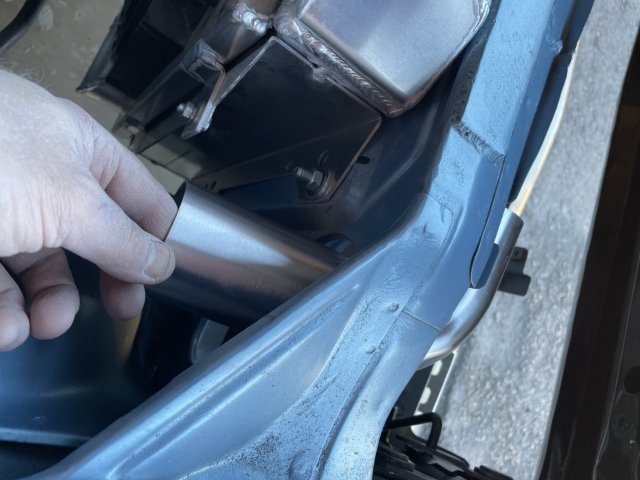
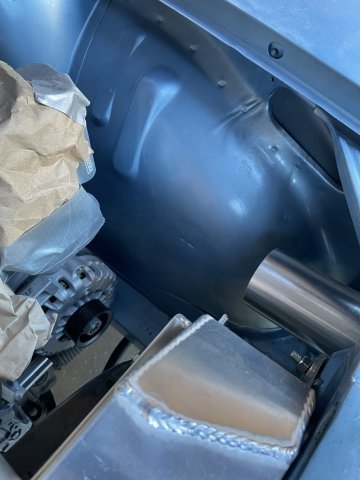
started tackling the turbo system. designed and machined a stainless exhaust flange because I couldn't find one I liked. 304ss that seamlessly transitions the oval port to round so i can use sch 10 stainless. Went with a billet turbo flange from elmer racing. I make these kind of things but no way I could have made one for what they charge. beautiful piece. I ordered 321 sch10 stainless weld els to make the rest. after a little "writers block" i finally got a decent layout for a turbo manifold. The car came with a precision turbo but unknowing the condition and the size wasn't ideal i ended up going with a garrett gtx3076r with a v band inlet.
-
280z 1jz track build from a pile of parts
flatout replied to flatout's topic in S30 Series - 240z, 260z, 280z
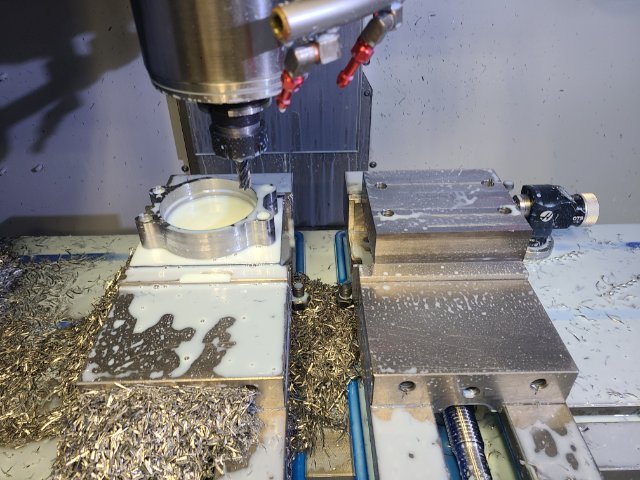
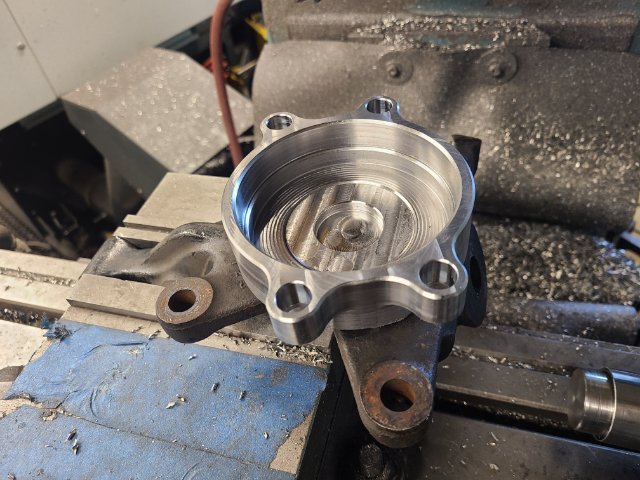
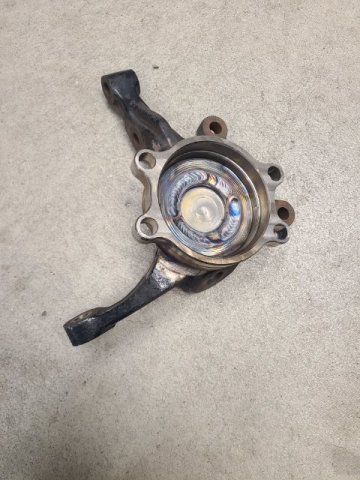
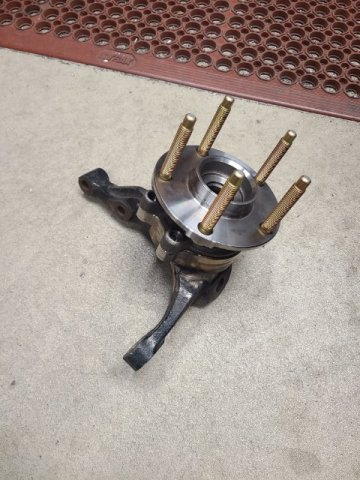
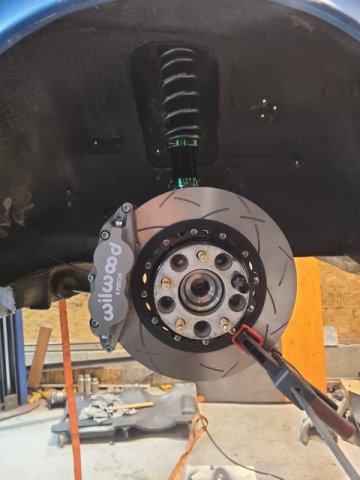
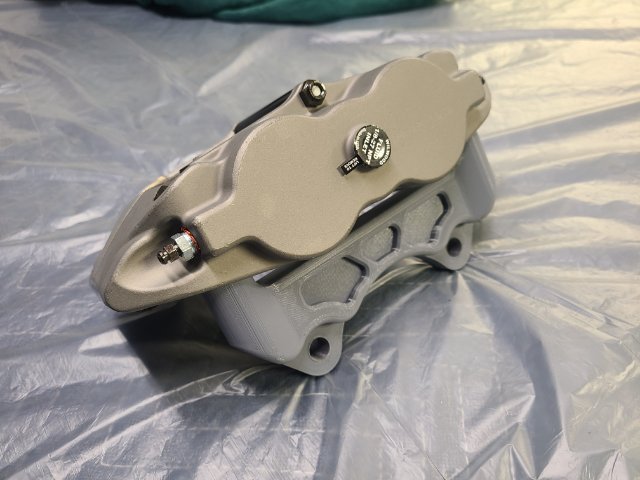
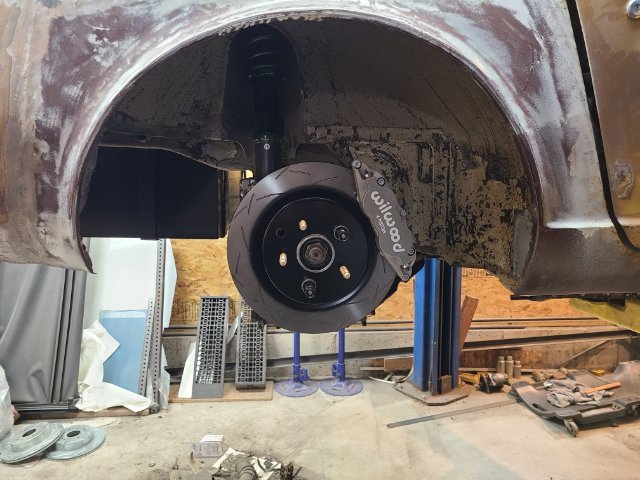
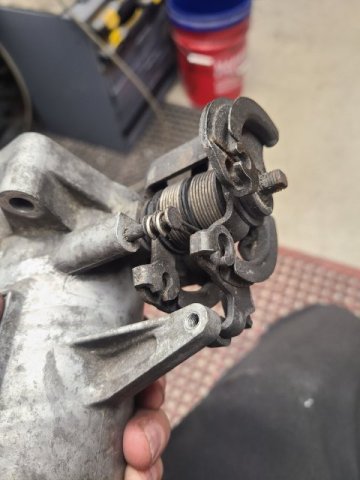
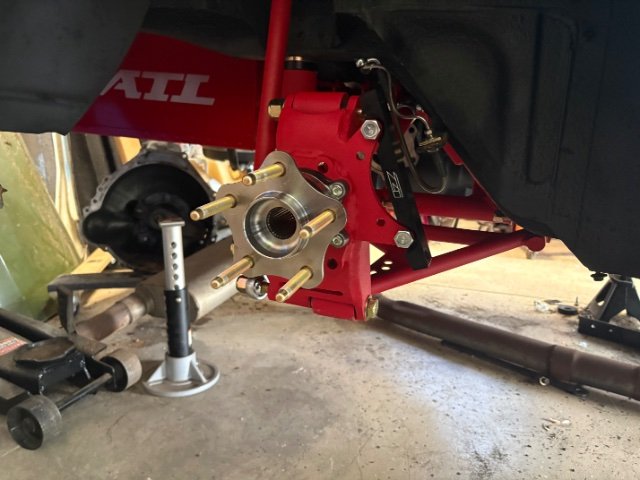
The car came with s13 front knuckles. Apparently this was a thing a long time ago but the geometry is terrible. So I 3d scanned a knuckle and started designing a knuckle that will work. in the mean time I am modifying these with the corrected geometry I came up with for real word testing before I made a set from billet. My new design will use the 370 wheel bearing so I modified these to accept that as well to go 5 lug since I'll need that bearing eventually. They need more changes but I figured i needed to get moving on other projects like brakes, turbo stuff and body work so these will have to wait a bit before any more modifications. Went with a custom set of wilwoods. after talking with the reps a few times settles on a set of superlites front and rear. The piston volume front and rear meets the common spec of twice the front piston volume compared to the rear. designed and 3d printed calipers brackets that will get CNC machined when i have some spare time. Plan was to do 7075 for the front brackets but may get made from titanium because I have some in the right size, but rear will be an alloy steel because of the design I want the strength.
-
280z 1jz track build from a pile of parts
flatout replied to flatout's topic in S30 Series - 240z, 260z, 280z
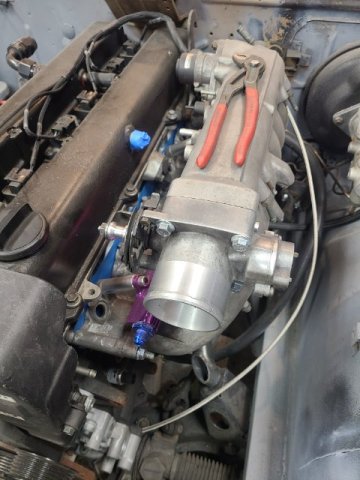
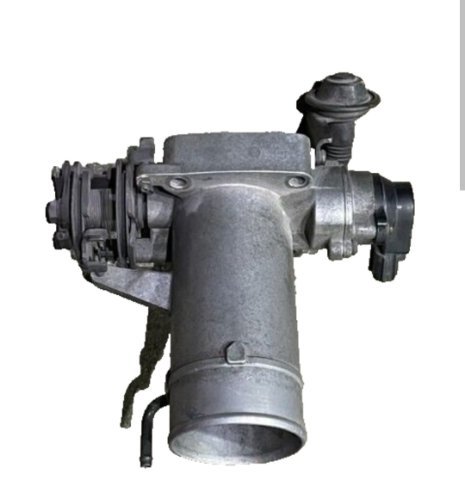
the 1j factory throttle body is big is dumb looking so i decided to trim it down and remove all the unnecessary pieces. made up a little billet spacer to remove the cruise control pulley. I may go dbw eventually but this will do for now.
-
280z 1jz track build from a pile of parts
flatout replied to flatout's topic in S30 Series - 240z, 260z, 280z
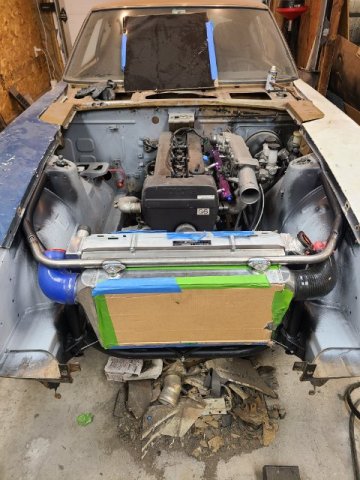
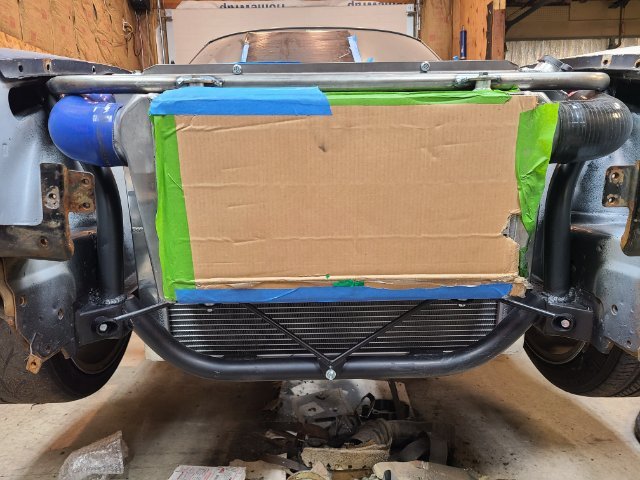
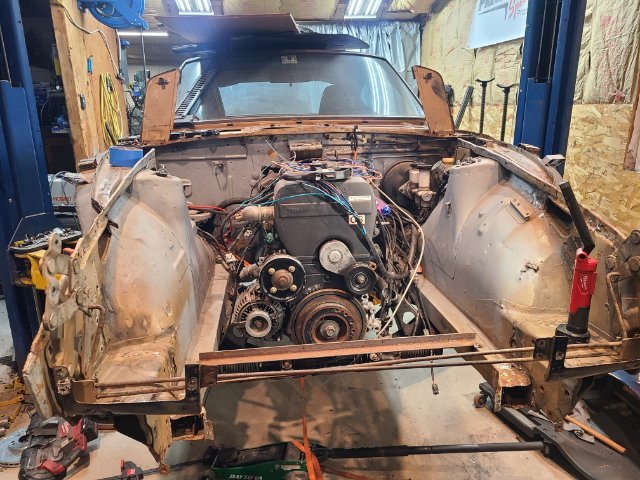
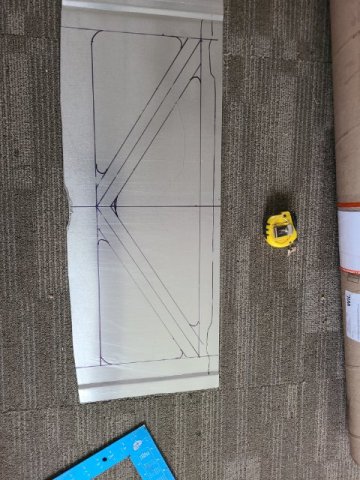
spend some time planning out the front, bending up some tubes and getting the tubular front made up.
-
280z 1jz track build from a pile of parts
flatout replied to flatout's topic in S30 Series - 240z, 260z, 280z
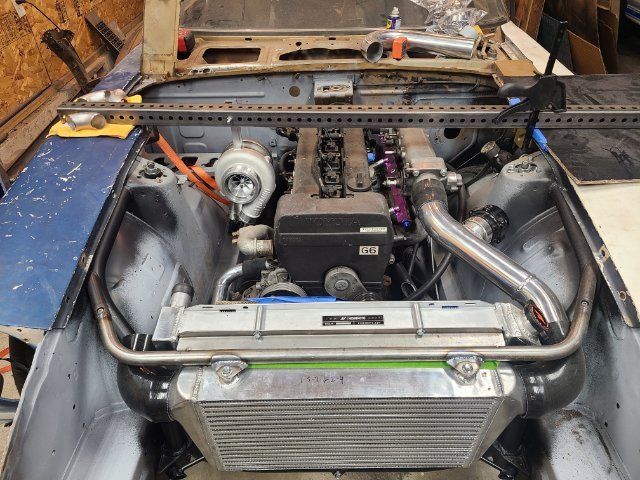
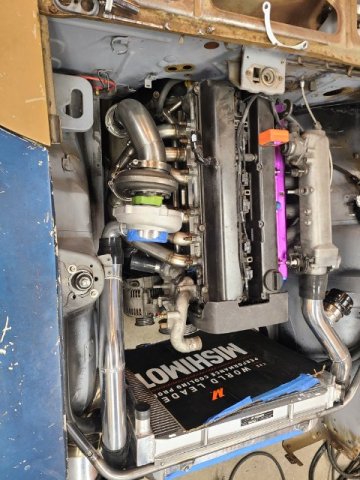
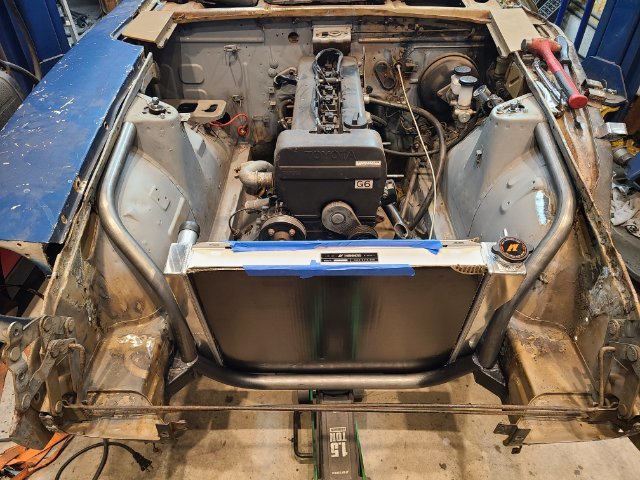
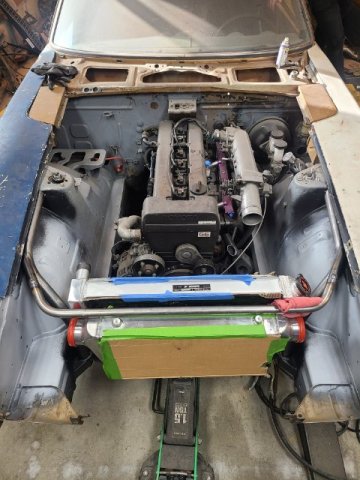
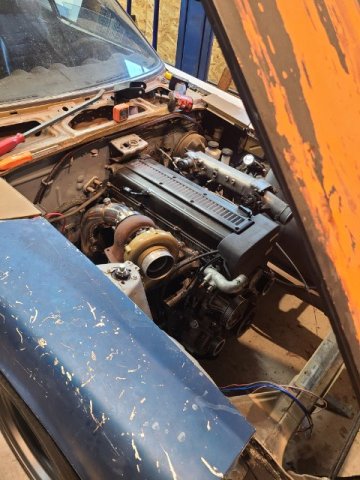
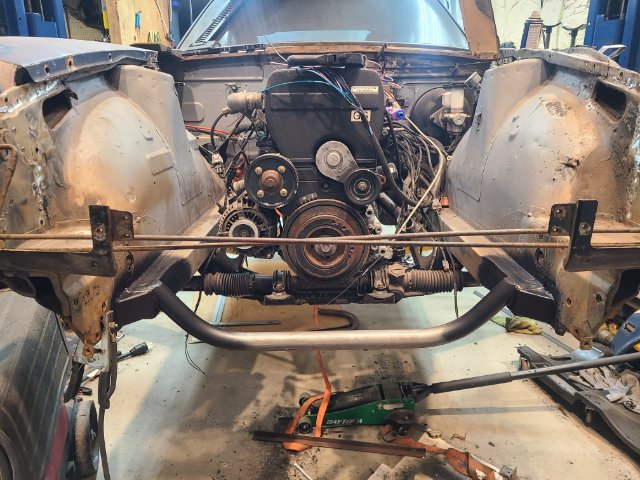
Next order of business was to get the 1j sitting in there. It came with some cx racing motor mount kit but I really didn't like them so decided to make my own to put the engine where i wanted it. Apparently i only took 1 photo. but just imagine a second one of these mounts. once the engine was sitting where i wanted it i decided to cut the factory radiator support out and make something removable to make service easier.
-
280z 1jz track build from a pile of parts
flatout replied to flatout's topic in S30 Series - 240z, 260z, 280z
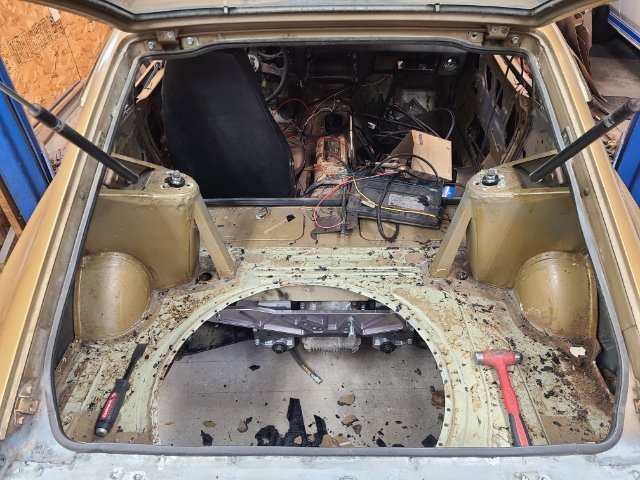
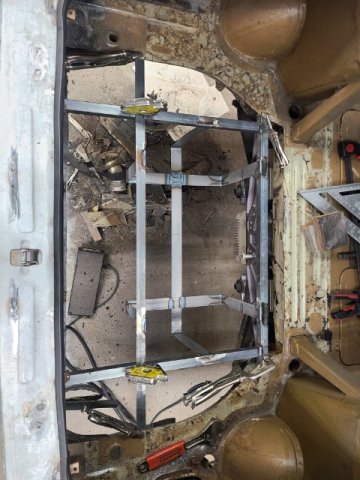
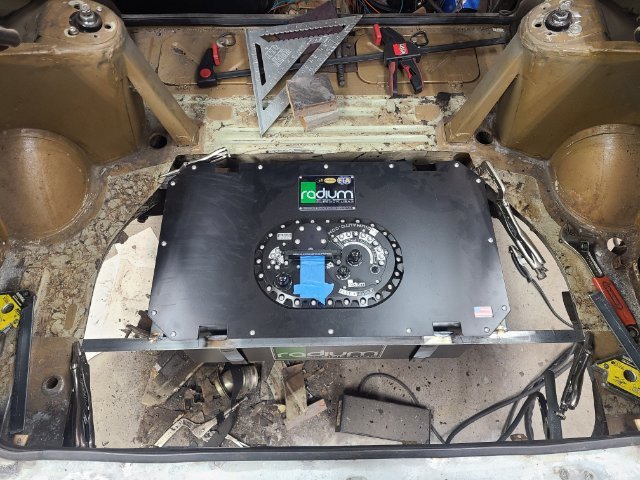
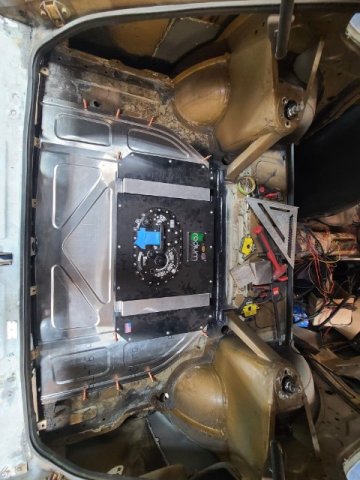
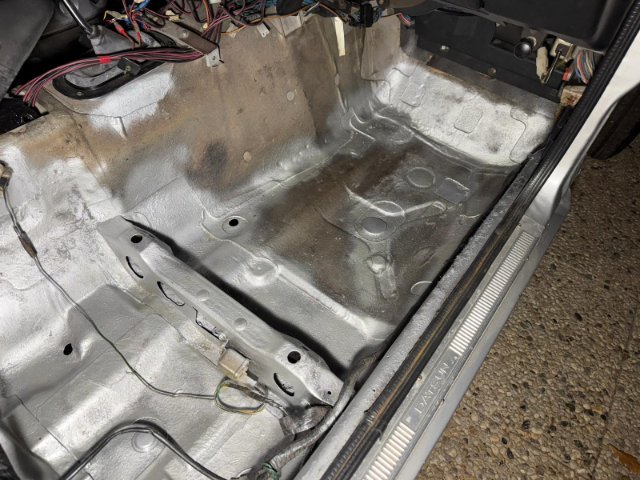
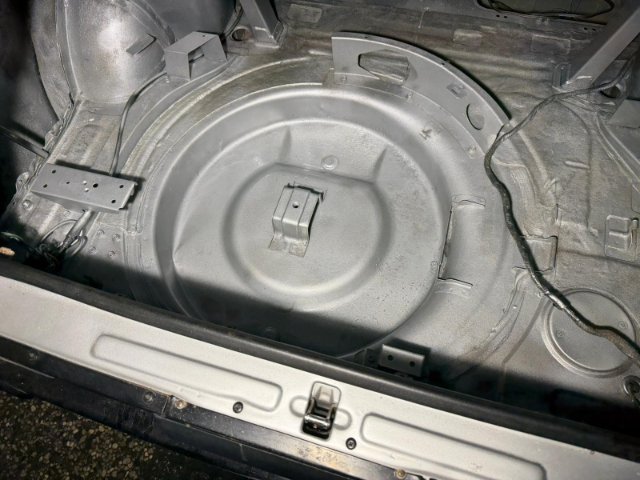
first order of business was to add a fuel cell since i didn't have a fuel tank. Went with a radium 14 gallon unit. Cut the trunk out between the factory frame rails and built a basket. Cleaned it up with some bead rolled panels. plan to add a fill behind the license plate like an old muscle car.
-
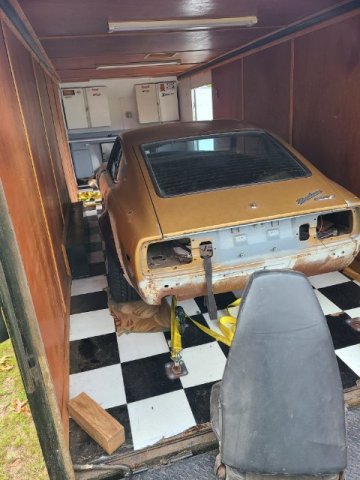
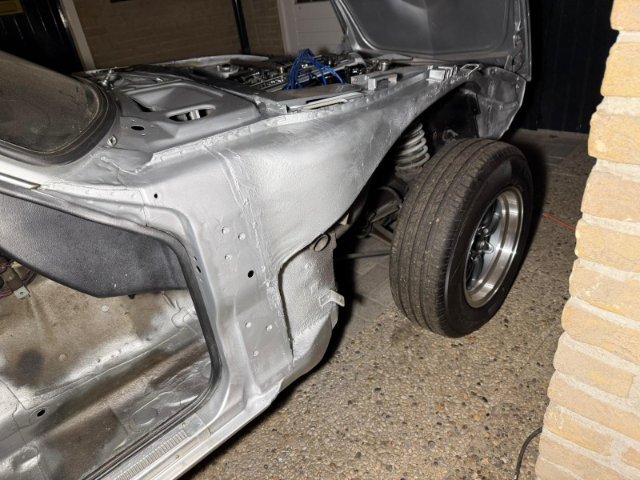
After about a decade of talking myself out of buying something as Ive spent a lot of time building and tuning a handful of other cars in road racing and drag racing disciplines, as well as starting and building a machining business 5 years ago, I finally started the search for something to build to race myself. I tossed the idea of a lot of different chassis options. S30, 240sx, Mustang, Corvette, MR2, ETC. The 240sx made the most sense considering I have a S13 240sx as a high performance street car, that I have also raced in a few different forms so I am very knowledgable in that chassis, but my search always ventured back to the S30 because I have always liked them and not to mention beating up on modern sports cars with a 50+ year old car just really sparks and interest for me. My main road race car i support and tune is a gt40 so going to the track with a couple old cars and beating up on Porsches sounds like a good time. I searched far and wide in the north east, USA looking for a quality candidate. Unfortunately rust made that a challenging feat. Randomly a friend of a friend posted a 1jz for sale and my friend had a suspicion that it meant he was giving up on the 280z he had been trying to build for 10 years. I reached out. showed "interest" in the engine. showed up and talked him into selling the whole deal. The chassis has some really "questionable" work done but overall the chassis is a super low mileage fairly clean car that i wont feel bad modifying and making a track oriented build. The deal ended up being a package deal with: 1jz-gte with 350z trans a pile of T3 suspension parts R200 short nose conversion fortune auto coilovers 300zx front and rear brakes Universal wiring harness bunch of misc parts. wheels not included, I planned on going 5 lug so they where not use to me.
- Yesterday
-

Fast Floridian's 240Z Track Build
FastFloridian replied to FastFloridian's topic in S30 Series - 240z, 260z, 280z
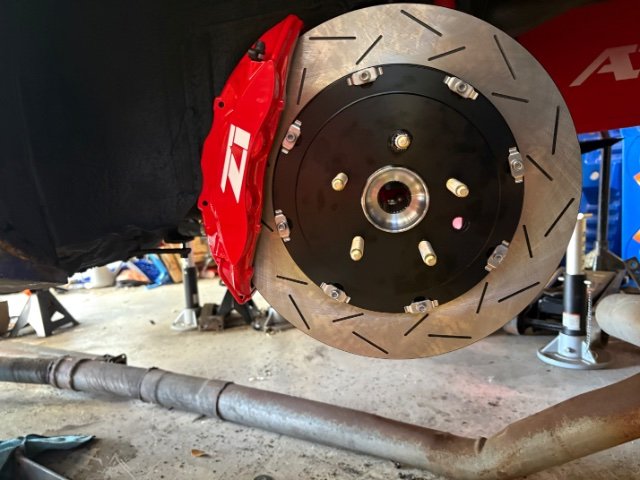
Got the rear calipers on today. A few challenges getting this to fit for the 240Z. Tight tolerances between rotor and caliper, needed some washers to align it right. Also getting the pad clips on were tough, some clearance issues with the wheel well as the pins go in from the back, but got it eventually. I love big brakes 😍.
- Last week
-
Very interested to see. Jim's Swiss 240Z (stock internals except for a mild cam) with ITB's and a Holley ECU tuned by our local legend - Tony at UMS - made about 183 RWHP. Jim was a bit disappointed (he was thinking 200ish) but we all thought that was pretty amazing for just ITB's and a good tune! It would be nice to see what all your engine work will accomplish. In ANY case it'll be a blast to drive!
-
If he doesn't get back to you, i might be interested
-
anyone. Don't really care which brakes they are. Mine are both locked up from the car sitting. Would also buy some fronts if you have those. Thanks. 918-318-947 five
-
You still looking?
-
Bumping this, the site still needs it!
-
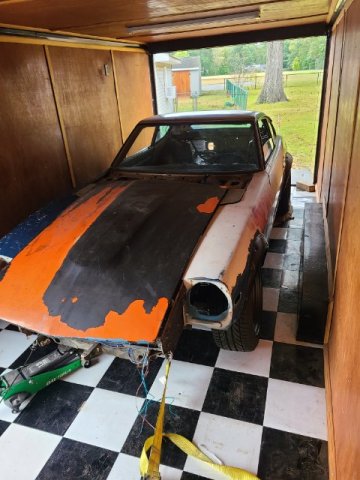
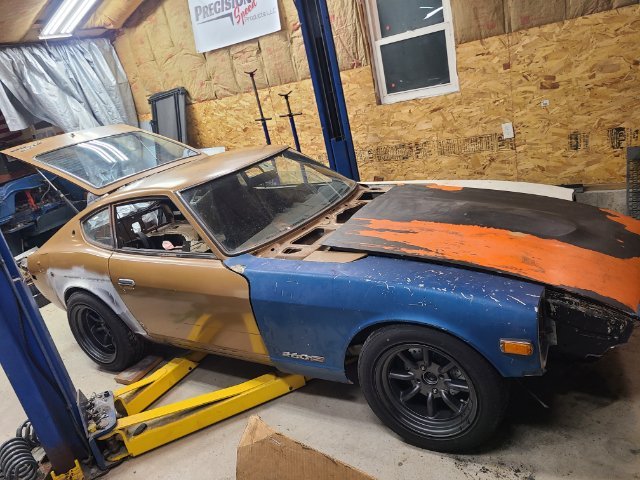
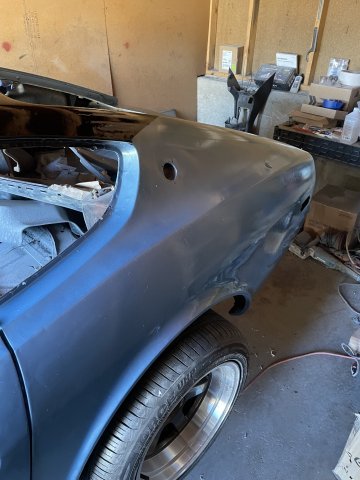
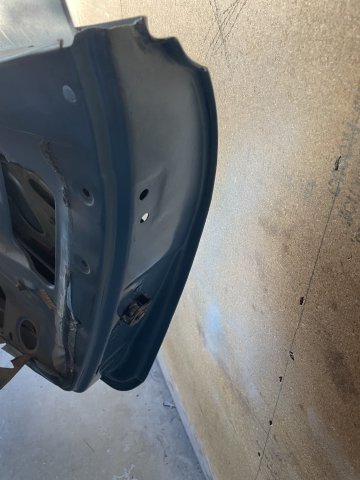
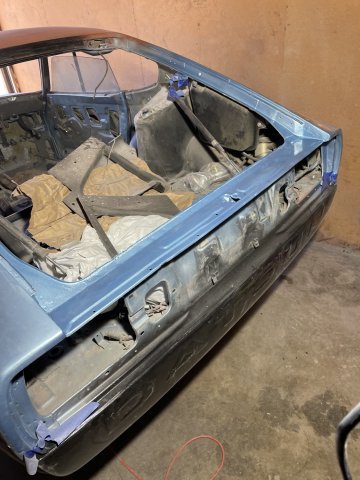
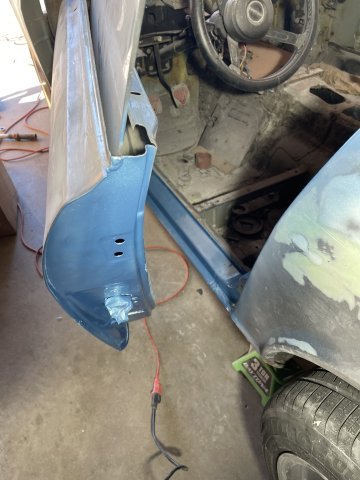
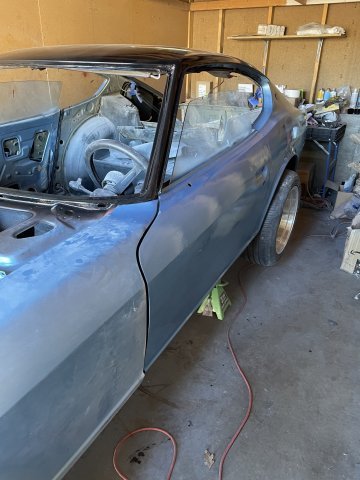
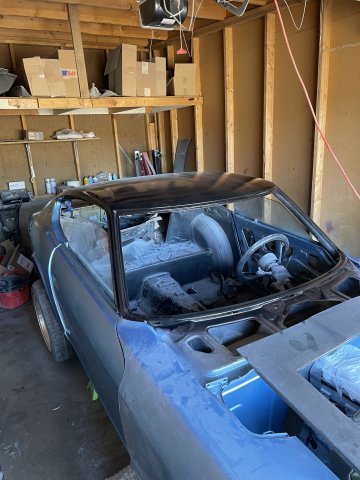
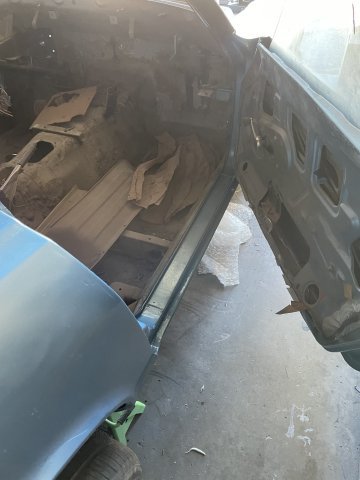
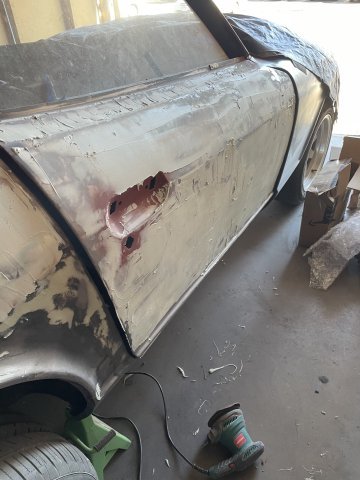
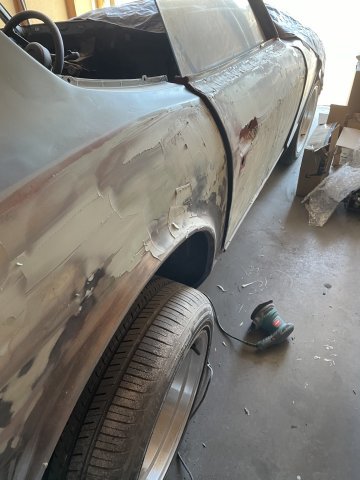
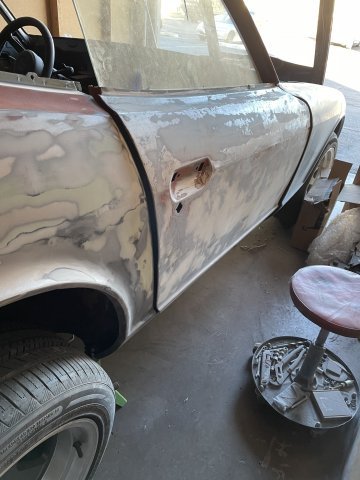
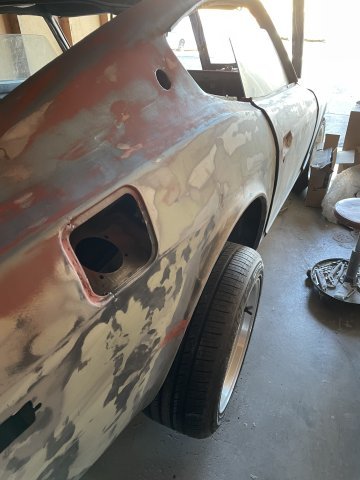
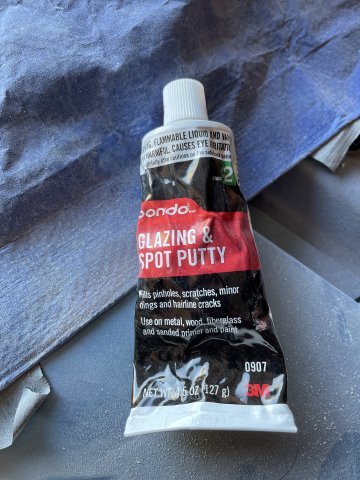
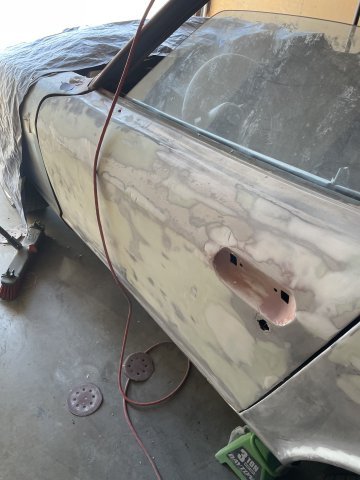
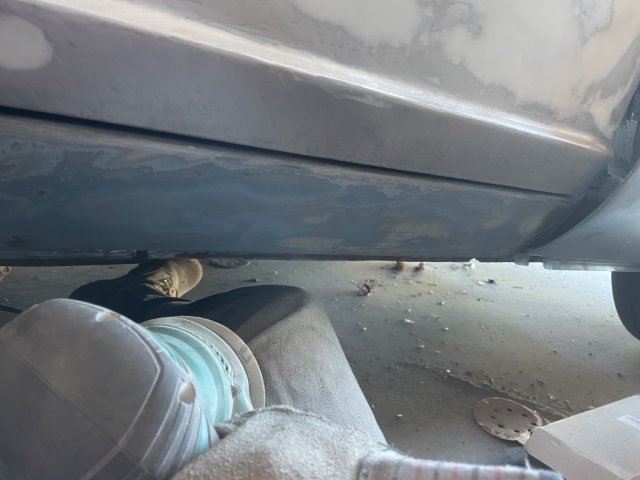
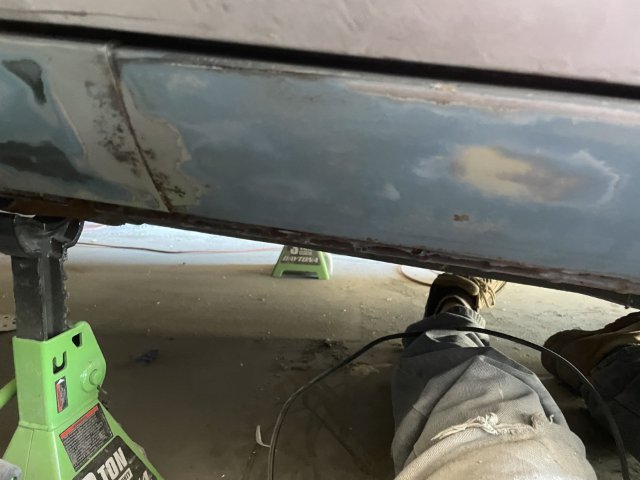
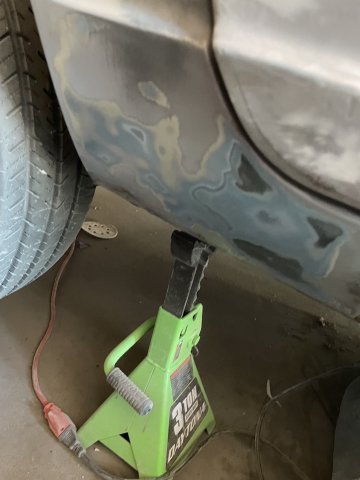
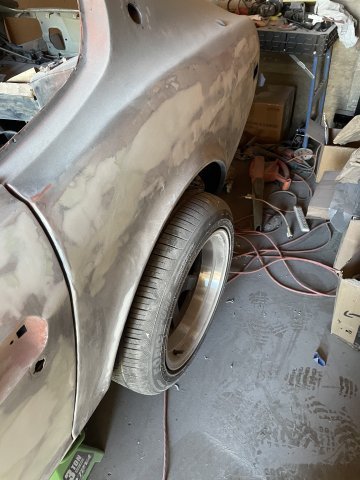
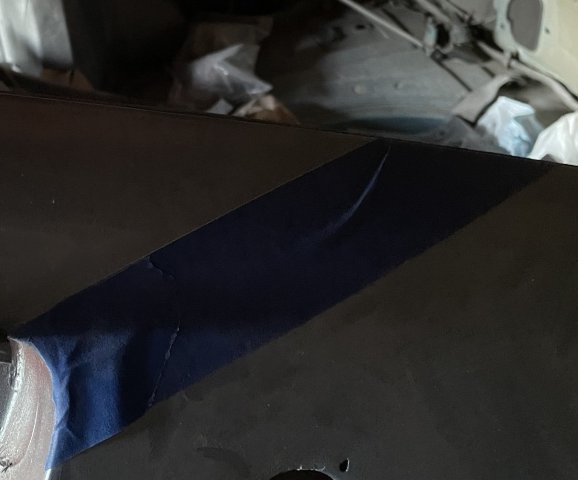
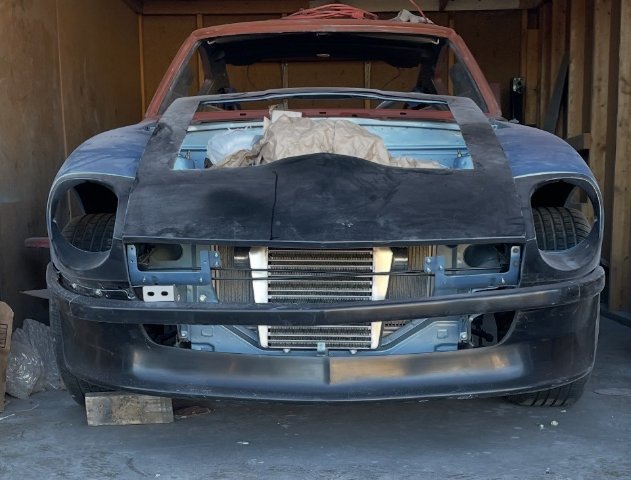
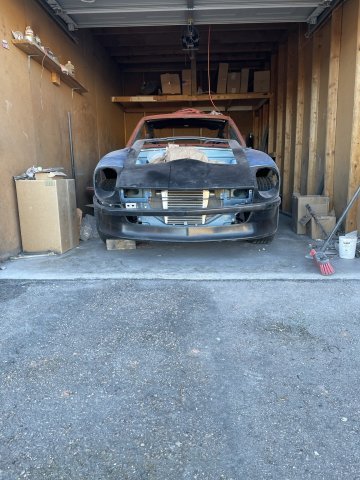
01-15-2026. PAINTJOB. Ok so it is painted now. there are a few spots I can later address and spot paint, but the major paint and bodywork is done. PICS:
-
ch12matt joined the community
-
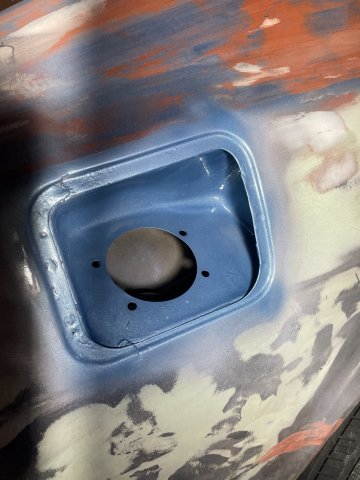
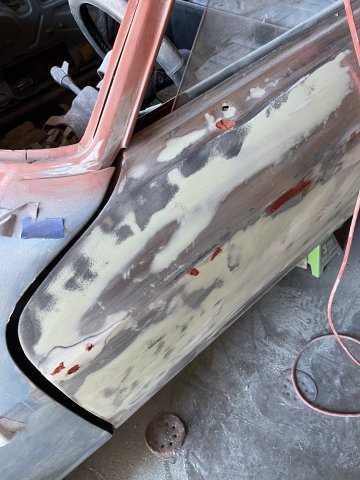
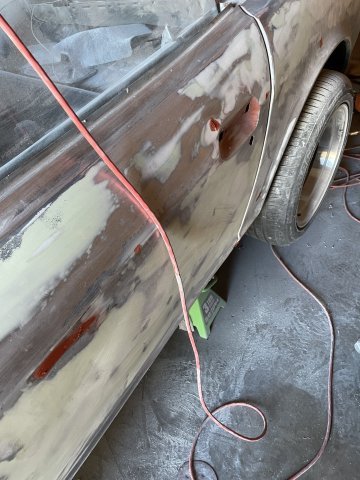
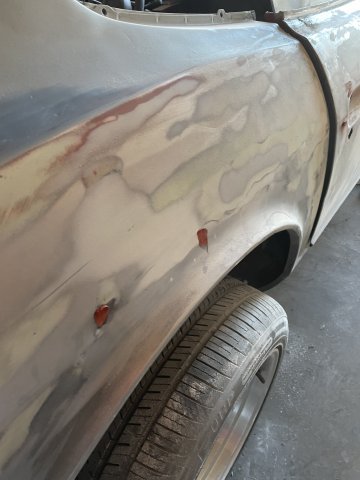
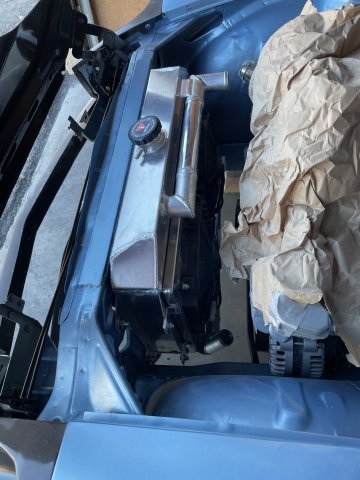
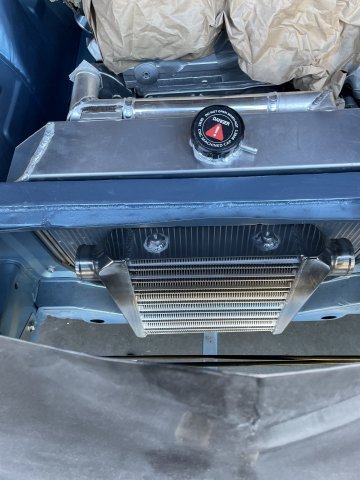
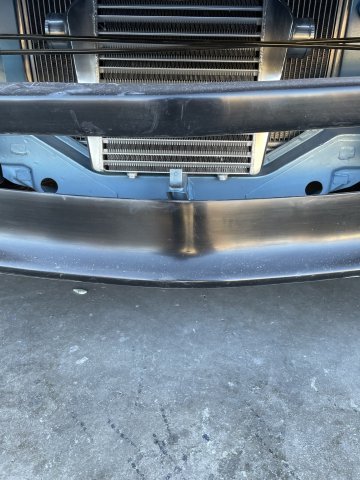
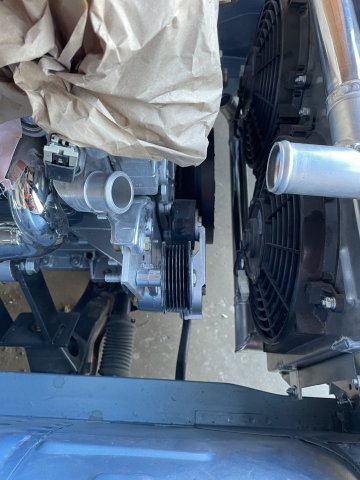
01-14-2026. Prepped for more paint. I was able to get the body ready for more paint, and I will paint it, knowing I will see spots later that I can spot repair/fix if needed. this will get it to about 95% on being completely painted. Working on the body is such that you could spend a year and still find things to "fix".....and I think it's time to "push" it forward. After getting it ready for paint, I installed the radiator finger tight and the cut down radiator engine inlet I got from 42004U.com. I then grabbed the intercooler and put it in there to get some measurements for making brackets. I grabbed one of my 90's do this as well. TIME FOR MORE PAINT!
-

A 2026 SEMA SHOW 260Z Build all the way from Great Britain
toolman replied to toolman's topic in Body Kits & Paint
Part 3-SEMA SHOW 260z More work on the Gull Wing Door and Rust Removal using Laser Technology -
Nice progress, looking good. You are further along than me. I picked up the race wire kit during some Black Friday deals but haven’t gotten around to installing yet.
-
01-13-2026. Just a little something to keep my motivation going. New badge and antenna delete plug from Resurrected Classics and Z Car Depot. I know, the clear looks dull, it will just need to be sanded and buffed. I'm planning on using Poppy's Patina wipe on clear in the summer God willing.
-
Gosh it better be more then 260hp. I will eventually dyno test, but we don't have one close to me. I live in a tiny town in Northern Idaho. Its a very clean z, but sadly painted in the 70s- early 80s and the owner danced on the roof. Lol
-
A 2026 SEMA SHOW 260Z Build all the way from Great Britain
flatout replied to toolman's topic in Body Kits & Paint
love how European shops are so full. lots of nice tools and cars all stuffed in a small "shed" -

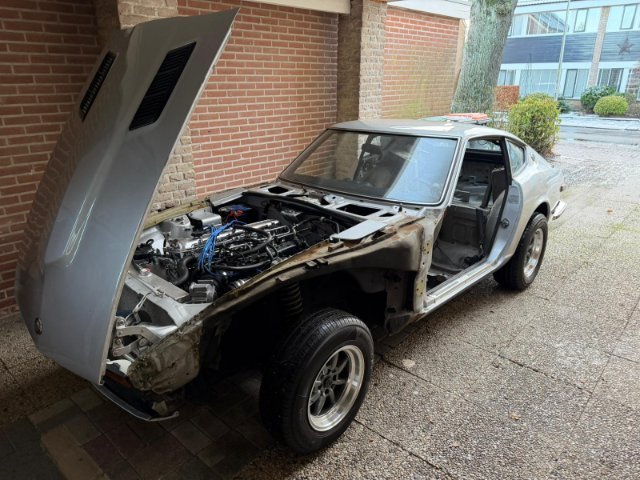
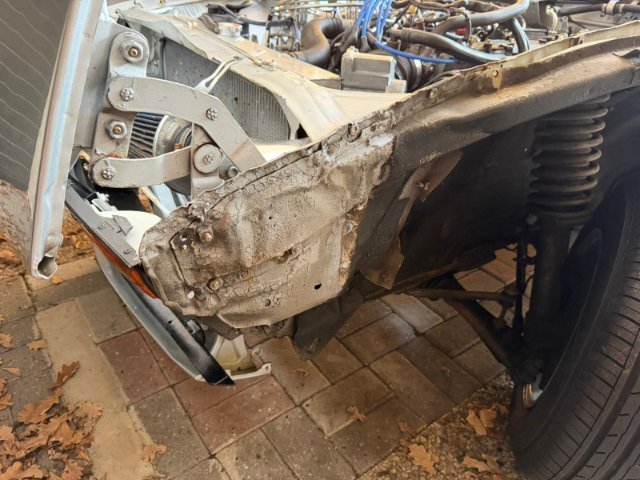
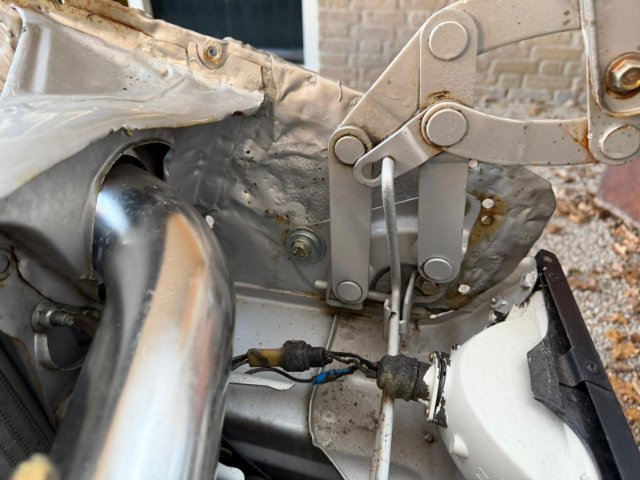
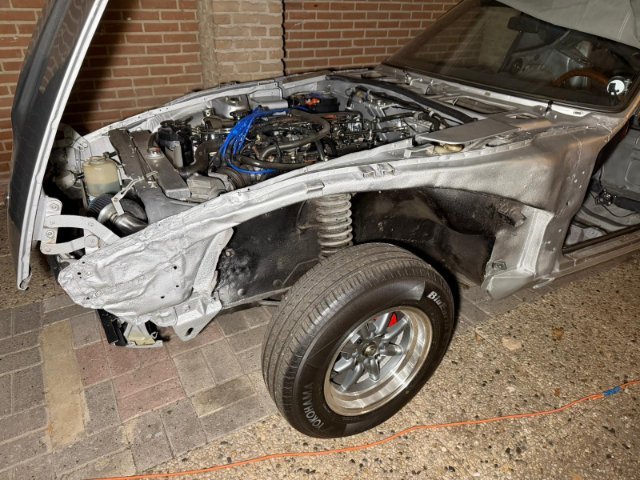
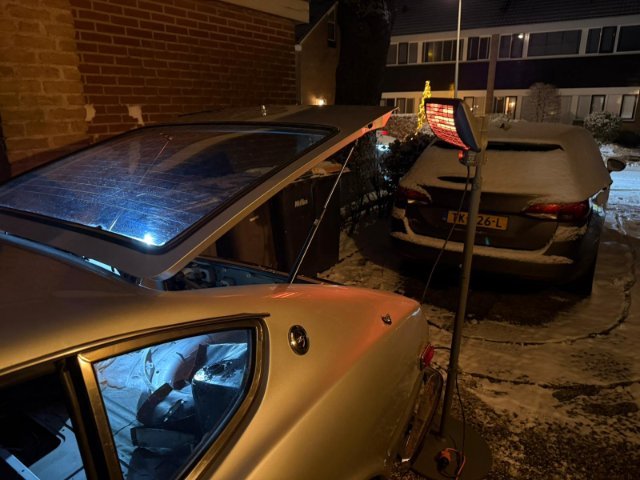
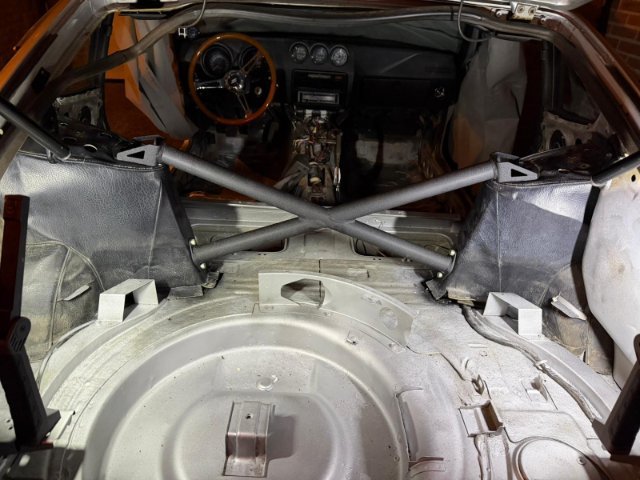
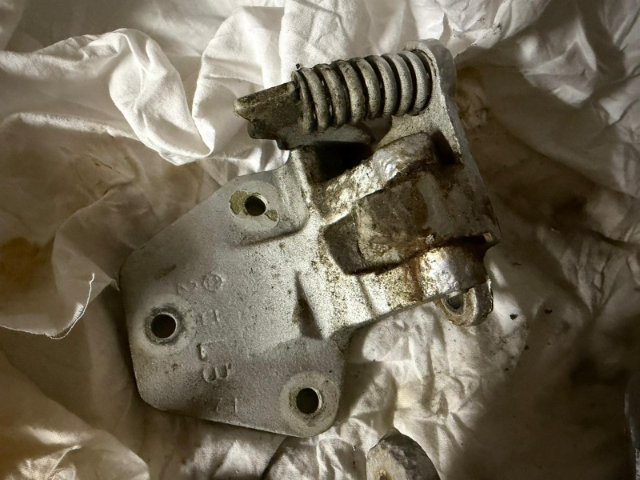
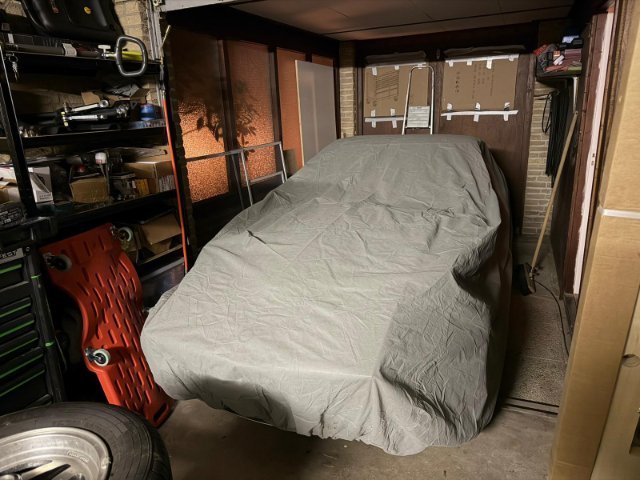
1977 280z driving project from the Netherlands
Mitchel0407 replied to Mitchel0407's topic in S30 Series - 240z, 260z, 280z
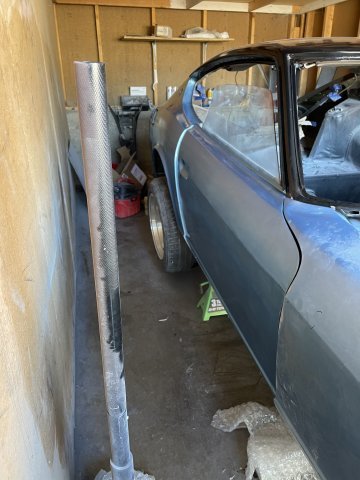
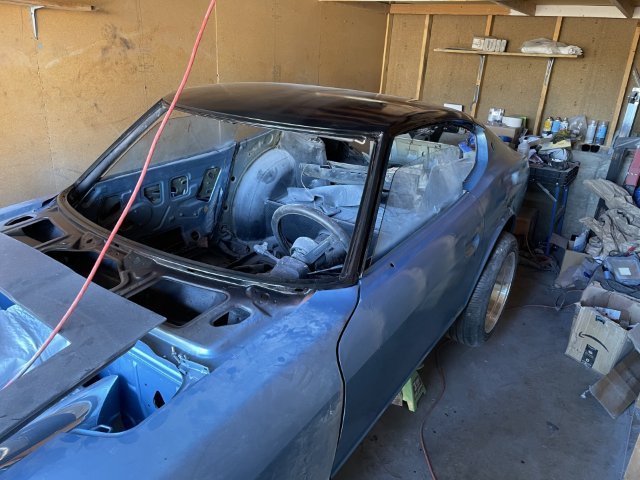
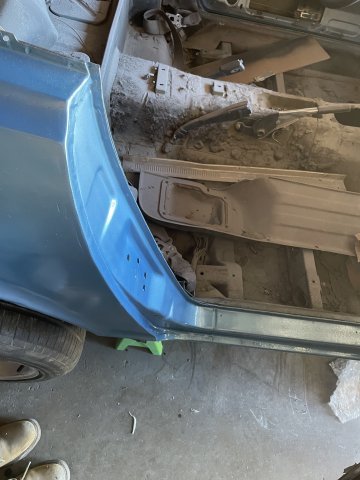
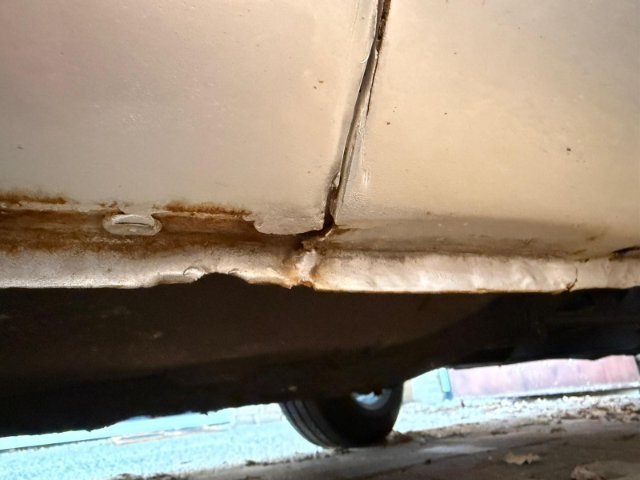
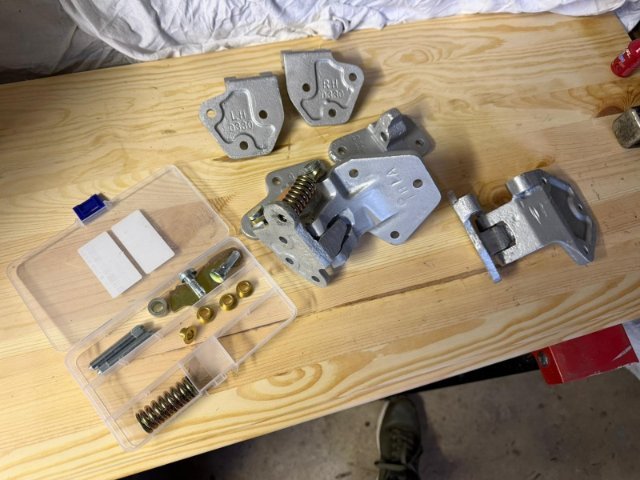
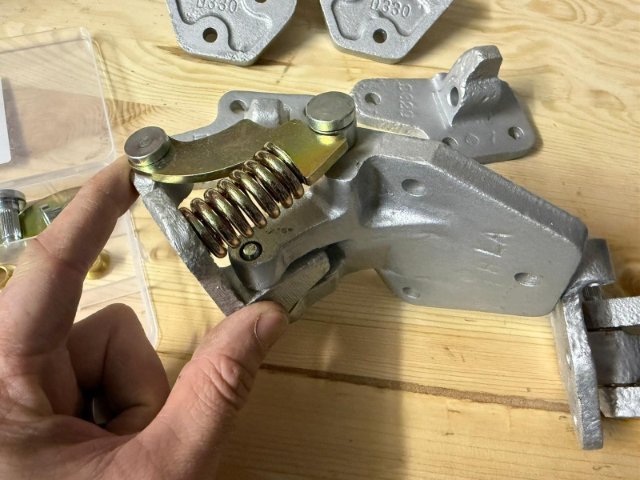
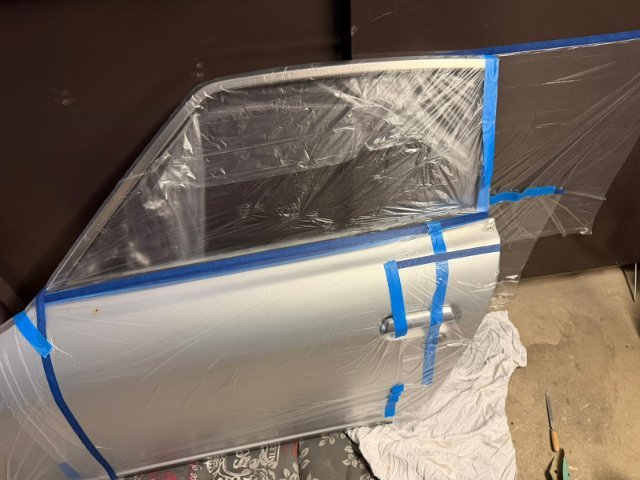
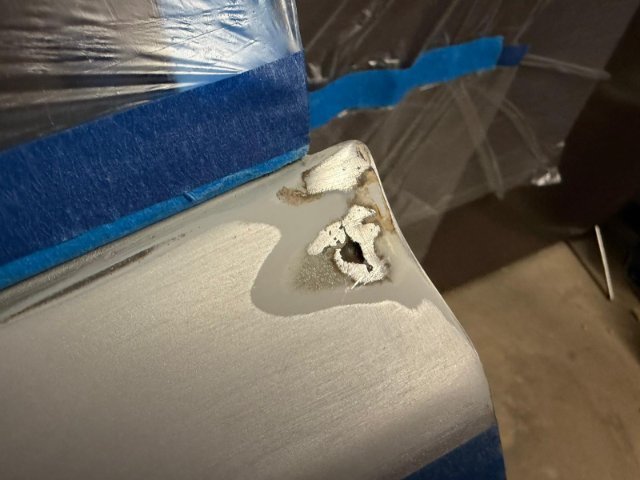
A new year has started and my battle to get the 280z road worthy goes on. I had liked to get some more things done over the holidays but sickness and other obligations got the better of me. That doesn’t mean I didn’t get some progress in. To prepare for a new years eve party I had to temporarily get the Z inside the garage so I continued my journey of stripping down the Z by removing the fenders and wiper cowl. I kind of regret but I'm also glad I did. Turns out the last “restauration” was a fairly cheap one. Some threads where damaged and instead of repairing the thread or welding in a nut they just left the bolts out, or in case of the lower mounting points of the fenders just weld and bondo them on. After getting them off I was met with the nice surprise of finding out they never painted the inside/back of the fenders or any non-exterior part for that matter, only primer. As a result I was met with a lot of surface corrosion spots. I also discovered the car has some crash damage on the front left that was never properly repaired. Some sanding, rust treatment and painting later the car already looked a lot better. At least now I know the Z won’t rust away in the next couple of years. Every panel I remove it becomes more and more clear that a full restauration to the bare metal of the body is necessary if I want this Z to survive at least another 10 to 20 years. I really wanted to start installing some of my new goodies from Apex so I decided to install the rear strut brace as it won’t interfere with any of the bodywork. It was freezing outside but with the help of a heater it was quit doable. I do love the look of the Apex rear strut brace. It’s strong, elegant, functional but doesn’t scream “aftermarket modification” which I like a lot. I don’t really want my car to stay stock but also not heavily modified, just tasteful, functional and a bit more modernized but still the classic look and feel. The last few couple of days have been pretty cold so I moved back to the garage for some of the car work. Unfortunately my garage isn’t insolated and I don’t have a strong enough heater but it’s better then outside and good enough for some paint work and rebuilding the hinges. Rebuilding the hinges was easier then I though at first. Having a vice does make life a lot easier when removing and installing the hinge pins. To get them out I just used an impact socket and an old bolt that was slightly smaller then the hinge pin. With some force they came right out. All hinge pins where worn which caused the doors to sag and the passenger side (which sagged the most) was even bent! The rebuild kit I bought from Zservices EU was great with the exception of the hinge pin bushings, both the outer and inner tolerance was out of spec on all of them. If it was to tight then that wouldn’t be that much of a problem as I could modify them but the tolerance was to loose causing the bushings to sit loosely in the hinge and the pin to have some play. I decided to rebuild the passenger side hinges anyway and will install them soon to see if they sag with these bushings installed. If they do I will have some custom made at a machine shop. Continuing with the doors I decided to do some spot repair on the upper corners of the doors as both sides had some corrosion under the paint, and the doors where off the car anyway so might as well do them now. Here to I discovered the inside of the door was never painted causing some corrosion on the inside of the doors. The more I work on the car the more I want to punch the previous owner and bodyshop in the face. Even so I can't wait to drive the Z, I guess that’s the S30 life for yea….
-
A 2026 SEMA SHOW 260Z Build all the way from Great Britain
toolman replied to toolman's topic in Body Kits & Paint
Part 2-Sema Show 260z This video shows the construction of the Gull Wing Doors on this 260z. The workmanship is excellent and the Shop-Yorkshire Car Restoration is very well equipped with very expensive and high tech fabrication tools. The construction is very interesting and well planned out. -
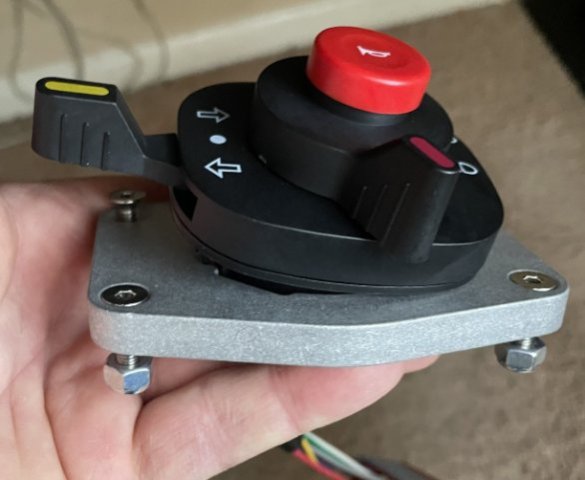
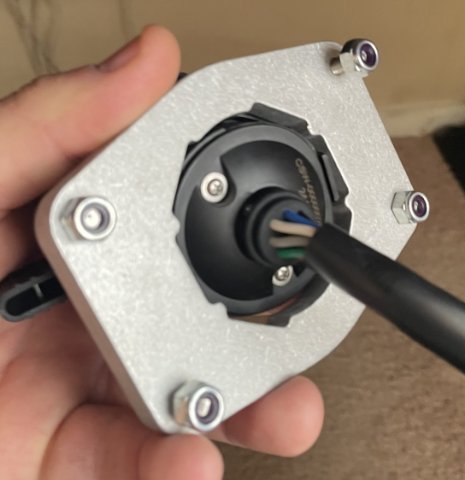
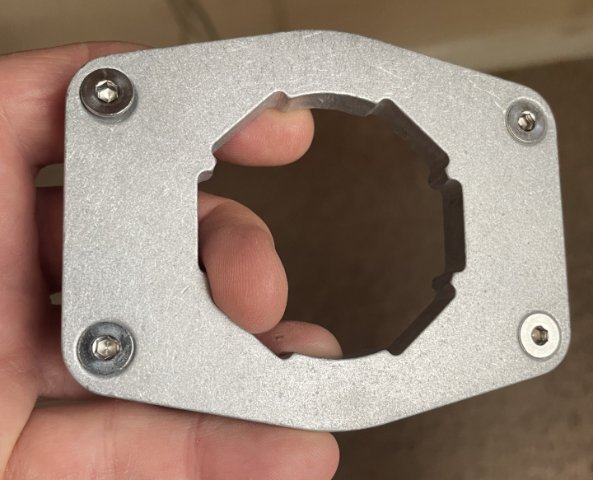
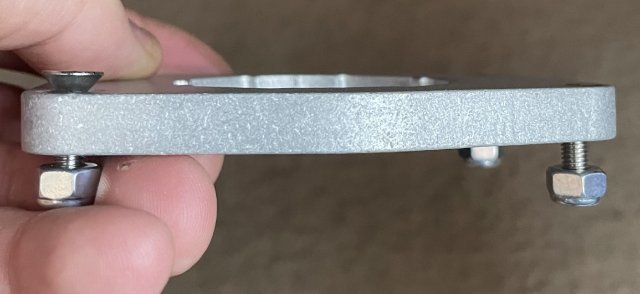
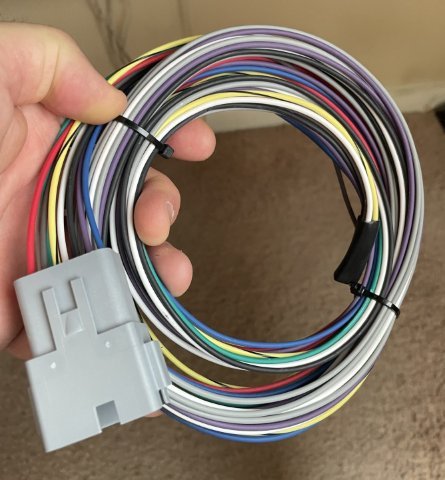
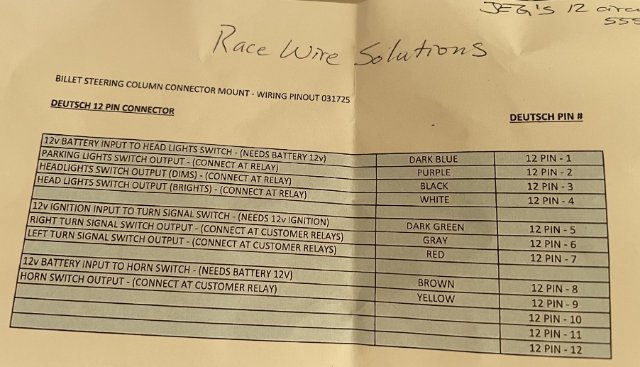
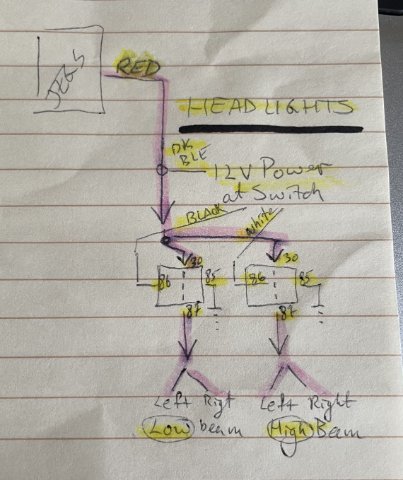
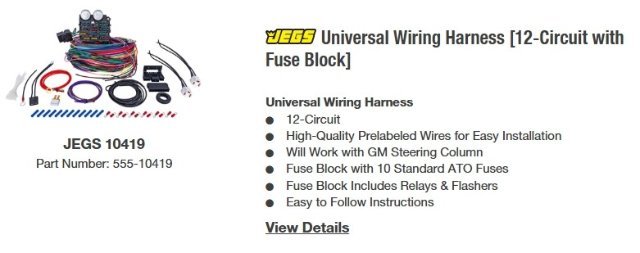
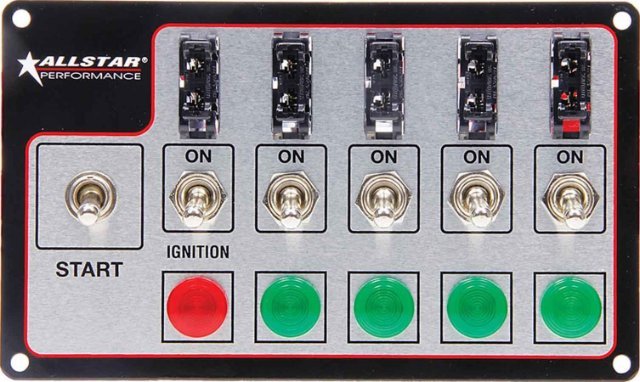
01-11-2025. Pretty cold out today, so I stayed inside and started looking into some of my wiring questions I needed to solve. My combo switch and adapter plate from Race Wire solutions came in the other day, and I will be using that along with the 12 circuit rewiring kit I bought some time back from JEG's. I got Chat GPT to help me keep it straight in my mind and went about figuring out how to wire in my combo switch with what JEG'S sold me. it will be installed in the dash, as part of the dash center plate I got form Skillard, along with 2 gauges and a cool panel/bank of switches made by Allstar Performance I ordered from Summit. now to decide paint the4 panel or upholster.....
-
Fast Floridian's 240Z Track Build
FastFloridian replied to FastFloridian's topic in S30 Series - 240z, 260z, 280z
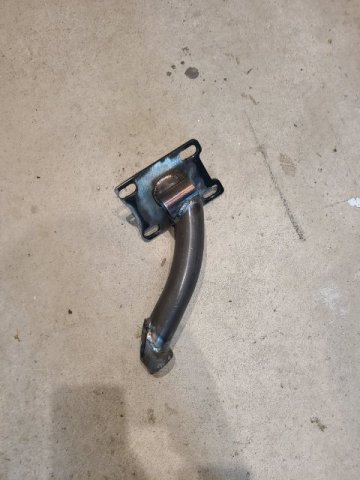
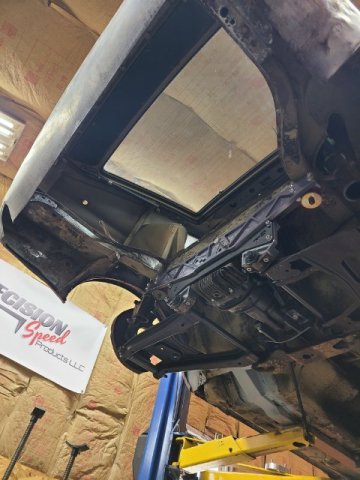
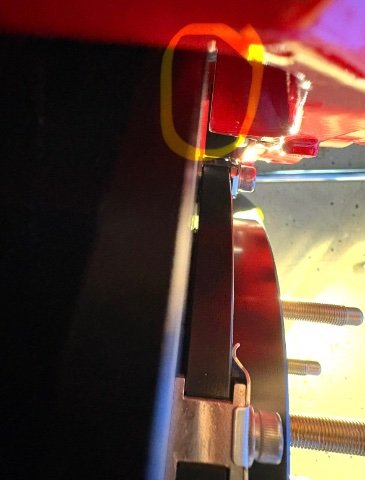
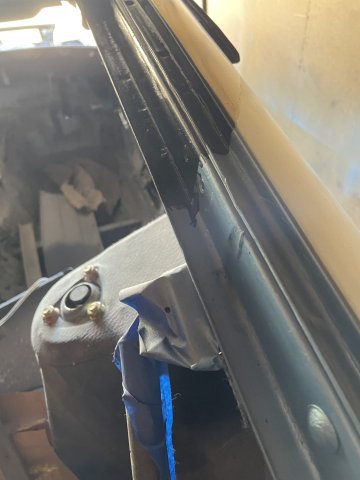
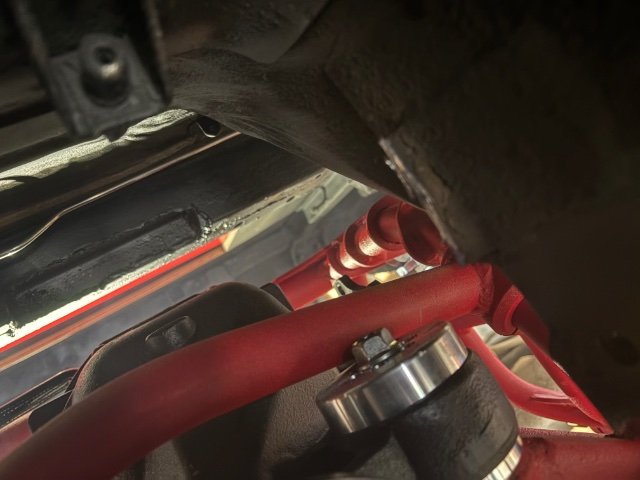
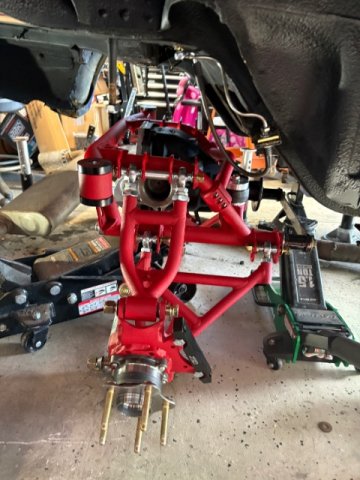
Worked on getting the rear subframe on. Started lifting it up and found this bracket hitting the differential bushing. Had to lower it down and cut it off. After that little set back I was able to get it all bolted up. Waiting on the axles, but I can start on the brakes and just leave the control arms loose.


.jpg.b34f27553f5960421801c8ab2cbf5db3.thumb.jpg.7889e8073010b6a0d8d6aae0626e768b.jpg)


-
Who's Online 1 Member, 0 Anonymous, 242 Guests (See full list)