Mike Mileski
Members-
Posts
355 -
Joined
-
Last visited
-
Days Won
3
Content Type
Profiles
Forums
Blogs
Events
Gallery
Downloads
Store
Everything posted by Mike Mileski
-
Datsun looks like its driving crooked
Mike Mileski replied to JDs78's topic in Brakes, Wheels, Suspension and Chassis
I hate to say it but, if it's that noticeable, it may have been tweaked in an accident and the rear portion of the car has been pushed over sideways a bit. A frame shop could tell you for sure. Mike Mileski Tucson, AZ -
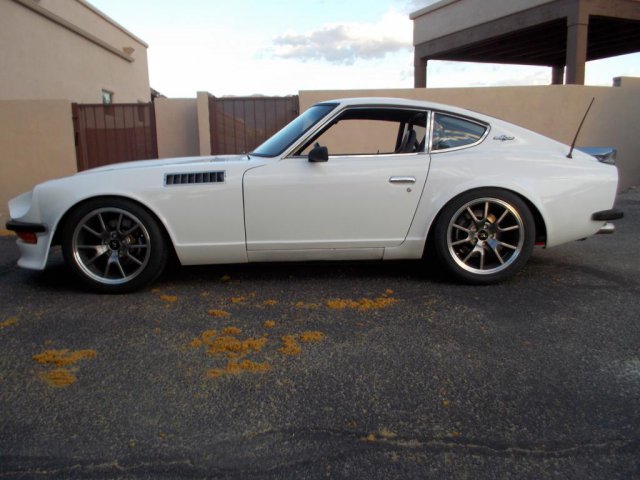
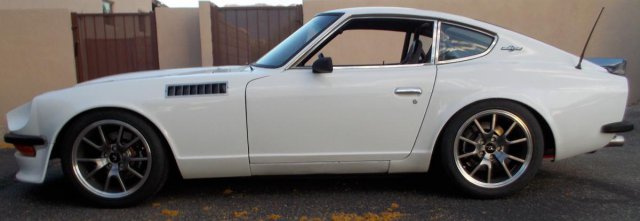
One off, custom made ones in my Subtle Z flared fiberglass front fenders. They're a couple of inches deep (inset inwards) and the vent panels are angled back. Mike Mileski Tucson, AZ
-
New Front Control Arm
Mike Mileski replied to Mike Mileski's topic in Brakes, Wheels, Suspension and Chassis
Oh crap! Back to the drawing board. Mike Mileski Tucson, AZ -
New Front Control Arm
Mike Mileski replied to Mike Mileski's topic in Brakes, Wheels, Suspension and Chassis
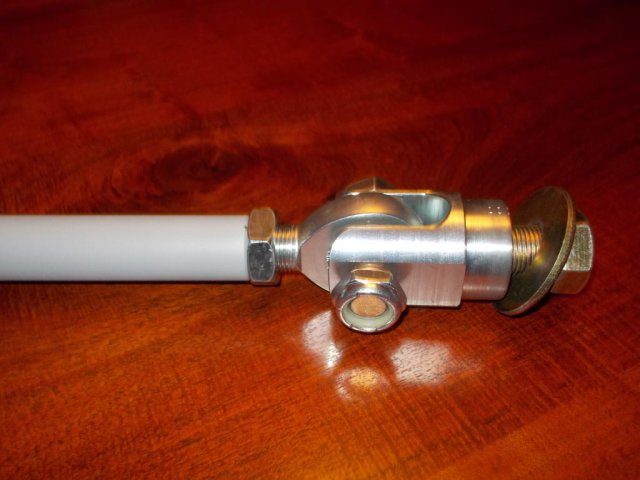
Jon, if you look at the new arm assembly, the clevis that's at the frame attachment point for the TC rod will be mounted with the slot vertically oriented and it allows enough side-to-side movement of the standard rod end (not a solid eye rod end) to compensate for lengthening or shortening the TC rod. In fact, I did some calculations and, starting with the control arm pointing straight out from the car (90 degrees from the car), lengthening the TC rod a full inch, or shortening it an inch, only moves the TC rod about 1.5 degrees in either direction. With the clevis I'm using, the rod end can move about 5 degrees in either direction. Mike Mileski Tucson, AZ -
New Front Control Arm
Mike Mileski replied to Mike Mileski's topic in Brakes, Wheels, Suspension and Chassis
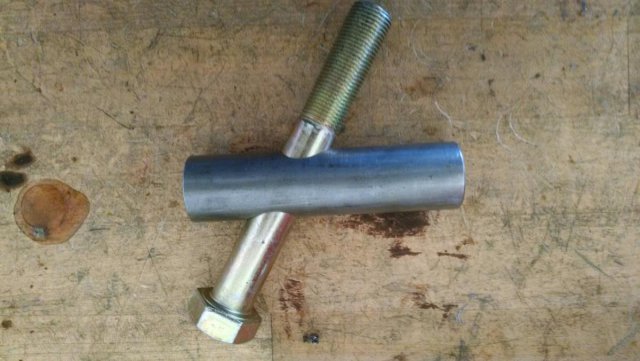
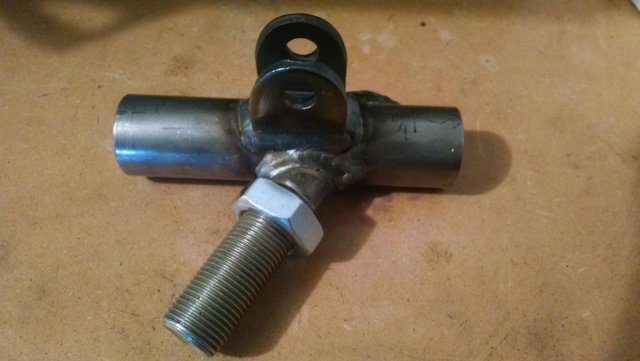
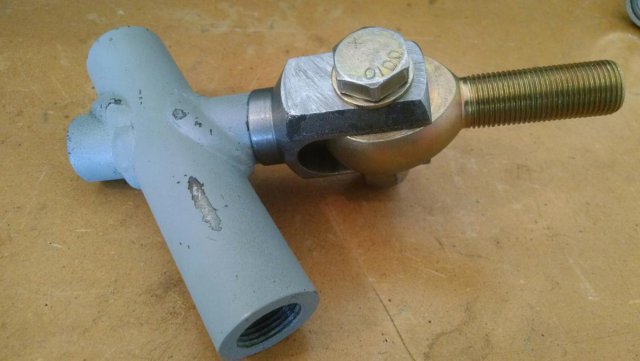
Here's what I ultimately ended up doing: Picture 1. Drilled a 3/4" hole at the correct angle through the main body of the arm. Inserted 3/4-16 Grade 8 bolt. Picture 2. Welded both sides and cut/ground off excess material on backside Picture 3. Finished new arm Mike Mileski Tucson, AZ -
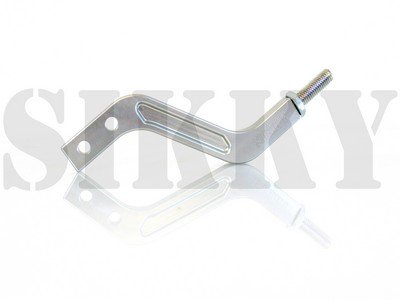
I don't know how much you guys are paying for tailshaft mods, but Sikky Manufacturing makes a T-56 shifter extension that is really high quality (see attached or their website). I think it comes in 3 different lengths, 4", 7" and 9". Mike Mileski Tucson, AZ
-
New Front Control Arm
Mike Mileski replied to Mike Mileski's topic in Brakes, Wheels, Suspension and Chassis
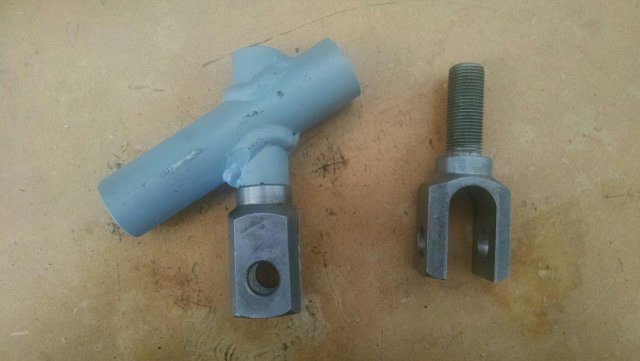
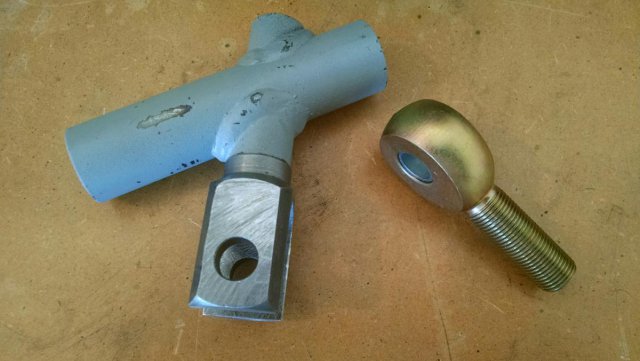
Yes, I have the steering arm drilled out to accept a 5/8" bolt. I have also figured out how to make a solid connection at the arm. I had some clevises with a 5/8" gap and a 5/8-18 male thread (see pictures). I was able to drill the cross piece out and tap it for a 5/8-18 thread, screw in the clevis and I'll have it welded directly to the arm to make a solid connection. I then found some solid rod ends that were 5/8" thick wiith a 5/8-18 male thread. Once I drill and rethread the arm side of the TC tube to a 5/8-18 RH thread , I'll be all set. Even the length dimension will remain the same. Mike Mileski Tucson, AZ -
New Front Control Arm
Mike Mileski replied to Mike Mileski's topic in Brakes, Wheels, Suspension and Chassis
I'll be thinking of something to make them solid. I like Jon's idea of welding on a clevis and using a solid rod end, installed horizontally as opposed to vertically. Mike Mileski Tucson, AZ -
New Front Control Arm
Mike Mileski replied to Mike Mileski's topic in Brakes, Wheels, Suspension and Chassis
Well, I'm glad I had most of this hardware already "laying around". The only money I had to spend was for the 1.125" metal rod material I wasn't aware that the TTT rods changed from standard rod ends to solid. Back to the drawing board for me. Thanks for all your input. Mike Mileski Tucson, AZ -
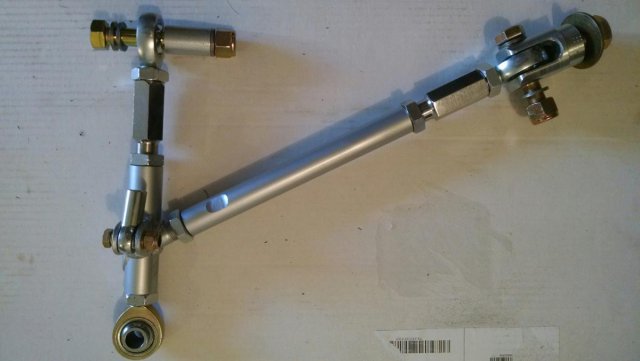
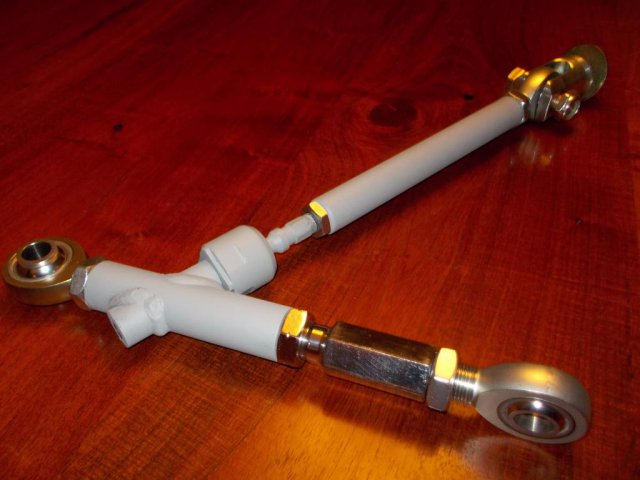
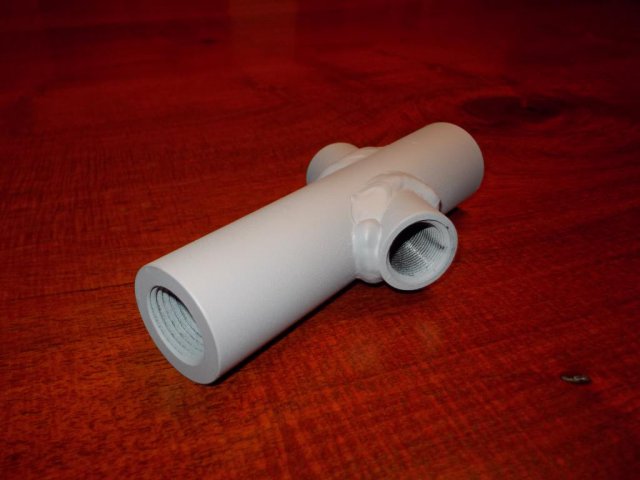
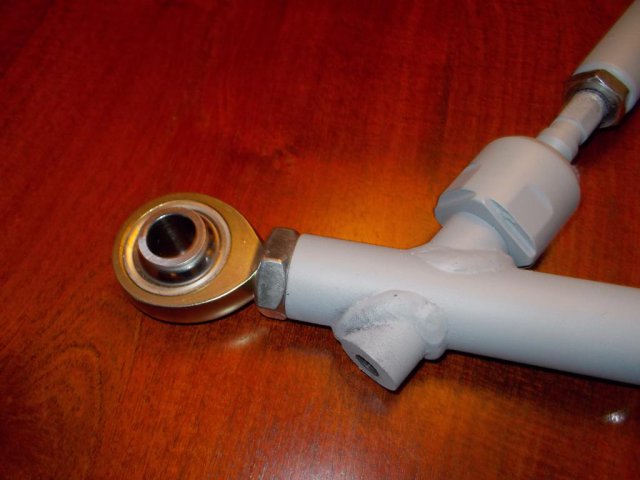
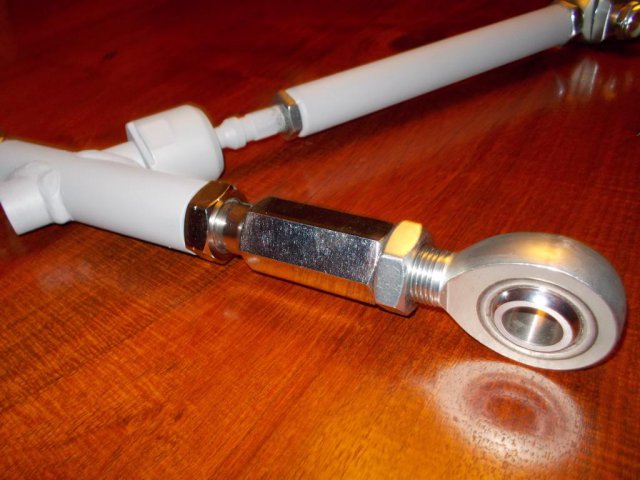
Attached are pictures of my new front control arms (as yet unmounted). The main body is a 1.125" OD rod that was drilled and tapped on both ends to accept a rod end on the outboard end and a double adjuster on the other end. The angled cross piece is a .875" OD rod tapped to accept an inner steering tie rod I used from a Z31, which acts as the outer end of the TC rod. I had a pair of machined clevises that I used for the attachment of the other end of the TC rod to the chassis. The TC rod is also RH/LH threaded to allow adjustments in length. I used a high misalignment rod end outboard for attaching to the steering arm because my steering arms are already drilled out to accept a 5/8" bolt. The outboard rod end is not used for any length adjustments, only the double adjuster. Just thought I'd post them and see what others thought. Mike Mileski Tucson, AZ
-
Weld in roll bar with stock seat belts. Help?
Mike Mileski replied to rturbo 930's topic in Interior
When the belts are on, they just seem like seatbelts in any other car. Mike Mileski Tucson, AZ -
Weld in roll bar with stock seat belts. Help?
Mike Mileski replied to rturbo 930's topic in Interior
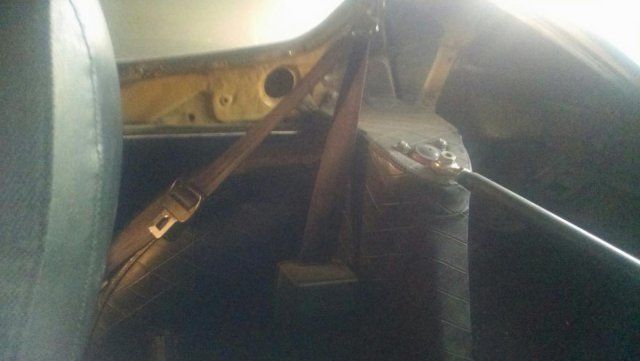
I bought a universal set of retractable belts from Juliano's and bolted the retractable housing just in front of the rear shock tower. I bolted it to a 1/4" thick bar, 1" wide and about 6" long that I placed under the floor, accessed via inside the tool storage boxes. This was to provide an area to spread any force that might occur in the event of a front end collision. Seems to work fine. Mike Mileski Tucson, AZ -
You say that the two diffs have the same external measurements. What really matters in this case is: What is the relationship between the location of the rear mounting studs compared to the location of the front mounting points, in an up and down dimension? My guess is that the two diffs are different in this respect and that's what's causing your twisting issues. If the dimensions on the Subie diff were the same as the Datsun diff, then it should bolt right in. Mike Mileski Tucson, AZ
- 28 replies
-
- differential
- rear suspension
-
(and 4 more)
Tagged with:
-
Just starting my ls1/t56 build!
Mike Mileski replied to CableSrv's topic in Gen III & IV Chevy V8Z Tech Board
I had to cut out some material on the rubber boot to get it to slide all the way down to the bottom of the Sikky shift handle. Mike Mileski Tucson, AZ -
Just starting my ls1/t56 build!
Mike Mileski replied to CableSrv's topic in Gen III & IV Chevy V8Z Tech Board
boyracer, I using this Sikky shifter handle in my car and it relocates the top of the shifter handle back about 2 1/2". Check out the pic, it might work for you. Mike Mileski Tucson, AZ -
Techno Toy Tuning Tie Rod
Mike Mileski replied to Keepn it OG's topic in Brakes, Wheels, Suspension and Chassis
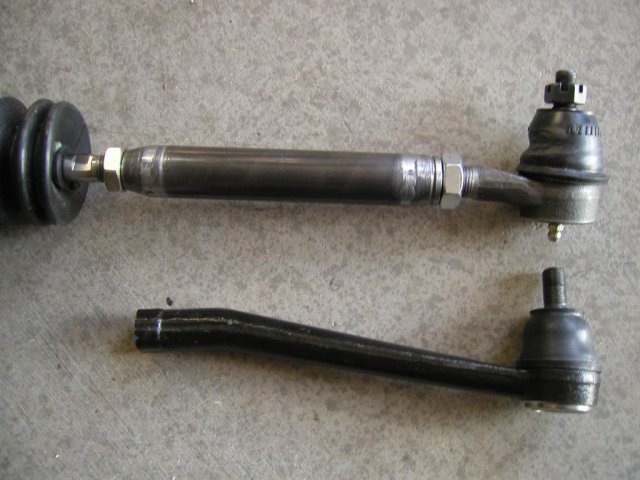
Actually, I couldn't find them either so I bought two 1/2-20 tube ends and drilled them out with a 1/2" drill because, conveniently, that's the tap size for a 14mm X 1.5 thread. Then I just threaded them for whatever inner tie rod threads you have (in my case, one was LH and one was RH. If you've had your LH inner tie rod replaced on your steering rack with a RH one, then you would need two LH thread Corvette outer tie rods and two RH 14mm X 1.5 tube ends). Mike Mileski Tucson, AZ. -
Hood latch cable broke
Mike Mileski replied to jeromio's topic in Brakes, Wheels, Suspension and Chassis
Yep, you did it pretty much like I did. The linkage acts as the transition point in going from horizontal to vertical and, in your case, the wire insulation give it a good surface to slide on, making it less apt to bind or catch. My current car has functional side vents on the fenders so my backup release wire stays horizontal all the way out. It ends just out of view inside one of the vent slots on the driver's side. Mike MIleski Tucson, AZ -
Techno Toy Tuning Tie Rod
Mike Mileski replied to Keepn it OG's topic in Brakes, Wheels, Suspension and Chassis
I made a set of adjustable tie rods for my 240Z. Mine still had the stock, left hand and right hand threaded outer steering rack tie rods. I got two 14mm X 1.5 (LH and RH) threaded tube ends and two 5/8-18 (LH and RH) tube ends and welded them up. I found that Moog #ES323R and ES323L for 1963 - 1982 Corvettes have the same dimensionally tapered ball stud as the Datsun has, so that's why I used them (they have 5/8-18 RH and LH male threaded shanks). It's worked fine for several years. Mike Mileski Tucson, AZ -
Hood latch cable broke
Mike Mileski replied to jeromio's topic in Brakes, Wheels, Suspension and Chassis
Like I said before in my post over 15 years ago (#11 above), if you just get a 16 - 18 gauge solid wire, you can hook it to the hood latch lever and then route if into the passenger compartment or over towards the driver's side of the engine compartment, near the brake master cylinder, and then down near the frame rail. I did have a hood latch failure since my post above and all I had to do was reach up under there, find the wire and give it a good pull with a pair of pliers and the hood popped right open, no problem. This is certainly a lot easier than converting to hood pins. Mike MIleski Tucson, AZ -
Sikky makes a slick one. Choose offsets of either 4', 7" or 9". Expensive but quality. http://www.sikky.com/product/t56-magnum-shifter-relocation-kit/ Mike Mileski Tucson, AZ
-
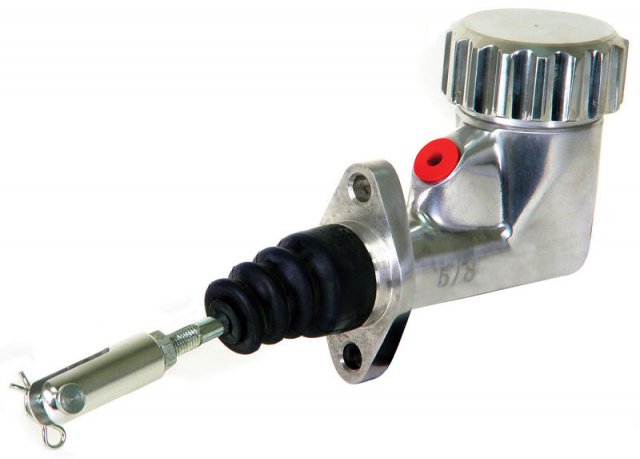
I just came across this cool little one piece master cylinder with integral reservoir that would be perfect for a Z clutch master cylinder. I've seen them in several different bore sizes: 5/8", 3/4" and 7/8". You can get them plain or polished (polished shown). The part number is 799512. Several places sell them. Mike Mileski Tucson, AZ
-
Maybe you've already done this but, not knowing, I'll say it anyway. When your clutch pedal is resting all the way back in it's normal position, adjust the threaded rod that goes into the clutch master cylinder so there's just a tiny amount of free movement in the pedal before it starts pushing on the piston in the clutch master. That way you know you're getting full movement of the piston in the master cylinder. If that doesn't do it, and there's no leaks, it's either your master cylinder or slave cylinder that's the problem (assuming you bled it correctly). Mike Mileski Tucson, AZ
-
Seibon hoods and Retro Spec parts
Mike Mileski replied to Arif's topic in S30 Series - 240z, 260z, 280z
I bought a Seibon hood for my '71 240Z. It weighs 8 lbs. The stock hood weighs 37 lbs. I weighed both on a digital bathroom scale (my weight holding the hood, minus just my weight). My only complaint about the Seibon hood is that there is no metal reinforcement in the flanges that stick out that bolt on to the hood hinges. One of mine has cracked and now I need to figure out a way to reinforce and fix it. My friend had a carbon fiber hood on his Z (can't remember what brand) and it did have metal reinforcements in those flanges. Those see a lot of stress and I wouldn't buy another carbon hood without first checking if those areas have any metal reinforcement. Other than that, the fitment was great. Mike Mileski Tucson, AZ -
Will a 2012 Camaro LS 3oil pan fit?
Mike Mileski replied to MileHigh280's topic in Gen III & IV Chevy V8Z Tech Board
I have a crate LS3 I have already mounted in my car and the pan sticks down way too far for me. However, I have coilovers and like it down in the weeds. I was lucky enough to get a C6 Corvette pan which is 2" shorter than my LS3 pan. I'm planning on changing it out within the next couple of weeks. Capacity is less but the C6 pan is well baffled compared to the LS3 pan. You need a different windage tray too. Mike Mileski Tucson, AZ
