
smoorenc
-
Posts
188 -
Joined
-
Last visited
Content Type
Profiles
Forums
Blogs
Events
Gallery
Downloads
Store
Everything posted by smoorenc
-
LS_1 / 280Z Speedometer Question
smoorenc replied to rwwisnesky's topic in Gen III & IV Chevy V8Z Tech Board
Thanks, I am installing an Autometer electronic speedometer. So I won't be worrying about the mechanical part. I looked but I can't find the thread on the transmission adapter to show you. -
LS_1 / 280Z Speedometer Question
smoorenc replied to rwwisnesky's topic in Gen III & IV Chevy V8Z Tech Board
Do they mean the teeth in the sending unit in the tranny? There is an article about using different color adapters (white, yellow) in the transimssion according to your rear end ratio to keep a "normal" speedometer corrrect. -
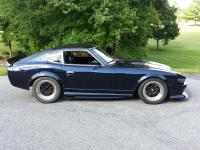
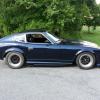
Do your engine braces block the battery bad? Or do they remove easily enough? Your swap is so nice looking! GREAT job. You are so far ahead of my swap. I have parts everywhere.. haha I have about everything I need for the swap. I am waiting on the custom roll bar to be fabricated/welded into the car now. Next the fenders cut out for wider tires and the flares mounted. Then off to the body shop. There is a 510 in line in front of me thats being completed now. I have done about all I can do by myself. I can't weld at all, so I am waiting.... www.4moores.com/280z
-
You can call them and they will do it. I wanted some custom colors and they were going to do it. Bu I went for the Phantom's instead. Their phone # is 815-899-0800 Also get the 5" for speed and tach and 2 5/8" (66.7mm) for the main gauges. I just installed the Phantom gauges http://forums.hybridz.org/showthread.php?t=127360
-
It looks like it will be an LS1 for mine
smoorenc replied to worknprog's topic in Gen III & IV Chevy V8Z Tech Board
I am doing the same with an '02 LS1. There is great info here and even better people! Good luck -
No pics, "page can't be found"
-
great!!
-
Well I got the game and it's pretty cool. One thing I noticed is turn level 2 means STOP! Ha-Ha EvilC don't forget to PM mr with the info for Sunday night. Also don't forget I will need a 2 lap lead, minimum! Scott
-
How to make autometer fuel gauge read properly
smoorenc replied to smoorenc's topic in Ignition & Electrical
Yes its the stock sending unit. -
I got the autometer fuel gauge to read correctly with the 280z sending unit: http://forums.hybridz.org/showthread.php?t=127605
-
Well like most of you I got the auto-meter fuel gauge made for Ford's pre 1989. I got the phantom series # ATM-5815 which has the compared values: _____Stock Sender_____ Gauge Empty __90 ohms______73 ohms Full ____10 ohms______ 8 ohms The problem was at the half way point on the stock sender the gauge would read just below 1/4 of a tank. I used the excel calculation sheet I got from here: http://mywebpages.comcast.net/pparaska/gagecalibration.htm which was used on Mike Kelly's gauge. According to the sheet I needed a 367 ohm resistor between the sending unit signal and ground. So I went to www.newark.com And ordered up some resistors. I couldn't get exactly 367 so I ordered an assortment and figured I would have to put them in series. These are the 2 that worked and I will explain how I had to put them in parrallel to get a resistance value of 173 ohms: Part # 65K3789 $0.383 $0.38 350OHM Manufacturer Part No: CW02B350R0JE70 Part# 01H0119 $0.34 $0.34 360OHM Manufacturer Part No: AC03W360R0J If you can find a 170/180 or 175 ohm 3watt resistor it would work easier than 2 in parallel. I found one at www.newark.com 64K8918 180ohm for .99cent. You might want to try that first. The only reason I used the 2 in parallel is I didn't have one resistor in the 170 ohm range. Remember for basic resistance in seriries "add" the values. in parallel, divide the values. I don't know why but nothing in the 300ohm range would work. So I just started experimenting with different resistors until it worked right. At 173 OHMS it seemed to work good. Here is the original half way point on the gauge: Setup with no resistors: Full Half Empty Putting the 2 resistors in parrallel and soldiering them together / heatshrink / adding leads: Then I connected them to the ground post and the sending unit post This is how the gauge is measuring now: Full Half Empty I did not come up with all of this info. I just put it together with pictures.
-
Great!
-
I got the game today and I am "training" now. Seems to run fine on my PC. I only have a GeForce 6600GT with 256meg of memory on it and I am not having any display issues. It's an older video card too. Can someone please PM me with the internet game to go to on Sunday. When you are old and have arthritus in your hands like me, do I get 1 or 2 laps head start??
-
20 bucks I am in!
-
what game exactly?
-
She finally showed me her naked body last nite.
smoorenc replied to bjhines's topic in Body Kits & Paint
Wow that is great! -
I was asked by Tx1021 to take a night shot. Well the dash is on my work bench connected to a battery. But here you go: The one is a little crooked be cause they are not tightened all of the way.
-
I saw it, sounds like a 18 wheeler! It's huge. Made my new Tundra look so small.
-
For the 5" gauges I am using the Autometer Speedo and Tachometer. For the 3 center gauges I am using 2 5/8" Auto Meter gauges: Oil Pressure, Voltage and Water Temp. I am going to pit the Fuel Gauge and Oil Temp down below somewhere. I might have to look at a gauge pod. I couldn't find 2 5/8" combo gauges that worked anywhere. That would of been perfect. Also on a side note, I am putting electic tape/rubber grommets around the cut outs. I couldn't edit the original post for some reason.
-
WOW cool G-nose police car
-
How did everything work out? I need to flare my fenders out and I was searching.
-
The idiot light/turn signals etc is my next step. I have heard sme brave people have taken apart their new 200.00 Speedo's and put some LED's in. But I am not that brave yet.
-
Hi I don't know if this is the best way to do this, but I thought I'd give it a try. We are having a LS1 installed in our '76 280Z. I wanted to swap out the original gauges with Auto Meter Phantom gauges. I took apart the original gauges and basicly gutted them out. . Here is the outer ring, you will notice that the inside mount is angled.: I used a dremel at medium speed with a cutter bit to make the inside even. Then I used a drum sander to clean off the plastic burrs. Then put the gauge in from the out side and use the included mounts. fron behind. I used a washer and nut to tighten and hold the gauge to the outer ring. I figured out the place where the posts would come through the back. Then drilled them out. I put the back cover on and drew an outline around the power/sensor and light bulb posts. I used the dremel cutter to cut out the section for those areas. Pass the light wires through the hole you just made. Mount the rear cover and screw into place with the original screws. Use the meter's supplied star washers and thumb nuts to tighten it all down. re-install the original bracket "thing" Put the gauge under that dash and screw the mounting bracket on.
-
Help with rear swaybar needed.
smoorenc replied to smoorenc's topic in Brakes, Wheels, Suspension and Chassis
I found out MSA has what I want and I am also talking to Dave at Arizona Z Car. So I got it figured out. Thanks. -
I need to get the sway bars for my '76Z that is having the LS1 put in it. I am told to get the 1" front and the rear that is in front of the differential like the original sway bar. This will be a street/VIR track car. Also I got the Arizona Z springs and Illumina adj shocks. When I go to places like MSA they don't say how they mount (in front of diff) and I don't know if they are the best for this anyway. Can one of you guru's help by pointing me in the right direction. Thanks