-
Posts
1917 -
Joined
-
Last visited
-
Days Won
12
Content Type
Profiles
Forums
Blogs
Events
Gallery
Downloads
Store
Everything posted by 1 tuff z
-

LSx s30 Longtube group buy thread
1 tuff z replied to 1 tuff z's topic in Gen III & IV Chevy V8Z Tech Board
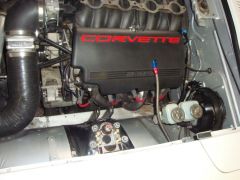
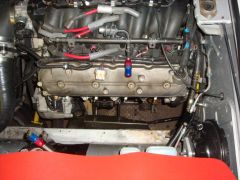
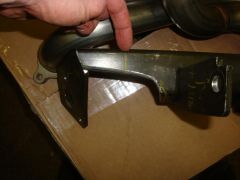
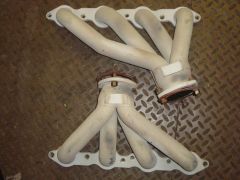
I will be updating the install instructions with some input of my own install then uploading when complete. Left [driver] side is in and they are tight! I will say it has taken me about 4 hours total to get the left side in-not because I'm completely incompetent but wanted to do the job right. At this point I do not anticipate needing to remove any material from the t/c bucket and the collector does not touch the body. The header is about 3/16" from the steering rod-very close. The 'rub' marks you see on the header & steering rod are from when the header was not yet bolted in. Removed the johns' cars mount and had Jimmy Z [he makes the billet parts sold on Hybridz] put the mount on the mill for a few mods. First was to 'slot' the single/top hole on the mount that is sandwiched between the crossmember & framerail to allow easier alignment for that bolt. Next, enlarge +1 size the engine mount bolt [long one] holes for easier alignment-worked great. Remove the guesstimated material from the rear of the mount [see pic] for header clearance. Where my finger is pointing is about as far as needed to remove-any more material removed toward the upright part of the mount is not really necessary. More later... Left side install complete! So, I just couldn't stay away and figured on trying the right/passenger side. Pulled the starter completely [figured the header would be in/out at least twice so wanted to make it a bit simpler]. Installed the header to determine how much t/c bucket trimming was needed. Broke out the cut off wheel and trimmed that piece-done. Next hurdle-the header bisects the floor as it point to the rear of the car, instead of paralleling the tranny [see pic] and needs to be shortened or turned or both. Looks to be about 15 degrees of ''bend" needed. Will work on that next, done for today. You are welcome sir! From the beginning I had hoped for long tubes that met all our criteria-we are nearly 100%! -
From the album: LSX long tube headers
-
From the album: LSX long tube headers
-
From the album: LSX long tube headers
-

LSx s30 Longtube group buy thread
1 tuff z replied to 1 tuff z's topic in Gen III & IV Chevy V8Z Tech Board
Began the install this evening. Figured I'd spend about a half hour test fitting the left/driver side, 2 hours later I'm closer... I think the header went in & out about 30 times! Began [sortofish] following Blakes directions. Remove brake master and pull to the side, disconnect steering rod at coupler, set aside. Then I realized it would be easier to completely remove the steering rod but the only way to do that is to also remove the john's mount-so I did that also. Now I'm fighting so the 'while I'm at it's' don't completely take over. I wire brush, clean and lube the steering rod ends [so they re-assemble easier], decide that the john's mount needs a few mods for easier install and attempt to zone in on where the material needs to be removed. Wow are these a tight fit but they look awesome and can't wait to hear it fire up! Yes, she will be fired up open tubes... Enough for tonight-too cold in my unheated upstate NY garage. -
From the album: parts / cars for sale pics
-
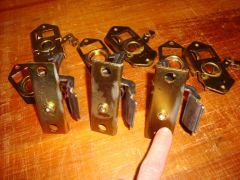
Paul, mine are recovered in a very dark grey tweed. We used an SEM plastic prep to 'soften' the plastic then 3m adhesive to adhere the tweed. Care was taken to align the pattern to flow from panel to panel and we enlarged the 'rivet' holes to take into account the extra material for the hole. I also converted to a honda pull type fastener which are reuseable. Question about your z-I noticed your bumpers have no holes and the rear is a 1 piece. Did you get them that way or have them modified?
-

LSx s30 Longtube group buy thread
1 tuff z replied to 1 tuff z's topic in Gen III & IV Chevy V8Z Tech Board
Josey, can u post a close up of where the left mount was cut. I'm not quite clear where Blake did that and would prefer to see that before I begin 'hacking'! -
Brian hooked me up with the same rear spoiler-only in white!
-

LSx s30 Longtube group buy thread
1 tuff z replied to 1 tuff z's topic in Gen III & IV Chevy V8Z Tech Board
Here are the instructions that came with my headers-with some slight revisions for clarity. Had Blake email me the pics so I could enlarge them some. The piece which was removed from the left john's engine mount is upside down from the orientation as it was removed. So, if you're trying to visualize where it was removed from simply turn it 180 degrees! This forum would also be a great place for us to share any efficiencies we discover for our install. Z LSx Long tube install instructions.doc Z LSx Long tube install instructions.pdf -

LSx s30 Longtube group buy thread
1 tuff z replied to 1 tuff z's topic in Gen III & IV Chevy V8Z Tech Board
Sweet!-glad they'll fit without too much modification. -

LSx s30 Longtube group buy thread
1 tuff z replied to 1 tuff z's topic in Gen III & IV Chevy V8Z Tech Board
I'd text or email him. -
From the album: Drivetrain / Exhaust
-
Mild or ss, check cone engineering, here is a link to their transitions / cones pdf, inexpensive...
-

LSX Long tube exhaust options & plans
1 tuff z replied to 1 tuff z's topic in Gen III & IV Chevy V8Z Tech Board
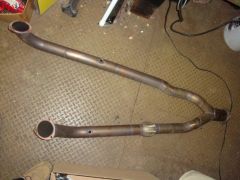
Hunting around for components to build the gap between the new long tubes & existing exhaust I determined it best to run dual 2.5" after the LT's then merge into a single 3" aft of the tranny. Anyway, found what I feel are the most reasonable cost/length/etc. transitions from Cone Engineering. Spent some time speaking with Rich [think he's the owner], got a quick education and he helped me narrow it down to their TR7-2530-SS 3"-2..5" transition. 4.1" long, 7 degree taper, ~$23 each, in 304 ss. Very reasonable compared to some of the other transitions out there and all made in house to boot! Here is a link to the Cone Engineering website, here is the link to their parts pdf-look on pg 3 of 4, under "SS collector transition cones". Most likely will purchase my components [tubing, etc] from Columbia River Bends, click-here -
I have one but it would have to be shipped from upstate NY. Pm me if you're interested.
-
Vinny, October 2014 will mark 30 for my 73z, which I purchased with a fist full of cash I squirreled away while serving in the Army in Korea-early 80's.
-
So you have their monster rear brakes. At 13" they should provide more than enough to lock the rears first-as I found on my first run after upgrading to the silvermine rears from the mml 240sx rears [and had removed my prop valve]. First run locked the rears-drove carefully home, reinstalled the prop valve and began adjusting it after. Were the pads & rotors bedded in properly? Again, I would not use the Hawk HPS's as I easily wore them down to nearly nothing during a 2 day event, the HP+ [while I'm sure they're not the best pad] last me significantly longer. HPS & HP+ both create plenty of dust on the wheels.
-
So now that my long tubes have finally arrived been thinking about the rest of the exhaust. My current setup is dual 2.5" into a single 3" [just aft of the tranny] into a single 3" in/out offset summit racing muffler. Entire system is T304 SS mandrel. Like to hear from the rest of you who got on board with our group buy as to what you've planned! pic of my current setup
-

WTB: Lower Steering Joint (lower steering column) for 1971 240Z
1 tuff z replied to VlaDeMaN's topic in Parts Wanted
Garrett, thanks for the info & link but I'm a bit unclear on the install. Welding involved? Your pic in the referenced thread shows each [new] end. Just wanted to be sure I know how you installed the new u-joints. Probably simple and I'm just not getting it-sorry for any confusion.

