Zetsaz
-
Posts
943 -
Joined
-
Last visited
-
Days Won
34
Content Type
Profiles
Forums
Blogs
Events
Gallery
Downloads
Store
Everything posted by Zetsaz
-
That's why I said reasonably priced and not cheap
-
So between recently purchasing my G37, wanting to keep my Z semi-stock looking but with some suspension mods for a bit of track use, and going to drift events regularly, I may be looking for a helmet soon. Drift events up here sometimes let you do a ride-along during some tandem drifting for free, but you need to have your own helmet and I know for auto-x down the road that's something I'll need. That being said, does anyone have any suggestions that are reasonably priced and meet current spec?
-
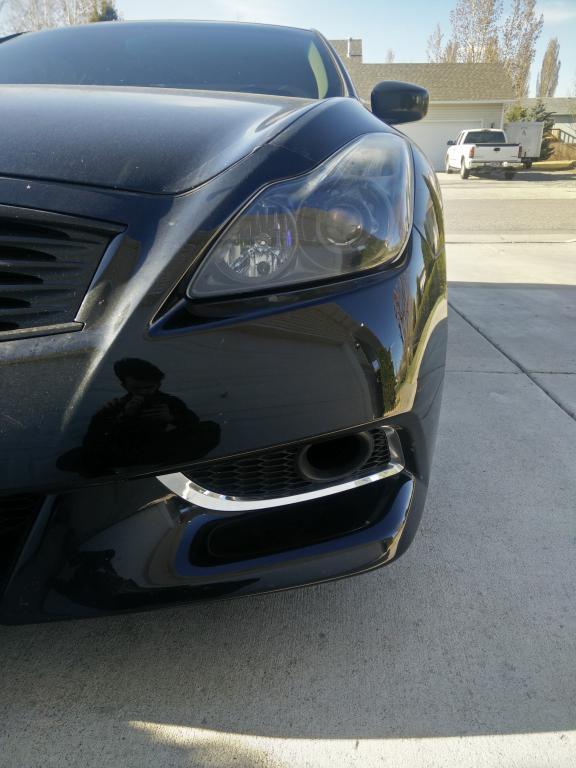
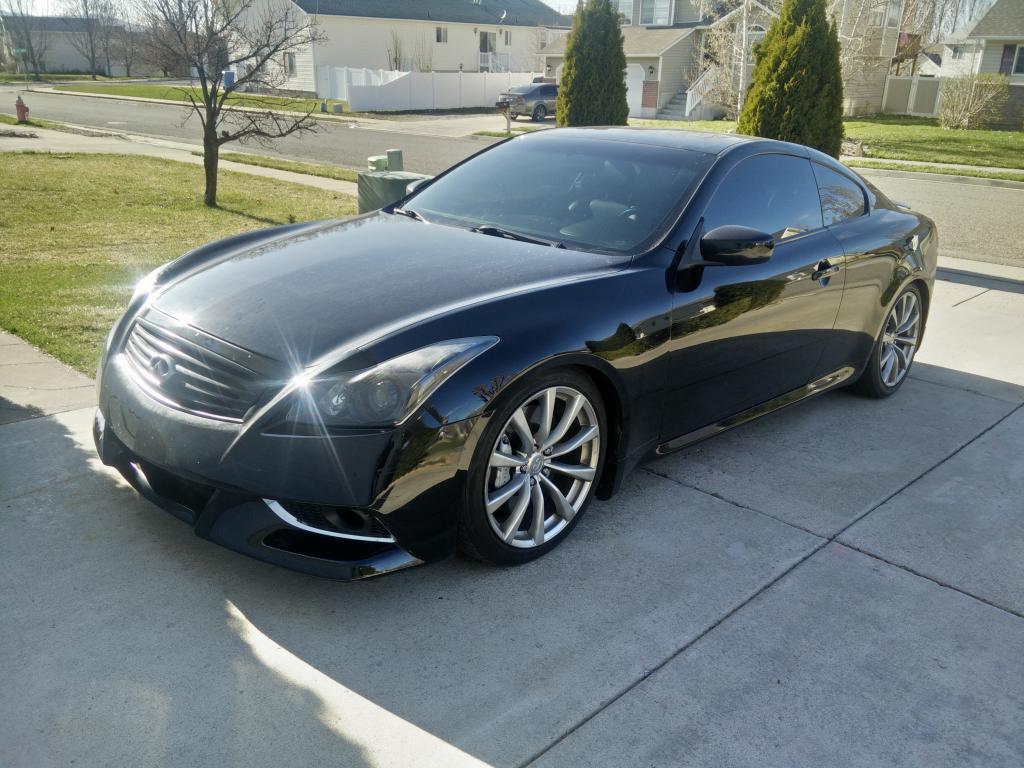
I got a thing yesterday! Pardon the subpar pictures in less than ideal lighting. Also had hdr turned on on my phone somehow. Made the drive home to Utah from Washington for spring break yesterday mostly without a problem. Front tires are worn and need to be replaced but I already knew that before buying, and I hit a relatively large bird while driving through Idaho at about 1 in the morning that put a tiny tiny chip in my previously immaculate windshield. Other than that I'm really enjoying it. The gtr start button is a nice touch and I love the keyless entry. Coilovers are sitting a bit low for my taste, but fortunately I can adjust that.

-
Made a deal on a G37s 6MT. A little bit over KBB price, but it has pretty much every mod I would have wanted on it, the engine is untouched and it's low-ish miles for an '08 at 65k. Sitting on BC coilovers, has the IPL front bumper I like and an ARK exhaust that sounds a little deeper but isn't obnoxious. Should hopefully get everything tomorrow, but it's a huge hassle having my cosigner in another state.
-
 Yeeeeeeeessss
 -
Yeah, I'm probably not going for the G35. As much as I like my brother's it's getting hard to find one that isn't either high mileage or just highly modified. I'd prefer close to stock.
-
That one looks nice! I'm already approved for a loan at 3% and I've found a nice G37s not far from me. Looks like I might be making a deal in the next couple days after talking to the seller. If everything checks out I'll be sure to post some pictures!
-
Definitely go L28. Also agree with Tony. Avoid college debt at all costs. Only reason I can afford the car I want to buy as a new daily is because I graduated with no debts. I'm working full time out of college and I'm not even thinking of a swap until way down the road. Costs start to add up really fast over the little things you don't usually think about. Cost of swaps is usually double or triple what you'll pay for the engine/trans combo even if you do a lot of the work yourself. L28 on the other hand is reliable, fairly easy to work on, and very simple to swap over. I Tony will probably agree, the last thing you should be thinking of is go fast bits. Get an L running properly then focus on brakes/suspension/rust so you don't destroy the car when you do have more power in there.
-
G37S is exactly what i was leaning towards and this is just making me more comfortable with the decision, thanks
-
Aha, that's more of what I was hoping to hear. My oldest brother had asked if the G37 was really worth the extra money to me and I think it might be fore exactly that. Brother that does accounting and owns the G35 is the one who suggested I spring for an early G37. I've read that the oil issue was "fixed" or at least greatly improved on the G37
-
This is all very helpful actually. My brother has a G35 and I love it, but he suggested I go with the 37. Looking at getting the coupe, RWD. Loans definitely suck, and so does maintenance but that's part of why my brother suggested I get the G37. Much newer, lower mileage, not as much time for boy racers to get their hands on them and mess with them since they're still above that crowd's budget usually, or they go for subarus, which I was considering but I don't like the cheap feeling interior and having to mess with turbos on a daily. Gas mileage from what I've read is similar to what I'm getting now in the old Maxima, I'd just be paying a bit more for premium gas. Mostly I was hoping someone had any experience on reliability and maintenance or common problems.. Want to commit to something really nice already so I don't have to worry about more than oil changes/general maintenance for a while.
-
My beater of a daily finally went up in glorious flames (figuratively of course) to the point where repairing it would cost more than it would sell for. (Not technically if I fixed things myself, but my time is valuable....) Brother has suggested I buy a G37 as a new daily. When he had his first accounting he bought a G35 as a daily. At the time it cost as much as the G37 does now and he was making about the same as I am now. I could probably drop like $5k or maybe a bit more on a down payment and the loan would end up being less than I've had to pay monthly just to keep my current car roadworthy. That being said, anyone have any experience with these two cars? Pros/cons? Side note: Not looking to buy a 350 or 370. Just not practical enough for me to have a 2 seater in a modern daily, even though that's what I was tempted to do with the Z.
-
Pretty sure you've seen at least bits of my thread and I'm in total agreement. Getting some of these pieces to fit was a process. They get someone like me with minimal experience in body closer, but they require a lot of thought put into them to get them fit. I had to do some trimming and bits of bending to get things right. I think my rockers/doglegs turned out really well but it was a lot more work than I was expecting.
-
Those rear valence pieces are a pain the ass. I ended up cutting the corners off mine and just using the long side to patch only the portion that was rusted.
-
http://forums.hybridz.org/topic/117944-a-musicians-therapist-the-300-z/ About 1/3rd of the way down the page. My setup might not be ideal for some people but I've found it works quite well. Got the idea from Jeromio. I'd link you to his site, but it doesn't seem to be up. At least not the tank swap.
-
Take a look through my thread for how I mounted my fbody tank. User you've linked a picture from has a later model 280z that's slightly different than your car and mine
-
Twin cam head for the L6 from Derek at Datsunworks
Zetsaz replied to Derek's topic in Nissan L6 Forum
Daaaaaaaang. I'm excited to see some clips and more pictures! -
A musician's therapist (The $300 Z)
Zetsaz replied to Zetsaz's topic in S30 Series - 240z, 260z, 280z
Yeah, I bought the new alternator from O'Reilly, but I don't even trust them all that much these days. Will probably just go through NAPA from now on. Anyway, I've been test driving some newer cars now that I can get out with my beater daily, but the more cars I test the more I just want to get the Z going and bring up to Washington with me, so I'm thinking of just dumping what I would have spend on a newer car into the Z and driving that as my daily for a year or two before relegating it to a more horsepower oriented project once I get myself a nice new daily down the road. That being said I'll be focusing on finishing some patching and suspension/brake work in the meantime. Going to try to keep up with my old purchase list especially since I got a nice tax return. -
Looks about what my repair looked like on the outer rockers. Wish I'd had your pictures this past summer, would have saved me a lot of trouble haha! Some great work here.
-
A musician's therapist (The $300 Z)
Zetsaz replied to Zetsaz's topic in S30 Series - 240z, 260z, 280z
Never trusting autozone bench tests again. After my Maxima left me stranded I couldn't figure out the problem. I had already bench tested the alternator when I first noticed problems and it tested good. So I was without my own car here for about two weeks wracking my brain with multiple multimeter tests trying to find voltage drops in wiring, ground points, and fuses. Finally on a whim I bought a new alternator because I figured that had to be it, just like my first thoughts were. Swapped it out and what do you know... I'm back over 14v at the battery when the car is running. The alternator tested good three times, and those faulty tests cost me rehearsal time when I was left on the side of I-5, a $100 towing fee, and two weeks of my social life. Next time I go into any parts store ever and I'm asked if I need help I'm just going to reply with Ron Swanson's "I know more than you." Haha Gonna keep driving this thing and get more use out of all the recent new parts while I keep my budget as it was for the Z and keep saving to get a new daily in cash. -
Looks excellent. Love that you kept it I6 for the engine, and I really like the blue!
-
A musician's therapist (The $300 Z)
Zetsaz replied to Zetsaz's topic in S30 Series - 240z, 260z, 280z
Yeah, down the road I'll definitely have AAA. This is my first real job out of college and I've been saving loads of money, but I haven't really gotten to the point of getting on my own insurance or anything. If I go with the xenon I'll definitely buy it through them, but I'm leaning towards the fiberglass type 1 dam, non-ducted. I like the classic style a little bit more and I won't really be tracking the car much, so the brake vents are really just aesthetic at that point. -
A musician's therapist (The $300 Z)
Zetsaz replied to Zetsaz's topic in S30 Series - 240z, 260z, 280z
Next purchase is front air dam, but that'll probably wait until next month. Muild might be slowing down just a bit. My beater daily car that I was driving in Washington while I fixed the Z or went home to rebuild my Celica's engine died on me middle of I-5 just a couple miles from home. It'd been having some electrical issues that I thought I resolved, but I lost power within a half mile of noticing my lights dimming. Had the adventure of getting pushed across a bridge by highway patrol and coasting to an exit in the dark with no lights. Fortunately I was close to home and the tow bill wasn't too much. Shame I don't know anyone here, back in Utah I could have called any of a dozen or more friends who could have pulled me home. I think I can still fix the car and get it back to Utah at some point, but I'm definitely gonna look at buying a new daily. Anyway, that being said, I'll still be slowly buying parts as I had planned, but I'm in the market for a newer more reliable car. $8k-10k. -
For those curious I'm pretty sure the color is just Daytona Blue. Figured this after talking with a bunch of guys on a Datsun facebook group.
-
Oh dang! That's pretty close. I like that! Thanks for the response. Still wanna know if anyone knows the owner. I've been searching for a bit, but I've only found those few pictures on flickr. The pic you posted is pretty much the style I'm going for too. Hadn't seen that one. Same air dam, no flares, hood and pillar emblems only. Very nice