-
Posts
421 -
Joined
-
Last visited
-
Days Won
2
Content Type
Profiles
Forums
Blogs
Events
Gallery
Downloads
Store
Everything posted by yellowoctupus
-
Sounds like you have leaky injectors or something. I don't think I've heard of that being a Ford problem necessarily though. They could have varnish on the pintle seats I guess? Maybe if you run them for a while it'll clear that issue up, or get them cleaned/tested.
-
Yeah! Glad to see you're back at it! I can't remember if you already had it running, but now that I switched to the Megasquirt when I put on my supercharger, I now have two 4.6 ECUs that are 'unlocked', ie no PATS etc. If someone needs one, PM me.
-
Ratsun would be another good place to look for 210 swaps. We're 99% Z's over here, but of course appreciate some 1% madness too!
-
By the way, this is where you can look up WIX filters by spec. Unfortunately, to get a lot of the other dimensions you have to click on each part number, which is a pain, but it is doable. http://www.wixfilters.com/lookup/FilterBySize.aspx
-
Been driving the car to work a bit lately and working on my tune steadily. It's getting better running the autotune feature in megasquirt, but i think the old units (like I have) the autotune is really slow. Would be REALLY helpful to have one person drive, the other person tune. Oh well. My dad will be in town next week, maybe we can get out and do a little tuning. I redid the mount for the clutch slave cylinder to get a more optimal push 'direction'. No pictures yet. .. Also, had a big fuel system issue for a while. Turns out (2 fuel pumps later!) the 10µ fuel filter I installed was actually intended for low flow hydraulic systems, and had quickly clogged up with tiny bits of who knows what. Aftermarket filters are IMO mindbogglingly expensive, so I did some digging and came up with what I feel is a good solution with parts that can be picked up at any auto parts store. The pre filter I used is a 140µ wire mesh WIX 33270 (NAPA 3270-$10) with 3/8 in and out hose barb style terminations. I also replaced my tank to fuel pump line which ran me a under $10 in low pressure line. I think I bought 4ft and had a little left. I also used a Unicoil 3/8" to make sure the hose didn't collapse on the 90° bend to the fuel pump. The high pressure filter is a kit (PN 910-34190) from Speedway Motors which is cool as it comes with 2x AN-6 to 3/8" quick connect (OEM) style adapters (PN 617-44120). The filter's rated at 120gph(!) at 60psi and has a 10µ filter element (PN 910-33190). The kit was $34. You can order just the replacement filter from them as well, but I'll just figure out the OEM number for that too, so I can get it locally if need be. All went in pretty smoothly and the car actually runs better too. I wasn't leaning out at the high end (surprisingly) but the pump WAS making weird noises and had a varying fuel pressures.
-
Bit of a pain to find a locker for the 28spline IRS, but not impossible.
-
....fastest 200 days of my life. I think I spent all of it sleeping too. I should feel more rested....
-

Ford Super 8.8 irs swap thread. Rear brakes too
yellowoctupus replied to Invincibleextremes's topic in Drivetrain
The validity of that statement depends largely upon the hardening done to the original shaft. I would imagine they are induction case hardened at the splines only, so while it will be easier to cut down and remachine new grooves outside of the hardened shaft area, you consequently would have weaker splines. Additionally, are you having the splines rolled or cut? IIRC Ford used to run different diameter shafts to help counter wheel hop. (Of couse this does nothing for shaft strength, it just changes their torsional stiffness.)- 282 replies
-
- disc brakes
- suspension
-
(and 7 more)
Tagged with:
-
Yeah...we get it. Glad to see you're forging (or is that foraging...) ahead! I saw you pop up over on the MS Facebook group a while back working on this one. MS can be a peculiar beast sometimes.
-
Wow, how did I miss this one. And then find it 9 years too late! I'll gladly bring this one back from the dead for somebody else to find! Kudos!
-
Thanks! Working on getting my gauges working again today. They all got disconnected when I made my scratch built engine harness.
-
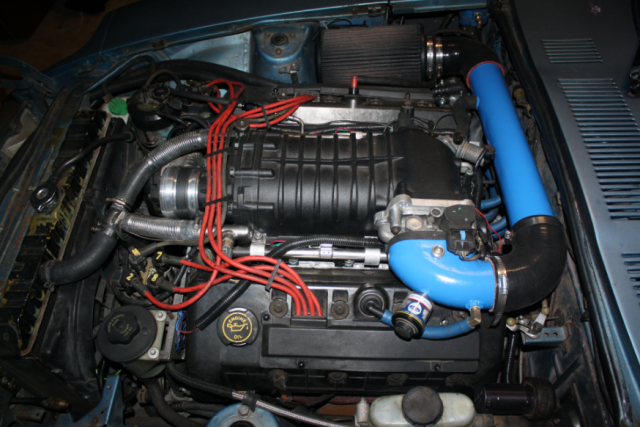
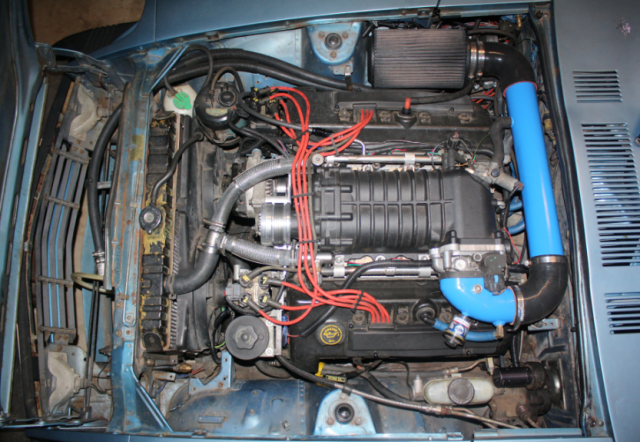
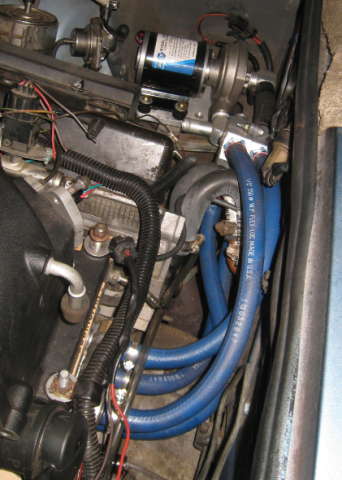
Got the cars off the boat, other than being filthy, they're both in good shape, no damage, fired right up etc. Just a few quick shots of the intake configuration. I finished this literally the night before we drove the cars down to the port. Kinda wonky swinging around to the other side, but there's no room for the air filter in front of the radiator, and no room on the driver's side, so it works over there. I like the idea of it pulling from a 'cold air' intake, but for now the hood vent above it will have to do. The blue elbow coming off the throttle body was kind of a pain to fab up; in the end it came out pretty well, for what it is. Took it out the other day, and while there's still some super lean parts in the higher rpm, low load parts of the tune I'm working through, luckily the 'in boost' part of the tune looks pretty safe. And fast. Gotta get somebody to go for a ride-along so I can tune while we drive. Maybe someone in the local Z club.... volunteers??? I have to hook up a vacuum gauge to that Ford Air Filter Indicator thing I've got on there too. I don't know at what point it is 'fully extended' but I'm sure that's not a good sign if it is! I installed it mainly as a novelty, but if it shows the filter's not adequate, I'll have to....do something...I guess? Can't imagine running a bigger air filter, I suppose I'll cross that bridge when I get there. IIRC it's off a late 90s/ early 2000s direct injected turbodiesel. I think even though they're branded Ford they're made by a Donaldson and are marketed as the "Filter Minder".
-
Yeah man, time flies. Since Prunedale CA, we've lived in Port Hueneme CA, Groton CT, Silverdale WA and Bremerton WA. Less than a week we'll be in Oahu! The Navy keeps you coast hopping, that's for sure. I'll have to get a few pictures up here when I have time, I think I saved them on my 'porta-drive'. Movers just packed up the house, and the Z is down in Seattle waiting to go on a boat tomorrow for it's big trip. Hope it fires up ok for them, lol. I had literally 1hr to tune it before we drove the cars down to the Seattle Port. It's a pretty rough tune. Works ok, but lots of weird flat spots etc. The laptop battery died before I could really dial it in. The hood does close now wth some new intake routing, and I made a new pulley to drop that boost down from the (maybe?) 10psi I was seeing to hopefully 7ish, 8max. Starting with a 9.8CR isn't ideal for big boost. Picture isn't the clearest, but what do you expect from a 5yr old at least we've got our heads in this one.
-
Are your wiring issues ignition/spark related or fuel related? Any thoughts of going EDIS to ditch the distributor? (I'm not familiar with the FITech, but I'm assuming it can control an EDIS module??)
-
Ok, I think I got the video up there ^ straightened out. Direct FLV, MP4 didn't work great, VIMEO didn't want to embed properly, but YouTube seemed to work really well. Working on upgrading the fuel system. My megasquirt logs showed the car going lean a few times, which may be an artifact of the tune not being complete, but the stock pump/fuel lines are honestly probably not up to the task, so I'm going to run a Walbro GSL392 (255lph) external pump with an Arrow 10micron post filter and a full run of 6AN stainless braided PTFE hose up to the engine bay. I have a ton of hose, so I'm not worried about the expense. (I think I have 60ft of hose, or something crazy like that). Sorting out all the lines/fittings is taking longer than I'd like, but when a single fitting is $10-$15 I'm going to take my time. Oh, and the hood won't close with the intake ducting setup the way I have it. Oops. Shouldn't be a terribly difficult fix, but will take some time.
-
Hm. It WAS a video. Wonder why it didn't like my MP4...
-
Thanks! Anyone else see the video I posted just as a sound clip? I don't see video on Firefox or Chrome.
-
Pre-tuning/test drive. Gotta rev it a few times No car driving videos yet. Gotta convince a co-pilot to come along first. (The wife.)
-
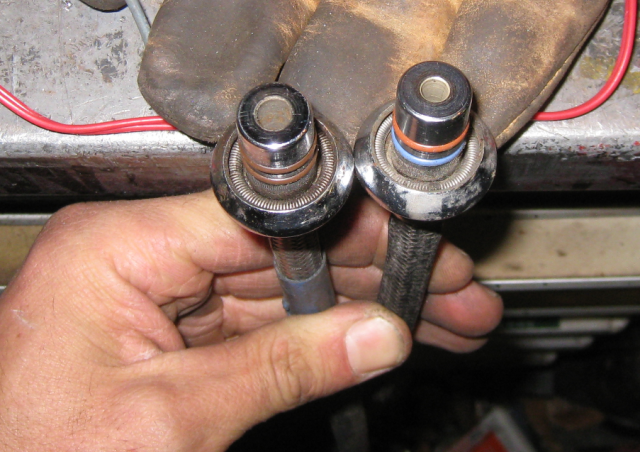
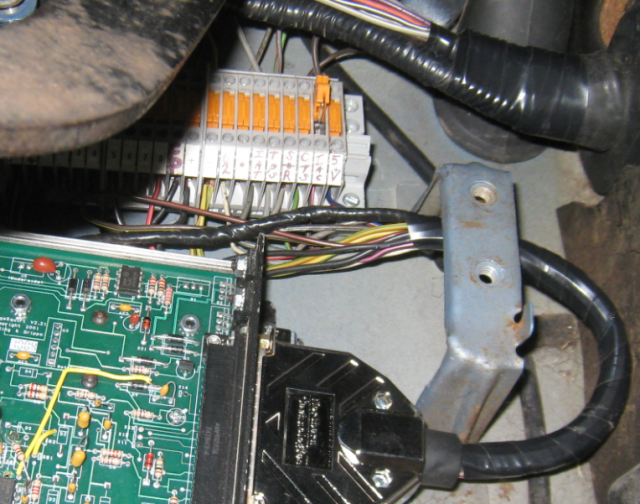
Yep, Megasquirt went way better on this install than it did on my Mustang. I think I had issues with the TFI on the Mustang or something weird with my crazy custom intake. Never really did get it all sorted out which is why my Mustang has a carb on it and this MS unit is in here. Turns out I had one other thing swapped, which was two wires for the TPS. Now all the sensors work, etc. Had one unplugged injector, and one totally dead spark plug wire. I don't think I've ever seen that happen before, but I swapped one of my 'nice' red Ford wires for the old grodey grey wires (almost getting stiff they're so old) and it ran way better. Found the injector by using a mechanics stethoscope on each injector, one wasn't loud enough, and the spark plug wire by putting my timing light on each wire to see if the timing gun would flash. Pretty straightforward. The Pheonix contact thing is great. Seems like you wouldn't want the additional potential corrosion points etc, but it's been really handy so far. Great for troubleshooting/isolating circuits already. Oh, and I had one weird issue with my fuel pump output from Megasquirt. It's supposed to create a ground path for a relay. Easy enough. The weird thing is that with the car turned off (no power to MS unit) it would make the 'injector' light flash on the MS unit. I can only guess it was getting some amount of current backfeeding through the relay coil or something weird like that. Don't have time to investigate further, so I just tied the fuel pump relay to the output of the main ignition relay. Keys on, fuel's on. Not ideal from a safety standpoint, but that's actually how I had the car wired up for the past...8yrs, so it'll work for now. The machined waternecks etc all are working great, no leaks, no worries. Glad I spent the time making them. Not glad there were so many revisions, but you gotta break a couple of eggs to make an omelette they say. Got tired of picking up the M122 from the middle of the car. And it was hard to do evenly with the coolant lines, injectors etc all going on at the same time. Also glad that's not an issue anymore. Temporarily buttoned up. Still have to plumb the PCV etc. Kinda weird, but not all Ford fuel feed lines are created equal apparently. The one on the left is from a 5.0 or 5.8, mid 90's. The one on the right is from an '06 E150 4.6. No idea why the one has so much smaller of a feed line. I may try to modify one to run some -6 AN line up there. Certainly have to try to open up that hole though!
-
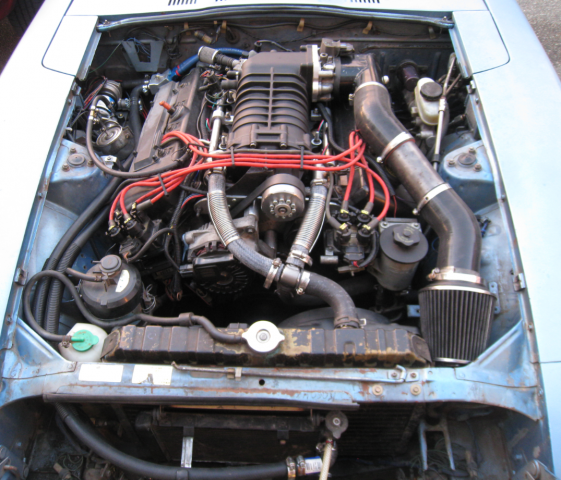
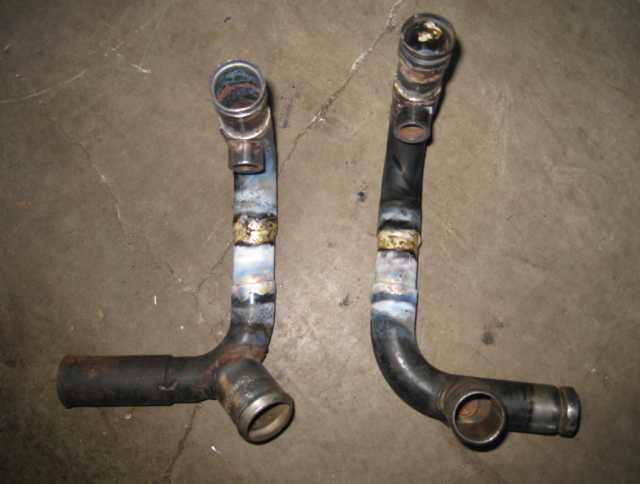
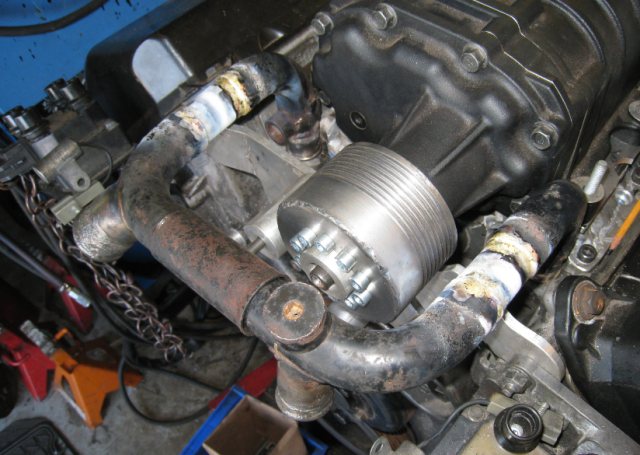
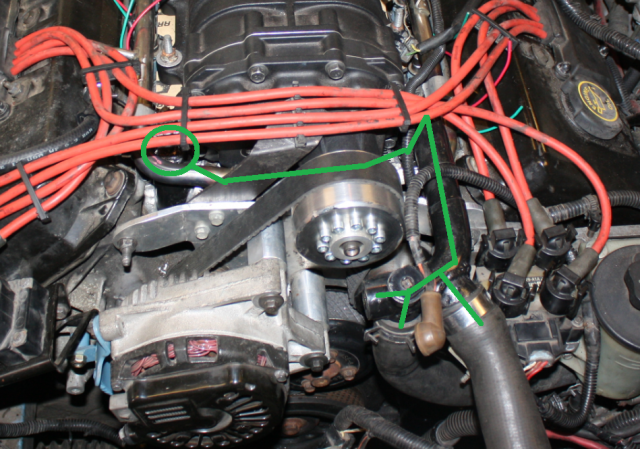
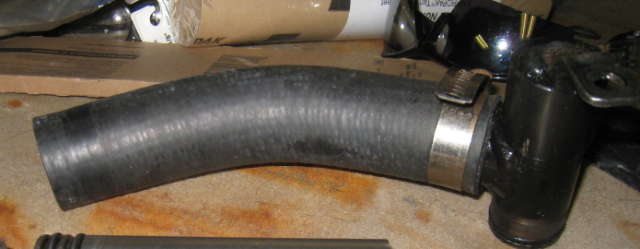
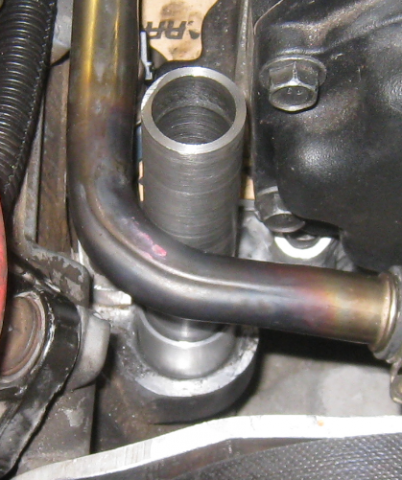
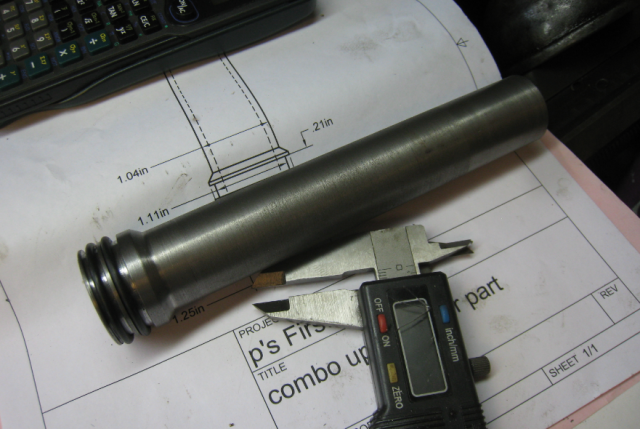
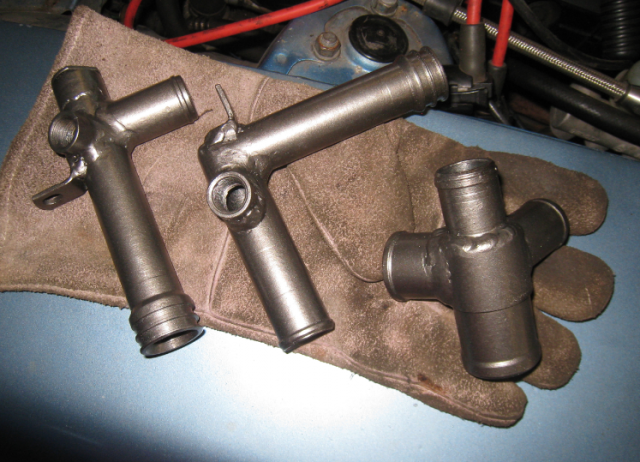
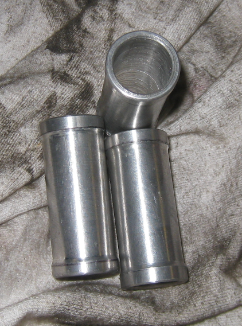
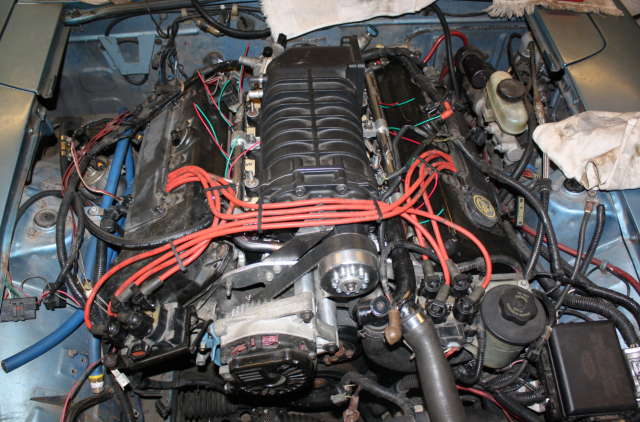
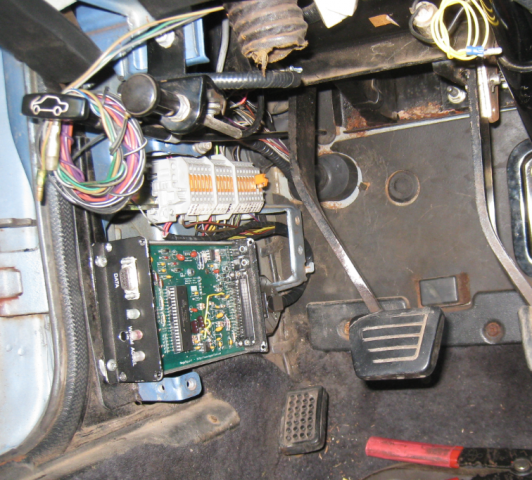
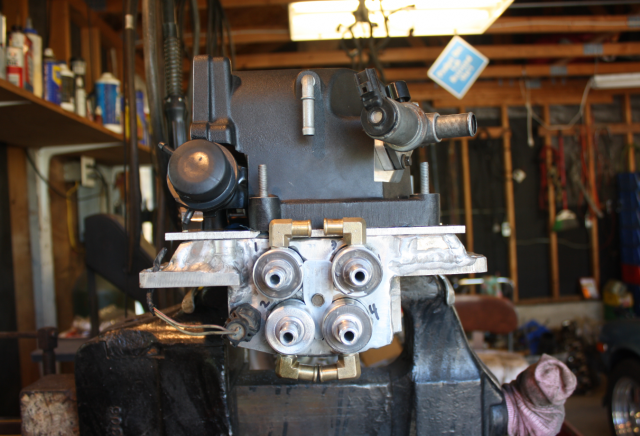
Thanks! Glad to see somebody besides me is still reading this saga like adventure. So, I've been seriously jamming on getting this done now, as our 'move to Hawaii' date is coming up in almost exactly one month, and my 'sell the lathe/mill etc' date is at most a week away. Gotta get made whatever I gotta get made, and like NOW! I haven't been taking a ton of pictures, but here's a few for kicks. Pic1/2: 1st design of coolant crossover tubes. No way it would fit once it was in, well not under the stock hood anyways. Pic3/4: 2nd design put crossover under supercharger. Ok idea until you realize that it meant the supercharger, fuel rail, injectors (and injector plugs), and crossover cooling line had to be installed SIMULTANEOUSLY. REALLY hard to do. Oh, and it had a pinhole leak at one of the welds that I had to take it out to fix. Looked kinda kludgey too. Picture is hard to see crossover, but it's under everything where the green line goes from one side to the other. Pic5/6/7: 3rd design, decided to run the crossover in front of the supercharger again, but this time machining all of the parts instead of a mix/match of welded / brazed OEM and custom built pieces. Found out that I could install the aluminum/steel double oring adapter thing all at the same time, which meant I should eliminate one more leak point. Installed picture shows why it has to be necked down, otherwise neither side will fit. Things are REALLY tight in there. Pic8/9: final design. ID of steel tube was opened up a bit due to not needing the additional space for double o-rings like the last design. Am I done yet? Please????? Pic10: 3/4" splicers. Intercooler lines need 90° bends and long runs, these were actually quick to knock out, especially after I just made all the other steel parts ^ up there. Pic11: Starting to run intercooler lines to the pump. Pic12: This is the 'before' picture for wiring reference. (Spark plug wiring remains the same, but there's a big difference between the engine bay here, and what it actually looks like now. I basically got rid of all of the Ford harness that was stuffed in there. What a mess.) Pic 13/14: Megasquirt is in, wired up and works. One injector was switched with the IAT sensor (oops, I guess light blue and the grey I used looked similar under the dash.) and for some reason I'm not getting 5v to my TPS, but the regulator is working fine, so I'm guessing it's another wiring goofup on my part. I had this neat industrial terminal block laying around (sorry for the poor picture), which is really neat because it has these flip lever disconnect switch things on it. Makes it easy to 'turn off' a circuit or just probe the circuit with/without something there without having to jumper things in the engine bay, use piercing probes or any of that silliness. They're made by Phoenix Contact, and are not cheap if you buy them new, individually. Good to salvage and keep if some fall into your lap though. Oh, and yes, it all fits under the stock 280z plastic ECU cover, so you won't be able to see it at all when I'm done.
-
Ah, good point. Would be pretty easy to put a piece of threaded rod through the old cable hole to draw the fork out of the way. I've gotta squirrel your bracket design away for when/if my slave goes out, I like it better than mine. It's been on there for 5yrs now I think with no issues though, so it might be some time before I have to implement it.
-
Totally agree on the Wilwood being a waste of money. I like your bracket, wouldn't have thought to run one on the inside of the bellhousing like that. Mine bolts to the outside of the case, but isn't as 'in line' as yours is. Can you access those bolts while the transmission is attached, or does the transmission have to be off the car to get them all the way out?
-
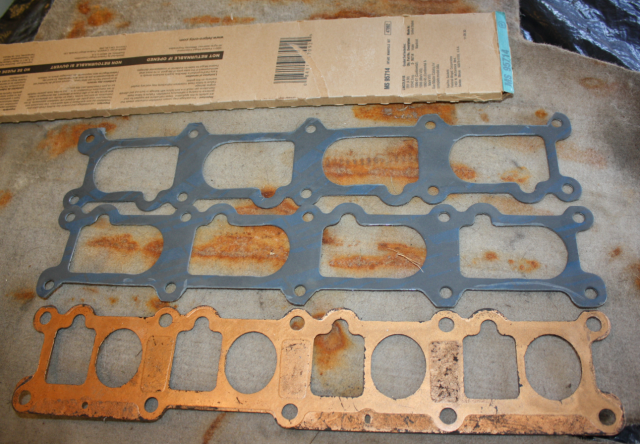
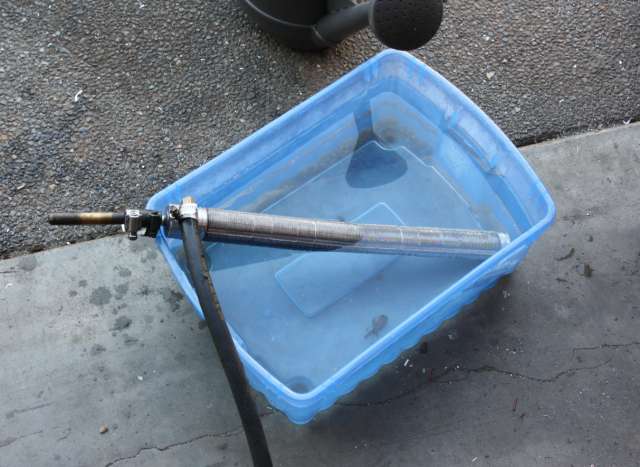
Progress.... Pic 1= Laminova cores JB Welded up, 90° fittings installed, special 'locking widget' installed (keeps intercooler cores from sliding in or out of the manifold. Not that they would with the orings on, but it's a peace of mind thing.). Oh, and Ford IAT sensor installed. Thankfully there was room there, cause that's the only place I could find to mount it. Stock 94 Mark VIII sensor. Pic 2= Modifying intake manifold gaskets. Yeah, so there's metal in the middle. Had to 'trim' them with a dremel cutting wheel. Took quite a while. Pic 3= Pressure/leak tested the individual cores. Black line is air at 40psi. No bubbles 😰
-
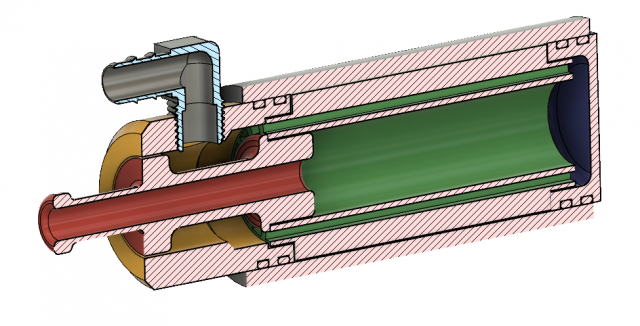
Finally came up with a way to plumb those pesky laminova intercooler tubes. The green is the intercooler tube itself (A much shorter CAD version just for easier visualization). Blue is the 'dummy' or 'return' end cap. Lots of the parts will be JB Welded together, hopefully it works well for this application. Their technical information is vague at best. I wish I knew what the optimum cylindrical gap fill was. I think I'll do it at like 0.010" to give it enough room so it doesn't get pushed out when I put the parts together, but not so much of a gap that it wants to run out either. More updates to follow as I take more pictures. The Ford coolant crossover tube assembly is on rev 3 or 4 now, I'm over it at this point. Starting to build parts from scratch. Fuel rail got flipped backwards, and I put a lot of heat to it to bend the two respective ends under the supercharger snout. Came out well though. The rail's stainless, and now the fuel inlet line is conveniently on the passenger's side where I ran the lines years ago. I also plumbed in the return regulator over by the fender mounted filter.
-
I'd at least waste SOME time on the Edelbrock unit before throwing $$ at it and going over to a Holley. I have an Edelbrock on my 351w right now, and when I got it linkages were seized up, metering rods were stuck, it was a mess. Got a $30 rebuild kit, and took my time setting float height etc, went through a bunch of PB Blaster getting things moving again, but y'know what, it runs great now. Fires right up, no bogs, etc. 585Z had great advice, I was actually going to suggest a few of those points myself.


