palosfv3
-
Posts
175 -
Joined
-
Last visited
Content Type
Profiles
Forums
Blogs
Events
Gallery
Downloads
Store
Everything posted by palosfv3
-
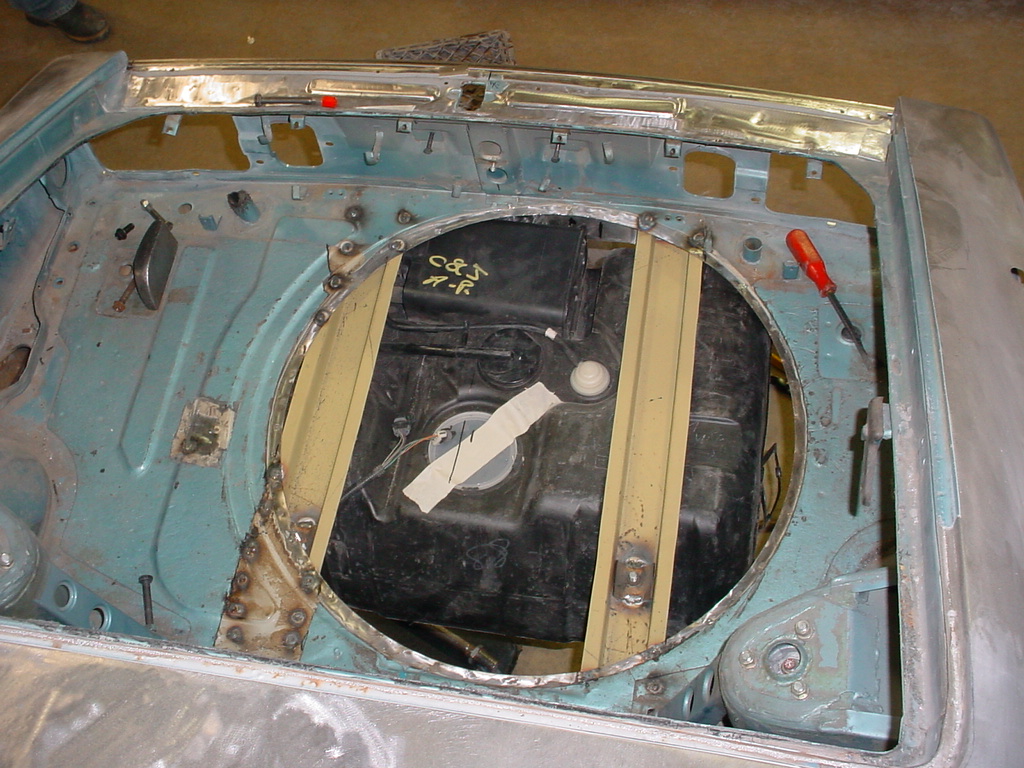
Complete F-Body LS1 Fuel Tank Install Process???
palosfv3 replied to SSuspect's topic in Gen I & II Chevy V8 Tech Board
I have a number of pics posted installing a f body tank into a 260 we did a year or so ago. They can be found at http://www.picasaweb...WgmautoGregScar Scroll through to find the pics . I believe they are in order but one or two may be out of sequence. Drop a note if any questions.
-
Trying to band aid the finish on your car is futile. Your in LA and the rust on your car is not going to get any worse in the near future unless you park it on the beach near the ocean. Think about how old the car is and how long it took for the rust in question to form. Save your money until you have enough to paint it the right way. You state its running a little rough . This should be your first problem to tackle. Why paint a car that may not be able to run ? Drive it a little and get to know what this car does well and what it needs . Then map out a plan for what to fix first. The pic of the cowl panel I posted was stripped to bare metal with a chemical stripper. I did this to show how the rust forms beneath the paint . Additional pics of this car and the paint process can be found at . https://picasaweb.google.com/wgmauto/1974Datusn260z# This should give you an idea of what is involved .
-
Most of the rust in your pics is surface rust caused mostly from the failure of the paint . Strip the entire car to bare metal !!!! Trying to paint over the failed finish will cause problems in the painting process . If you dont strip it your better off buying Lotto tickets , you would get a better return on your investment. Your cowl panel is in worse shape than the one in the pic I posted. It should give you a good idea of what is lurking beneath the paint on your car. The best inexpensive way of stripping that finish is to use an 8 " diameter 3m 05580 pad on a variable speed buffer with either 80 or 40 grit paper. You will have to experimant a little for the correct combination of speed and paper for the best result. If your going to get this involved in this project you will also find it more cost efficient to avoid the aerosols and go straight to the spray guns and bulk automotive paint materials,
-
Proper rust repair is dependent on the type of rust damage your correcting. I'm assuming this is surface rust from exterior paint failure and not perforations from the sheetmetal rotting due to moisture entrapment in the rockers and such. The assumption is exterior paint failure . In this case removal of the rust to clean bare metal is critical. Care should be taken to not damage ,warp or create more harm to the metal than the rust .damage . Stripping the entire panel to bare metal is recommended . If you have several spots of visual rust you will more than likely also have several small spots of rust under the paint that are not visable. This cowl panel shows what I am speaking of. This was a California car that has been maintained well over the years. The rust removal method should be matched to the location and size of the rust damage. For tight inaccessable areas a sandblasting guns with "blackbeauty' may be preferrable to naval jelly. Some light surface rust on flat exterior surfaces can be easily reoved with a light sanding of 80grit paper. I would recommand the black 3M clean and Strip wheels for rust removal ( 3M 07460, 07461 , 07466 ) All bare metal should be treated with a metal conditioner prior to the application of a zinc based primer ( for rust prevention and adhesion) before the application of a primer surfacer. All primer surfacers are pourous and should be top coated with an exterior paint for best long term results. I would stray away from the dulicolor paints and go to a local PBE supplier and get the professional quality aerosol primers for best results.
-
I made this one a couple of years ago. A wheeling machine does make it easier. Is yours that bad it cannot be repaired ? You can check out the Metal Meet forum , that where all the metal shapers hang out. http://metalmeet.com/forum/search.php?searchid=629404
-
Carefully check the upper front and rear inner sections of the door inner frame where it welds to the outer skin at the belt line . Z doors will stress crack in these areas and if broken can result in issues as you are expieriencing..You may have to lift the rubber seals and look underneath them to see the area clearly.
-
Came across this on the Dogfight forum. Dont recall seeing it here . Thought it might be of interest to some. Who says the original design is unstable at speed ????????????? 1972 240Zbreaks 25 year old F/GT record In Car Video: http://www.rebelloracing.com/racevideo4.htm On September 17th 2010 a 1972 Datsun 240Z Powered by a 3Liter, L6 Rebello race engine broke the 25 year old F/GT record at the World of Speed at a USFRA sanctioned event. Victory Motorsports Driver Douglas “Burton†Brown together with his Dad (Donald) realized a long term effort by beating this record by more that 4.2 MPH. The record, was previously held by a Ferrari 308 QV. "Car was ready to load Sept. 12, 2010. We set out a little early only to end up spending 63 hours getting the 1800 miles put behind us. A Broken Hydraulic pump on the tow vehicle left us on the side of the road in Nebraska for 33 hours. After arriving at the track we passed Tech inspection on Sept. 14th. On the 15th our first run was cut short with a shifter problem. After a quick fix in the pits we were back up to the line for our next run. The runs were done for the day but we were given a number for a place in line the following morning. On the 16th our first run qualified us for impound at 172.275. The car went to impound where the next morning we backed up our run with a speed of 173.673. The average of the two runs set the new record at 172.9 MPH. There is still some speed left in the car and we believe we can get it up over 180 with this engine and stock body. We would like to move up 1 engine class in the E – engine (4.2L) and see if we can break the 200mph mark. You will have to wait and see Rest of the story on the site link above
-
We have run into similar situations at our shop in the past of cars striking an object and putting a hole in the pan. The real issue is the hole in the pan, not that the shop may have started the motor , as the motor may have run without oil at sometime between the accident and when the shop received the car. I'm assuming an insurance company is involved in this loss wether your own or anothers. Remember you are the person responsible for the authorization and payment of the work not the insurance company. If this is a leased vehicle check your lease as there are contractual criteria that must be followed in the repair. Also be aware of the OEM collision repair guidelines for the proper structural repair of your car. These repair guidelines must be closely be followed and adhered to. did the airbags deploy ? Dont forget to check the restraint system. Even if the bags didn't deploy there may be seat belts and other safety related items that may need inspection or replacement.. Best next step at this time is to notify the shop and your insurance company with a phone call and then writing to stop all repairs until the condition of the engine is established. Your insurance company should accept the investagative charges , this damage as part of the loss and more than likely rebuilding the engine .This additional damage along with the body and paint repairs will probably result in the car being declared a total loss by the carrier. The insurance should pick up any expenses and charges that you have incurred at the shop as well as pay the fair market value of the vehicle plus title ,taxes and transfer fees. Many of the new engines are not running insert bearings and as a result the actual damage would have scored the block once the oil left the engine. Dont fall for the bs to put oil in the engine and run it for a while to see if its OK from anyone. Running a close tolerance engine without oil is fatal. They are not as forgiving as the old style motors. Your suspicions are relevant about the shop beliveing the car is a total but the real issue may lie with the insurance adjuster/ company. If Ihey are a DRP shop for the insurance company there are criteria they are arm twisted to follow and may not be aware of how to get around the hurdle. As an example they would only be allowed to replace the engine with a LKQ motor not a new or rebuilt or they may not know how to hold the insurance company accountable for the inclusion of this loss related damage. Once the carrier is aware of the engine damage I'm sure they will step up the pace and get things resolved quickly.
-
43 years worth. Been around cars since 1965.
-
We built the LS1 260 in my avatar at our shop for a customer . There are many threads about building one of these Zs but costs and time are so variable depending on what the end product you desire will be and what each individual finds acceptable. It would be nice to find a properly completed V8 Z but it seems many dont want to accept the fact that building or buying a correctly built one is not cheap . For an example the orange car had around $30k in engine ,trans , suspension and brake upgrades. Yes others state you can buy the necessary parts on the cheap for far less but if you go with new parts ( enginge and trans were original 4,000 mile used) you are going to spend near this amount. Give a call or drop a PM if we can help or you need to talk to someone about the details of such an undertaking.
-
What exactly are your plans ? Which motor and trans? LSx ? other? All new suspension ? Brakes ? A little search through the V8 conversion threads will get you started .
-
Inner sill carpet retainer
-
The ability to visualize a custom concept is a skill not possessed by everyone. Some people are naturals , many have formal design training and others have many years of expierience in the school of hard knocks. There is a process that needs to be followed to find an appealing design . Most of this is best handled as a series of sketches or photoshops till the desired effect is reached. Attention to the ratios between height and width amongst the entire rear bumper and tail lamp area is critical . Think of the back of the car as a human face. Position of the eyes , lips , brow , shape of the face . There is actually a ratio between these facial characteristics that defines natural beauty . Facial expressions also play a part . Dont mix angry eyes with a smile as an example. Its challenging to get it all together and sometimes you may need to seek outside help if you really want a good design. I have customized a number of cars over the years and even when I had a good idea of what I or a customer wanted I still retained someone to draw things out before I started the project. Its really inexpensive when you consider all that is involved.
-
Based on your pictures, 60 hours to get your 260 ready for paint is not unreasonable . I would only suggest you remove the remaining trim and windows before any priming or painting is started. Regards
-
LS/T56/240z Project Mentor Wanted
palosfv3 replied to RebekahsZ's topic in S30 Series - 240z, 260z, 280z
What suspension., differential and brake system is under your car ? How fast do you want to go ? How much do you want to spend ? I sure you have read through most of the LS threads. There is a lot of good info posted but you have to really read through it carefully. I recently added up the costs on the LS conversion we completed at our shop last year and in just the partsexpenses totaled over $30K. After going through this build I would change several items, suspension arms and wheel/tire combinations, rear axle ratio. There is a hell of a lot more work and planning needed to make this swap really work well . Its a little more involved than what your first impression can be. Not to be discouraging but to many make it sound like its just getting a engine/trans and a weekend worth of work and your up and running. -
Doing body and paint work for the first time can be challenging. Trying to get the correct answers to problems confusing. Your base coat issues appear to be related to mixing and application of the materials. To help several questions need to be answered . What type of spray gun andwhat size compressor are you using ? What paint brand are you using and are you using all their recommended products ? Are you measuring out your base and stabilizer/reducer or bartending it ? Please review this link it should get you answers that will be helpful. It doesn't matter what brand your using the problems result from the same issues http://pc.dupont.com/dpc/en/US/html/visitor/s/trouble/PDSG_Home.html I would recommend a little more practice with your base before attempting to spray the panels again. Paint and clear isnt cheap . Also, you really should spray the entire car at one time ,especially with silver, for best color uniformity. Your best bet for success will be to check with your paint vendor and see if the base can be recoated. Some manufacturers basecoats may lift if not recoated within specific time windows. Better to be safe than have a bigger problem. Good Luck
-
Slide hammers , big hammers and angle iron are not the correct way to bring this panel back into alignment. Damage like this needs to be pushed or pulled out with finesse not beat out with brute force. Doing something like this in the garage can be slightly challenging depending on the tools and equipment available. At the shop we would just anchor the car into the frame rack and tack on a tab or two to pull the damage out with the machine. Since this may not be available find a 4x4 that will span the width of the rear strut towers so that the ends of the timber butt up squarely and securely against the towers. You may need two one for the upper edge and another for the lower edge. Cut two 6" 2x4s to place against the damaged area of the rear body panel. Place one at the upper edge of the damaged area the other at the lower. With a small hydraulic ram or screw jack jack the damaged area back to its original position. If done correctly you may have little metal repair to do after the pull/push.
-
Based on the pics of the original hood there is a definate possiblity the the front unibody is swayed from the strut towers forward. It is difficult to measure the body on the Z cars because many of the typical holes used for measurement are absent. The best you may be able to do for a quick check is use the center of the rear hood height adjusting bolt diagonally across to the tip of the opposite fender . These measurements should be within a 1/4 " on the diagonal. If these are beyond the 1/4" you will likely need to have the structure pulled over on a frame machine. Your door gaps and fender gaps are OK. Even if they were not , the gap for aligning the hood that is most important is the rear edge of the hood to the upper cowl grille panel. This gap should be parallel and about 3/16 " wide . The rear of the hood should also center between the inspection covers. There is no side to side adjustment for the front of the fenders. This is why I am stating the front structure could be swayed. It doesnt take much , as litlle as a 1/4 over the factory measurement will cause problems. Resist any suggestion to oblong holes or twist things to fit. It just wont work . you will continue to have to cheat things all the way through. Do it right the first time. A couple of tips for alignment. Remove the hood striker and safety catch before attempting to align the hood. A misaligned striker can also complicate the hood aligning process. Remove the grille and horns for access to the hood and hinge bolts.
-
What was the reason for repaling the hood ? Did the original hood fit square in the opening ?
-
You dont mention the mileage on the car. The Fit is a small light car but I would still recommend a quick check of the tie rods .ball joints and front wheel bearings. Electronic steering assist functions mainly in turns, at lower speeds and is not usually operating when the car is going straight down the street or over a specific MPH. Check the FSM for details on how the system in your Honda is designed to function as they all vary slightly in how the manufacturor sets them up.
-
The damage to the unibody should be returned back to the original factory dimensions before any replacement of parts is undertaken. You should consider having a qualified frame shop complete this repair as specialized equipment will be needed to repair correctly.
-
Wheel rubbing, help! ***PICS***
palosfv3 replied to jacob80's topic in Brakes, Wheels, Suspension and Chassis
How much space is left between the inside edge of the tire and the strut tube ? Your may be able to correct this with a different wheel offset. -
Getting down to the last couple of items needed for my 260z restoration. Has anyone recently used any of the replacement front or rear bumpers from Black Dragon? If so what was the quality of the pieces? I did a search but most of the responses are to old to be of help. If not does anyone have a good front and rear center that has not been replated ? Thanks Larry
-
Specific size tires are designed for specific rim widths. Check the tire manufacturer's data page the for tires you are using. It has to do with the side wall being square to the thread of the tire for best overall tire wear and performance . I know others will say "we do this all the time" but why would the engineers that designed the tire post the recommended info ????????
-
I would also recommend applying a color or top coat to the repaired / primed area as most primers are porous and allow moisture to penetrate through to the metal.