palosfv3
-
Posts
175 -
Joined
-
Last visited
Content Type
Profiles
Forums
Blogs
Events
Gallery
Downloads
Store
Everything posted by palosfv3
-
New paint job has lines - opinions please? Pics inside...
palosfv3 replied to zeeboost's topic in Body Kits & Paint
In a month of Sundays you'll never wet sand and buff those out. Be careful with the shop owner . His response to the problem is concerning and leads me to believe one of two things . Hes trying to avoid redoing the paint because he doesn't want to take the hit of the cost of redoing the job or he hasn't a clue as to what they did during the application of the finish. Whatever you do don't buff the car . He could use this as an excuse to shift the responsibility of the problem unto you shoulders. Refinishing of the affected panels is the only way to remedy the streaking. The problem is painter error but can go into several different areas. Poor spraying technique , a dirty spray gun , improperly adjusted spray gun, wrong paint mixing ratio , wrong stabilizer ( if its BC/CC ), improper flash time between base and clearcoat ( if its BC/CC ). This is also a common problem with high metallic single stage enamels and is subject to the above issues. If its single stage don't sand or buff it it will only get worse. Time will not change the paint problem what you see is what you got. Best Regards -
Who needs financial advise the most ? A guy that has figured out how to make a ?? million or the average guy ? The guy that figured out how to make a couple of million really understands and knows how to use and leverage his money and even if he losses a little he still has the knowledge of how he made the millions. Most of his losses may have minimal affect on his overall being. The average guy who doesn't have the resources that the millionaire has most be very careful about how he invests and manages his monies . A small loss can be catostrophic to him and he may not have resources available to recover. Finding the right financial adviser is critical to either persons long term interests. You are correct . Finding a great financial adviser is difficult . They are out there. Ask the wealthiest people you know who they use and how well they did for them in this trying economic time.
-
Doing a front or rear clip on an old unibody design such as an S30 has been done many times over the years . What is important to get right is the type of cuts through the windshield pillars and making sure that the inner rocker reinforcement is cut in the correct location and welded correctly. The floor pan cut should not be in line with the inner rocker or outer rocker cuts . Making cuts in a straight line through a pillar or rocker puts the load straight through the weld joint. Windshield pillars should use an offset lap joint. Rocker and floor pan cut should also be staggered. I thought the info would still be on the I-car site but a search showed they removed this information as it is old tech. If you need this info PM me and I can forward the info I have here at the shop.
-
Not a job for the inexpierienced with welding and frame repair. It really doesnt make much sense to repair if you have a good donor shell. If you really need to know go to www.i-car.com site and search for unibody sectioning. It should list general info that is applicable to most cars. Front body sectioning is a non recommended repair procedure as far as todays manufacturors go.
-
Not having road salt put down on the street in your area is a good thing but will not keep rust from occuring. The moisture from the dew in the morning is enough to encourage the oxidation process. If the exterior of the car is wet with dew, so will be the inner panels and areas of the car .As stated before the best rust inhibiting material is an epoxy zinc based primer. Rustproofing, chip guard are only coatings that inhibit rock chipping and deaden sound. What ever you do dont use bed liner coating . Many brands are not repairable and if you ever have to remove it , your best bet may be to throw the car away. Just coating over unprotected metal with the chip guard /undercoating will produce pockets of oxidizing hot spots underneath the coating that will accelerate the rusting cycle. Just think about why the original Datsun panels rusted so quickly. If undercoating was as good as some think it is, there would not be a rusty Z in existance.
-
With a car down this far your sequence may need some minor tweaking. How nice do you want this car to be ? Depending on your answer, your process will change slightly. Reinspect all previous metalwork for proper installation and fit. Fix any uncovered problems before proceeding any further. Trial fit new engine ,suspension related components. Paint and metalwork to the body shell (including engine compartment) should be completed before any parts are attached to the body. Door jambs should be edged and doors hung before installing dash. Just finished up the LS1/260z conversion. I have pics posted of the progression we used to complete this car. Will be posting new pics of finished car in the next day or so. Link to pics at bottom of signature. Use Picasa and go to Greg's car.
-
T-56 transmission lengths, LSx, F-body & GTO.
palosfv3 replied to BRAAP's topic in Gen III & IV Chevy V8Z Tech Board
The shifter relay block is slightly different. This is the block that the shifter arm ball fits into and attaches to the main gear shift rod. GM #12523298 -
3M 8964 chip guard is a much better choice than undercoating. Its paintable and designed to work in underbody areas. Undercoating or chip guard have no rust protective qualities. All rusty areas should be preferably sandblasted and coated with a zinc based epoxy primer,
-
Your comment about JohnC being your dream shop and him being out of your price range needs to be discussed. If this was your first choice whats really holding you back ? Just think about what has happened so far. Would you be further ahead if you started with him or a qualified professional competitor from the begining .Your current dilema is routinely expierienced by many undertaking the rebuilding ,modification, restoration of an specialty car . Just by looking at many of the parts you have installed on your car it appears you are intent on building a quality car and this will take even a qualified individual a significant amount of time. Looking at your posted pics you have quite away to go. Whats your expectation of the finished car and what do you want to contribute to the effort ? This question goes a long way into discovering what the completion of the work will be in time, cost and needs to be reviewed before you go any further. Whats your budget for the project ? Dont be afraid to discuss this with your shop professional. If you cant trust the shop in this type of discussion , can you trust him to complete the work? You need to look hard at what options are available and chart the course that gives you the best value for your time and money. Were currently finishing up a 260z ls conversion and if I told you what was in this car I'd be flamed off the site. But the owner understood his limitations and advantages , what he wanted for an end product and what it was worth to him . This project has taken approximately 15 months and was worked on consistently and done to a very high standard. Drop me a pm if you need to discuss anything about what is the best way through the situation. Best regards
-
Something from around the shop.

-
List a car on ebay for $500, sell it for 250k.
palosfv3 replied to auxilary's topic in Non Tech Board
This is only one of the recent historically significant autos to surface lately. It is remarkable that it sold for that kind of money , especially since it didnt have a motor or trans. It is a part of racing history. As to everyones views of the auction price, I believe the owner of the Devin bodied early racing Ferrari chassis that was on Ebay a couple of years ago said it best ," Its good that its going to someone who has the resources to properly restore this car back to its former glory. I would have never been able to complete the restoration this car so deserves. Once it is completed and shared with the rest of the world ,we all benefit." While this isnt an exact quote , the logic of the statement is clear. I also believe that the question pondered by the new owner was "Is this auto worthy of the investment of $?,???,???.00. " Once that question is resolved, the rest of the purchase price is easy to determine. The proper restoration of this car is going to be a major challenge ,even to the top professional restorers . I'm currently starting the restoration of a historically significant custom for the mid 50's, that shares a similar condition and can tell you the task is not for the easily discouraged. -
You should use what is closest to the original metal your repairing. Going up the next size can make things more complicated and will not resolve metal distortion issues due to forming or welding . When the panel is formed at the factory you wind up with different thicknesses in different parts of the panel dependent on how the metal draws and streches in the die. If you have to form a crown or the like in a patch the difference will become apparent quickly.
-
LS1 GTO T56 Shifter Location
palosfv3 replied to Wheeler's topic in Gen III & IV Chevy V8Z Tech Board
-
Though I post a pic of the finished lamps . 61 Caddy
-
Pics ???????. Your making things more difficult for yourself with the drivetrain in place. Your going to need complete access to all rail areas for proper cleaning and welding. The additional stresses of the engine & trans weight can shift or twist the unistructure when apart. I believe there are unibody dimensions posted somewhere on this site. Get a copy .Then you can make up a set of centerline guages and check the datum plane measurements for twist and sag as you go. There is much to be aware of when doing this type of repair.
-
Were installing a set in our 260z build . I cant believe anyone would consider any other guages. These are of exceptional quality : adjustable led lighting , metal bezels , complete individual wiring harness provided with each guage, programable fuel guage that works with all sending units, but the best advavntage is the ability to customize the guage face fonts ,colors and bezels .
-
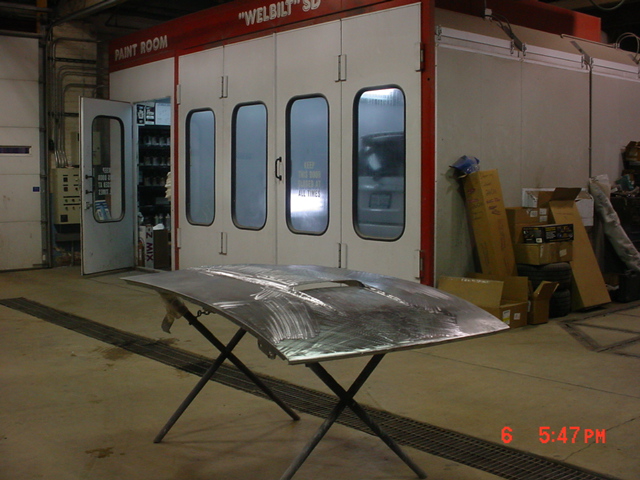
The rest of the front sheetmetal has also been modified. The hood was also arced to confrom with the bumper Larry
-
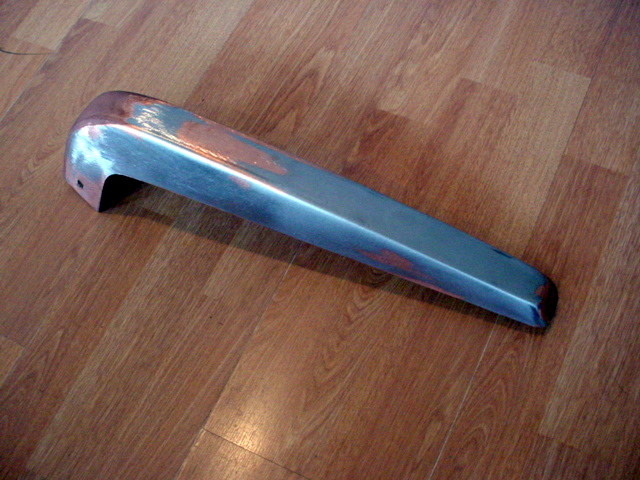
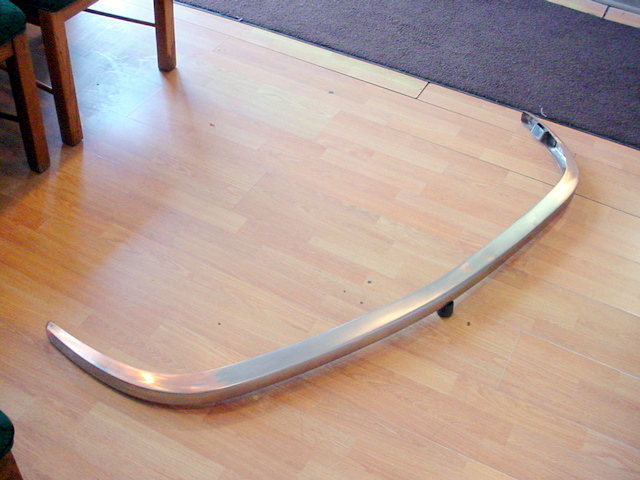
Before any welding or repairing is done all chrome should be removed. Chrome costs will vary depending on what the condition, shape and detail of the part is , quality of the metal work, whats expected as a final finished piece. Good quality platers are not cheap. Plating is just like painting the cost is in the preparation. Chrome is actually clear in appearance and the nickel is what actually gives the silver color that most think is chrome. Many have said so and so plated my stuff for $???.??. (insert dollar amount lower than $400.00). I havent seen anyone plate at these prices that will produce a show quality part. While you may not want to use a show chrome shop that does "Pebble Beach" quality plating for you Z you should expect to spend at least $650.00 for something presentable. The "Pebble" guy could easily get into the $1500.00 range for a rear Z bumper. As far as welding and metal finishing the pieces go the ends will present most of the difficulties . Welding up the big holes and working around the reinforcements for a plated bumper are not for the unskilled. Thought I'd add a couple of pics of some 260Z bumpers I'm currently doing. These will be plated . The front is close to being ready to send to the plater, Note the difference from a standard Z front bar . This one has been slightly narrowed to fit closer to the body without sealing strips or fillers and has the center section point removed and the center arced . The front bar took a skilled tech almost 16 hrs . The plater will probably spend another 8 before its ready for nickle and chrome. the rear end caps are ready to be joined to a new center. Hote the modified inner brackets these were removed to take care of the holes , modified and welded in so as not to distort the filled outer surface. About 6hrs an end to this point. Were expecting about a $2000.00 bill at the plater for these. I know some will think the costs and times are out of bounds but the finished product tells all and if your gonna do it , Do it right. Larry www.wgmauto.com
-
The main reason for the cracking of the plastic/fiberglass flairs is the different expansion and contraction ratios between the metal and plastic. Todays bonding adhesives are better designed to overcome this issue but the amount of exposure to extreme temperature is the primary cause of failure for properly adhered panels. Decades ago I was always told not to glass to metal and I rarely saw anyone have any real long term success. If you can do them in metal its preferable but costly. If your going to use plastic/glass flairs make sure you use one the the new adhesive products and not the fibreglass resin. Larry www.wgmauto.com http://picasaweb.google.com/wgmauto
-
Ran into a couple of problems in changing the guages on a 260 LS1 build I'm involved with. I can figure out all the electrical issues with the Autometer products many have used in their Zs but ran into a small problem. Autometer doesnt sell a 2 5/8" fuel guage that is compatable with the stock GM fuel sending unit on the Camaro / Firebird fuel tank and pump we installed in the 260. Autometer only makes a 2 1/16" that operates in the correct ohm range and it must be sent back to them to reverse a couple of leads to correct the opposite reading it gives. The 2 1/16" guages are not workable for our project ( just dont look right) and the 2 5/8 are about as close as you can get to fill the original spaces in the dash. I found these and they allow me to solve the issue reather easily . http://www.speedhut.com/gauge_products-auto-revolution.htm Has anyone used this vendor or these guages ? Larry http://picasaweb.google.com/wgmauto http://www.wgmauto.com/
-
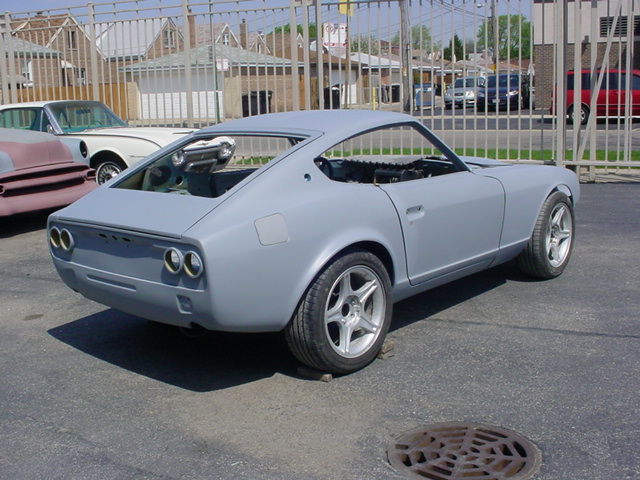
We are currently finishing up on this rear lamp arrangement. The t/lamp panel opening has been narrowed slightly and the bumper raised to bring things into the correct proportions. Lamps will be some modification of 61 Cadillac or mid 50's Facel Vega Larry www.wgmauto.com http://picasaweb.google.com/wgmauto/WgmautoGregScar
-
Are your arms sore yet ? They should be . You doing some things the hard way. A suggestion or two if I may. When applying any type of filler ALWAYS apply the filler material in the direction of the curve of the panel. The roof skin has two curves, front to back , and side to side . It is not a flat panel. Make shure your sanding blocks are flexible enough to adjust to the curve of the panel and as long in length as possible . This will assure getting the panel restore back to its original contour. ( Notice I didnt say straight ). Apply your plastic as smoothly as possible. You want your plastic to look just like a perfectly repaired panel before you start sanding. No edges from the spreader . No clumps or visible low spots. Feathered nicely into the metal. Apply a piece of 3/4 masking tape to the top of your bondo spreader. When applying the filler keep all your fingers on the tape. You will be amazed at how well this little trick helps get the filler on straight and smooth. Always apply filler in complete coats. Try to avoid applying a small patch of filler in the middle of a spot of already sanded plastic. All you do is chase the low spot around the area. Learn to read the plastic and metal. This may sound confusing but once you start this step you will be able to see immediate improvement in the process. Tiger hair or other types of heavy reinforced fillers are for the most part not needed. If your metal work is properly done , you wont be applying filler any thicker than 3/16" . If its oil canning you need to correct the condition as any filler applied over a streched area will crack regardless of the filler used. It also makes the job of getting the correct form back in the panel because the metal is always shifting even from just the light pressure of the sanding tools. Happy Sanding Larry http://www.wgmauto.com
-
Somethings not right . Quality paint ( Du pont , PPG, Glasuirt) and materials (primer, sealer , sandpaper, ect) will cost between $2200.00 and $4000.00 depending on color and such. Yeh ! You can buy the cheap fleet brand but you'll see it in the finished paint. You havent said what the shop will need to do to paint. Will they need to primer and block everything as well as color or just color? Will they color sand and buff or will you ? There are a lot of variables in the equation. If your giving him a bare steel shell and he has to do everything from the bare metal up ,you could easily get into the $11k to $14k range For labor and materials. Larry www.wgmauto.com
-
Glad to hear things worked out well for you. Larry http://www.wgmauto.com
-
Sandblast the area. ( I'm willing to bet you will find more perforations when your start your cleaning /removal process) This will then give you a good clean surface to start your repair. I'm not a fan of rust convertors for the long haul. Best way of keeping metal from rusting again is blasting and coating the cleaned metal with an epoxy/zinc based primer. If you have pitting , fill the pits with a polyesther putty after you have epoxy primed the area. Larry www.wgmauto.com