-
Posts
302 -
Joined
-
Last visited
Content Type
Profiles
Forums
Blogs
Events
Gallery
Downloads
Store
Everything posted by Naptown Dave
-
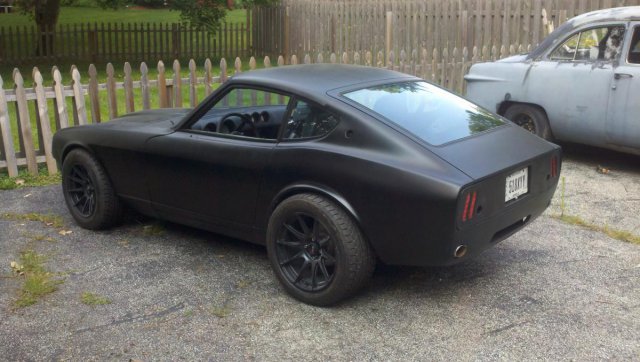
I need to go ahead and order some but the light housing part looks a little bigger than the vent hole. If it doesn't fit I think I'm going to go ahead with the idea and mount a red LED and cut out an appropriate sized Z logo out of aluminum. I shaved my stock markers and for some reason I get a little nervous about getting t boned while driving a flat black car at night. I built a fuel cell and just have a vent line with a tip valve dumping out the back so the vent isn't being used.
-
Has anyone tried to use the lighted side marker from a 350/370 in the sail panel vent? I may pick up a set to see how they work out.
-
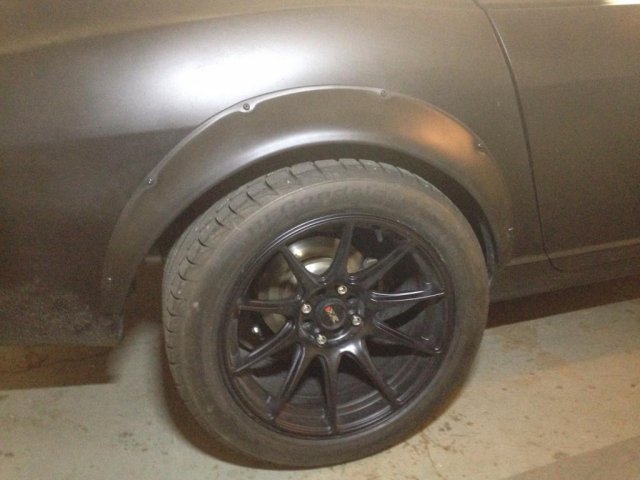
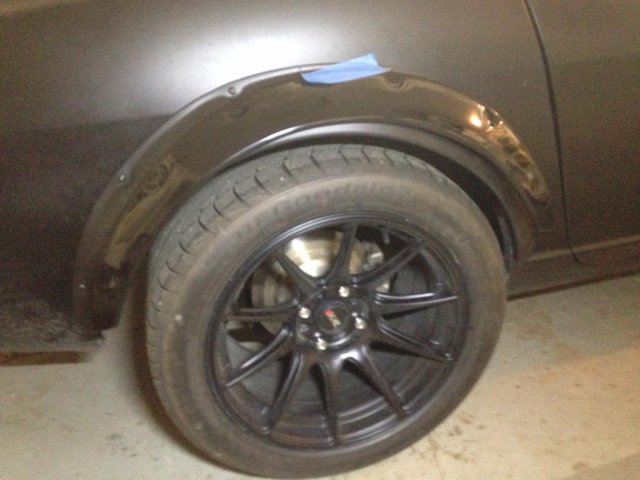
Kinda look like fronts to me too The second pic is the fronts taped over the rear, it's kind of hard to see the black on black on black especially with poor light but you get the idea.
-

Driveline vibration questions
Naptown Dave replied to socorob's topic in Gen III & IV Chevy V8Z Tech Board
It's worth looking into I suppose if you have ruled out wheels and tires. You might want to look into pinion angles as well. http://www.hotrod.com/how-to/paint-body/91758/ -

Driveline vibration questions
Naptown Dave replied to socorob's topic in Gen III & IV Chevy V8Z Tech Board
For what it's worth I had an annoying vibration from 35 to 45 mph in my truck that I swore came from the left front tire. It was a bad u joint in the driveshaft. -

removing /replacing spare tire well
Naptown Dave replied to Hypertek's topic in S30 Series - 240z, 260z, 280z
I removed mine to run a fuel cell and dual exhaust. I drilled out the spot welds where the well attached to the floor panel which left a 3/4" flange at the top of the well and the floor intact. I never compaired the hole diameter to the od of the well but it looks like if you drilled the spot welds out of your well you'd have enough floor to weld the pictured one back in. Harbor Freight has spot weld cutters for cheap that lasted longer than I expected. -
That looks like a tough build to top, you must have some big plans!
-
I have one for a 75 280 you can have if you arrange shipping. It's in as good or better shape than the above pictures, the top flange is intact but the spot welds are drilled out.
-

Whose Selling ZG Mount Kits ?!
Naptown Dave replied to datASSun's topic in S30 Series - 240z, 260z, 280z
When I got my car it already had huge holes in the wrong places. Mostly the floor, mostly. -

Whose Selling ZG Mount Kits ?!
Naptown Dave replied to datASSun's topic in S30 Series - 240z, 260z, 280z
I was just looking at nutsert on McMaster Carr. it looks like $7 for aluminum nutserts and $6 for black oxide coated stainless button head Allen screws. That is for 25 of each. They ship crazy fast too. -
-

Chasing Standing Mile Record ECTA
Naptown Dave replied to RebekahsZ's topic in Gen III & IV Chevy V8Z Tech Board
Sweet Keith! That's only 150 mi from me. If I can get back in town and finish sorting I'll be there! -
Before you get flamed on here let me give you some advice. 1. State the year and model, they are different especially the wiring. 2. Download the service manual for your car, it will help you identify the parts you have questions about. 3. Understand the systems/parts you are working on, the interwebs has a huge amout of mostly correct information. 4. Do your homework, dig under the dash and see where the mystery hoses go. Find the part that wire connection fits. 5. When you are troubleshooting focus on the system that you believe isn't working. I imagine you are looking at the whole car and saying how the hell is this thing going to work and getting overwhelmed. 6. Ask clear and concise questions, no one will answer without you doing 1 through 5 above. The guys on here are good dudes with a ton of knowledge but will not help with unanswerable questions like you have above. Oh and #7 get a multimeter, you're gonna need it! Welcome and good luck
-

Just starting my ls1/t56 build!
Naptown Dave replied to CableSrv's topic in Gen III & IV Chevy V8Z Tech Board
Looks good bro, nothing a little seam sealer and undercoat won't fix! I guess I was thinking more of welding in patch panels on the shiny side. I need to look into that Honda wiper motor swap when I get back in town. Where are you located? -

Just starting my ls1/t56 build!
Naptown Dave replied to CableSrv's topic in Gen III & IV Chevy V8Z Tech Board
I think I steal pure tungsten from work lol. Does the arc tend to blow off the side with thoriated? If memory serves its more for aluminum, it helps the high frequency start the arc. I struggled with 3/32" tungsten at first but now I run 1/16". After doing a semi shady job filling in my sunroof I learned the importance of a good consistent fit up so I have been running .045 mig wire for filler. If you can practice keeping your filler wire hand free enough to add additional wire when needed that would help with any odd gaps. One of the things my instructors always stressed at welding school was a consistent fit, it takes one of the many variables out of the equation. I shaved my door handles and locks, side marker lights, antenna hole and gas filler door half with TIG and half with .020 MIG and didn't really see much difference in warping, it's just I did a lot less grinding with the MIG. -

Just starting my ls1/t56 build!
Naptown Dave replied to CableSrv's topic in Gen III & IV Chevy V8Z Tech Board
Yeah a gas lens will help keep everything cleaner. Try the thinnest tungsten and filler wire you can find, it will put less heat (more concentrated) into the joint and cause less warpage and draw less crap into the puddle. -
Check LS1tech, the majority of us run manuals and I'd think you will have a better chance of getting your answer there.
-

Just starting my ls1/t56 build!
Naptown Dave replied to CableSrv's topic in Gen III & IV Chevy V8Z Tech Board
Yeah bro, you're making your life hard trying to TIG anything not absolutely clean. Save that tungsten for finer, more finished work and use the MIG for the floors. Whatever process you are using fully tack the replacement piece in and then connect the tacks while jumping around, letting the metal cool to avoid warpage. -

Measurement Request
Naptown Dave replied to Ryan Merrill's topic in Gen III & IV Chevy V8Z Tech Board
It seems $400 to the door is about the going rate for an LS6. I think MattD may have one, all you'd need is some epoxy to put it back together! -

Question about heater core lines
Naptown Dave replied to Acoolusername's topic in Gen III & IV Chevy V8Z Tech Board
I went to the trusty local auto parts store and got two hoses with 90* bends on one end and bam! They do rub on the valve cover so it's going to have to be an inspection item to make sure the hoses don't rub thru but I didn't see many options without major surgery to something. -

Just starting my ls1/t56 build!
Naptown Dave replied to CableSrv's topic in Gen III & IV Chevy V8Z Tech Board
I had to draw a diagram with all the different connections for the pickup, filter, pump, regulators, and rail connection to make sure I had everything covered. The tank I built has a 1/2" npt, the walbro was a 10mm, the regulator 3/8" I believe etc. i think I have some pics in my build thread. the long runs were easier because double flare fittings are available at most auto parts places. So figure out what equipment your going to use and your line size. Look at the specifications for the equipment connection size and style for each connection and then count out the appropriate fittings to adapt to the tubing. I would imagine those summit fittings would be fine if you are using aluminum tubing, they won't bite into steel tubing. -

Just starting my ls1/t56 build!
Naptown Dave replied to CableSrv's topic in Gen III & IV Chevy V8Z Tech Board
Fuel lines can be easy on the wallet if you don't get frustrated easily, I bought a tube bending tool and a double flare tool and made mine out of 3/8" od tubing. I had one minor leak that required some more torque on a coupling. I did use braded lines from the pickup to the pump (an8) I believe.


