walkerbk
-
Posts
227 -
Joined
-
Last visited
-
Days Won
10
Content Type
Profiles
Forums
Blogs
Events
Gallery
Downloads
Store
Everything posted by walkerbk
-
78 280Z 5.3/T56 swap + restoration
walkerbk replied to jfritts's topic in S30 Series - 240z, 260z, 280z
From the photos it looks clean. Let the fun begin. -
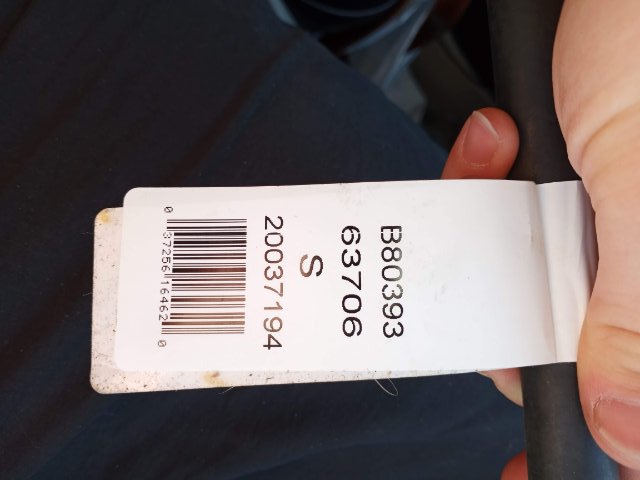
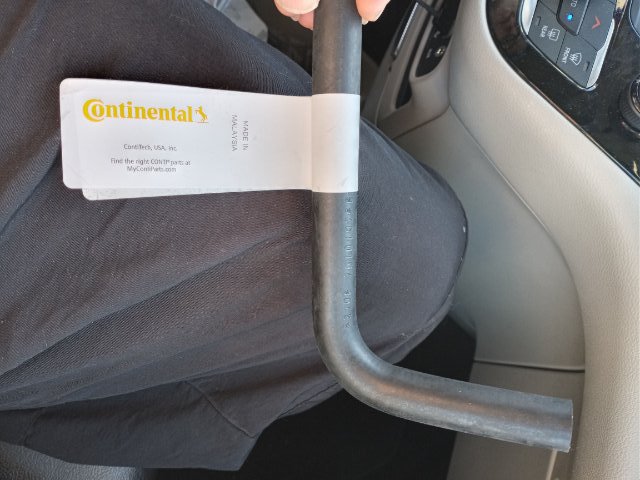
Well my 280zx 15/16 master cylinder has been leaking and I have been looking for a rebuild kit prior to taking it apart. After much research and reading that they are no longer available I might have found a solution. The link below is a master cylinder for a 720 with a 15/16 master cylinder. Best case everything swaps over (looks similar), worst case the seals should be able to swap over. https://www.amazon.com/gp/aw/d/B000IZ07L4?ref=ppx_pt2_mob_b_prod_image
-
IMSA GTU vintage racer build
walkerbk replied to clarkspeed's topic in S30 Series - 240z, 260z, 280z
I powder coated my suspension and the up front cost is high , but now everything is basically free ($20 bag of powder goes a long way). I have coated all suspension, cross member, valve covers, transmission case, oil pans... all for 2x bags of powder and the stuff is as durable as it gets -
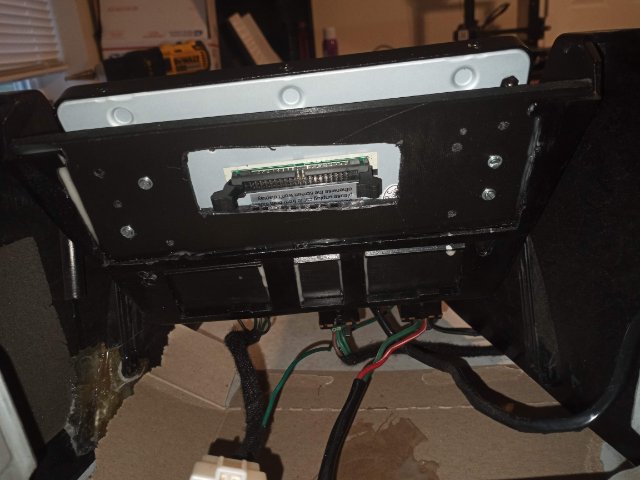
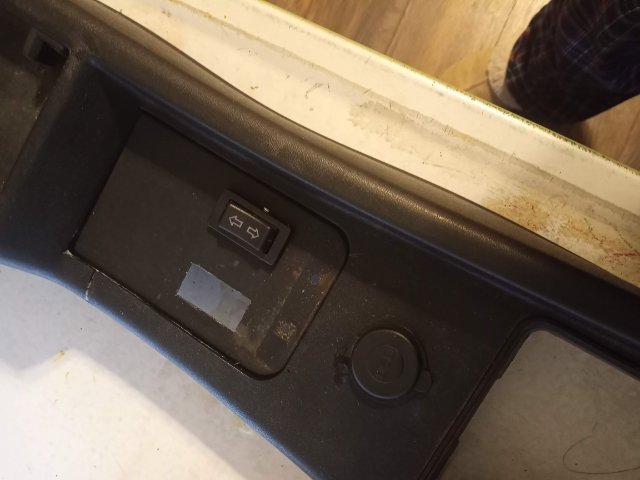
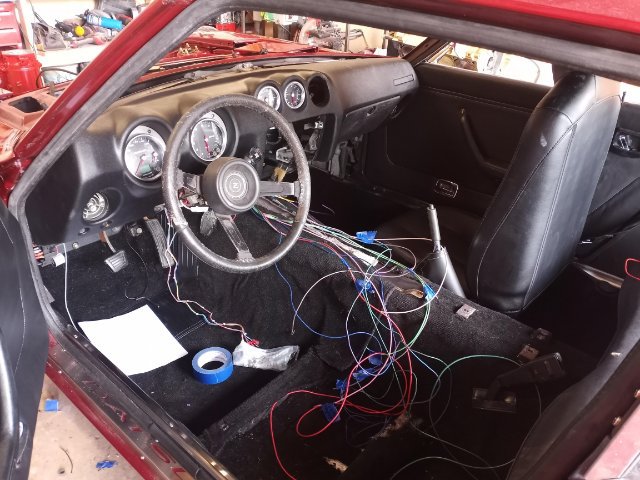
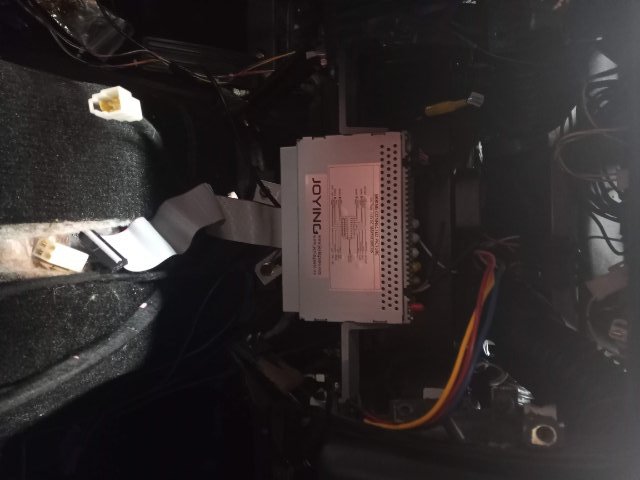
Got some work done on the car this weekend. I finished buttoning up the Transmission and got some work done on the center counsel/ radio. I had the common crack in the center counsel by the ash tray so I pulled everything off it and reinforced the area with fiberglass. To my surprise, when i finished, the patch just popped right off. I am guessing this is due to some kind of release agent that was applied and is still on the plastic. After some light sanding, some more epoxy was applied to the patch to glue it in place and everything held fine. I was originally going to put a cup holder where the ash tray was located but couldn't find a good place to install the power window motors so I ended up using that area instead. This is honestly the best place for them anyways as they are easily accessible from both sides and the ash tray underneath allows for the wiring to be installed. Once that was done, I 3d printed a radio face plate to cover up the factory area and the "warning" lights below. After gluing it in place I was able to attach my radio screen to the face plate. This allowed me to still use the switches with no impedance and made for a much lighter center counsel. The only thing is, I will have to trim a 1/2" off my AC control panel to make it fit together. Once everything was installed I got on and played with the setting doing the most important thing... updating the background. whatcha think. P.s, this is a full android sound system with 4g (if I want) so it is very customizable. I think HP tuners is come out with an app to hook up to their NMPV allowing you to tune from android which would be down right awesome. Let me know if yall got any questions.

-
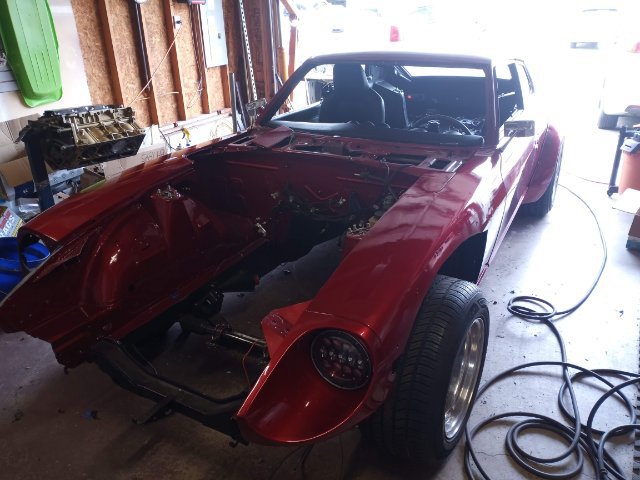
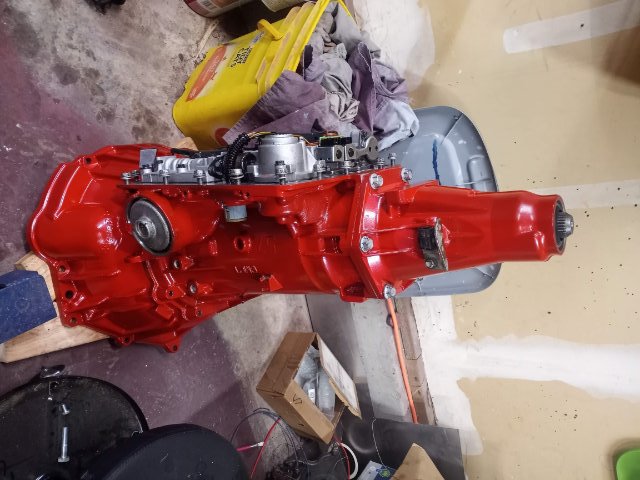
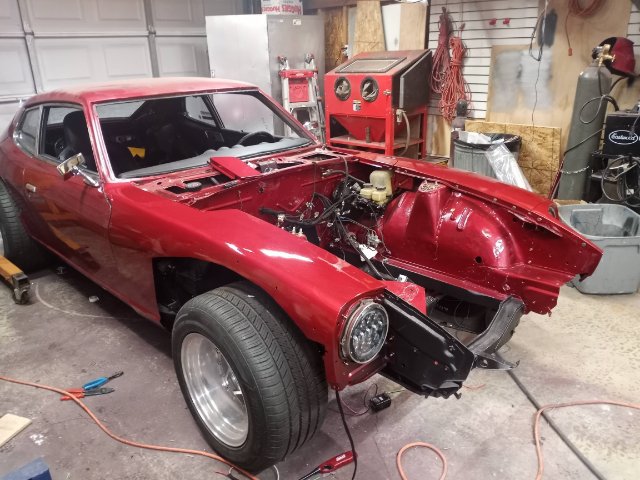
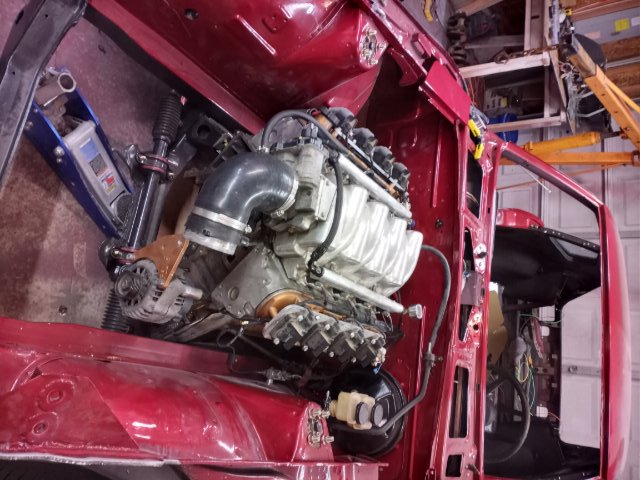
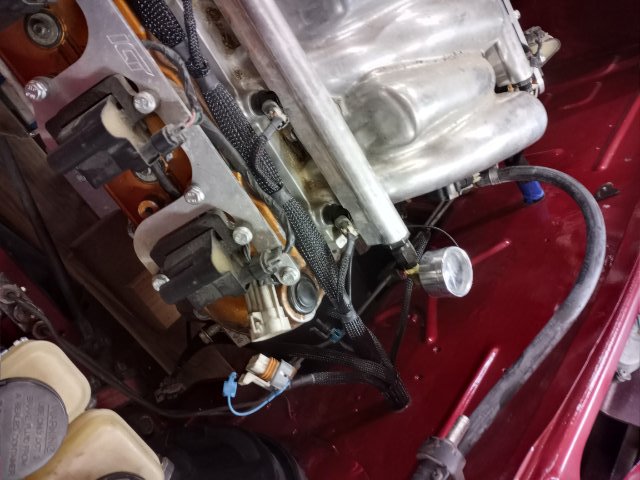
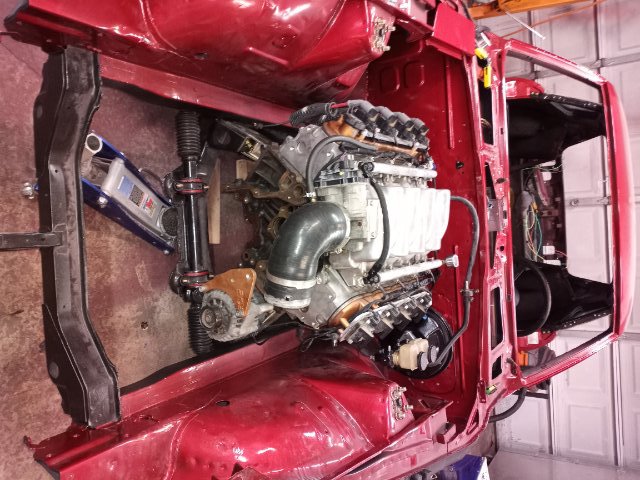
So much has been completed since I last posted. I mounted the new dash, rear hatch, front fenders, headlights, carpet, passenger seat, all the interior panels, door panels, sound system, rebuilt the transmission and... got about 50% through the engine. I bought a new dash from vintage dash and it is an almost perfect fit. It took a little longer to get installed than I wanted. I should have found all the bolt holes and cleaned them off prior to installing it, most of the time spent was locating the holes once the new dash was on the frame. I was able to reuse my old glass hatch gasket (I installed it a few years ago) and everything went together nicely. I have not (and dont plan on), running the wiring for the defroster. Please note, when installing the hatch, the hinges have to be mounted on the hatch first. After I got the wiring ran above the front horns I was able to get the fenders mounted. Every wire I have is tucked up under there to include the the wiring for the radiator fan. The only wires in the engine bay are those for the engine. I decided to go with a radio from Joying due to their unique design. The head unit and screen are separated by a ribbon cable allowing for easy mounting of both. I 3D printed up some mounting brackets to support the head unit and then the screen will mount onto the center counsel. It should make for easy removal of the center counsel as well as it wont be 10 pounds with the radio. Well the Transmission didnt have any problems prior but it was also behind a somewhat stock 5.3l so before sticking it behind a modified 6.0l I wanted to rebuild it with performance in mind. I bought a rebuild kit from Probuilt transmissions and went through the entire thing, powder coated the case and then re-assembled it... only time will tell if I screwed it up. I am waiting for 1x clip to arrive in the mail before I can close it up for good. Lastly, the engine. The rotating assembly is in, cam bearings are in, and the heads have been shipped off to Texas speed to be worked. I am using my 709 heads to bump compression near 10:1 and having them CNCed. I ordered Johnson lifters, CHE rocker upgrades, push rods, and a 228/232 112R cam to get the 6.0 to really wake up. Engine parts should be back in a week.
-
A musician's therapist (The $300 Z)
walkerbk replied to Zetsaz's topic in S30 Series - 240z, 260z, 280z
These are the bolts I bought for my car. They have the integrated washers and lock washers and matched up very closely to stock. Part number HXPP3-STC-M6-20, I ordered 100 and am down to about 10 after replacing every bolt I came across (could use another 50 to finish) https://us.misumi-ec.com/vona2/detail/221000546909/?curSearch={"field"%3a"%40search"%2c"seriesCode"%3a"221000546909"%2c"innerCode"%3a""%2c"sort"%3a1%2c"specSortFlag"%3a0%2c"allSpecFlag"%3a0%2c"page"%3a1%2c"pageSize"%3a"60"%2c"00000071420"%3a"nvd00000000000006"%2c"00000071025"%3a"00000071025.j!00252"%2c"fixedInfo"%3a"innerCode%3aMDM00005967324|21"}&Tab=wysiwyg_area_0 -
LS1 street cam recommendations
walkerbk replied to nick-james's topic in Gen III & IV Chevy V8Z Tech Board
I'm going for a 228/232 112lsa in a 6.0l. Torque doesn't come till higher up but I figure our cars are so light it shouldn't be an issue. -
Best degreeser you will ever buy is Easy Off Oven Cleaner from dollar tree. Cheap and will take even the worst of oil cakes off.
-
I went ahead and bought mine from Chester and herod auto. I can't speak to the fitment but it is actually sewn together into like 4 peices and I am very happy with the service. When I called to place my order I told him what it was for and you could clearly hear him ruffling through stacks of cut patterns for other cars. He then came back on the phone and asked if I had any modifications as to which we talked about my custom seat mounts and some other stuff. He asked that I send him some photos and said he would leave a couple inches that would need trimming just to make sure. Total time from calling to receiving my carpet was 2 weeks. Again very pleased. He can probably leave enough extra in the middle to do what you want or maybe even meet your needs.
-
I'm running 295/50-15 on my back on 11.5in rim. This results in an almost vertical wheel wall. They come in a couple of tires but no ultra high performance. I'm running the Firestone indies 500 tires.
-
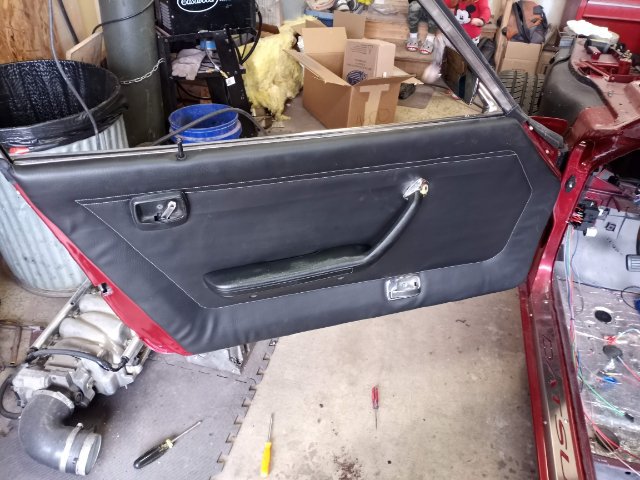
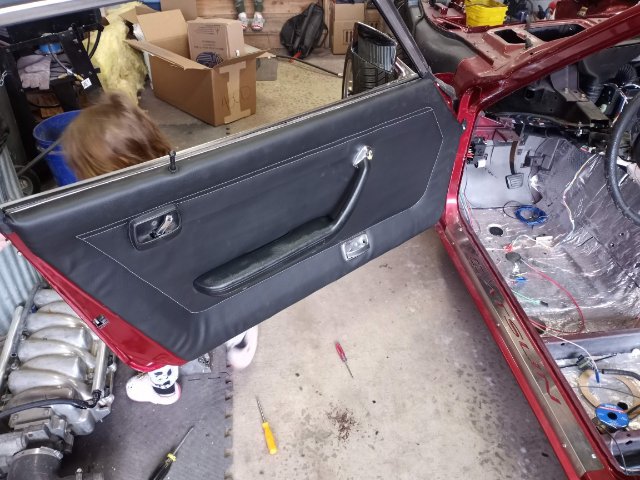
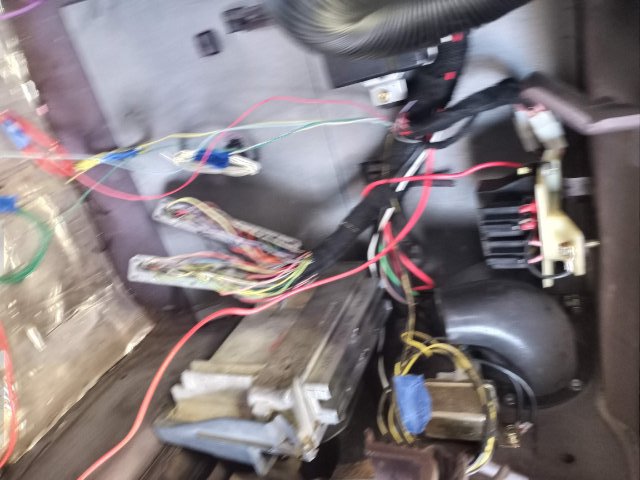
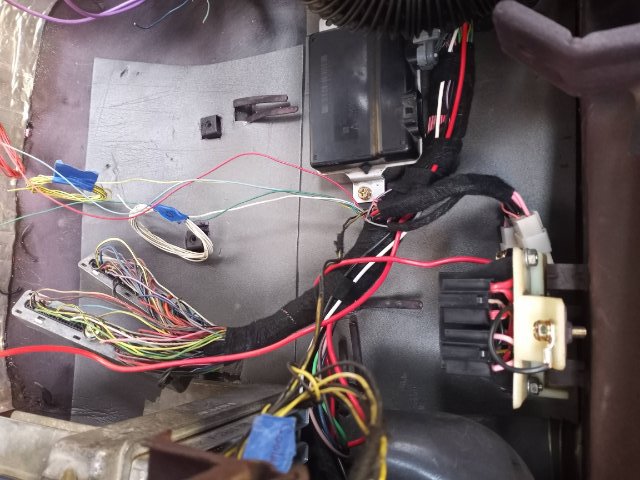
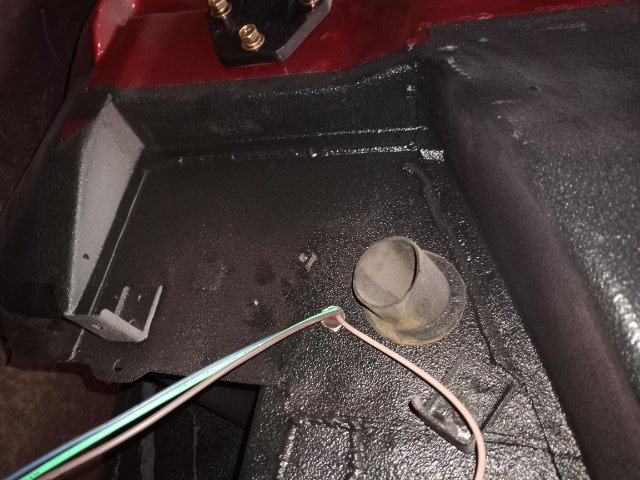
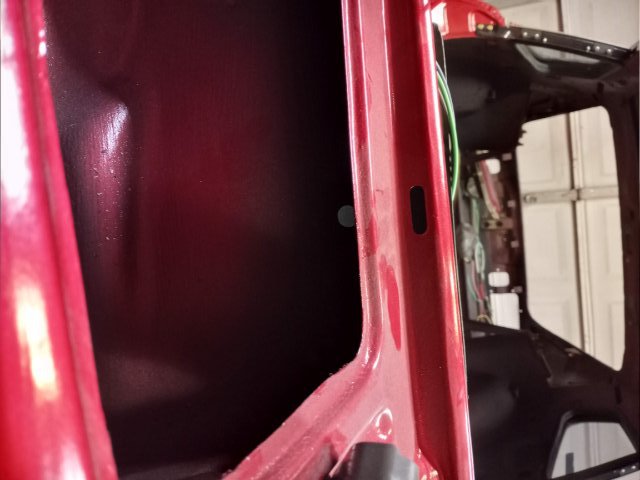
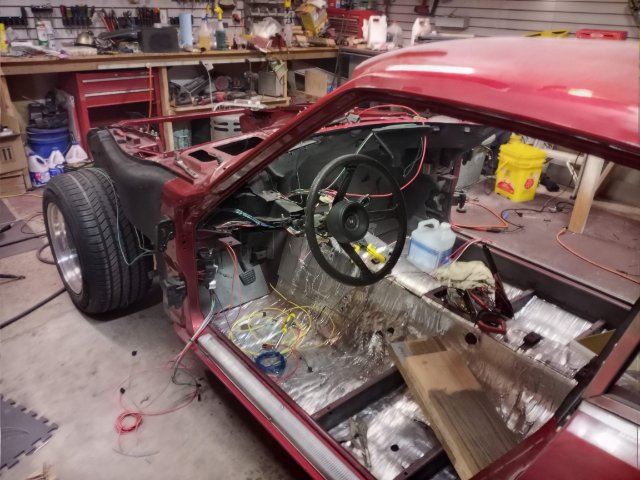
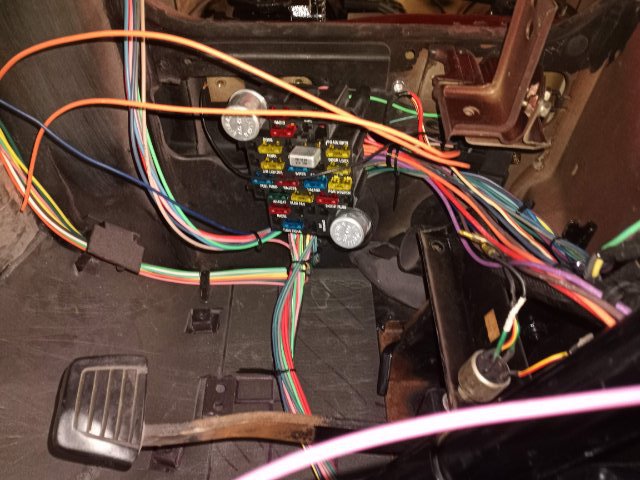
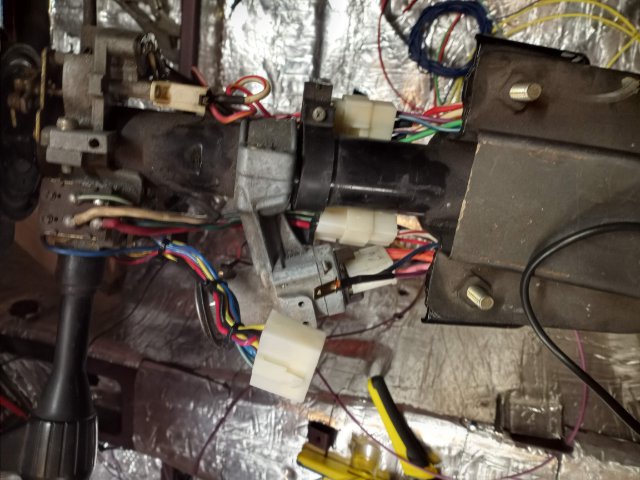
lots have been happening but I do not like to post from my phone and I dont get on my home computer very much. Over the past month or so I have acquired a massive amount of parts with my wives approval along with getting a new truck (Ram 2500, got to love the cummins). but I digress below is a list of stuff I have completed recently. electric door windows install rear hatch seal install brakes wired in headlights installed Vintage Air Mini II I have also purchased carpet, headliner, foam... so I can start working on the interior. Electric door windows I used the electric window motors from a 1998-2008 Subaru Forester. I am a firm believer in utilizing stock equipment instead of installing aftermarket kits. If they worked from the factory and lasted 60k miles or more they will work for my little Datsun. That being said, it wasn't my idea but someone else who did it here on Hybridz first. I was able to drill out the stock "regulator" and with minimal cutting of the bracket I mounted the motor and ran the wiring down out of the way of the window, up the side of the door and then through a grommet to go into the car. The way I routed the cable made sure it wouldn't drip water into the door as the door was the highest part of the wiring and the car frame bends back just above where the wire runs into the car. I have also sealed the interior with a little RTV. I tried multiple other means as to run the wires but none would fit like I wanted or cost an arm and a leg to even try and fit. Rear Hatch I purchased the rear hatch seal from Z Car Depot and it was the precision weather strip. Very nice piece but it is slightly to long. At the end of the day I might cut a little off to get it to fit better. If not the alternative is going to be to glue it down (my last one wasnt glued). Brakes I am re-using my old brake system but everything was disassembled and powder coated. my master cylinder however looks like it is leaking slightly so I think I am going to have to pull it back off and rebuild it. I am using the Nissan Maxima rear calipers and the Toyota vented (small pistons). Based on my math this gives a 60/40 front/rear brake bias. With a little more aggressive pad on the rear I can get that down to 52/48 (ish) based on the pad compound. Headlights / Wiring I ran all the wiring for the front of the vehicle out the side and up the front frame horn to help hide it. I had to rebuild the wiring harness to split it this way but the end view of the clean engine bay is worth it. For the passenger side I have also ran the battery power supplies for the LS harness, the body harness and I will have to run two more wires, one for the AC system coming from inside the car and one from a relay on the front of the car to power my Ford Tauris 2 speed fan. These are all running to a "through stud" that will have a small 4 gauge wire running to the battery. I have also added a number of relays to the wiring harness, 3x to the body (main power, headlight high, headlight low) and 2x for the LS harness; those are on top of the 1x that came in the harness and 2x for the AC system. Vintage Air Gen II Mini As I am trying to get as much wiring done before installing body parts and the interior I decided to get the AC system and install it. I made a bracket that connects into the factory location and runs down the backside of the vintage air unit to the transmission tunnel where I put a nut insert. This thing is stuffed in there tight and it is not moving. For the drain tube, I didnt want to use the stock one as it would kink doing a 90* bend so I went to Autozone and got a hose with a bend in it. The only remaining wiring to complete is the radio, center counsel (done but need to do the counsel), dash (same), and the door curtesy switch (just thought about it). Once complete with the wiring I should start installing the headliner and work my way down.
-
Did you ever find anything? I'm looking for a good quality 2+2 kit.
-
I bought a rebuild kit from a guy on Ebay and everything fit and worked well (bushings were very tight) and then used the instructions below http://atlanticz.ca/zclub/techtips/body/doorhinge/index.htm I don't know where to get a replacement detent pin but I replaced my roller with a part I got from tractor supply (a bushing that was almost identical).
-
It doesn't make sense for the old pump to get 12v and the new pump to not get 12v. Sounds more like its a ground problem. Use your multi meter to check voltage between the ground and source when on.
-
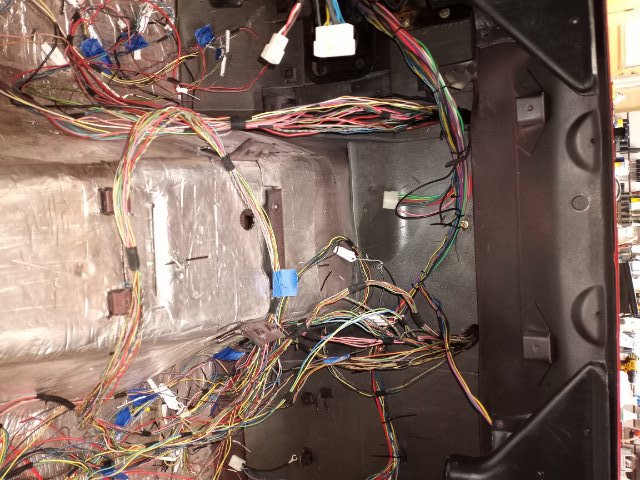
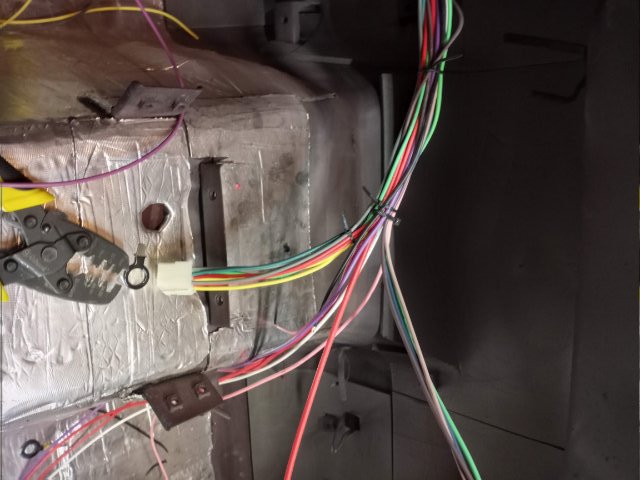
Still working on the wiring but I have moved onto the engine and dash wiring. I would like to tie it all in together prior to installing the engine or any major interior parts. I got all the wiring split into "two" engine harnesses; 1x for the pas side and 1x for the driver. The original idea was to run everything through a connector at the fire wall to support removal in the future but after rebuilding the harness i decided against it. Both sides will go through their own 1in hole in the fire wall right over the engine heads prior to meeting and heading to the passenger side where I will have the ecu mounted in the kick panel. It is almost starting to look like a car again. Next up... continue to work on wiring and install the ac system, and sound system (trying to run all the electrical components).
-
If you are going to be "flexible" i would 100% just clean it out and run it. Somethings you do right the first time and some things you do to get the car on the road. If not you will end up spending 3x the money on parts you just end up replacing.
-
Flushing it should be fine. It lasted 40+ years. What is your engine goals (swap or stay stock block)?
-
Don't know the offset off the top of my head but its 4.25in back spacing so somewhere in the negative 30-40 range.
-
My 3in flairs have 295s in the back on 11.5x15s and I still have room (maybe 315s). The front I have 2in flairs and have 275s on 10.5x15s.
-
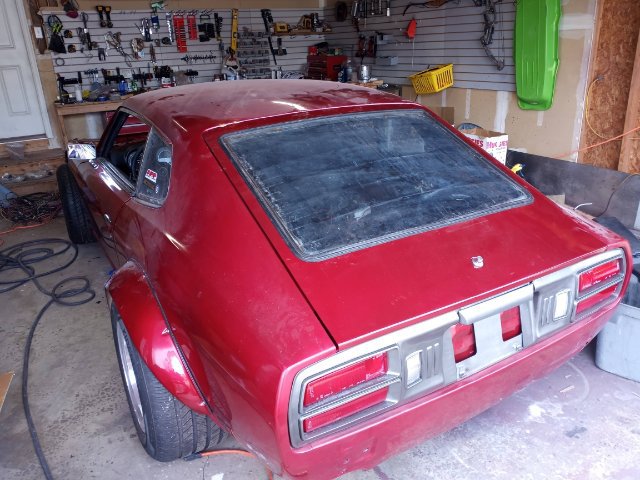
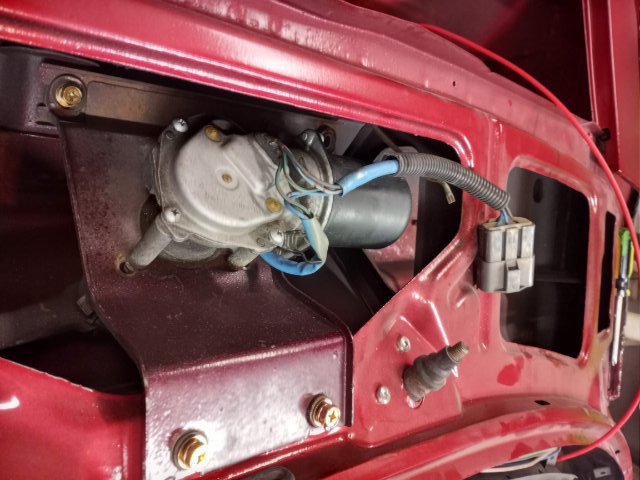
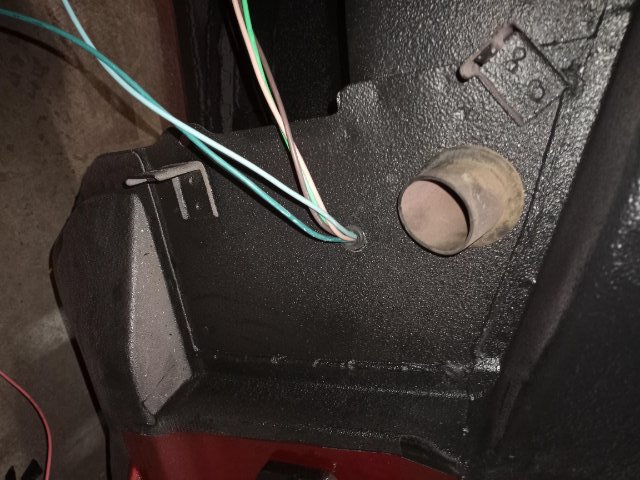
Wow it has been a long time. I have finished painting everything and it turned out ok. I had to paint the remaining body panels in two batches and messed up one of the batches clear coat so I will have to go back and cut and reapply another coat. The remaining parts are good to go. Since finishing with the paint and body I have transferred my focus to working on the electrical components of the car. I an utilizing an EZ wiring harness and the quality of the kit is very good but like many have said, there is nothing easy about it. The kit is made for a Chevy with a 350 or older engine and not a Datsun with an LS swap, on top of that, EZ wiring will not provide a schematic or anything more than the basic instructions which makes it harder to modify it. I laid it out 10x times and rerouted multiple wires along with removing all the extra "through" wires. I also modified the harness to meet two intents. 1st I wanted to route all the wires through the passenger and driver fenders to have a cleaner engine bay. 2nd I wanted relays for the high and low beam (which helps as the original Datsun combo switch was to ground and not power). I was able to get all the wires run for the combo switch, front, rear, center counsel. Everything except the engine bay (because I'm still planning out the exact placement to hide the wires) and the wiper circuit. I am working on the wiper circuit which isn't to bad as I saved the original wiper wiring; bagged and tagged. I am also using a Honda wiper motor with the original wiring. I have most of it cleaned up and ready to install whenever I get time. I am planning on running the wiring into the engine bay right behind the passenger defrost vent. This is tucked way up under the windshield trim where there is no wiper linkage on the passenger side so no fear of pinched wires and no one will see the wires. Next I am going to work on getting the engine wiring done up (which will be run through a bulk head connector) and the AC wiring (I want everything here prior to buttoning this up). Whenever I am done with the wiring I am going to make a video explaining everything and the pin out.
-
Very nice. I'm digging the carbin fiber door inlays. Did you make those?
-
That does look good but I'm curious as to how well it will hold up against the sun. I tried the graphite rim paint a few years ago and it didn't hold up over time. Now I'm debating carbon wrapped or good automotive paint and clear coat.
-
Stainless steel vs plated steel vs aluminum rivnuts
walkerbk replied to fusion's topic in Body Kits & Paint
I do the same thing depending on the situation. I only use rivnuts where I might need to change the location or where strength isn't an issue. Everything else is welded into the body. -
Sorry, see below.
-
I just ran across this on a Datsun Facebook group and was wowed by it (wife said I could buy one as soon as my car is running). https://www.facebook.com/groups/1114722628666967/permalink/2033838046755416/?sale_post_id=2033838046755416