walkerbk
-
Posts
227 -
Joined
-
Last visited
-
Days Won
10
Content Type
Profiles
Forums
Blogs
Events
Gallery
Downloads
Store
Everything posted by walkerbk
-
Not what viscosity but what brand; royal purple, red line... Is it made for LSDs (if I'm not mistaken you don't want a dedicated lsd fluid in a helical lsd. Lsd gear oil is made for clutch based LSDs).
-
What kind of diff fluid are you using? Diff fluid can make a huge difference.
-
Control arm damage fix opinions
walkerbk replied to calZ's topic in Brakes, Wheels, Suspension and Chassis
Depending on your welding skills. If it were me I would weld it just for peace of mind. Make sure to keep it cool so you don't warp it. -
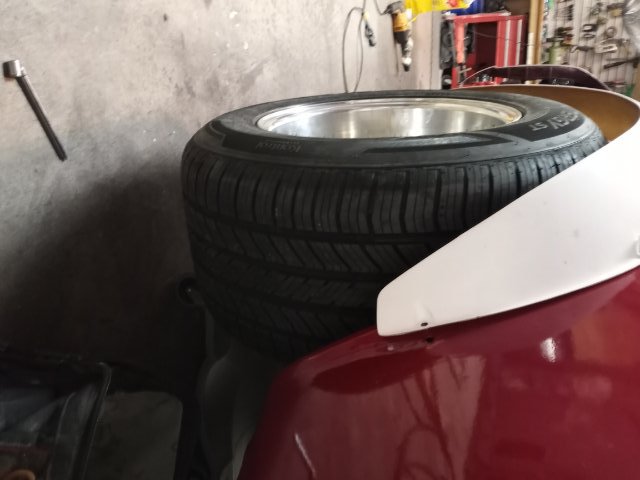
Not much has been going on except I got my new rims and they fit great. Fronts are 15x11 wirth 265/50r15 and rears are 15x12 with 295/50r15. I am still getting them polished and cleaned prior to putting all the tires on the rims. My unit got activated to go support efforts on the Dixie fire complex in California but I got these photos the night before I left. They are WIDE as ill get but they fit great.

-
Do your self a favor and go with southernpolyurethanes.com best paint you can get. You should only need 2 coats of base covered by 2 mid coats and then 3 coats of clear (little more for wet sanding). Should come out to 1.5g of base mixed and mid and then 2g clear mixed. You can do 3 mid coats if needed based on tiger stripping
-
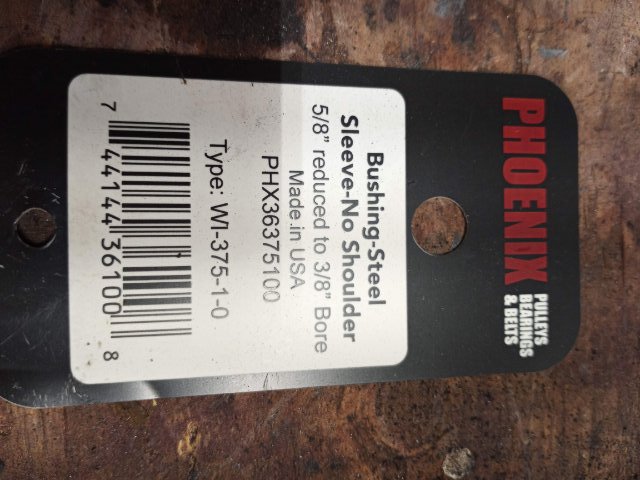
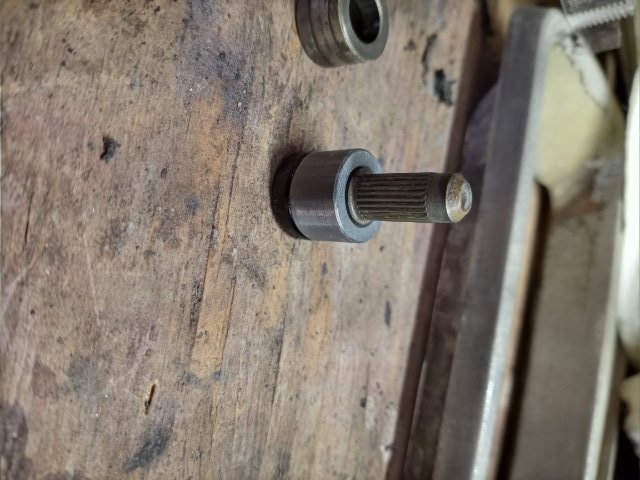
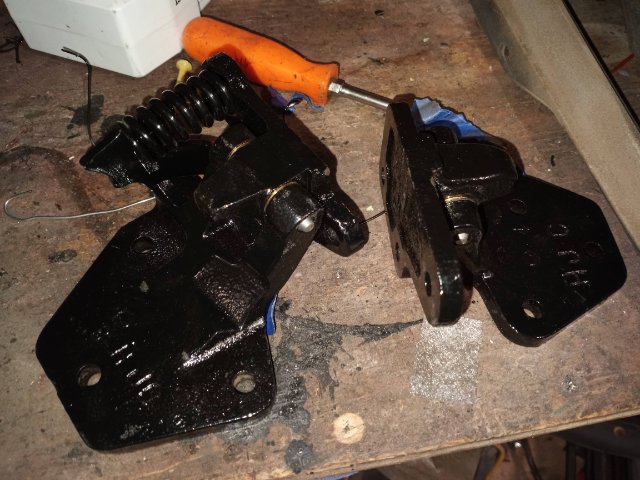
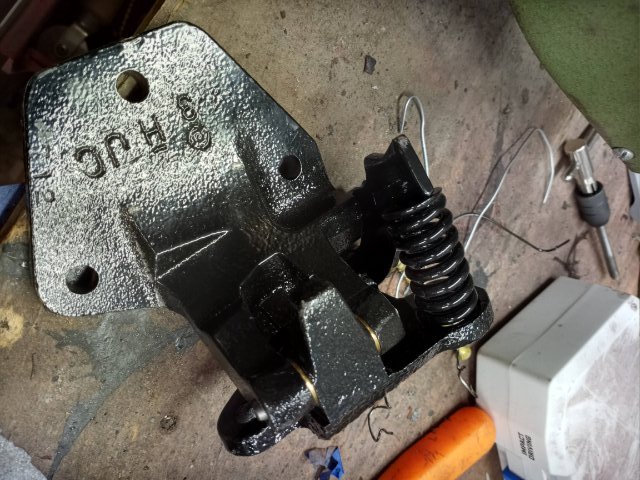
Got two of the door hinges rebuilt. Everything was disassembled, sand blasted, soaked in zinc phosphate and then powder coated black. I am just waiting on parts to get the other two built. I ordered the bushing and pin kit off Ebay from westworldautopartsuser and I was somewhat unsatisfied with everything at first but after finishing the first set im happy. When I was assembling the set it felt as though there would be a large amount of play due to the pin being loose in the bushings and the bushings being loose in the hinge body I do not believe this to be the case now as the final assembly was crazy tight. The roller bearing was worn beyond me wanting to reuse it so I found a decent replacement from Tractor Supply Co (Part number PHX36375100 See photo) in the form of a steel 3/8 to 5/8 bushing. It is almost identical the the original except it is slightly longer. 2-3 minutes on the bench grinder and it was shortened and polished up to ensure smooth operation for years. I am hoping to get the other two built this weekend and maybe even picking up my rims finally.
-
SPDRCR LS1 and 4l60e Build Thread
walkerbk replied to Spdrcr's topic in Gen III & IV Chevy V8Z Tech Board
What loker shifter is that? How is the fit? -
ANOTHER Datsun Z/LS3/T56 Swap Thread
walkerbk replied to Ironhead's topic in S30 Series - 240z, 260z, 280z
Best thing I did for tuning is by the hp tuners with data logging and hooked up my wide band o2. I was able to do exactly what iron head said by logging 1 day at a time and changing the tune in the evening. Then I went 2-3 days logging and changed the tune. It took about a month to get her just right. Big thing I learned is to push your spark tables 1 degree forward at a time and then once you get knock back it off 4*. Without a true dino 4* is the safe play to get max power. -
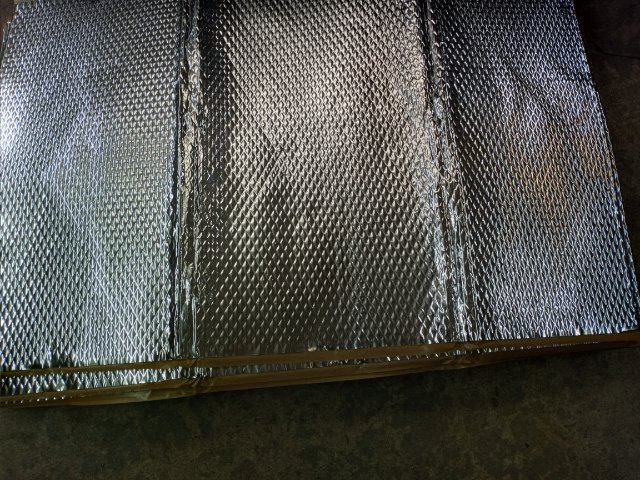
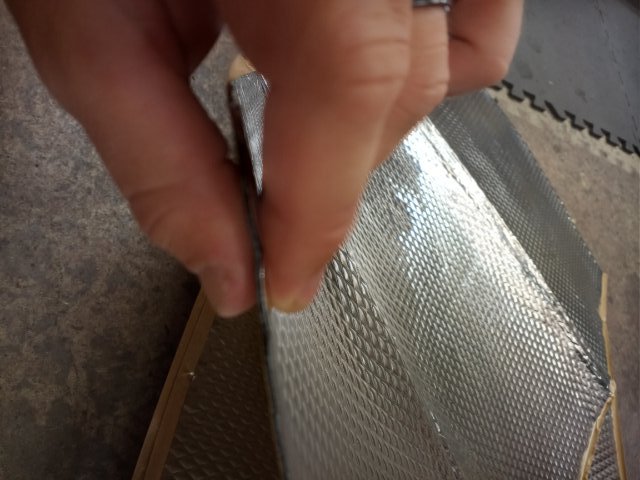
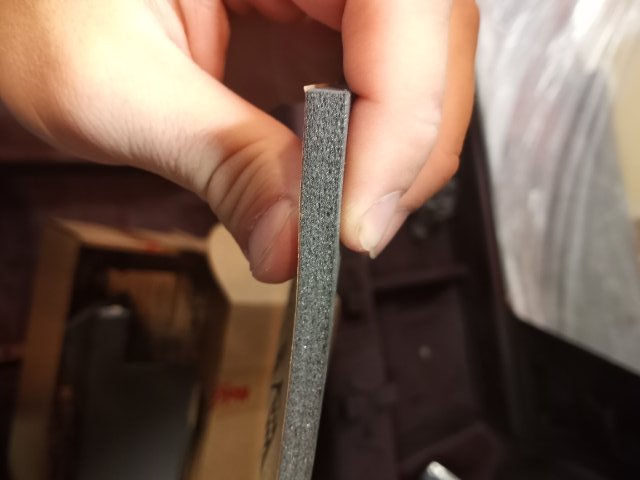
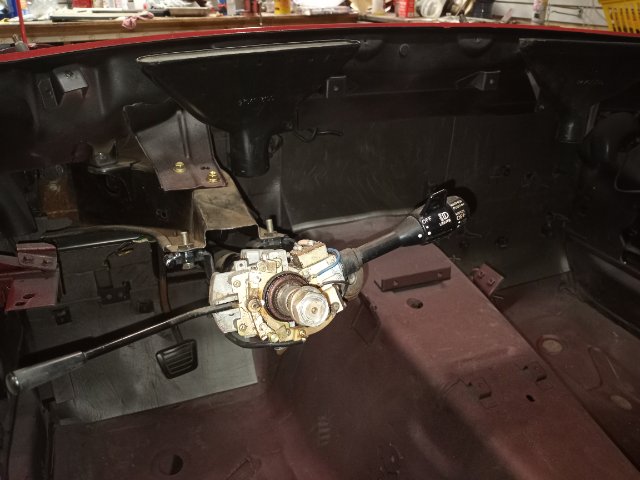
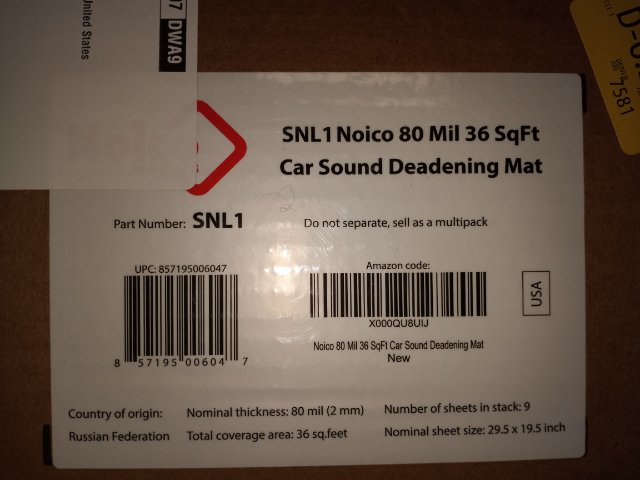
So, I have been on leave (kind of) and have gotten a lot done on Athena. I have moved on to the next thing I can do without wheels on the car and that is interior sound deadening. I ordered Noico sound deadening stuff for the fire wall and the floors from Amazon for about $80 for everything. I ordered thicker foam (1/4in thick) for the firewall and it ended up being way more than I needed so I decided to use it in the trunk and still have 6 sheets for the doors. This foam stuff is very sticky and shouldn't have any issues down the road pending issues with heat. For anyone worried about weight, this is the stuff for you. When I got the box I thought it was empty. This stuff is light. I got the thinner stuff for everywhere else. It is the standard stuff that looks like tar (doesn't smell) and is foil backed. I haven't started with this stuff but cab tell you it is heavy (about 1/2lb per sqft). I also have steel fuel line on order and should start working on the wiring next. Below is the links to the two products I got. https://www.amazon.com/gp/aw/d/B07QW2RL2Q/ref=sspa_mw_detail_0?ie=UTF8&psc=1&spLa=ZW5jcnlwdGVkUXVhbGlmaWVyPUExTlFEV1dNRFhDNkpPJmVuY3J5cHRlZElkPUEwNTQ4MjQzM1NUSUROSUlNUVhJSCZlbmNyeXB0ZWRBZElkPUEwNDc3MzE0MUFRSjEzNFJRUUlOMiZ3aWRnZXROYW1lPXNwX3Bob25lX2RldGFpbCZhY3Rpb249Y2xpY2tSZWRpcmVjdA==&pd_rd_i=B07QW2RL2Qp13NParams https://www.amazon.com/Noico-deadening-Automotive-Insulation-dampening/dp/B00URUIKAK/ref=pd_aw_fbt_1/142-5099796-2266522?pd_rd_w=T79EB&pf_rd_p=5a17cc08-b2ad-4a9b-927b-db1f6ea04791&pf_rd_r=PJ4D91WDH4GJA829T9KQ&pd_rd_r=7834d1ae-0b14-489a-b893-5bd904d0957a&pd_rd_wg=Cf8UU&pd_rd_i=B00URUIKAK&psc=1
-
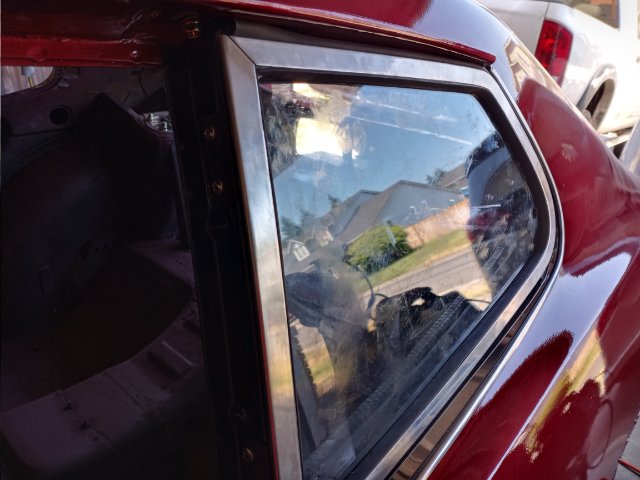
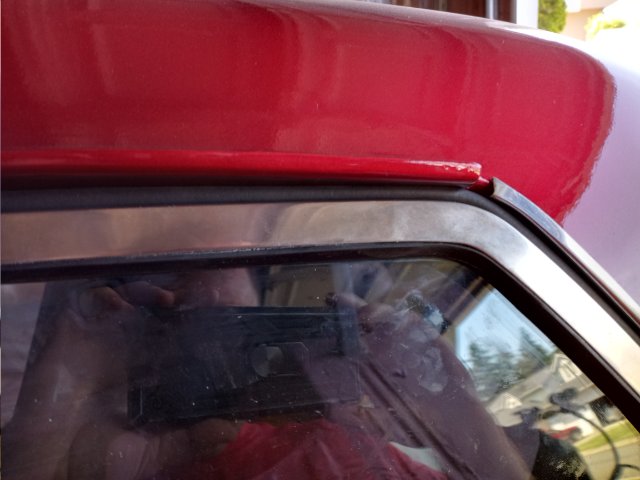
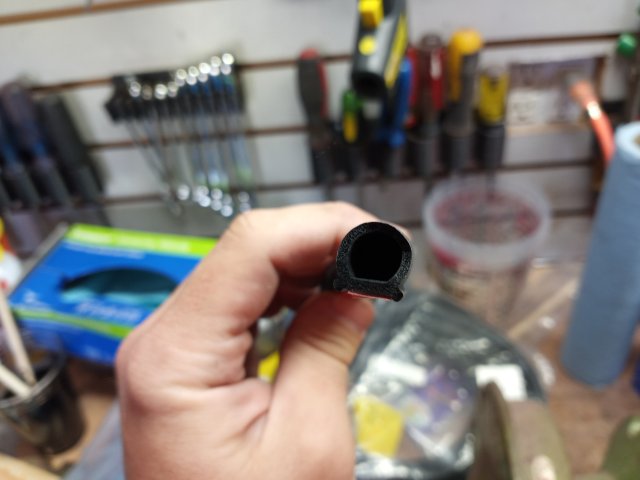
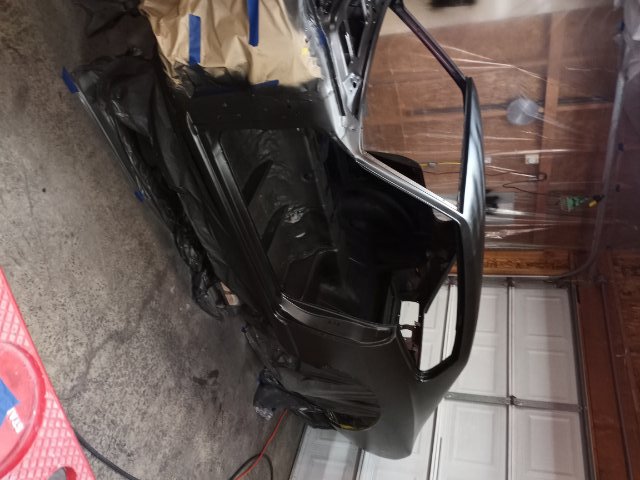
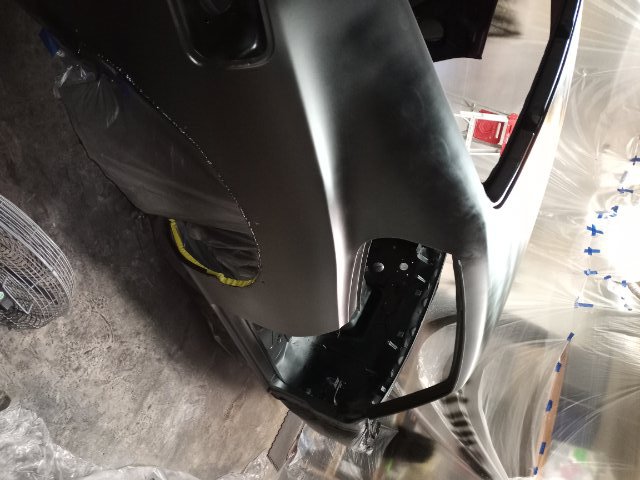
Its by no means a pro job but I'm super happy with it. I did multiple wipe downs with wax and grease remover and tacked it right before. I had the garage door open about a foot and had multiple fans pulling exhaust out and then I wetted the floor (after I swept and mopped for almost a whole day). The worst part about it is knowing I got to do the rest of the body panels now. Well I got some more done. I mounted all the brake lines, master, booster, front cross member, some of the trim and got the driver 1/4 window in. For the 1/4 window I powder coated the upright and used all new hardware, replaced the seal that holds the window in and reused the body seal. Trying to save money while also getting the best bang, I searched and found a seal (d shape I think) that fits nicely. This should replace the 1/4 window and the top door seals. https://www.amazon.com/gp/aw/d/B0733TDRLB?psc=1&ref=ppx_pop_mob_b_asin_title
-
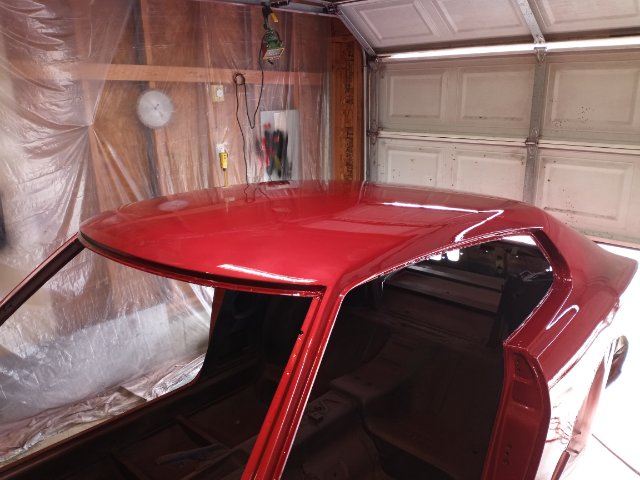
I'm going to wet sand and buff once I get the wheels on and can roll her out of the garage. That being said, I am still waiting on my rims after almost 2 years... I think I might have to get some temp rims.
-
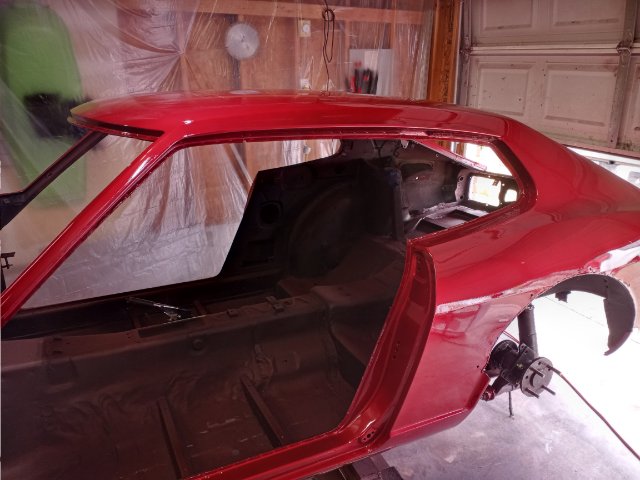
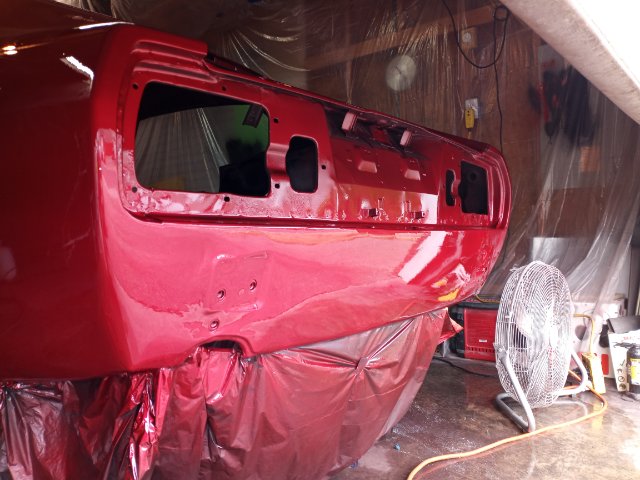
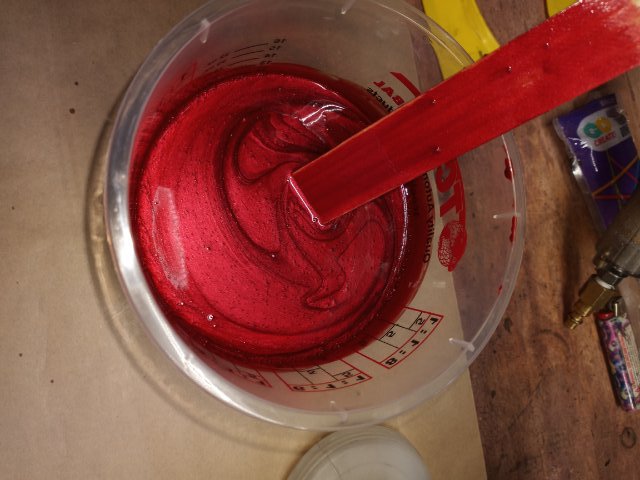
2 coats of TCP restoration shop fire red pearl urethane basecot over the black primer and then 4 coats of custom shop 2020 clear coat (only 2 in the engine bay). There are a few nibs here and there but for the most part it is very clean. Now to start doing the rest of the parts, interior, and wiring. I know every auto painter out there is cringing at the fact that I am painting the parts separately but I do not have the space to paint it all together.
-
Well, based on some other sites, I lowered my pressure, tightened up my fan and dropped my paint supply to almost none existence and it worked ok... almost like fogging on some powder coat... Anyways, I got the final coat of sealer on. I will start laying down my 2 coats of color and 3 coats of clear first thing tomorrow morning... wish me luck.
-
How does everyone paint the fuel filler area? I got it in black primer but I don't think I can get a good coat of metallic base or clear coat. Do yall just leave it black or o yall use like a detail gun of sorts?
-
Best 280z rear end for lots of torque
walkerbk replied to 280cummins's topic in S30 Series - 240z, 260z, 280z
Good luck with finding a rear end setup... if I were you I would switch to a solid rear axle setup. You will be hard pressed to find any IRS that can handle the torque. -
Front fender scraps from a flare installation
walkerbk replied to wingwalker's topic in Body Kits & Paint
No problem. I to am lacking on the body work speed but thats because I'm waiting for my rims to come in... -
Besides ccw, where do yall get wide rims in 4 lug? Felgen werk is giving me the run around after having an order in for over 1.5 years. I'm at the point where I can't move forward without rims and tires as I have to mount the rear fender flares. I'm going to start stripping all the body panels while I continue to wait or find an alternative.
-
What kind of flares are those on the rear? I looked through the 9 pages and didn't see a brand or name.
-
I have seen some people install double dins but i do not know how. Let me start by saying my car is in the process of being built (still in paint and body) so i cannot tell you if i like it but I bought a joying double din. The main brain box is a single din connected to the 9in screen via a 8in ribbon cable so I have much more mounting flexibility. This was the only way I figured it would work as I will have a vintage ac system along with a shifter cable going through the area. This is like the one I bought. https://www.joyingauto.com/joying-8-single-din-android-8-1-0-car-multimedia-player-4gb-64gb.html
-
Question about potential engine swaps
walkerbk replied to Projectcarguy's topic in S30 Series - 240z, 260z, 280z
My 5.3ls with the 4l60 was around 300hp and would spin wheels in 1st and 2nd. I could down shift at 50 and still break the tires loose. At the 500-600 power range you are going to have to upgrade the rear suspension and drive train along with a lot of body mods to stiffen the shell (I hade some broken spot welds along the frame rail). I am currently building a 6.0 and may supercharge it if I ever get bored of the 500hp range. I am also going wide body to get some 295s under the rear. -
Can't Remove Differential Fill Nut 78 280Z
walkerbk replied to Mayolives's topic in S30 Series - 240z, 260z, 280z
I did this once and learned that you always remove the fill plug first. When I did mine, I had to weld a nut on the back of the diff plug and then using a cheater bar, jack the car up, put the bar on, and then lower the car (plus some jumping if I remember correctly). Finally cracked the seal. -
Front fender scraps from a flare installation
walkerbk replied to wingwalker's topic in Body Kits & Paint
I have exactly what you need in my shed and am located in spanaway wa. I cut off the parts and kept them hoping to use "datsun steel" for patches but ended up just getting clean steel for patches. I don't know if its worth shipping but I'm only about 200 miles away. -
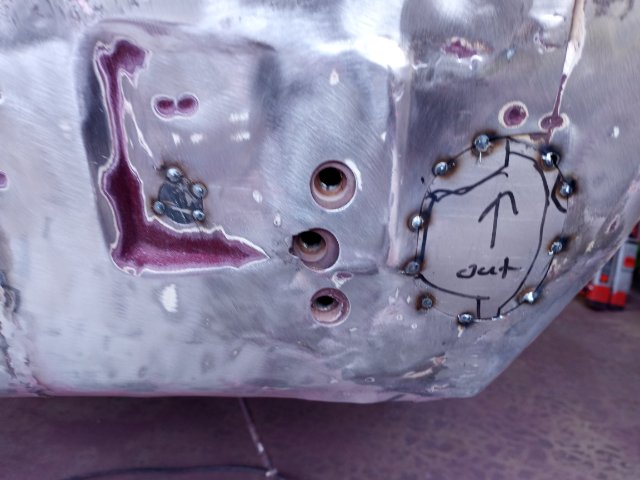
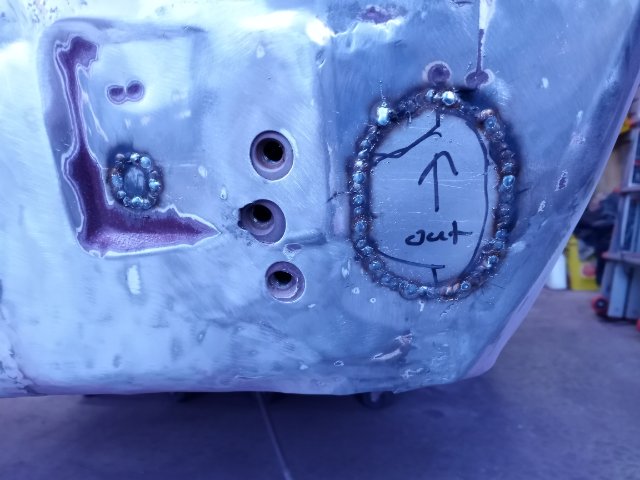
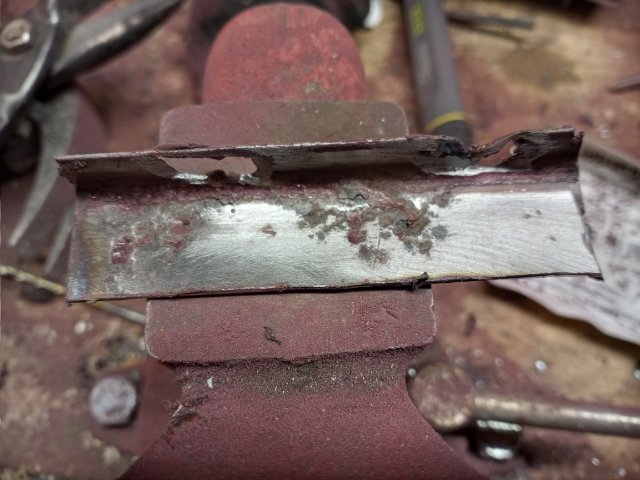
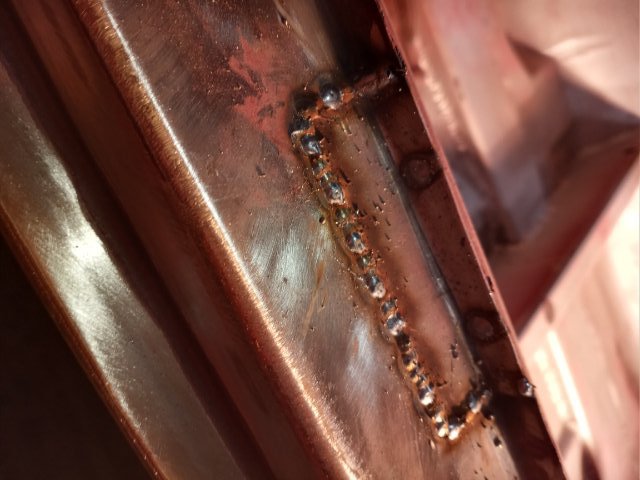
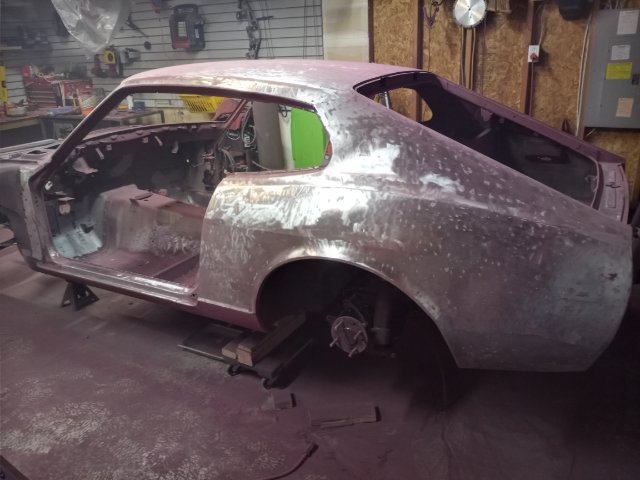
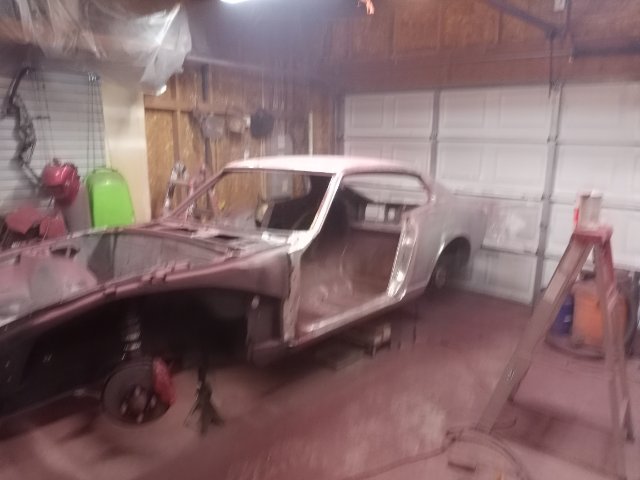
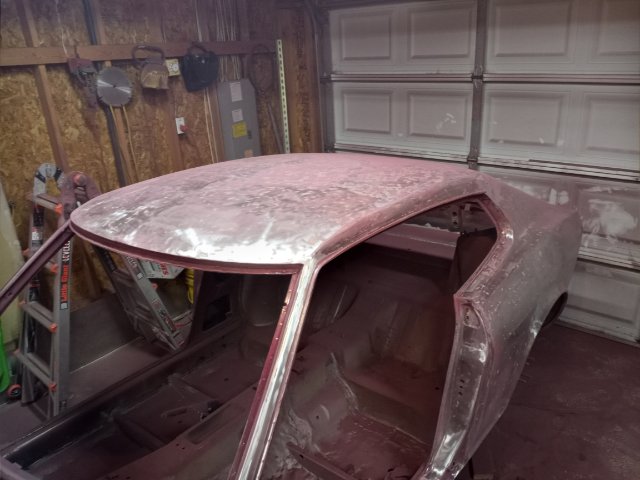
I have been able to get a lot done on the car over the last week. I decided to go ahead and order the Z Speed fender flares from Fiberglass Mafia. I figured if they were not exactly what I wanted I might be able to cut them down to make them ZG Wide Flares. Of note, I only bought the rears as I still plan on using the rocket bunny front end. I emailed them my request and they responded with an extra option on the website in less than a day. Very quick customer service. https://www.fiberglassmafia.com/S30-240z-260z-280z-Z-Speed-Fender-Flares--Rear-Pair_p_61.html The weather is going to be a little warmer this weekend so I decided to start preping for epoxy primer. It is going to be in the 60s still so I will through the heater in before and after spraying as I have to have a minimum of 70*. I have the main body stripped down and am just getting the finishing touches cleaned up. I have been using some paint stipping disk I got from Amazon and have been very happy with them. They work very quickly, create minimal heat and last a long time. I have only gone through four on the main body so the 10 that I bought should do the entire body. https://www.amazon.com/10-Pack-Grinders-Removes-Strips-Cleans/dp/B07YKMPRBC/ref=pd_rhf_ee_s_rp_c_2_0_2/145-6868535-7298507?_encoding=UTF8&pd_rd_i=B07YKMPRBC&pd_rd_r=077cf418-53f2-45de-8f35-503ed1d6a6d9&pd_rd_w=AvZtb&pd_rd_wg=ZtqOv&pf_rd_p=45ea3989-28e2-45c9-97ac-7e99f613a91b&pf_rd_r=DGZ2407QX3QGY50QZJ19&psc=1&refRID=DGZ2407QX3QGY50QZJ19 I did during stripping the body found one last rust spot that could not be cleaned out. so I decided to do a quick repair along with patching the other rear bumper area. I am hoping to get the paint booth set back up tomorrow and spray epoxy either tomorrow afternoon or Saturday morning.
-
A musician's therapist (The $300 Z)
walkerbk replied to Zetsaz's topic in S30 Series - 240z, 260z, 280z
I have removed my windshield 3 times since replacing the gasket almost 10 years ago and have always reused it. I just push it backwards towards the front of the car softly with some screw drivers (or soft plastic bike tire mounting things to keep from cracking the glass by accident). Work your way around the glass and it will slide out after you get about half way around. -
@calZi have read that thread at least a 100 times. They fit very nicely but I was looking at their other kits and possible fitment on a 2+2 (I think the lines are the same, just front to rear distances are different)