walkerbk
-
Posts
227 -
Joined
-
Last visited
-
Days Won
10
Content Type
Profiles
Forums
Blogs
Events
Gallery
Downloads
Store
Everything posted by walkerbk
-
So i was told that i would receive a shipping invoice via email on or around 01Jun19 and i didn't. I called them on or around 10Jun19 and they said it had already shipped and then provided me with the shipping information. not a big deal, as they did ship it on 1-3Jun19. Off the top of my head, i do not remember the name of the company that they shipped it through but it was not your ups/Fedex company (probably because of the size). the box arrived with no noticeable damage and they did an excellent job on packing (in my opinion). The parts were all wrapped in at least 4 layers of good bubble wrap (not the cheap thin stuff) and the parts had a little room to move within the box. My wife was going to check the fitment of the parts however she just had a death in the family so she is flying back to Texas for the next little while (and im out of the country for a while). It did take her like 30 minutes just to cut the bubble wrap off there was so much of it. there was damage on the front bumper along the leading edge near the middle. There was a crack in the gel coat which went into the fiberglass but it should be an easy fix with a few layers of fiberglass on the back for reinforcement and then fixing the gel coat. I'm hopping that she sends me some of the photos prior to leaving for Texas. If she does, ill post them. If someone is interested in the fitment and is in the Seattle Washington area let me know and you can come check them out.
-
Bump
-
@Jboogsthethug yes I am. Currently holding over in an airport on my way to the middle east. Just called the company because I hadn't received anything other than an order confirmation. They were very nice and informed me that my order is currently scheduled to ship on Monday (10jun)
-
Will do. I have left for the year but my wife is going to get them and tape them in place for me so I can see myself. I'll share what she sends and once I get back (in a year) I'll give as much information as possible.
-
260z 2+2 door interchangeability
walkerbk replied to VillageIdiott's topic in S30 Series - 240z, 260z, 280z
Only interchangeable parts are in front of the doors (windshield, hood front fenders? And some suspension parts (springs are heavier weight). -
I dont know if anyone has seen these guys but I just found them and decided to take a gamble on them. The kit looks to be a rocket bunny knock off. Once it comes in I'll get some photos and post them. https://carbonfiberhoods.com/vsaero-frp-tkyo-wide-body-kit-gt-datsun-240z-s30-1970-1973-106078.html
-
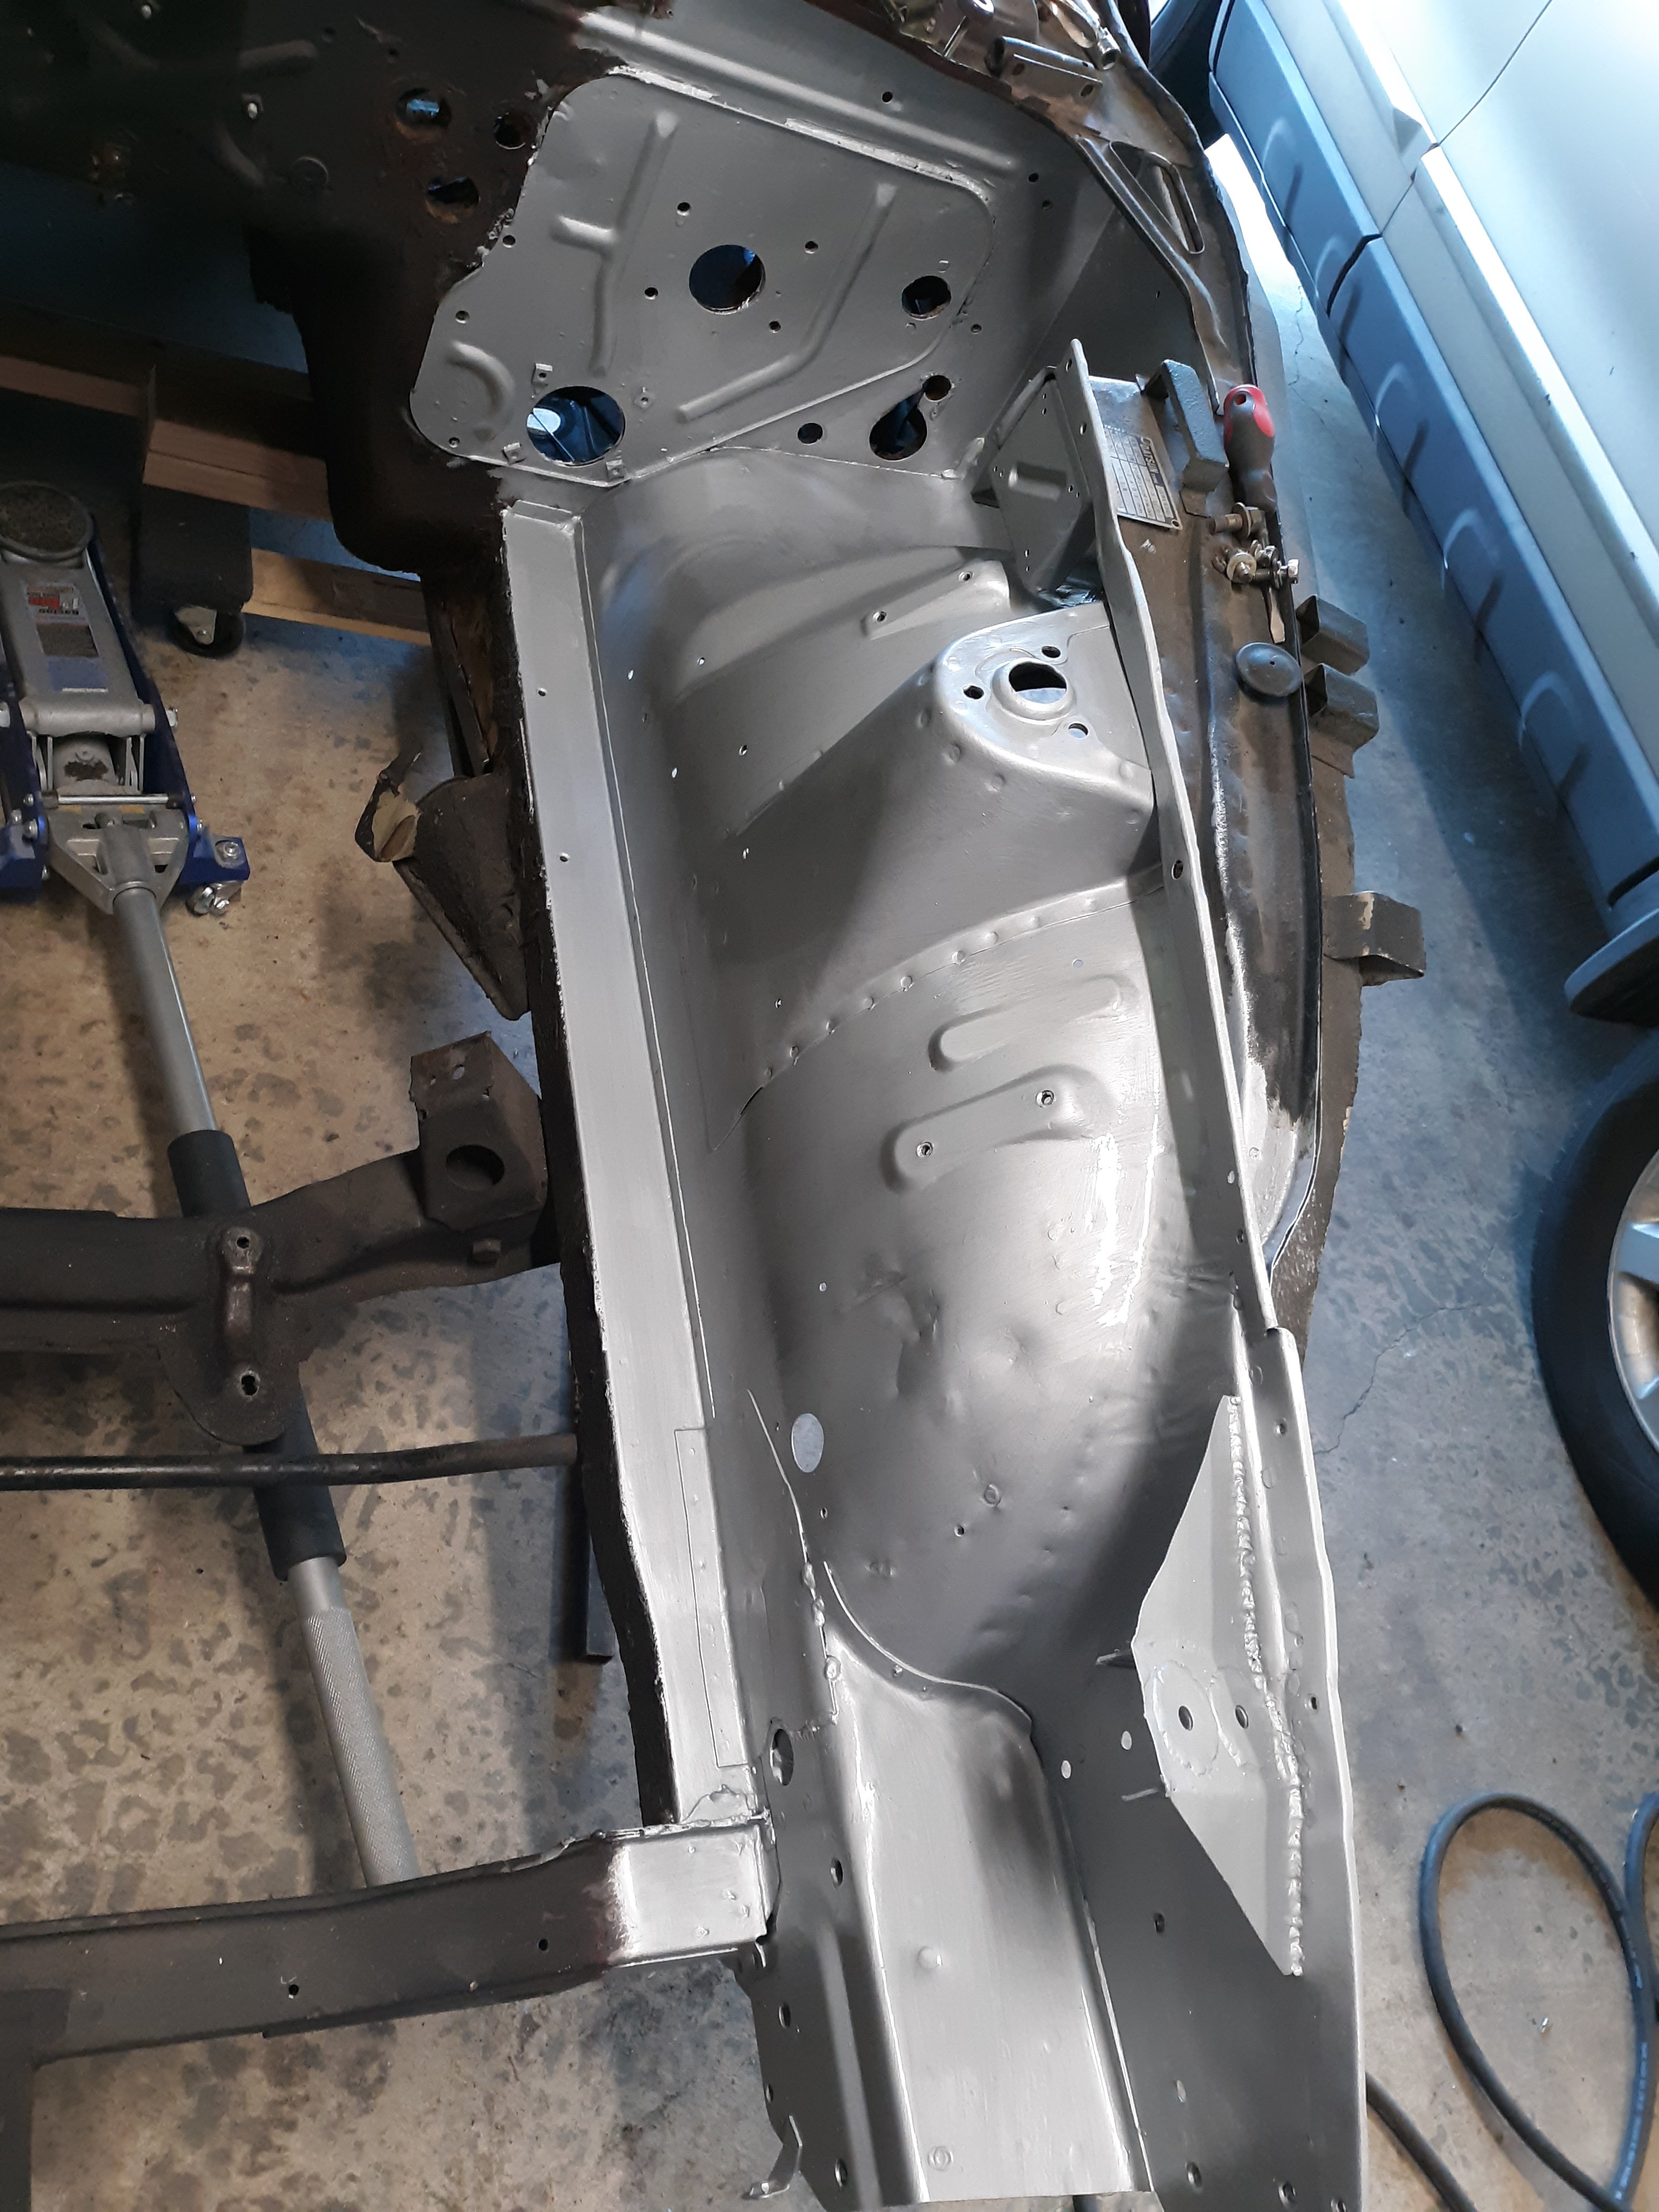
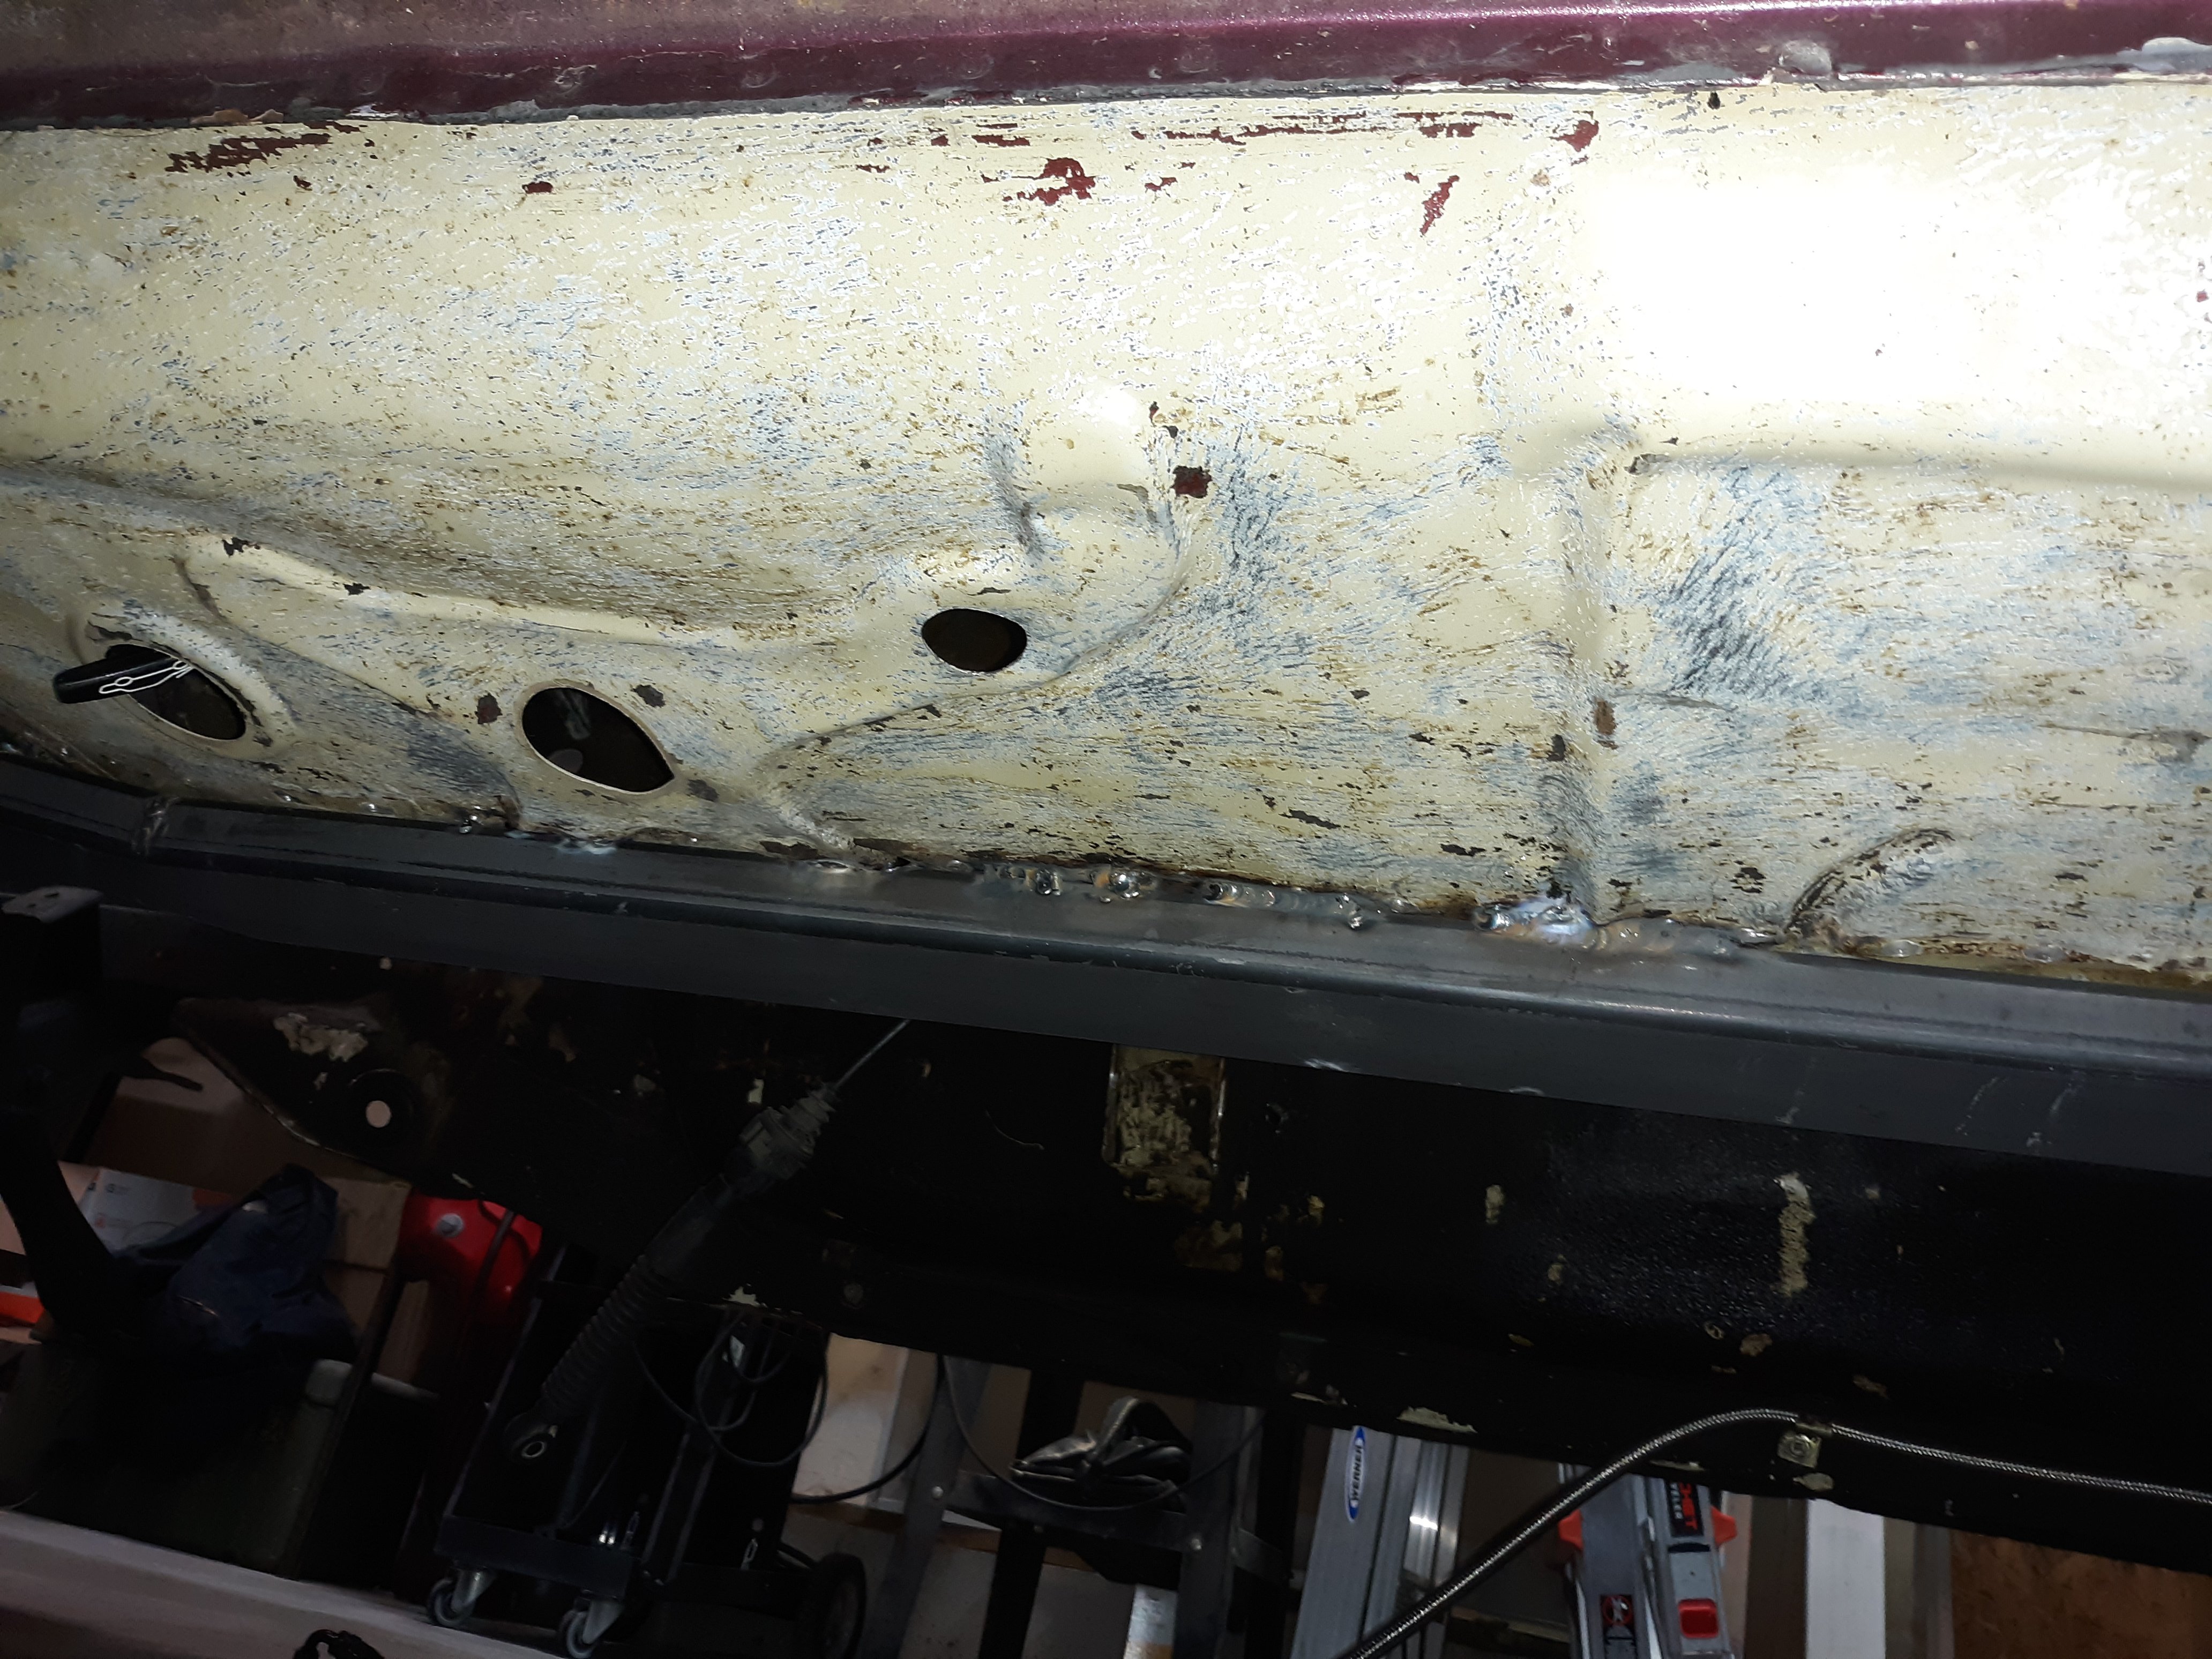
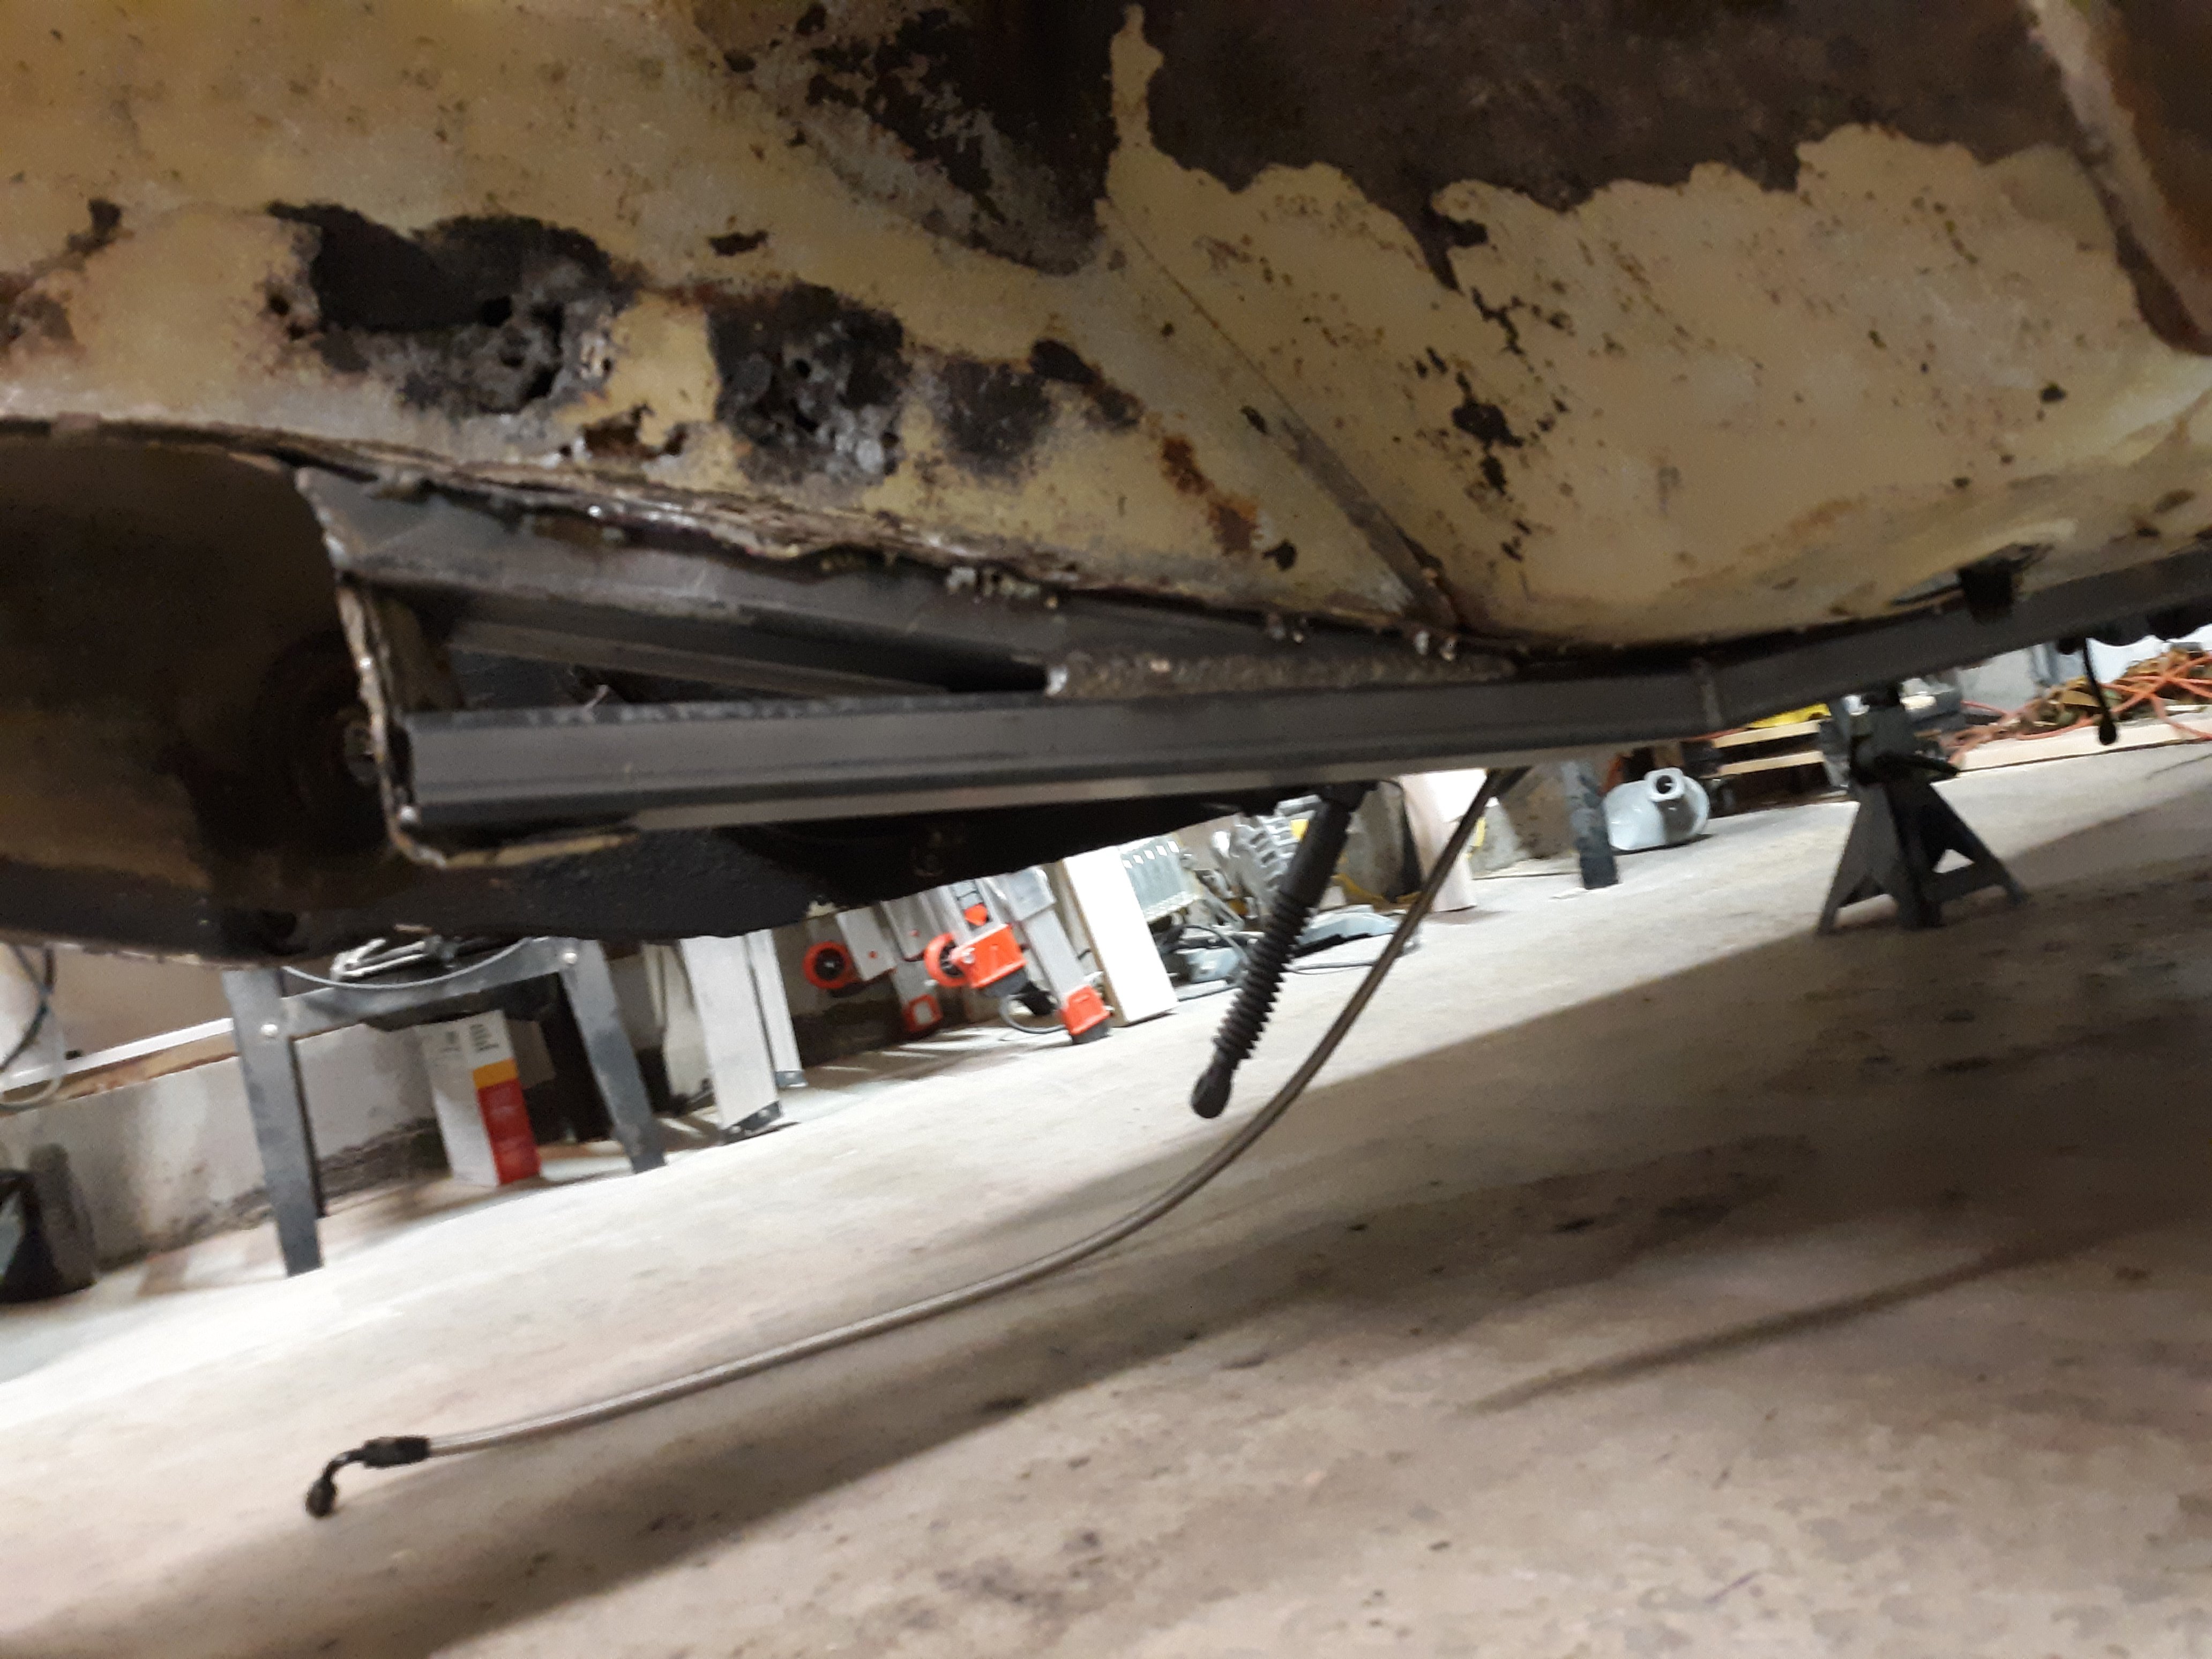
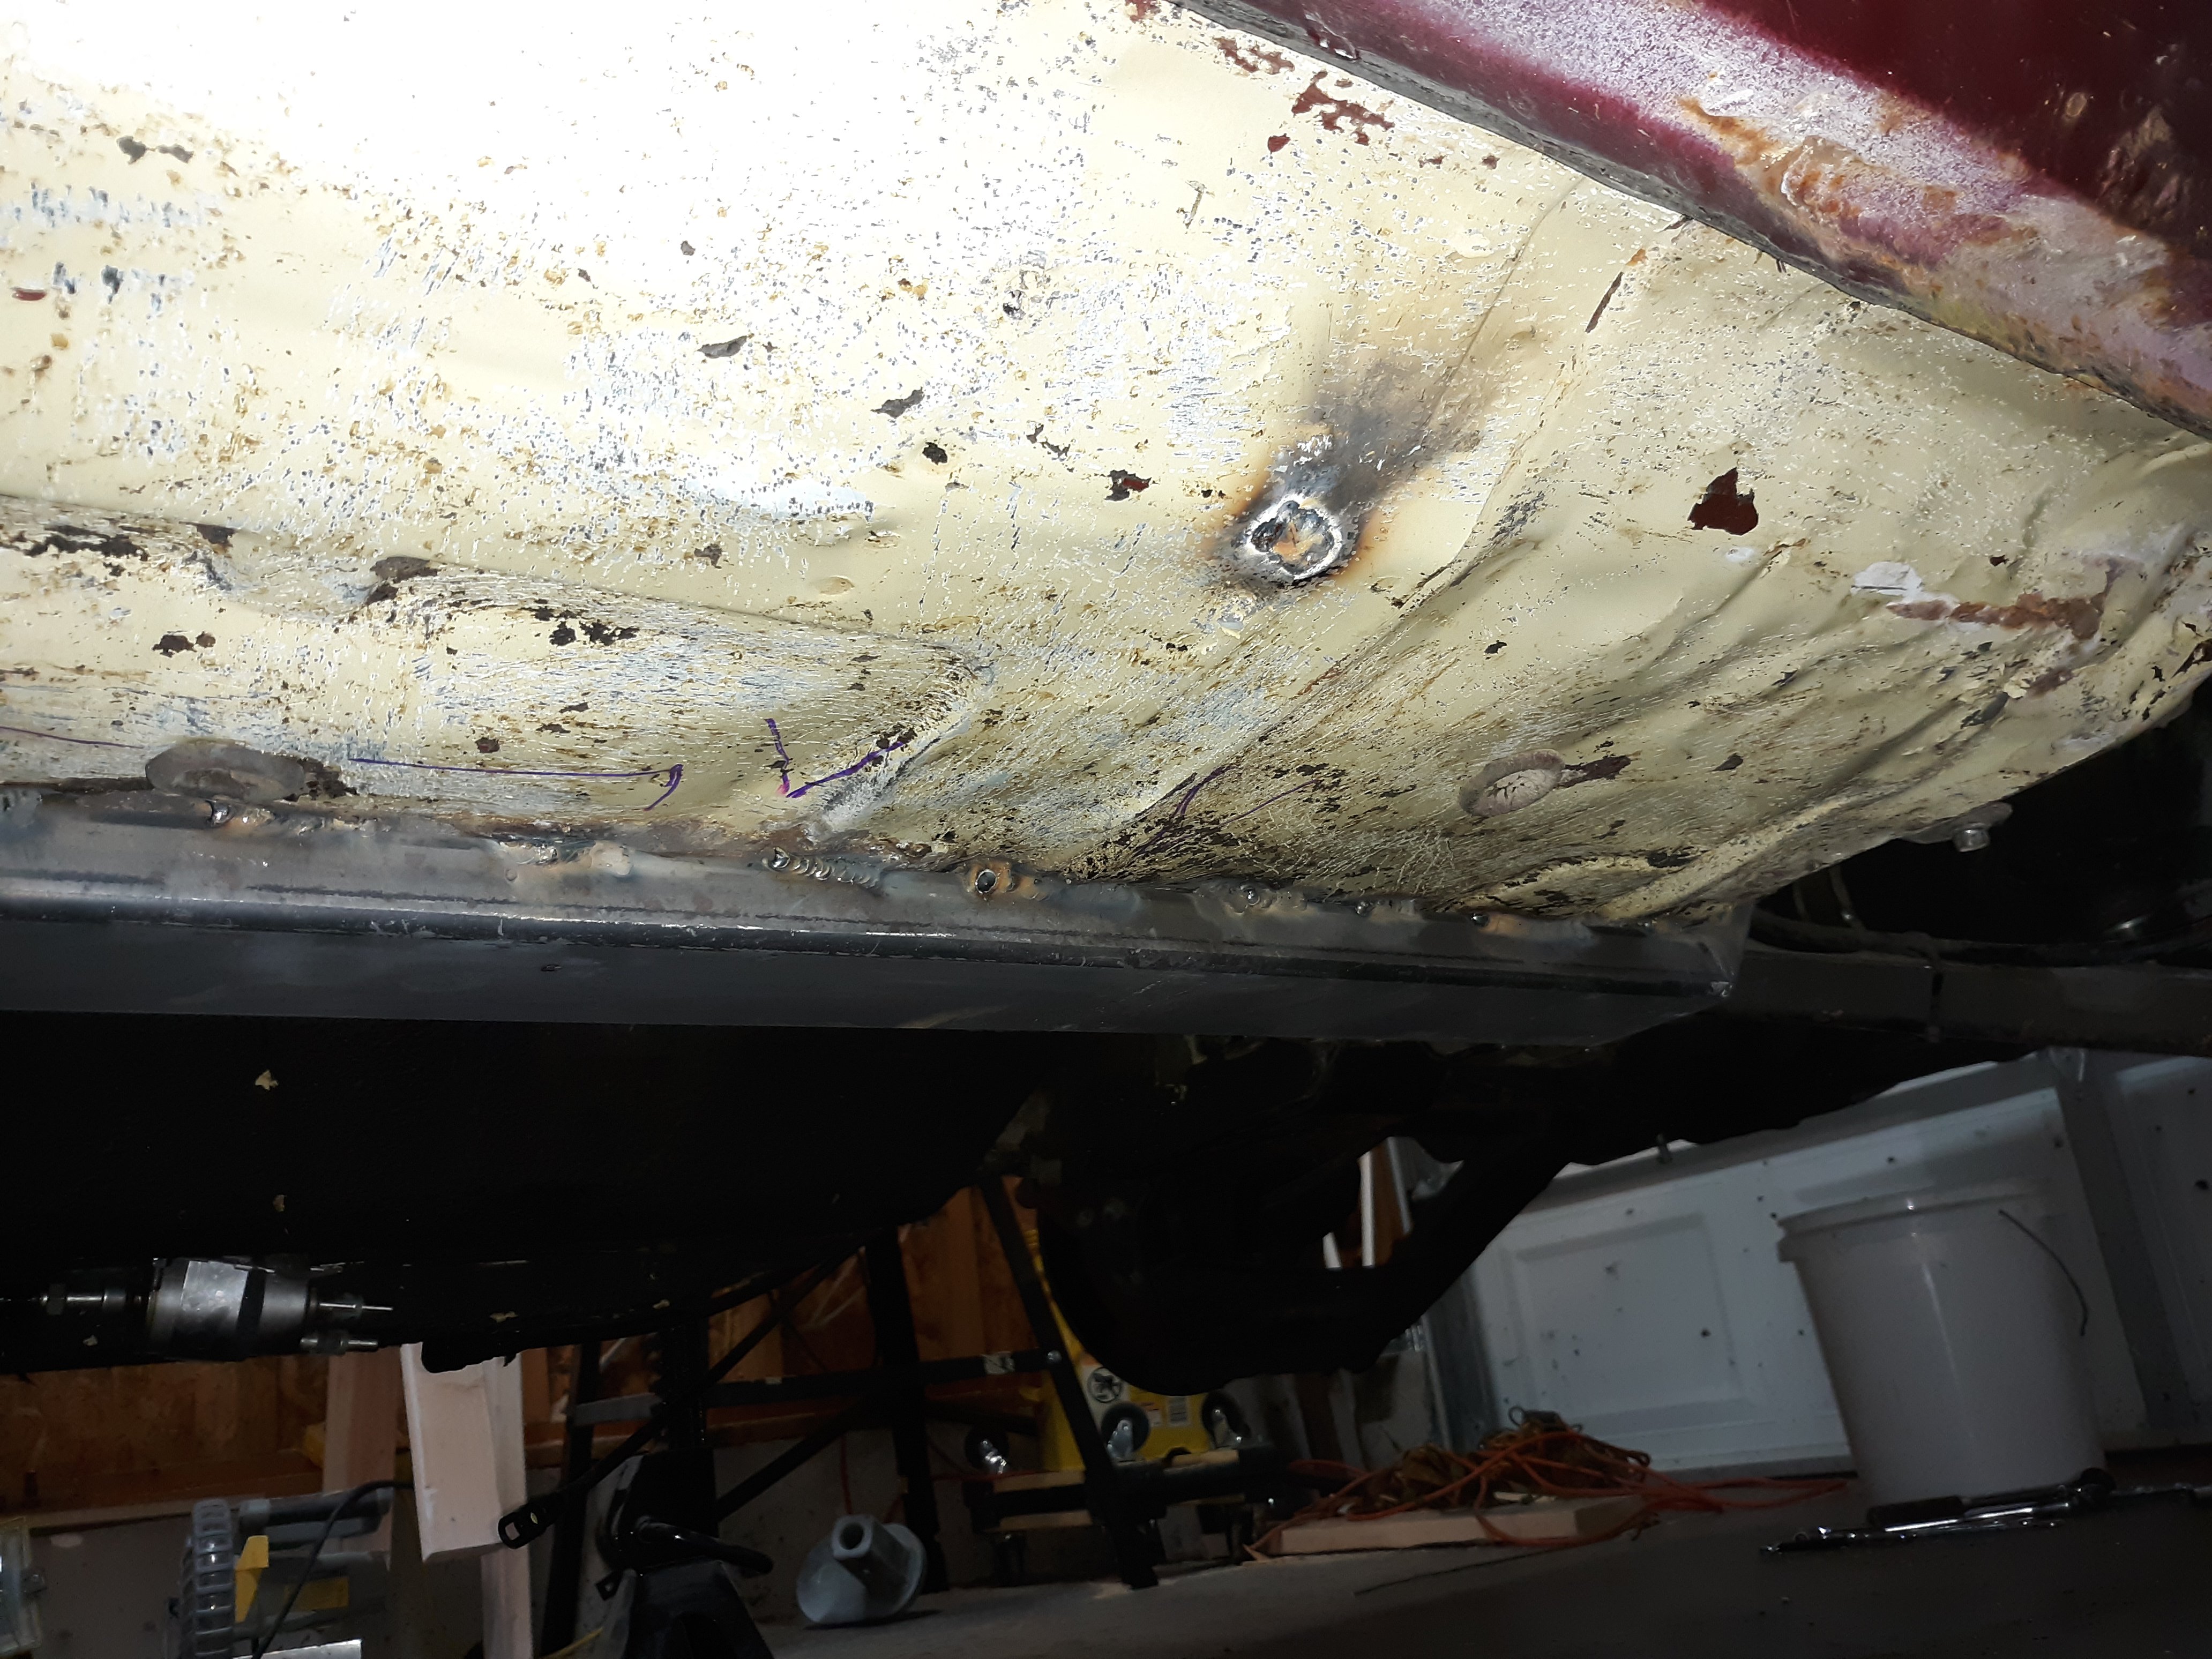
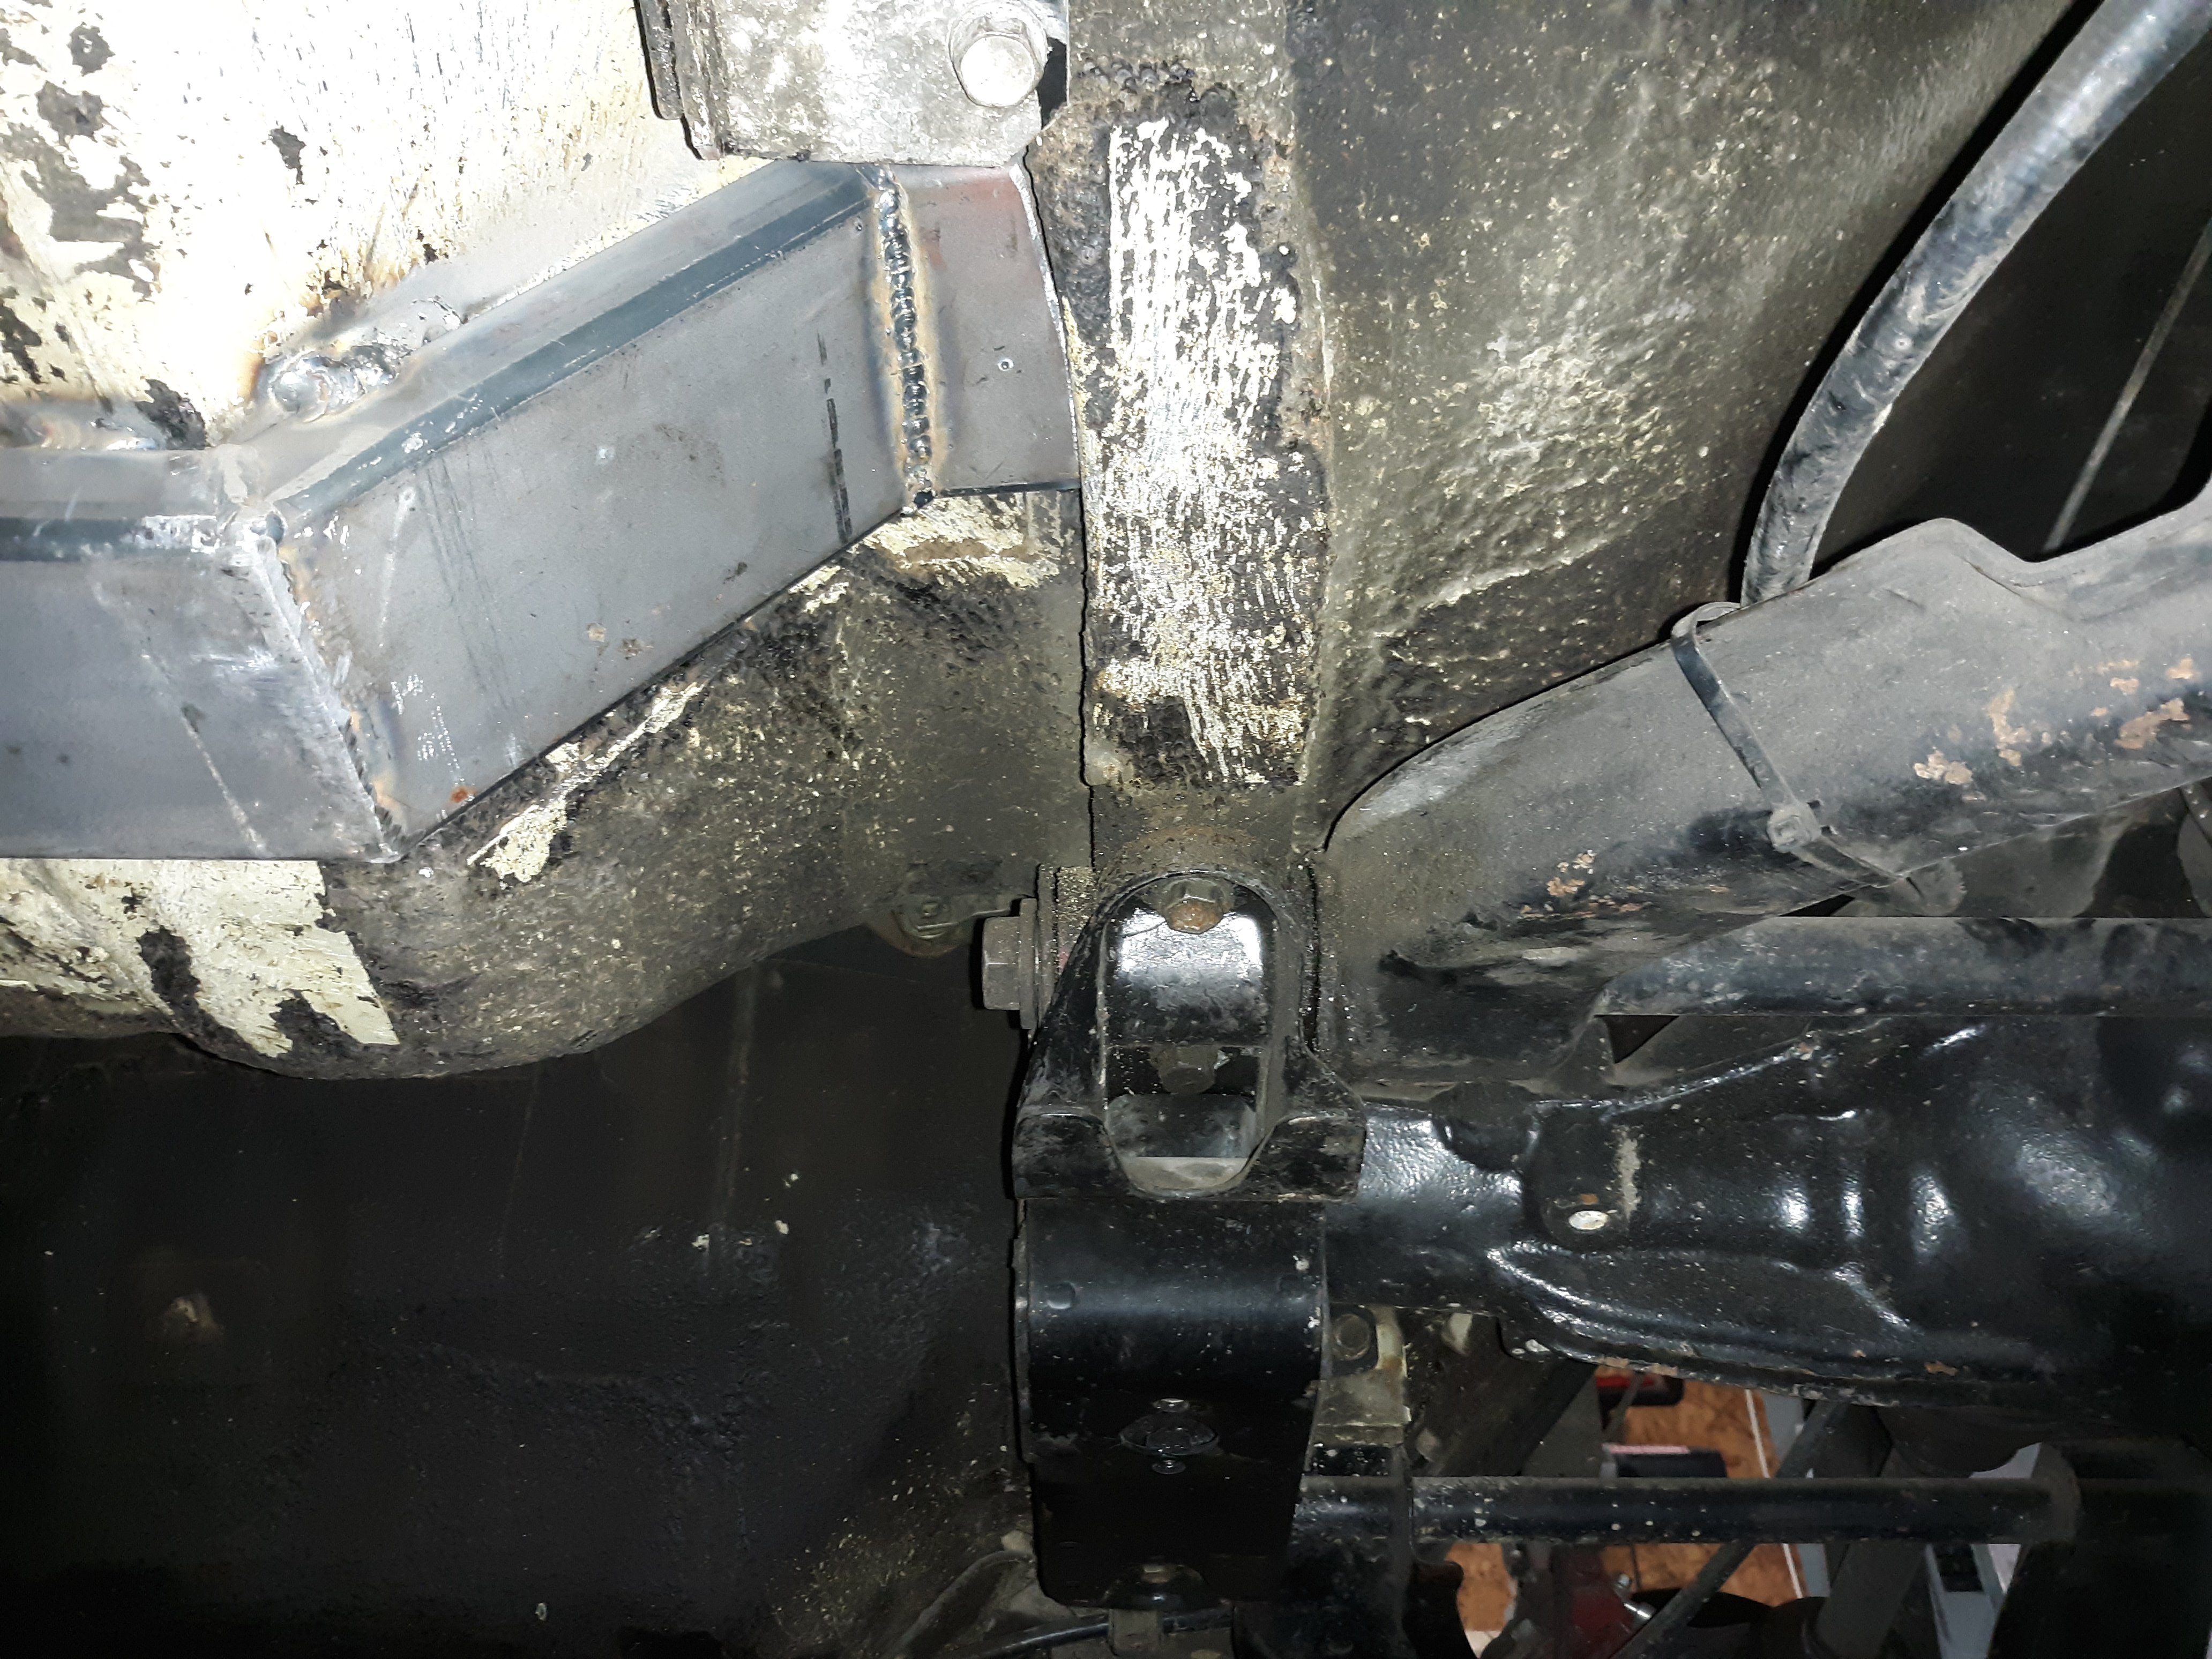
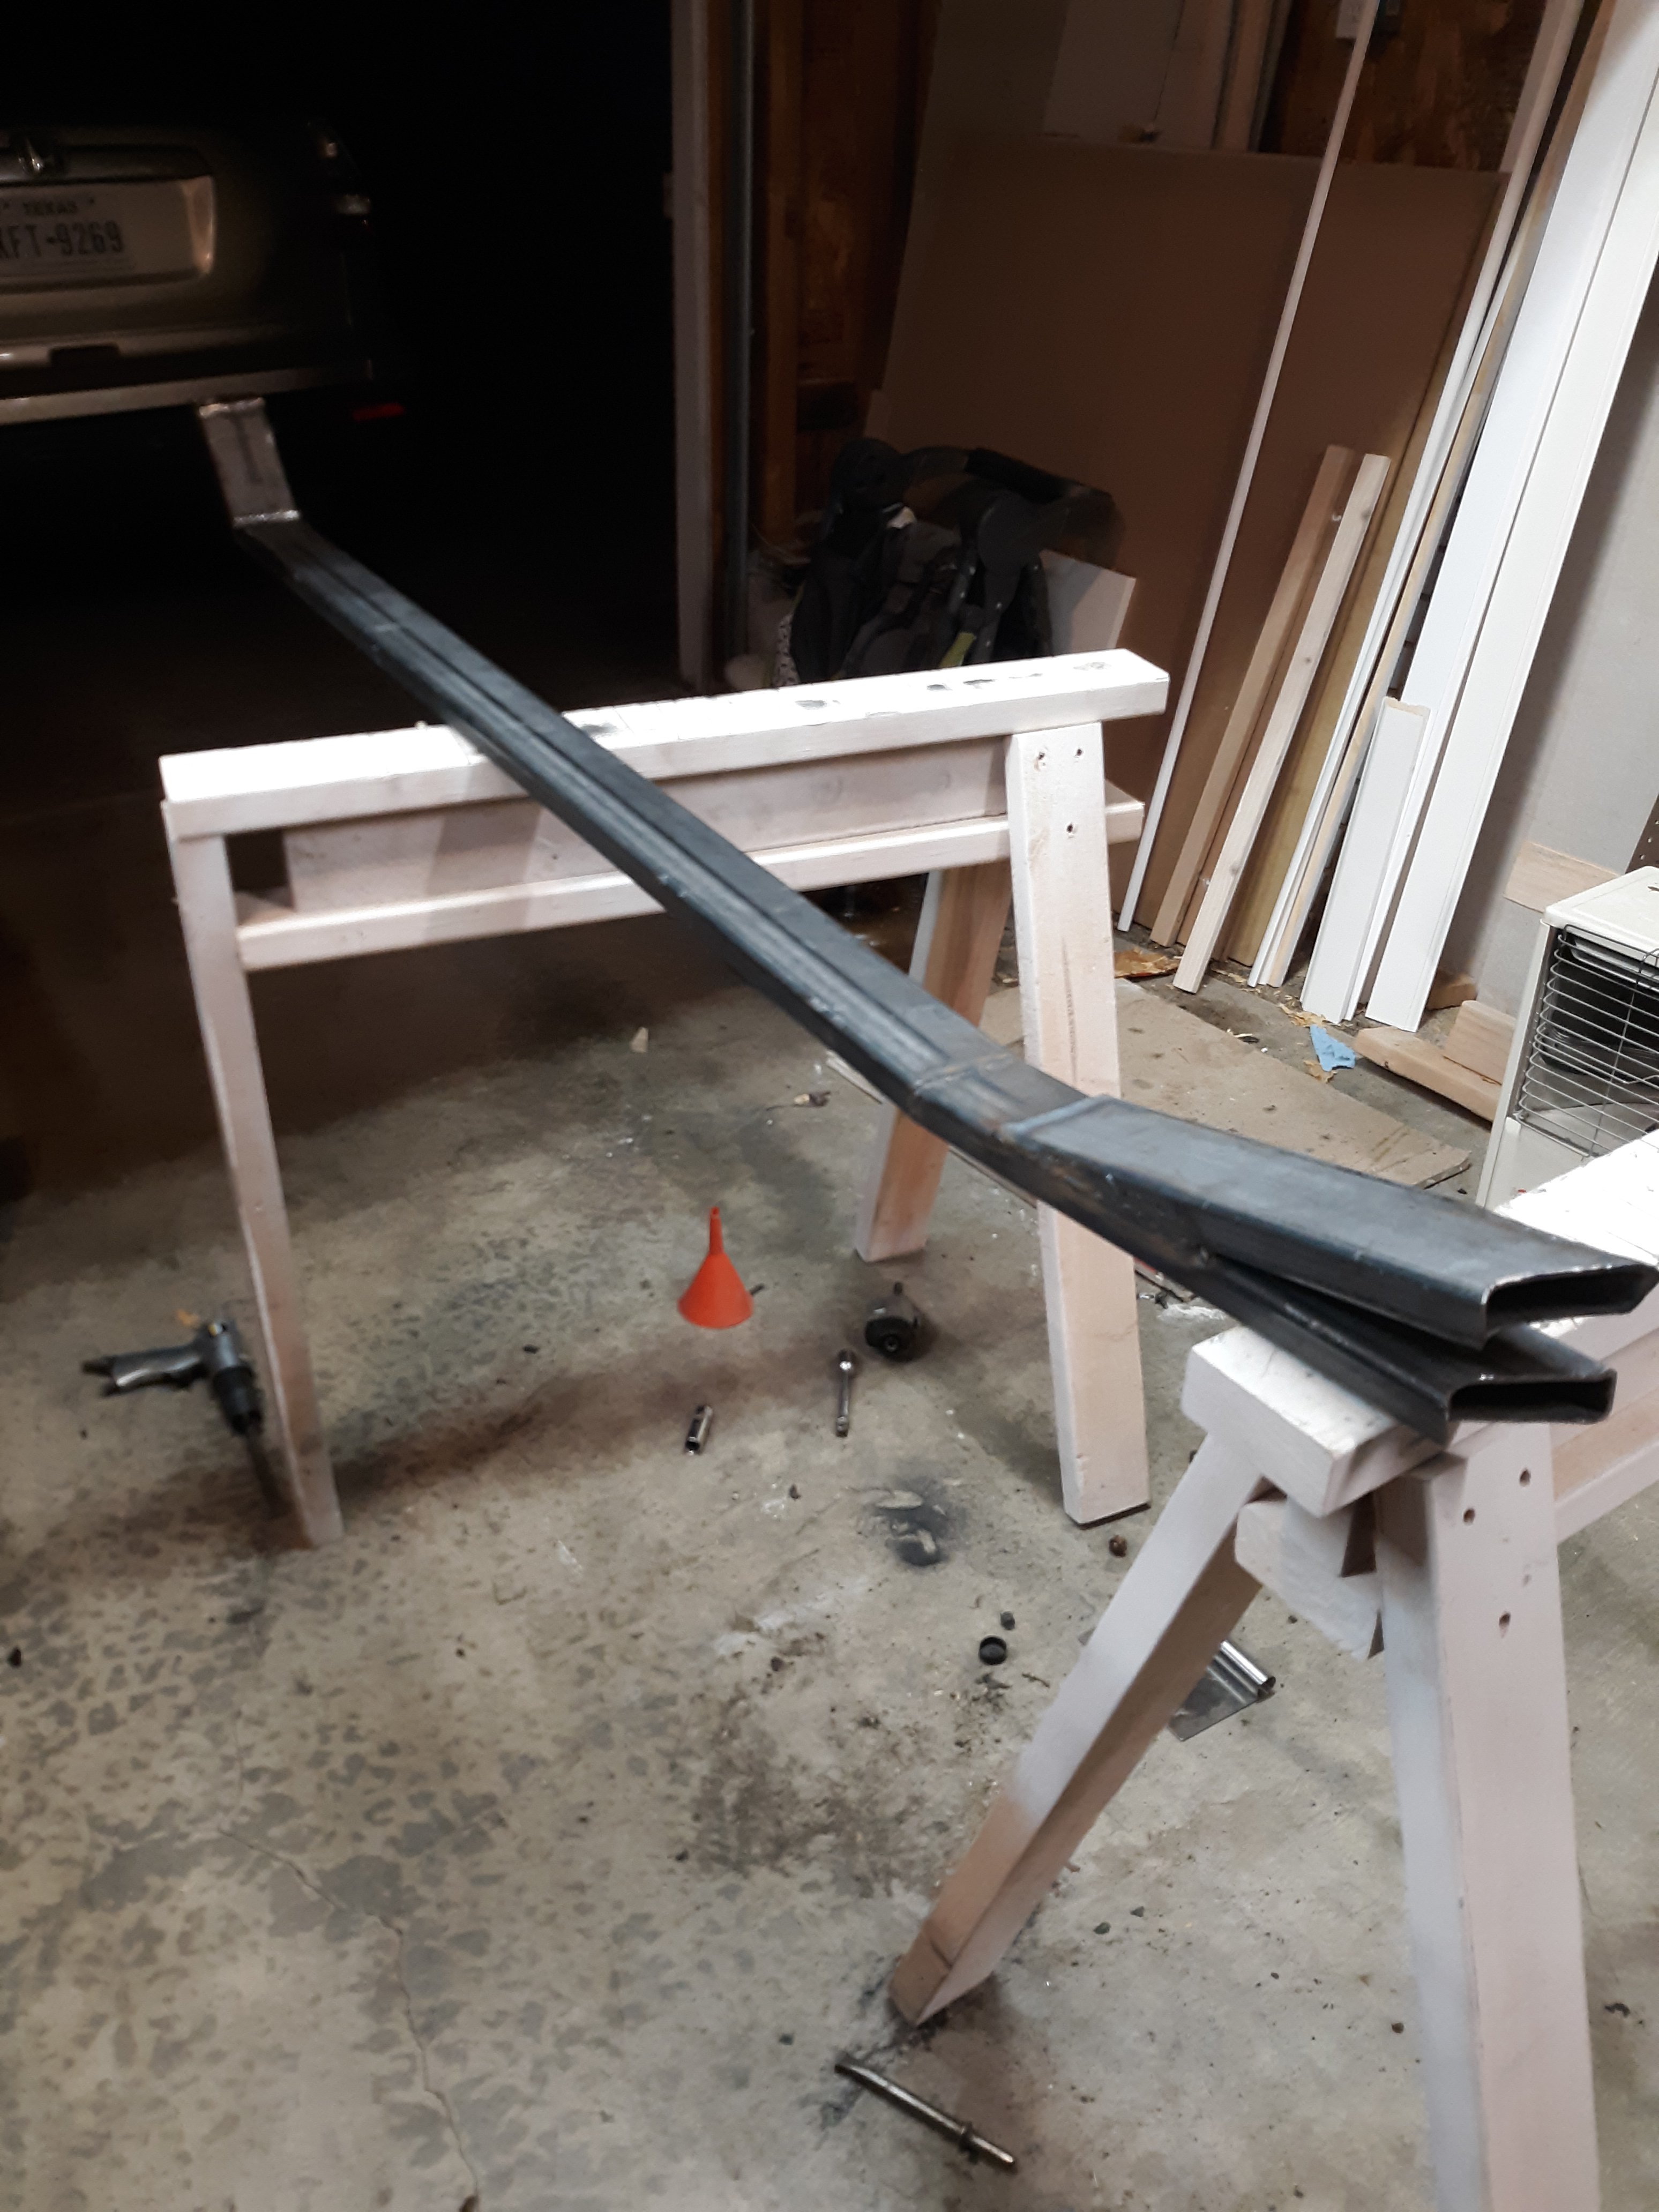
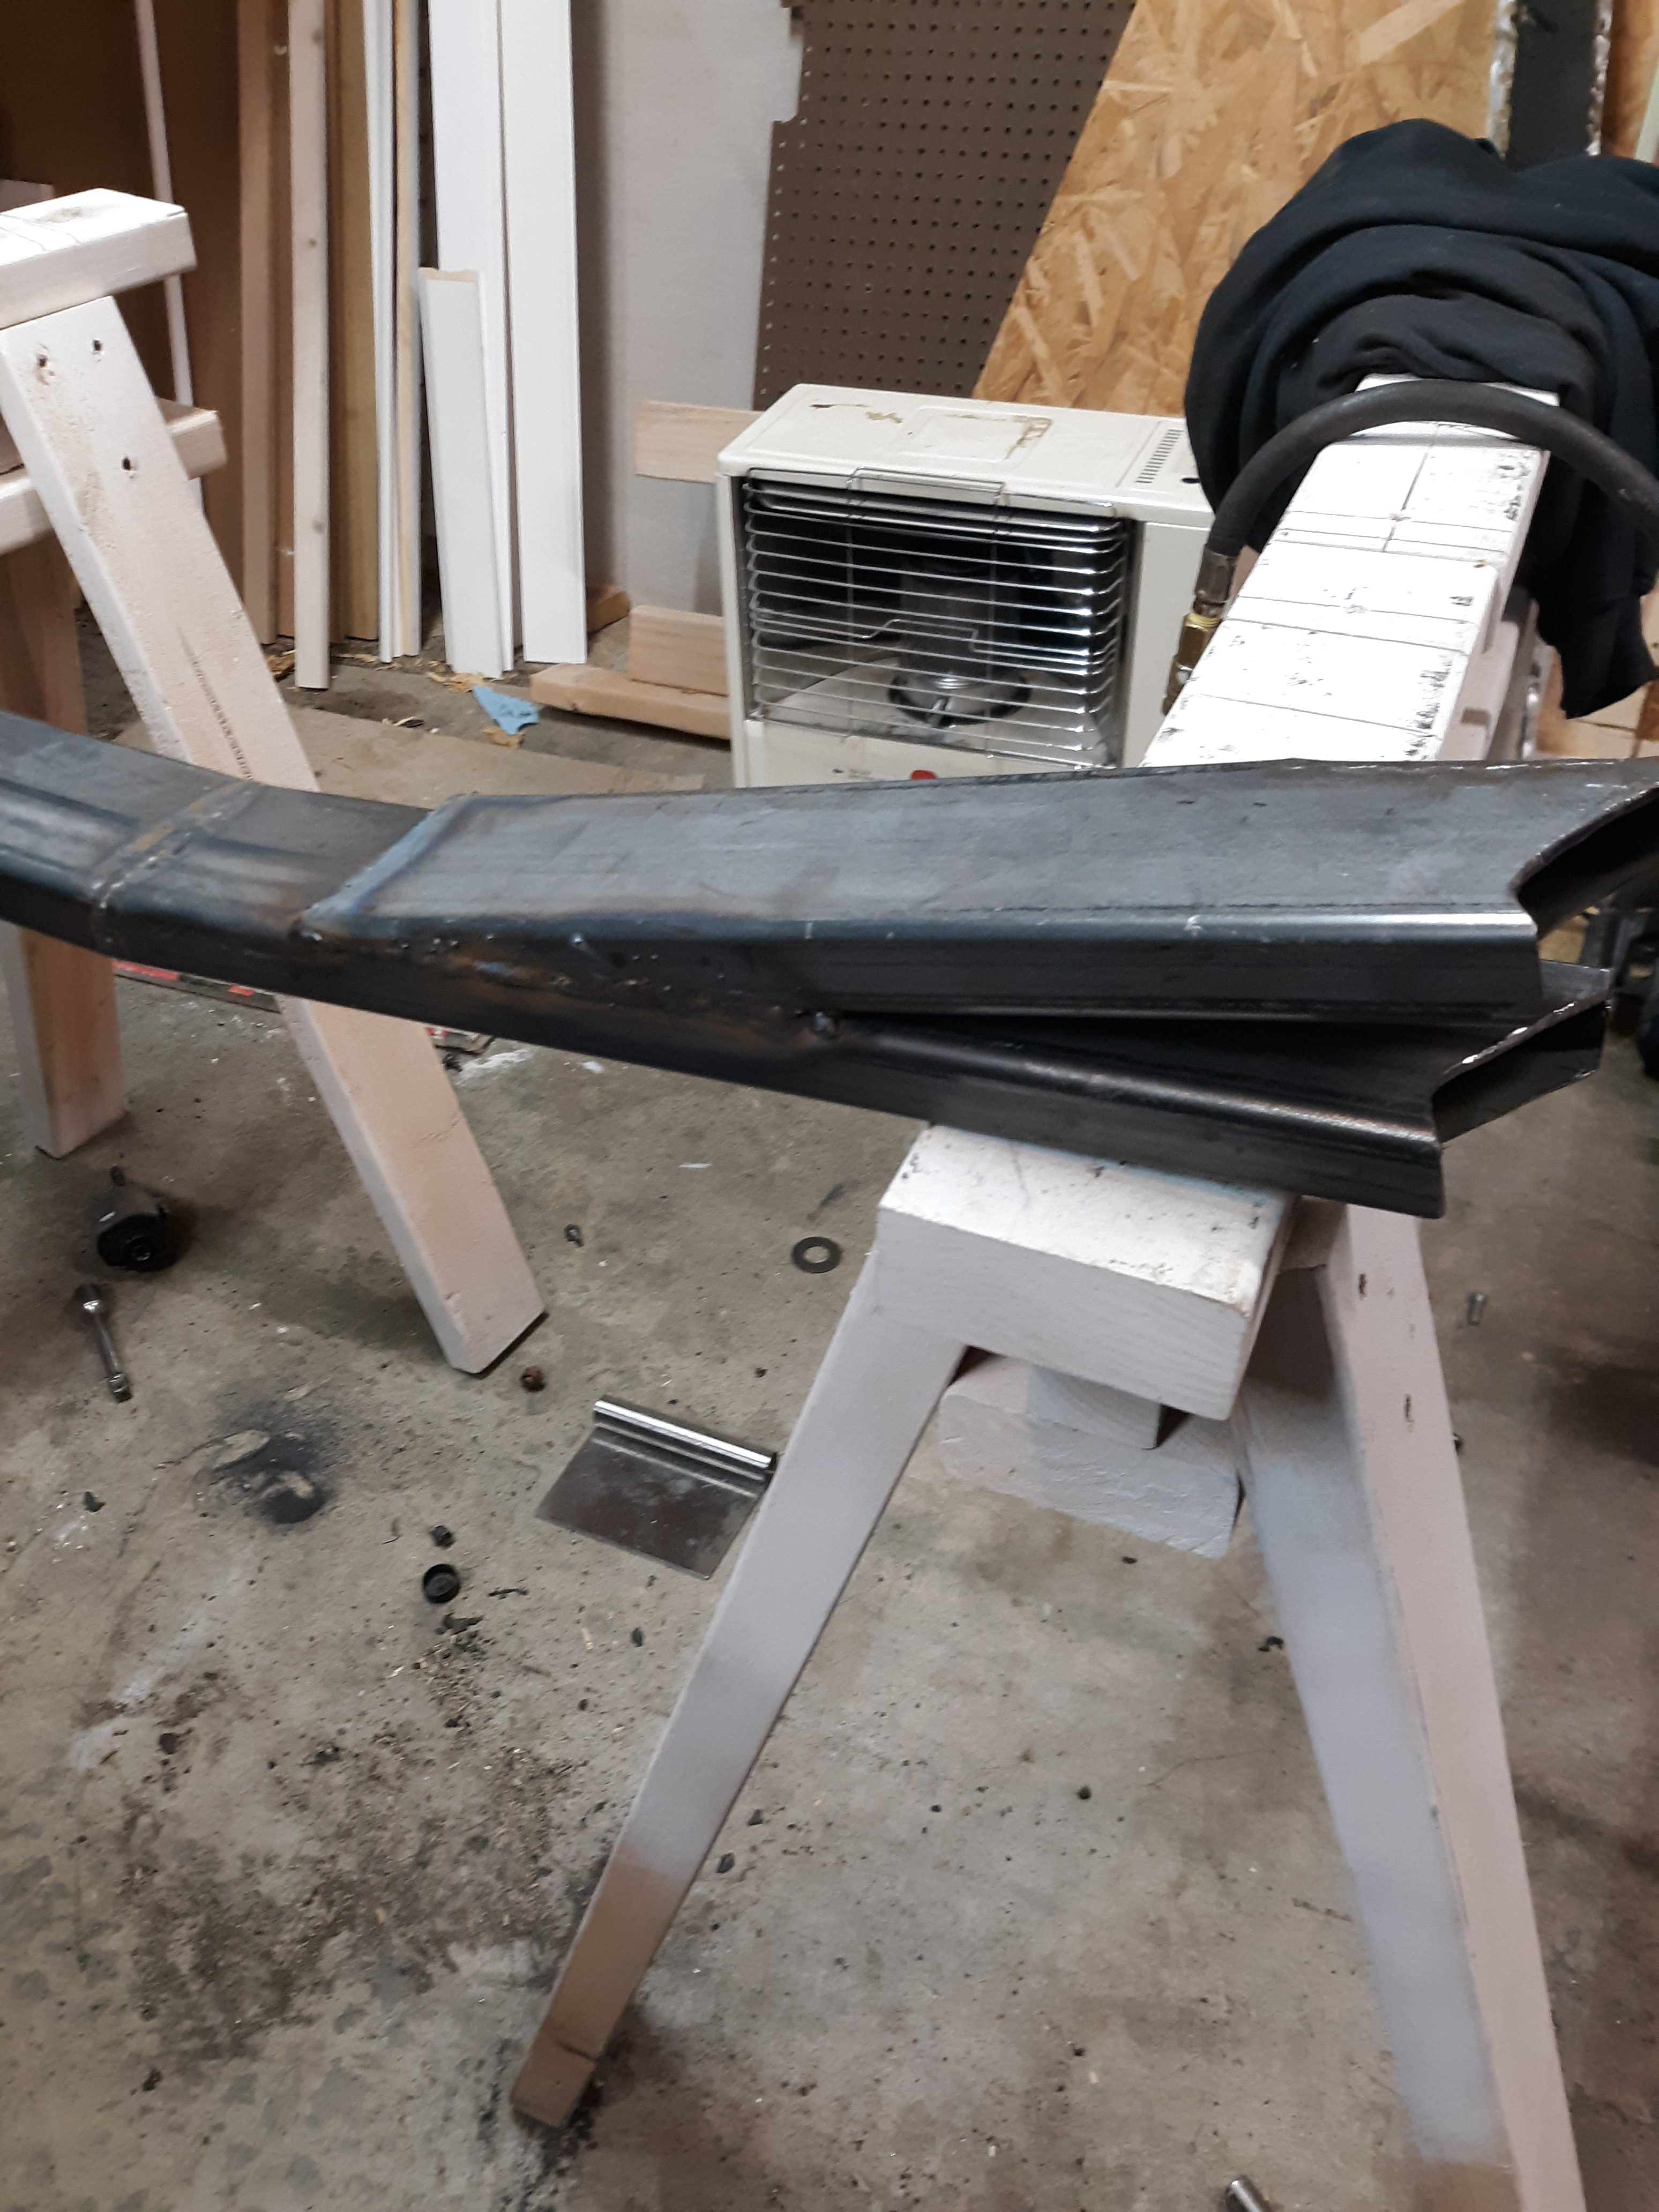
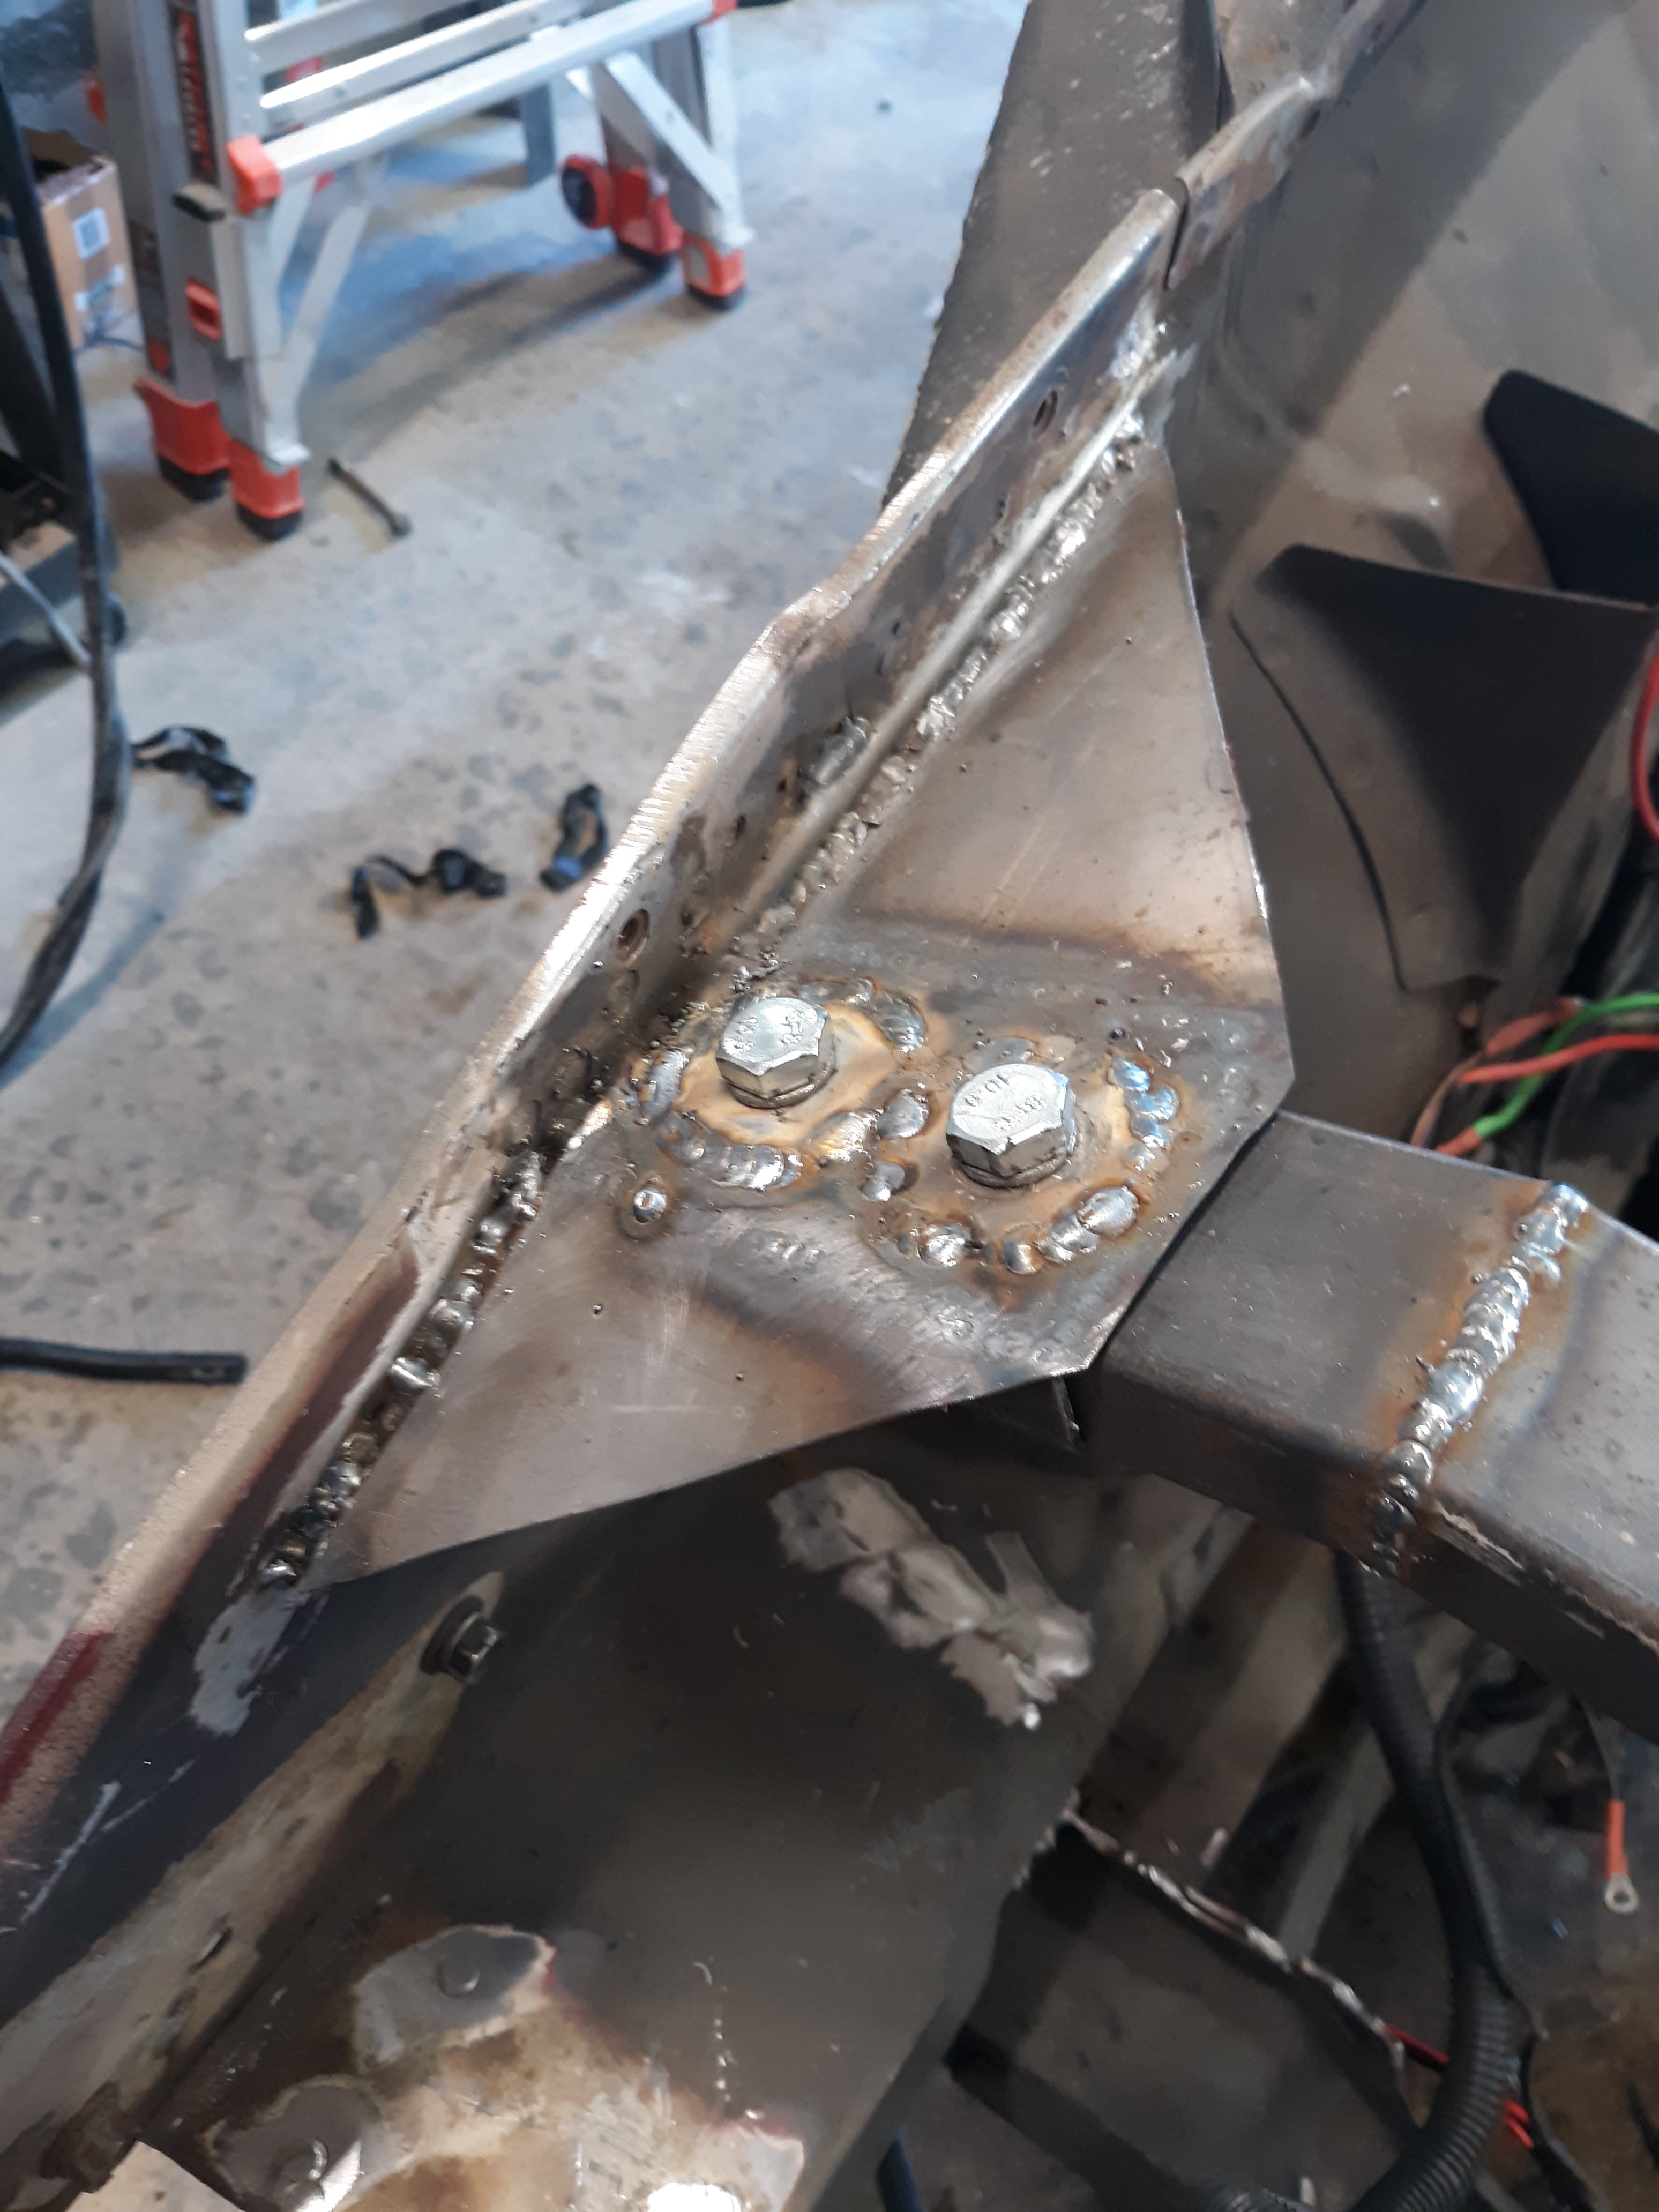
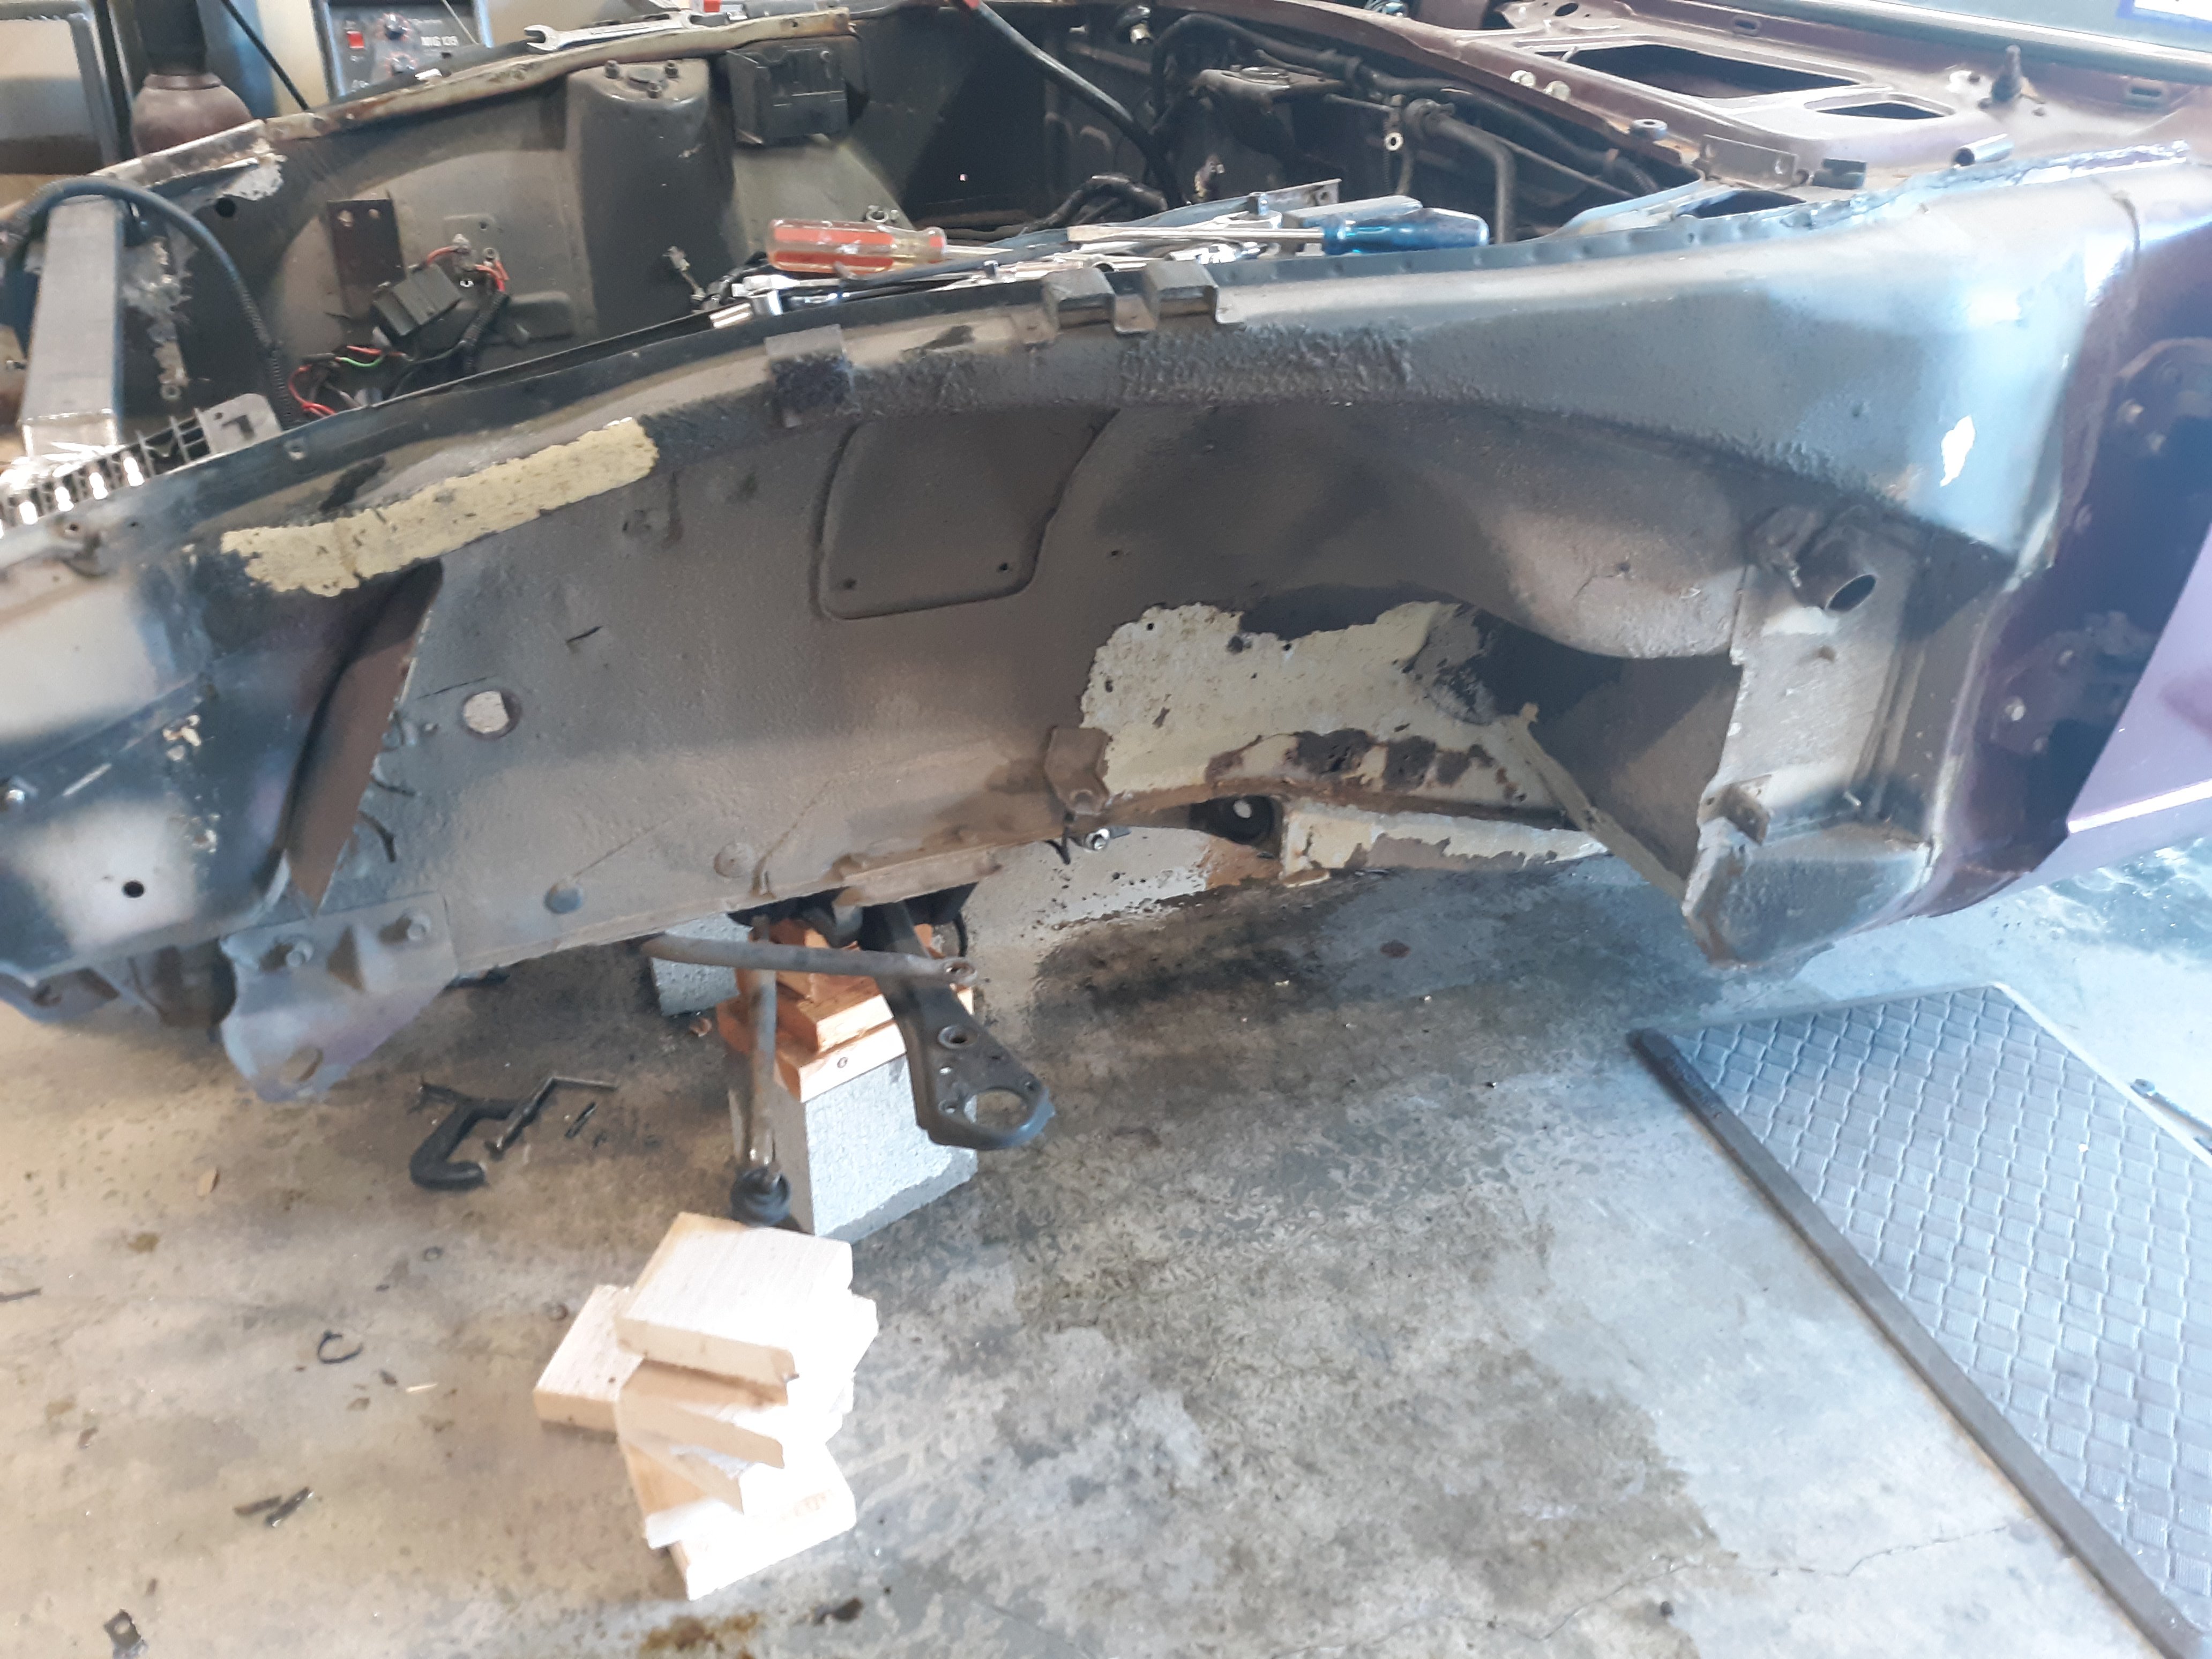
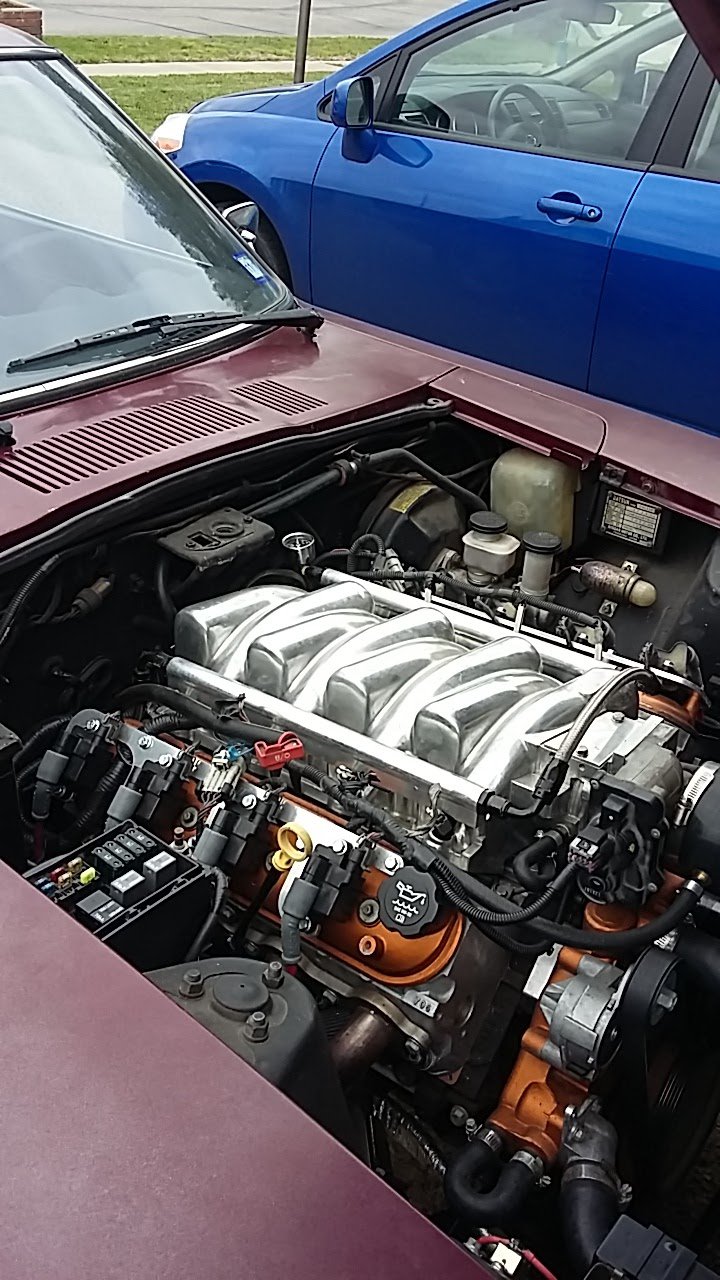
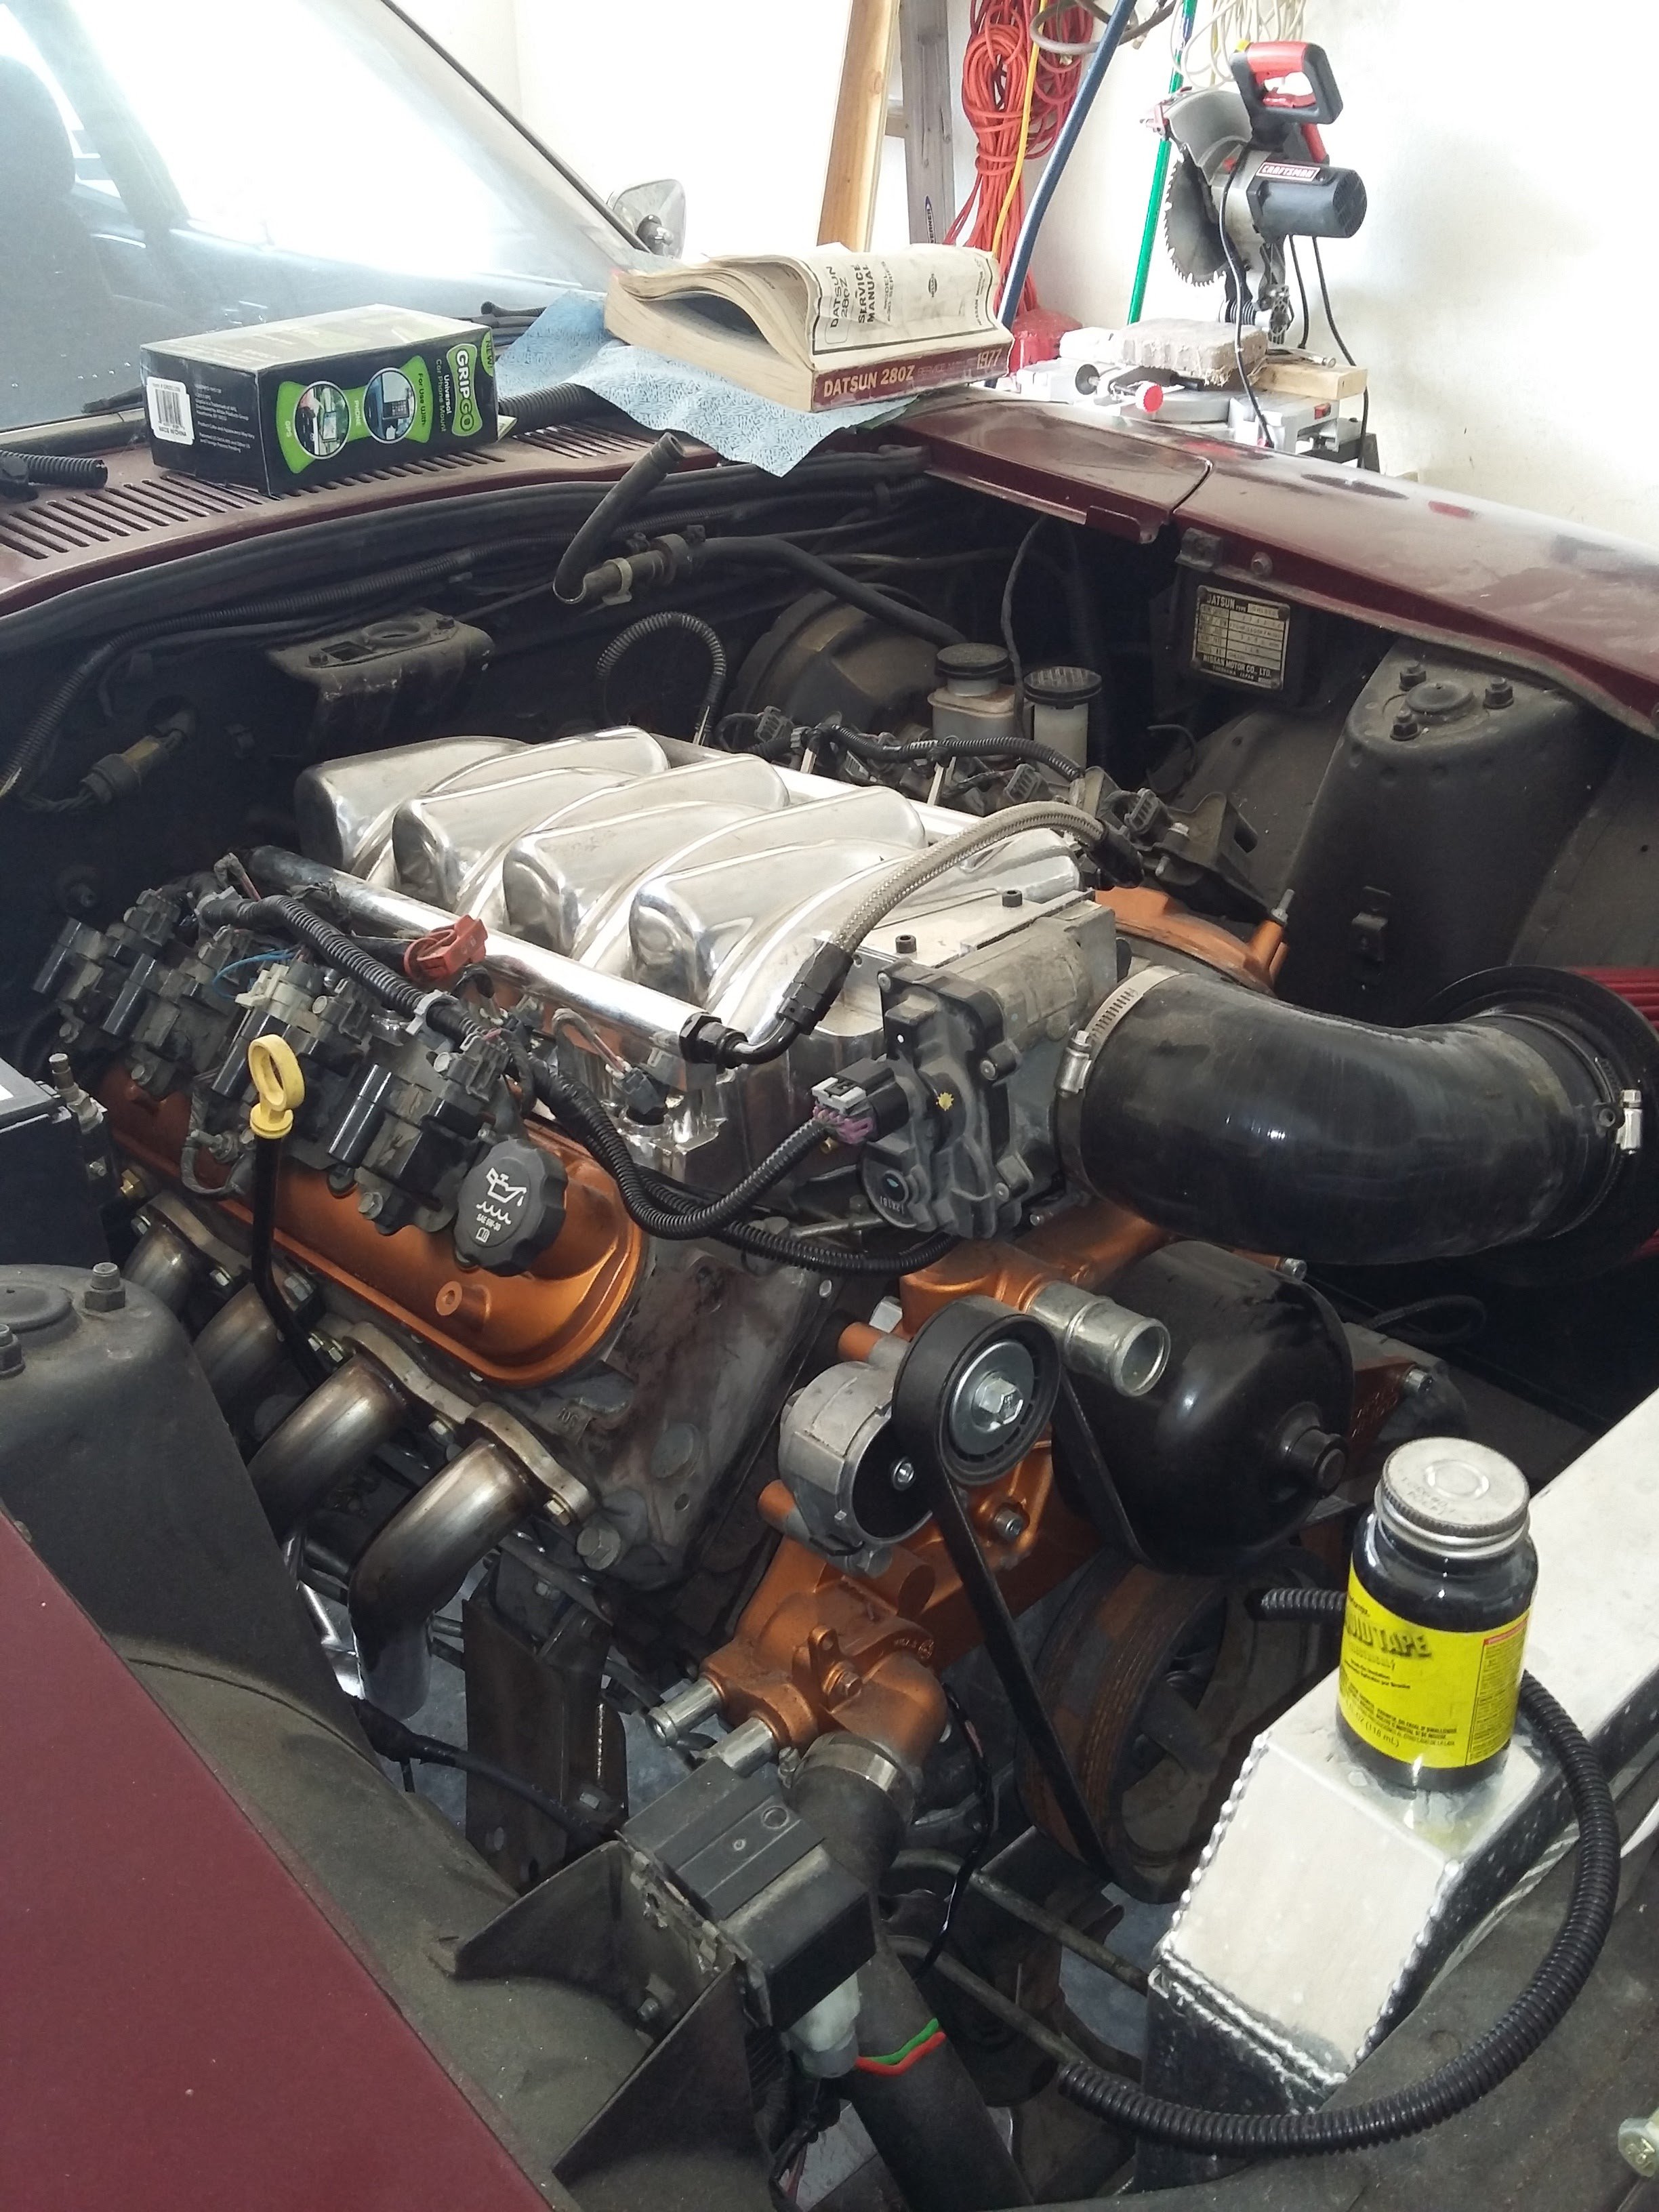
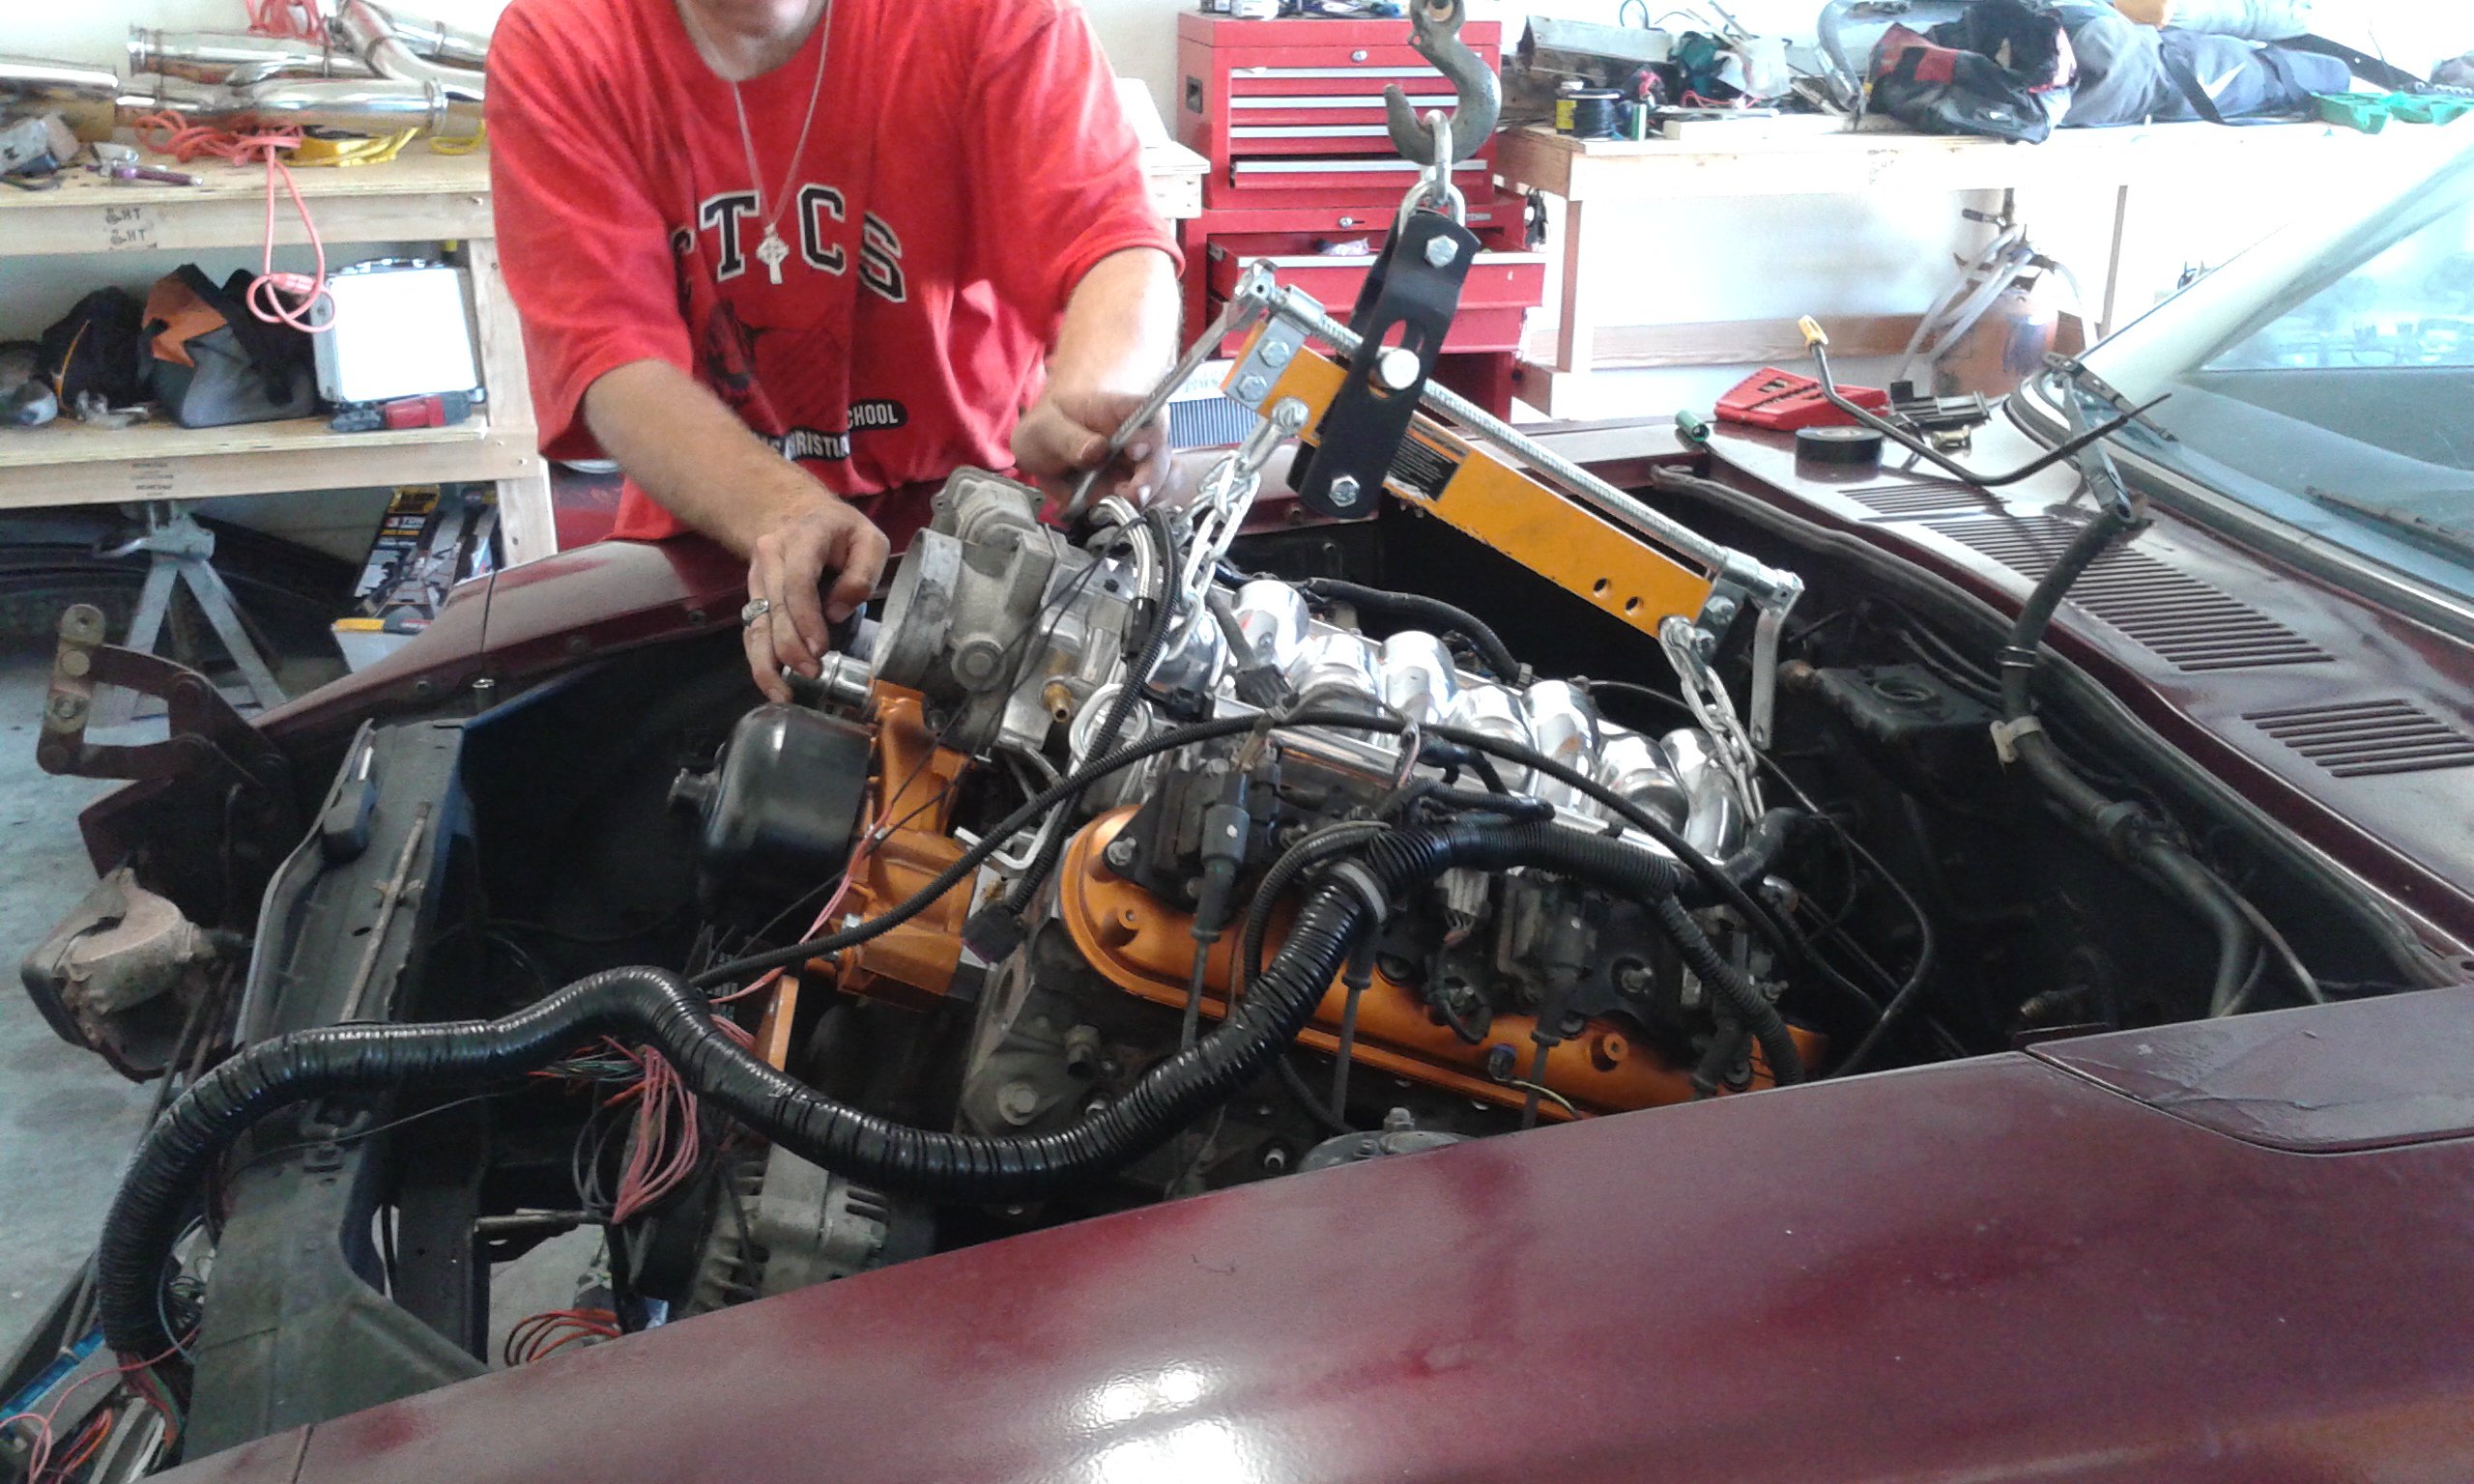
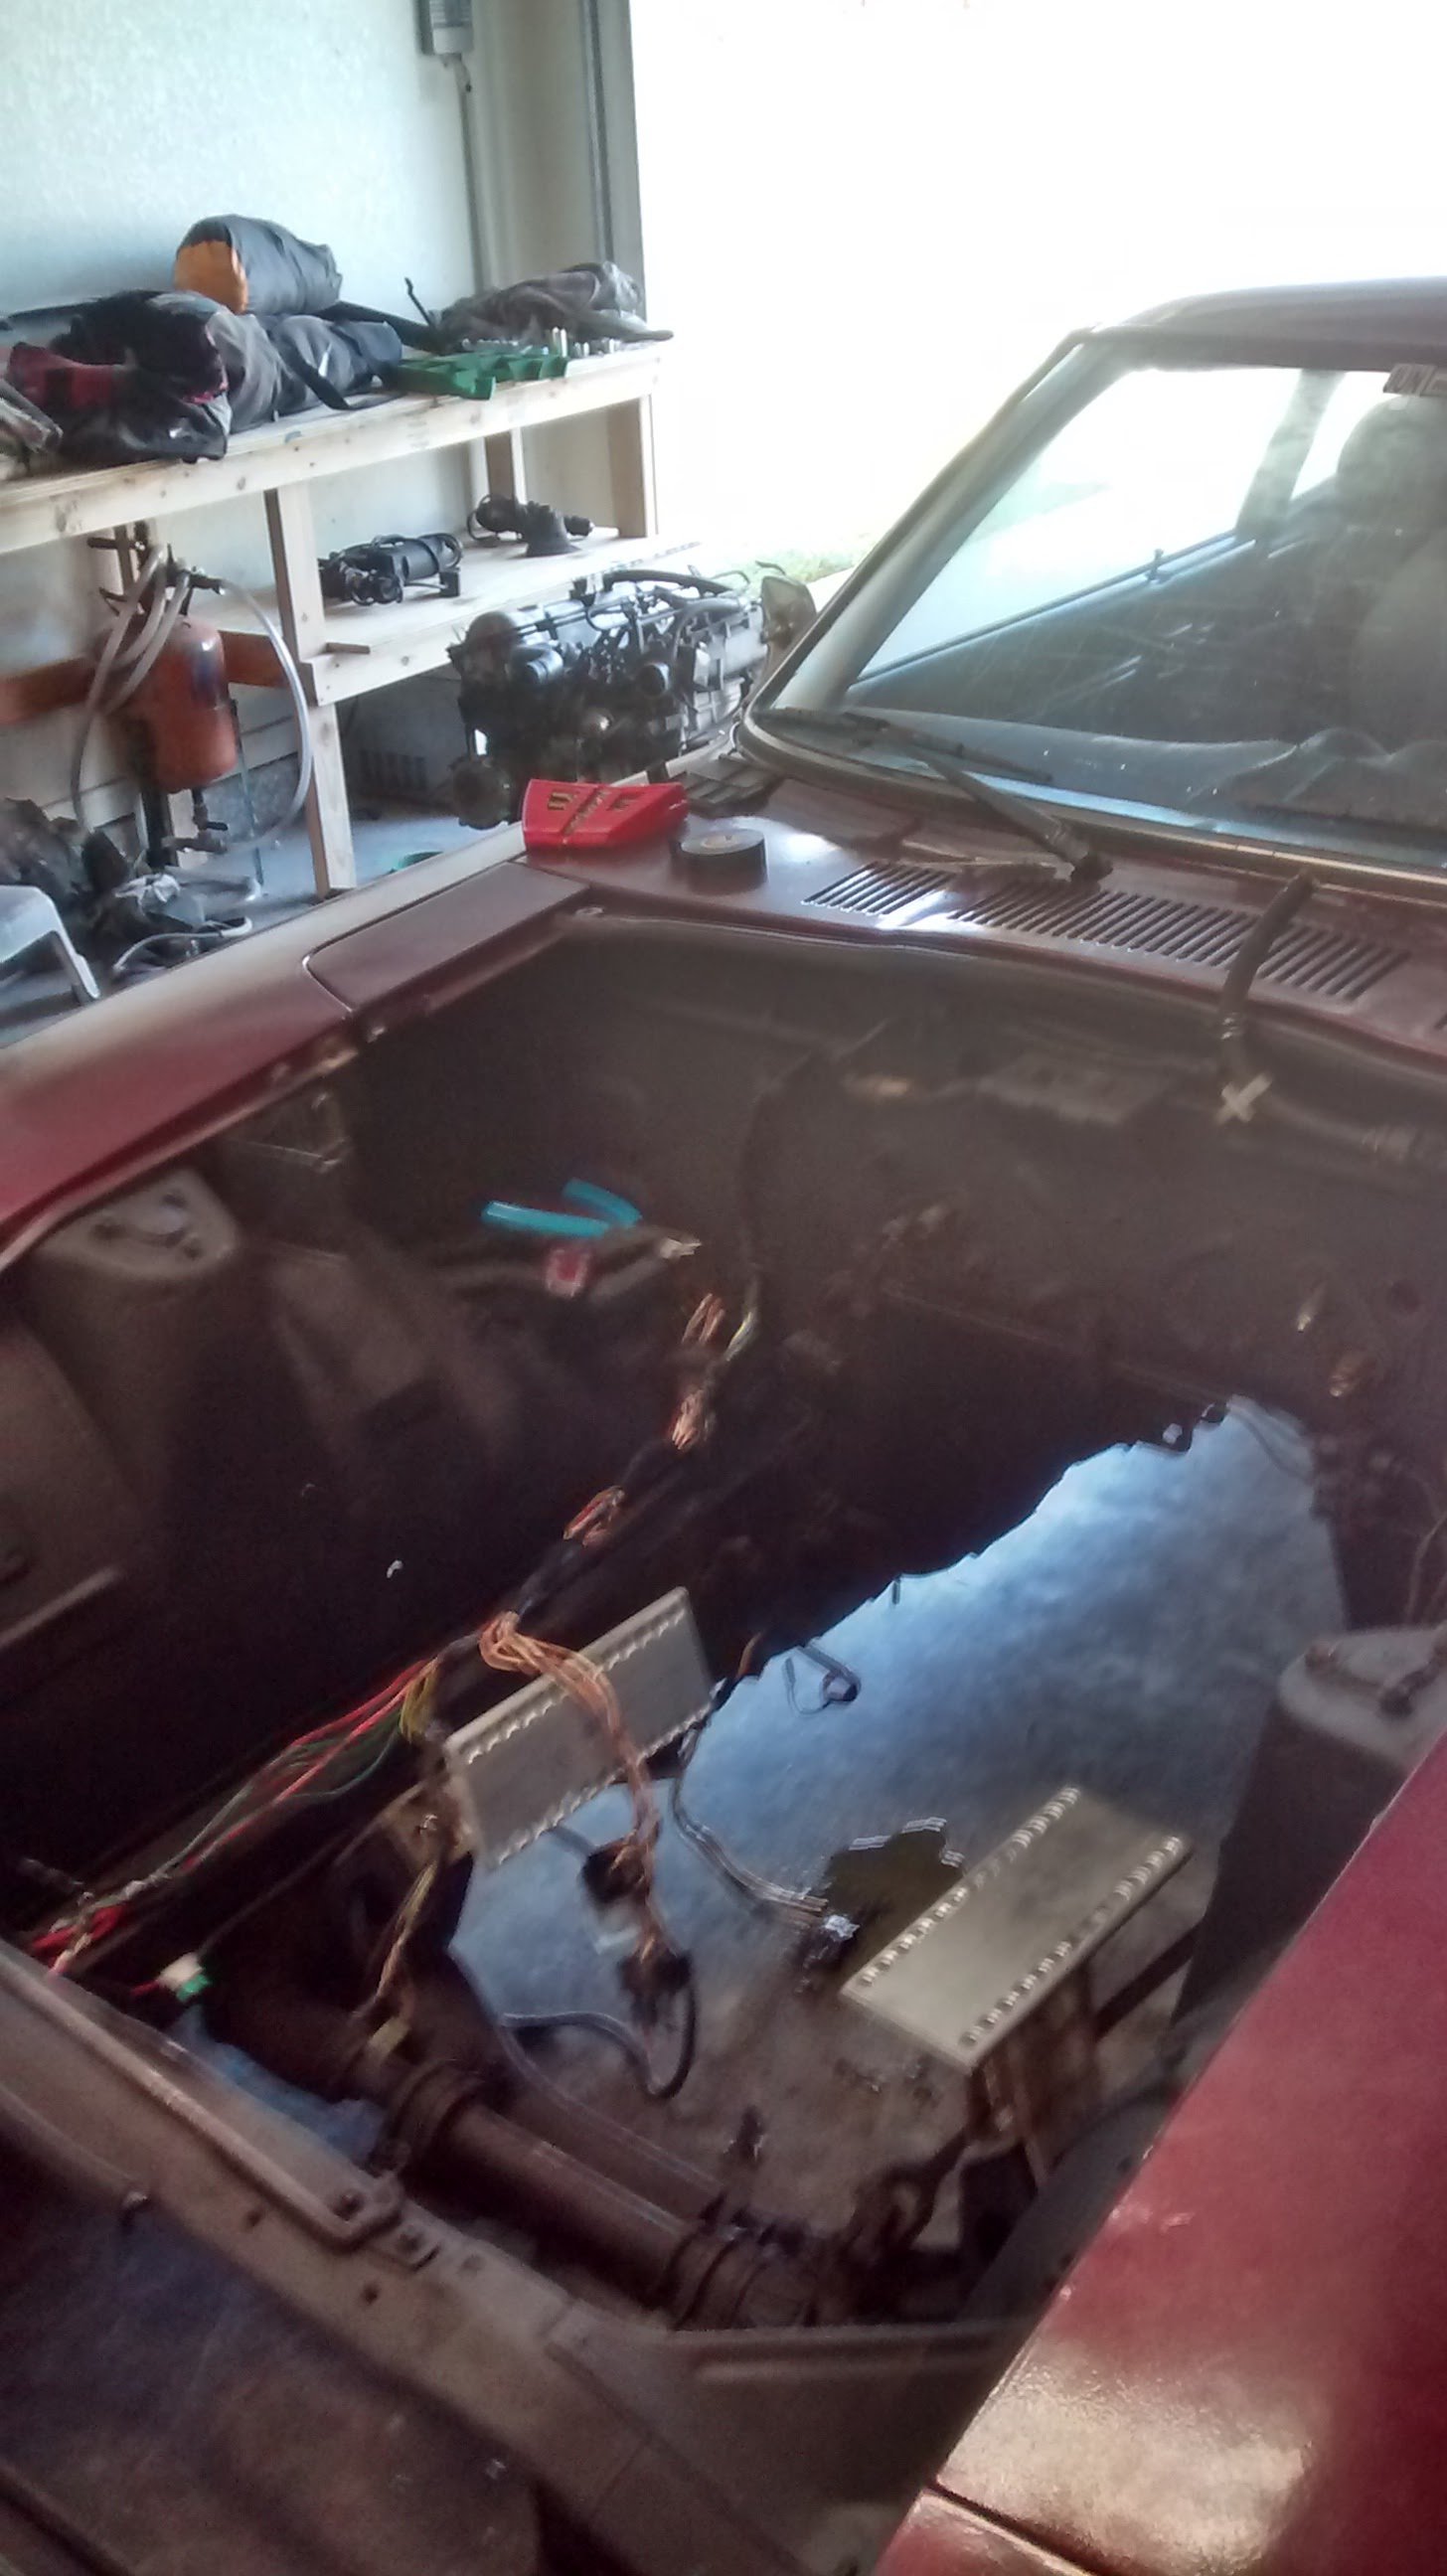
Some more photos covering the frame rail and engine bay

-
Well I got the passenger side frame rail completed and welded in place. this side was different from the driver side for the fact that the floor has a large dip that goes the entire length of the car. In order to cope with this problem, i placed my laser level under the car prior to removing the old frame rails and made some marks on the ground to ensure everything stayed square. I then cut out a 3" wide gap the entire length of the car and welded the frame rail in place. with this side being mounted 3/4" higher, i wanted to make sure that if i placed a jack stand under the frame rails they would sit level so I added a spacer in both the front and rear for a jack mounting point. As i just got orders for a year long vacation in the desert, it will be some time before a post any progress on her (maybe the wife will suprize me and work on her some). with that being said, once completed with the frame rails, i sat Athena down on some movers dollies and moved her over so the wife could fit her car into the garage. One of the other things i have been sparingly working on is cleaning up the engine bay. I have decided to use a product known as Master coat. It is like POR 15 but is UV stable (not a big deal for the engine bay. the other nice thing is their metal prep has a high zinc coPhotos (6).zipntent to stop rusting. it is supposed to be ok to just wipe the stuff on and leave it for a year (lucky me). well i only got through cleaning the driver side and didnt get any of the patches welded into the firewall but it will have to do for now. Overall i love the metal prep and have not used the rust sealer enough yet to have an opinion, i will update when i get back.
-
Relentless - 1977 280z LS (5.3l L59) swap
walkerbk replied to Box5's topic in Gen III & IV Chevy V8Z Tech Board
Having done the wiring before. I would mount the harness on the engine and make sure that your can get the ECU to where you want it. -
And gas will eat through most of the hoses you will find at autozone. Your best bet is to get one from another vehicle to fit or you can buy fuel filler hose from mcmaster (although it is a little stiff).
-
Just make sure its the Corvette ls2 pan as the Camaro ls3 pan is deeper.
-
1) not sure. 2) yes. The best pan to swap to is now the ls3 Corvette pan as it is only 5in in depth vs the 5.5in for the standard f body pan. It does cost more however. When I used the f body pan, I just bought it from jegs at the link below. https://www.jegs.com/i/GM+Performance/809/19212593/10002/-1?CAWELAID=1710617647&CAGPSPN=pla&catargetid=230006180000848102&cadevice=c&gclid=CjwKEAiAjsunBRCy3LSlz_PJqCgSJACJY7yKZxNrqEL8j_Jq8Ixh7drpumY1VwzWCYc2fmoDyB2L7xoC1w_w_wcB
-
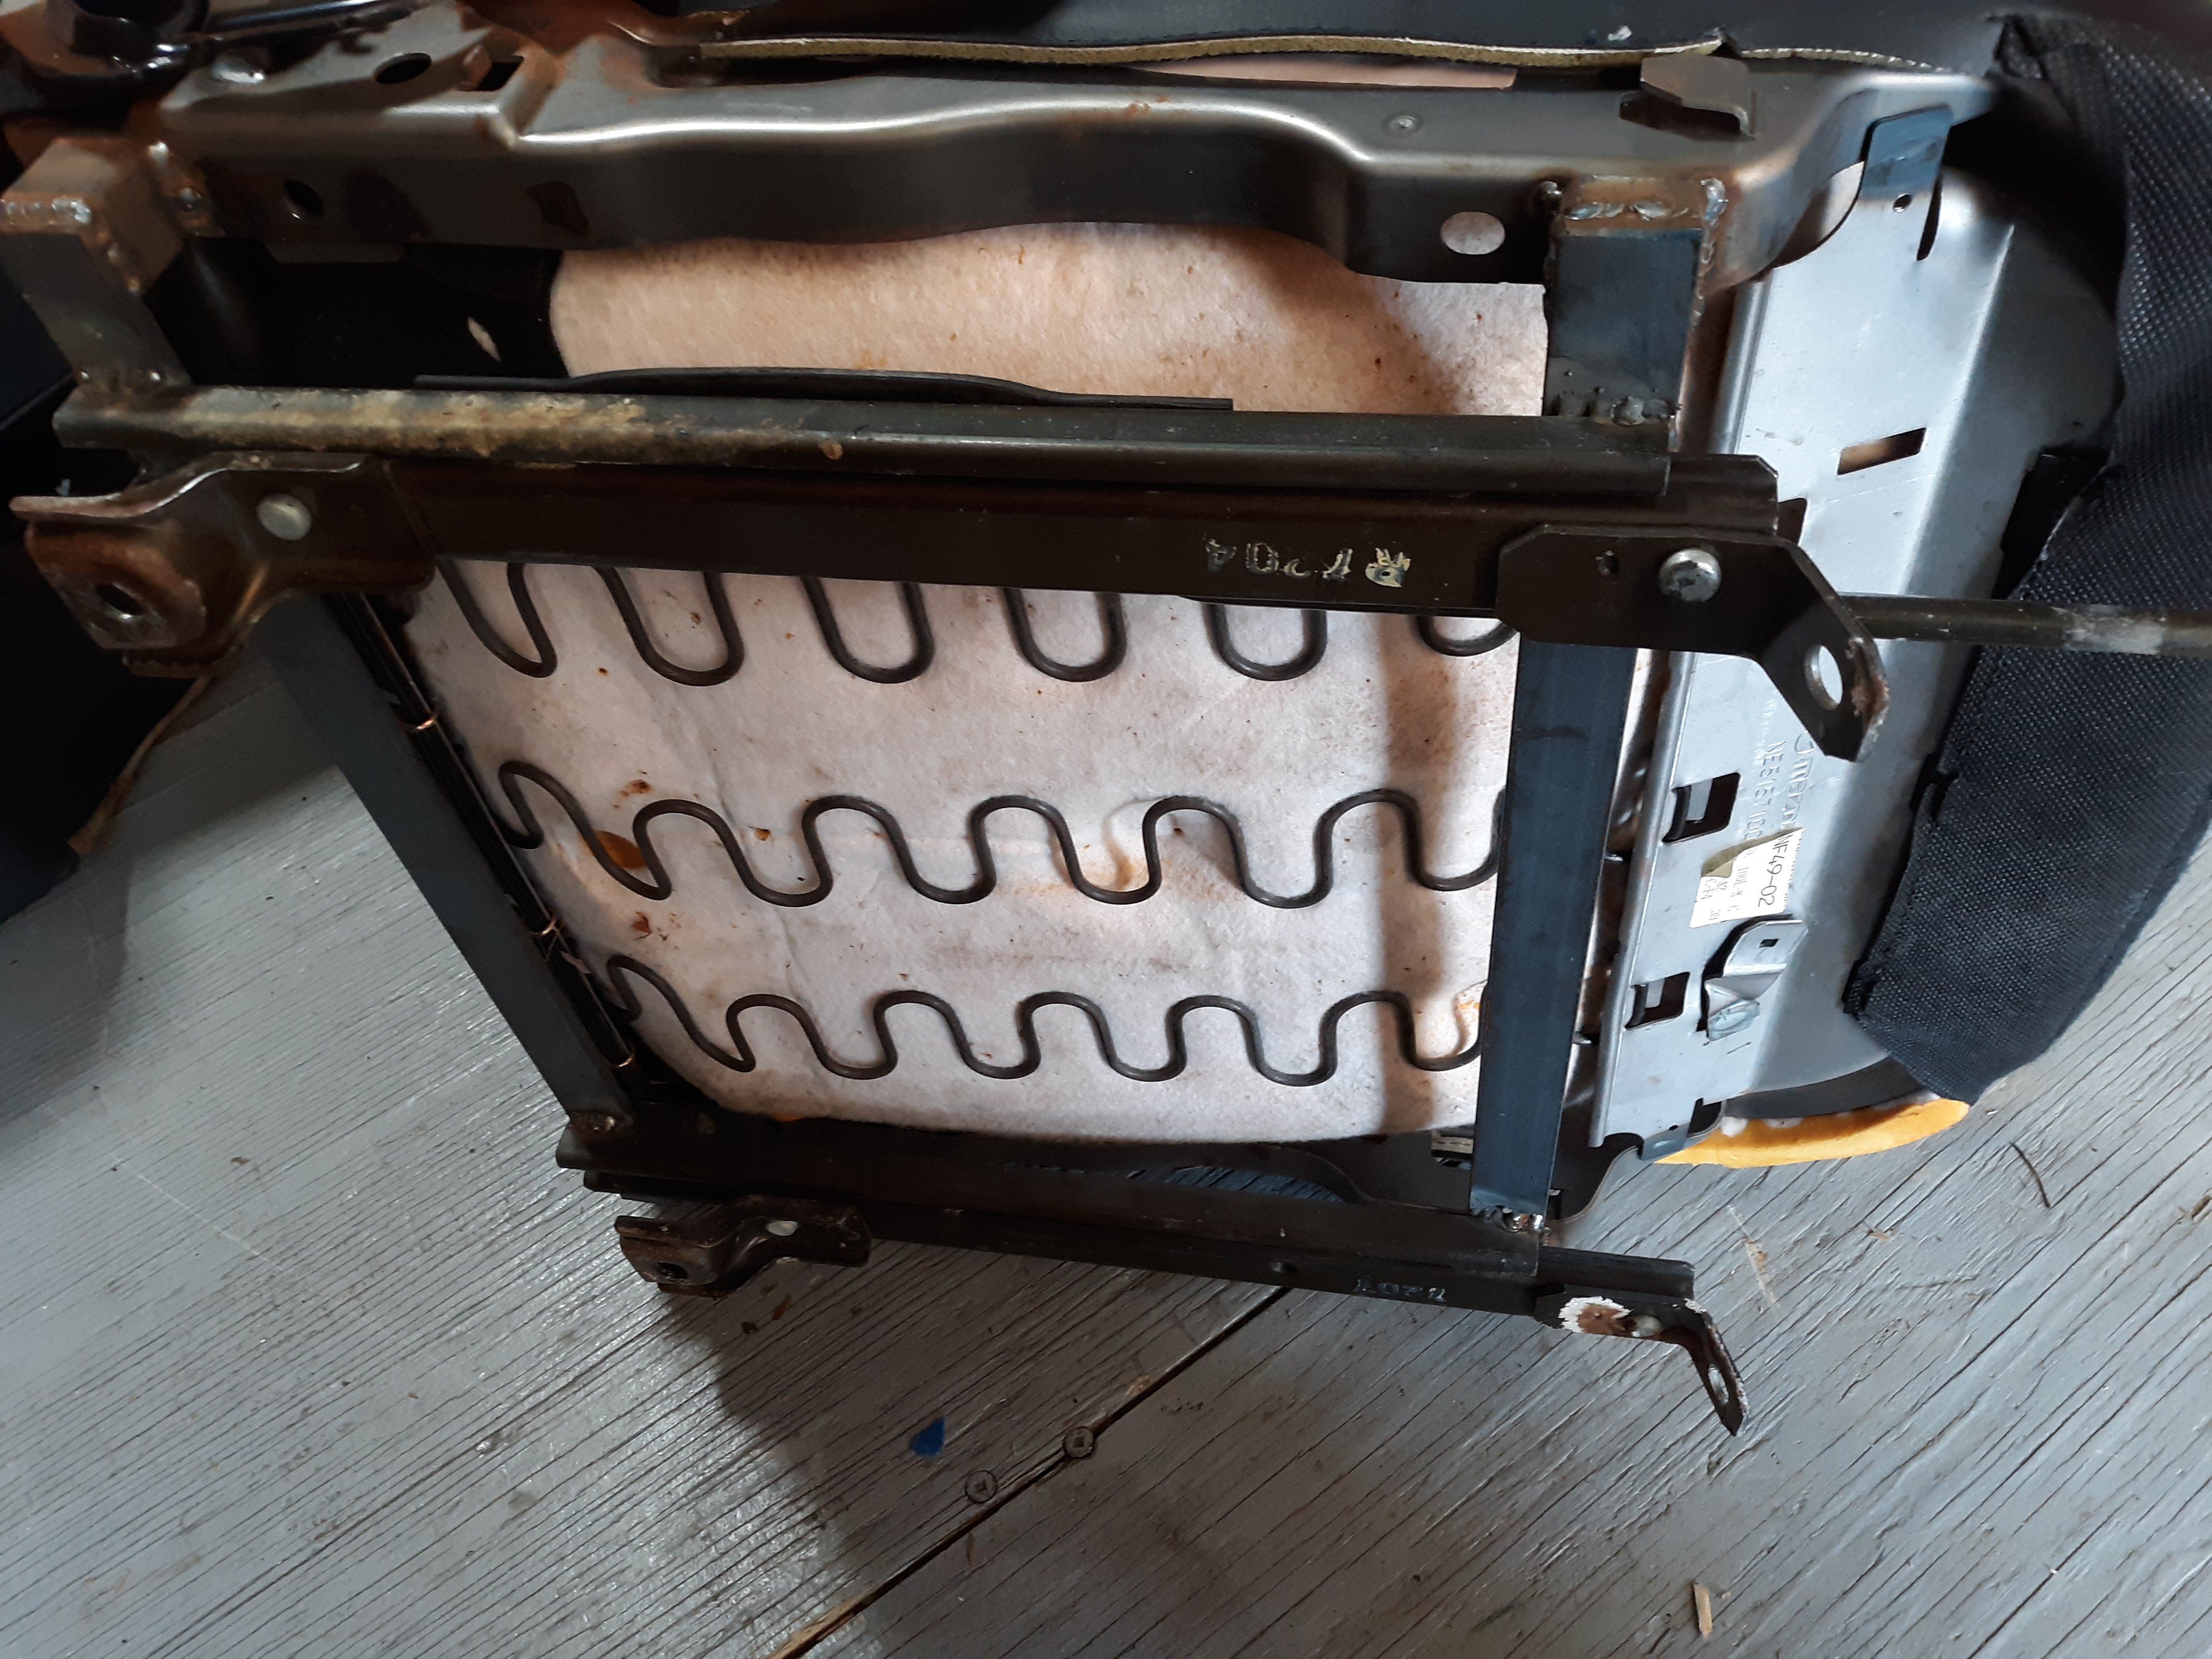
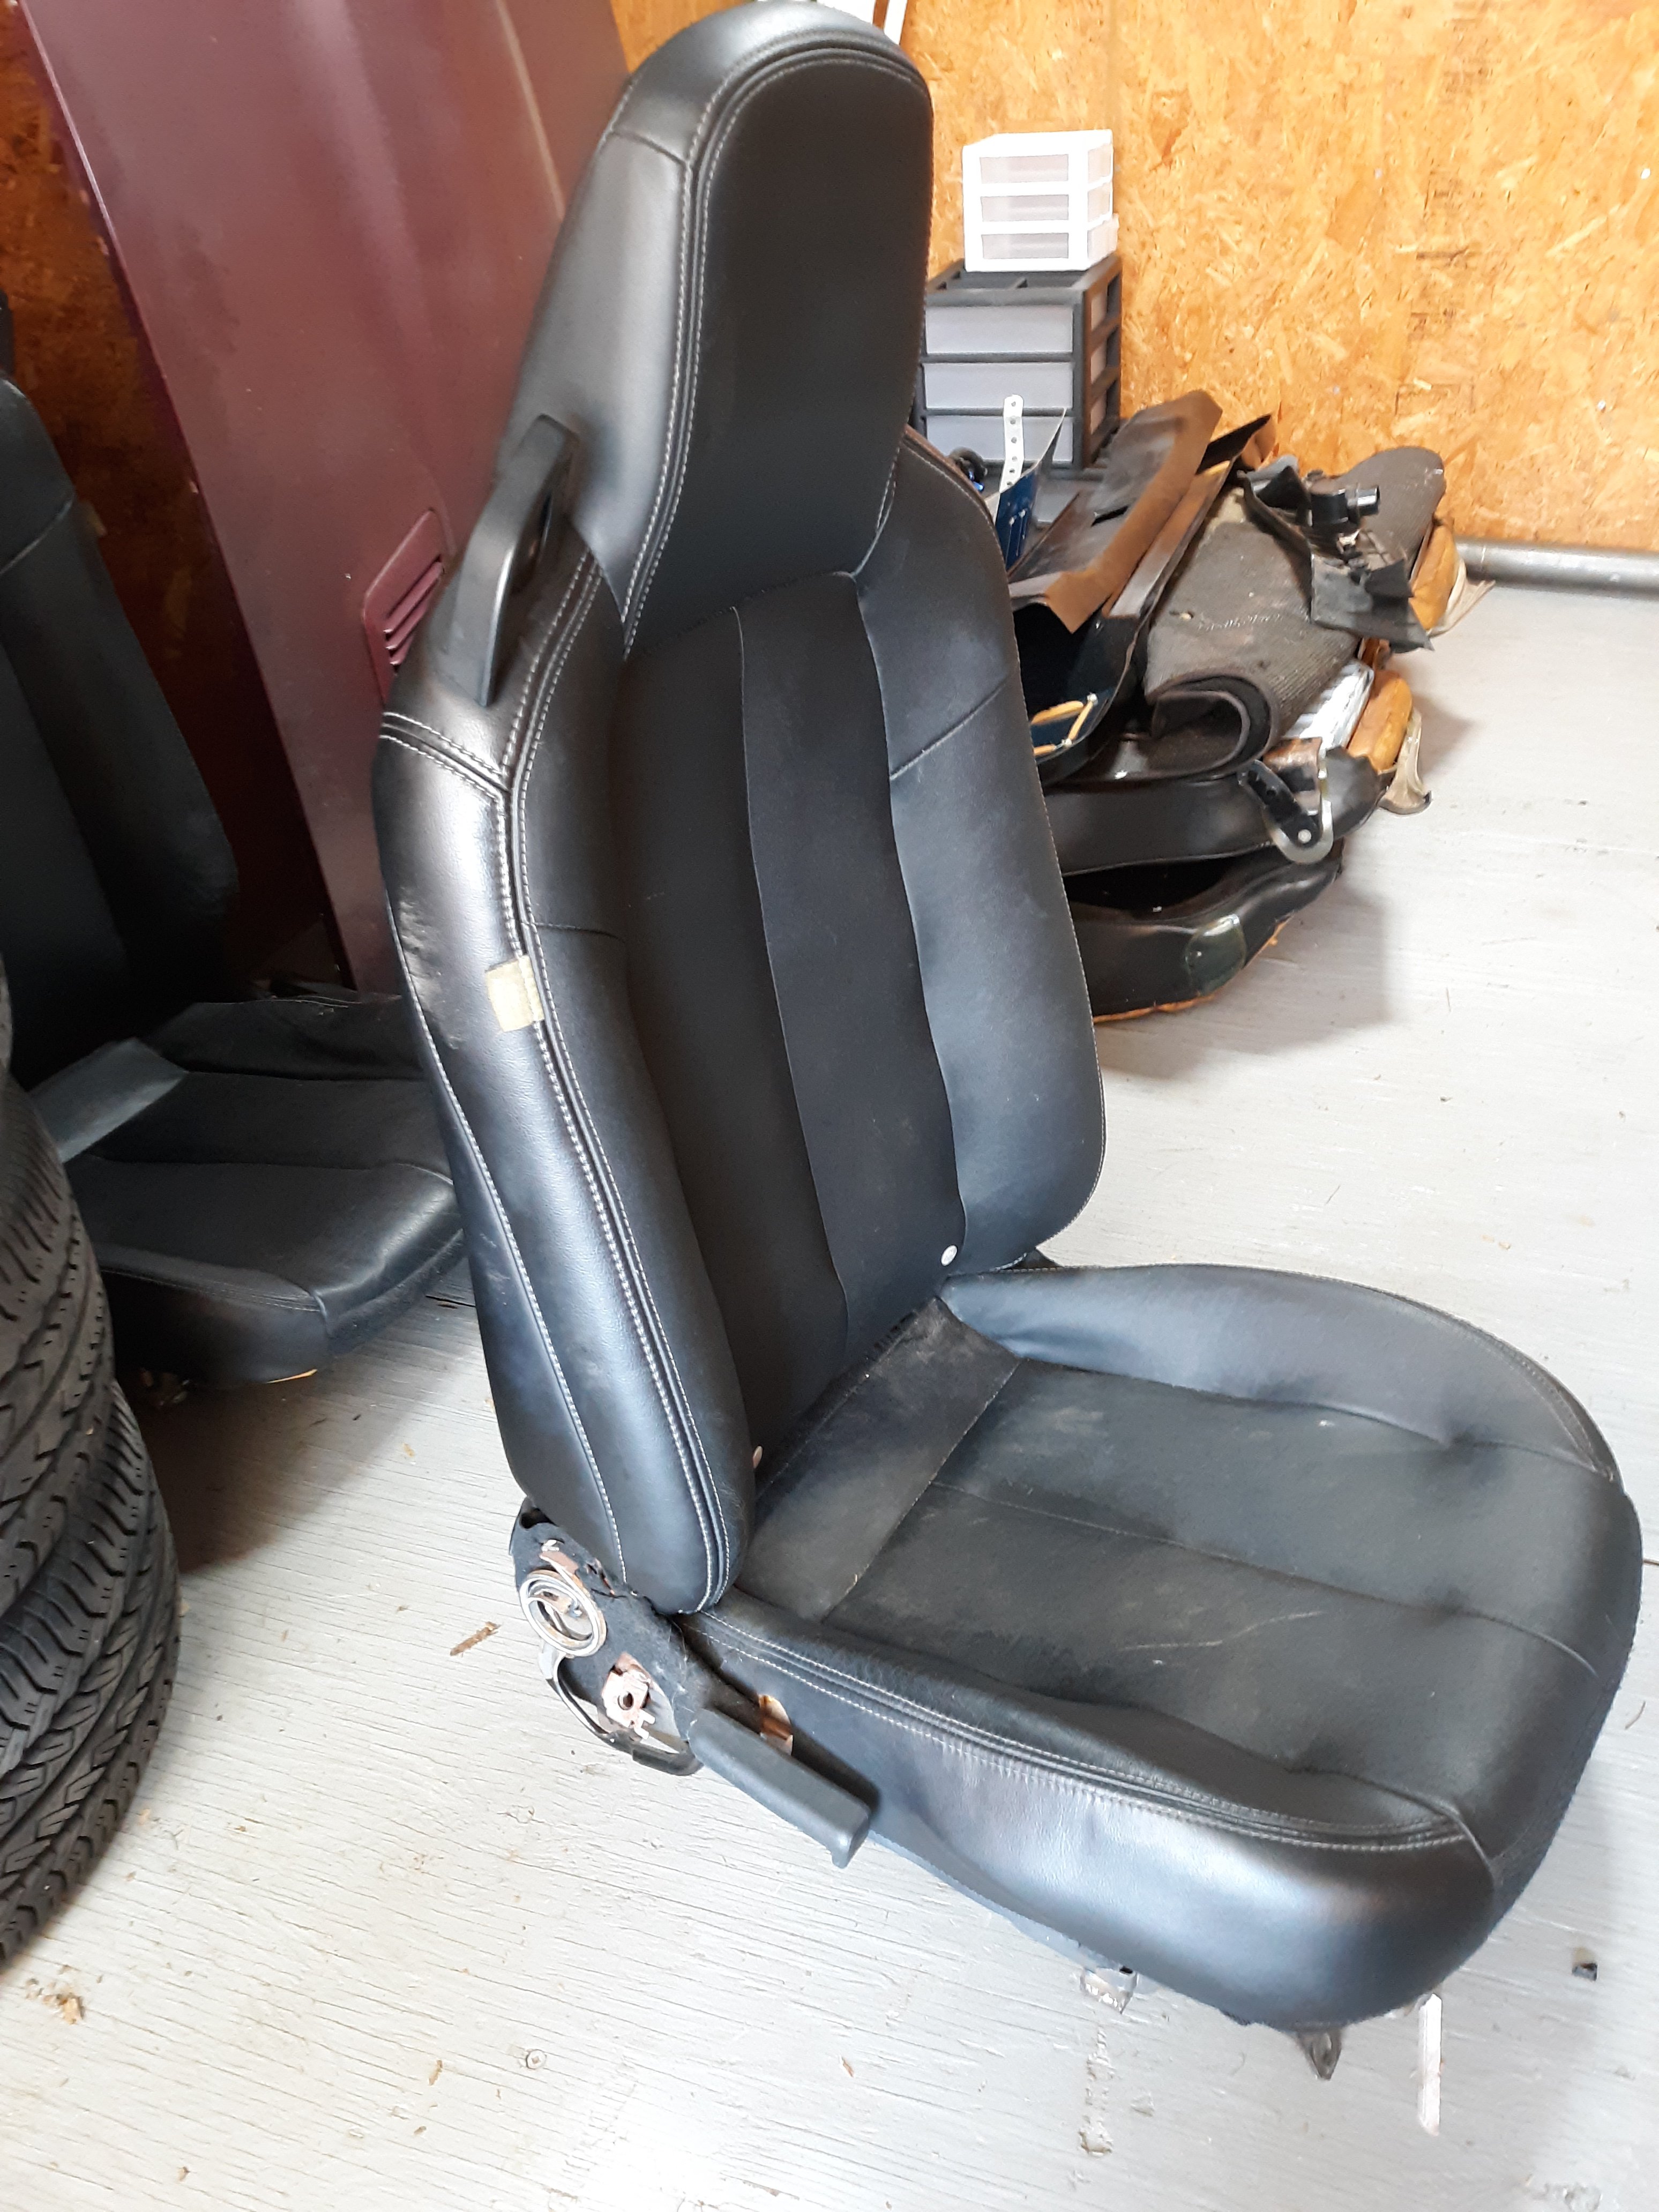
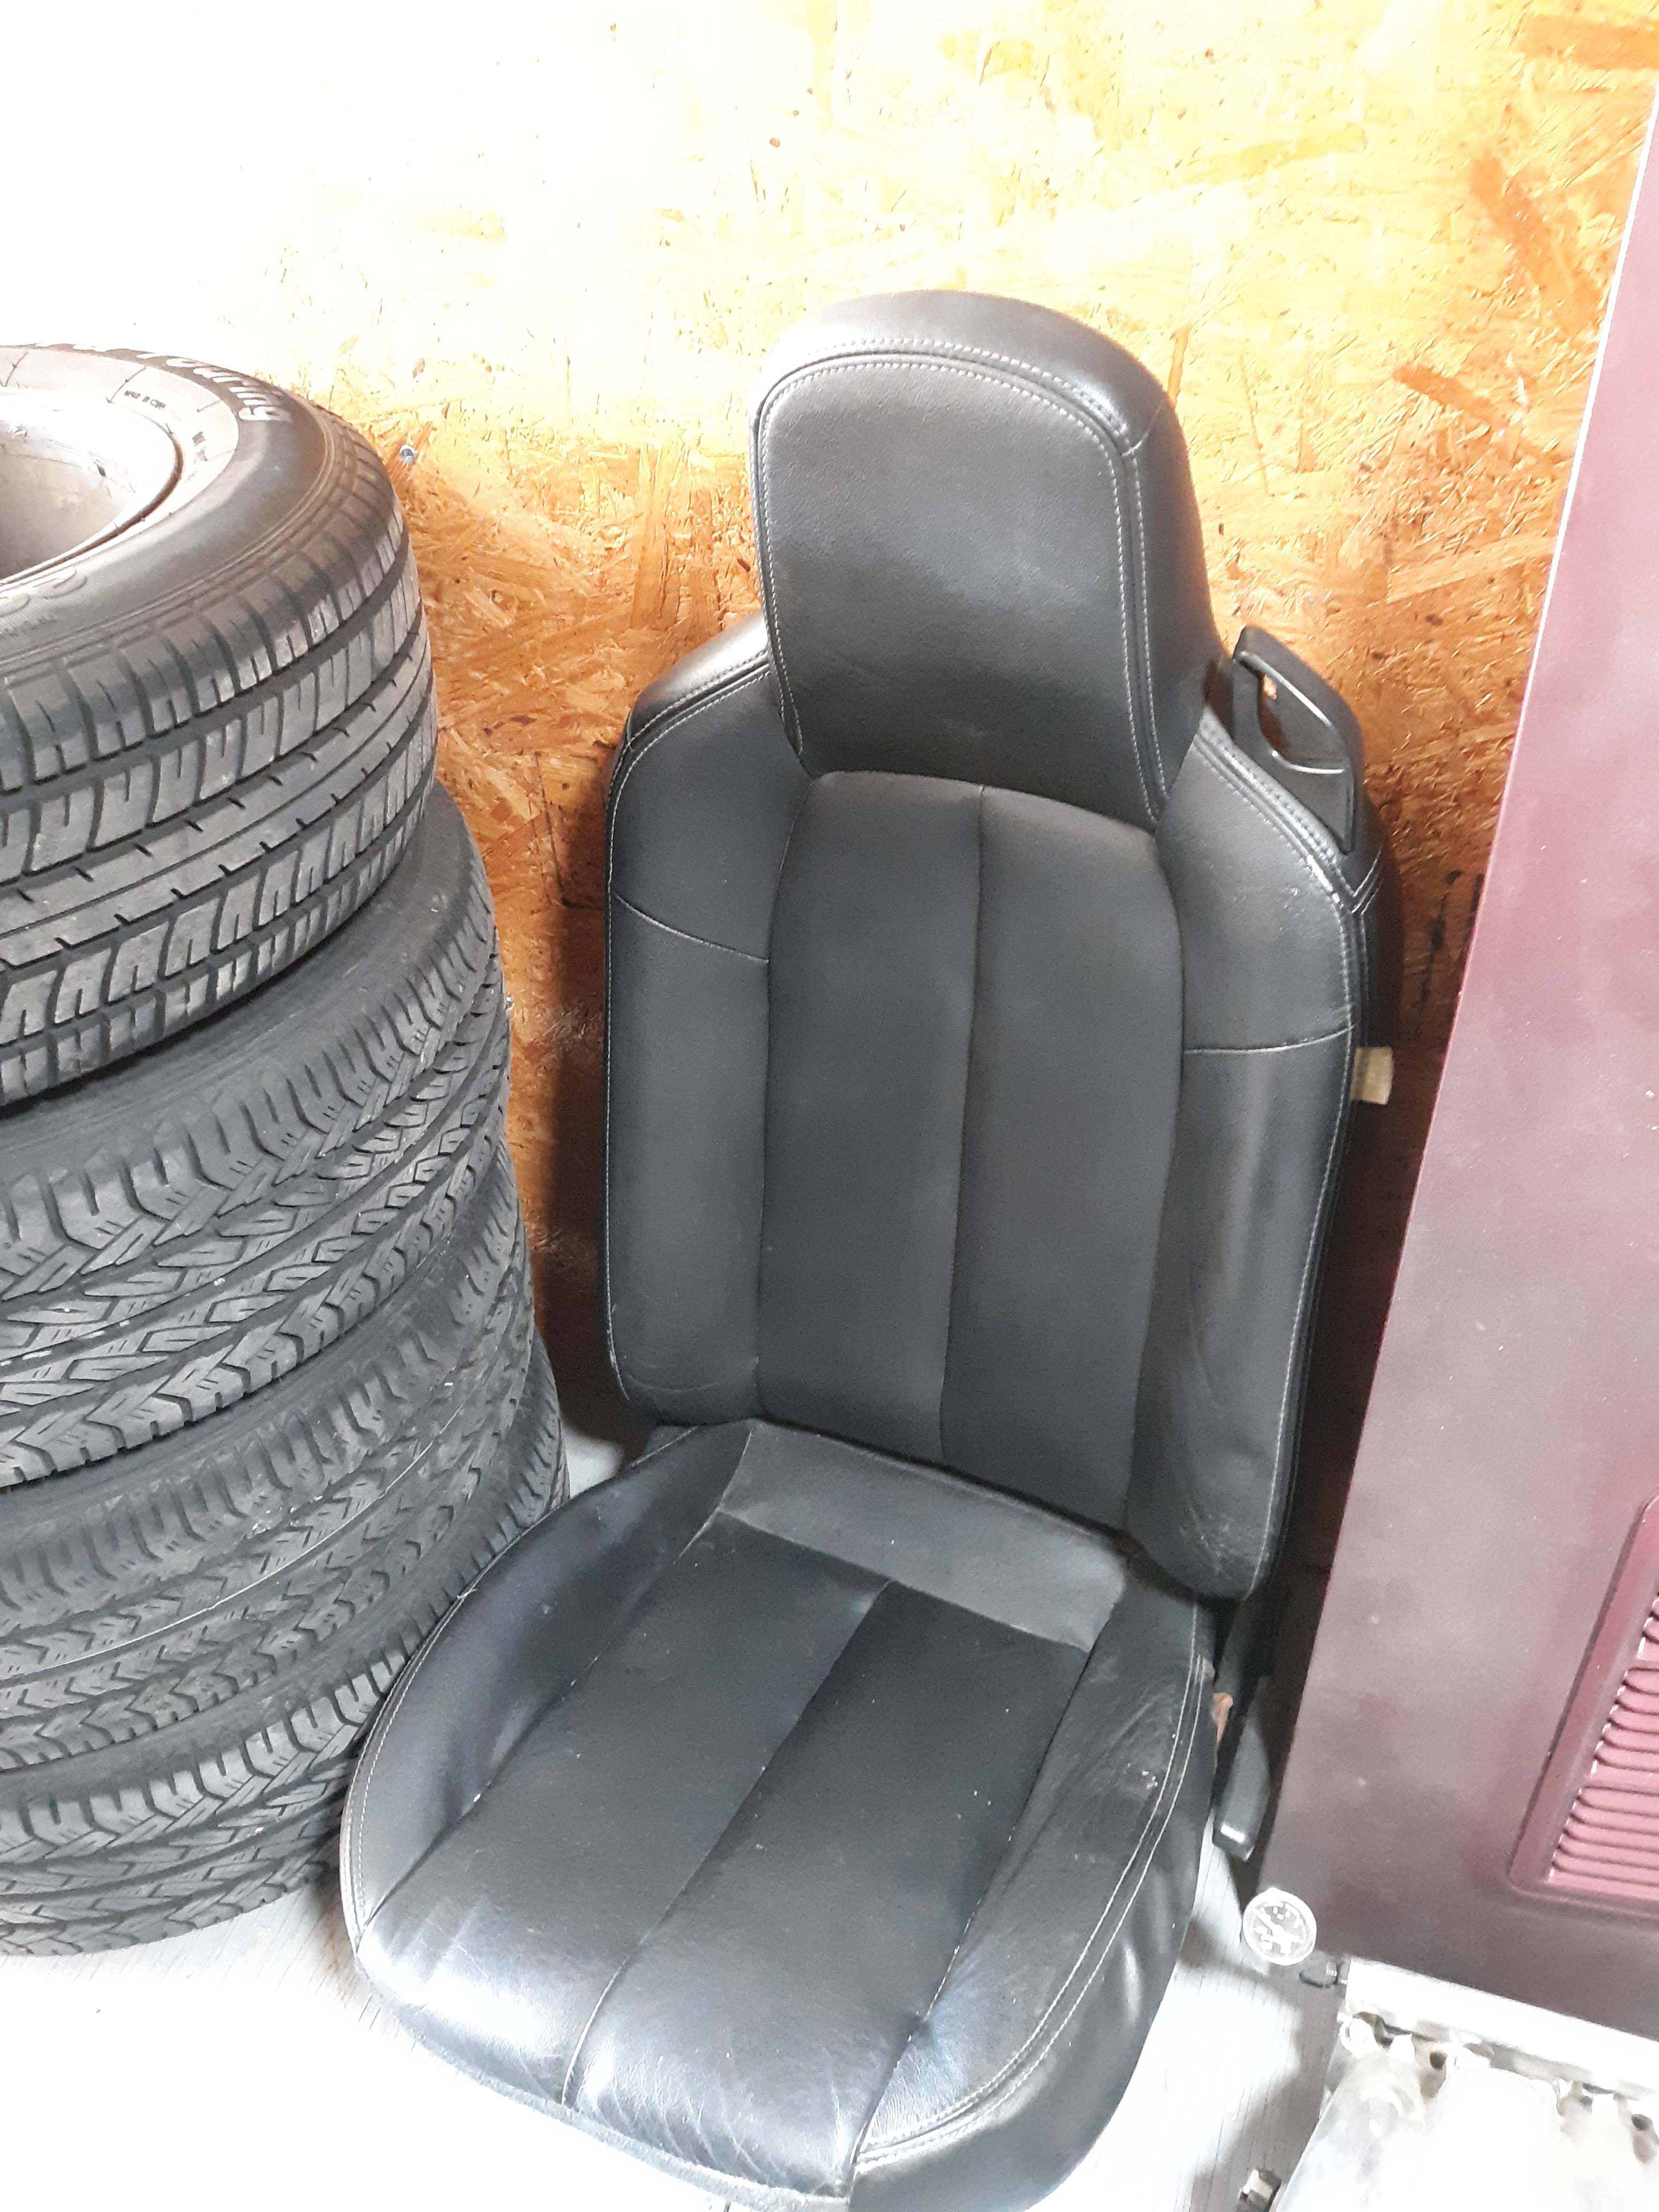
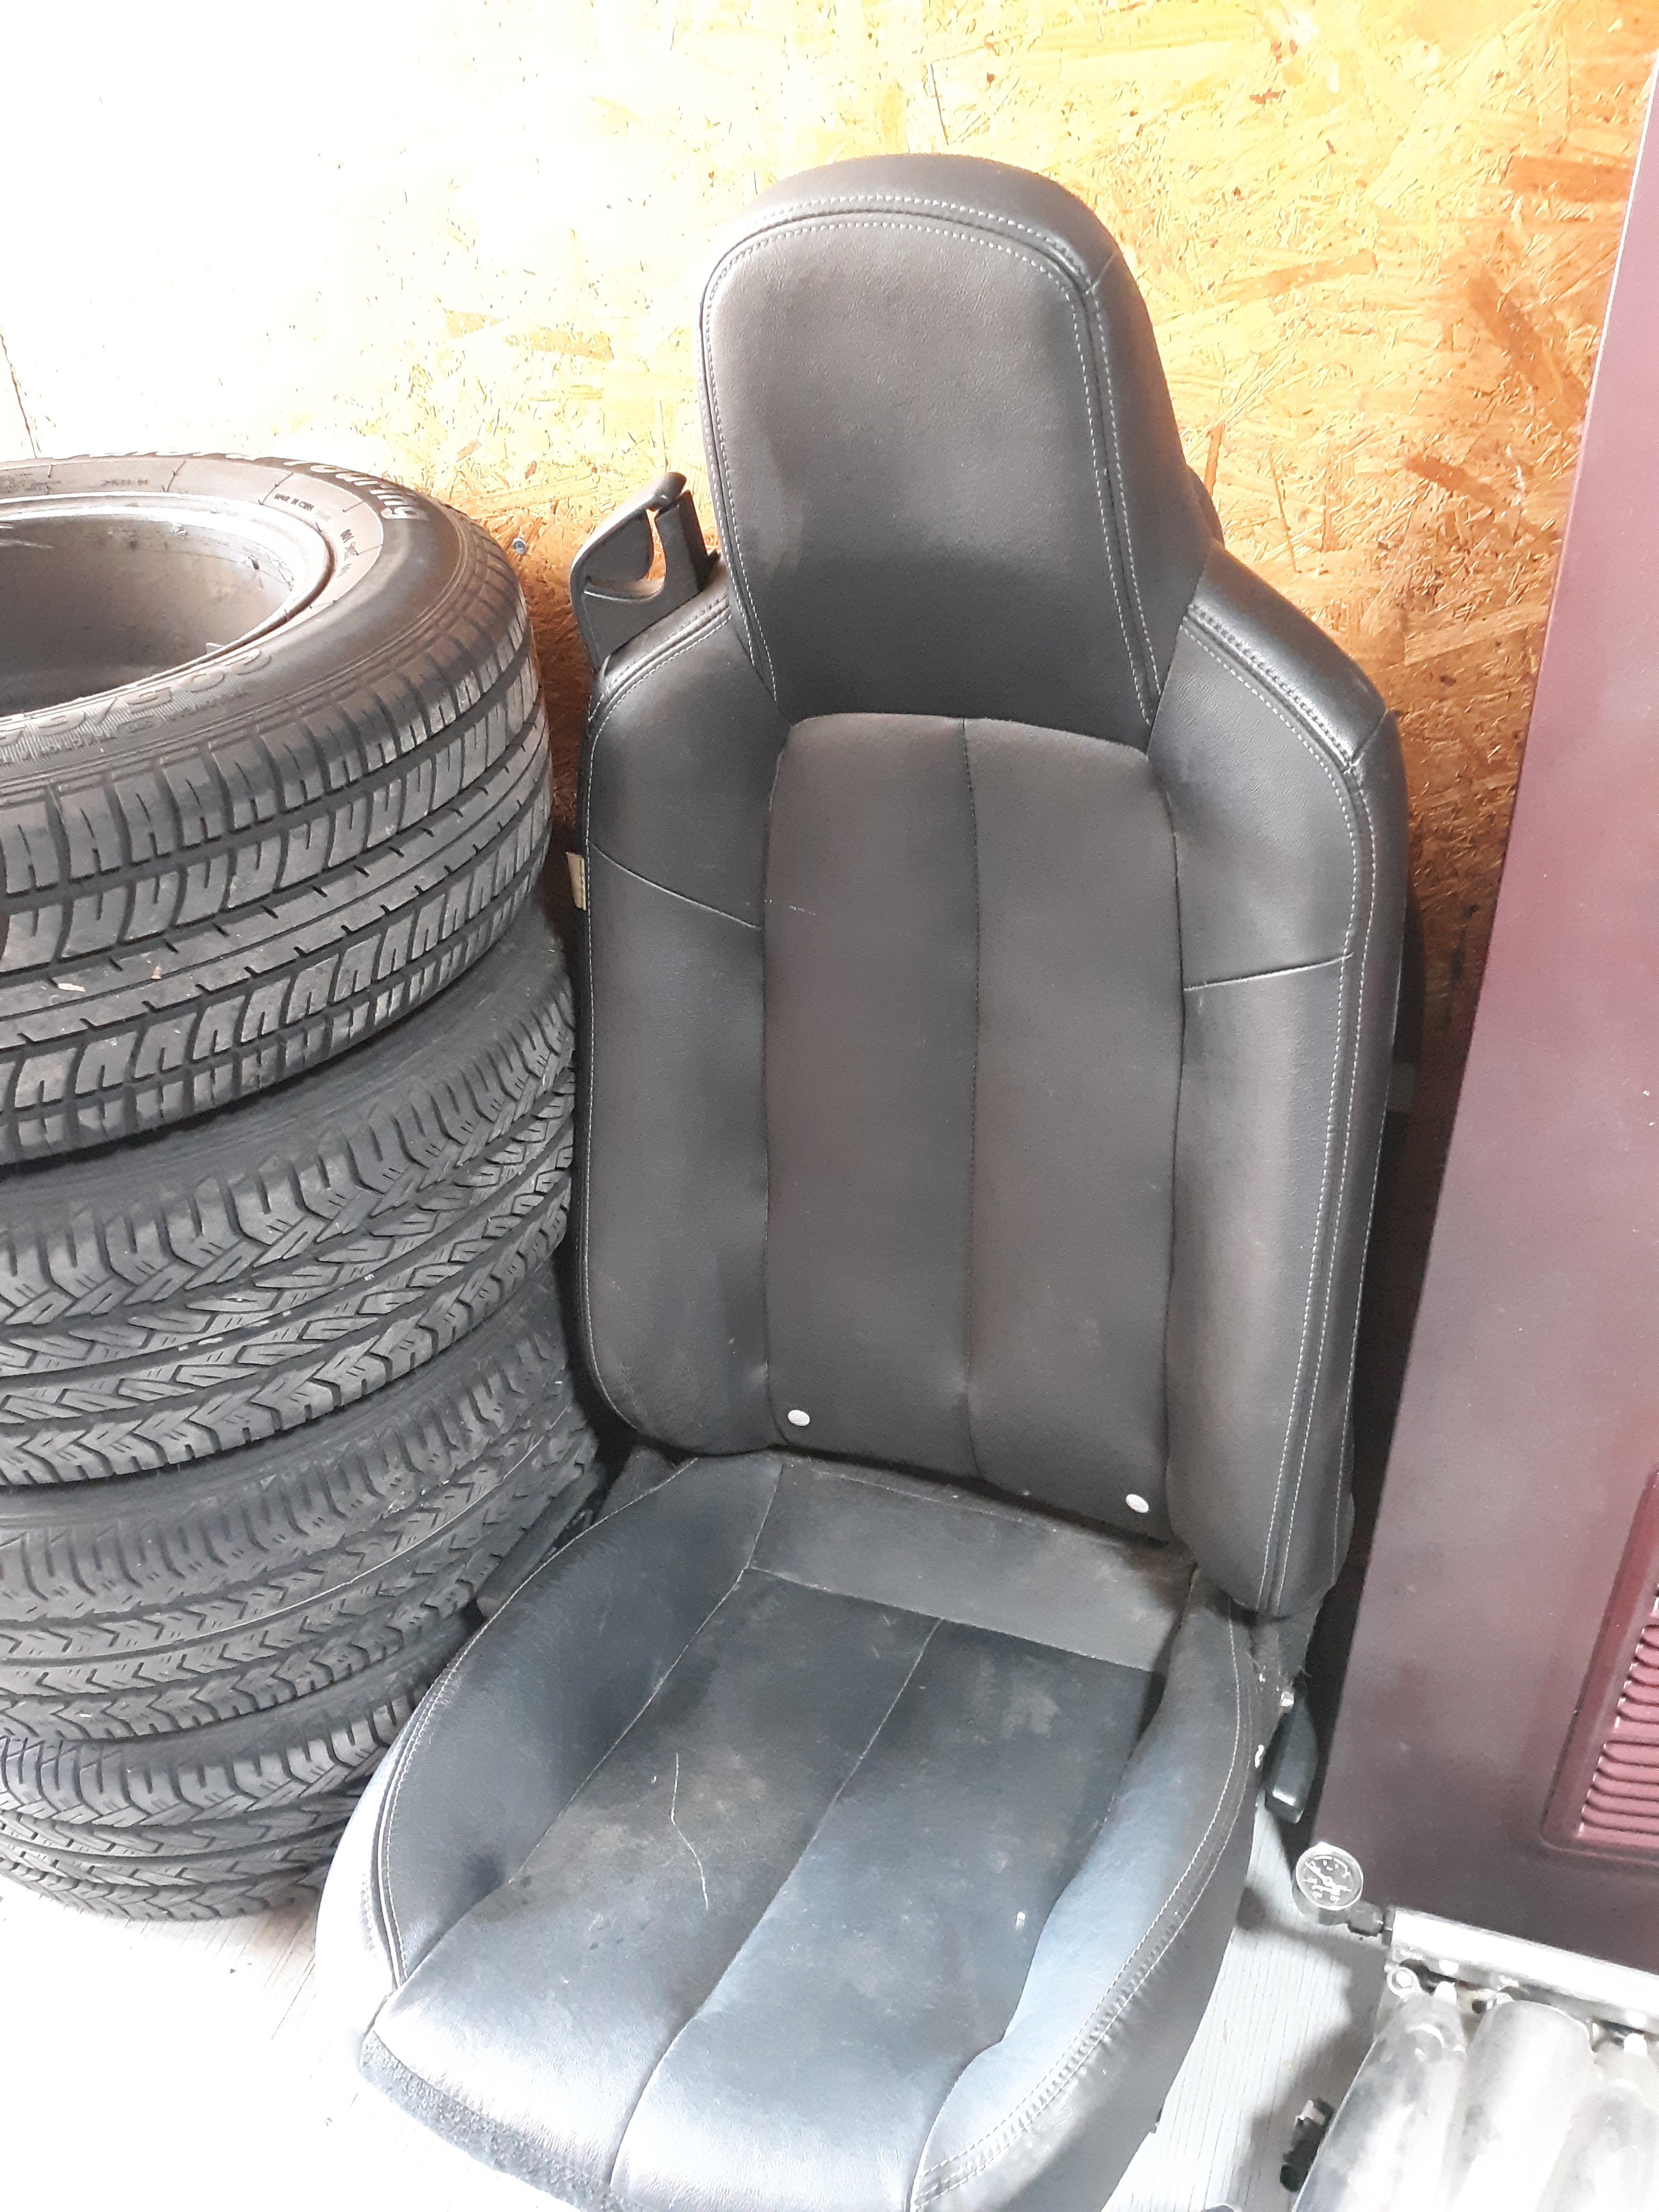
I have a set of 08 black leather seats out of a mazda miata. These have been modified to fit a Datsun 280z. As such, all the original mounting hardware was removed and datsun 280z seat rails welded in place. The leather is in perfect condition and the only part missing is the plastic side trim. The only reason I'm selling them is to mount some rsx seats in their place. Asking price is $300. I'm located in Puyallup Washington about 45min south of Seattle.
-
That is very sad as I had seen others build using the carbon signal body's and had planned to spend the money on a kit in the near future. Maybe it was the last ones and that's why it was on sale.
-
I took a torch to mine and bent it over about 1.5" when I did the ls swap. The only thing is now the pedal looks crooked... I might cut the pedal (just the metal square plate) off and straighten it out. I'm overall happy with it though.
-
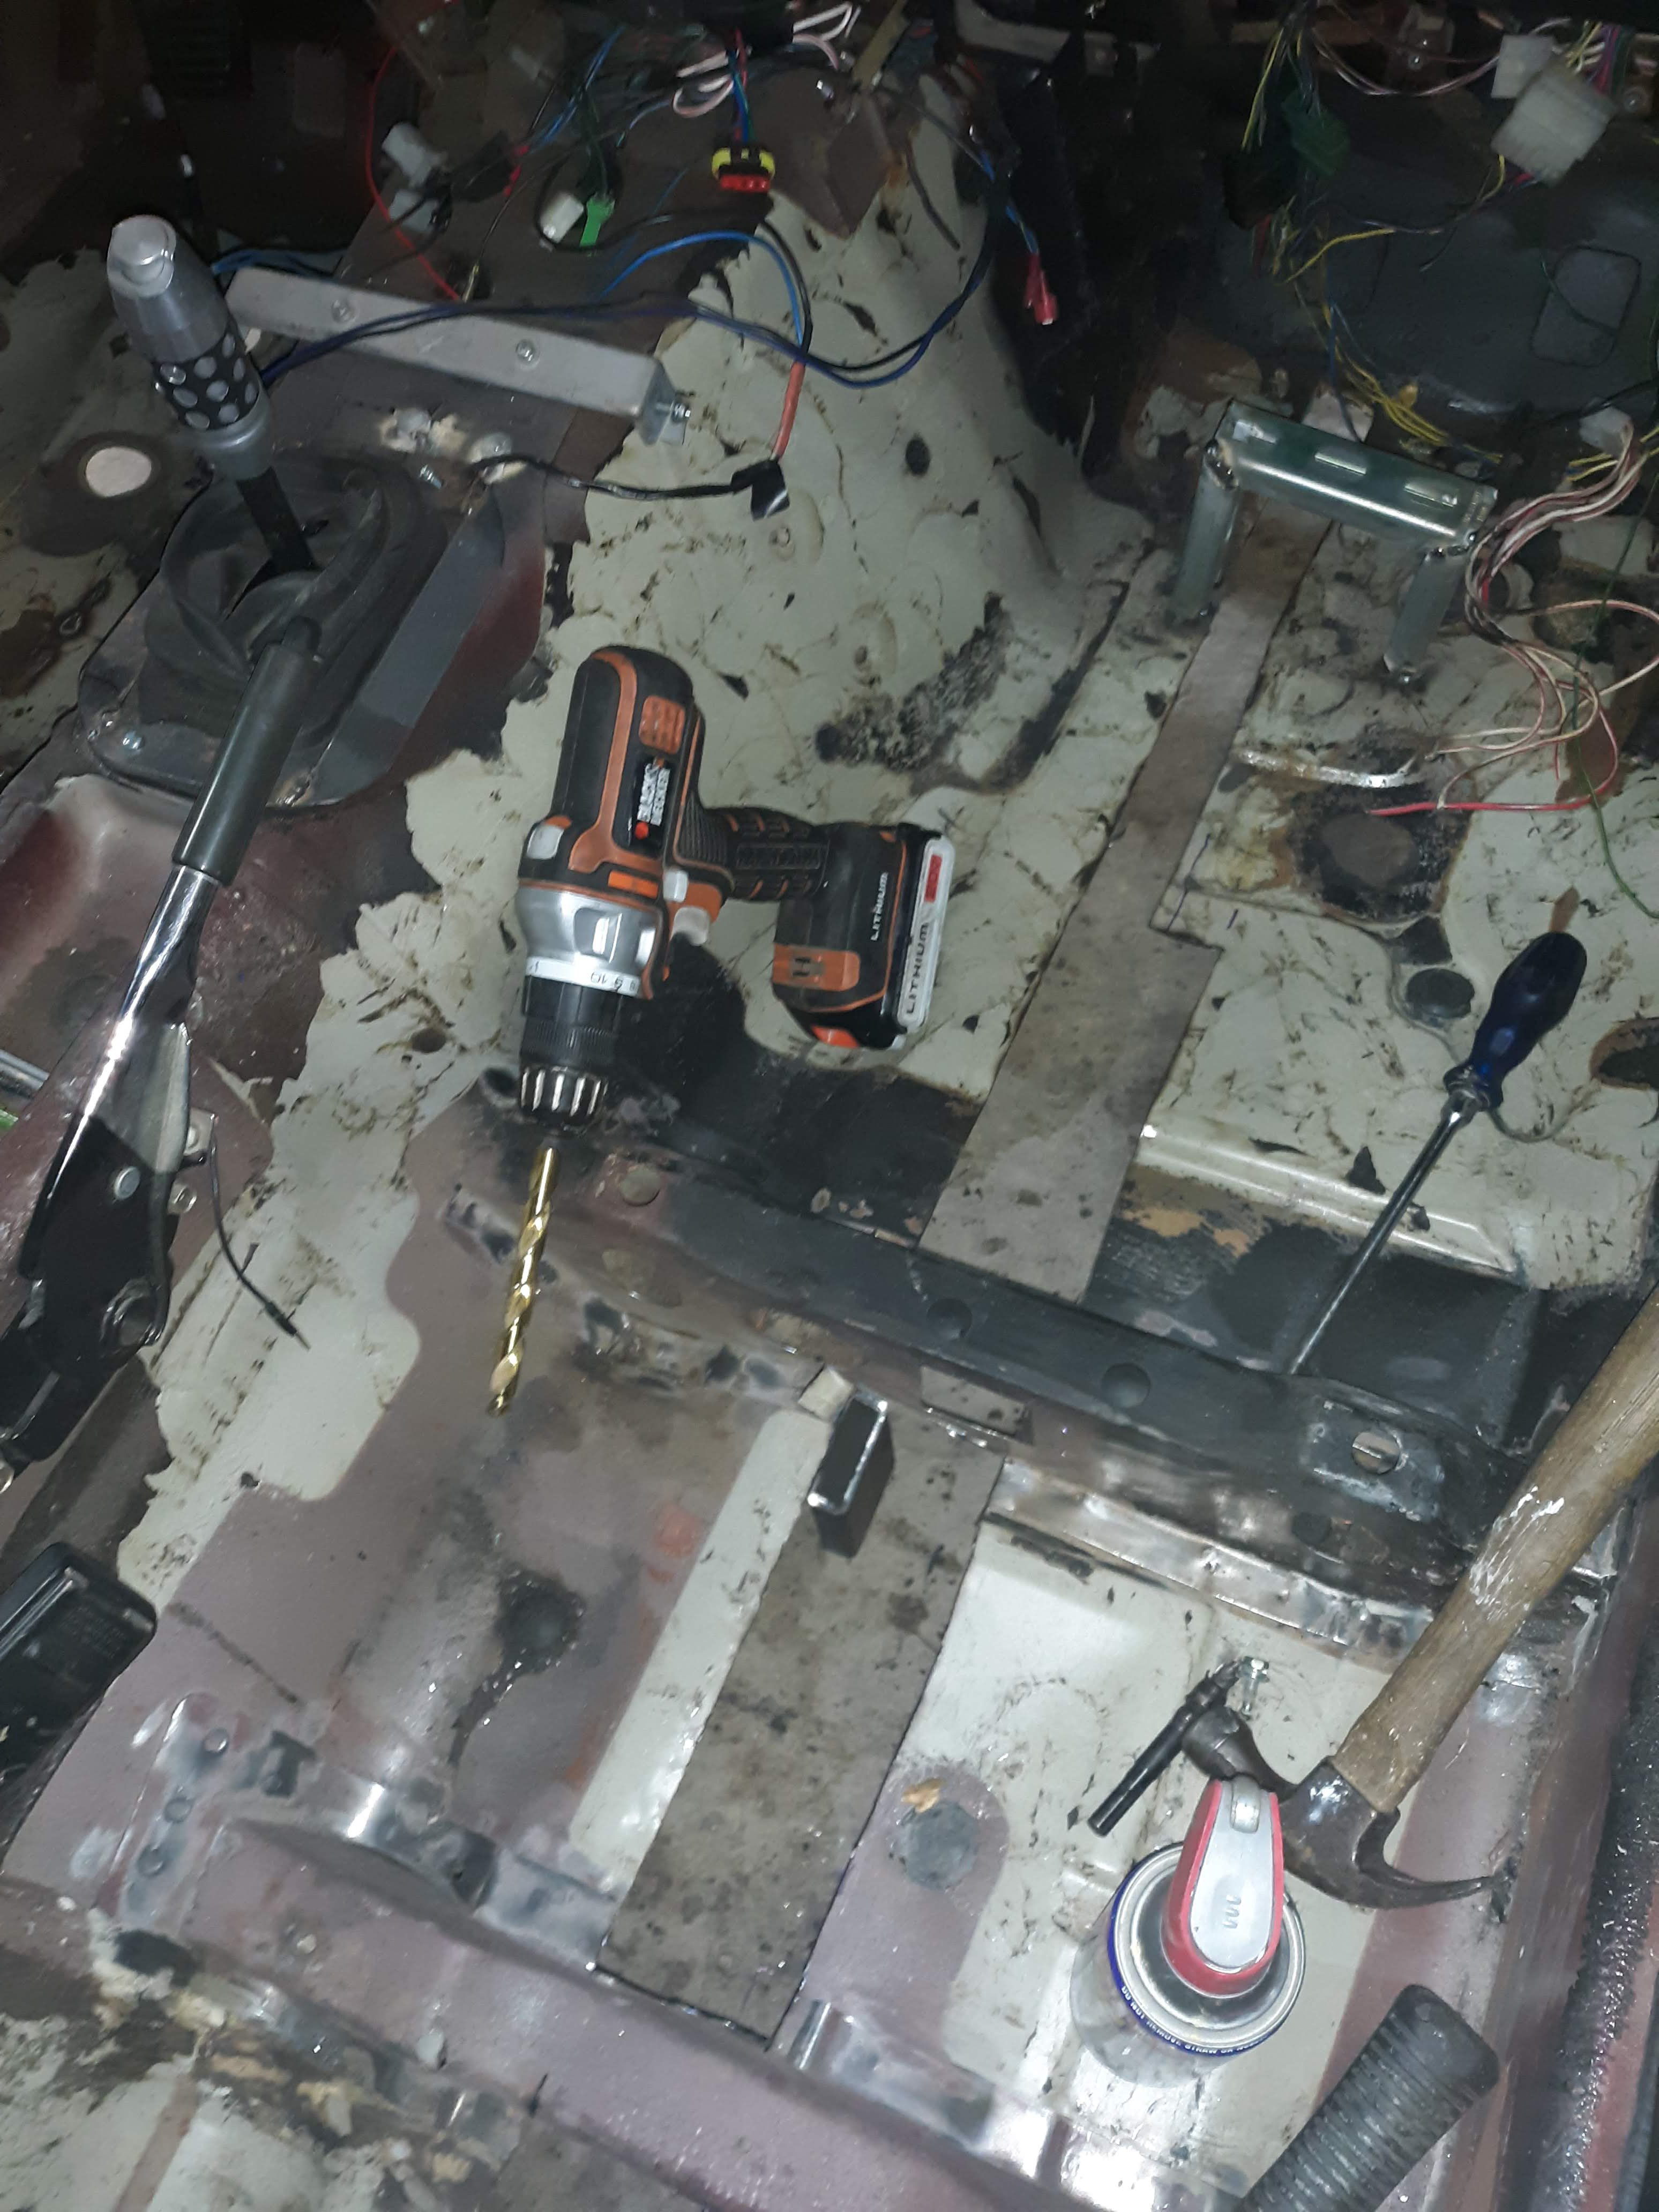
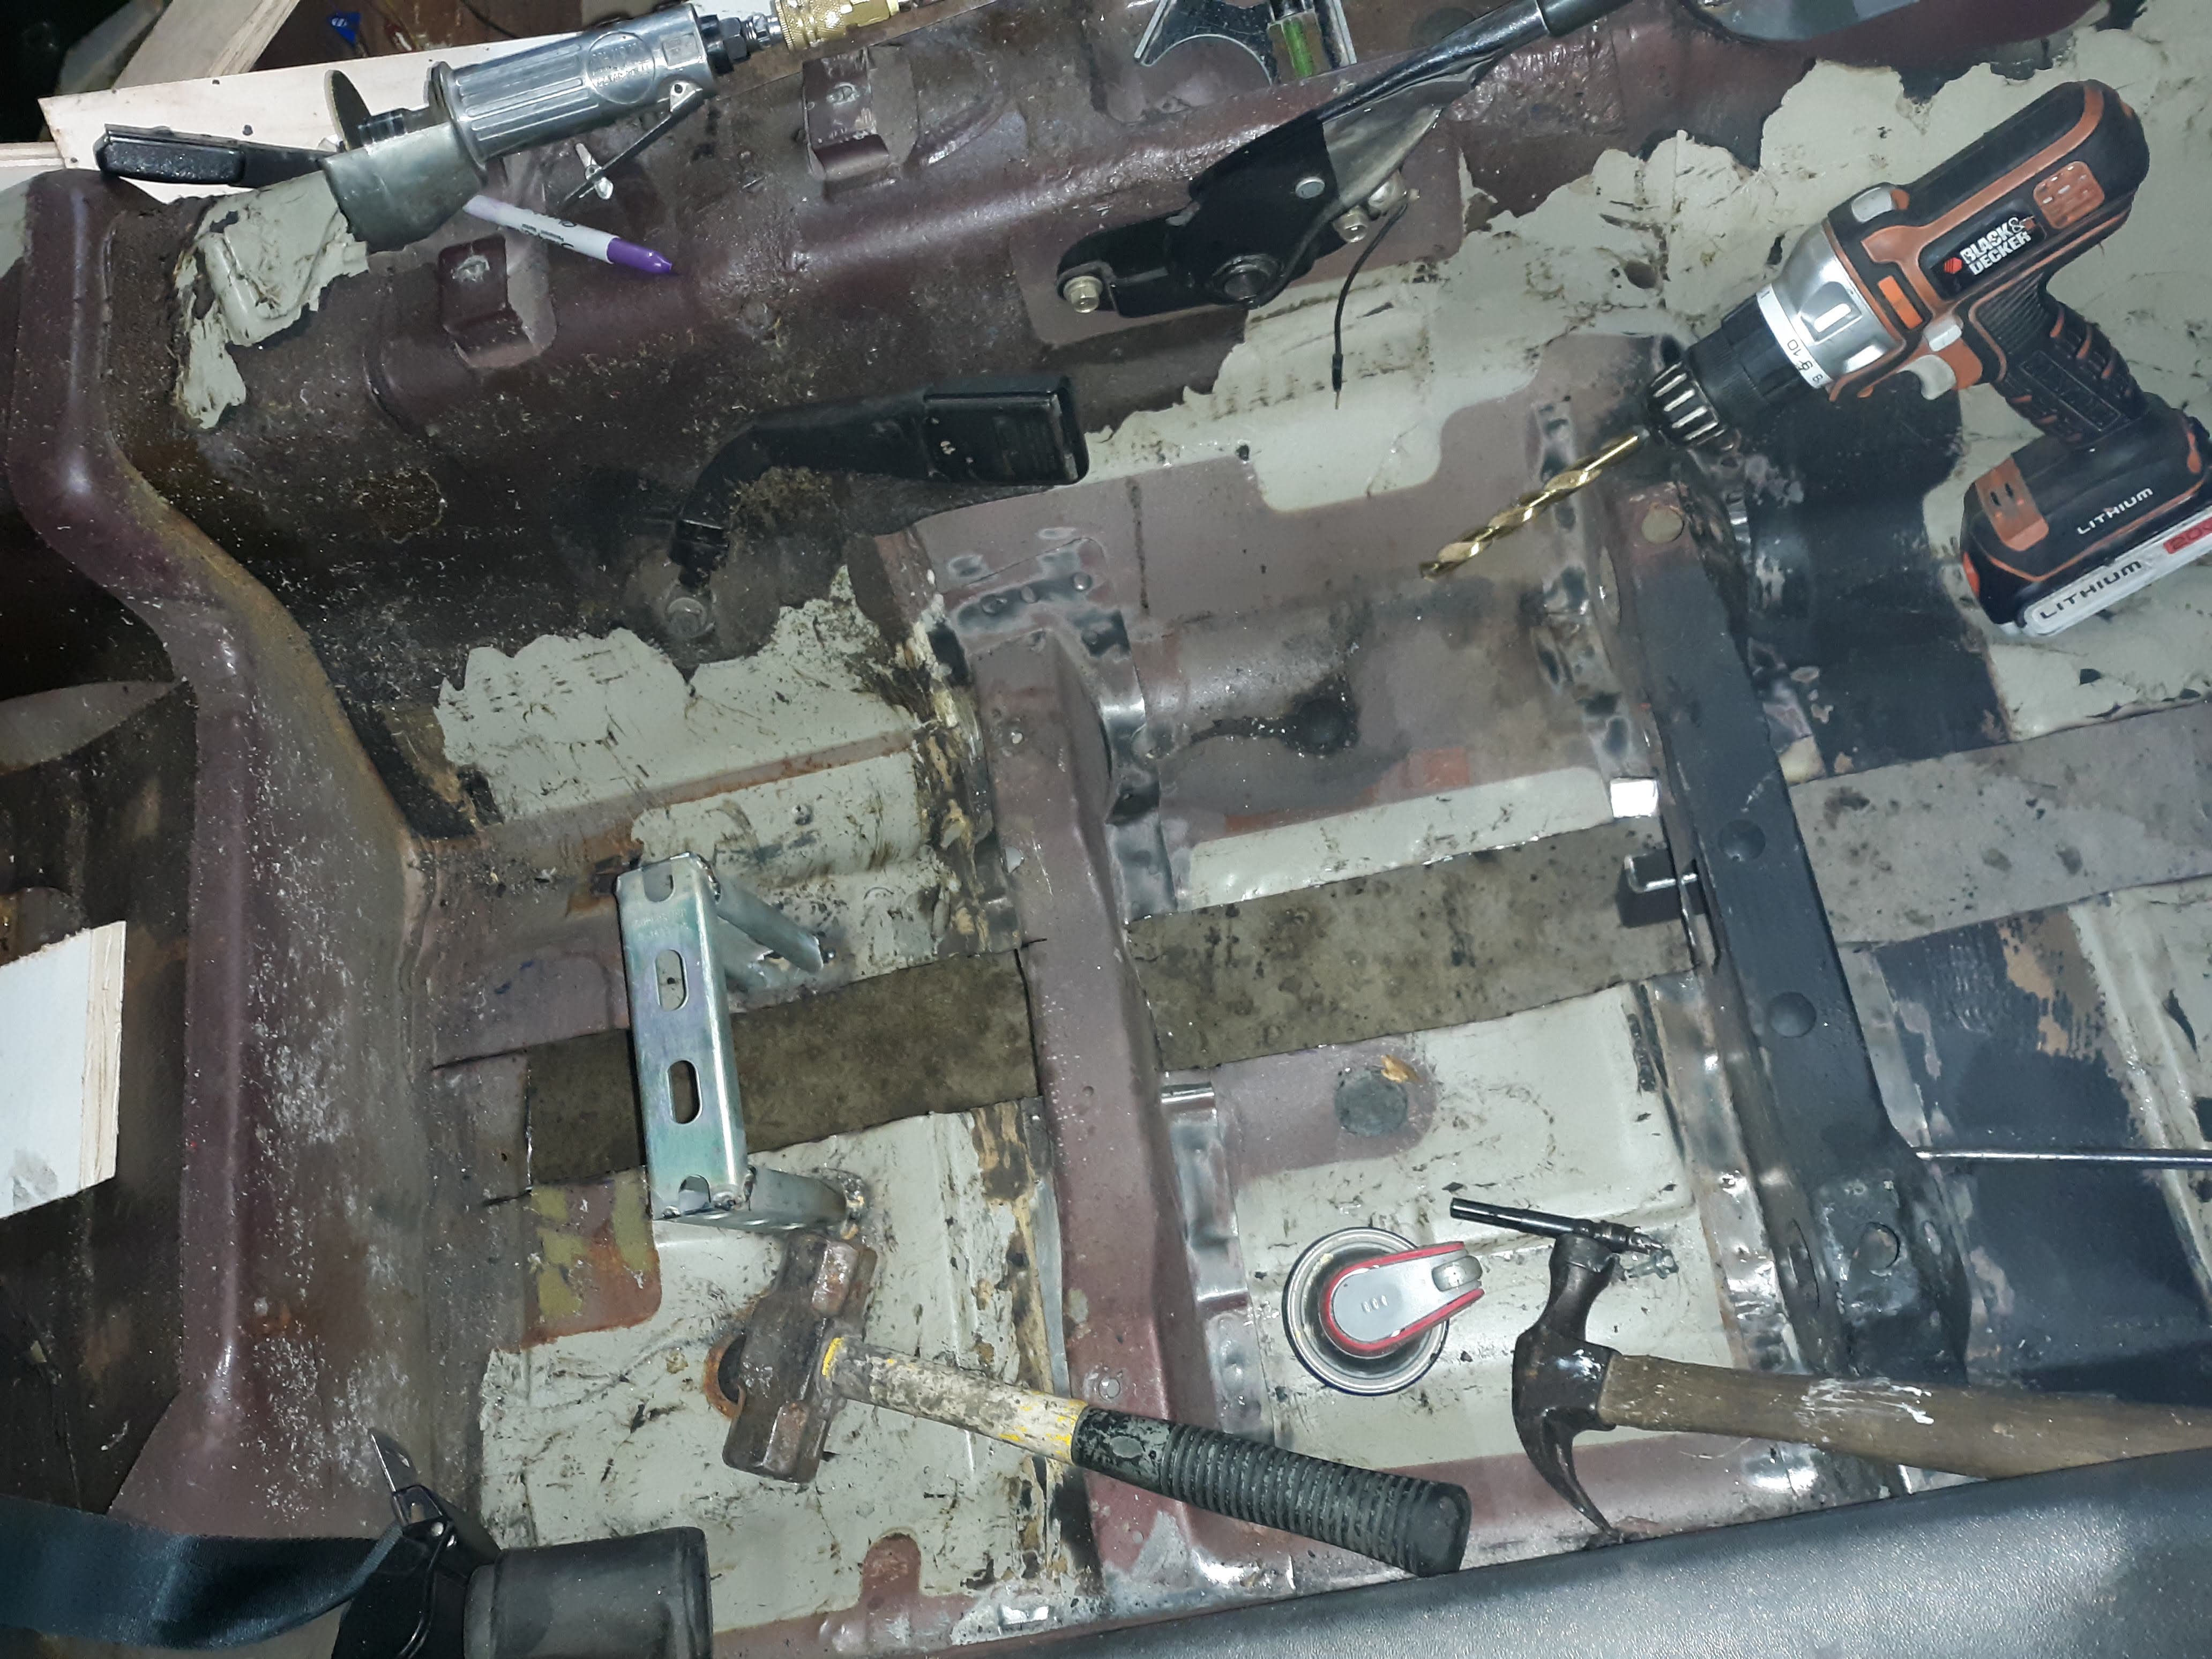
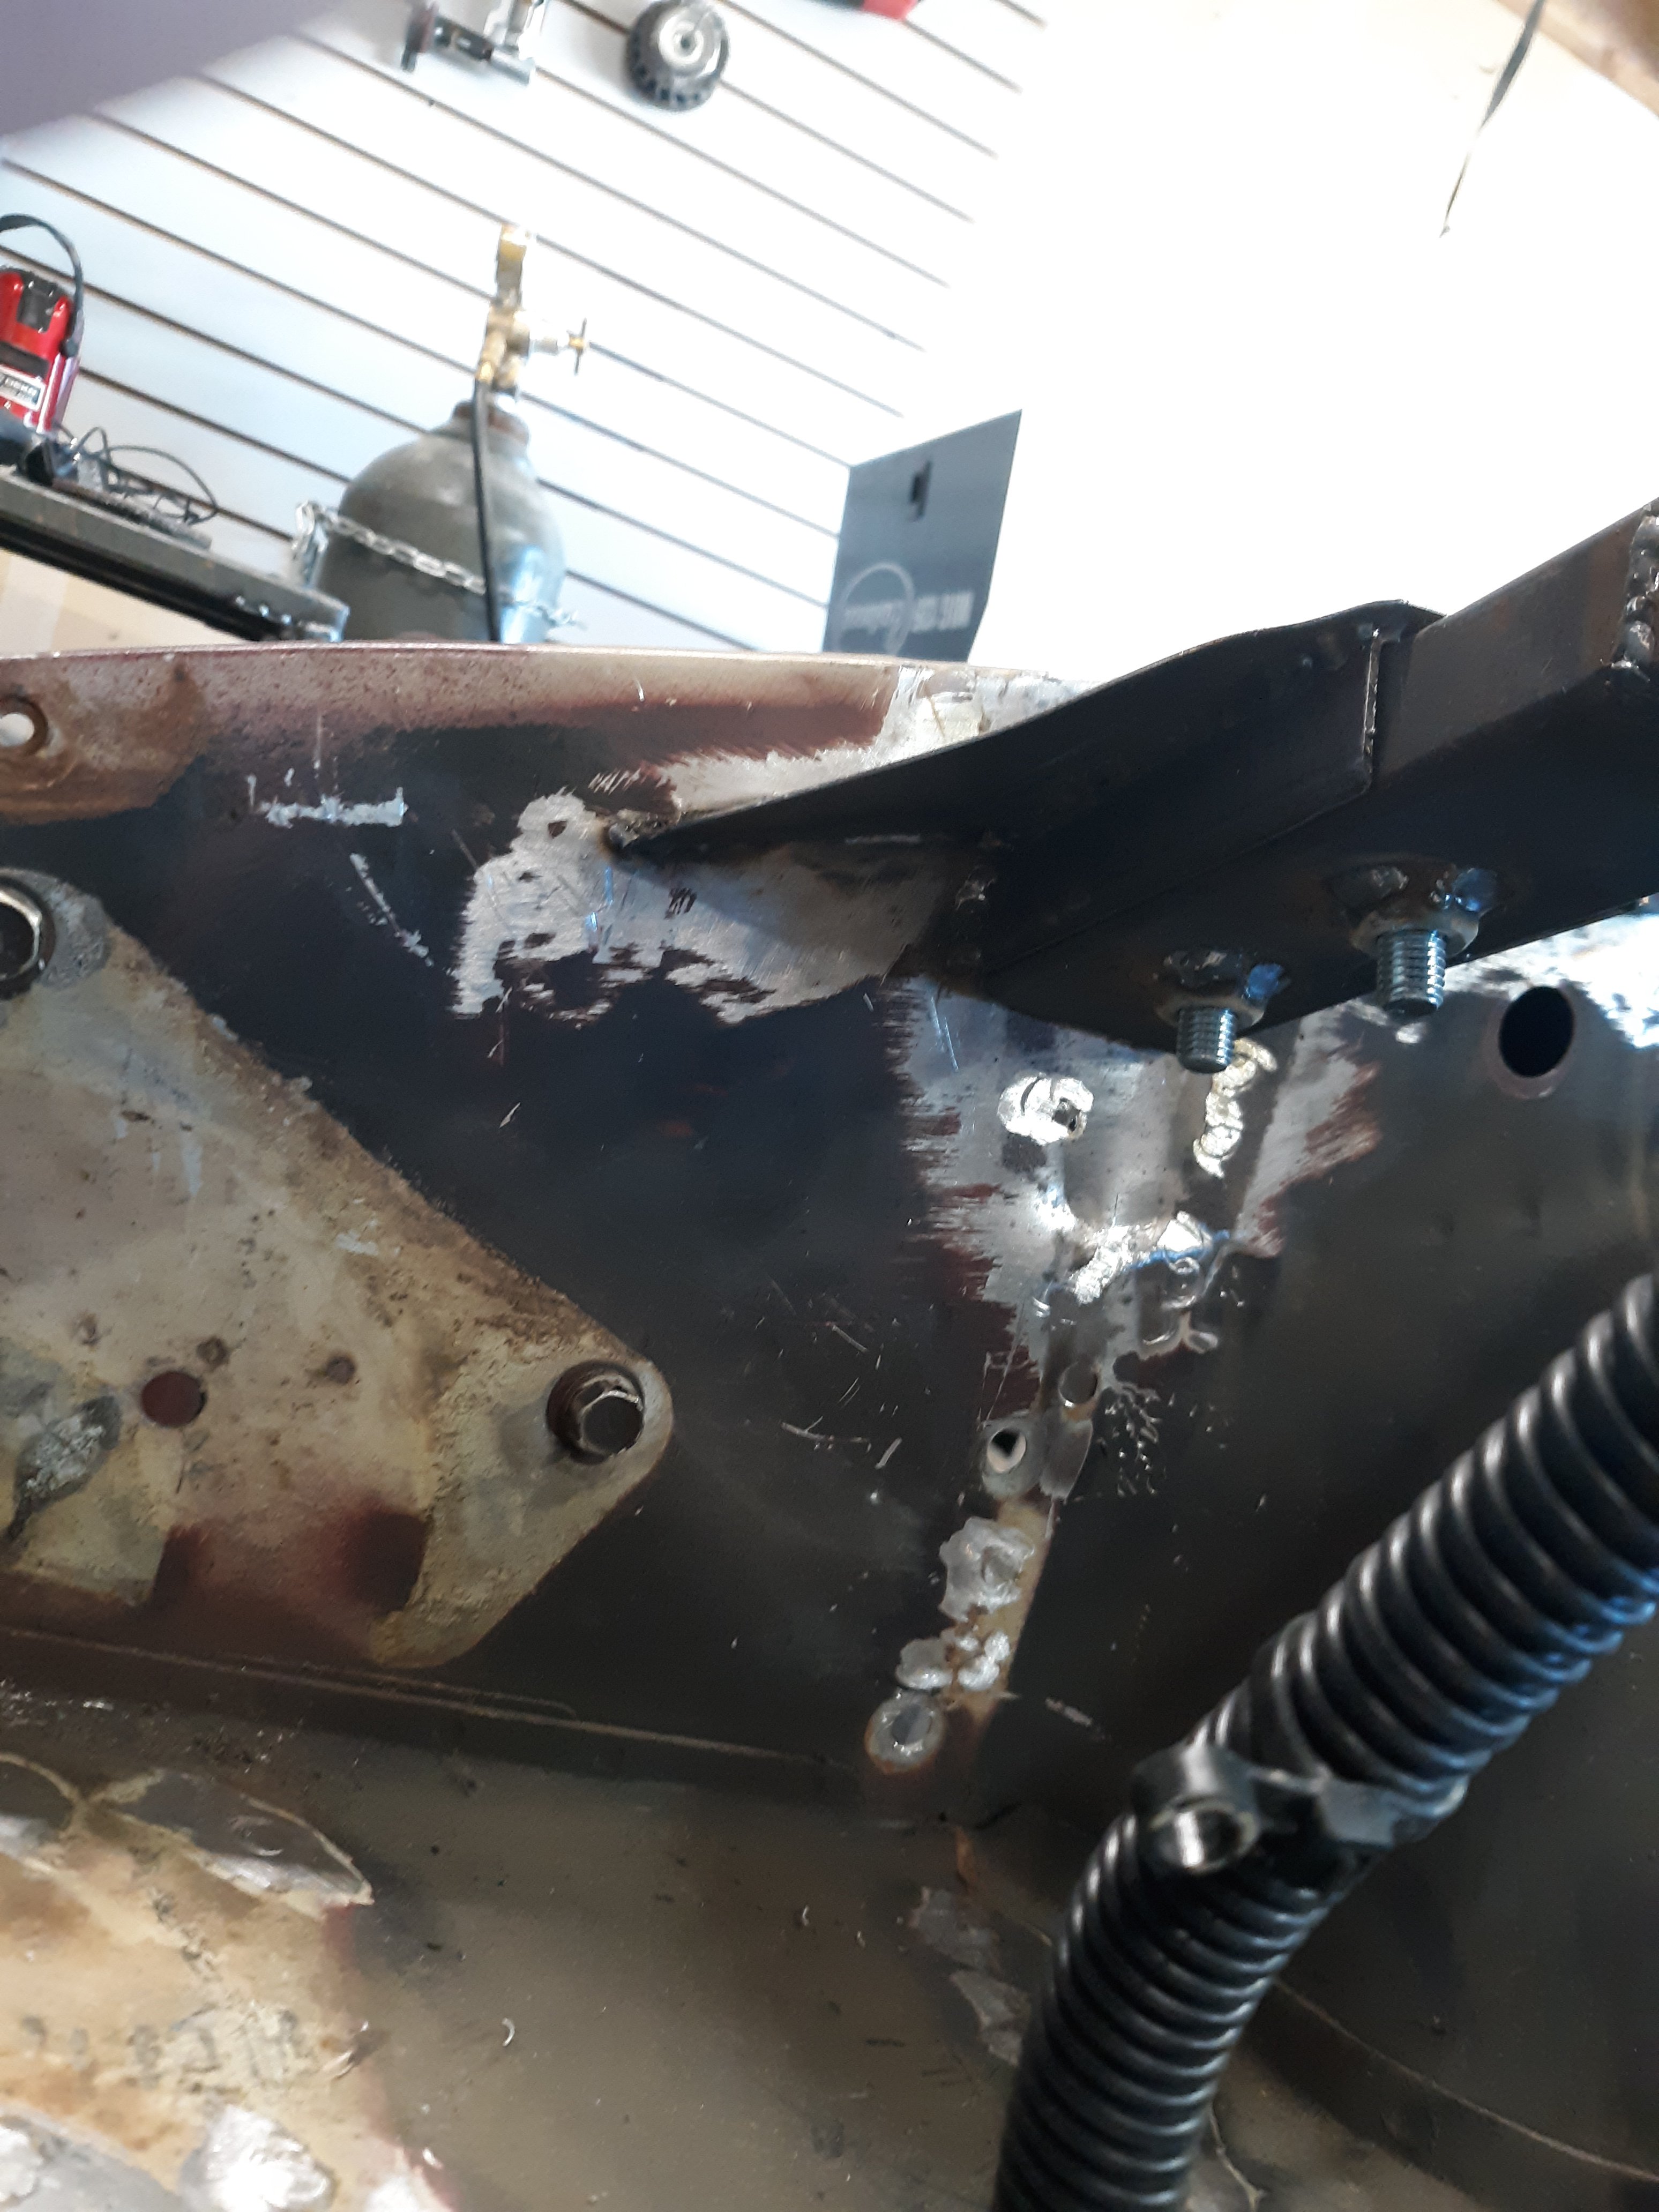
Here are some photos of the frame rails. I had discussed earlier on in another thread about how to go about mounting them on healthy 280z floor pans since they are not "flat". The outcome was to mount them up with jacks/stands and beat the floor flat. There were a few areas on which I had to cut out the floor or make relief cuts but over all pleased with how it turned out. Now for the second one.
-
I got the driver side up and welded in for the most part. I stitch welded it running 1-1/2 in weldeds every 6 in or so on each side. Is that enough or should I just run a continuous weld down each side? I'll try and get photos tonight.
-
I got the driver side frame rail complete and ready to install. I should be working on that tomorrow afternoon evening. They go the full length of the car and are made out of 1x3x.125 dom. They attach to the t/c rod at both the top and bottom and will then have a piece of sheet metal covering up the gap. I'm at this point debating on removing the seat mounts or keeping the originals. I currently have 2012 Mazda Miata leather seats in there right now on which I like but with my goals, I want to put seats in that can except a harness.
-
Brake safety switch delete...please help?!
walkerbk replied to jersey280's topic in S30 Series - 240z, 260z, 280z
They are easy to prepare. The hardest part is pulling the cylinder out from in the middle if it is seized. To solve this, I grabbed a grease zerk from napa and pumped it out with the addition of some heat. Then just replace the seals with ones from mcmaster (cant remember the part numbers that I used). -
Heavy Duty frame rails and connectors
walkerbk replied to toolman's topic in Gen III & IV Chevy V8Z Tech Board
I'm interested to see how the bolts hold up when being installed. I figured the powder coat would chip off when you put a wrench on it. If not, I know what I will be doing a lot of. -
How she currently sits. I am about 1/3 way complete with the driver side frame rail.
-
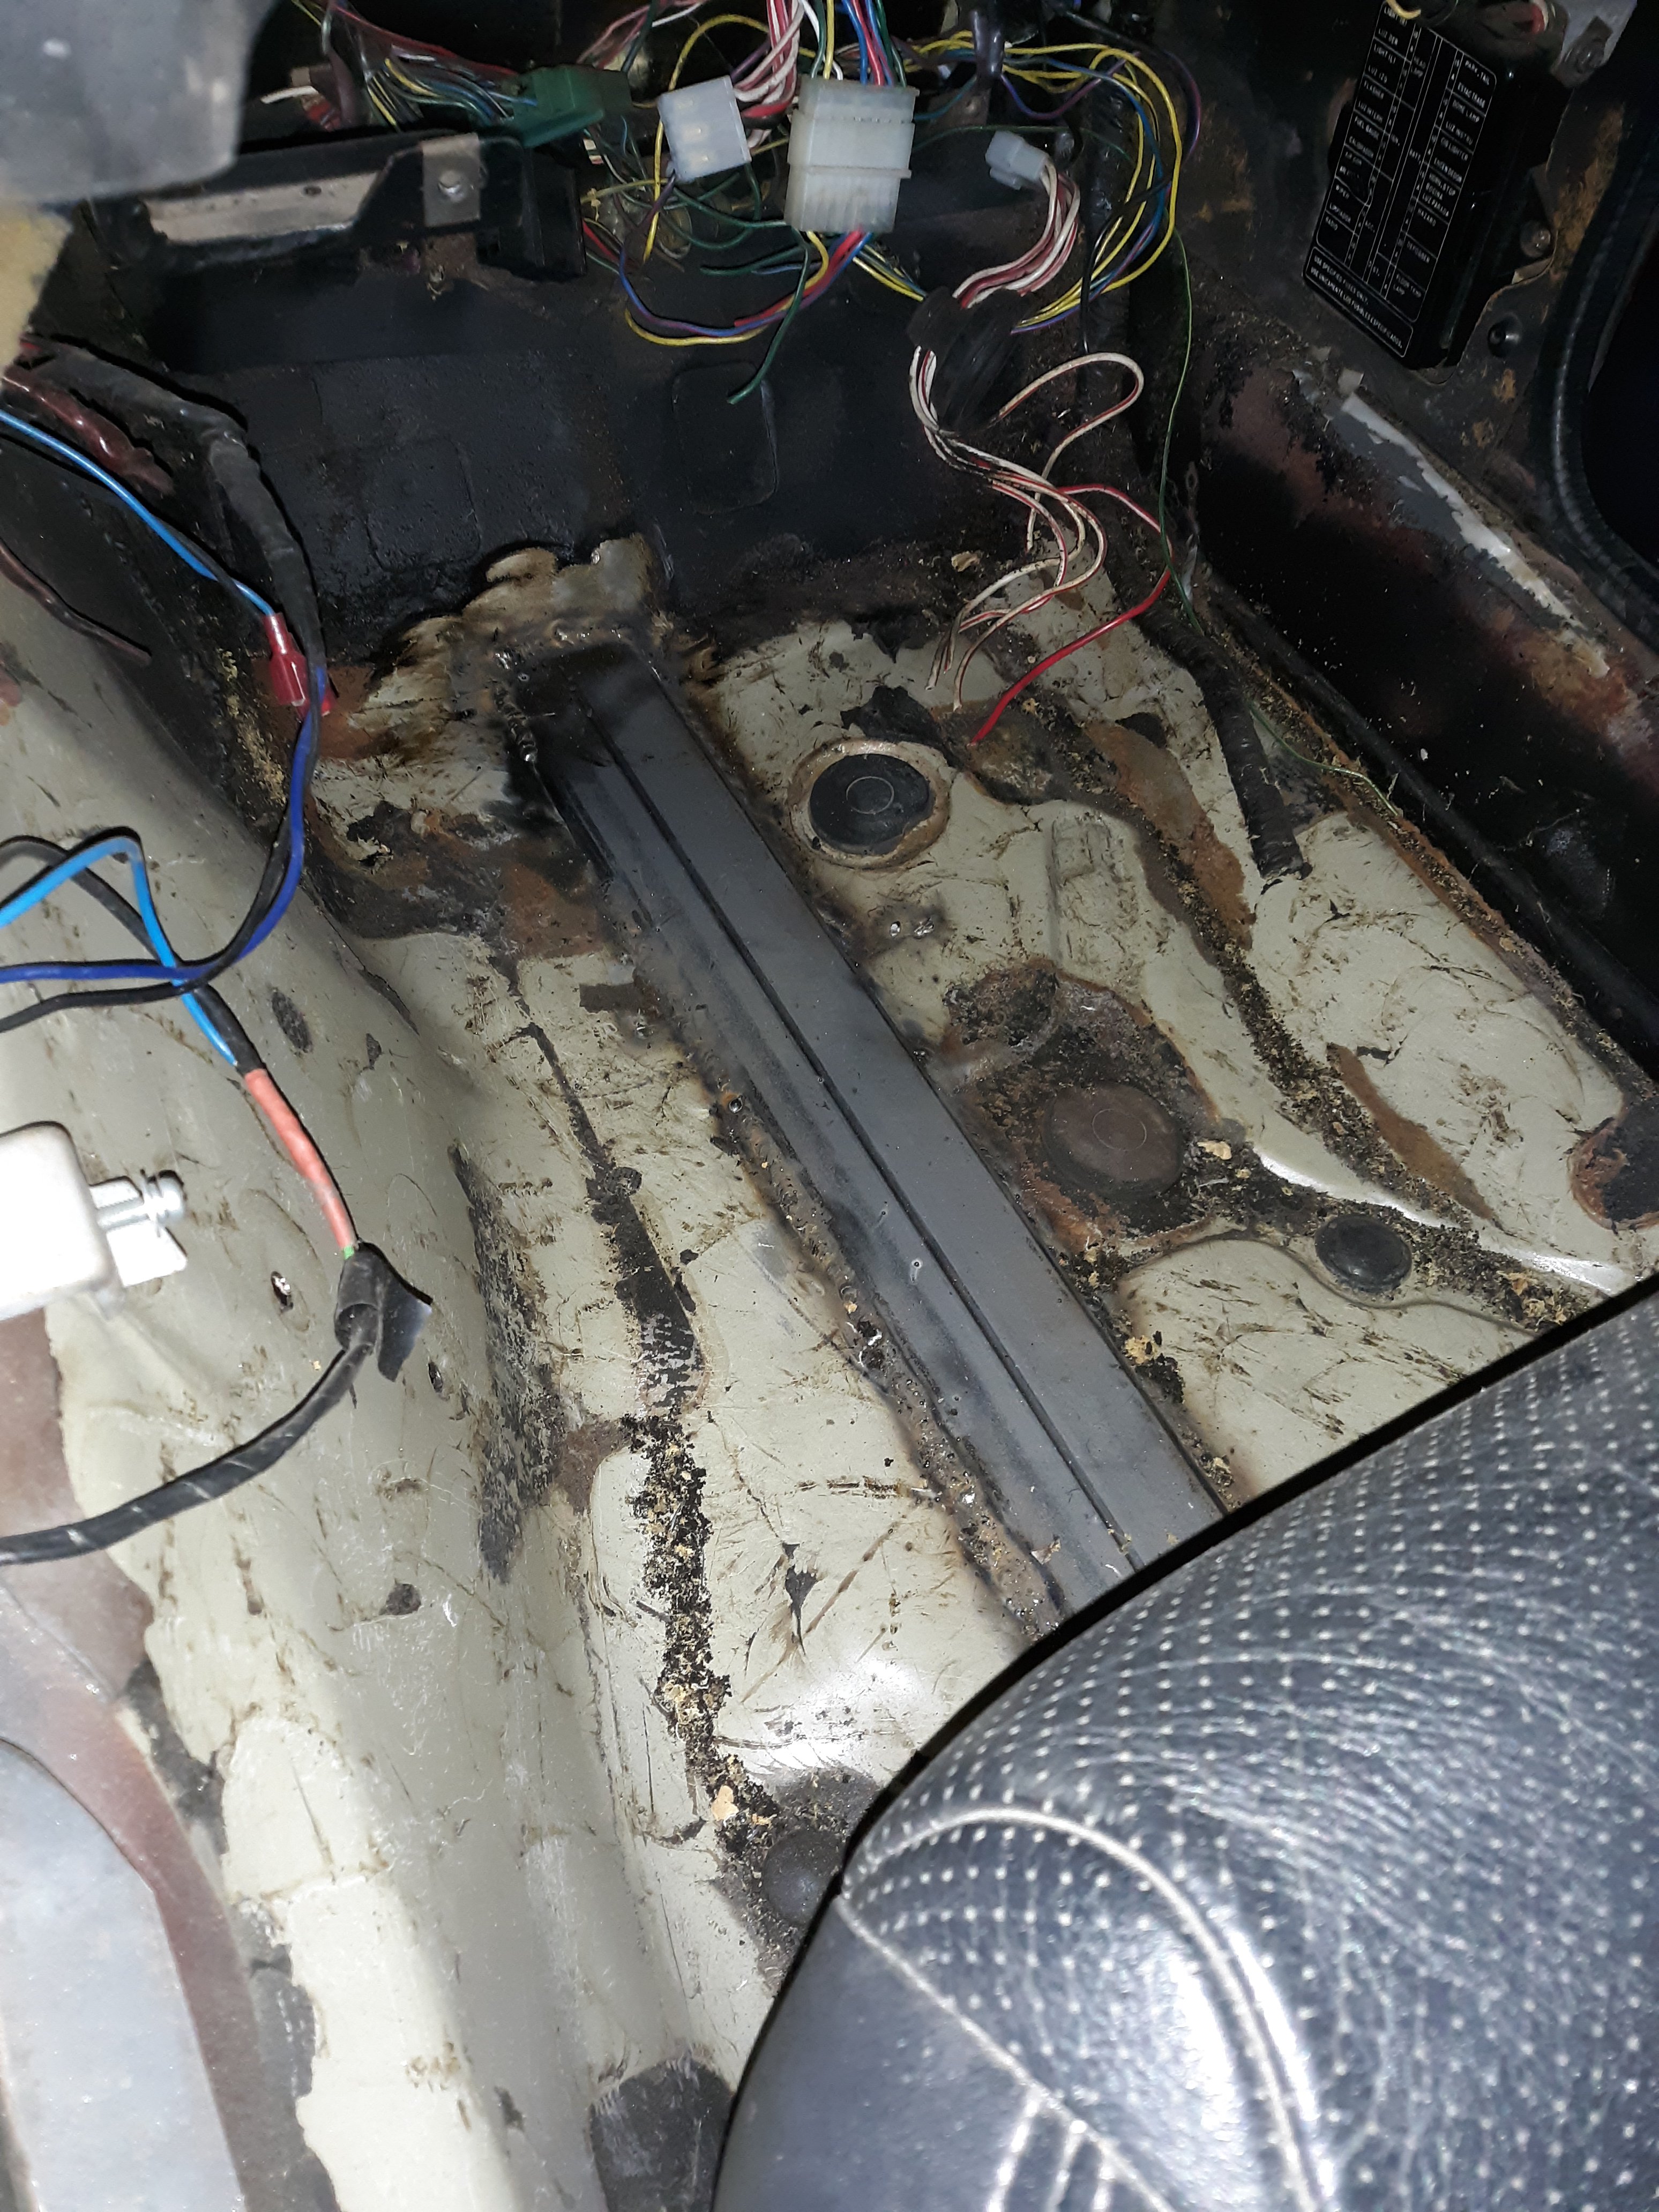
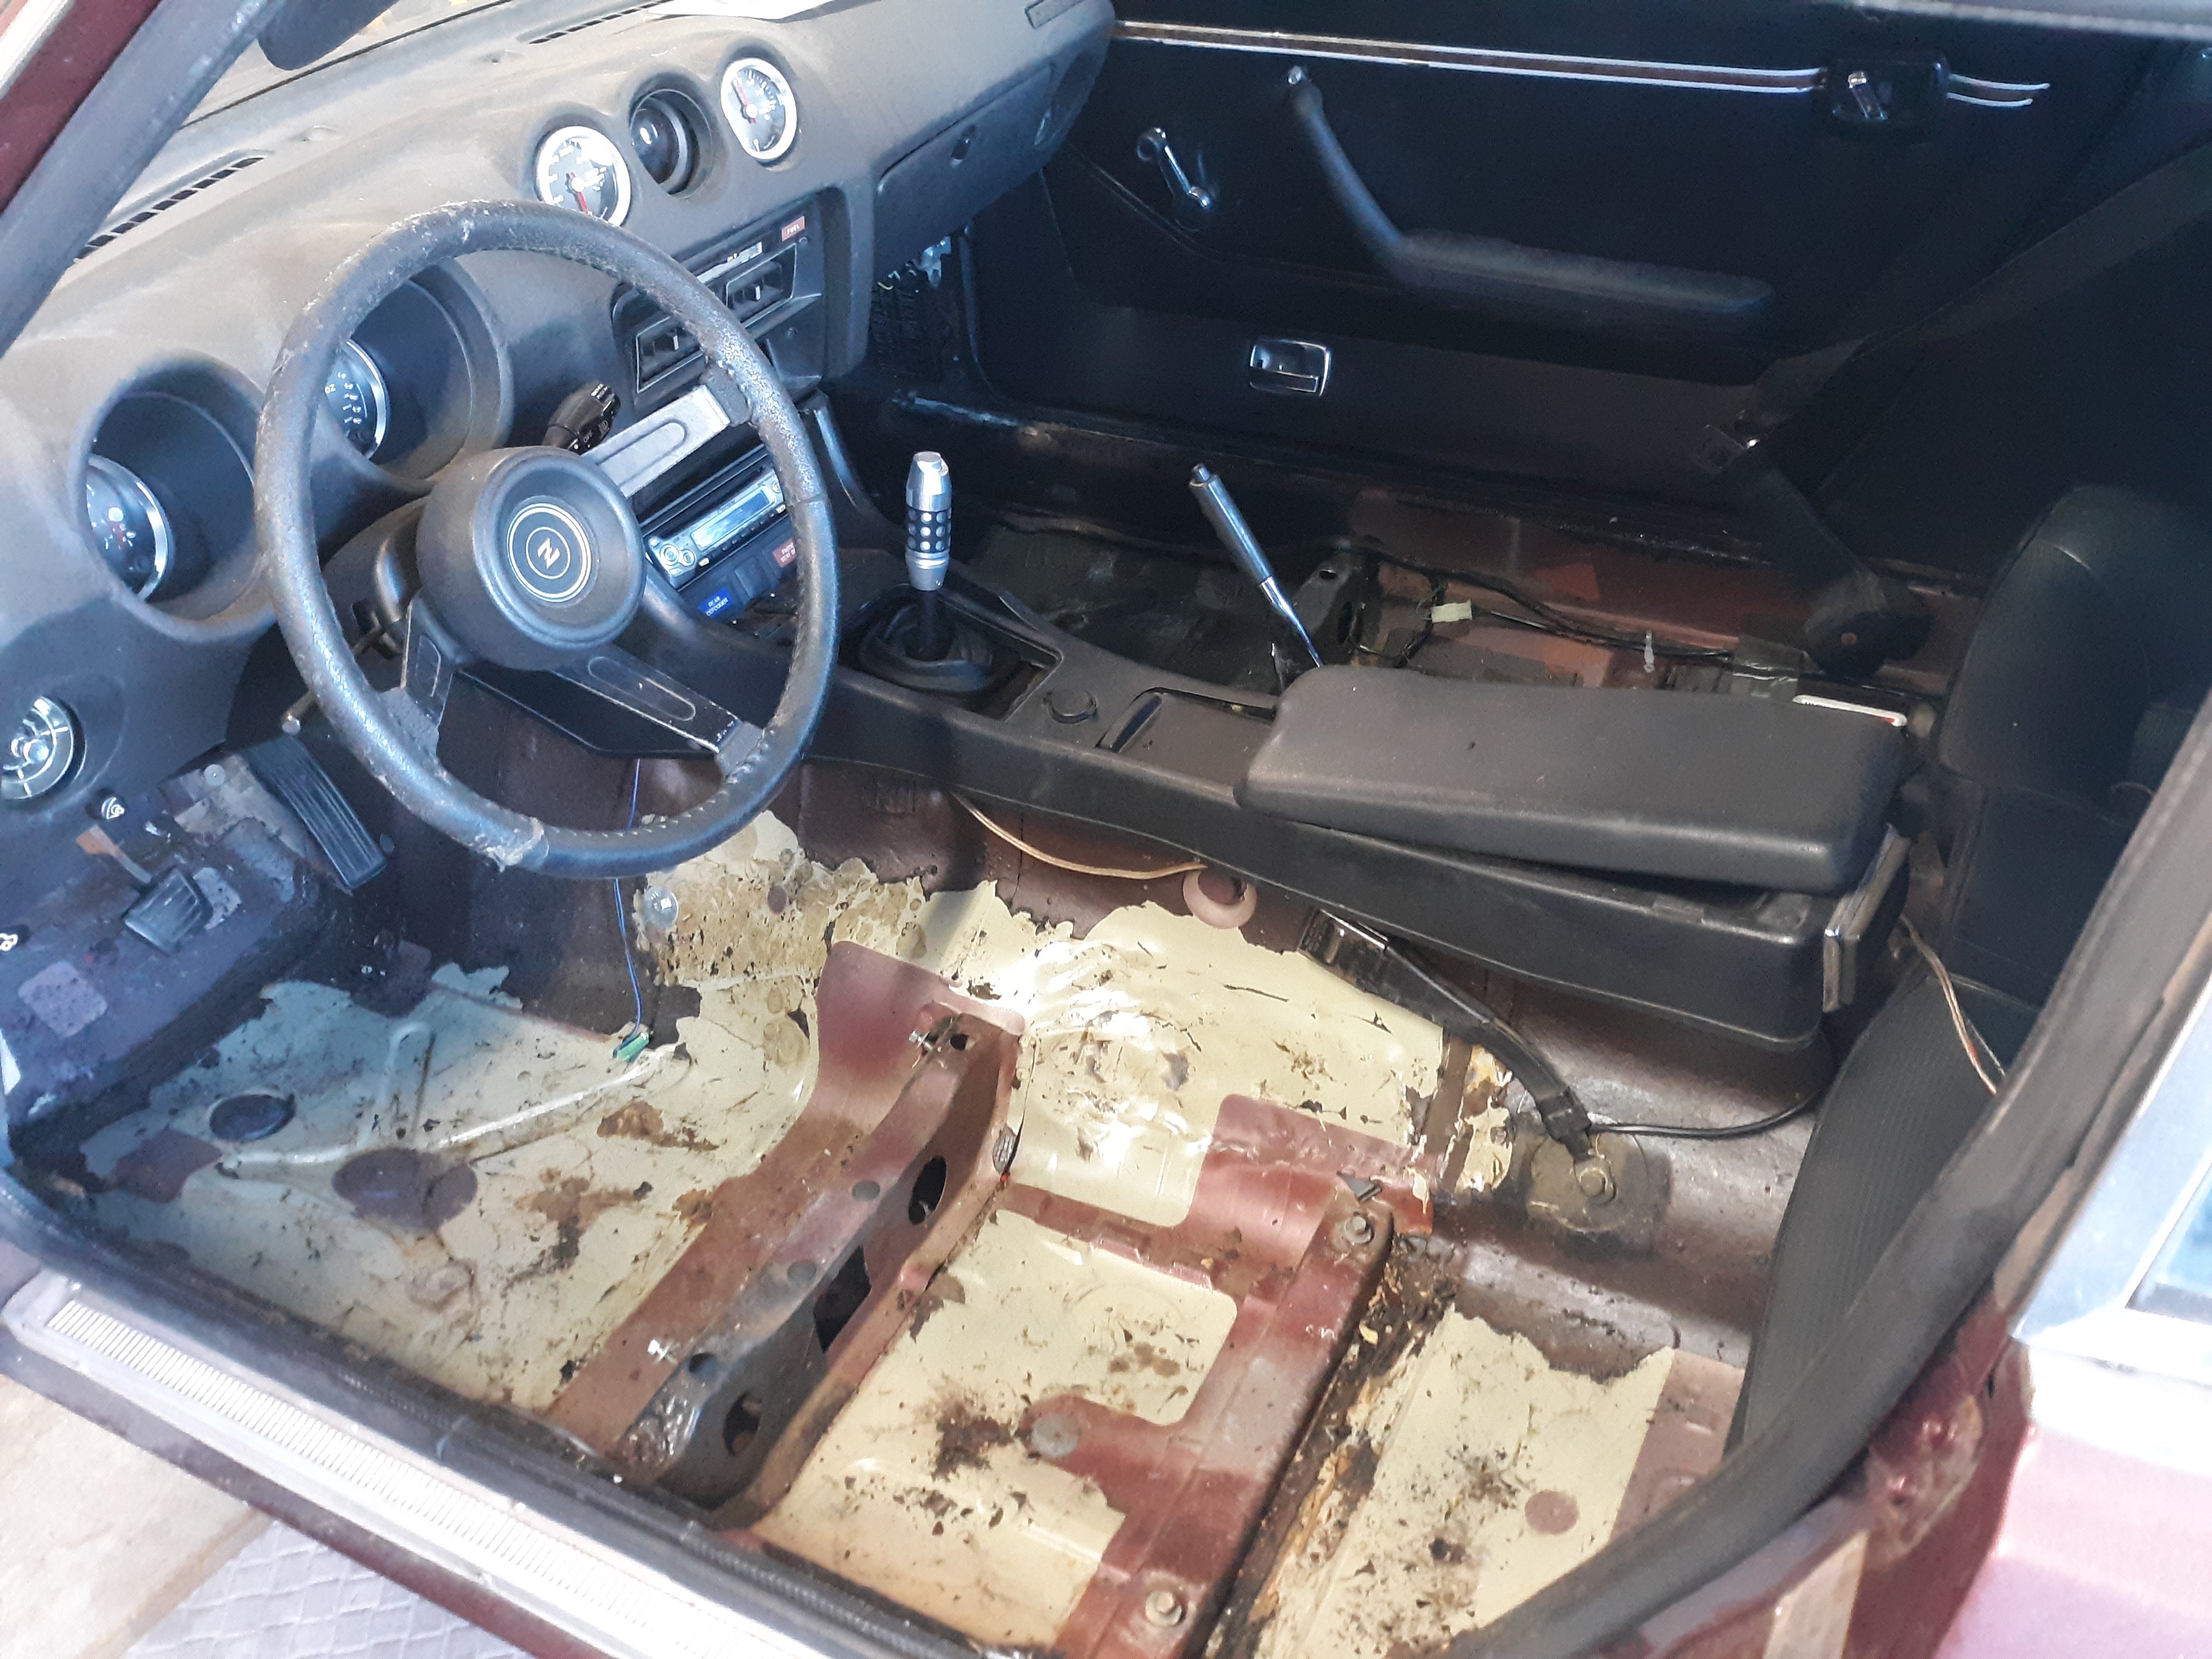
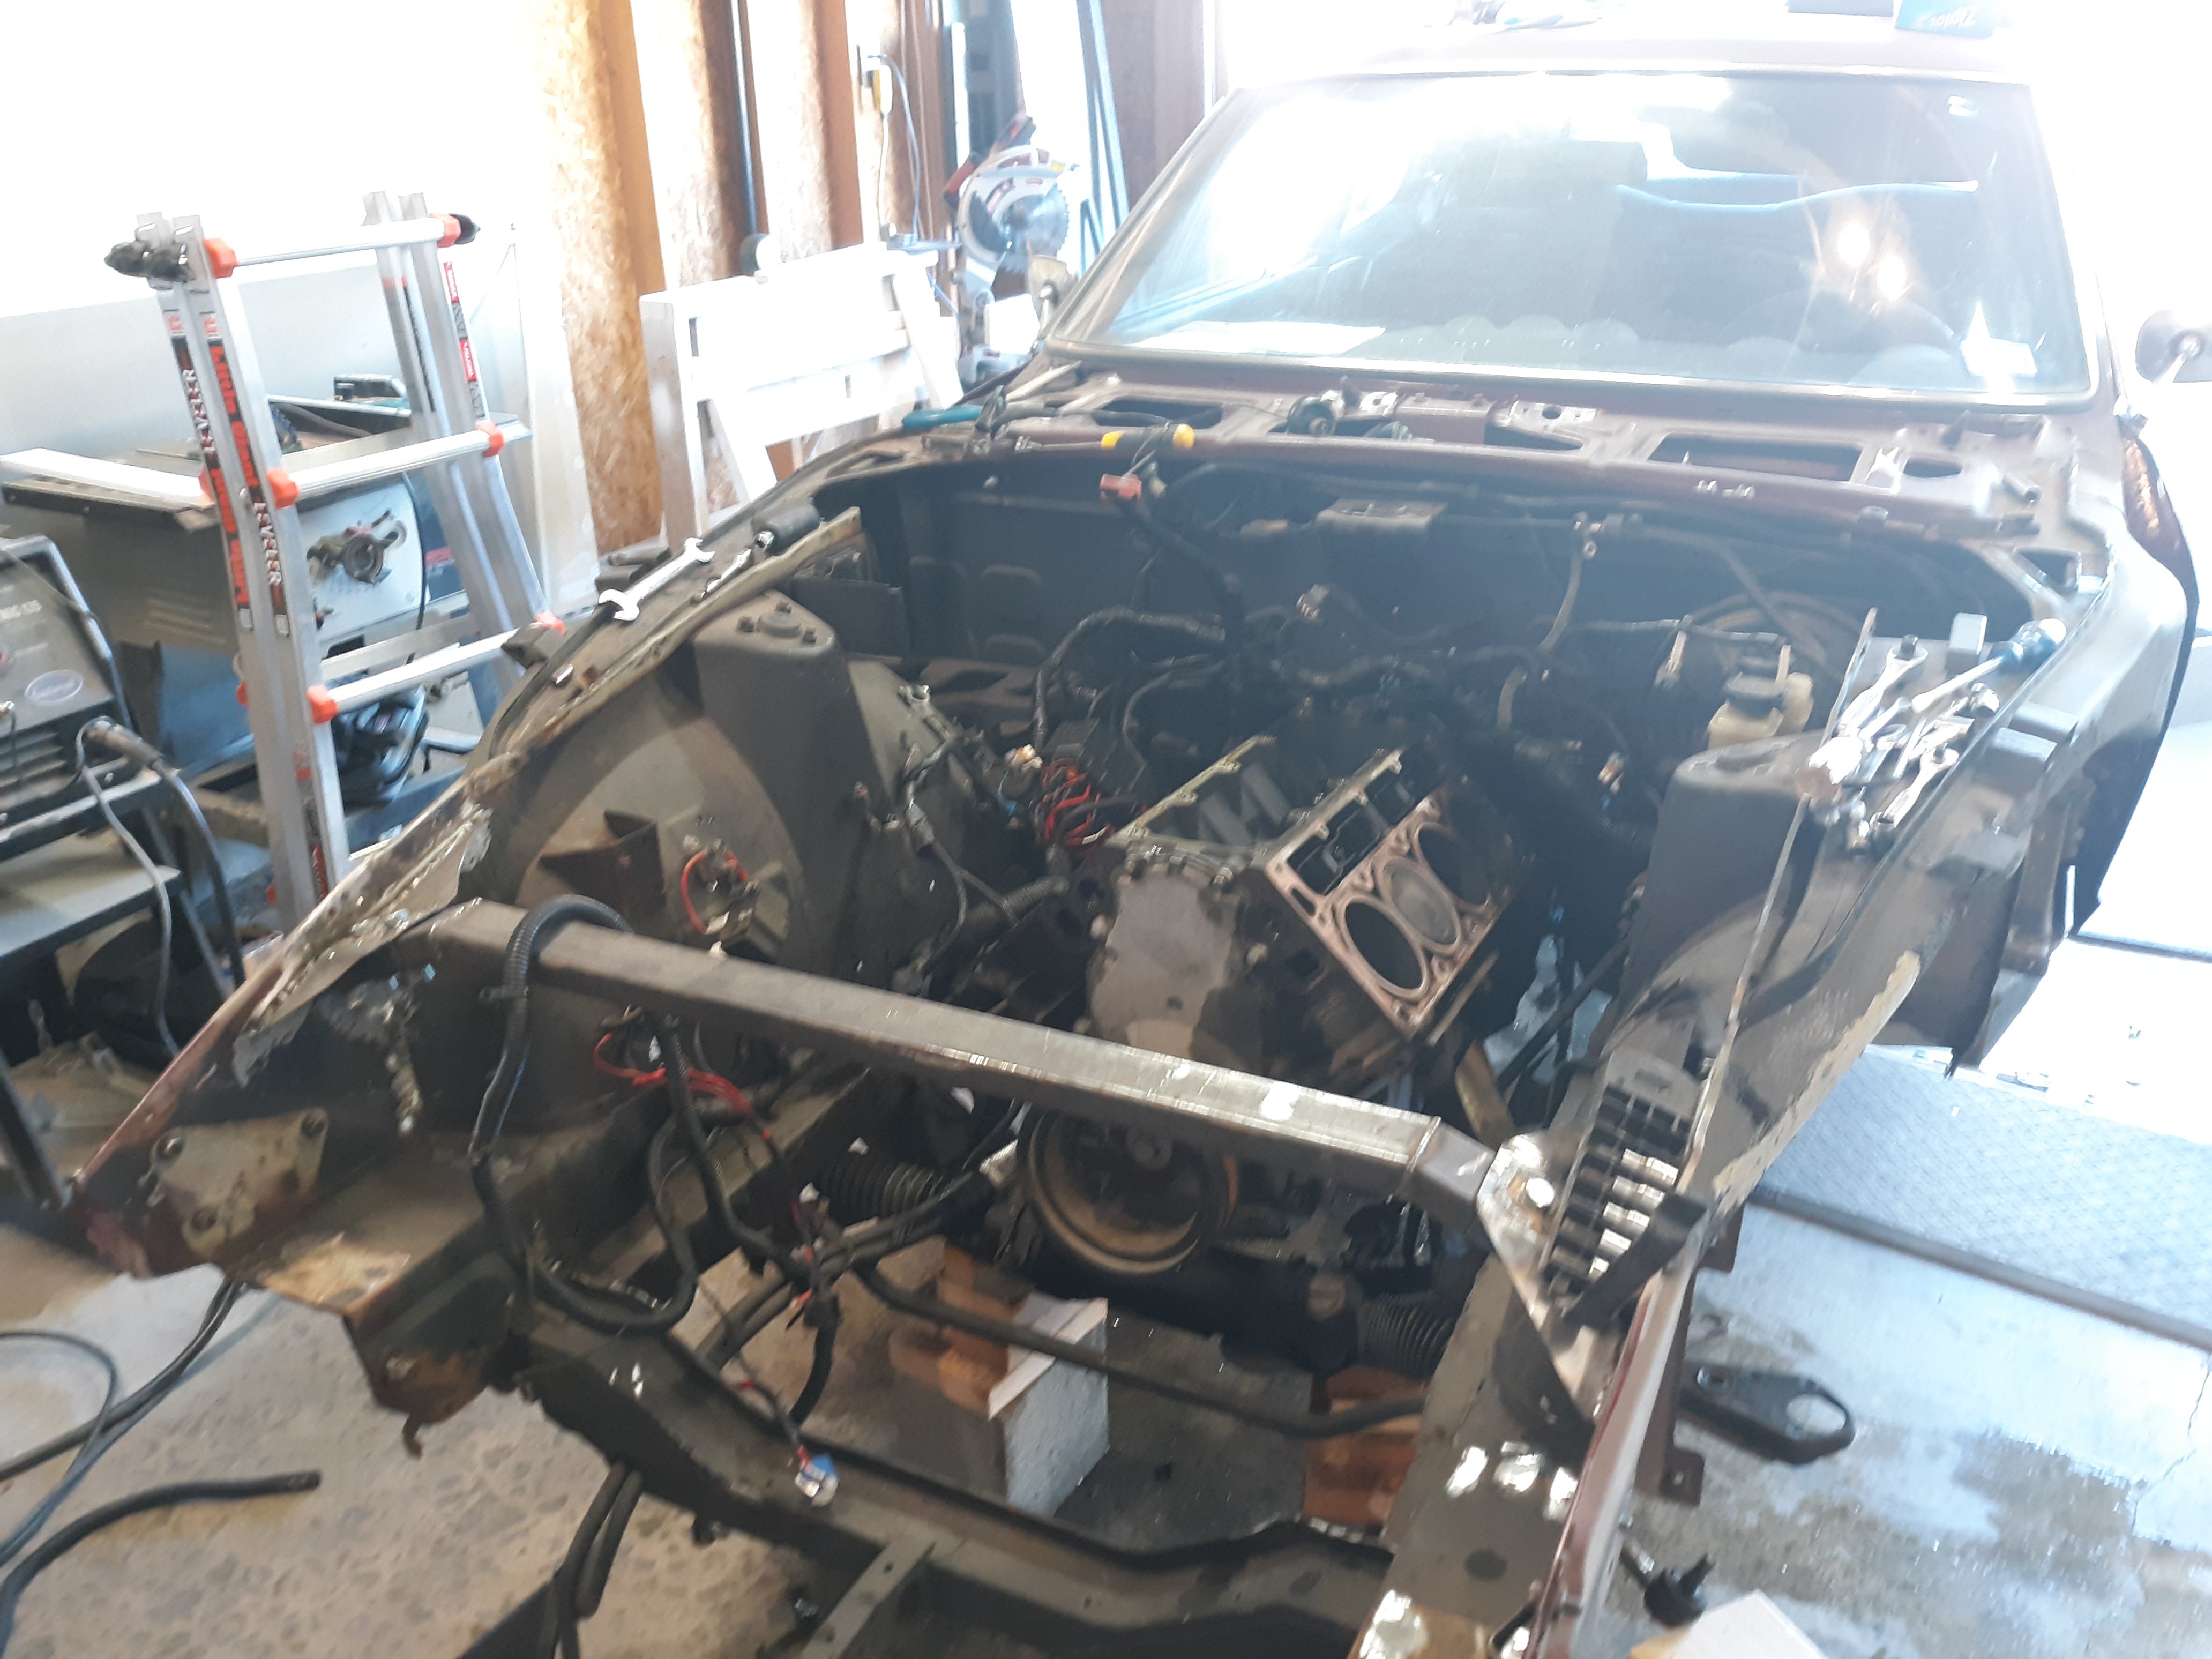
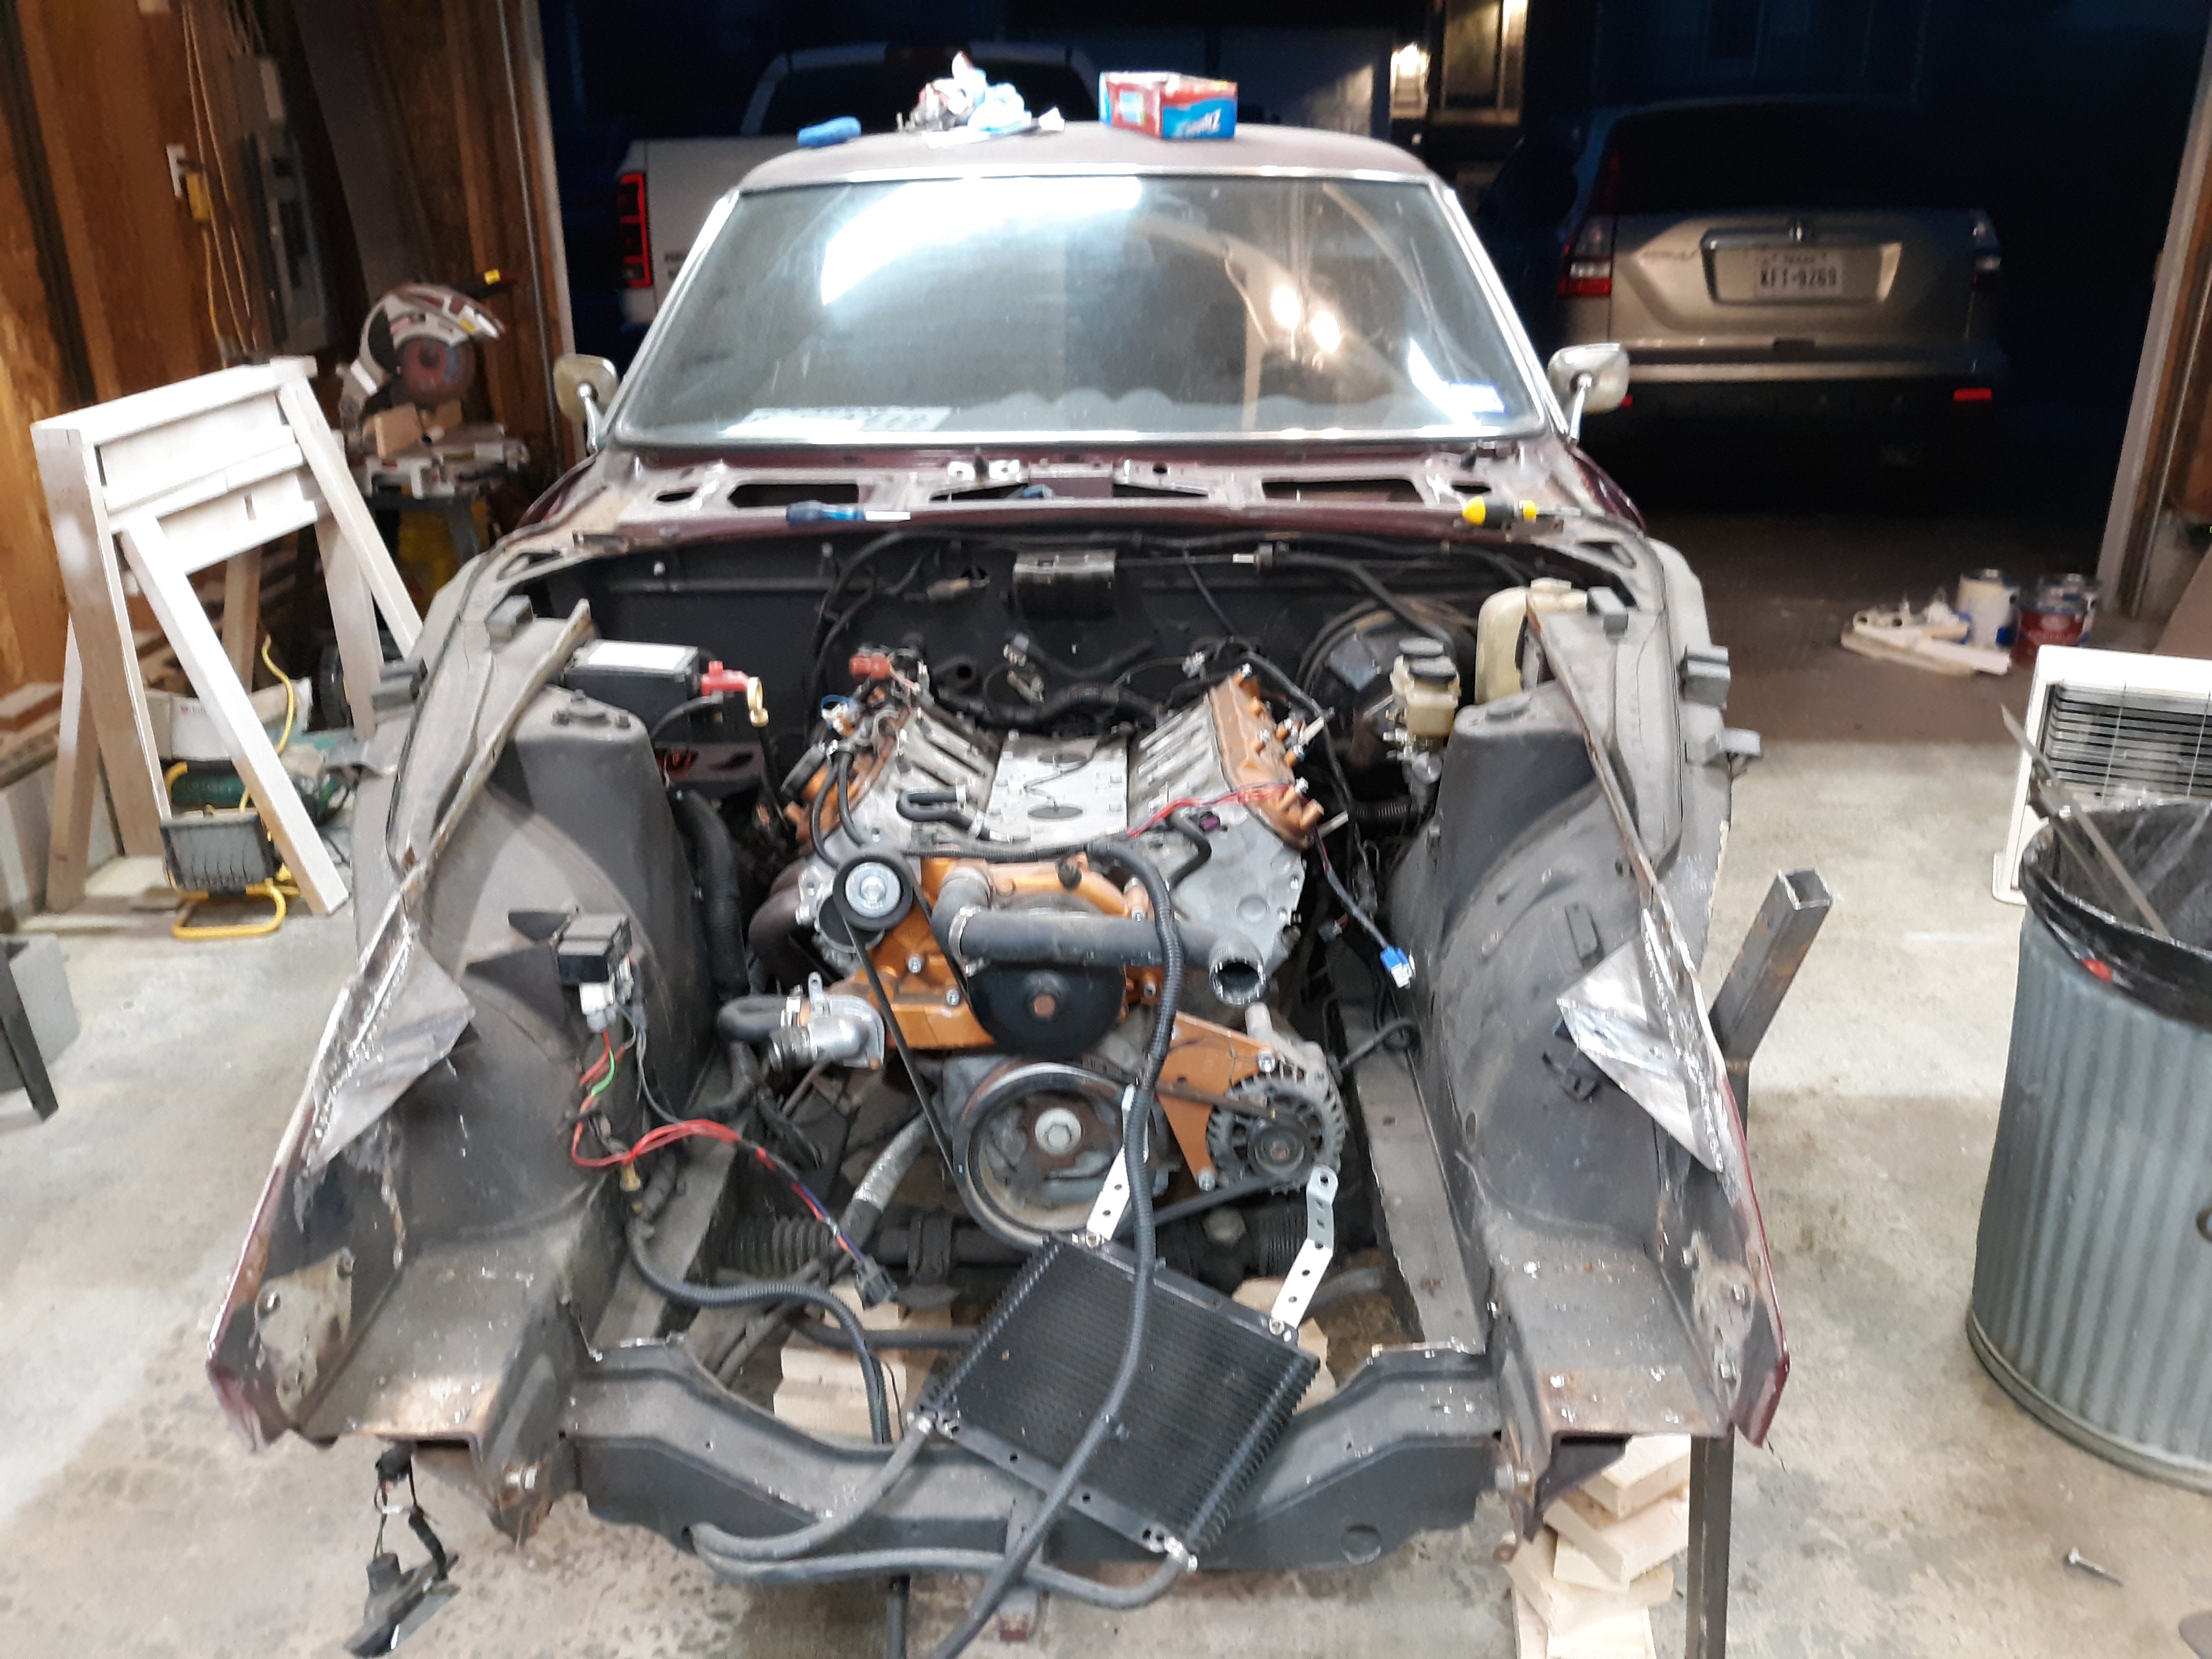
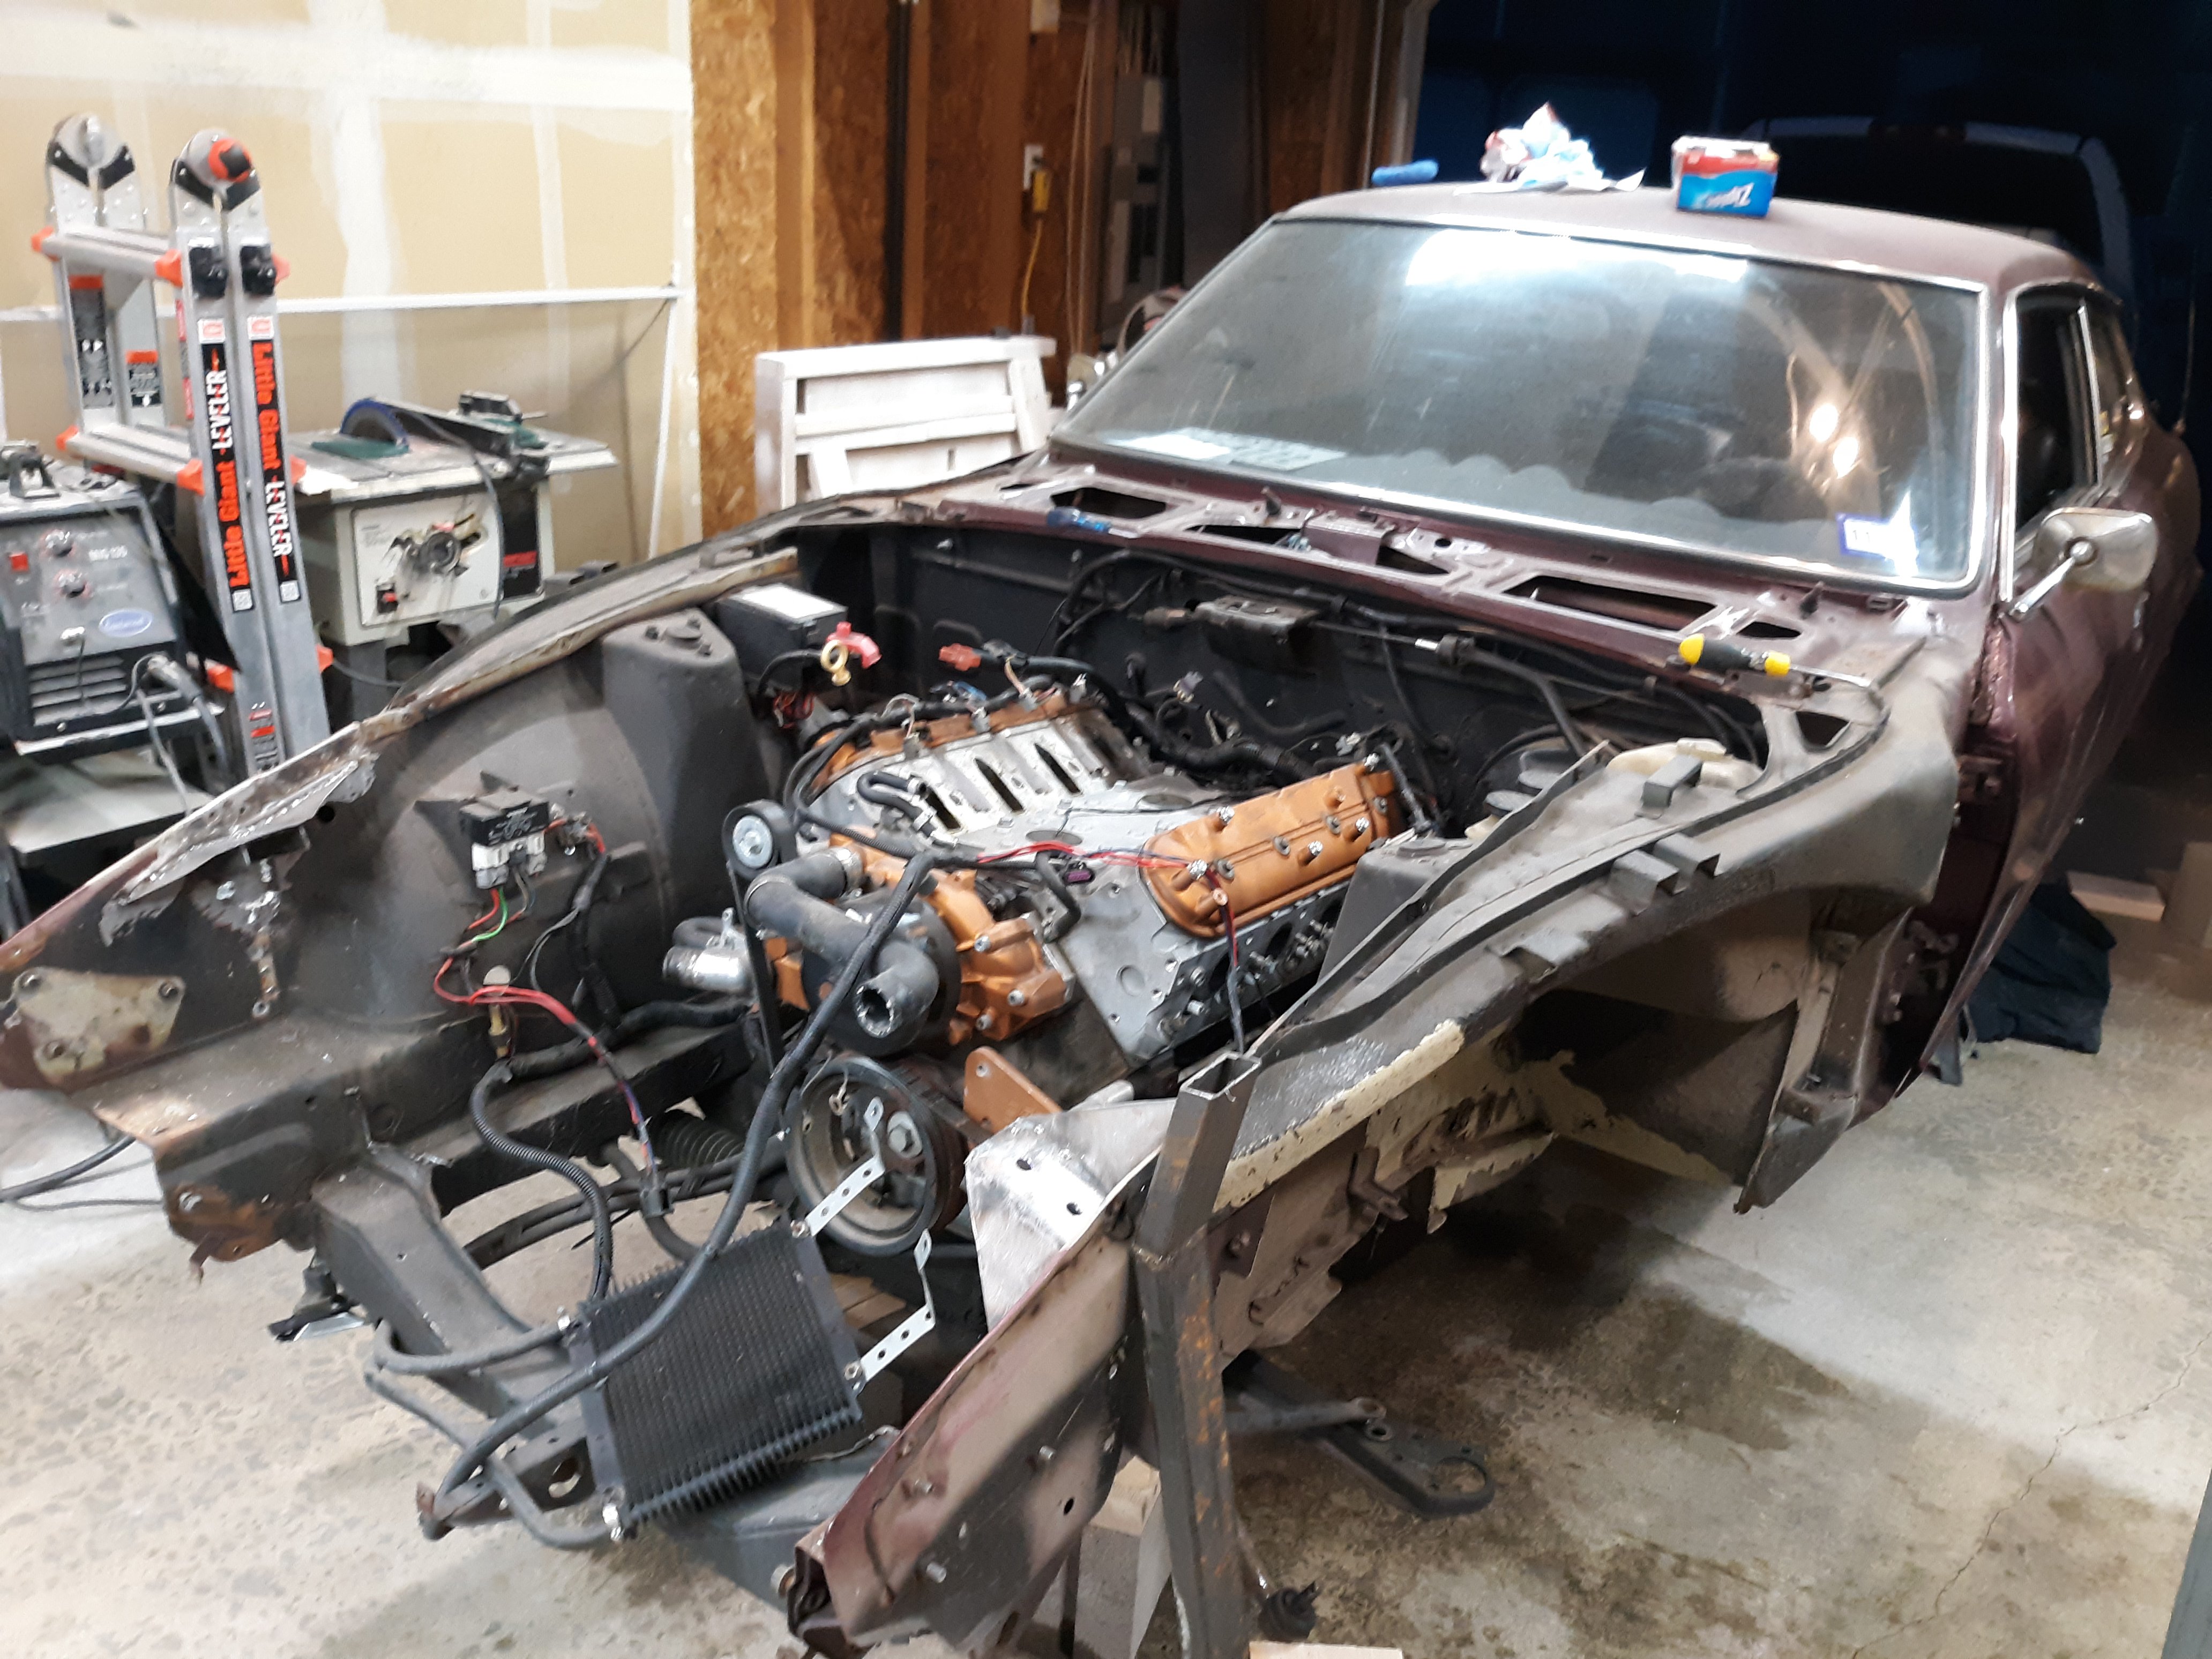
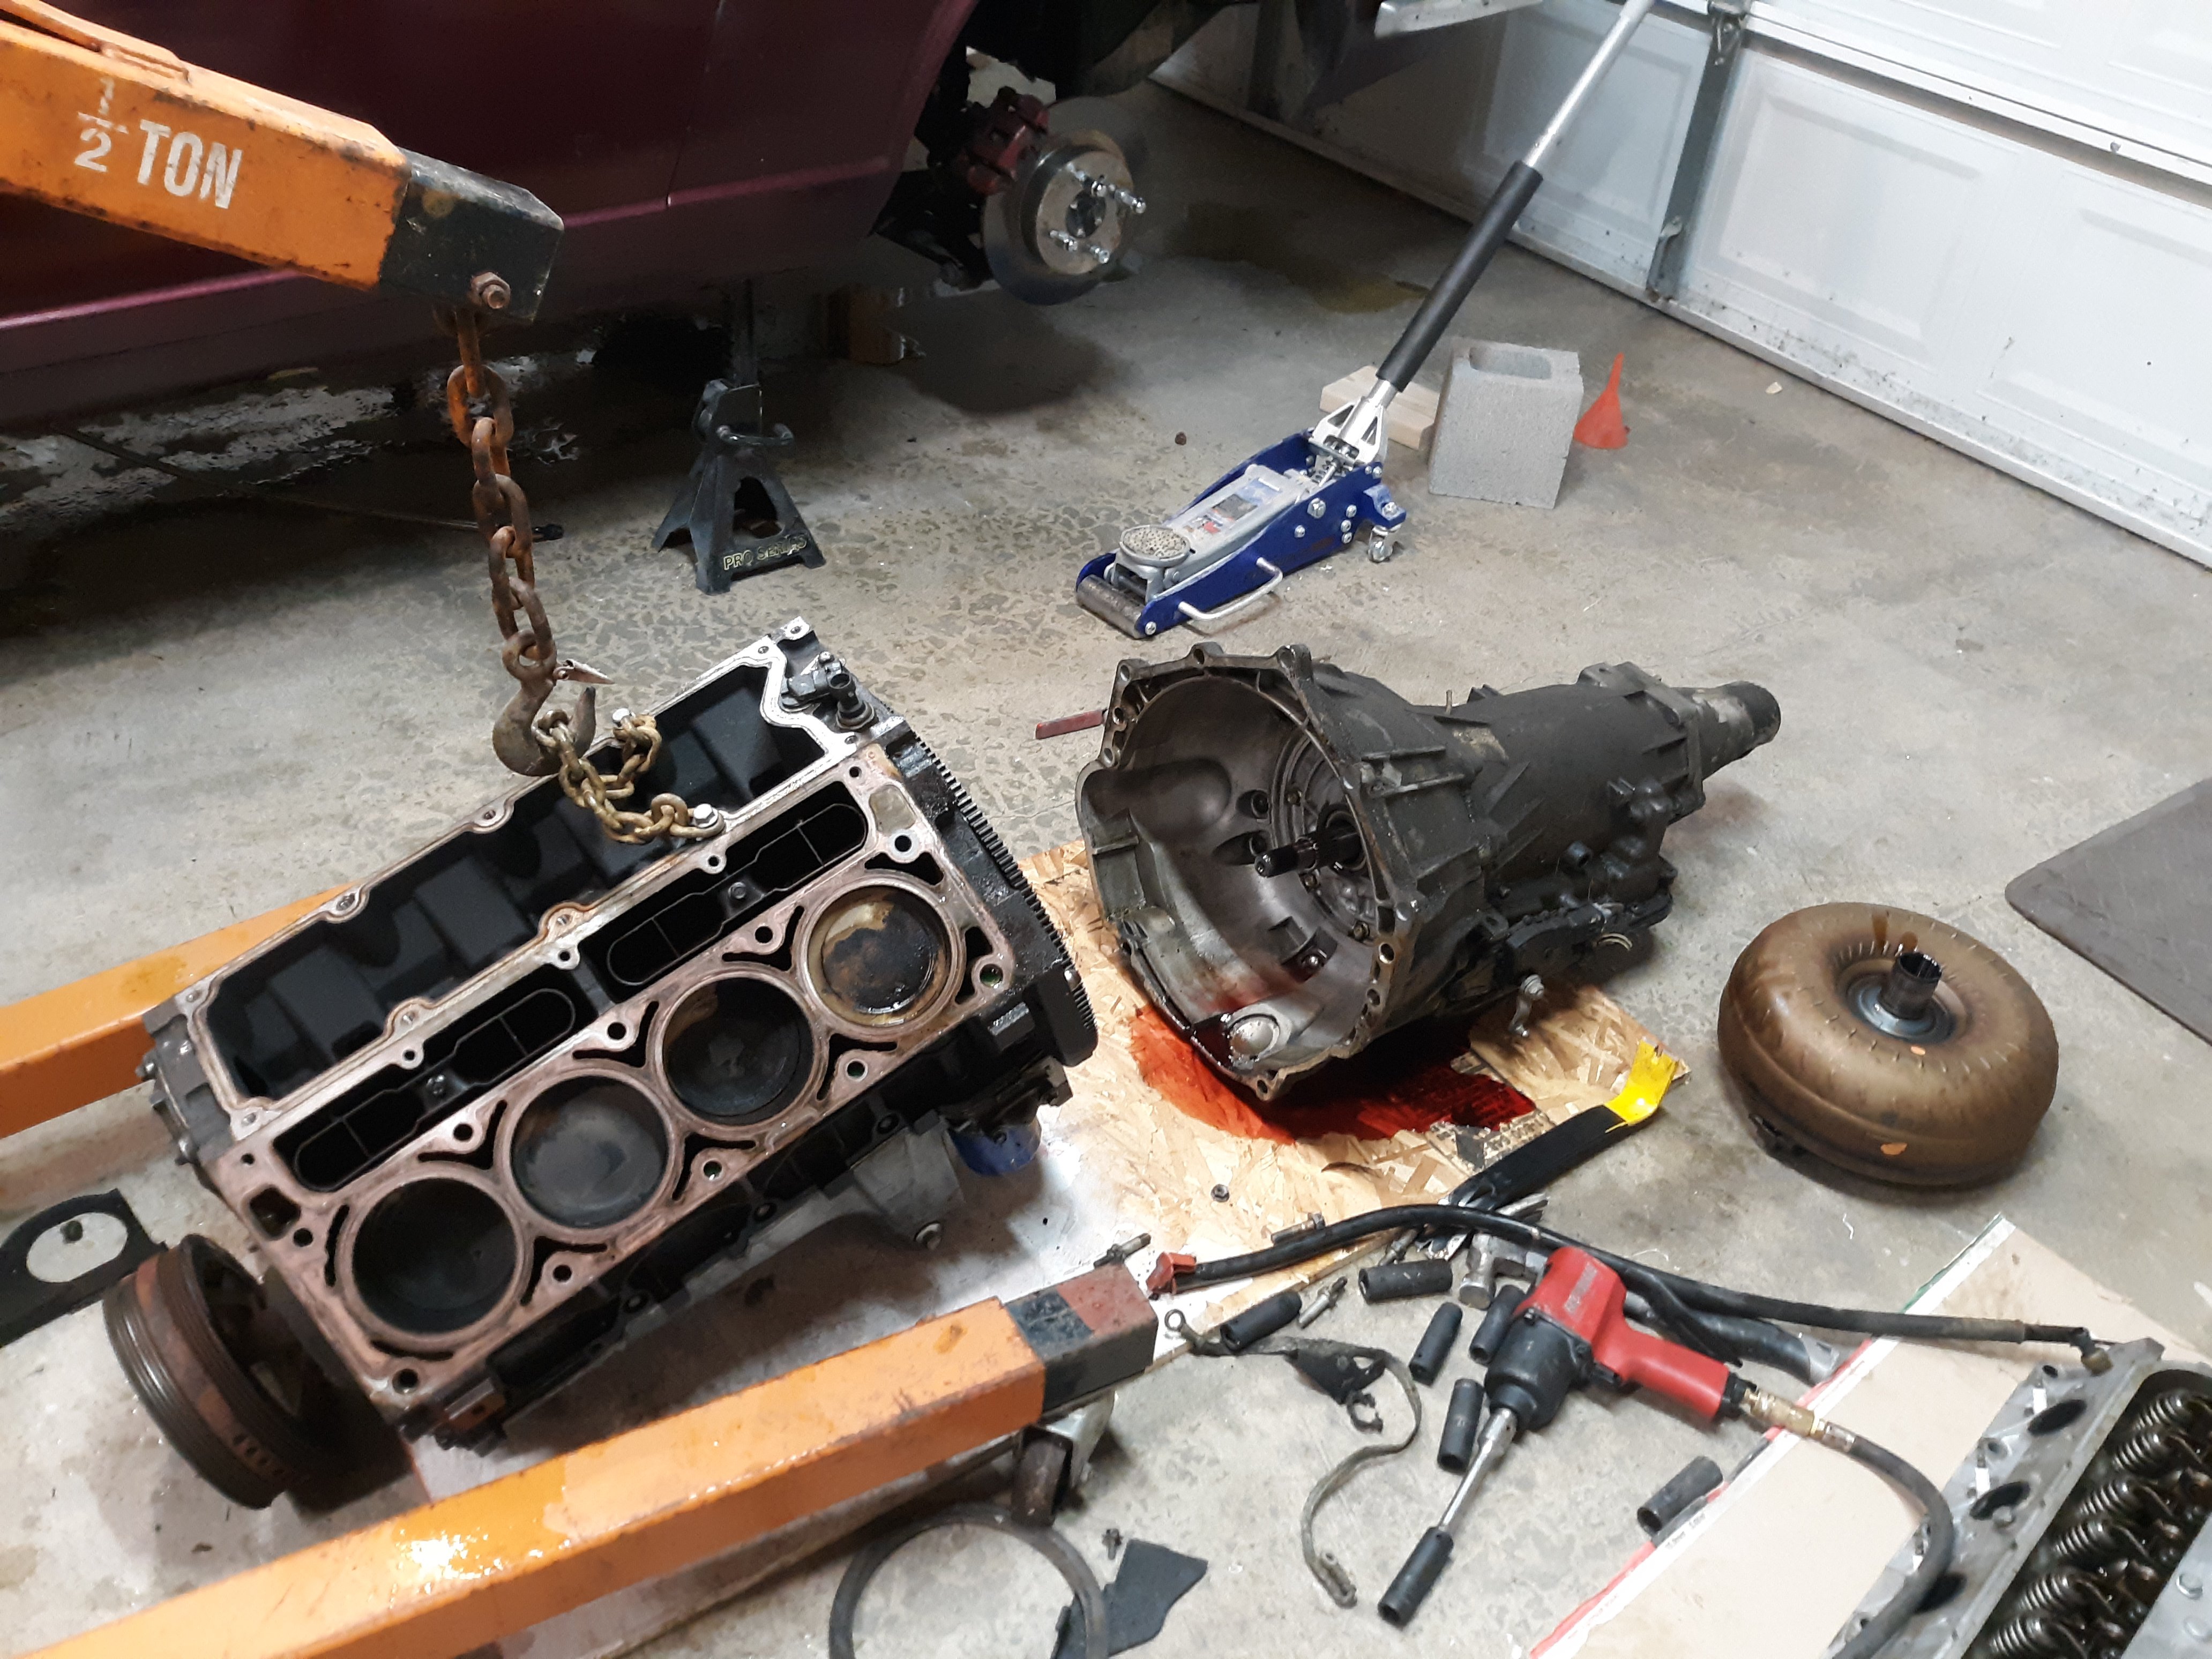
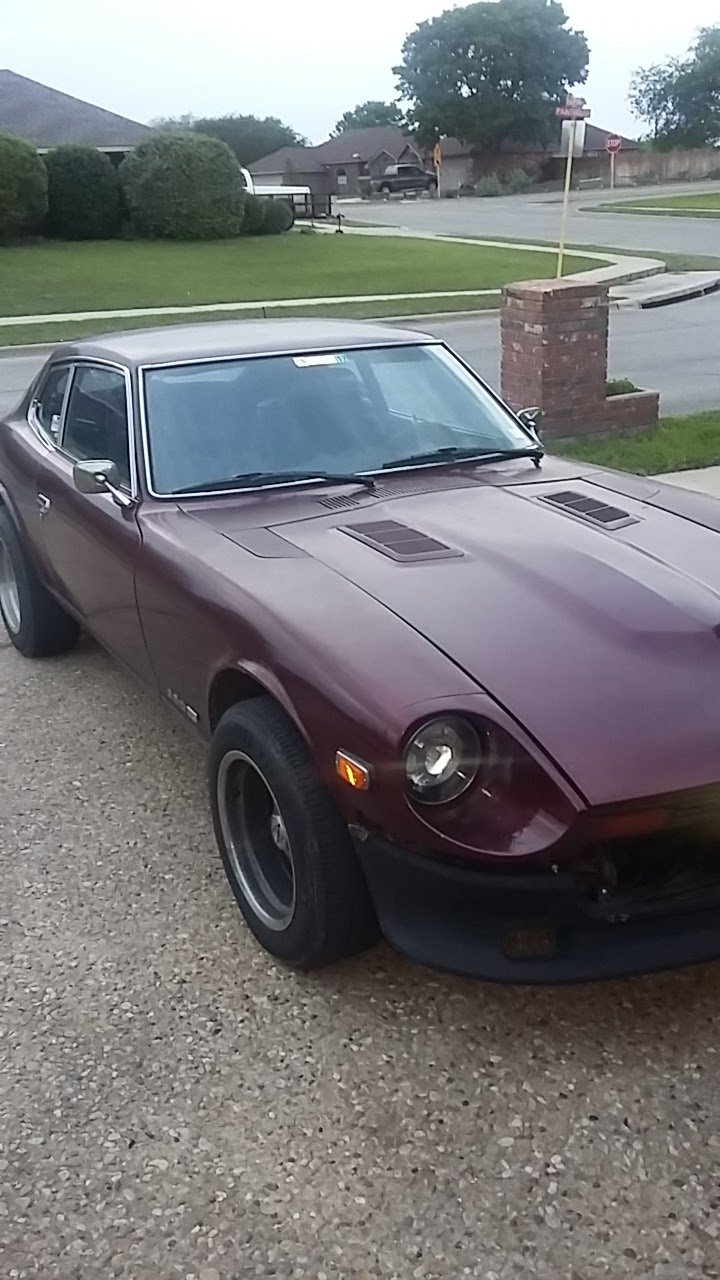
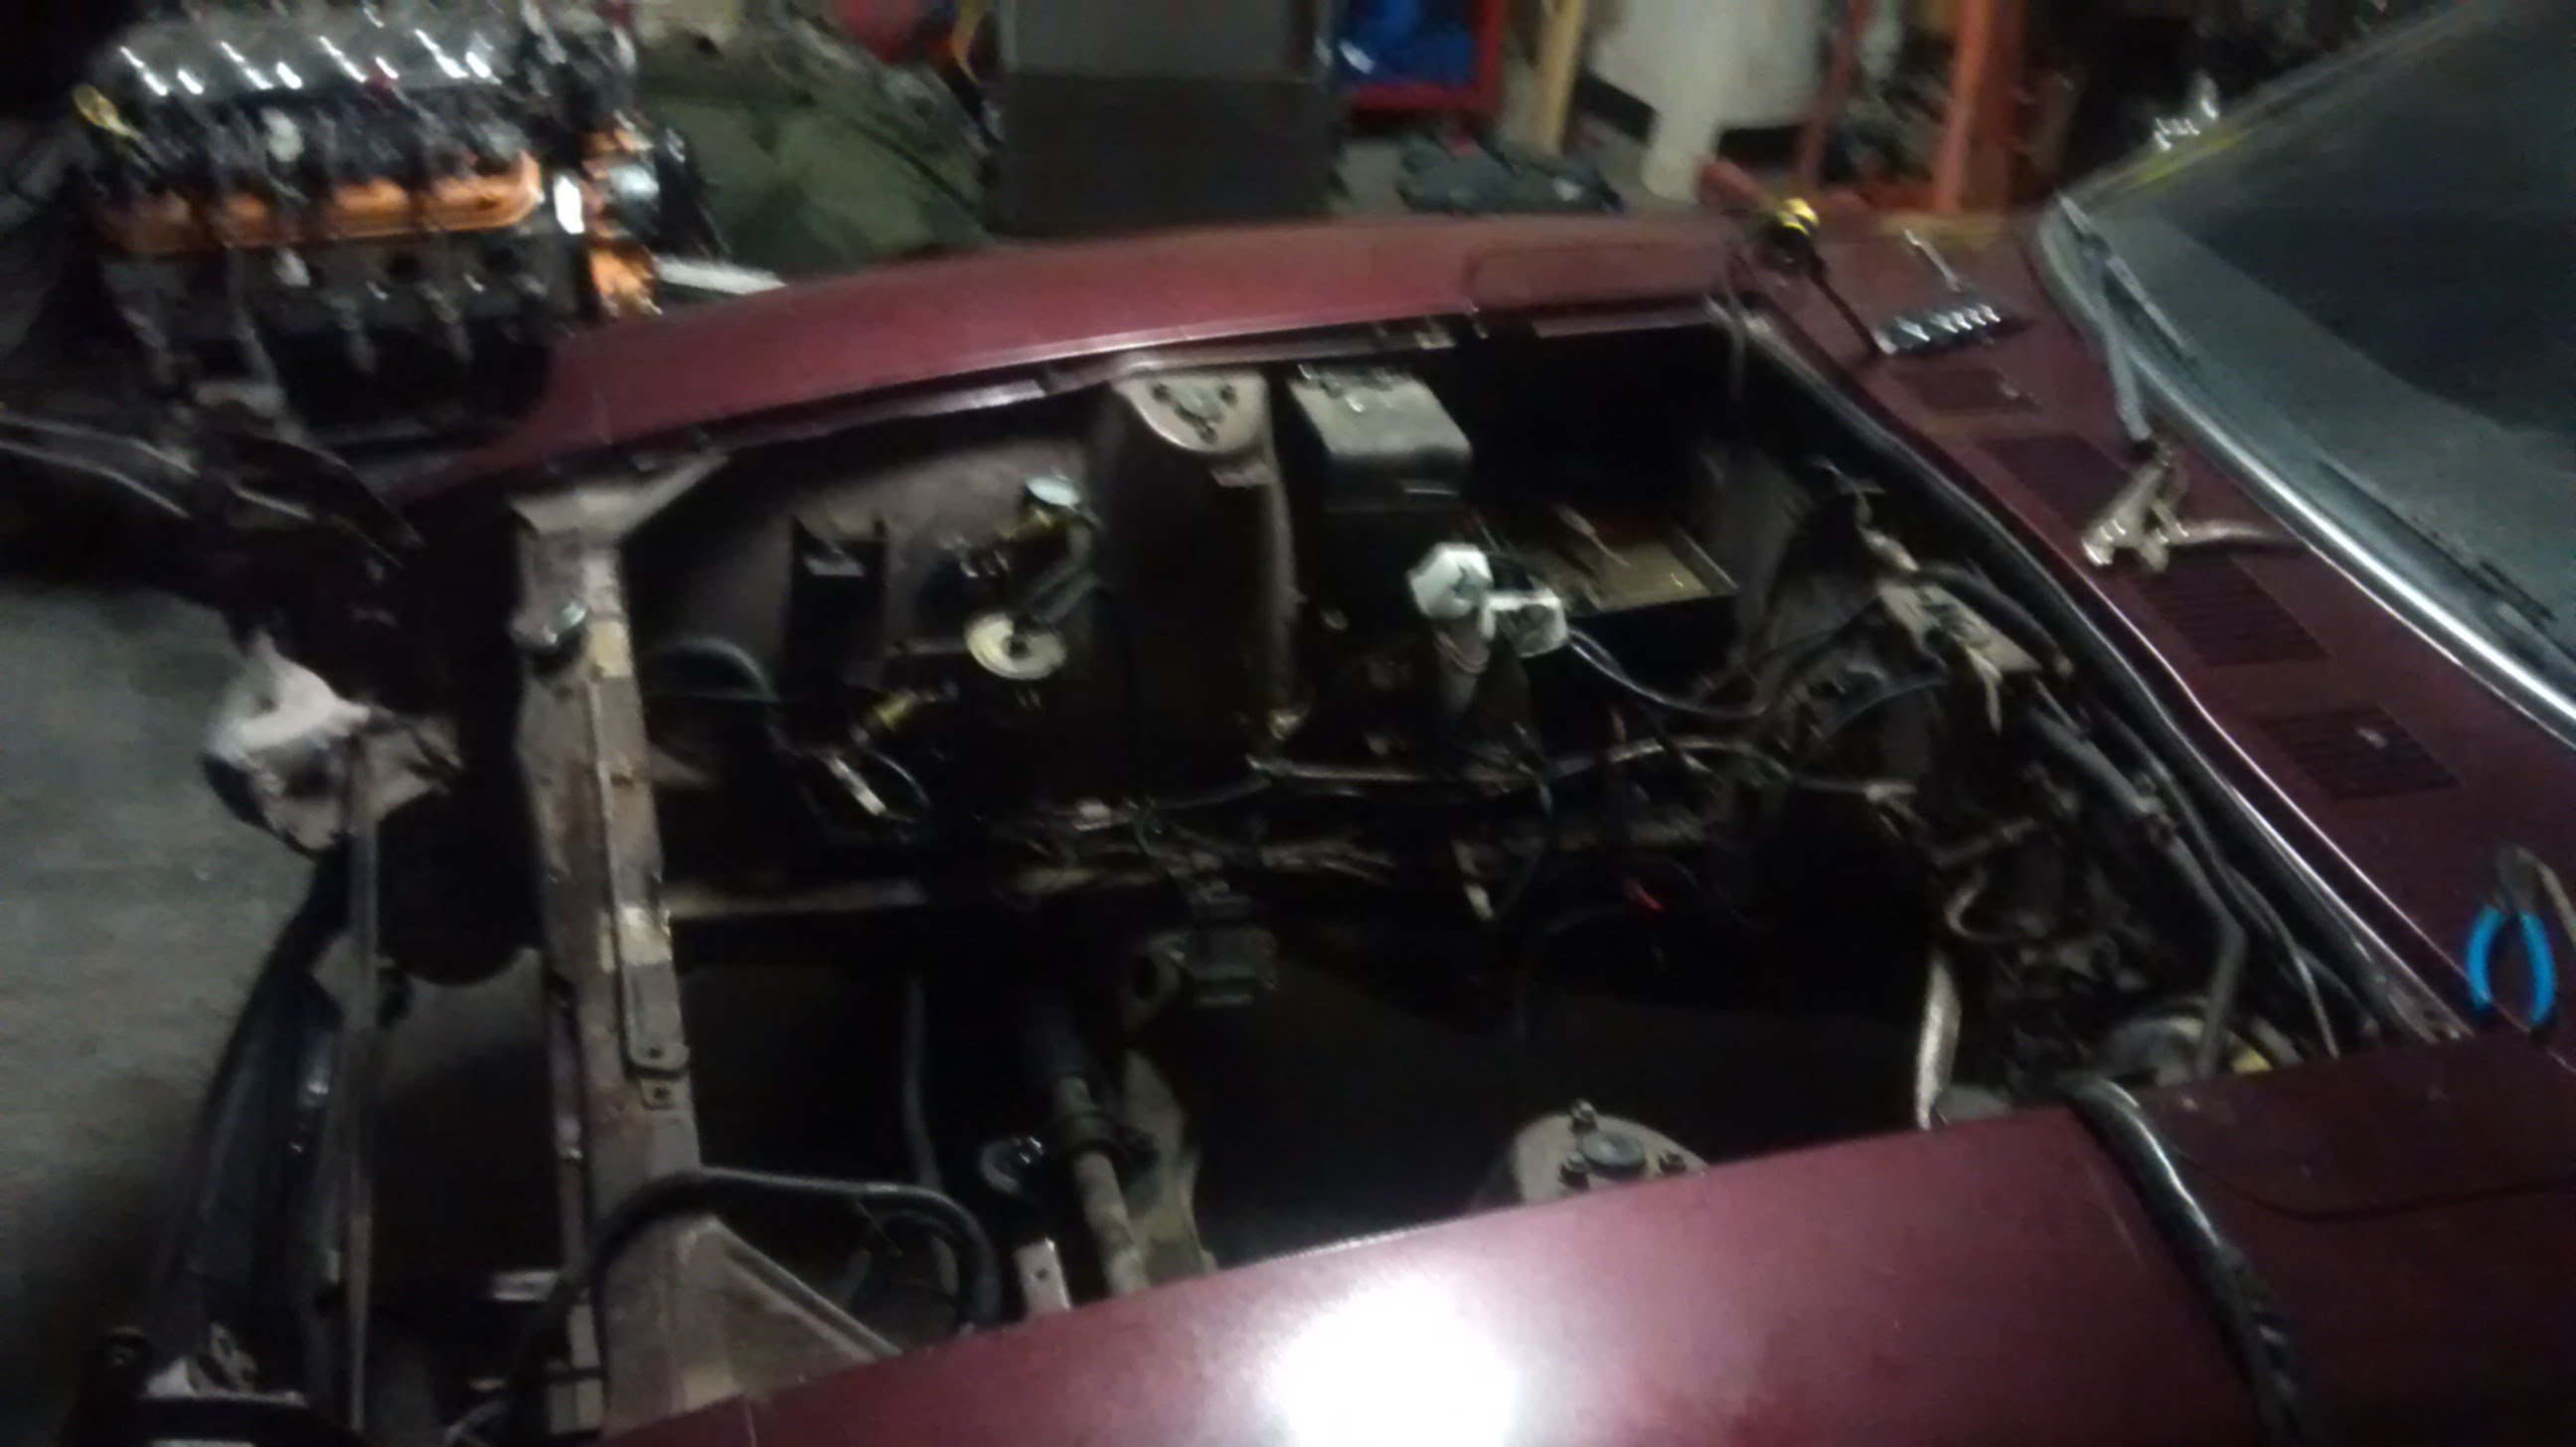
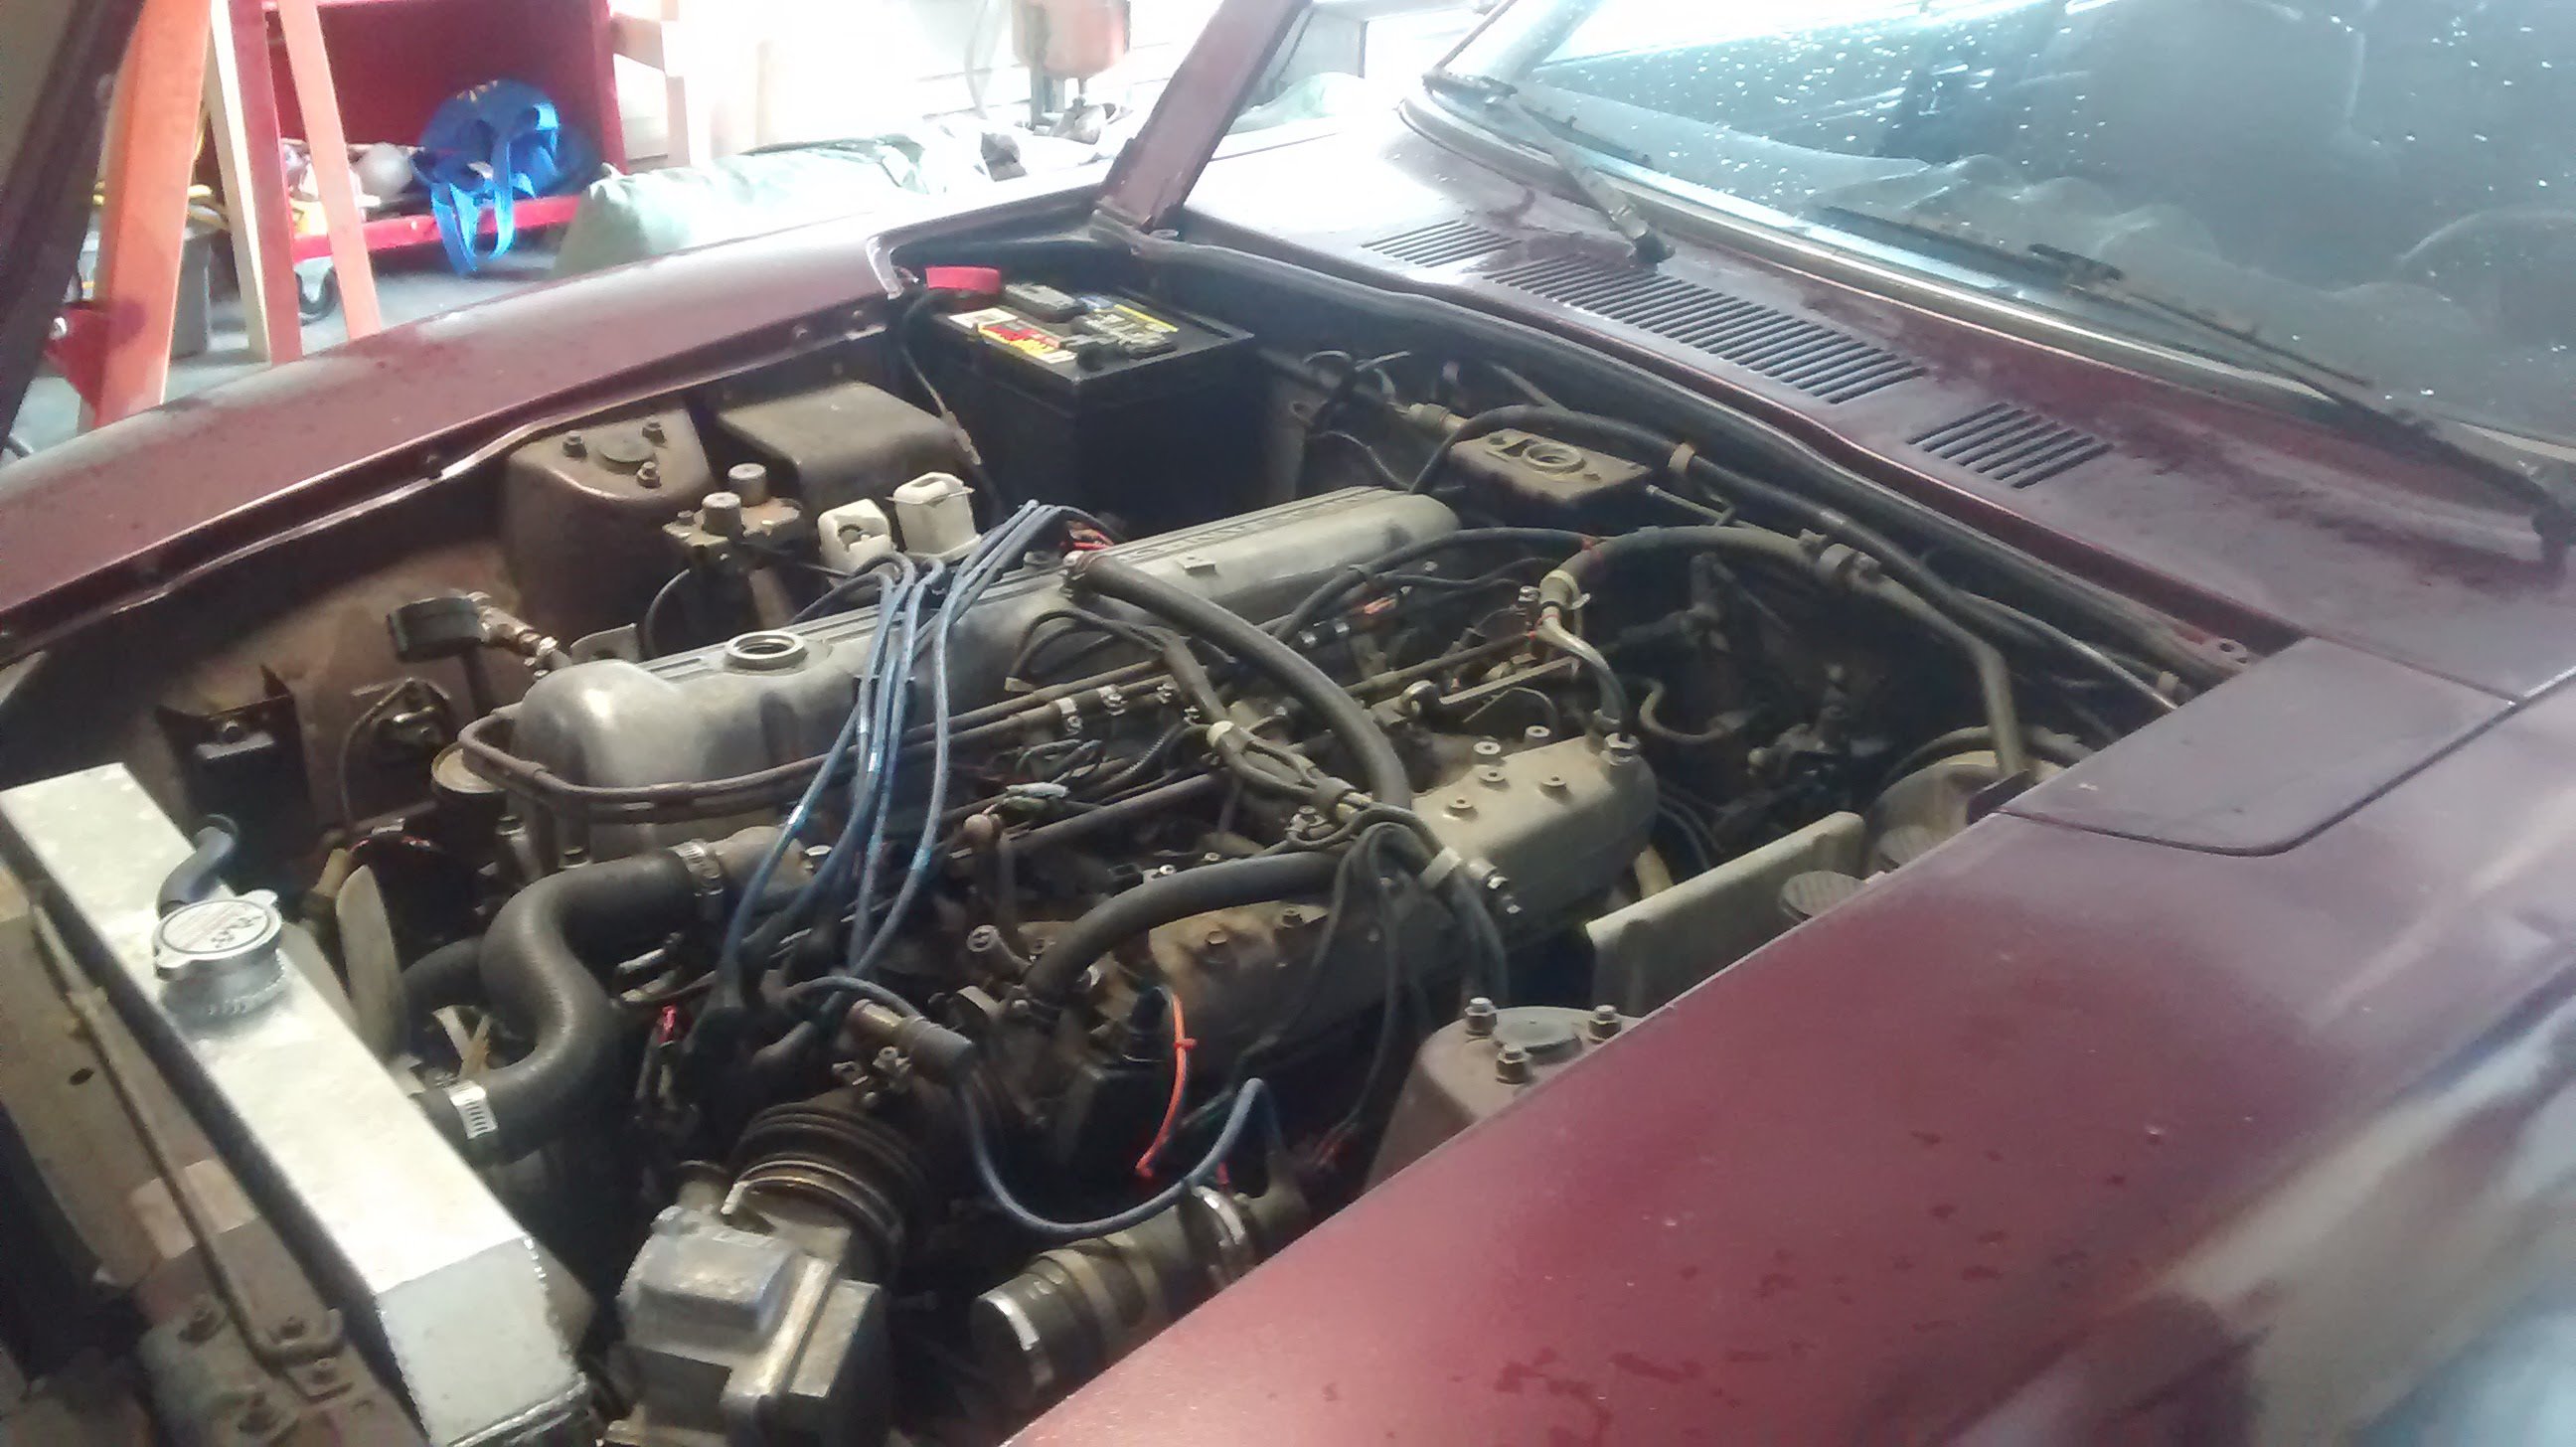
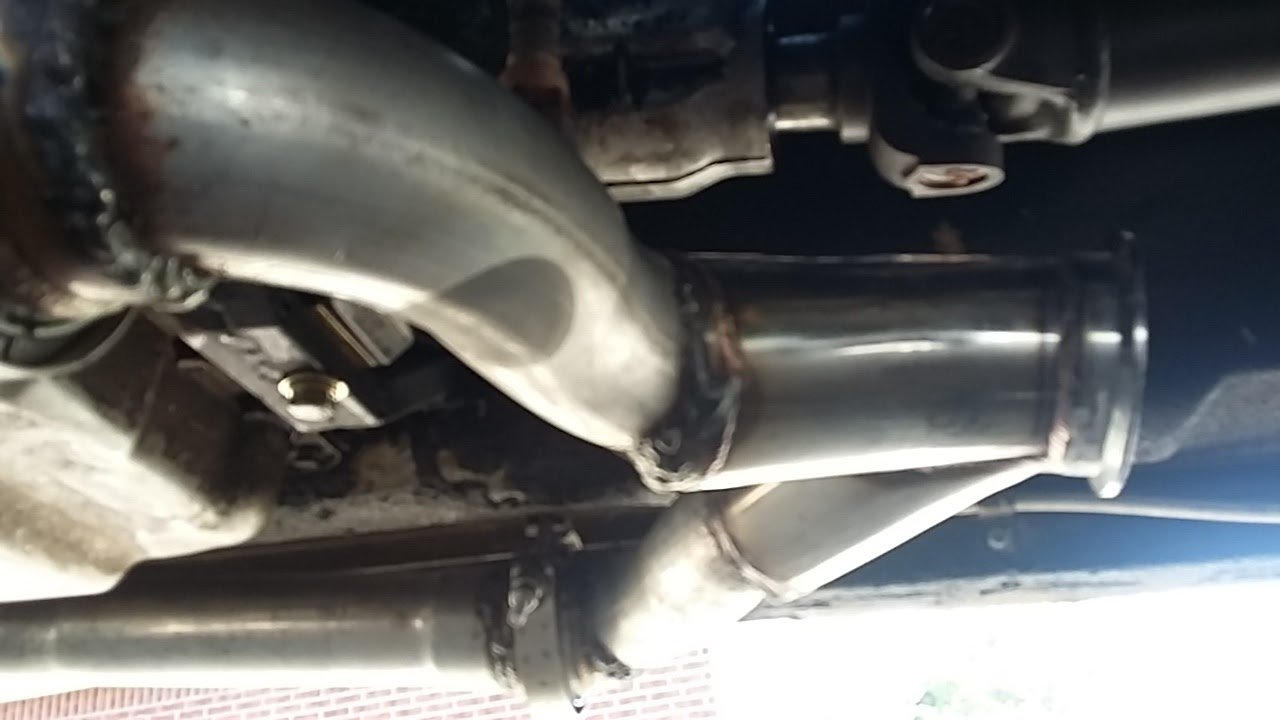
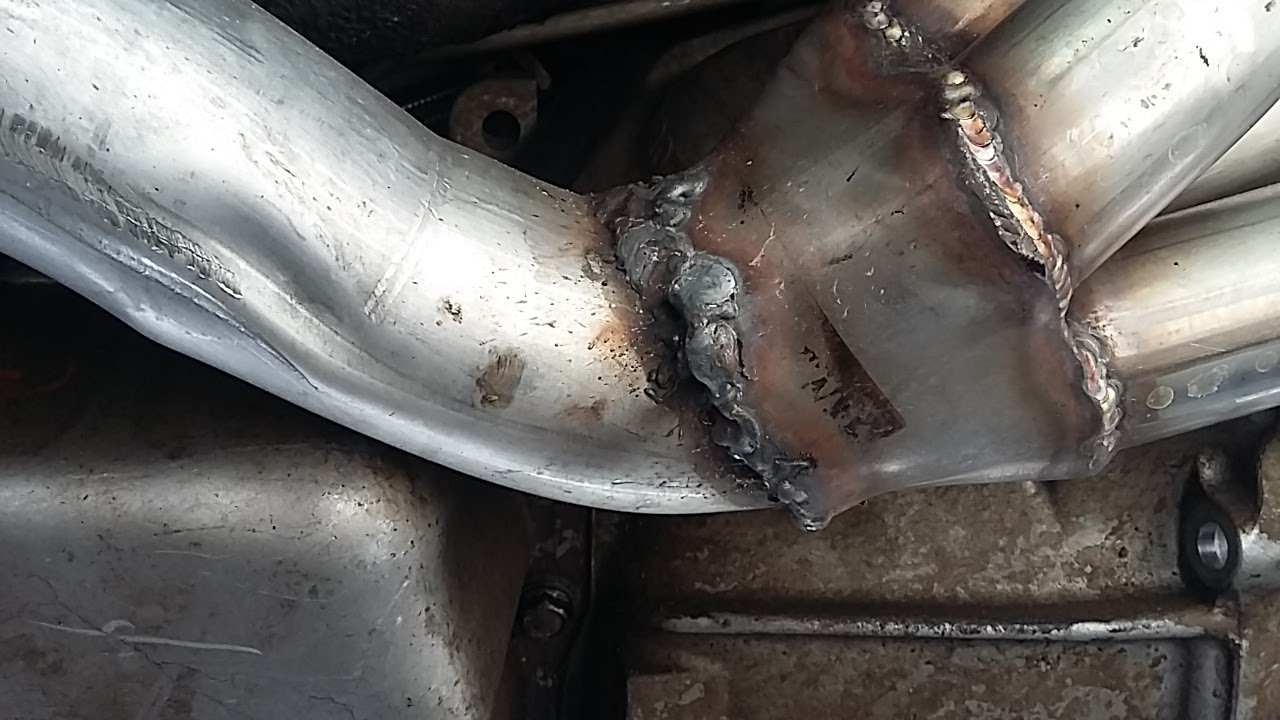
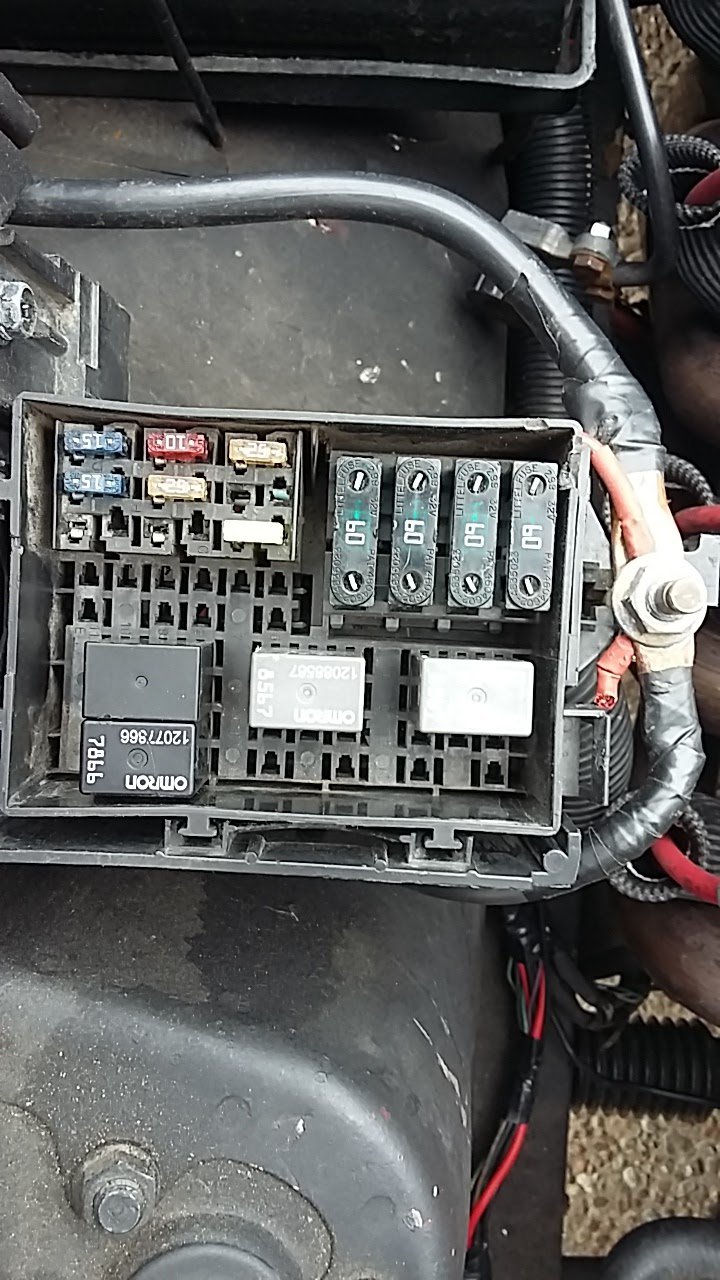
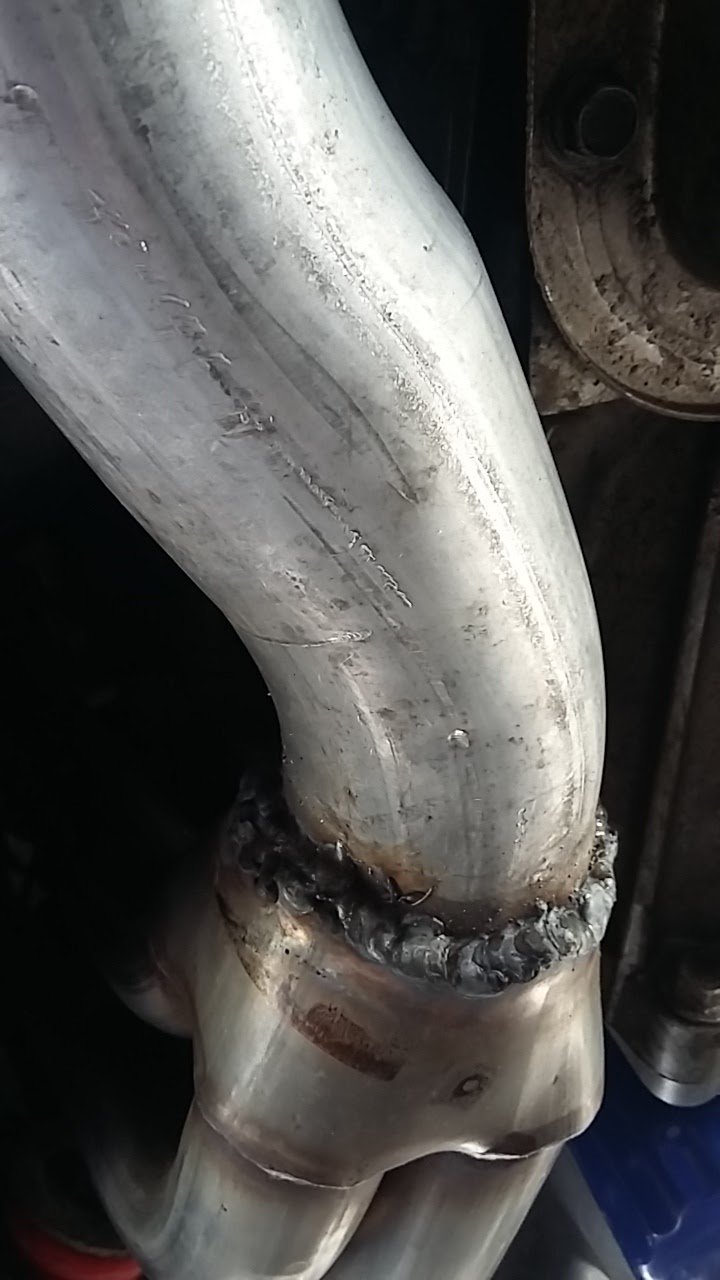
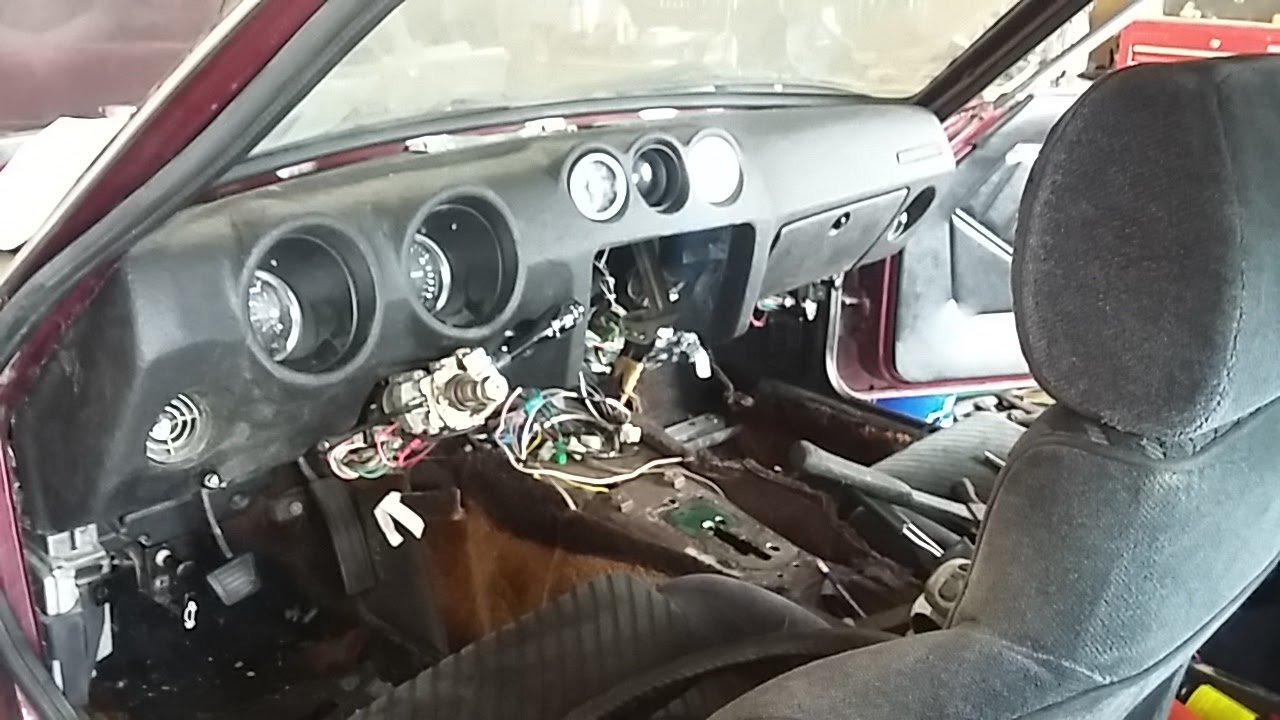
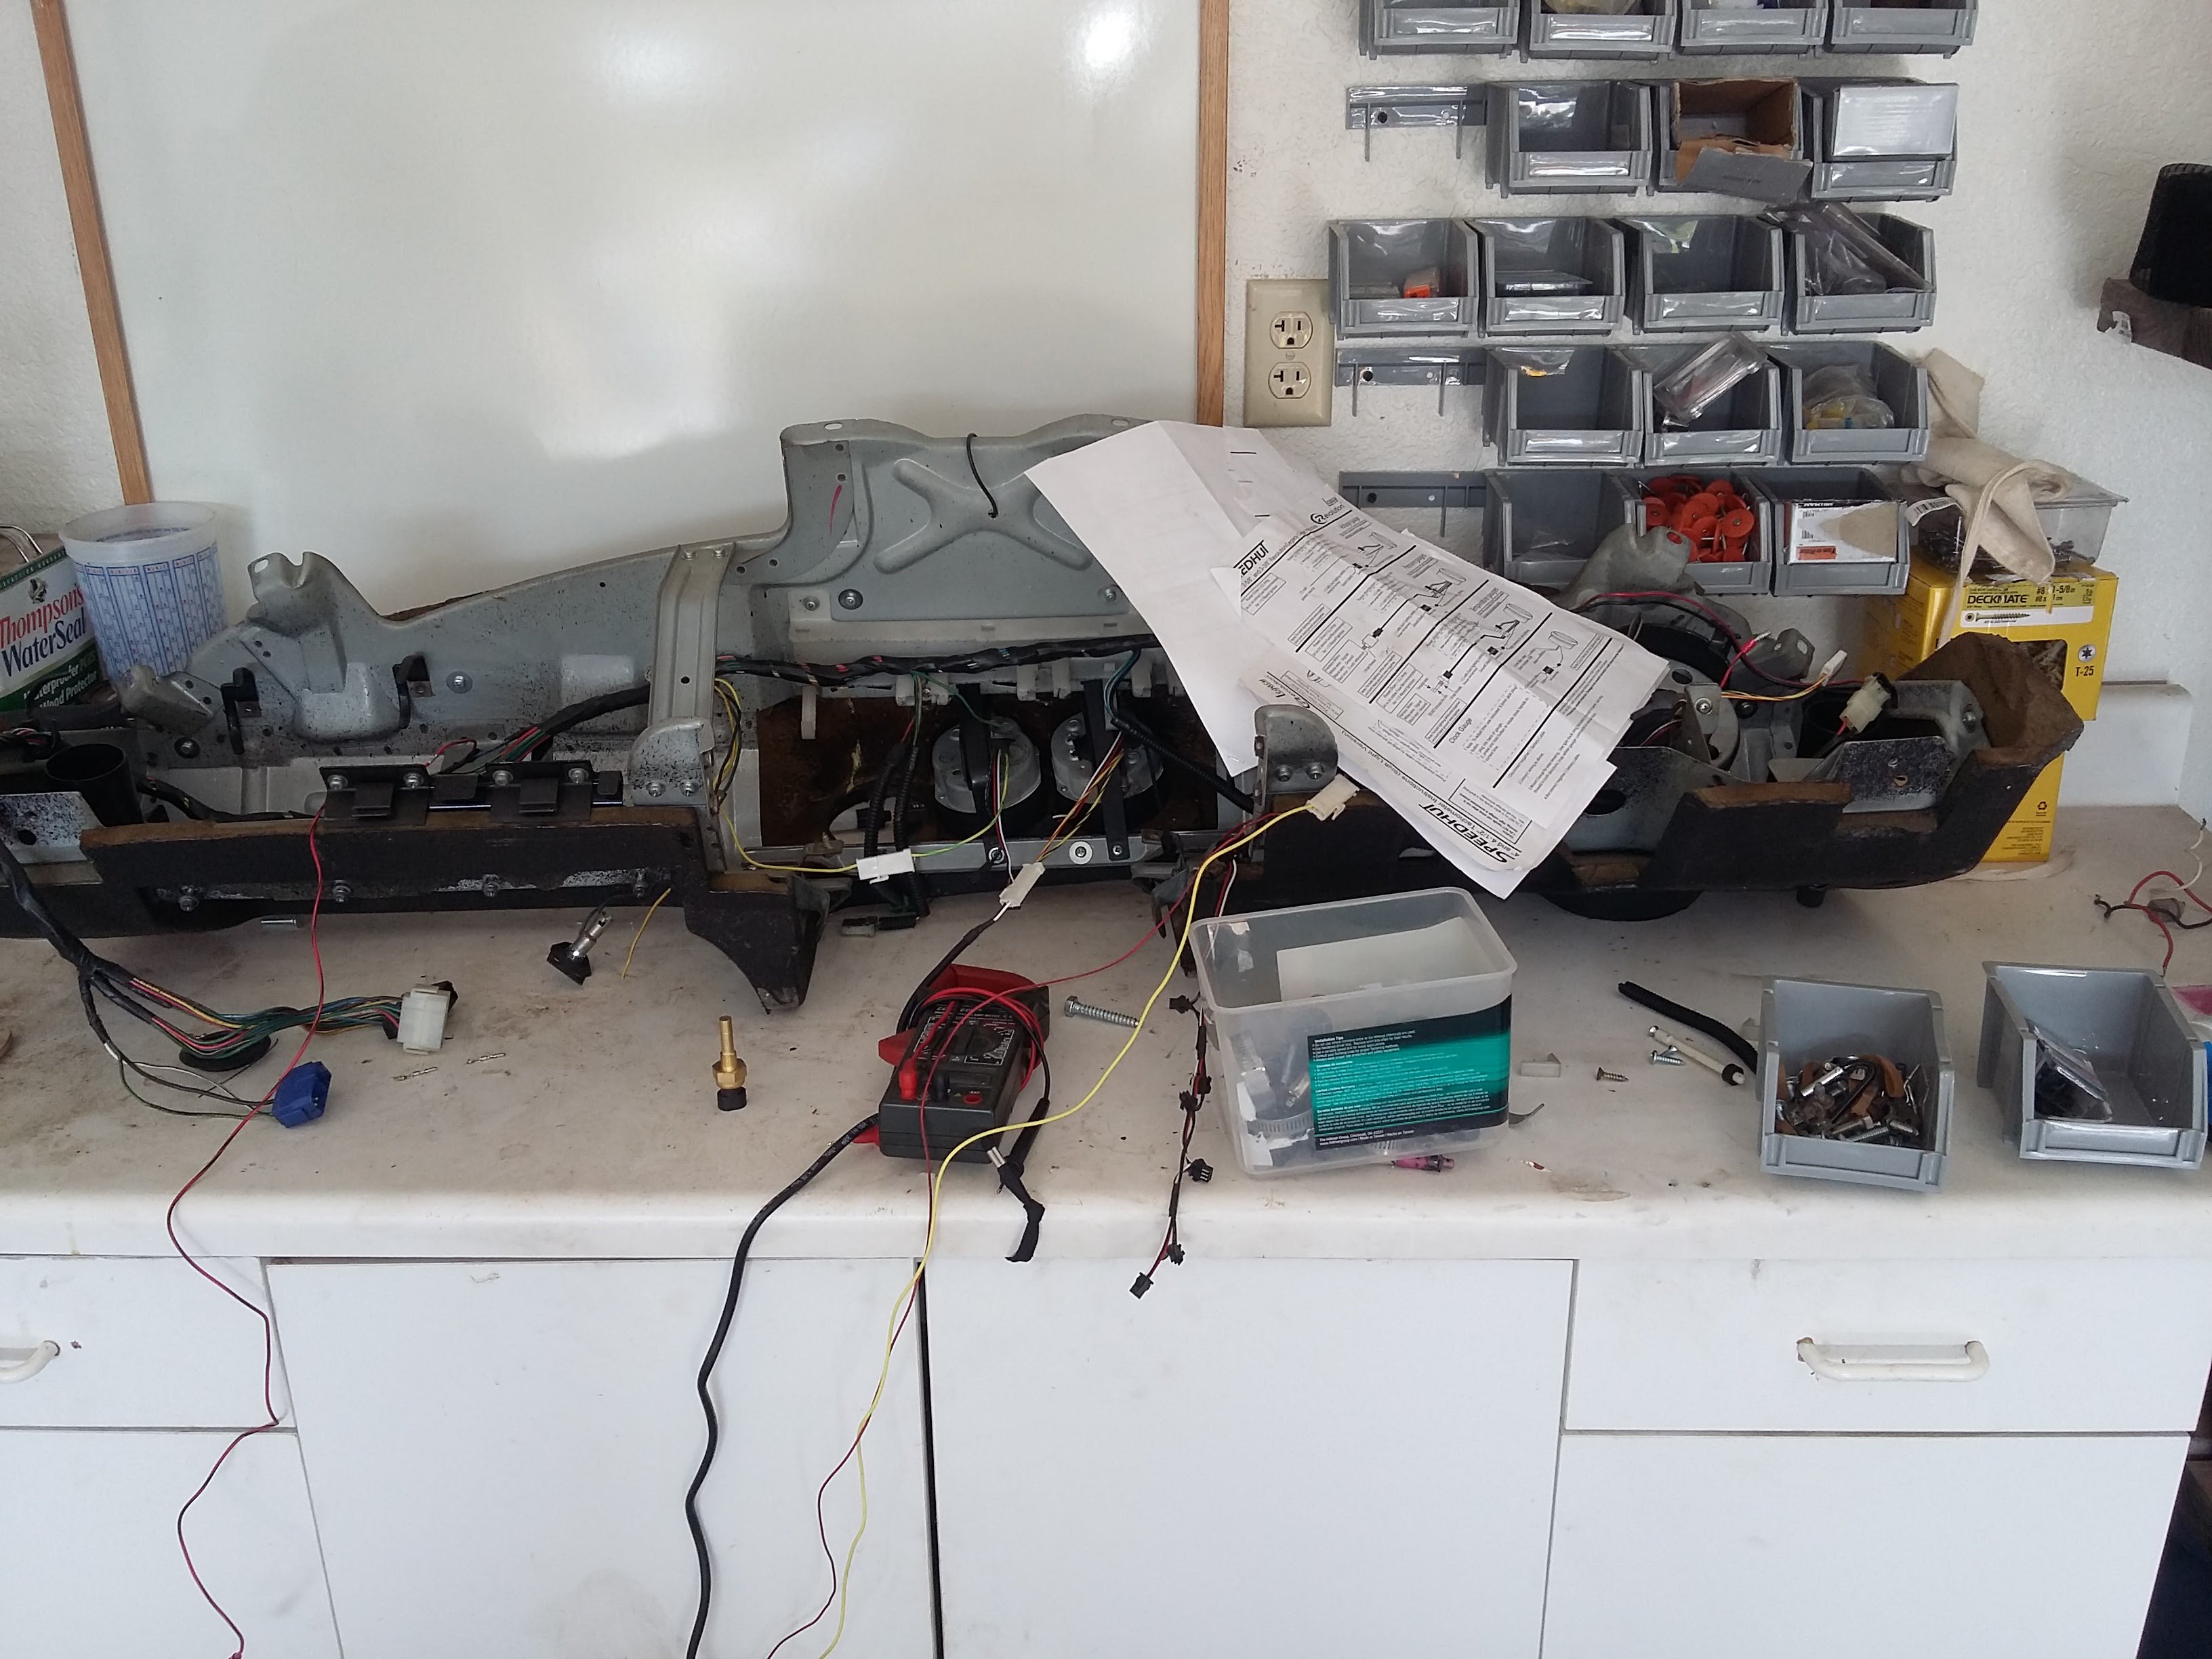
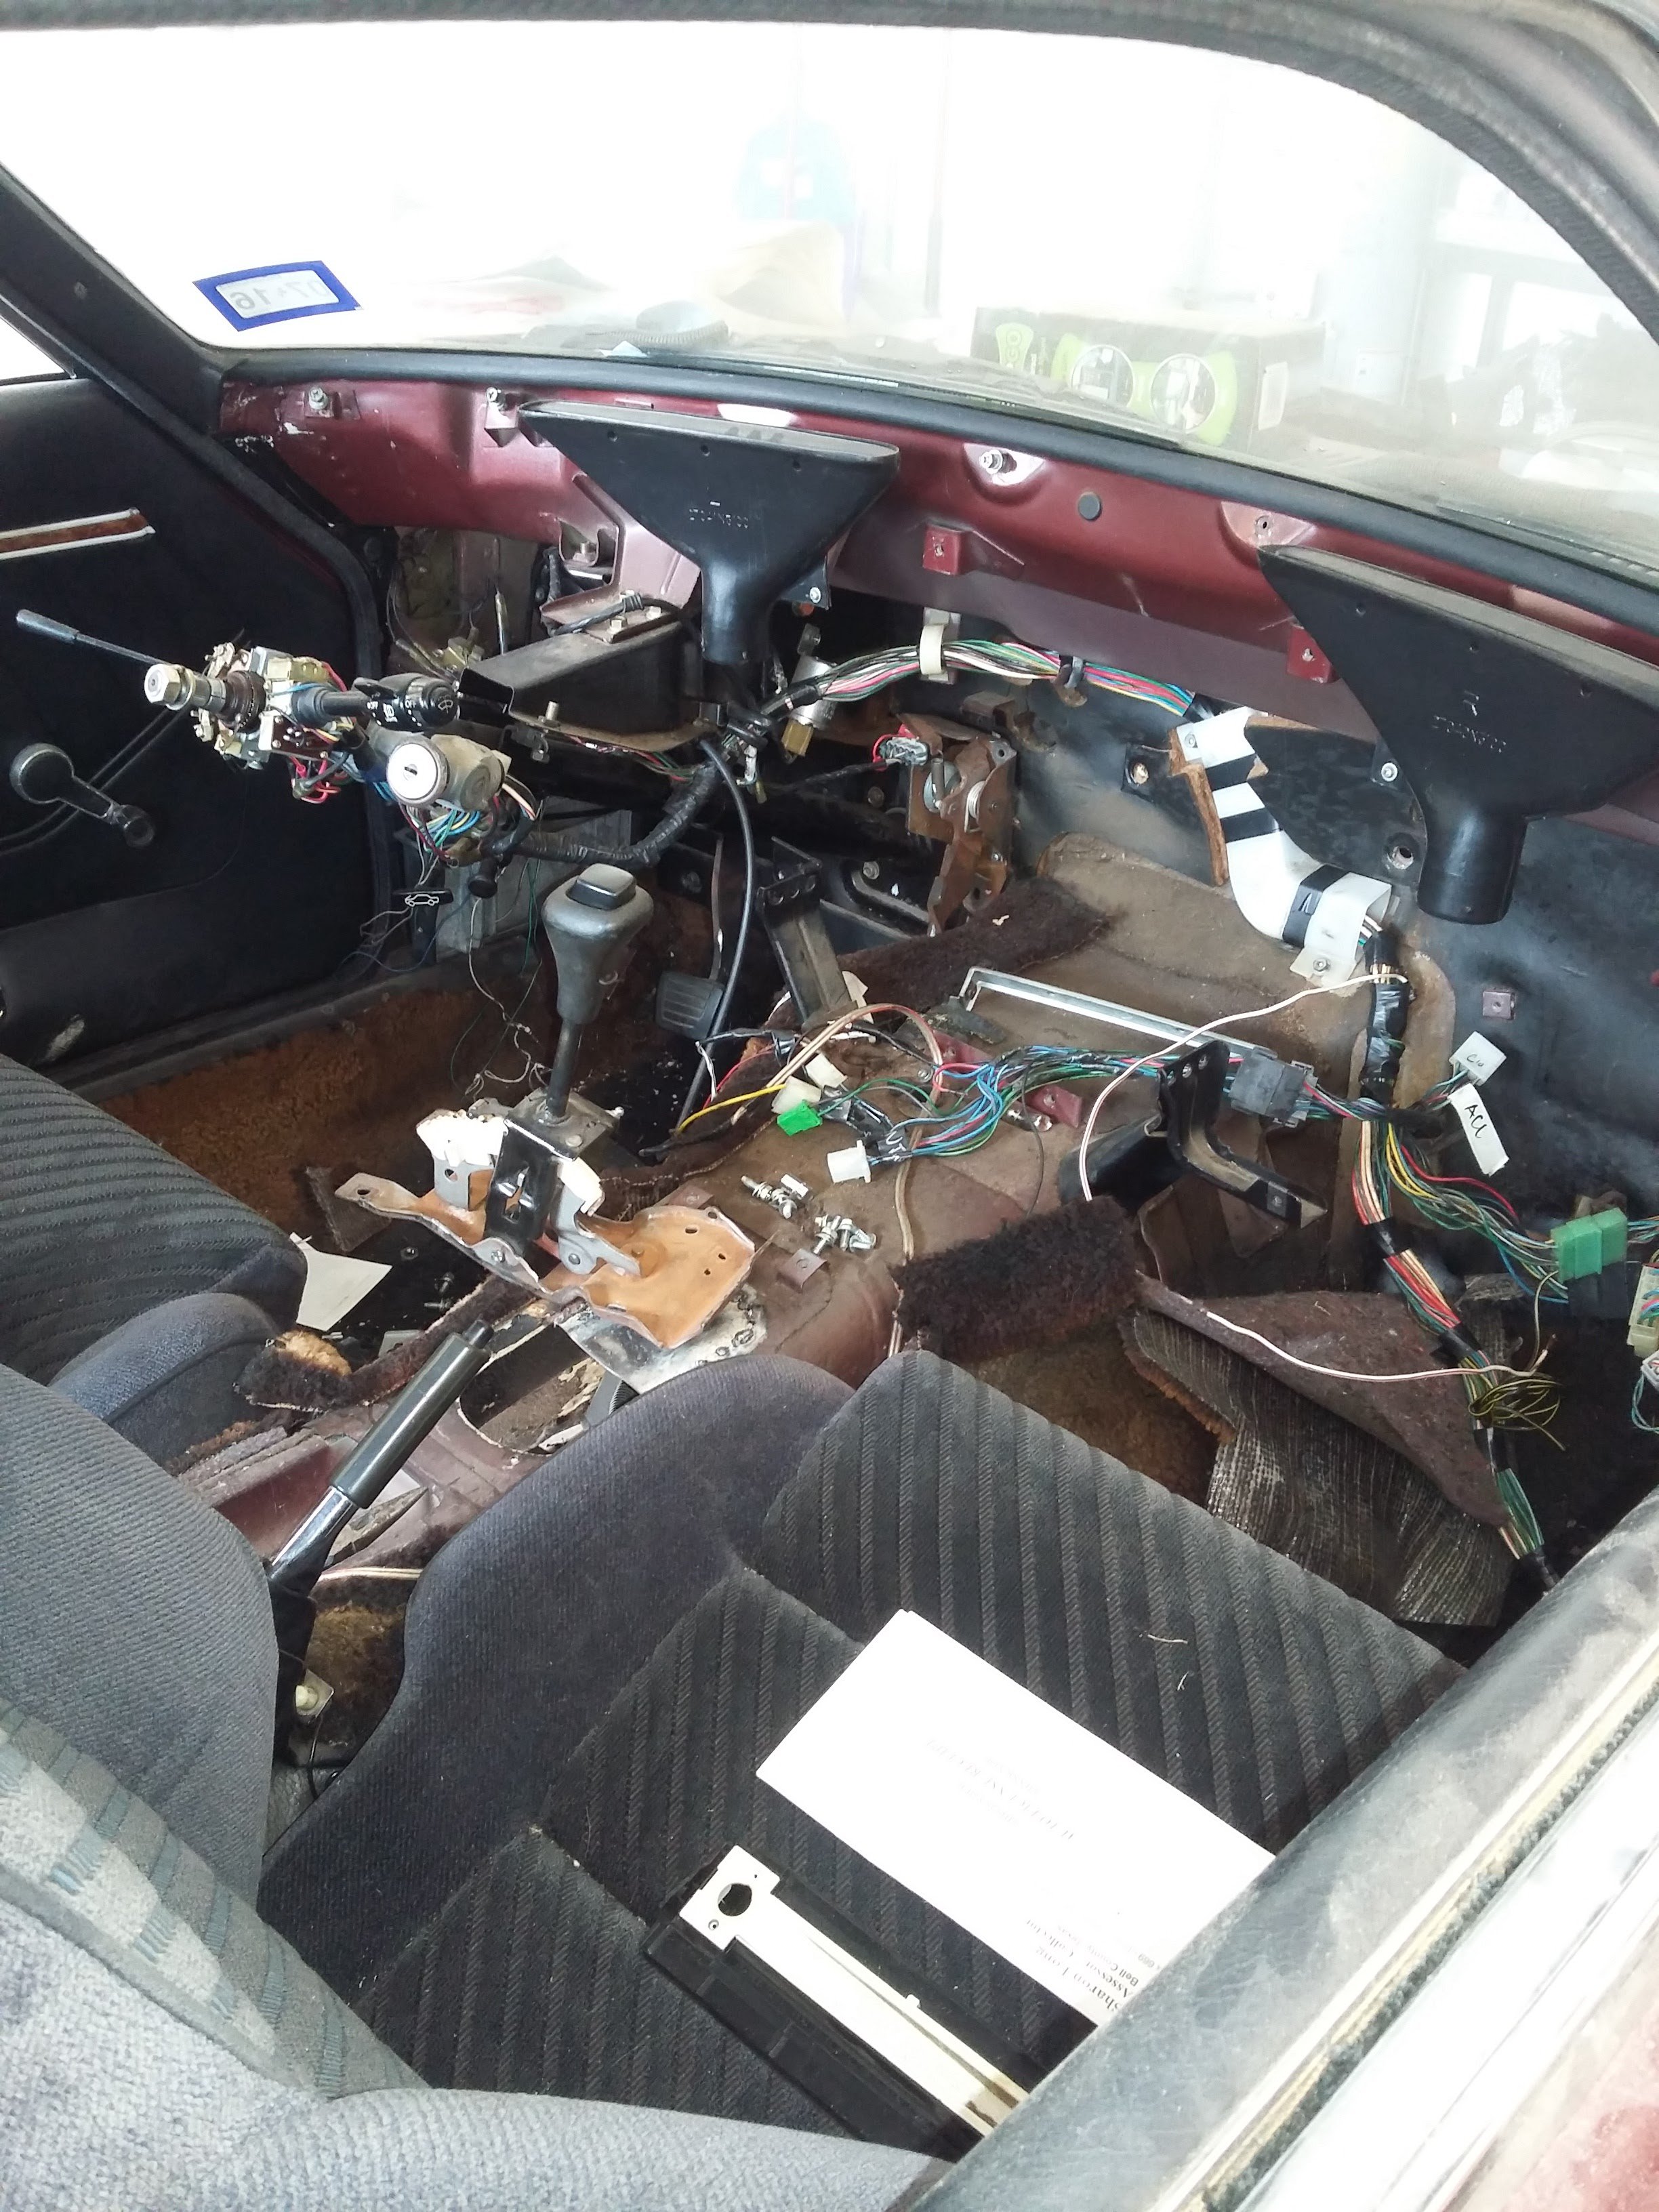
I have always read through other people's posts and learned from their successes and failures but have yet to make a build documentary of my own... I first saw the Z cars when I was younger and knew that I had to eventually buy one. It wasn't until I was in college working multiple jobs that I was able to buy one and start working on it. I found a maroon 77 280z 2+2 in Dallas Texas for $3000 (not running at the time) and received every document on the car (to include the window sticker). His dad was the original owner of the car and then he purchased the car so I was now the 3rd owner. When I got started I knew nothing about cars other than the basics. I had a firm understanding rebuilding small engines growing up and having a background in industrial engineering but had never worked on a car to such extent. As most do, I swapped out the bushings, springs, and struts and got her back on the road. As it turns out the reason it did not run was there was a leak in the windshield gasket over the ECU which fried it. After replacing the windshield gasket and the ECU she ran pretty good for a 40+ year old car. During the following few years I worked on her, fixing the brakes and doing small upgrades here and there. After graduating and moving to Fort Hood, she died on me several times for various reasons (alternator, battery, rusty fuel/ clogged filter...) and I decided that I needed to make her a more reliable car if I was going to keep her. With that decision I convinced the wife to let me swap a 5.3L/4L60E into her. I knew nothing about swapping engines or wiring but I figured with enough time and preparation I would be able to get her completed and back on the road. The engine and transmission was bought from a wrecking yard for around $1300. Wanting to add a little show to the engine I decided that I wanted to use long tube headers which gave me very few choices on installation kits. After comparing all the prices and options I decided on the CXRacing kit. The kit is meant for the LS engine with T56 transmission so I knew that I would have to do some modification to make everything work but I figured it wouldn't be that hard. Additionally, the transmission mount that came with the kit would not fit the 4L60e so that was scrapped. Over all, I shouldn't have gone with the kit since it was never meant for my body (2+2) or transmission. Some of the other materials that went with the swap was the shallow LS oil pan, speed hut gauges, the wiring harness on which I custom made, the drive shaft from JTR, typhoon intake to clear the hood, fuel system (Camaro tank, 6an lines, corvette filter), and other odds and end. I quickly had the old engine out and the new engine and transmission in over the weekend and then it took another about 6 months to figure out the wiring and get it all connected. I had to make the LS engine wiring harness which in it self is not that hard, I then had to mate it to the 280z stock harness with the engine in the car which became a nightmare trying to get to places. I then also had to rewire the dash which caused more problems. And it is important to note that I knew nothing of wiring prior to starting. After the wiring was completed, I had to work on the exhaust, and fuel system. At the time I did not have a welder and had minimal welding skills (stick welding) so I decided to take it to an exhaust shop to have them reconfigure the exhaust. For those who don't know, the CXRacing headers come down and point directly at the 4L60E pan so most exhaust shops wouldn't touch it. I finally found a guy that would "fix it" for a few hundred. When I came back, I saw the ugliest exhaust work I had ever seen. I still cant believe that this guy was in business. So I sadly payed him and took the car home. After asking around again I found one more person that said they could redo the exhaust so I dropped it off for the week. When I came to pick her up there was nothing that had been done to the exhaust. After talking to the owner of the shop, he informed me that there was no way that he could get the exhaust to fit and that I would have to swap the headers. I thanked him for his advise and went home to learn how to weld. After buying a small 120v welder, 2 bottles of gas and 3" exhaust pipe, I went to work cutting, fitting and bending until everything lined up the way I wanted. It took about one month working nights and weekends just to get the exhaust welded in.After the exhaust was welded in, it was time to finish the fuel system. I had decided to go with the Camaro fuel tank and the Corvette regulator filter combo. Of note, the Camaro fuel pump has a built in regulator which put in line with the Corvette regulator creates problems. I decided to cut out the spare tire well and weld in 1x1 tubing to support the tank and then use cheap metal strapping to hold it in place. Overall the idea was solid but the design was flawed. The Datsun 280z is designed to crush and the square tubing that I had welded in went north to south (front to back). This meant that if I was ever rear ended the force would have done 2 things 1) it would have pushed the gas tank forward into the cabin 2) it would have carried the force of the collision forward past the rear axle which would become dangerous for the driver. Knowing this I kept it the way it was since it was finally complete and it ran.After taking her for the first spin around the block I knew that I had much more than a reliable daily driver, I had a stupid fast daily driver. So over the next few months I started getting into drag racing on which I was able to get into the low 12s on "grand touring" tires. I kept her this way for about 2 years as I was quite satisfied with my work. I took her to car shows and although she never won, she always drew a crowd. Very few people have Datsun 280zs even less have them with a LS Swap and of those I don't know of another 2+2 model. I also upgraded small things as I found parts and time. This included swapping to leather seats from a 2008 Mazda Miata, fiber glassing/custom making interior parts as needed, swapping to the Honda wiper motor, and redoing paint.It was then time to move to Missouri where I would spend only a year conducting training. While I wanted to work on the car, I also wanted to save money so we rented a very small apartment without a garage. That however didn't keep me from taking care of the small stuff. Knowing that I needed to improve my stopping power, I decided to swap brakes. In the front I went with the Toyota 12s+8 and the vented 300z rotor. This caliper rotor combo is the best. It is vented providing better cooling capabilities but the pistons in the caliper are still the one large one small piston reducing brake bias. In the back I decided to swap to the Nissan maxima caliper and the 300z rotor. The maxima caliper has the biggest volume capacity reducing brake bias. After doing calculations, I have determined that the brake bias is (I believe) 59% front 41% rear. To go along with upgrading the brakes I added the larger 280zx master and rebuilt the brake switch in the engine compartment. The brake switch in the engine compartment was a pain to get apart. As it had seized up long ago pushed to one side resulting in less fluid flow to the rear brakes. I had to use a grease zerk bought at Napa and heat to force the piston out. Knowing I wanted to go faster I decided to add in a LSD and CV axles. Seeing as im not a rich man I decided to go with the OBX with 300zx turbo axles and do the rebuild myself. I ordered the upgraded spring washer kit and had it all put back in the differential over the weekend. After one lap around the block I knew I had screwed up... I had the LSD to tight causing wheel hop. Taking everything back out I corrected the issue and we were back on the road. The axles were a different story. I bought the adapters and welded them it in (in a parking lot under a blanket as my wife stood there) and test fit everything in the car... the axles were too long. After a lot of searching of what to do without spending any more money I found someone else that had ran into the same issue and solved it. When looking at the 300zx axle splines you have about and additional 1/2 in of spline after the retaining ring grove. If you remove everything and cut a new grove closer to the back of the splines you can gain this extra 1/2 in on each end giving you an extra inch of travel. The down side of this is you loose contact area on the splines where the old grove is inside the carrier. My thought is, the axle will break before the carrier at which point I replace with shorter axles, if it doesn't break then I saved $400. So far, there have been no issues with this theory.Nearing the end of my time in Missouri I found out that I would be moving across county to Washington state. To do so with 3 cars and a 32ft trailer was not possible so I decided to have my brother in law come drive the Datsun back to Texas and then when available drive her up to Washington. 5 minutes after he leaves I get a call informing me that he had a tire blow out. Being at work I cant really do much about it so my wife goes and takes him and the tire to the local shop. When he went to put the tire back on the car, I guess he didn't tighten the lug nuts properly because 20 min later I get another call and he is in the ditch with only 3 wheels. Over all the damage wasn't to bad. The rear control arm was beat up but still serviceable, a dent in the hood, rear valance was bent, gas tank was hanging on by a thread (poor design as stated above), and the exhaust was scattered along the highway. Now I start going through the emotional trauma and determine the best place to hid the body as my brother in law has just demolished the last 4 years of work. The insurance company came and towed her back to their lot and started doing their evaluations to determine whether or not she was a total loss. After working with the adjuster we settled on keeping her, but since I had been the only person working on the car for the past 4 years and didn't want anyone else to work on her they just gave me a check for the damages. Now I only had about 1 month left in Missouri prior to moving to Washington, I had no garage to work in and had to pack up everything. I quickly broke out the tools and started cutting off all the old, and working on the fuel system and the exhaust. I could care less at this point about the cosmetics, I had to just get her back on the road. I decided this time to replace all the 1x1 with 1x2 to make it stronger and I went with support bars running side to side to make the car overall safer. The tank was then framed in using 1x2 and then straps underneath. Over all, the new design I believe is bullet proof. The exhaust was too easy to fix as I still had left over exhaust tubing from building the exhaust the first time. I finished the car the week prior to leaving Missouri and had her moved to Washington via car transport. Now that she is in Washington I have started driving her again. One of the things I realized that a) I needed heat and air which was removed at the time of the engine swap, and b) she need the body work done as I skipped that due to lack of time. With the thought of doing body work I wanted to make her look as good as possible and one of the things that has always bothered me is the amount of wiring under the hood that looks like a spider web. Knowing that I couldn't just fix one thing I have decided to start from scratch. I have already removed the engine, transmission, under the hood brake system, under the hood wiring, most of the interior, front suspension and I'm sure there is more. My current build plans are to pull everything apart and do the needed body work. I have already built most of the removable core support which still needs supports running vertically to tie everything together. At this time I am rebuilding the frame with 1x3x.125 in order to support the larger motor. Once complete I will move into building a cage which will still allow the use of the rear seat (yes I have fit 4 grown adults in there). Once that is complete I will start the body work. At this time I plan on building a carbon signal body to add the needed width to the rear and painting her blue. Once body work is complete, I will move into rewiring the body and engine. This time I am going to use milconnecter types at the firewall for 2 reasons, 1) it will assist in the cleaning up of the wiring harness, 2) it will make the motor very easy to pull with the wiring still attached (on plug and one grounding strap). Once wiring is complete, I will install the engine and move into rebuilding the interior. I am going to make her as nice as possible this time, vintage AC, carbon fiber door cards, new dash, keep the speed hut gauges. I'm sure there is more that I'm missing.The only speed bump in the road is I leave for a year vacation to the beach with no water (Afghanistan) in July. The good thing is that I will be saving money during the year to help fund the build, the bad thing is it's a year away from the car right in the middle of the build. My current plan is to get the frame complete, the engine bay and interior cleaned up and painted and then ensure bare metal is protected to ensure that she is ready to start body work when I return. If able I will start body work and get her in epoxy primer but I don't believe that is realistic.
-
Do you by any chance ever come to the Seattle side? If you do let me know and I would definitely buy interior parts from you.
-
This should have what your looking for http://www.atlanticz.ca/zclub/techtips/body/doorhinge/index.htm
-
I had previously swapped an 5.3 into my z. Well as all things go, it's time to improve it and get a bigger engine. With that, I'm rewiring the car front to back (already pulled a lot of it so there is no changing my mind). I have seen somewhere on here where people ran the wiring through the fender to hide it but I cant for the life of me find it again. I am going to use mil connectors to make the engine removable with the harness and then directly route the body harness through the firewall where needed to best hide it. My question is where did yall put wires through the firewall to best hide them and where do you go into the fender?