walkerbk
-
Posts
227 -
Joined
-
Last visited
-
Days Won
10
Content Type
Profiles
Forums
Blogs
Events
Gallery
Downloads
Store
Everything posted by walkerbk
-
Yes - another Brake Thread. S12W and drums?
walkerbk replied to PrincePaul's topic in Brakes, Wheels, Suspension and Chassis
Im not sure which brakes those are, but the later years before they switched to the s12w, they took the s12+8 calipers and widened the channel in order to accommodate the vented roter. That gives you the best bias. As for calculating for front/rear bias with disk/drum set up, the calculations are completely different between disks and drums. Disks the force is applied equally on both sides sandwitching the roter. With drums, the cylinder pushes outward but then the pad material further from the cylinder has less effect on the drum itself. When I was doing my calculations, i could never find a clear cut way to calculate drum brake bias. -
Yes - another Brake Thread. S12W and drums?
walkerbk replied to PrincePaul's topic in Brakes, Wheels, Suspension and Chassis
Newzed: I completely agree with you. Everyone just wants to slap a set of brakes together to look better. I personally hated the drum brakes when it came time to change pads. At the end of the day I could lock brakes before and after the upgrades. The only difference is cooling abilities of the vented roters over solid and the solid disk over the drums. Drum brakes when set up right work great. My 36ft trailer will stop my truck fully loaded with only drums on two of the wheels. -
Yes - another Brake Thread. S12W and drums?
walkerbk replied to PrincePaul's topic in Brakes, Wheels, Suspension and Chassis
If you look at a brake bias calculator you will see that by switching to the s12w with the stock drums is a bad idea... The s12w overall are bad. They require more wheel space and the duel large cylinders makes them hard to match. The later years before the 12w they made the 12+8 with a large and small cylinder which makes it easier to match while also allowing you to run vented calipers. Even these however I would never run with stock drums. My set up I believe works very well. S12+8 and vented calipers with the needed spacer in the front. Maxima calipers and 300zx roters in the back with needed bracket. This set up when calculated gives me 67 to 33 front to rear ratio which depending on use, weather pad materials... should be between 55-70% front. If you don't get enough bite in the rear you will fish tail/ spin out. Best test of brake bias is stopping in the rain and still going straight. -
Just got it in and the axles fit quite well. They have a little play (less than 1* I would guess) but over all good. I went ahead and rebuilt it which was defiantly needed while adding new washers and bolts. Although the ones that came with it were intact, they were rusted and grimy. Plus it was filled with cutting oil from the construction of the body. Less desirable was the packaging that it came in however. I could have packed it better in a shoe box with tissue paper... but that's what you get when you buy on ebay. I'll let you know how it goes worked after the install
-
I just bought mine, should be here in a few days if you want to wait. I however don't have my axles out yet (I'm swapping to 300zxt axles which should be identical on the diff side).
-
Easier to remove dash pad or entire dash on 240z?
walkerbk replied to 5 Star Rising's topic in S30 Series - 240z, 260z, 280z
If it is anything like the 280, it is very easy. My 77 280, had like 4 bolts up top and 4ish below and then there was 3 wiring plugs under the passanger side. You do have to "drop" the steering wheel, there is 2 bolts that hold it up to the frame and then remove horn and wheel. Really only takes about an hour -
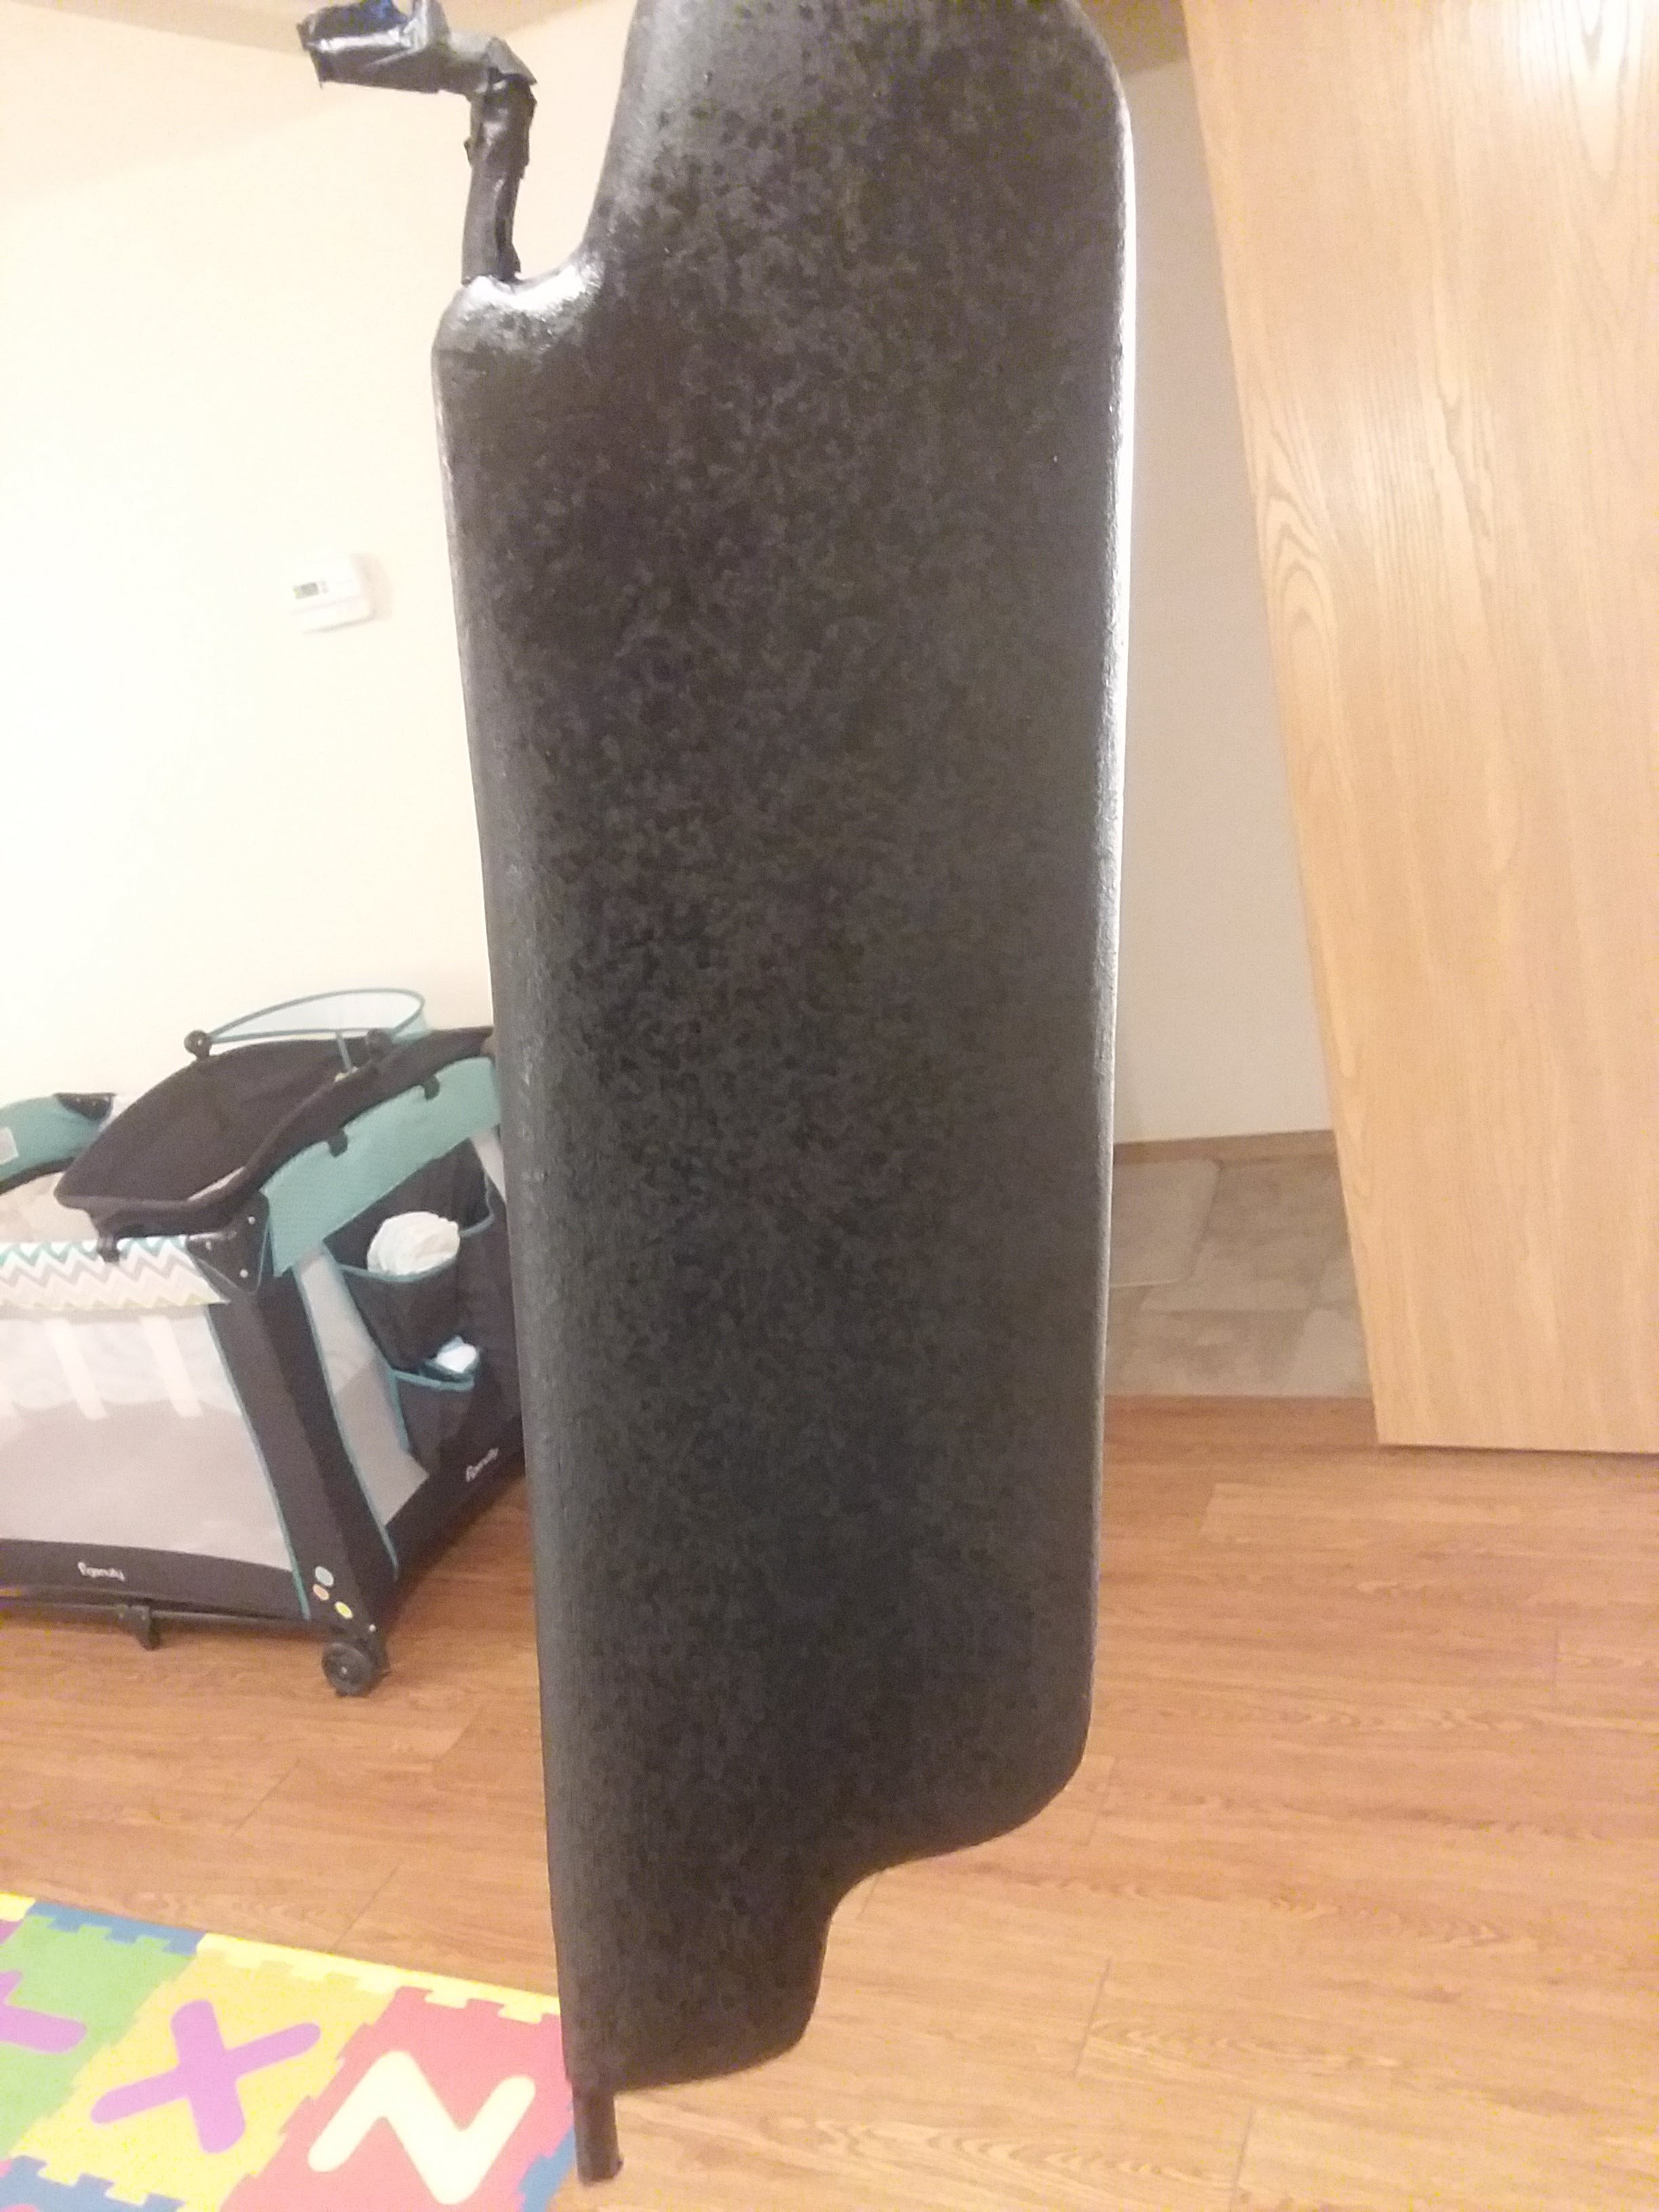
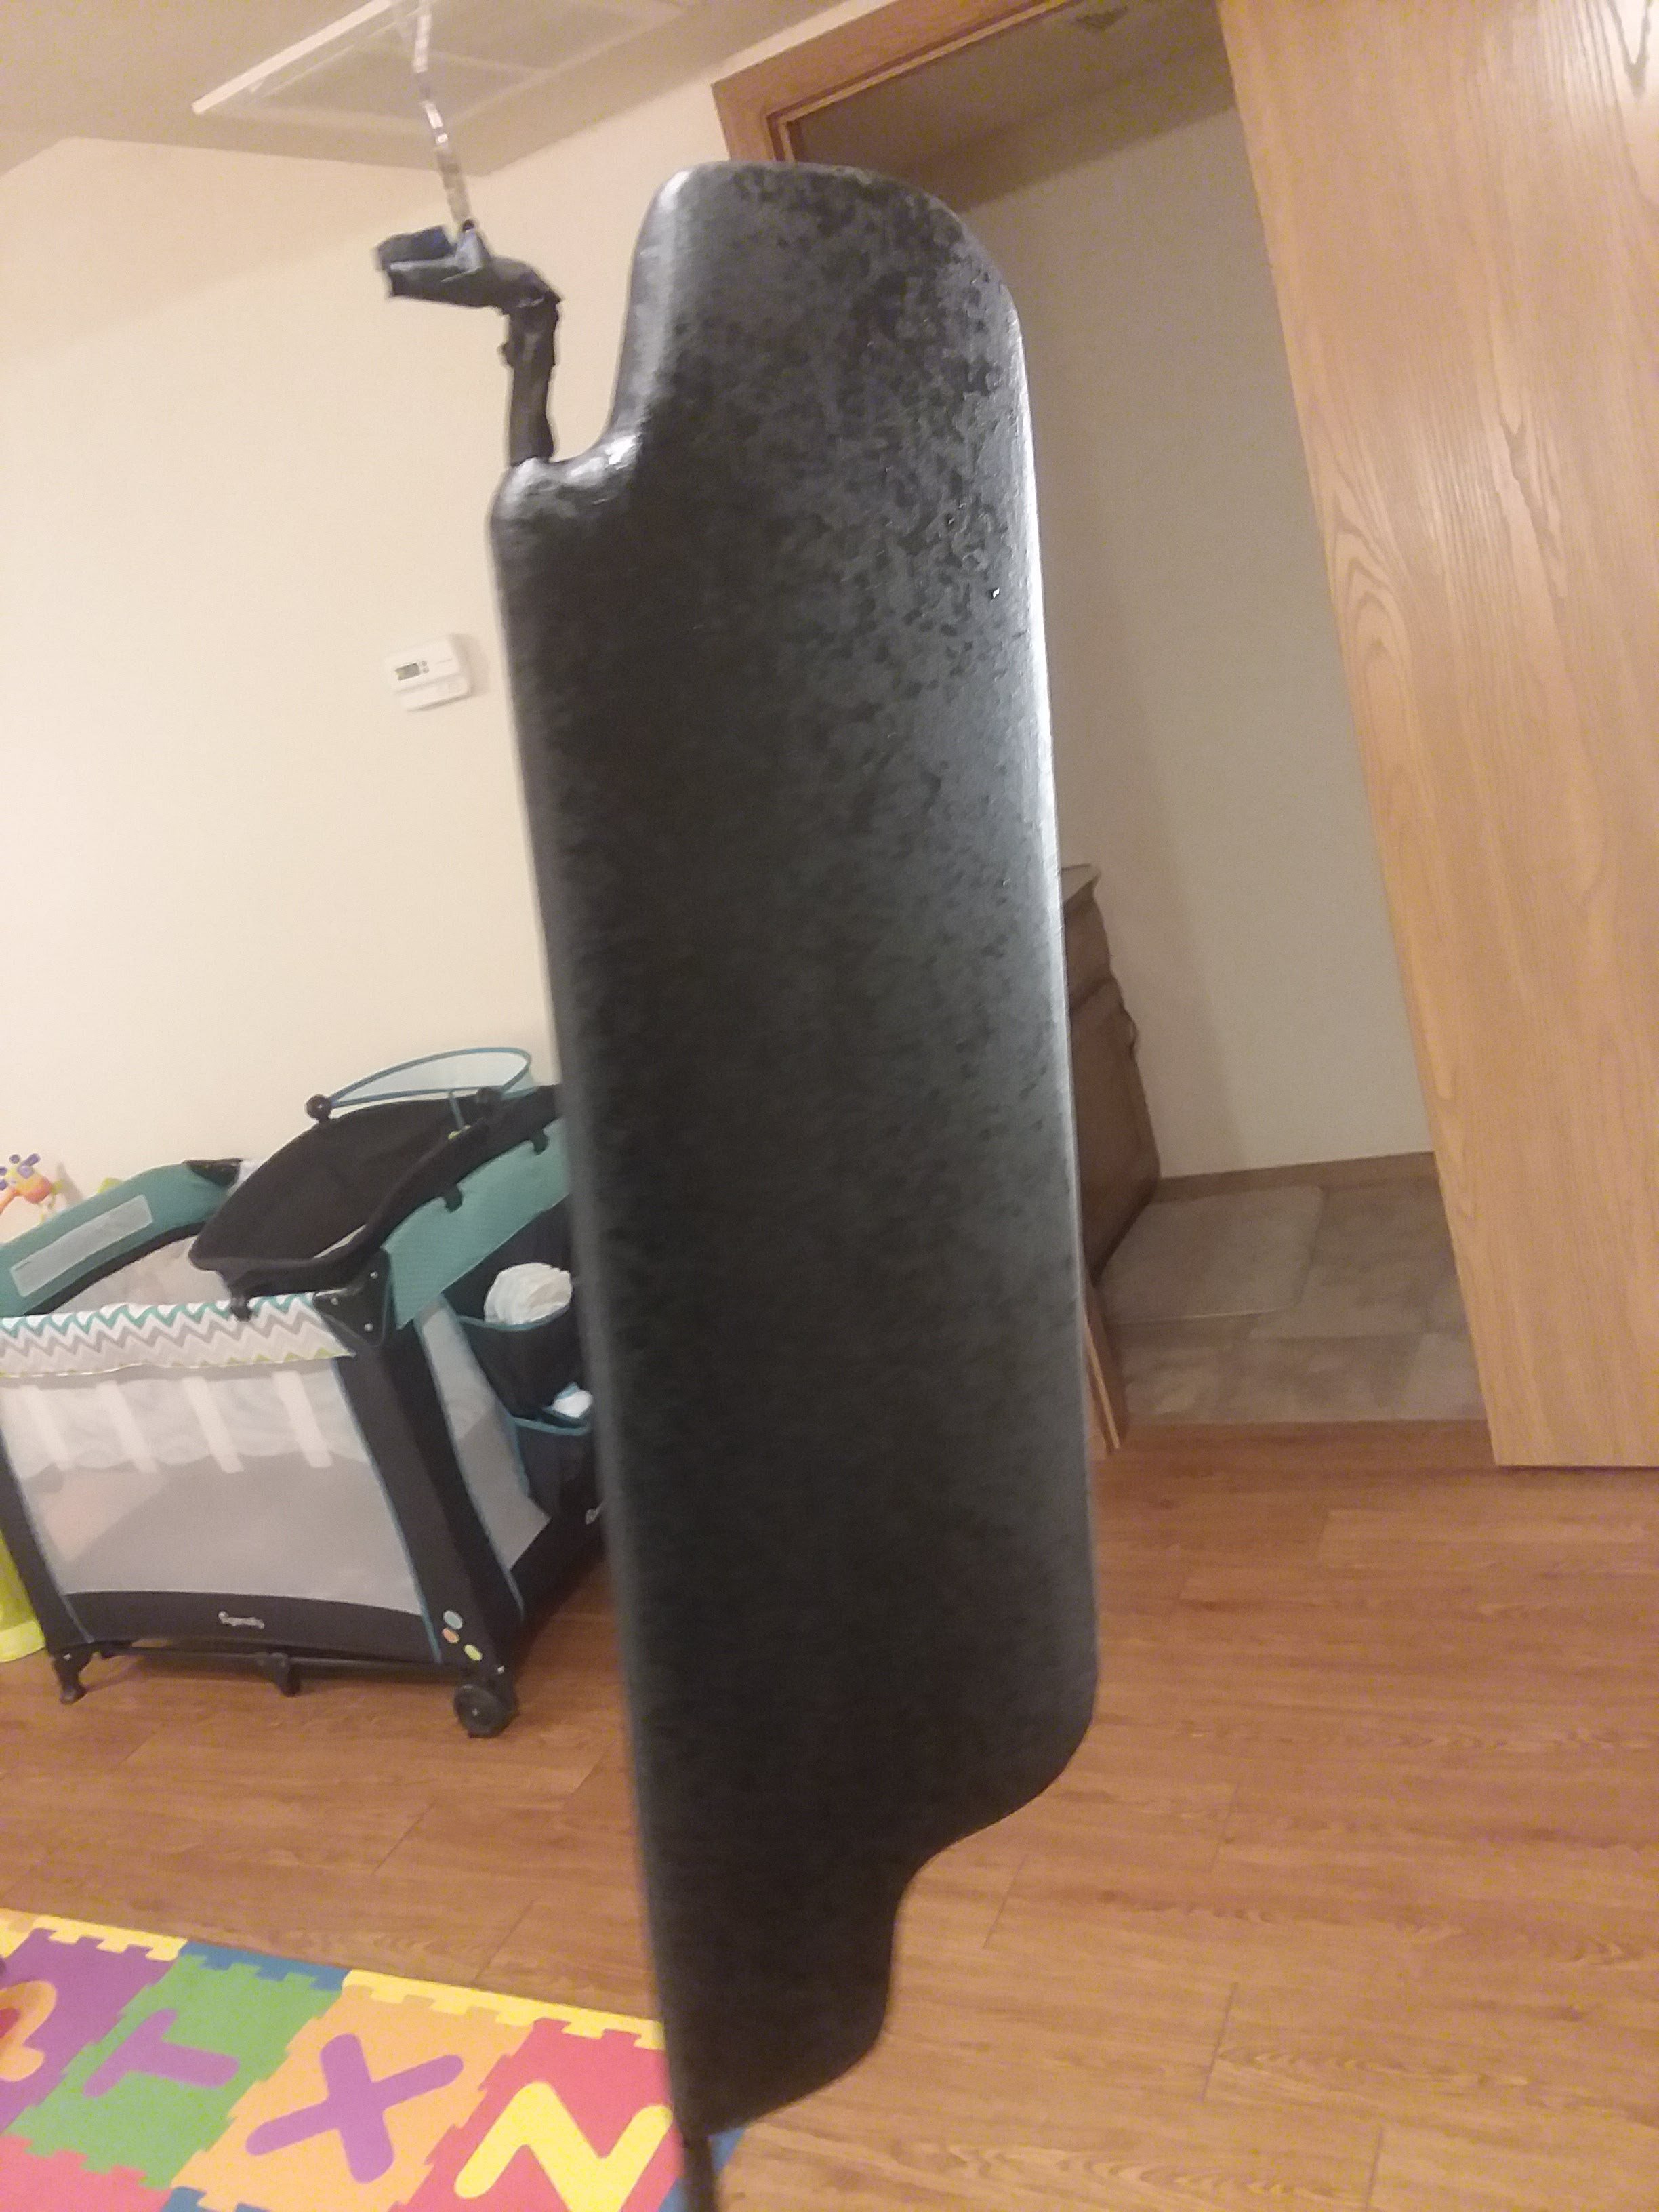
It is very similar to the stock weight, maybe a few ounces heavier. When I pull the passenger side one I will get a weight difference. Before I finished filling everything in with foam, the screw that attaches it to the metal arm can be adjusted for more or less tention adjusting the amount of tension it takes to pull it down. I just set it where I liked it and filled over the screw with foam for a nice clean look.
-
The caulk and paint are outdoor use so I am hopeful that won't happen. The foam I used was green insulation so it should be fine. I painted it with bed liner to give it a texture so it should be fine.
-
This is to all you haters out there. In the hopes of improving the process I continued to search and attempt to improve my idea. After further investigation, I found that many people use foam for stage props and cover them with a type of material. this is called to as hard coating. there is many different types of coatings that you can buy or make. From my searching, the most common that I found was a mixture of latex paint, latex caulk, and joint compound. the paint thins the caulk and the joint compound hardens the surface. these three ingredients can be mixed in any different amount to achieve a soft pliable or rock hard surface. I decided that since the surfaces of the car should remain flexible I would not add any joint compound. I mixed about 2/3 caulk to 1/3 paint. I used the alex siliconized latex paint since it is still paintable and coated the foam 3 times with a paint brush letting it dry 24 hours between coats and sanding with 60 grit sand paper in between coats. Also, the paint that I I used was satin and I had it tented black to help make it easier to paint. when mixed with the white caulk it was a nice grey. My first impression was that it was still laying on very thick and that I should thin it out but though the drying, it leveled out some and then the sanding helped. The third coat I should have thinned out a little more to help it smooth out the surface but through sanding I was able to make it pretty near perfect... but I will let you be the judge of that... As for the test piece. I have always hated the soft trashy visors that came with the car. I tried to remove it and make a new one out of vinyl but it was no better. In the end I removed it and glued two pieces of foam over it. In between the two pieces of foam is a 1/4 piece of cheap hobby wood. This did two things; one, it filled in the area that was taken up by the wire frame, two it added more stability to the visor. After that I filled in the edges with great stuff spray foam and trimmed down to the wire frame with a dremel sanding drum. The actual shaping was done with a sanding block and 60 grit sand paper. this ensured a smooth and even surface. In the end I am very pleased with the results. In the future I will be buying another dash to redue, and more than likely start recovering or making my own interior panels with this method.

-
5/8th bolt option for spindle pin replacement
walkerbk replied to hwvigo's topic in Brakes, Wheels, Suspension and Chassis
Sorry. It's been a while. I do not have mine notched, I check them for torque every 10k miles or so and no problems. I also have poly bushing if that changes anything. -
5/8th bolt option for spindle pin replacement
walkerbk replied to hwvigo's topic in Brakes, Wheels, Suspension and Chassis
I have 5/8" bolts in mine and have been drag racing it. No problems. I have also pulled them and checked after about 5k miles and they had no marks. -
Drag racing suspension
walkerbk replied to walkerbk's topic in Brakes, Wheels, Suspension and Chassis
Well I definitely plan on a dedicated set of drag slicks but I have to increase funds first. I have the set of street slicks, daily tires, and it is going to take some talking to the wife to get a 3rd set of tires. I don't have a goal for the car. Built it to be reliable and I love going fast. Obx lsd is in the future with a set of wolf creek racing axles and coil overs. Should be about 2k next time I have the money. I am also currently seperated from my car. I had to move up north for a while and couldn't drive the Z up and the truck. I should have her back around Christmas -
Drag racing suspension
walkerbk replied to walkerbk's topic in Brakes, Wheels, Suspension and Chassis
I have everything you just mentioned except the welded diff and the roll bar. I am running a street slick ment more for autocross so I know I am losing traction with them, but I was running the same times with my touring tires. I know I am putting down around 350-400. Definitely wish I had them slicks like that though. -
Drag racing suspension
walkerbk replied to walkerbk's topic in Brakes, Wheels, Suspension and Chassis
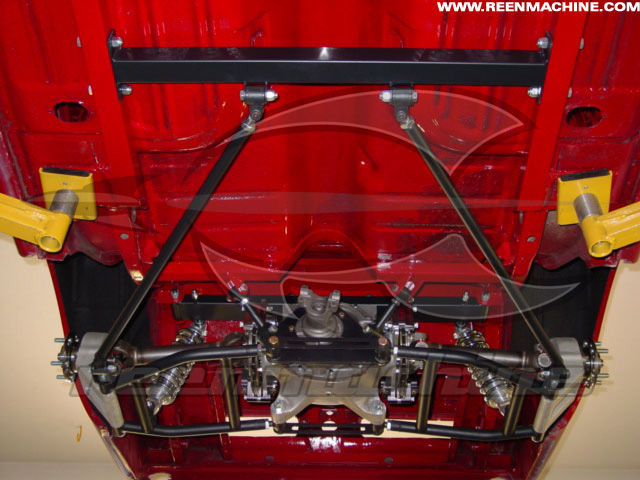
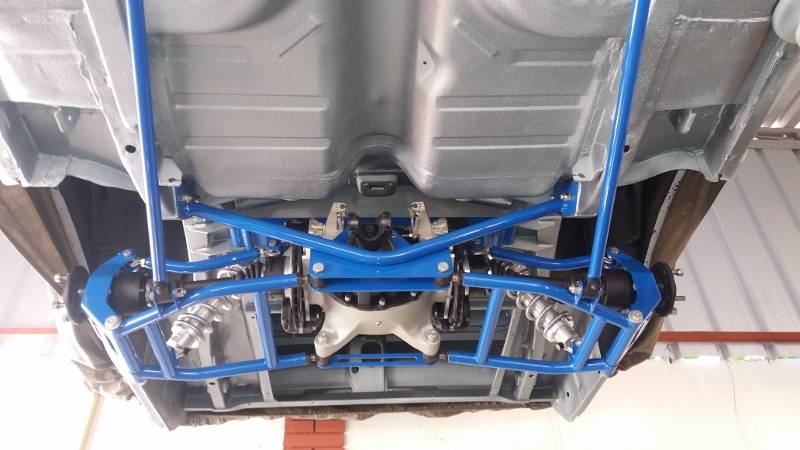
Check out this page, toward the bottom. They call it a subframe connector but it looks like it would do the same thing as a torque arm, lift weight off the nose and apply it to the rear for better traction. https://ls1tech.com/forums/cadillac-cts-v-2004-2007-gen-i/1549239-tuning-irs-drag-racing.html Also, I attached two pics of the same thing where they attach the subframe to the rear suspension. Don't know how much upward torque is applied though, I think this design more helps with wheel hop.
-
280z LS376/480 4L70E HELP!!!
walkerbk replied to 2reckliss's topic in Gen III & IV Chevy V8Z Tech Board
Btw, the best way to do it, is to get the engine and suspension set up, get the car running, take it all back apart and then do the body and interior. That's my opinion anyway. -
280z LS376/480 4L70E HELP!!!
walkerbk replied to 2reckliss's topic in Gen III & IV Chevy V8Z Tech Board
-Kits: i did thd CX racing headers and engine mounts but I used the 4l60e transmission so the headers had to be modified and every welder that looked at it said it couldn't be done... so I bought my own, figured out how to weld SS and did my own turned out fantastic. I will later add duel cutouts before the Y pipe. If I had it to do over I would have gone JCI all the way. I would have also turboed but that's me. -Suspesnion: left mine mostly stock but I'm getting back into that now. I did the poly bushings and am going to do 4 corner coilovers, nothing special. This is my toy that likes to make the mustang and camaro guys wonder why they just spent 40k on a car when they just got beat by a car that cost 10k to build. Brakes: Silvermine for the 240 caliper and 300zx roter. Remove the stock prop valve (replace with a union) and you will be around 70/30 braking. Paint at 2k: get it running. Dynomat: get it running. 225 tires: same I got... can still spin them on a dry road while going 40. Driveline: jci makes a great steel shaft. No need for aluminum since it is so short the weight savings is going to be minimal. I think mine is only 2.5ish feet, maybe 7lbs. CAI: focus on getting it running. Radiator: stock 3 row and then go get a random hose from autozone that fits (go behind the counter and pick). Fuel cell: I swapped over a camaro tank and wish I had left the stock one with the walbro fuel pump. Quote Quote this -
Drag racing suspension
walkerbk replied to walkerbk's topic in Brakes, Wheels, Suspension and Chassis
So miatas use a open style torque tube that runs from the differential to the transmission. It is the same setup as the corvette torque tube except that it is only closed on 3 sides to make it easier to maintain. And it doesn't need as much since there isn't the torque of a v8 in there stock. From my understanding, the key to a hard launch is to be able to transfer vehicle weight to the rear wheels as fast as possible. 4 link push and pull the frame up applying all weight from torque to the wheels. The torque arm is mounted to the front of the differential and as the nose of the diff rotates up it pushes the front of the car up applying the weight to the rear. My thought is that even though it is an irs, the diff still acts the same. Under hard acceleration, the nose of the differential launches upward. This is the reason for the strap over the diff and the reason the rubber mount under the differential separates. That being said, if I was 100% sure this would work, I wouldn't be asking here. My design thought is to remove all the mounting on the front and then have 4 pieces of angle iron bolted to the nose going to a torque arm on both sides of the drive shaft. This will also make it easy to make a drive shaft cage. -
Last time the guy poped the hood and said "is that stock?". They do not care in Texas (this was in bell county as well).
-
Drag racing suspension
walkerbk replied to walkerbk's topic in Brakes, Wheels, Suspension and Chassis
Btw, I have upgraded to poly bushings, springs and struts and do use the car for autocross as well. -
So I have finished my ls1 4l65e swap and love it. Anything over 3k rpm gets a little scary. Went to the strip to show up all the mustangs and running street tires got nowhere... literally spun tires for the first 60ft and then just rolled through the finish. After buying a set of street slicks I went back. Still could not launch as hard as I wanted to but I was running low 12s. My thought is coil overs, bigger sway bar, lsd differential and true slicks. Well I am getting ready to start my next build (63 c10) and am researching what I am doing for suspension and have decided to keep the solid axle and add a torque arm. After researching torque arms I thought why not put one on the datsun? Is there a large difference since it is a irs? My thought is the torque is still going through the nose of the diff (thus the clunk that I had to fix). My thought is remove the extra mount over the diff that I added and remove the stock nose mount and replace it with a bar that goes up to my transmission mount. This would make it to where the diff is mounted on the rear and then to the front of the car right under the driver seat.
-
Different Progressive springs
walkerbk replied to walkerbk's topic in Brakes, Wheels, Suspension and Chassis
You make a good point. I still think it is a viable option, just not for what I need. I guess I'm going to chop everything up and go with coil overs. -
Different Progressive springs
walkerbk replied to walkerbk's topic in Brakes, Wheels, Suspension and Chassis
That is why I was looking at these springs. The stock ones are right around 100lbs/in and with these being 150lbs/in I figure that should give the soft side about a stock feeling and then the firm side enough to reduce roll when cornering. -
So to start off, I am cheap. I hate over paying on car parts just because my car is older than most of the peoplease that work in parts stores. Some times I can get away with it, other times I just flip open the wallet and hope the wife doesn't knowtice. I currently have chevy chevelle springs (moog 6556) on my ls1 280z 2+2 and although they ride great in the front with the extra weight, they are way to stiff in the rear at around 197 lbs. So I have been planning on swapping to coil overs for the ability to change springs and I came across a website that has specs for moog springs http://classiccarsprings.com/coil-spring-specifications.html Looking through this list, cc257 is a progressive spring that is 149lbs at 15.5 in height so it is only slightly stiffer than the stock springs and very close to the exact hight. What do you guys think? Btw, these springs are for a 90-97 honda accord I believe
-
Get this stuff from home depot. They only sell it online and it is the same as the automotive material http://m.homedepot.com/p/UltraTouch-48-in-x-6-ft-Radiant-Barrier-30000-11406/100656748?MERCH=REC-_-PIPHorizontal1-2-_-NA-_-100656748-_-N
-
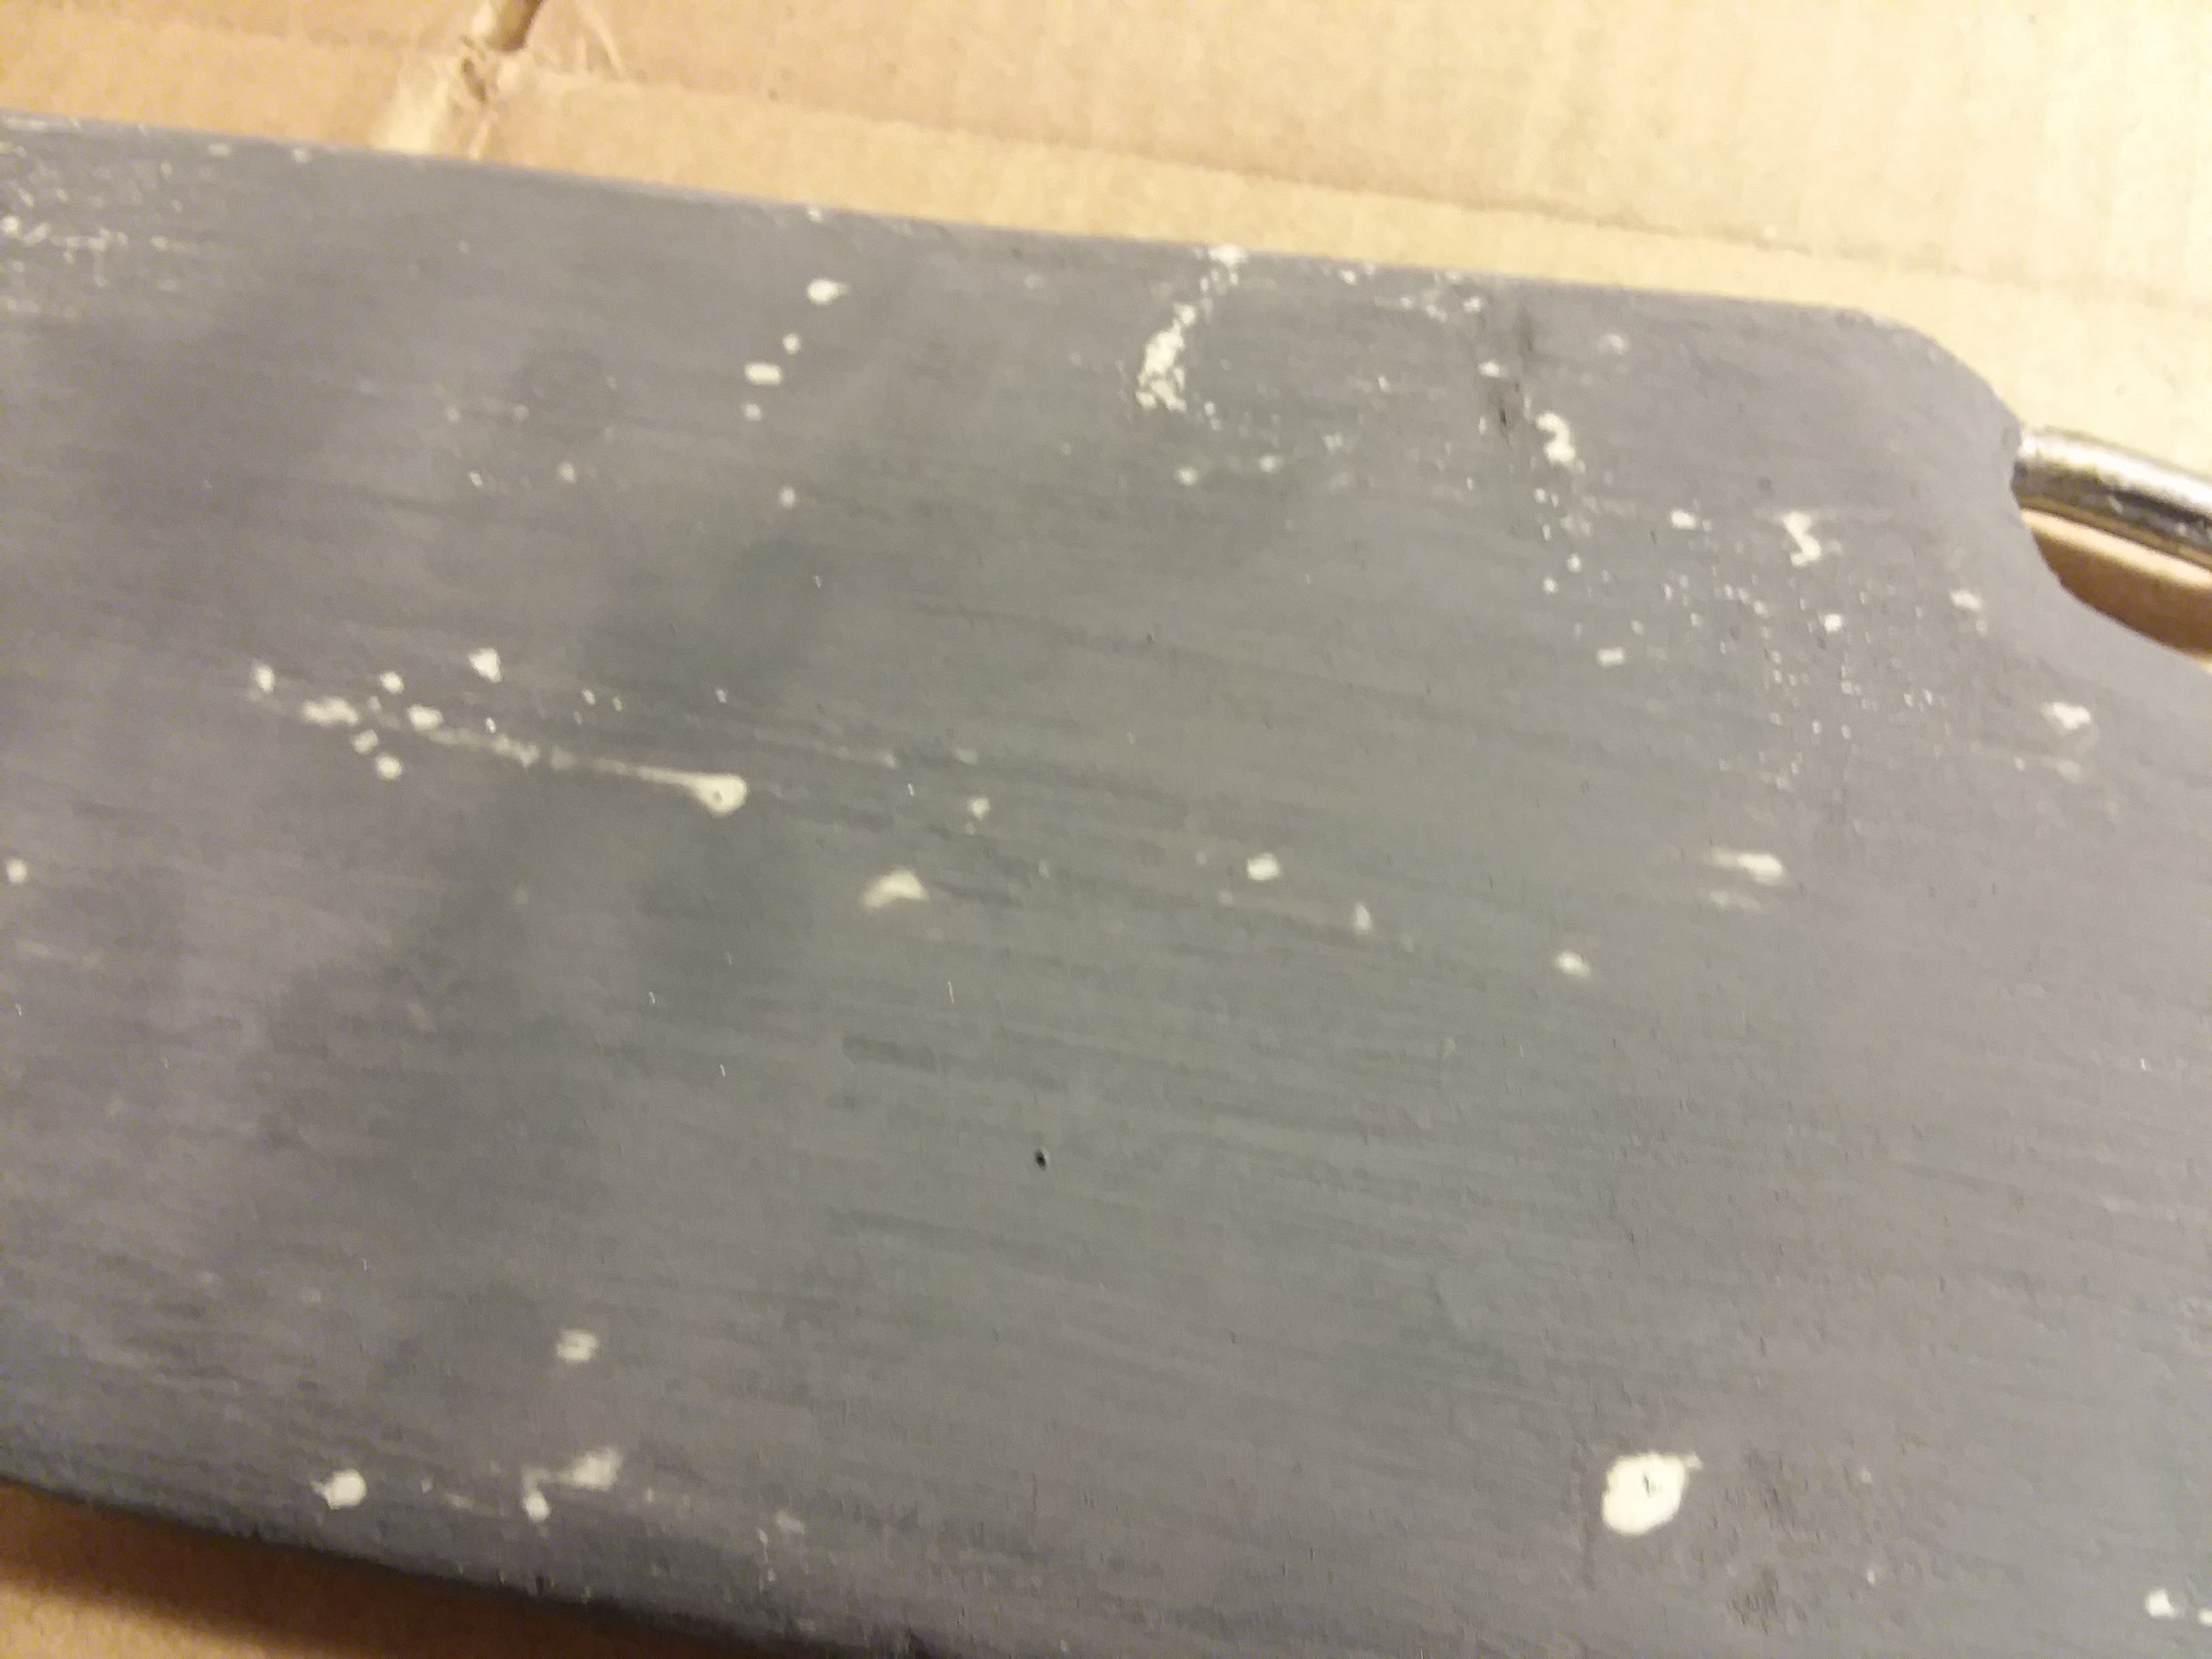
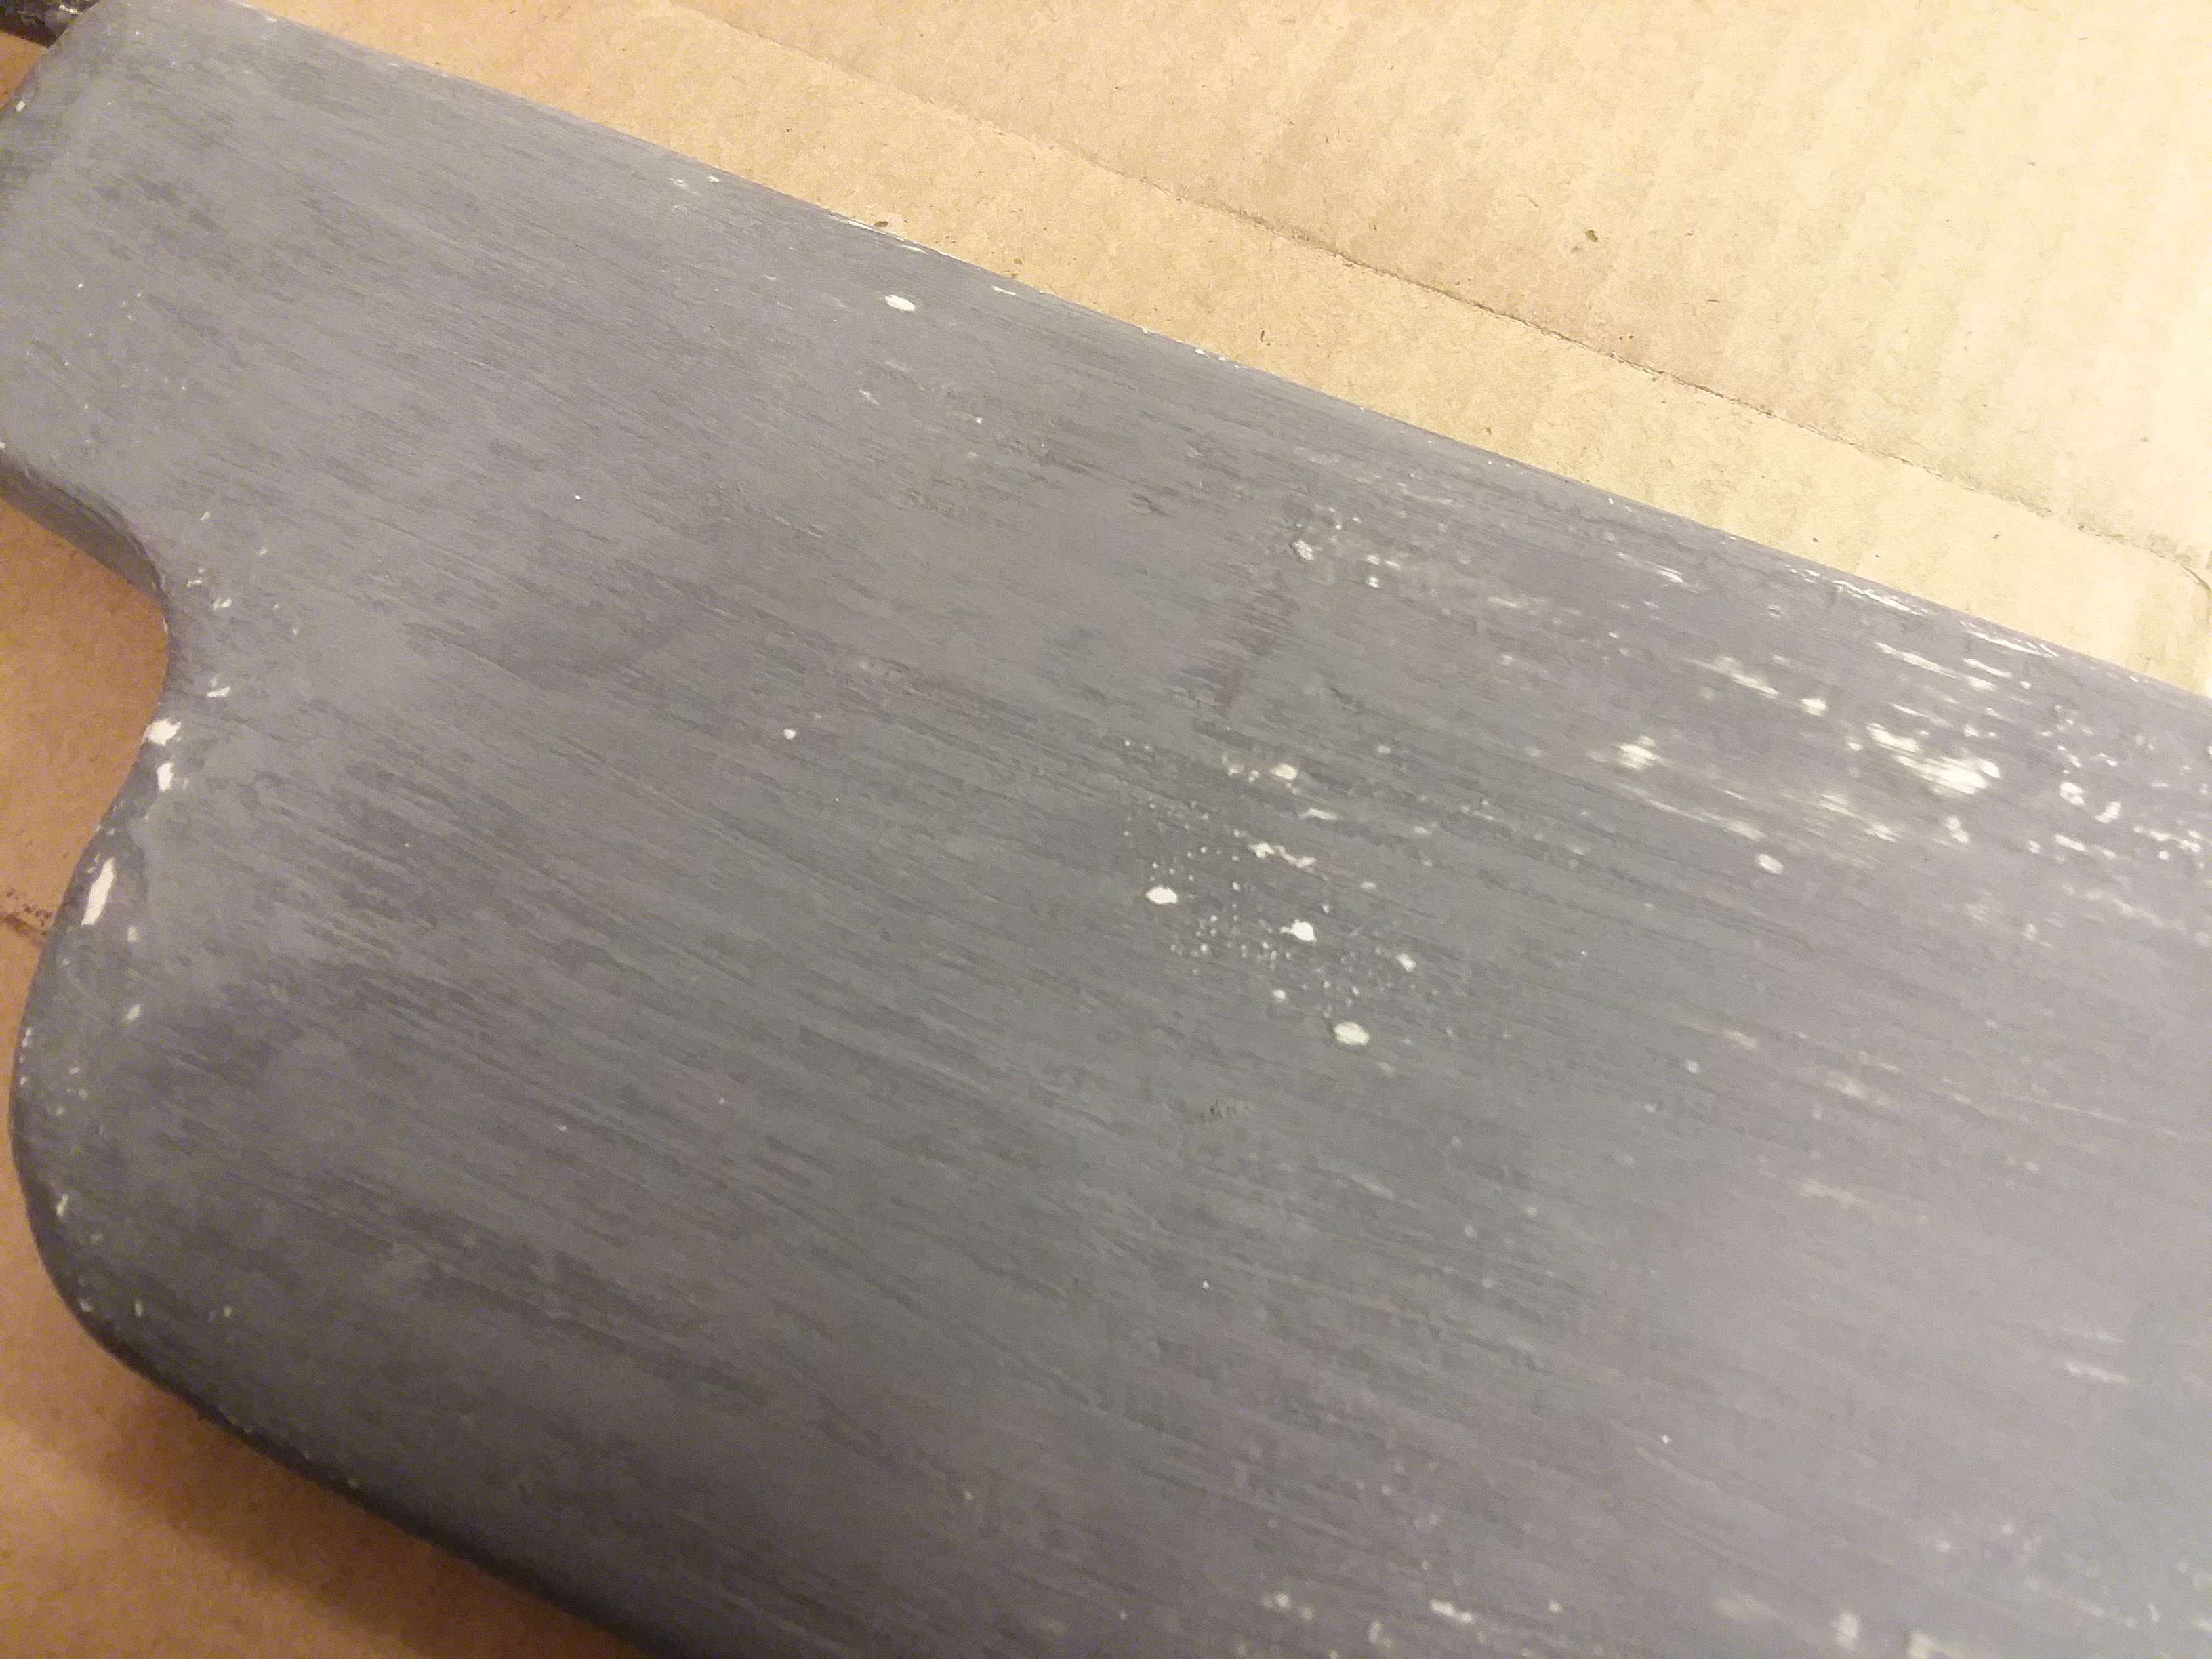
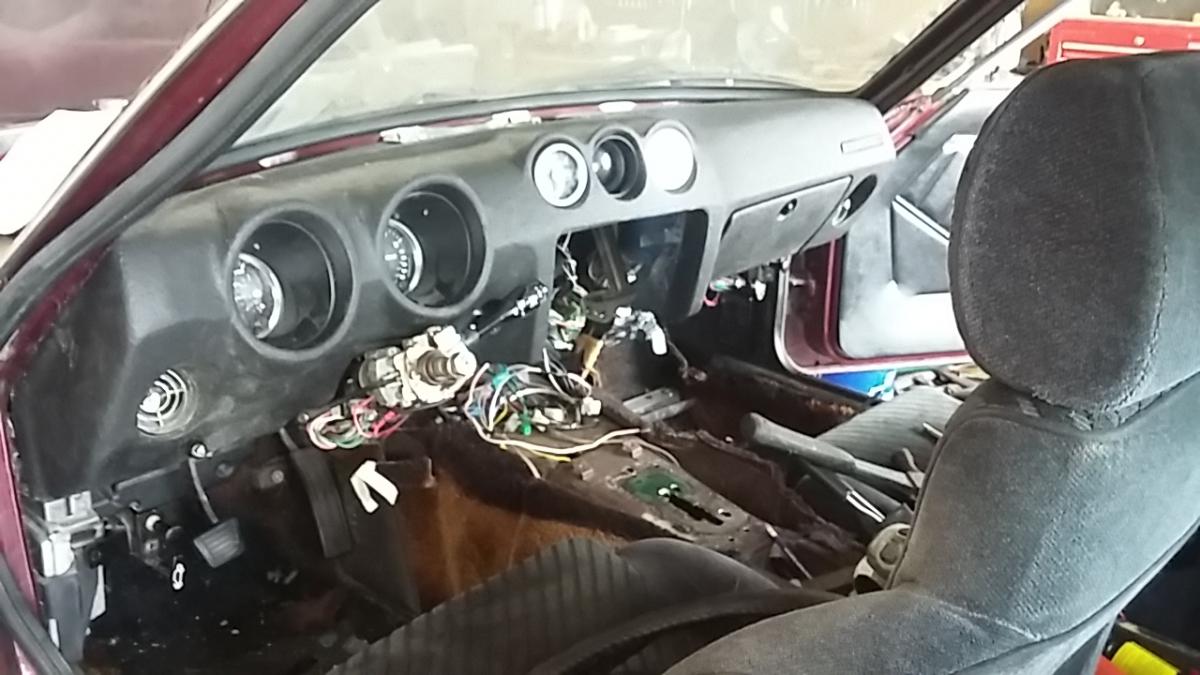
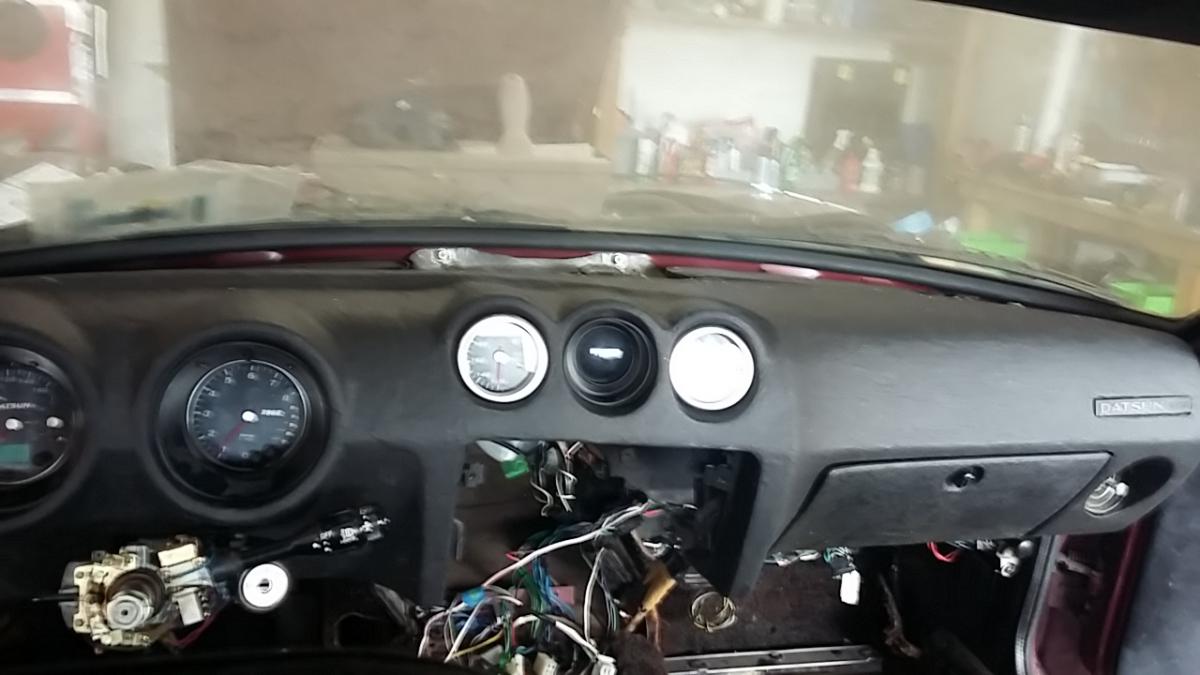
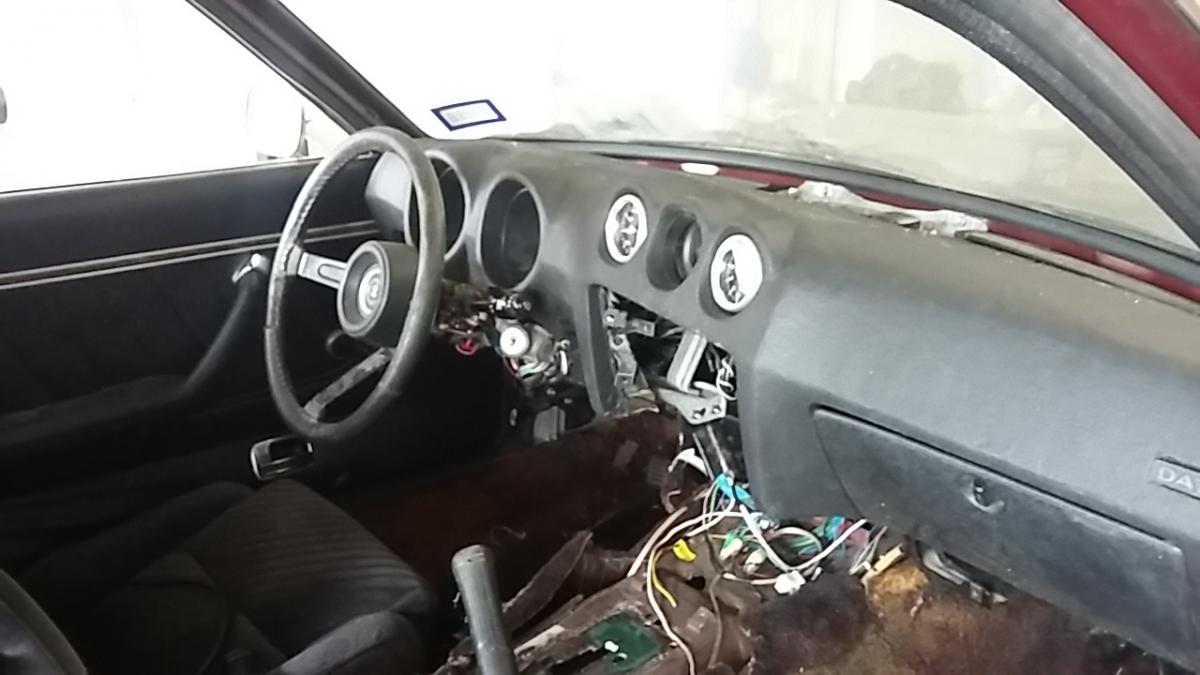
you guys are killing me. It's the fact that it's just the photo that looks bad. The dash really looks a lot better than the photos show. Here are some during the installation. These are more of what it really looks like.