Dat73z
-
Posts
852 -
Joined
-
Last visited
-
Days Won
8
Content Type
Profiles
Forums
Blogs
Events
Gallery
Downloads
Store
Everything posted by Dat73z
-
So after rebuilding the cooling system I put in the jets my buddy lent me. I suspect Rebello tuned the engine for straight dyno power pulls 4k+ rpms as the drilled/soldered jets in there responded crazy going into insane rich levels on tip in with 0 pump volume and still lean popping at idle an 10 afrs so a definite fuel metering issue. With the new virgin jets, the engine is responding now like any other sidedraft setup I've tuned which is going slightly lean on tip in with 0 pump volume and much more responsive. 20220724_205157.mp4 Unfortunately it was getting late and most of my neighbors have young kids so I shut it all down before 9pm. But at least now I can start re-baselining and actually tuning for a super responsive NA later this week. Hopefully I won't be pulling straight 12-14+ hr days at work again but we'll see tom evening.
-
Today some friends came over and we were checking out the car when the lower rad hose blew. Not sure what's going on but I've been struggling through some cooling system pressure and boiling issues. I bled the car for over 1 hour 2 times elevated with a spillproof funnel and kept getting more air out. Before the lower coolant hose blew I was seeing maybe 190 at the tstat housing and 180 oil temps with a 16lb rad cap. Nothing is burning or mixing so far as I can tell. I bead rolled the ends of the coupler I made a bit more (it blew out on the side which was "factory" rolled) and hopefully I can shake it down more tonight, and it was just a tightening issue. I mentioned earlier in the build I wasn't too confident in the factory hose clamps for a high performance app but I've been working with what I have. It was a bit of a bummer that I basically dumped 50$ of coolant on the ground but fortunate it happened right in front of my house so I was able to wash it out and animals didn't get to it. Another positive note is my buddy lent me some OER jets when he stopped by and another friend has a bunch they can lend me. Just another day of shakedown I guess but it was good to see friends that I haven't seen for years

-
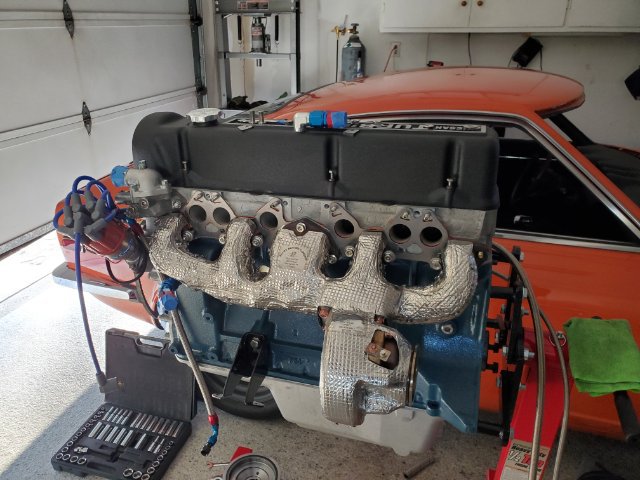
I had to hop way back in my photo archives but I did a skim of high temp rtv on either side of the gasket. It was probably overkill but removing the manifolds on this engine means pulling the engine out of the car. Also not my OE gasket does not have the injector cutouts but you can make out the metal reinforcement areas on the exhaust side.
-
The OE gasket you want should also have the metal reinforced sealing area for the header/exhaust side. What you linked from zcardepot looks correct, and it has the injector cutouts for your itbs.
-
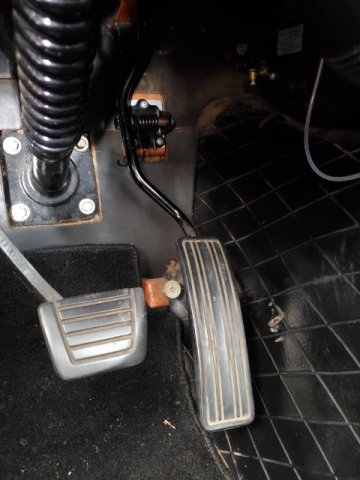
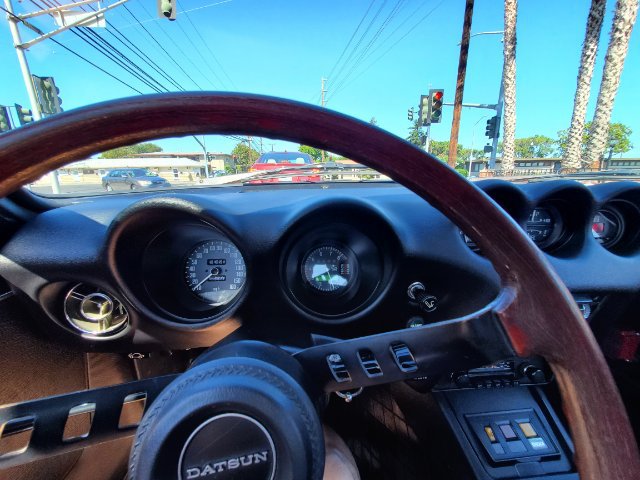
One thing that's always bugged me about the s30 Zs was the gas pedal height in relation to the brake pedal for heel and toe. For whatever reason the Z pedal has always felt low to me compared to my other vehicles and I'm pretty sure my pedal isn't bent downwards or something as I've experienced in some other Zs. So I made a spacer plate to bring the pedal height up on my current Z car. Is this a common issue with the s30s or are there some other adjustments I am missing? I thought about adjusting the clutch and brake pedals downwards but they actually feel correct to me where they are.
-
Have it all machined so everything is square and true. You can still get the OE graphite gaskets and there are some vendors in Japan that make the graphite gaskets for a variety of bore sizes. I used a thin smear of high temp rtv on mine (oe graphite gasket) just to be sure, but this was also after having everything machined flat.
-
Thanks @rossman! 100 miles down maybe 400 to go before I get to a good state of tune. I'll def post some pics and vids. As I've been doing research on these setups over the years and actually doing it now I've found a lot of forum posts and very few vids of how these setups run on a hot L. We know from 80s japan they're capable of really big #s and low 1/4 mi times. However, most vids I've found online are of poorly running/tuned setups where rapping the throttles results in major bog or popping. So I'm going to really focus on the tune for this build and get it dialed in to respond like a super responsive NA before boosting and tune more from there
-
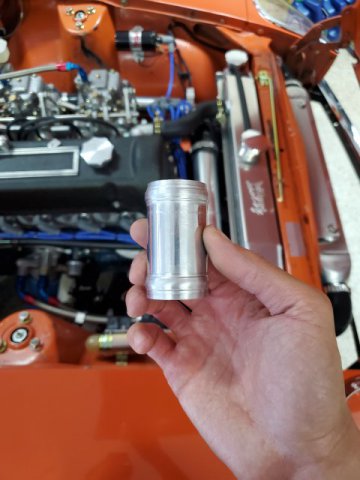
This morning I had a couple hrs to keep shaking the car down so I've been racking up the miles and breaking things in. The jetting on the car is close but still far out. Unfortunately the 60 pilot jet was drilled and soldered up so I don't have any idea what I actually have. Fortunately my buddy has some 62.5 and 65 fixed air pilots which should be a good baseline for a 3.2 stroker. Hopefully I can test those out this weekend. As I've continued shaking the car down I've noticed I have some significant oil overcooling as expected. Even after idling for an hour and driving around for another, the oil temps never exceed 180. I think I'm going to obscure the oil cooler with cardboard for now and keep tuning.
-
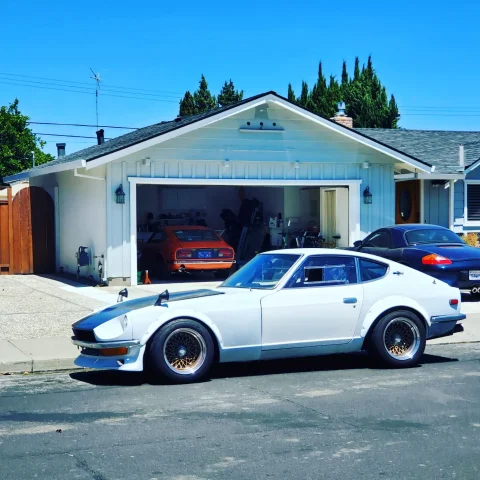
Today I managed to get the car re-registered and promptly went for a nice long drive...in circles to the gas station Lol I got everything set up just enough for the car to idle and drive decently but I can feel the jetting is slightly off. Also as the car has been heatcycling and new parts wearing in, the settings are moving around but it's getting smoother and smoother as the fuel circuits are getting flushed. At the advice of my buddy who rebuilds and tunes sidedraft carbs I'm going to focus on driving the hell out of this thing NA for the next couple of weeks to let everything wear in and get the jetting on point. Once I'm satisfied with the baseline I'll put the surge tank on there and start boosting...to the dyno at my friend's shop for more tuning 🤣 In the meantime as with all ground up builds there are a few non-turbo related items that have crept up during shakedown runs to address.
-
Been working 12 hour shifts back to back and needed to unplug so I started in on the tuning tonight after work. I temporarily capped off the vacuum ports and got the carbs mixtures generally set and balanced. I'm still getting some lean popping out of all barrels with my afr gauge reading 12-13. My mechanical fuel pressure gauge is also showing 4psi while the electronic is showing 1psi. I think I need to go through and check all grounds just to be sure, but I'm not trusting my gauges too much right now. Tomorrow I'm going to try and dial in some more fuel after I get the registration sorted, then begin road tuning and continue shaking it all down. 20220720_200356.mp4
-
Had to take a break for a while due to a close friend's wedding but final parts came in so I started assembling. The car now runs and drives but I won't be able to shake it down and start tuning until this weekend. Somehow during the pandemic the DMV didn't process my non-op reg but they gladly took my fees and didn't send me a notice to let me know. Or maybe they did but I also moved like 3x this past couple of yrs. So now I need to go to the DMV to dispute a few years worth of backfees on Thurs. On the bright side, the 3.2 stroker turbo sounds and feels like a monster. 20220719_184814.mp4
-
New owner, 74 260z -head gasket woes
Dat73z replied to inis's topic in S30 Series - 240z, 260z, 280z
If you're going to run it I'd at least put a wrench on everything while the pan is off. Depending on how far you want to go, you could put in new rear cap seals and the the front and rear mains as well before you reseal the oil pan. Sounds like you've already checked everything for flatness. If there's no scoring in the bores you could just run it and see. -
Thanks @AydinZ71. I really like how you mounted that. Really clean install. Good point on angling it I hadn't considered air would be an issue. Are you running a baffled oil pan as well? Any tips on the cable install? Did you just loop it for the extra length? Doing some more research I'm not sure if it's overly redundant on the L series to do both the accumulator and a baffled extended capacity pan (am running an AZC modified for drainback). I'm also at like 10 or 11 quarts of oil already. I do like the idea of pre-oiling as I cycle through vehicles so my cars/bikes can sit for a while between starts.
-
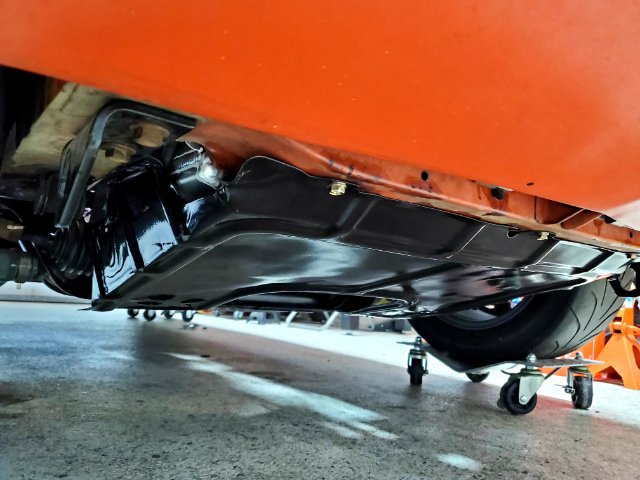
I'm thinking of mounting an oil accumulator in the circled teal area and teeing into the oil return line from the cooler. After some measuring It seems a 2qt canton accusump will fit well there. Is anyone currently running an oil accumulator and how do you have it installed? I'd like to keep it out of the cabin but I think the only other places it may fit without having super long line length would be the fenderwell and maybe the tunnel. In front of the rad support is too packed on my car.
-
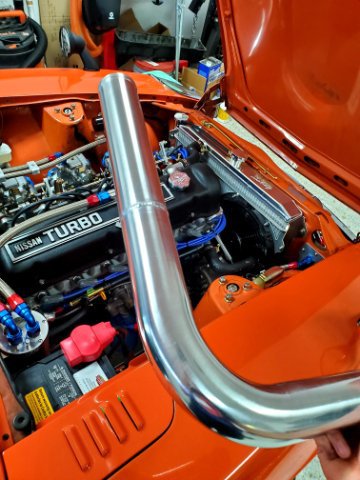
Hopefully it's something simple, chasing down rattles and vibrations is pretty annoying. If you were closer I'd say swing by and grab my Mishimoto fan shroud for the twin spal 12s! Couple of minor weekend updates since I'm still waiting on parts. I final mounted the hot side piping with the murray clamps. They are surprisingly simple for their cost. Basically a worm clamp with a constant tension mechanism and an inner band to prevent cutting the couplers/distribute forces more evenly. I pulled my gas tank about a month ago because I wanted to double check a few things and I'm glad I did. I was concerned with delamination of the tank lining, in-tank fuel movement, and the return hose submerged in fuel/degrading since it wasn't rated to be submerged. The redkote tank liner easily peeled off the AL tank cap but seems very well adhered to the rest of the tank so I'm going to run with it. I added 2 one way check valves in the baffle plate as the gap below was coated over. I also replaced the in-tank 1/2" return hose with a SS hardline.
-
A couple of minor details I sorted over the weekend for the turbo build. I final loomed the fan harness and verified everything works as it should. I mounted the fan harness under the fan bracket so it looks tucked but still serviceable from below. Really happy with how the wiring came out, especially since I was sort of dragging my feet on it for a while. I then mounted the splash pan. Note this is another reason why I raised the radiator. I think some rads I've seen like the AZC hang way low and definitely the Wizard slightly low, probably for the later 260/280 configurations. I wanted to at least run the 240z splash pan and later the full 432r undertray so I took that into account on fitup. Finally I got a nice uniform brushed finish on all the charge piping. I was mostly bothered by all the gouges the pipes picked up over the years and from fabrication/mockup so I sanded those mostly all out. I saw some pipe polisher tools which you can buy for $200 or so with abrasives but I was hesitant to spend that kind of money on a tool I may only use once per year. So I did it all by hand and I hope to never do that again. I have some Murray turbo clamps coming in this week so the pipes will be final mounted then. I didn't feel good about how the tbolt clamps were unevenly squeezing the couplers so a last minute change.
-
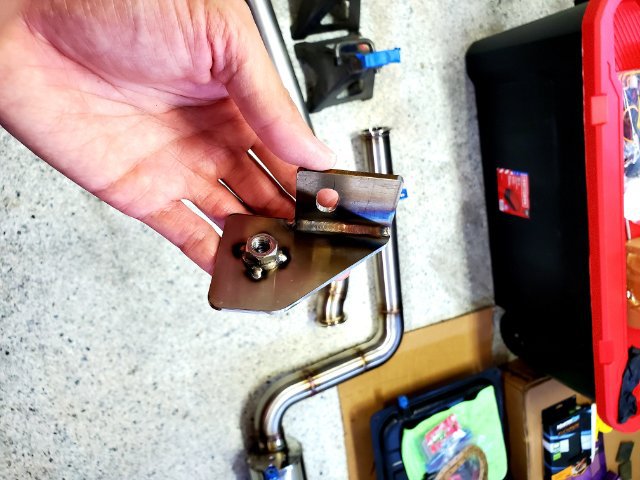
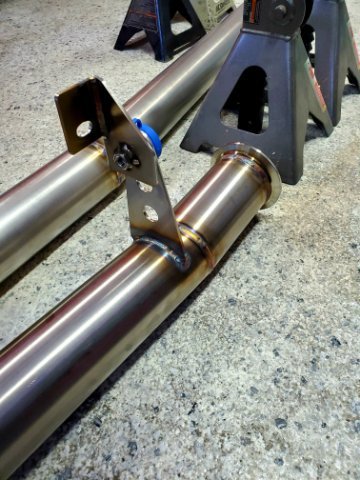
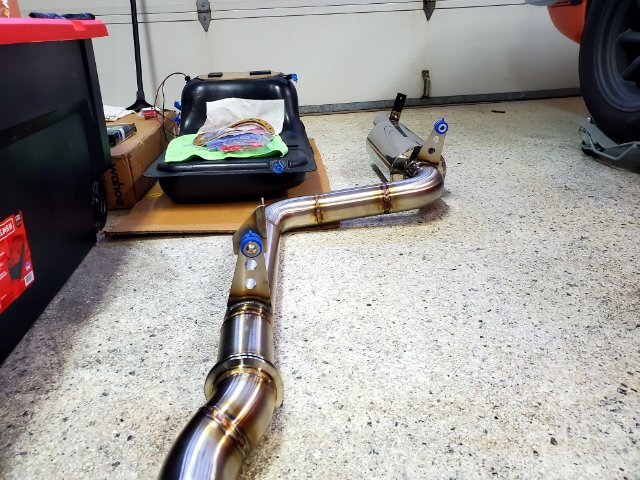
It was a nice long weekend. Didn't get much done but I did button up the build a bit more since I'm waiting on some final parts which apparently are shipping from the UK because there is no stock in the US. @AydinZ71 thanks I was more disappointed because I almost cooked the part by rushing thereby ruining the SS properties which at this point I know better 😅. Your welds are looking really good, especially coming from the mig 👍 @Zetsaz Here's some pics of the diff section brace. On the 240z there is like a strap arrangement for the OE exhaust hanger in that area, not sure about the 280z. Basically as with most other things on this build i used some scrap 1/8 SS and cut some shapes which I welded into an L bracket. I then tacked a SS nut I had left over from the exhaust mani so I don't have to mess with that in the car. It's super solid when mounted due to the poly bushing. I also slotted the chassis side hole, so I can tighten it down last however the vbands like to settle in to seal. I can move the entire car from the exhaust with the pipes only moving a couple mm. Note how I positioned the hangers, I offset them so regardless of which plane the exhaust wants to move it is constrained. It's something really simple but I've seen a lot of cars where that's not considered and the exhaust can freely swing in some direction.
-
The idea is to use the lease aggressive cutting method to achieve the result. I've found on really hard paint I might use a hard pad but fine compound. Or on really soft paint, a soft pad and soft compound. Some cars I've found there's really no need to go in a lot of stages, one or two could do it with a great result. On the edges you could also lay down a tape line just to be safe for burnthrough. Lots of great videos out there now, here's one on water spritzing. Once you've found the right combo it should go pretty quick and you'll get a great result. Good luck and keep at it!
-
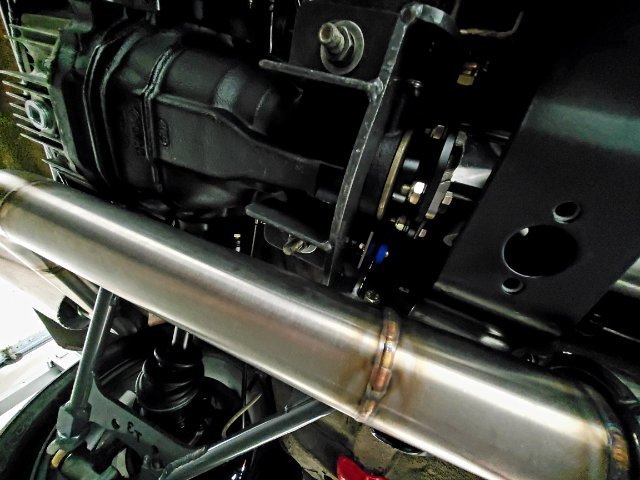
I'll grab some more pics this weekend when I get back into it. I have the exhaust off currently to check the torque on all the rear end fasteners. With the way I have the diff and rear muffler hangers positioned, the exhaust can't move more than a couple mm in any direction even when I'm banging or pulling on it as the hangers use poly bushings. This probably also means I'll get more vibrations in the cabin
-
BBK and wheel choices?
Dat73z replied to LooseRocks's topic in Brakes, Wheels, Suspension and Chassis
I run the 300mm t3 bbk front and rear, 15x8 0 offset Rota rkr, 225 50 15. I'm planning to go 15x9 and 245 45 all around. For the t3 bbk the rears with the ebrake mechanism are hard to clear 15s. I told the tire techs to be really careful where they stuck the weights and marked the areas where they should go. -
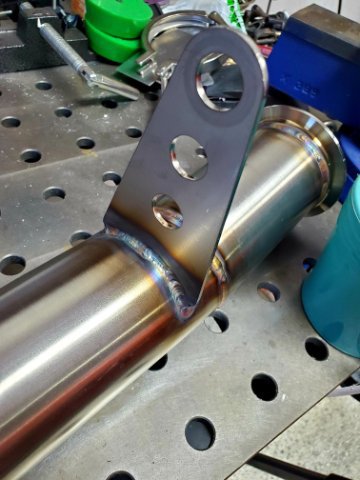
Waiting on parts and time so decided to finish up a few small projects. I forgot to post these pics earlier but I braced the rear exhaust section with an adapter bracket + hanger off the OE diff exhaust strap mount. My welds aren't the best because I had 15 minutes to do it and was rushing but oh well it's done. I also have some brackets fitup for the front bracing but I'm not sure if I want to weld it up as I'm undecided on the final driveline. I want to run a s15 6 speed with a PAR gearset 1-5 or the 1-4 in my s13 trans. Something to figure out later
-
And after plugging in the remaining sensors for the turbo build last night it turns out the O2 sensor I ordered is incorrect. I placed an order for the correct O2 sensor and was promptly hit with the supply chain mfg backorder message ship date tbd 🤬. Hopefully I won't be waiting 6 months like I had for other pieces. I feel like this past couple of years has been a struggle to get parts but I'll take it as a sign to wrap up the things I've been putting off on other parts of the car.
-
Looks good keep it up 👍 Some tips on the buffing: the tools and compounds you use makes a huge difference. I think 10 or 15 yrs ago I tried wetsanding and buffing a car at home with turtle wax and a drill like you're using. It was extremely difficult and I got poor results, burnthrough in areas as well. At the shop we used a rotary, wool pad, and 3m compound for freshly painted cars. Ended up buying a cheap porter cable DA and a bottles of meguiars m105/m205 for home use. I got pro level results and was able to do an entire car in a day. It was worth the cost and I still use the porter cable today. you probably know this since you're doing it but you don't want to go excessive on the compound as you want it to break down. You can spray the pad or panel with water if you need more cutting action or longer spot work times
-
Fortunately or unfortunately with the way gas prices are I'll probably only need a couple oil changes per year... Yeah I'm running oil temp from the pan to a channel on my Stack integrated tach. Good info on oil temps. I don't recall why I went so far overboard on the oil system but I suspect I'm going to run into significant overcooling issues on the street. I was thinking the other day I'll probably have to go through $20 of gas just to get up to temp 😂
-
Thanks @rossman and good info.Rebello put a pump on the engine so I assume it's good...we will see 😅 Counting the bottles I realized I put in 8 quarts with the big oil filter minus a small amount of oil from the turbo feed when I was testing. That gets me to the high mark of I think the 280zx dipstick...need to check the part # on that. I am going to assume I'll need to dump in another quart or two for the volume of the oil cooler and lines once the oil thermo valve opens. Basically the same volume of oil as my Porsche at 10+ quarts...expensive oil changes. Now to figure out if I dump that in before or after the first start.