Dat73z
-
Posts
852 -
Joined
-
Last visited
-
Days Won
8
Content Type
Profiles
Forums
Blogs
Events
Gallery
Downloads
Store
Everything posted by Dat73z
-
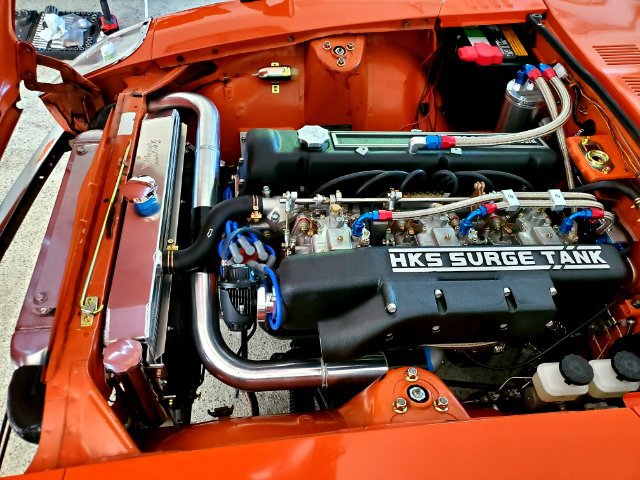
Tonight I wrapped up the bead rolling. It's been a really busy week but 15 mins here and there is bringing this to the finish line. This weekend I'm going to set mechanical tdc and on the distributor. Also see what base map Rebello ran the engine in on the dyno with

-
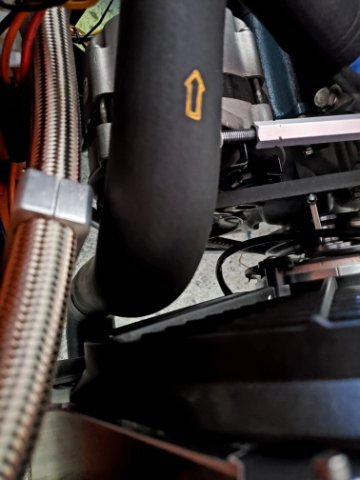
Yeah I was surprised to find that OE's basically run some improved worm clamps for even clamping pressure. I priced out Murray clamps and it's 1-200$ just for that, and HD clamps are like $100 each! Maybe someday in the future. I tested the tbolt clamps on my hot side piping and the movement is constrained to 1/4 or 1/3rd of what I had in the vid above when I'm really yanking on it. I'm basically at the point of having everything back together enough for a first startup so this will do for now.
-
So after a lot of reading on IC charge piping design, it seems: 1. A bit of flex is good. Setups with bracing can crack out the AL welds for brackets and this is a known issue even for mass produced intercooler pipe kits/hardpipe upgrades. 2. If bracketing and using silicone couplers, care should be taken to ensure that the bracket and chosen pivot point(s) doesn't create more issues with hose blowoff. 3. There are other coupler options available similar to vband clamps but can be fairly expensive and adds fabrication time. Some are able to flex, others have no flex. 4. If using silicone couplers, use high quality parts including at least tbolt clamps. By design, tbolt clamps do not provide even clamping force and can go out of round. There are other more expensive clamp options as well such as Murray clamps which are similar to what OEs use but with a constant tension mechanism. The best clamps have even tension and will not break or loosen resulting in boost leaks. I'm leaning towards no bracing and running the tbolt clamps I have to keep moving forward. It seems all of the other options are basically more $ and time for an incrementally better result. Open to suggestions if anyone has thoughts, here is the worst case movement I get with no clamps on the hot side. The cold side is fairly constrained and short. 20220615_202353.mp4
-
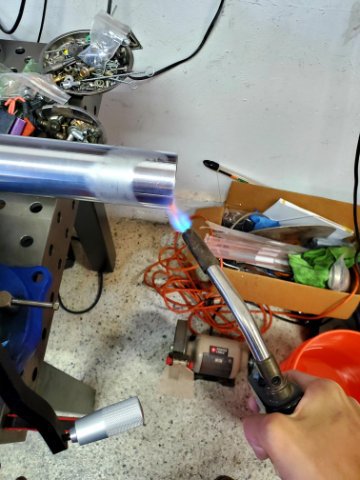
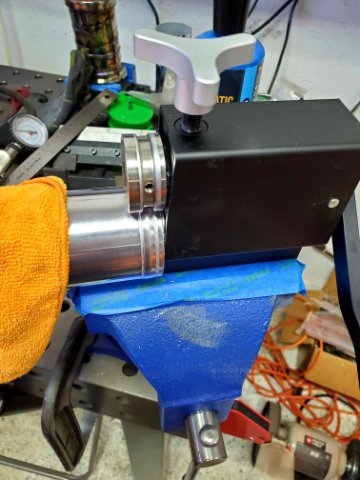
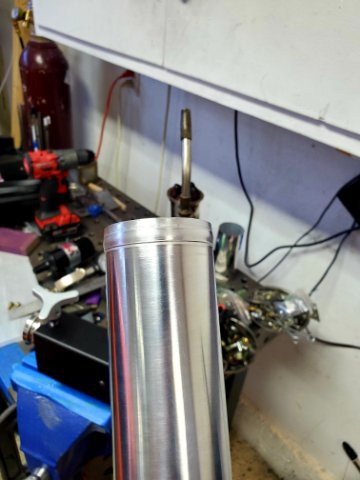
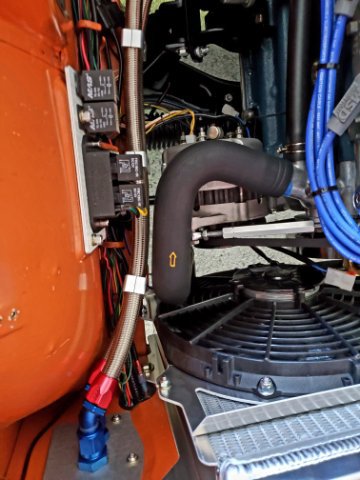
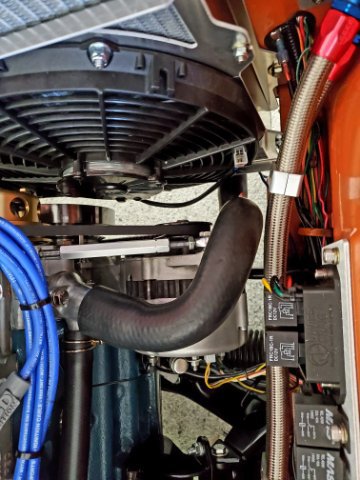
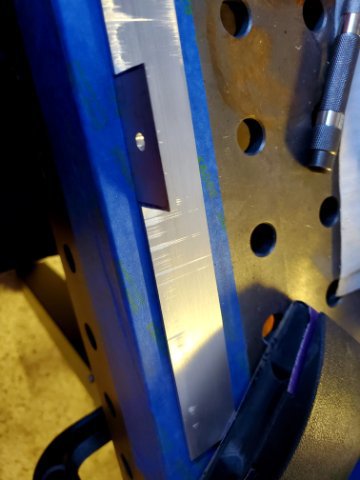
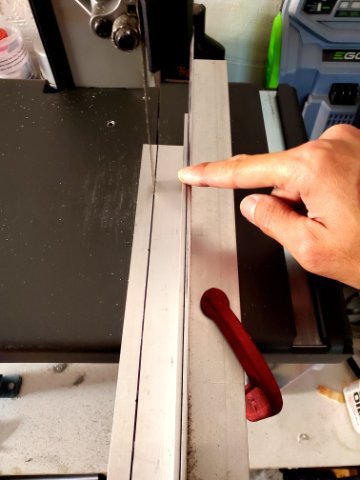
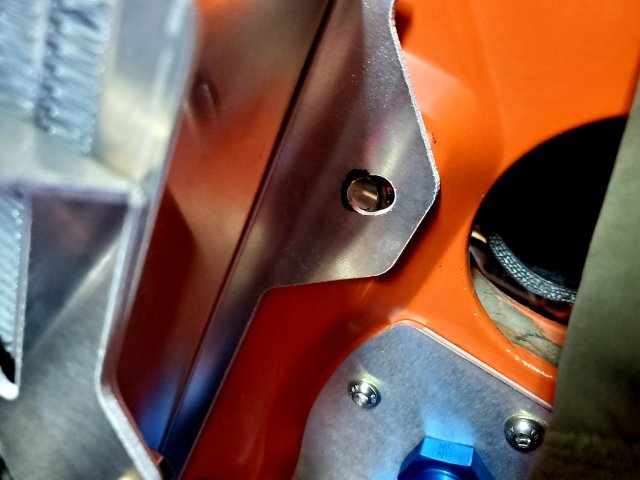
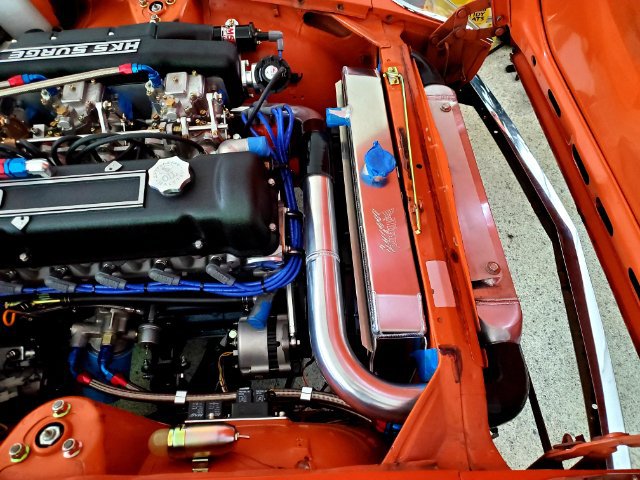
This evening I got my hot side piping mostly finalized. I was waiting to complete the rad fitup before final trimming and I'm glad I did. The final clearances came out just about right. I did the final cuts to the charge piping on the bandsaw then using my new clean hose cutting skills trimmed the silicone coupler down a bit. The pipe needs to come back out one more time for bead rolling and maybe refinishing. Unfortunately during the past couple of years when I was moving around and couldn't work on the car I carried the piping with me with every move instead of putting it in storage with everything else so it has some nicks and scratches. Not sure if I want to put the time into that right now. I am also considering fabricating and welding in some bracing for the charge piping that bolts to the head but I need to do some more research on the pros/cons of that. I've seen a lot of turbo builds that run without it and some that do
-
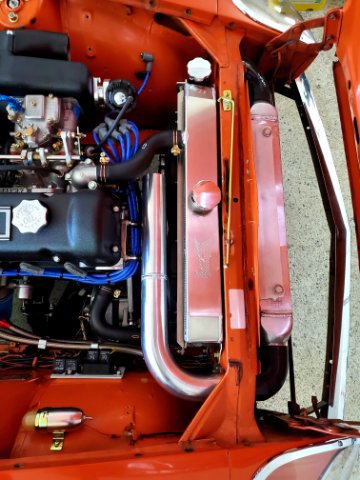
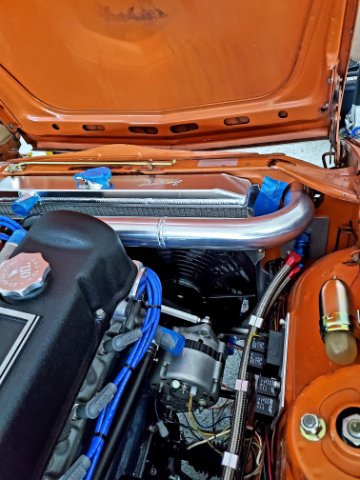
With the radiator change fiasco out of the way I started back in on final trimming of the intercooler piping over lunch. Because everything is so tight on this setup I've really been trying to be considerate of serviceability, even something as simple as trimming tube. For the cold side I sectioned the run to give just enough clearance to swing out of the way of the upper rad hose. Otherwise I'd need to drain the coolant down and remove the upper rad hose to work on this section in the future. I need to do some final adjustments and bead roll the ends.
-
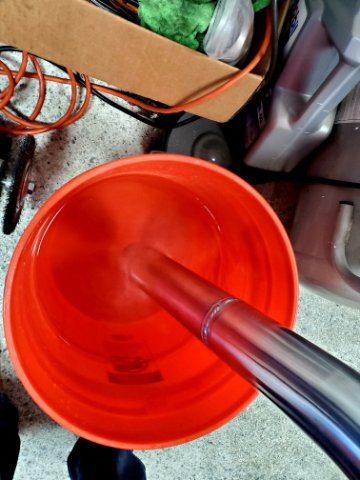
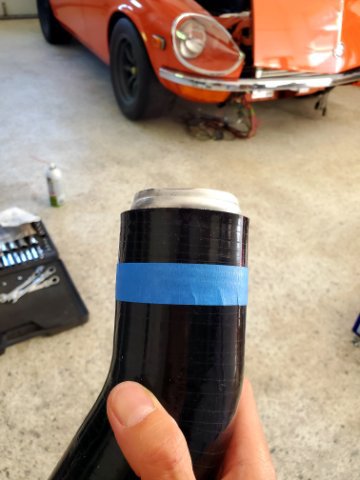
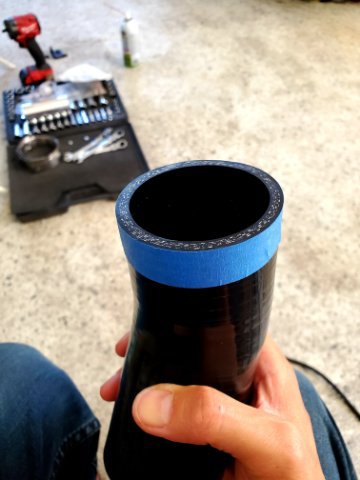
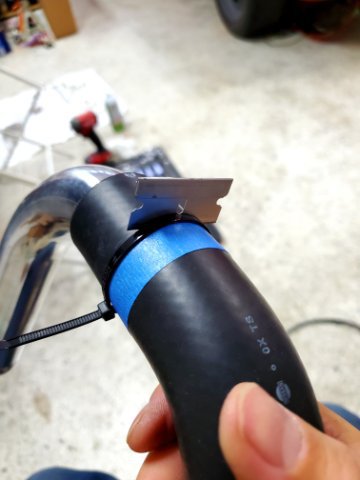
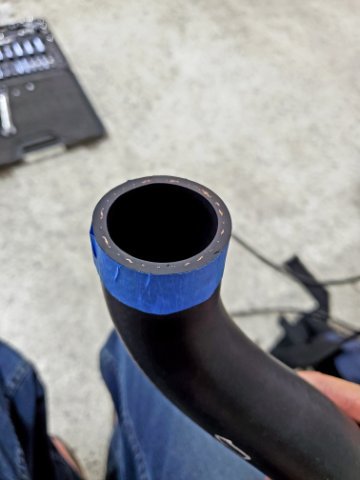
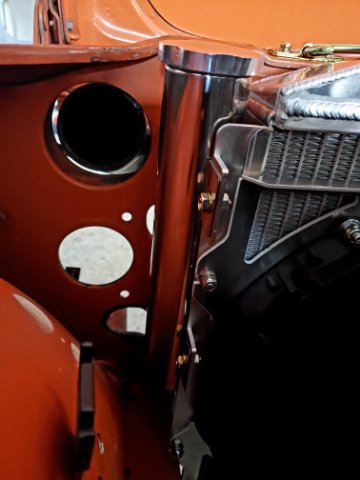
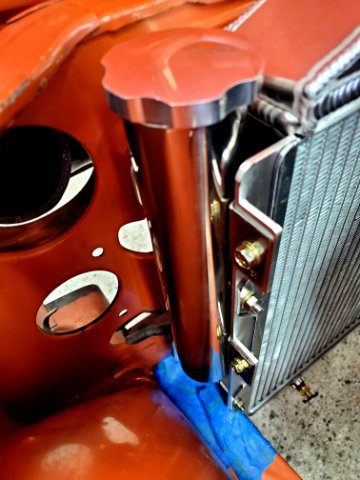
Last night I finalized the rad positioning. I was able to raise it 1/4" which left me somewhere between 1/4-1/2" spacing between my chosen rad cap and the hood bulge. It is now hopefully not coming out again for fitup. I also trimmed the coolant hoses to fit and installed the hose clamps. I can't remember why I decided to use the OE style clamps as there are better styles available but I think it was because I was sending a batch of parts out to zinc plate anyways and I already had them. On cutting the hose I have always struggled with making clean cuts so for this build I decided to change that and attempt to make clean cuts.
-
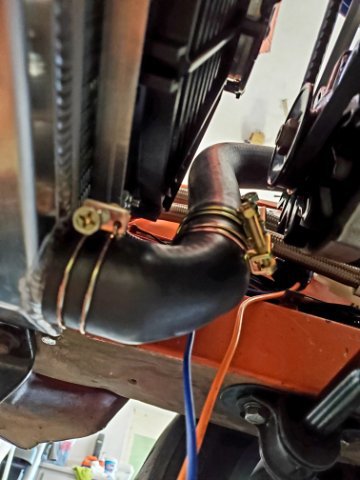
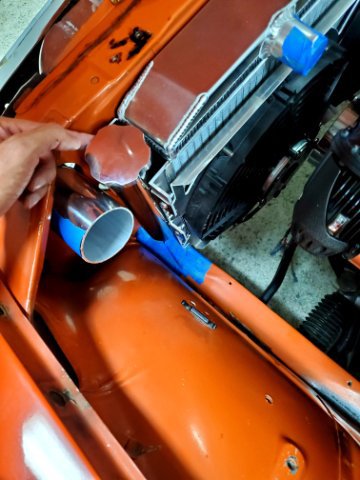
And after more measurement and mockup with what I have on hand it turns out the 240z hose with a 90 from the 280z hose at the bottom with the AL coupler I made will work. It's not perfect but the closest point is to the fans. I figure when the fans engage or driving the hose will tend to move back towards the firewall instead of towards the fans. I wonder if my aftermarket 280z hose is a lot different than the OE 280z hose as the 240z OE hose runs a lot further forward to the rad before bending down. But I'm only $14 into it and I guess in the future I can just order a 240z hose, a 90 elbow, and reuse the coupler I made. I was kind of hoping I could use order a 280z hose in the future to trim but if anyone has pics of the OE 280z hose in their car please let me know.
-
Nice! I tend to geek out on details when I'm working but when I'm doing my own projects my brain is 99% unplugged which is also why I tend to go through a bunch of revisions and whoopsies 😅. I'm in the SF Bay but formerly LA/OC. Tonight I started fitting up the lower rad hose. I started by trimming the 280z hose 2" in the vertical plane and added the coupler I made. Then I realized the assembly is way too close for comfort to the oil cooler lines and alternator fan. The Wizard cooling radiator is much larger than the Mishimoto unit. I have a few options here I believe. I'm going to start by trimming the 280z hose a bit more to see if I can pull the vertical portion of the hose away from the oil cooler lines/alternator and towards the rad. If that fails, I have some scrap AL tube and I was thinking of hardlining the entire run and having just 2 rubber or silicone couplers at either end. The 240z hose is just dimensionally wrong due to the increased size of the rad. I feel like every time I do anything on this car a bunch of custom fabrication is required but the build goes on
-
The ultimate Z car strut solution (possibly?)
Dat73z replied to clarkspeed's topic in Brakes, Wheels, Suspension and Chassis
Doesn't Tein already have a solution like this? I recall maybe 15 years ago I got a ride from a mutual friend who had a Tein coilover setup on his Lexus GS. He was able to adjust the rebound from a Tein module on the dash Edit: Found an older article on it https://motoiq.com/tein-edfc-active-controller-suspension-tuning-at-its-best/ -
@Zetsaz Here's a better shot of the clearances. I think I recall the mishimoto is slightly smaller so you might be able to tuck it in even tighter
-
@Zetsaz yeah it fits pretty good, pretty happy with how it came out 👌 It is a champion 2"×10". I got the idea off some posters on FB. The guy who sent some installed pics had a slightly diff mounting config and what looked like the larger 2"x13" bottle
-
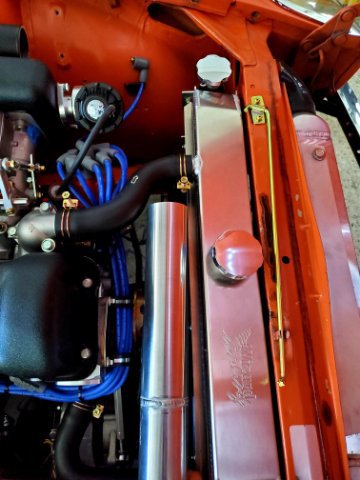
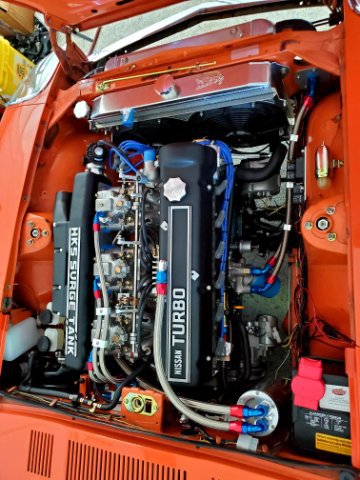
Final weekend update on the turbo build. Just wrapped up the coolant overflow mounting. I was thinking to do some aesthetically interesting things to the bracket but ultimately kept it simple with radiused edges and a brushed finish mainly because I kept getting distracted so function over form. Hopefully my radiator cap comes in early next week so I can do the final adjustments to the cooler packaging and move forward with final assembly. Next week there are a couple of non turbo related items I need to address but I think the objective will be to get the engine ready for the first fireup.
-
💯 I would've saved hours, probably days if I had purchased the correct raw materials upfront. Good info on the various alloys...I'm actually a degreed and licensed engineer with a background in mechanical/materials but I'm only practicing electrical now. If it hasn't been apparent I've sort of just been sending it on this build in my spare time and mostly whatever I have on hand 😂 In terms of tig welding there are lots of affordable machines out there now. I started on mig as well and besides the additional and to me at least annoying prep/positioning that goes into a quality weld I prefer tig. You get a lot more control. If it's in the budget maybe get a cheapo tig machine and make some stuff. It's not difficult to do some functional welds and with your background in mig think you'll pick it up really quickly. Worst case your welds look like 💩 and you grind it down like you would with the mig lol
-
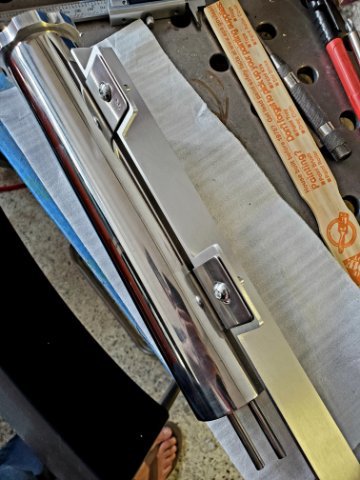
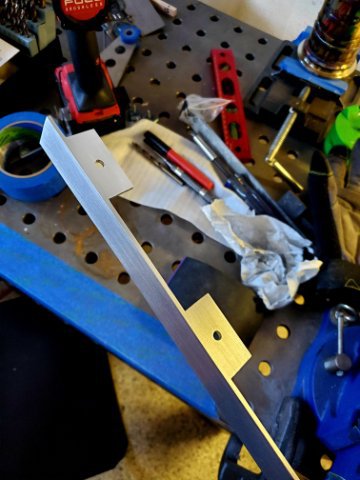
Thanks @AydinZ71. Honesty I'm not sure the alloy. I had a bunch left over from my wife's garden...reinforcement for some planter boxes I made and hangers for flowers. So I used all the scrap AL to create all the custom brackets I used for this build. It doesn't sand or weld very well at all and putting a uniform brushed finish on it was a pita. It's also like 1/8" thick so I'm limited to hacksaw or bandsaw for cutting and it doesn't like to bend at all. I honestly can't even remember where I got it, probably Home Depot or Lowes.
-
Yeah I found that out the hard way when I pulled the windshield and the previous glass co gouged and siliconed the entire windshield frame resulting in rust. Oh well, it's been repaired. This morning I woke up early to keep working the bracket a bit and make it look a bit nicer. I'm going to radius the edges a bit and maybe add some design elements like speed holes before calling it good. I also realized by cutting close with the bandsaw and trying to save some sanding time I created a bunch of extra work for myself blocking out the gouges for a brushed finish. I'm not a professional fabricator so I guess this will be a lesson paid for in extra time
-
Started in on mounting the overflow tank. I've been going back and forth on where to mount it given everything is so tight but it seems next to the rad will have to do for now. I started with some scrap AL from the garden which I also used to fabricate all of the other brackets on the car. After some trimming I think I have something that will work. The charge piping will barely clear beside, and the AC lines should have just enough room to run below.
-
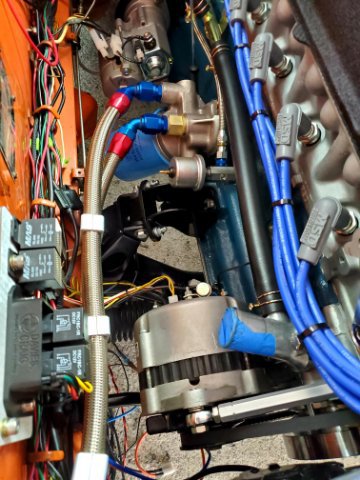
I should probably also mention eventially I want to do all stainless hardline in front of the rad support for the oil cooler and AC, like how I did my fuel lines. For now I ran the SS braided to get me back on the road as I already had the AN fittings and hose. The 10AN SS tube and bending tools I don't have and are quite expensive
-
@AydinZ71 I agree less fittings, less chance for leaks. SS braided line really doesn't like tight radius bends, and it will eat through anything around it. I wanted to keep my cooler packaging as tight as possible along with my hood springs since this will also be a street car. I also couldn't move the oil cooler any further to the DS as I'm going to be running AC and my condenser barely fits in that spot, but it fits. I also wanted to run SS Braided and not nylon braided or pushlok. So it's a compromise from all perspectives. If I was building a turbo racecar I'd omit the hood springs entirely and move the intercooler forward and at an angle along with boxing on the entire frontend. Move the oil cooler further to the center and forward. That would gain the clearance to run some large swooping bends with the SS braided line and also make things easier to work on.
-
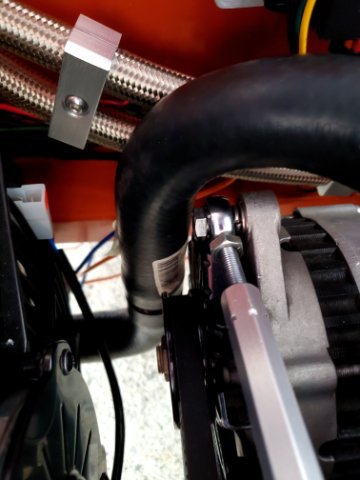
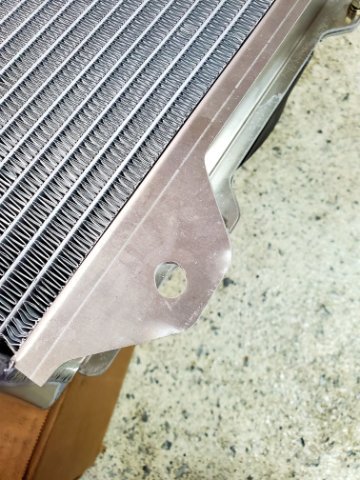
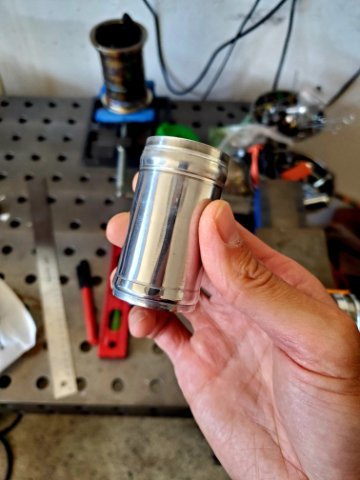
This past couple of days I've been busy working on some welding projects for other parts of the car but I managed to make some progress on the turbo build. The Wizard Cooling mounting tabs are off. After some test fitting I slotted the holes and bolted the rad in. I may raise it a couple of mm for additional clearance of the charge piping as well but I've been waiting on my radiator cap to come in to ensure it won't hit the hood with the additional height. Things are getting really tight. I found a 280z hose has the right bends but needs to be trimmed maybe 1" so I created a coupler from some scrap AL tube. It was good practice on cutting, grinding, annealing, and bead rolling. Hopefully I'll have enough time to fabricate a bracket for the coolant overflow can as well but we'll see how the weekend goes.
-
Is your clutch and slave system fully bled out and the clutch fork spring bringing the ToB and collar back to rest fully disengage the ToB from the pressure plate? Residual pressure in the system could cause the ToB to ride the pressure plate. I believe on the s30s the ToB should not be riding the pressure plate and that's how I measured it out on the clutch + ToB assemblies on my setup which is not OE (there are a couple mm of free play before ToB to pressure plate engagement) but maybe others can chime in as well. I would lean towards pulling the trans and replacing the ToB. Also ensuring all of the measurements are correct. I think you're fairly limited in what you can do with the trans in the car. I have seen clutch forks which have a hole and threaded bolt through it for adjustment but mine have always been the dimple and socket type
-
Haven't had much time to work on the build this week but got a more few parts in for final fitup. For the hot side pipe I wasn't happy with the original routing so after some measuring I added an angled coupler to gain clearance and clean up the run. Just waiting for a few more parts to come in and mock up which is mainly the coolant overflow before I slot the radiator mounting holes and finalize the position. Sounds crazy given how large the s30 engine bay is but things are really tight and since I work on my own car I've been trying to be thoughtful of how things are mounted as to be serviceable
-
Nice clean build. Arizona Z car sells a 15/16" master cylinder if you're looking for a complete solution
-
Are you worried at all about compromising the structural integrity of those spacers? It looks like you ground it pretty close to at least one of the bolt holes which is likely where a fracture or failure would occur.
-
One item I installed earlier in the week for the turbo build were new engine mounts. I was searching for a moderate (e.g. non-solid) option for a while and couldn't find anything that I was satisfied with so I kept my good condition OE mounts and travel limiters originally. Recently Milkfab Engineering came out with a set of 40-50 shore D mounts which is a similar durometer to mounts I've run in my other street/track dual duty vehicles in the past that I've been happy with. I've run harder mounts in the past and personally don't care at all for all of the cabin vibrations for a street car. I was really impressed with the build quality and the alignment/installation was actually easier than the OE mounts due to the stud design. I like how the design takes into account the full stack height of the OE assembly (mount + travel limiter). They came with good instructions along with torque specs and Andrew @ Milkfab was also super quick to respond with any Qs. Pretty excited to see how these will perform
-
So far this weekend I haven't done much on the Z due to being distracted on a bunch of house projects. I've actually been waking up at 4 or 5 AM on some days just to get an hour or so in on the build before the day takes over. I did manage to wrap up the clutch lines, fill, and bleed everything out. It's nice to have working brake, gas, and now clutch pedals again, feels like progress is actually being made. First impressions of the OS Giken twin plate is the pedal is much stiffer than the Exedy 240mm I had before but definitely not as stuff as some of the clutches I've run on other cars. Definitely within range of what I'd consider streetable personally but driving and holding ability will tell the full story. If I can find a couple of hours today I'd like to at least final mount the radiator in position so I can move forward with the final looming of the wiring harness 20220605_084524.mp4