AydinZ71
Members-
Posts
1073 -
Joined
-
Last visited
-
Days Won
27
Content Type
Profiles
Forums
Blogs
Events
Gallery
Downloads
Store
Everything posted by AydinZ71
-
240z SCCA vintage race car, restoration
AydinZ71 replied to AydinZ71's topic in S30 Series - 240z, 260z, 280z
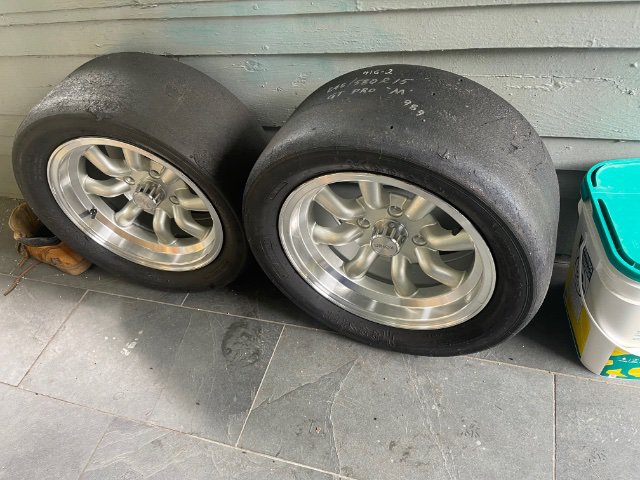
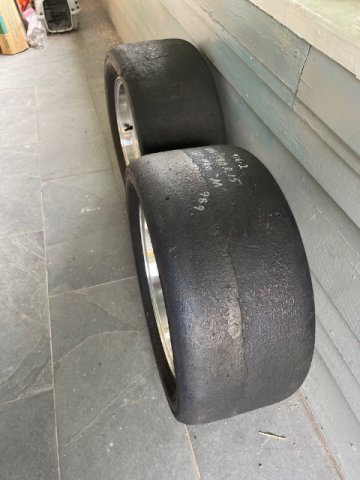
Most definitely. In the case of EP, it’s not the power that makes the Z shine 😂😂 Maybe against the Miata sure, but the Z3’s are putting out over 300hp from what Greg tells me. It does have quite a bit of torque comparatively though. I mean, what do I know… I have yet to see a track i still have not tackled the brakes… for now I was planning on running porterfield shoes with the AL rear drums, and the fronts are OEM calipers and cross drilled oem rotors (PO). I’m not sure if better shoes/pads alone will cut it. I have 2.5” ducts pre-made into the front air dam (PO did them), but I still need to fabricate a rotor backing plate to direct the ducts into the rotors. I also drilled a dozen or so 1/4” vent holes into the rear drum dust/backing plate to allow them to vent. tires are mounted and it’s time to work up a flare solution. The whole assembly is surprisingly light. Il throw them on the scale today. -
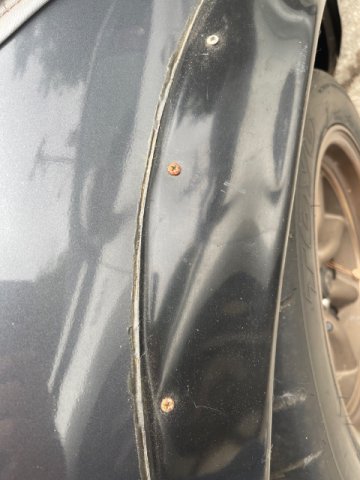
Here is what the PO did to my street Z. MSA flares (which I hear are not the best, but not the worst). Sheet metal screws for temporary fastening until the epoxy cured. Looks like he used JB weld or some other more flexible epoxy. i believe the idea is to remove the sheet metal screws now that the epoxy is cured. As you can see, you still have to finish the seam and the surface of the flares with some kind of filler to eliminate the dimples caused by the sheet metal screws. if I were confident about how to remove these, I’d take them off and put them on the race car. I’d rather have the Japanese marugen flares for a street car. I might still try. The race car needs flares for the 245 cantilevered slicks.
-
Agree @JMortensen and @Dat73z that welding definitely poses a risk of warping over rivnuts. I’d only recommend it if you already have some experience with welding thin sheet metal and metalwork in general (hammer/dolly). I’d want the flares to sit flush without having to use body filler at the seam, hence welding, but I’m looking at it from the perspective of someone who has now done two years of sheet metal welding so I’m bias. Also, welding to the wheel well will naturally ruin or eliminate your existing finish at those locations. I’m dealing with mostly bare metal on mine. the welded nut can give you a nearly flush surface (w/ pan-head) on the wheel-well side in case you have a super tight tire clearance at that specific location.
-
That’s what I would do. I’d use a fender washer on the other side to spread out the load, then tack weld it to the fender. Just need to make sure you get good penetration so it doesn’t break loose
-
A musician's therapist (The $300 Z)
AydinZ71 replied to Zetsaz's topic in S30 Series - 240z, 260z, 280z
Sweet man! Yeah sounds good! Oh the temp creep issues I was talking about was at the actual cylinder itself. As in, the block/head at (5 and 6 in particular) get much hotter than what the registered temp is at your gauge (which is reading at the thermo housing). You see this when you tear the engine apart and see heat related wear in the cylinders/rings themselves but never ran hot at the gauge. That’s what I found on my turbo motor. As you said, not really a big deal for occasional street boosting. If you back-off after one or two pulls, things will normalize and you will be OK. The heat-sink effect is really where you see the most cylinder wear, and that comes from spending time at high boost and high rpm’s without giving the cooling system a chance to “take away” the heat accumulated in the iron. Keeping at or below 6k rpm helps, and so does an oil cooler! -
A musician's therapist (The $300 Z)
AydinZ71 replied to Zetsaz's topic in S30 Series - 240z, 260z, 280z
Have you tried running it (just for shits and giggles) with the downpipe only? These motors sound like a mean diesel truck when paired with a turbo. I remember that was the most common comment I got. Apologies, I have not been following your posts very closely. I thought I eyed an internal wastegate. I don't recommend running the motor much past 6krpm. Once you get it tuned, you will notice these motors tend to lose torque quite dramatically towards 6-7k rpm, unless you are progressively adding boost to balance traction and maintain a flat curve. That gets back to the 2-valve and head flow restrictions. These motors are torque MONSTERS when paired w/ a turbo (for their era). My biggest issue was breaking the tires loose at 3500rpm (even in 2nd gear) when the boost came-on realllly strong. You are probably familiar with some of the cooling issues running high HP numbers, and unfortunately those are internal design limitations that are difficult to improve upon. The popular head mod which adds cooling lines to the 5th and 6th cylinder heads (directly) does help but not as much as you need to maintain cylinder temps at high boost and high rpm. All this to say, i recommend spending most of your time at the peak torque curve vs. peak HP. In my experience, I had a lot of time keeping cylinder temps reasonable when boosting near redline. You will still have tons of fun and your rings will last longer (ask me how I know). For me, this was shifting right around 5500-6000. Good luck buddy, and she sounds great! -
Yeah on stainless, that might be the ticket. That's what I would do, especially dealing with that curvature that tends to kink your jig or tear at the work surface. I would drill a 1/2" hole, trace the larger hole (3/4" bung?) then use a die grinder to make it bigger. it is much easier on a drill press but you already had everything assembled.
-
Hey at least you only need one O2 bung 😂 My silly-ass needs two, one for each SU carb. All this fancy tech to make a 50-year non-competition carburetor into a contender. Great attention to detail.
-
IMSA GTU vintage racer build
AydinZ71 replied to clarkspeed's topic in S30 Series - 240z, 260z, 280z
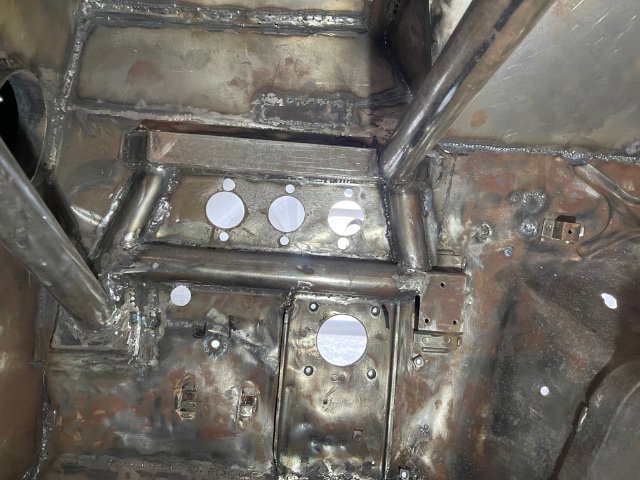
Makes sense! I enjoy learning about the decision making process. That’s where the fun is for me. I’m running a Tilton firewall-mounted assembly. Just as you said, I had to add-back rigidity since I had to remove most of the OEM firewall section for both rust repair (at the cowl) and to create a blank for the new penetrations. Everything is mocked and boxed waiting for the finish. the 16ga 1.5” tube resisting tension from the roll cage also continues through to the front drivers-side strut tower. PS: I have had several folks talk-shit on my sheet metal welds. I don't what they are talking about. I dont think they look all that bad for a MIG. I think most folks are used to continuous welds on thicker metal so they assume any kind of blobs is just poor technique vs. balancing enough heat for penetration but preventing burn-through. -
IMSA GTU vintage racer build
AydinZ71 replied to clarkspeed's topic in S30 Series - 240z, 260z, 280z
Very nice! Love the false floor plate. Novice question: why did you choose the bottom-mounted MC’s vs a firewall mount or otherwise? Just curious. Pretty neat where you hid the resevoires. You clearly have a sheet-metal brake 😂 -
240z SCCA vintage race car, restoration
AydinZ71 replied to AydinZ71's topic in S30 Series - 240z, 260z, 280z
Thanks @clarkspeed! I went ahead and bought the Koenig Rewinds. $480 including insane CA sales tax and shipping from Summit. I really can't believe decent wheels have gotten this cheap! So far everyone I have interacted with is happy with them. This buys me some time (a few years) to save-up for and keep looking for a lightweight wheel. I will look-into the Goodwin Mazda wheels! Yeah Greg raves about the Volks, and even said he would be interested in buying another set if I could find them in our size. They apparently had an anniversary edition (15X7) that we just missed a few years ago. He also told me about the Jongbloed, otherwise I would have never run across them. That is pretty damn light for a 15X10! If you are going to add weight to a hub, the best place it can be is as close to the center of rotation as possible since the moment of inertia has an mass times r^2 relationship. This is why a lightweight tire is so critical. Hence, the few pounds added for a spacer isn't great, but its also not equal to the same weight added to the whole wheel. I am pontificating and you already know all this... -
240z SCCA vintage race car, restoration
AydinZ71 replied to AydinZ71's topic in S30 Series - 240z, 260z, 280z
Hello friends!! Koenig Rewind wheels. What's the story? Why are they so cheap, and do they hold-up? Reviews online seem to be favorable but have not seen any on a race car yet. Listed at 13.4lbs So I am striking out on the racing wheels... genuine panasports: US distributor out of stock Ultralites: no longer available in 15X7 Ray's Volk: No longer available in 15X7. ones on ebay are all from FWD cars since they have massive offsets. Rota: heard they are not a good option for a race car Jongbloed: left a VM... we will see if they call back Turns out the diamond racing steelies the car came with were actually 14X7. Must have been drunk when I measured them, no idea how that happened. I just sold them for $200. -
Help. Rusted cabin air intake, no "cover" to remove?
AydinZ71 replied to scartail's topic in S30 Series - 240z, 260z, 280z
I didn’t bother with the spot welds. I just removed the lap joints in their entirety and did full-seam butt-welds throughout. Once the epoxy primer was on, I had no need for seam sealer since I no longer had any exposed lap joints. The downside is you need to have good practice with butt welds, need to be more careful with managing heat, it’s not OEM (not that anyone will notice). I have done it both ways now, and prefer the butt-welds. Once the epoxy primer is on, you can easily spot gaps and holes in your weld work, and top-dress with a single-component epoxy seam sealer -
240z SCCA vintage race car, restoration
AydinZ71 replied to AydinZ71's topic in S30 Series - 240z, 260z, 280z
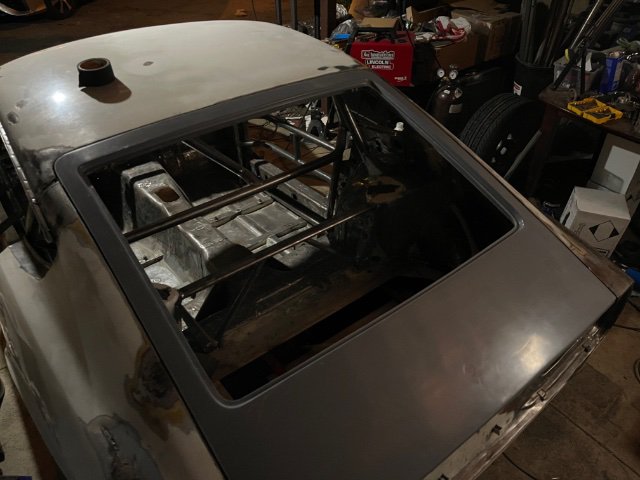
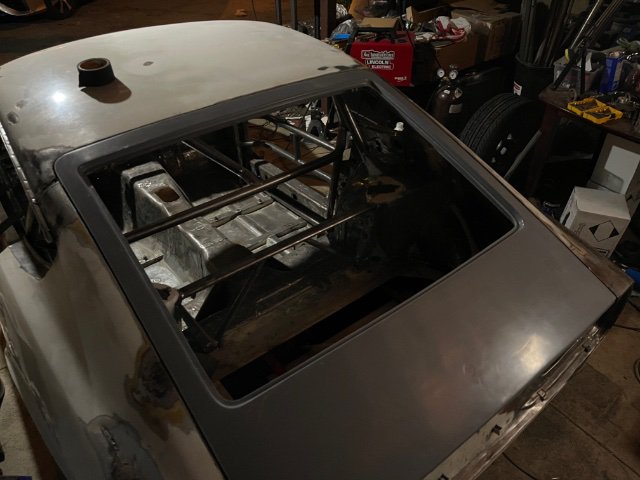
@clarkspeed thanks Clark! Yeah I really don’t have any first hand experience so you and the communities tips will be much appreciated once the suspension is back on. Update: hatch mock-up and fastening is done! Used a single 1/4” quick latch in the OEM position. I sat there thinking about the geometry for a while until it dawned on me… I can just turn it upside-down and hit all the clearance and misalignment issues. The pin is now on the FRP hatch and the release button is upside-down. Accessible from right above the license plate holder. Works like a charm. i made a big 4” flange/washer out of 20-gauge 304SS to resist the downward force and prevent the fiberglass from cracking. It’s hidden in the hatch cavity. I’m happy with it. Going to tear this all down now and continue with bodywork. 245 slicks should be here next week so I can check fitment and noodle a flare. if it’s “close”, I might just modify the OEM fenders with some sheet metal. If I need more than 1” of augmentation, I might just buy a pair of flares. IMG_8495.MOV -
240z SCCA vintage race car, restoration
AydinZ71 replied to AydinZ71's topic in S30 Series - 240z, 260z, 280z
Oh 100% Jon. I’m a bit concerned about modifying the mounting hole position on the crossmember since we have this whole “stock attachment points” requirement in the GCR. I’m sure there is some wiggle room but it’s hard to test the waters without first-hand experience. We are specifically allowed to add-back adjustability in the suspension, but how the suspension attaches to the unibody needs to be OEM. For example, they gave a thumbs-down to weld-in camber plates. -
240z SCCA vintage race car, restoration
AydinZ71 replied to AydinZ71's topic in S30 Series - 240z, 260z, 280z
Cool! sounds good, il go with welding 2X 1" ones and see where I land on my RC. I suppose once you get away from the OEM strut geometry, all bets are off. Are you still planning on a single control arm or considering double wishbone? -
I paid $150 to have a shop heat and bend my 6061 AL sway bar arms. I paid it gladly knowing the risk if they overstressed and cracked the metal. Best way I validate a machine shop is ask a few shops how long they think it will take. Try to find an avg. (like 4 hrs.) and see what that comes out to in $$/hr. Here is socal, $100/hr is not crazy especially if they have specialty experience (like racing engines). Obviously if they have to buy parts or use consumables, that is extra. Large jobs (8+hrs) like a full block rebuild (20hrs at my shop)sometimes come with a discount or they throw-in free work like clocking the head to the block.
-
240z SCCA vintage race car, restoration
AydinZ71 replied to AydinZ71's topic in S30 Series - 240z, 260z, 280z
thanks John @jhm! Ahhh I never thought about the broad utility of the spacers. I was just anxious about adding the rotational mass, but I do have a set that came with the car. on the double adjusters, I fabricated them in a way such that at max thread engagement, it was already +1/2” track on both sides (totaling 1” hub-to-hub). This allowed me to use the S130 adjustable steering tie rod which is longer leaving max thread engagement on a starting basis. In hindsight I would have been more careful with my measurements and given a little more adjustability in the negative direction but se la vie. At least they are ready for even wider track (at least in the front, rear is limited) for non-EP events. while on the topic of suspension, I need some pretty hefty RC adjusters (2-3”) based on Greg’s specs but obviously no one makes them that big. Should I just stack 2-3 and have someone TIG them together? -
240z SCCA vintage race car, restoration
AydinZ71 replied to AydinZ71's topic in S30 Series - 240z, 260z, 280z
Ahh, yeah I should probably mentioned I also have wider track thanks to adjustable LCA’s etc. the rules allow for it and it does provide an improvement to handling. I haven’t purchased the flares yet and I’m gonna wait till I have the tire mounted. If it’s close, I might just make them out of sheet metal. It’s a race car afterall. Thanks for the heads up @calZ! -
240z SCCA vintage race car, restoration
AydinZ71 replied to AydinZ71's topic in S30 Series - 240z, 260z, 280z
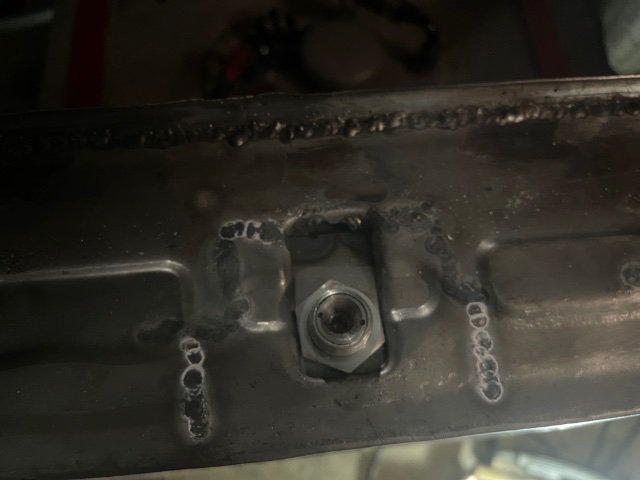
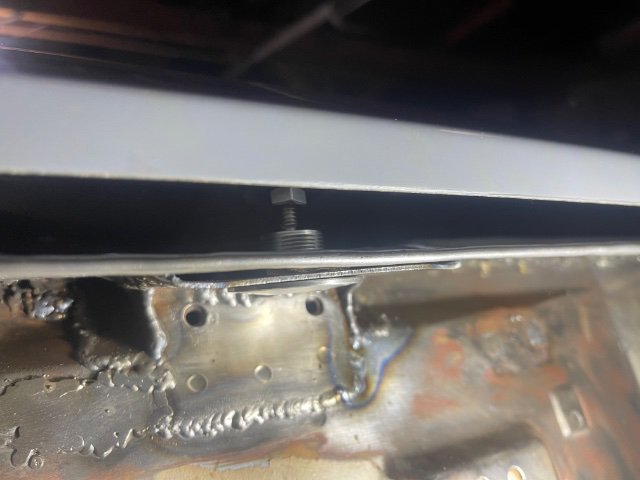
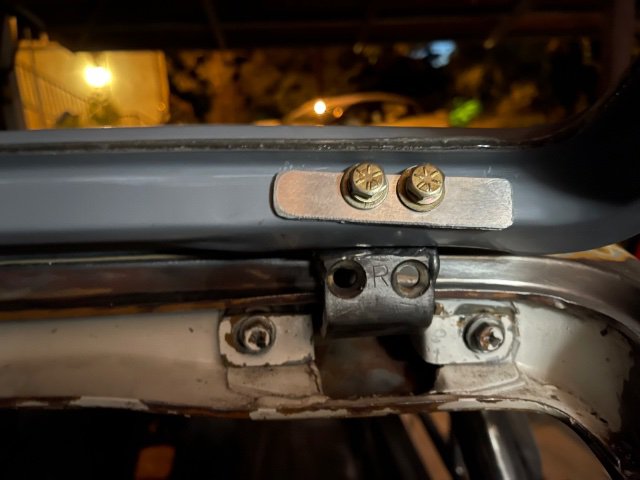
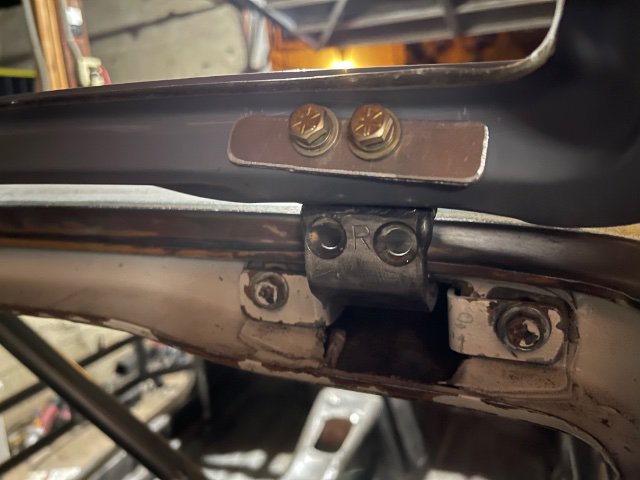
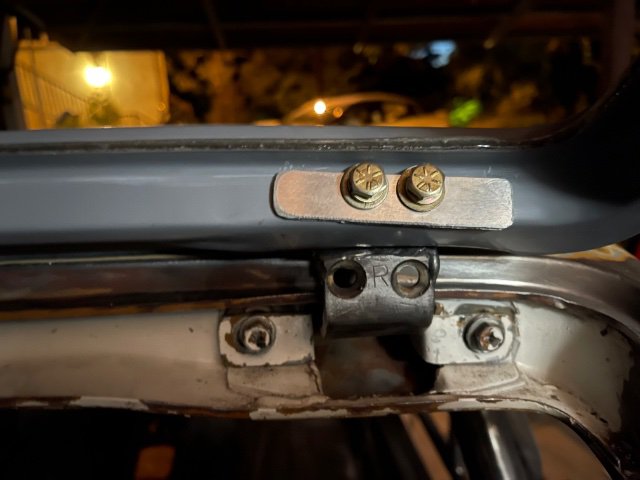
Appreciate it @clarkspeed. I like the format here where folks can respond with their own volition based on interest, but I am entering a phase in the project where I might need to reach out directly. Greg has been a huge help as well, but his (well deserved) at-home-bodywork days are behind him so there are always questions being the novice I am. Between you, John, Jon, and the rest this has been a great resource for almost two years now. on to the updates: I finally tackled the FRP hatch. If you are familiar, there are little steel stand-offs on the OEM hatch which mates with the hinge assembly near the roof of the car. I cut those tabs off my old rusty/damaged hatch and used them to correct the mating angle onto the hatch reinforcement channel. I test fit the hatch onto the car and drilled two 1/8” pilot holes through the fiberglass channel into the steel tab from OEM hood. After some finagling and repositioning the hinges, I was satisfied with the through holes. Mocked the whole thing up with through bolts and was ecstatic that the hatch went on with symmetrical gaps and nothing protruding too badly. I was anxious about the fiberglass being stressed and cracking, so I decided to put flanges on both sides of the channel to distribute the pressure. To maintain geometry, I used some spare 20-gauge stainless on the hinge side. On the opposite end of the channel, I used a small strip of 1/8” 6061AL. I chose these materials because they are light, quite resistant to inelastic deformation but still elastic enough to “hug” the fiberglass surface. Bolts are 1/4” X 2” SAE. Now on-to the single latch. IMG_8486.MOV IMG_8467.MOV -
240z SCCA vintage race car, restoration
AydinZ71 replied to AydinZ71's topic in S30 Series - 240z, 260z, 280z
@jhm thanks John!! I found a pair for a reasonable price on the eBay site you shared and got them on order. Many thanks!! Now to noodle a flare option and get it all mounted before I finish bodywork dunno what I’d do without this community. Thanks all -
240z SCCA vintage race car, restoration
AydinZ71 replied to AydinZ71's topic in S30 Series - 240z, 260z, 280z
Thanks @clarkspeed! Yep, 9” wide is the one! I confirmed with Greg after cross referencing with the Hoosier website. It’s the 245/560R15. Comes in MS and M compounds. Usedracingtire.com has them so il grab a set and get them mounted. Seemed silly to prep for paint without having the wheel clearance confirmed. my fenders are still OEM so il need some kind of a flare to fit those 9” meats. I know we can run FRP fenders front and back, but I just really want to get her on the road now. My street car has MSA flares the PO put on, so I could take and look and see how easy they would be to recreate in 20-gauge sheet metal. Otherwise il go with those Marugen ones. -
240z SCCA vintage race car, restoration
AydinZ71 replied to AydinZ71's topic in S30 Series - 240z, 260z, 280z
Hey all. Mind sharing those links to the folks who sell used racing tires (on facebook I believe)? I need to mount a set so I can check the clearance on the fender flares. I have 15" steelies. We can run cantilevered slicks but limited to a 15X7" wheel. Greg recommends a 245X45X15 Silly question for a complete novice, but am I gonna have trouble getting a shop to want to mount them? PS: these are the "right" Marugen Shokai flares yeah? I see a lot of discussion about getting the "special" for the added thickness. https://www.rhdjapan.com/marugen-shoukai-zg-type-special-over-fenders-s30-s31.html -
240z SCCA vintage race car, restoration
AydinZ71 replied to AydinZ71's topic in S30 Series - 240z, 260z, 280z
If you apply epoxy on metal than apply filler you really have nothing to lose. That is definitely the safe option. I was doing more reading and apparently only some filler is designated as a “DTM” (direct-to-metal), so I guess it all depends on the specific brand/model of filler. I’m reading really good things about eastwoods aluminum filler to replace the leaded seam filler I removed. That looks to be a DTM type and is more flexible than fiberglass filler but still as resistant to cracking. I’m going to start with that and confirm the rest of the materials I am working with are DTM or il put a layer of epoxy down. im only hesitating for two reasons. One: weight. Sounds silly, but if you pick up your can of primer, paint, etc. it isn’t light. It’s really hard to believe you can add that much weight to a car but it really is. It’s just spread out so thin and so wide you can’t tell how much you are actually adding. Two: hassle. Prepping, mixing, and cleaning the spray can for epoxy creates a lot of waste, consumables, and takes a lot of time. as everyone keeps reminding me, it’s a race car. As long as the filler and finish does not crack through the paint or separate from the steel, I’m happy I don’t think I would attempt all this myself if I wanted a great finish on a street car. I’m as Novice as it gets 😂 -
240z SCCA vintage race car, restoration
AydinZ71 replied to AydinZ71's topic in S30 Series - 240z, 260z, 280z
Thanks @clarkspeed, @Dat73z I’m leaning towards just applying filler over bare metal. I’m going to hit it with 80-grit on a DA sander to rough it up, then clean with acetone and let flash like you said Clark. depending on how straight it is, I may or may not use polyester primer on top of the filler. If not, il go straight to epoxy, block sand one more time, then base then clear. I will only wet sand the clear where there is dust or particles, then buff with compound. Oh… easy enough. Only another 2-3Mo 😂😂 On the interior I’m just spraying epoxy, base before the 3-day epoxy cure is up, then clear on top. im noodling the idea of painting my cowl and hood semigloss black. Just to cut back a bit on the glare. The rest of the car will be silver, and the tracks down here are really bright (desert).
