-
Posts
5399 -
Joined
-
Last visited
-
Days Won
58
Content Type
Profiles
Forums
Blogs
Events
Gallery
Downloads
Store
Everything posted by RebekahsZ
-

LS/T56/240z Project Mentor Wanted
RebekahsZ replied to RebekahsZ's topic in S30 Series - 240z, 260z, 280z
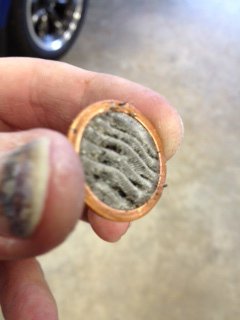
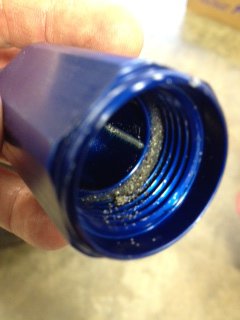
Having battled a dirty fuel tank for about 20 years, I like it that the filter filters well. I'm not going to eliminate it. I'll keep cleaning it for a while and if the problem persists, I'll go to a filter with a larger screen or perhaps something with a large surface area fluted filter screen or paper element, but equally as fine filtration. A larger screen would allow more sand to build up inside the filter housing before car stops running, but would still keep the sand out of the pump, regulator, lines, rail, injectors, cylinders, bearings, etc. So far, everything downstream of the screen seems to be clean. At least I can go to one place to clean it up as opposed to having to pull and clean all the injectors, one by one. -
New CV boots arrived yesterday from Rockford drive line. Waiting on companion flanges. JCI says my driveshaft flange measurements suggest that my current flange is correct. Ordering some clutches from Savage today, then all the parts will be on hand. Hope to start just as soon as fuel tank issues settle down. With JMortensen's shortened shafts, do I install the CV joints in the stock orientation, or do I "flip" them - don't really know what "flip" means as I've never worked with a CV joint before (please send tips). I've just read about "flipping" in order to use the MM system. I am going to be shortening my LCAs a little (guessing like maybe 1/2"), but I want the toughest axles and CVs that I can.
-

LS/T56/240z Project Mentor Wanted
RebekahsZ replied to RebekahsZ's topic in S30 Series - 240z, 260z, 280z
Hmmmmm (sad face). Thanks. I'll toss that around if I continue to have trouble. I'm glad I had it this time, I wonder how the pump would have tolerated that much sand? With the welded metal Corvetter FPR, there is no way to know how much crappe is in it... Could you send me a link or picture or something of the filter you switched to? -

94 300zx calipers mounted on 73z
RebekahsZ replied to yem73z's topic in Brakes, Wheels, Suspension and Chassis
That is so nice! I wish I had the energy to do the R230 swap.... -

LS/T56/240z Project Mentor Wanted
RebekahsZ replied to RebekahsZ's topic in S30 Series - 240z, 260z, 280z
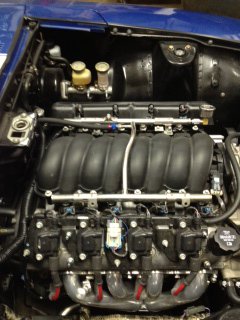
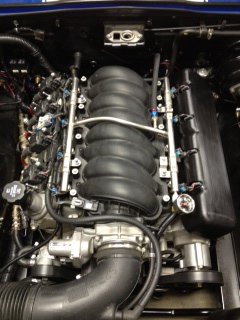
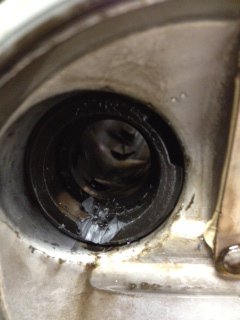
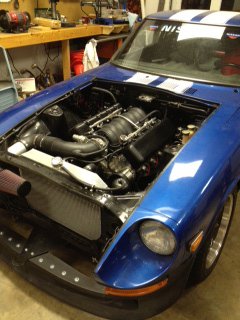
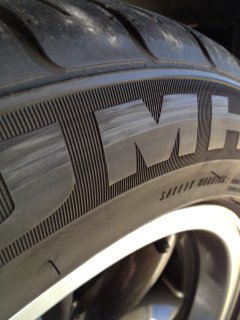
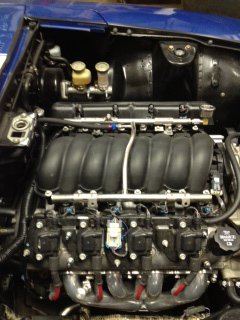
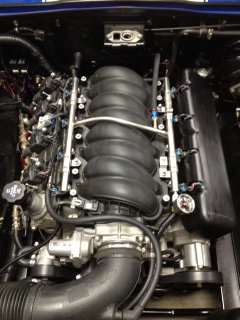
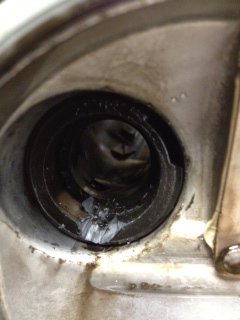
Since I can't go drive car around yet, I piddled with some bling for the motor. Installed Holley brand coil covers. I looked at Billet Specialties (the sweetest) and Edelbrock brands, but found that they require LS1 style coils. As best as I could tell, the Holleys were the only ones that fit LS2 coils and didn't require a ton of work moving the coils around. All was really easy, except for the passenger side. For LS2, the kit recommends installing the cover over the top of the fill port in the valve cover. To do that you have to remove the plastic oil fill tube. After no replies on a little thread I started, I went to LS1tech.com and found out that there is NO good way to remove the oil fill plug on a LS motor. Basically you have to destroy it to some extent. Remove the valve cover (so easy due to awesome GM engineering), cut a notch in the fill tube so that you can release the little spring-y clippy doohickie and out it comes. You have to remove the valve cover to keep plastic chips from getting into valvetrain. Inspect valvetrain-these motors are so AWESOME!! Put the old fill tube cap directly onto the valve cover. Reinstall valve cover, torque to 106 inch-lb and snap on coil cover. You have to spend a little time finessing coil and injector wiring and injector rotation, but that only took a second. I did no trimming. It is that easy. Will likely have to do some trimming when I wire 2-step rev limiter, that wiring is kind of bulky. Hope to decorate coil covers in future with some finned aluminum plating-may destroy some Edelbrock valve covers to get the Edelbrock symbol and fins off of some small block valve covers. Found that my driver side rear tire rubs a bit. I looked at the fender edge and I can see a sharp spot where quarter panel was repaired. Will try grinding that off tomorrow. Don't want to chew up my new tires. Had been thinking of ordering some 15X8 RBRs for my autocross tires. Looks like I will be sticking to 15X7s. -

LS/T56/240z Project Mentor Wanted
RebekahsZ replied to RebekahsZ's topic in S30 Series - 240z, 260z, 280z
Worked most of the day re-cleaning out the fuel tank. Made the mistake of cleaning my o-ring with brake cleaner, which made it nice and clean, but it then swelled up an became spongey. Gotta wait 'till Monday to get to O-ring shop and get a new one, but I'll be all ready to go, so another weekend burned without accomplishing much. It was sand plugging my fuel screen that sidelined the car and has me all held up. It is taking a while to get all the sand out of the fuel tank that was cut apart and sandblasted. My pre-filter before the fuel pump was totally full of sand. I'd have believed that sand would stay on the bottom of the tank, but it made its way into the filter. I may have to clean that screen again, but I can do that with the tank in the car. I went ahead and installed a new Corvette FPR while I had it apart. Do not clean nitrile o-rings with anything but fuel. Do not use Aviation Type 3 sealer around fuel. Do not sandblast your fuel tanks. Do not fail to install a screen-type fuel filter before your fuel pump. Do as I say, not as I do. -

New zx owner with a LS1 quistion
RebekahsZ replied to nova6511's topic in Gen III & IV Chevy V8Z Tech Board
Don't know. Try LS1tech.com -
I am installing Holley plastic coil covers onto my LS2. I need to remove the oil fill tube in the valve cover. I can't get the darn thing off!!! It looks like it needs about a 1/2 turn counter clockwise, but it just sort of stops turning, then won't come out. If I look at the oil fill tube that came with the coil covers, there is a little plastic tongue clip that snaps up when you screw the oil fill tube in, but I can't figure out how to release that little tongue clip. Please send recommendations. Keith Edit: Went to LS1tech.com. Seems this is a universal problem. Now I've found 2 areas where the GM engineers goofed up. The first was the clutch bleeding system, and this is the second. You have to remove the passenger side valve cover (an area where the engineers totally rocked) and destroy the oil fill tube from inside out. This was not made to be removed. I was able to fish out several plastic chips that I had broken off trying to avoid removing the valve cover. Easy job, now that I've done it. Out of respect for the GM engineers, I managed to design my fuel system such that the fuel tank must be dropped from the car in order to service the fuel filter-not one of my better moments.
-

Drifting handbrake (hydraulic handbrake)
RebekahsZ replied to RebekahsZ's topic in Brakes, Wheels, Suspension and Chassis
No. What I did was order a kit (the vendor should be listed further up in this thread) and I made my bracket using that bracket to tell my machinist how to set up the distances from the hub flange, and I gave him a drawing of how I wanted the other dimensions. I'll look and see if I can find the drawing, but it doesn't show any of the spacing to get the caliper aligned to the rotor. If I can find it, I'll cell phone photo it and post it here. -
It will be your car, but I'd have to do a tribute car to the BRE "roadster" like Adam Carolla has done. I love the roll bar and the lexan windscreen.
-
I've been mentally toying with a Datsun roadster with a 3800 Supercharged V6 out of a Bonneville SC. I just don't like how the bodywork on that car has the front tires hanging way out, while the rears are so nicely tucked into these beautiful 50s style fenders. I've wondered about some sort of staggered back spacing to correct the goofy way the front wheels always look. Early miatas were the same way, except backwards, with the back wheels haning out.
-
OK. I never expected hardware from you, but I'll sure take it if you are offering. Need some more money for shipping and your trouble?
-
If the above doesn't help, disconnect the line and ensure that fluid is at least getting to the caliper thru the line-the caliper could be bad.
-
Thanks johnc-that is what I've been doing and I thought it was rather non-scientific. If "good-n-tight" is the best torque that can be achieved, then that is what I will use.
-
I am installing a R200 LSD into my 240z with Z31 Turbo CV axles with JMortensen's shortened shafts and companion flanges. Almost all of my parts are on hand so I'm making final plans. At this point, I only a few questions: 1) What size/type nuts, bolts and washers do you use to attach the axles to the companion flanges? 2) To what torque setting do you tighten each of these bolts? 3) What systems of wrenches do you use to tighten and torque the 1) driveshaft bolts, and 2) axle to companion flanges bolts. I find it difficult to get a good angle on these nuts and bolts - it is just so darn crowded! I can't get a socket or a crowsfoot on the nuts and bolts. I can only get a modified box end wrench on, but I can't measure torque with a box end wrench. I'm gonna be drag racing with slicks and I don't want this stuff loosening up. Keith
-
Well done. I have considered the same approach with CV (I even went so far as to buy some, it is leaning in the corner of my shop). I wanted to do it to try to figure out what mandrel bends I need to order.
-

If you have to do it all over again....
RebekahsZ replied to jbuenviaje's topic in S30 Series - 240z, 260z, 280z
Chin up, Mike. You are a hero to the rest of us and we look up to you. -

LS/T56/240z Project Mentor Wanted
RebekahsZ replied to RebekahsZ's topic in S30 Series - 240z, 260z, 280z
Wish my car was that pretty. Call at night, I'll talk your dang ear off. Keith -

If you have to do it all over again....
RebekahsZ replied to jbuenviaje's topic in S30 Series - 240z, 260z, 280z
I wouldn't do a thing differently. When I built my first L24, LS1 weren't being made and I have enjoyed the whole historic nostalgic feeling of driving a throaty straight-6 with multiple carbs. Now I've done the LS2/T56 swap and the car is just awesome. It is like the car was built with this motor in mind. The workmanship and technology of the LSx family can't be beat and with the stand alone harness, it fired on the second turn of the key! No jockeying timing or tuning a carb at all. I would have liked to have learned to mig weld somewhere along the line so that I could do some sort of fuel tank swap. I have spent most of my time, when working on this car, addressing some sort of dirty fuel issue. The fuel system has been the bain of my existence since I bought the car in the early 1990s. -

LS/T56/240z Project Mentor Wanted
RebekahsZ replied to RebekahsZ's topic in S30 Series - 240z, 260z, 280z
Needed a break to cool off from frustation with fuel tank. So, I got on the internet and ordered $1300 worth of parts from Summitt, Jegs, Speedway and Raptor. Parts include: Raptor LS-style shift light, 6-speed shifter knob, (2) Corvette FPRs, MSD electronics insulators, stick-on weights for rear drag rims, Longaker Digital camber gauge, Holley plastic big-block style coil covers (looks like both the Edelbrock coil covers and Billet Specialties coil covers are only compatible with LS1 coils), 1" tilton clutch master cylinder (on back order), hydraulic pressure gauge (to help me adjust clutch), dummie 4" velocity stacks, QTP oval electric exhaust cutouts, Burns stainless 2-1 merge collector, Rockforddriveline Z31 CV boot kits. Picked up a fuel tank syphon kit (tired of drinking 93-octane) to start RE-draining fuel tank in order to drop it, clean off any sealer, replace fuel filters and try it again. -

Drifting handbrake (hydraulic handbrake)
RebekahsZ replied to RebekahsZ's topic in Brakes, Wheels, Suspension and Chassis
The ksport and driftworks hand brakes are the same - total crap. They look to be made in the same Chinese factory out of recycled beer cans. The cast aluminum plate handle bends like a noodle-mine bent 30 degrees on the second pull. If I were to do this over, I would use the CNC system. You need a solid steel or tubular steel handle. The in-line reservoir system is kind of funny. The adjustment of your handbrake affects the feel of the pedal brake system-the two are connected and feedback into one another. Pull the hand brake and the footbrake pushes up; step on the foot brake and the handbrake handle moves. I like it a lot better now that I have a remote reservoir. -

Drifting handbrake (hydraulic handbrake)
RebekahsZ replied to RebekahsZ's topic in Brakes, Wheels, Suspension and Chassis
Drift brake works great. Did have a problem. The brakes were progressively clamping down over about a mile of driving. Turned out to be due to a problem with incompatibility between the K-sport master cylinder push rod and the Wilwood push rod. I had swapped the K-sport rod into the Wilwood push rod and the end "button" on the end of the rod was of different dimension. So, I ground down the K-sport pushrod so that the dimensions were correct-locking of brakes stopped. Got 3 great spins with drift brake before fuel filter plugged and motor died. -

LSx s30 Longtube group buy thread
RebekahsZ replied to 1 tuff z's topic in Gen III & IV Chevy V8Z Tech Board
That tig welding is just beautiful. -

Wheel Show! Post your pics of you wheels
RebekahsZ replied to k3werra's topic in Brakes, Wheels, Suspension and Chassis
Spacers. Whatever thickness it takes.

