-
Posts
5399 -
Joined
-
Last visited
-
Days Won
58
Content Type
Profiles
Forums
Blogs
Events
Gallery
Downloads
Store
Everything posted by RebekahsZ
-
Blow 'em off. Been running without boots for 20 years.
-
In the past 6 months I have picked up a disturbing/distracting rattle from the T56 in 3rd gear only when getting on it pretty hard. I've looked at ls1tech and googled for it. Others have experienced it but I not yet have found anyone to suggest an internal or external cause. I'm gonna try to get in touch with Tremec next. Suggestions, anyone? It sounds like somebody put my teeth in a blender while holding it by my ear. Still racing this weekend-if it breaks I will learn the cause the fast way!
-

Installing Quick Time SFI Bellhousing with T56.
RebekahsZ replied to RebekahsZ's topic in Gen III & IV Chevy V8Z Tech Board
-

Slow Build 240Z LS1/MN12 - Build Thread
RebekahsZ replied to JoeK's topic in Gen III & IV Chevy V8Z Tech Board
Sounds great! I've been finishing my car for 25 years and it is just about beyond repair. The willingness to have fun and not get bent about classes and points is your greatest asset. I challenge ANYBODY to have more fun with their Z-car than I do: mostly broken and in pieces (in the 2-car garage I share with my wife), sometimes drag race (I race my last pass at test and tune), sometimes autocross (I just do the best I can and try to be somewhat intellectual about it), and street drive (I drove it to work today), and now landspeed (only clean pavement: Georgia 1/2-mile and this weekend I do the Ohio Mile). Try not to get too worked up about every scratch or rusty spot and you will have invested your concerns wisely. -

LS/T56/240z Project Mentor Wanted
RebekahsZ replied to RebekahsZ's topic in S30 Series - 240z, 260z, 280z
All safety done to go 9.99 anywhere in the country (as if I could!). All safety done to go 175 at the Ohio Mile (with some aero work, I think I can), maybe at the June meet. May is aero month! The photo doesn't come close to expressing this wicked rake.... -
Way to get out there and beat on it!
-

Turbo LS1 JCI Downpipe routing help
RebekahsZ replied to nmeone's topic in Gen III & IV Chevy V8Z Tech Board
If you solid mount motor you can get away with very little clearance around exhaust parts. -

Installing Quick Time SFI Bellhousing with T56.
RebekahsZ replied to RebekahsZ's topic in Gen III & IV Chevy V8Z Tech Board
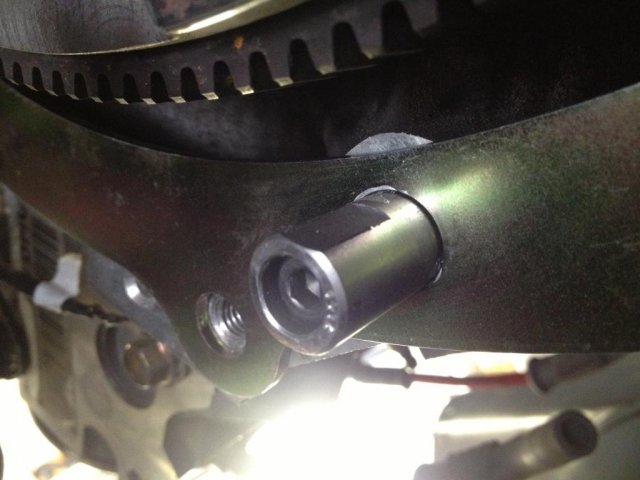
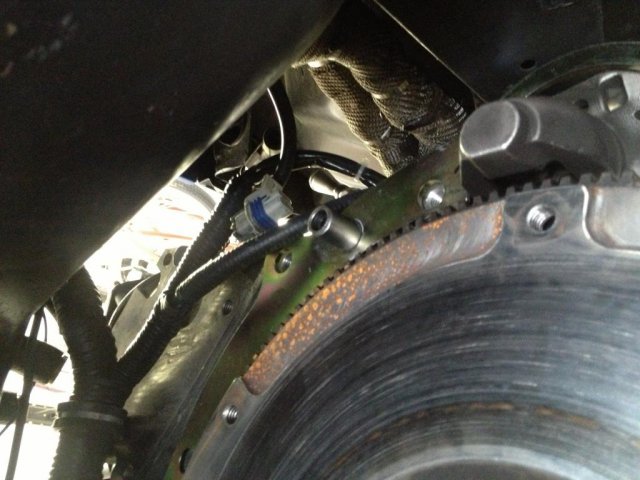
Ha! Spoke too soon. Went to hang the exhaust and the passenger side below the starter totally conflicts with the head pipe. An hour with the cutoff wheel and the pipe passes. I may have made my bellhousing un-re-certifiable if required, but for now it's done. I love the taste of burning iron! -

Installing Quick Time SFI Bellhousing with T56.
RebekahsZ replied to RebekahsZ's topic in Gen III & IV Chevy V8Z Tech Board
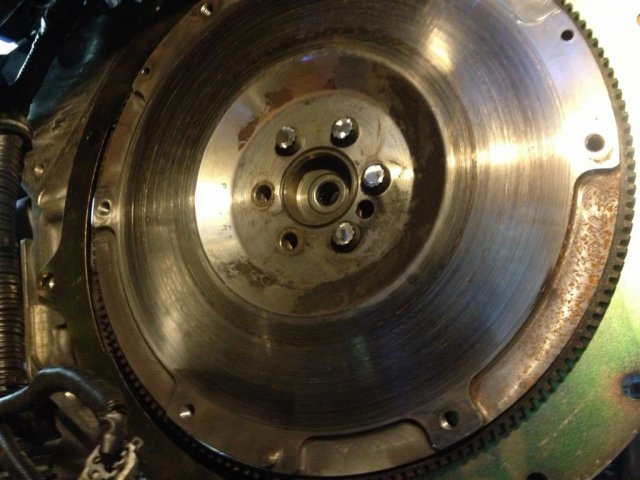
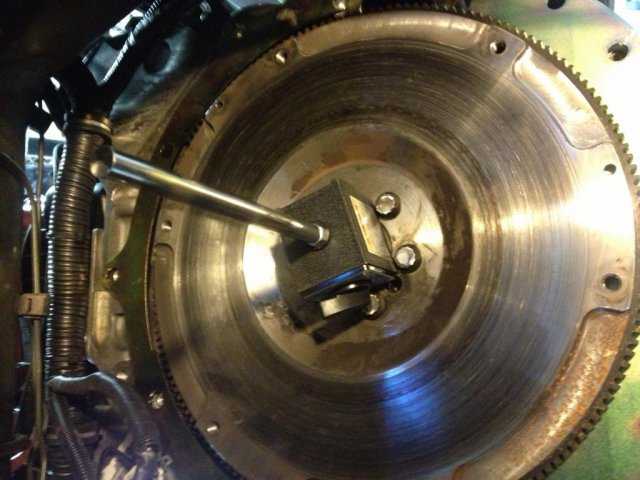
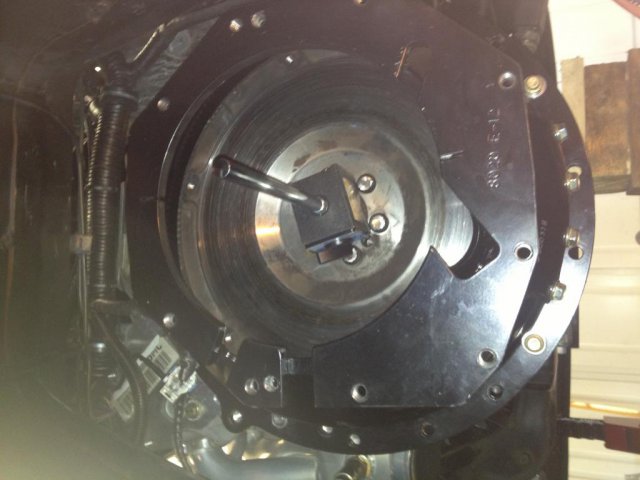
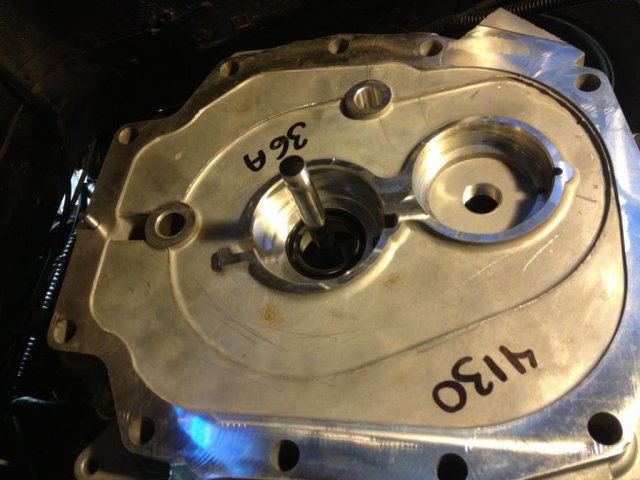
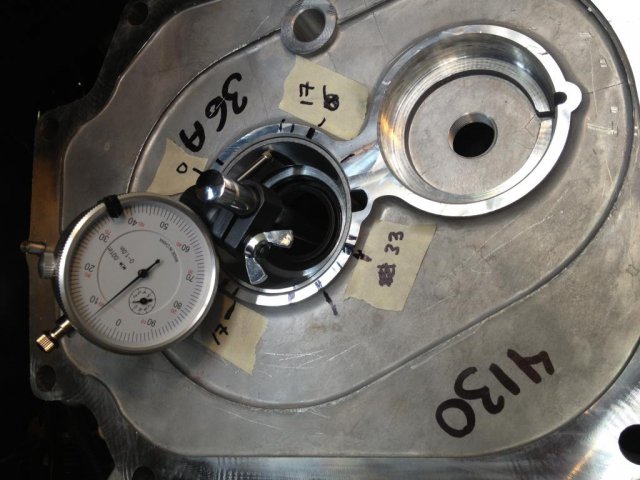
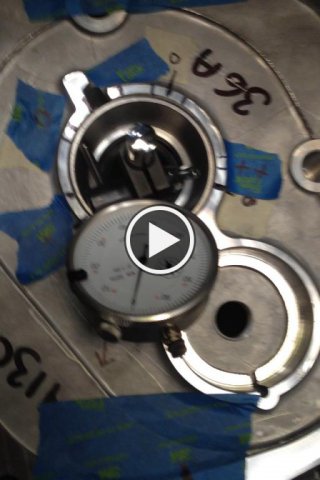
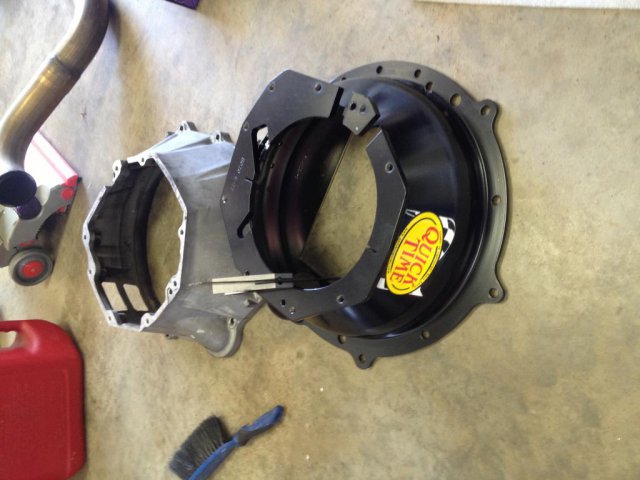
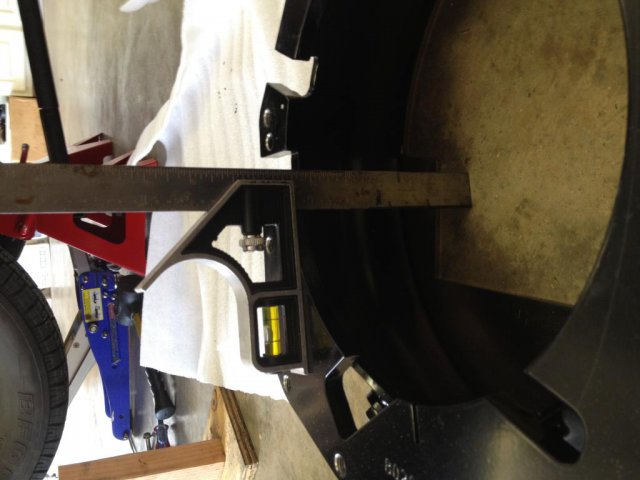
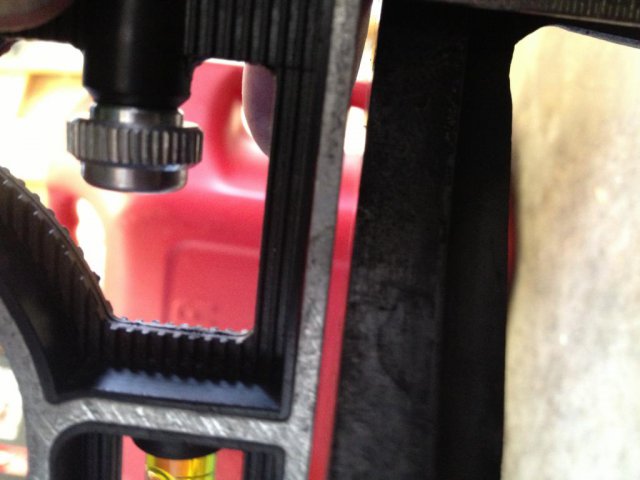
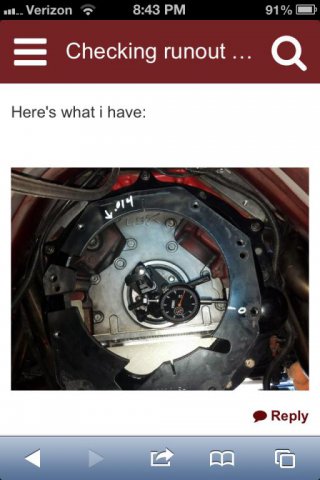
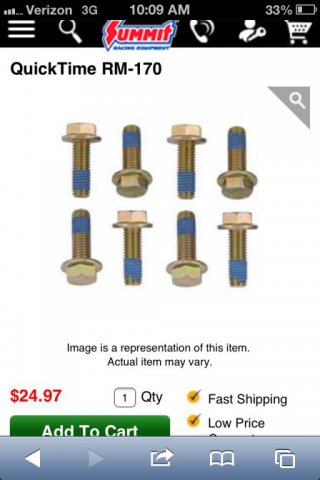
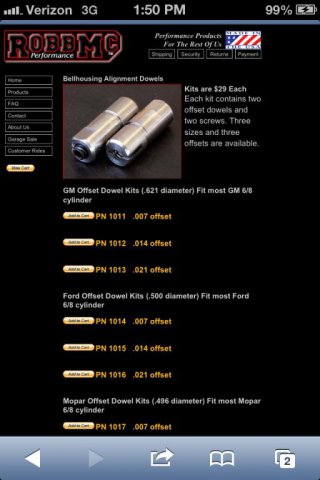
Bellhousing is on. This was a bitch but would have been no trouble if done with motor and trans outside the car. As such, I can skip Crossfit this week-Im all paid up to the gods of Rogue! Here's what you need for this job: A buddy-not your wife. Quick Time bellhousing RM-8020 Quick Time T56 trans bolts RM-170 Either the front plate off your tranny or, you need to buy another front plate. VERY IMPORTANT: you need the bearing race from the transmission input shaft bearing. This bearing is available at Advance Auto for $7! This race gives you the surface that your dial indicator will indicate from. This race is the "center" that must be consentric to the crank-this is the whole point of indexing the bellhousing. Harbor Freight dial indicator and magnetic stands 3/8" drive torque wrench Adjustable dowel pin kit (I showed part numbers above)-buy a three sizes. Big ass rubber dead low hammer. Every other tool you own. You disassemble all your stock stuff ti you get down to the crank. Install the motor plate that comes with the bellhousing. Install and torque the flywheel then remove two bolts. Install AND TORQUE the bellhousing. Reach into the bellhousing(BH) and install magnetic base in spot vacated by the two bolts you removed. Install AND TORQUE the front plate with the bearing race installed. Configure your dial indicator to mount on the post to measure off of the race. Have your buddy turn the crank from the harmonic balancer bolt while you watch the dial indicator. Repeatedly adjust the scale on the bezel of the dial until you find the minimum reading. Calibrate bezel so that point is zero. Mark the lowest point with a sharpie and tape. Rotate crank until you find the maximum measurement; mark the magnitude and location of that. The measurement half way between the min and max should be close to half. Of your measurements make sense. You are half way home. If your BH is centered within .005" from the factory based on this measurement, you can stop now. Mine was off .034". Now, tear back down to the flywheel. I had to remove the headers to get access (yeah for my short tube JTR headers!!), but you can get to the stock dowels in the block from the front side to top them out with a drift and a hammer. You can't get them out with vice grips like your redneck cousin used to do! To determine which offset dowels to use: find that maximum measurement from the dial indicator and divide by two. Chose the offset dowel that is closest to that number. Save the others to send back to the supplier to get your money back. Or put them in a box to give to your worthless son-in-law when you die. Or keep them for your next dream car. "Clock the offset dowels in-line with your maximum measurement angle. The fat side of the dowel points toward the maximum measurement. Put everything together to take another measurement. TORQUE the BH and front plate each time or you will get garbage measurements. Sweep the dial and you may find that you need to tweak the clocking of your dowels with an open end wrench, so leave the set screw loose until the end. Once your dial indicator is sweeping a TOTAL of less than .005", you are golden (I quit at .003"). Tighten your dowel pin set screws -dont go crazy on torque or you will break them. Strip back to the flywheel and put it all together for good. Don't forget to check to see if you need a slave cylinder shim before you bolt up the trans. You need to make that determination as soon as you remove it from the box, and you need a stock BH to measure from. Use that torque wrench. 37# BH to block, 25# trans to BH. 52# pressureplate to flywheel, 74# in three stages flywheel to crank. 100 INCH-POUNDS slave to trans. Enjoy the pics. Feel free to text or PM me in the middle of the night if you need help with this project. -
Bump for new photos added to yesterday's post.
-
50% of my car I tried to copy from MiKelly. The rest is....kinda ghetto.
-

Where to get brand new 280z steering rack?
RebekahsZ replied to Milenko2121's topic in Non Tech Board
There are NO good, reconditioned racks in the US. Just went thru this 6 months ago. As the previous post indicated, "rebuilders" are bead blasting the racks and putting new billows on them. Painting them with silver rattle can paint so they look good on the Internet, then they sell you a rack that is more worn out than the one that you had before. It's a dead-end. Been there and done that TWICE. -
Keep your head on a swivel with any new friend that you found via Craigslist. Might even want to take a buddy with you the first few times just to check things out for safety's sake. I remember a movie that came out a few years ago called "The Mechanic".... the guy was a hitman. If he asks you for a massage, time to run!
-
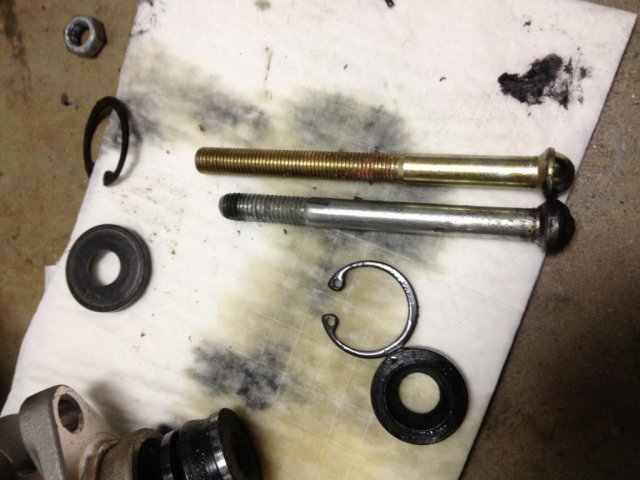
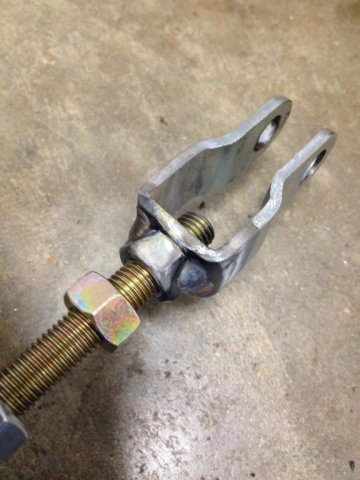
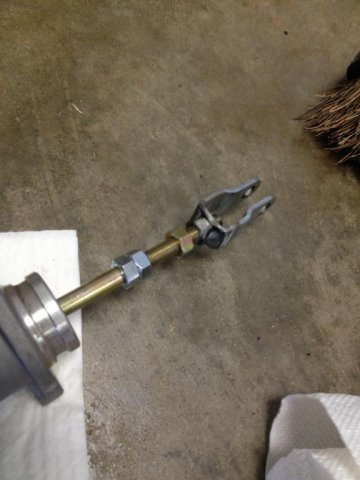
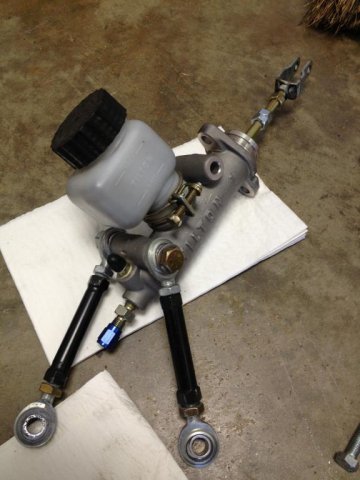
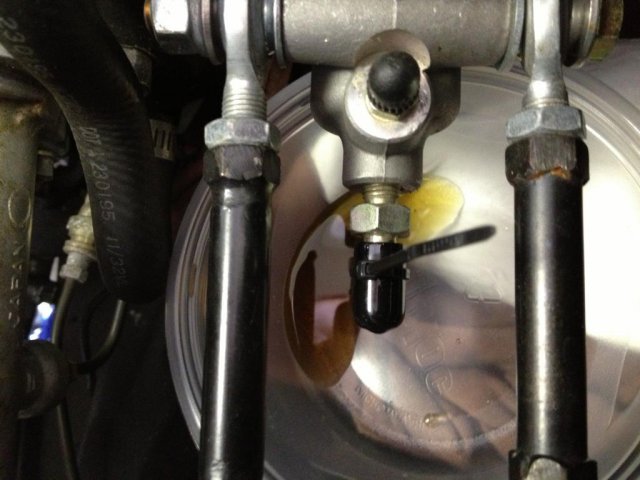
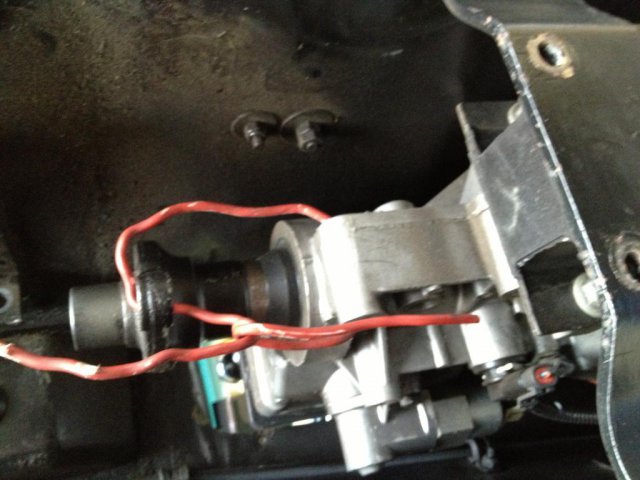
That's great news. I will probably get a longer one too. I got up early this morning to make a little progress on my bellhousing swap. Since all the hydraulic fluid had already run down my inner fender (only joking a little), I went ahead and worked on swapping to the longer rod. I had a defective Wilwood master laying around and I stole the longer rod off of it. This a job where you really wonder why God didnt create man with three hands! Got the snap ring out and swapped rods. Went over to my Porta-Band and grinder and cut the metric nut off the Datsun clevis. I have a short day at work and will run by the hardware store to get some extra fine thread nuts to fit the rod, then it's over to the welder for a couple of spot tig-welds. Photo shows the longer rod. I was on the last thread on the Datsun rod, and Im expecting to have to do some adjusting with the new bellhousing. It is worth noting that while the Datsun rod had flats on it for a 4mm open end wrench to assist with adjustments, the Wilwood pushrod does not. So I will be putting a couple jam nuts on the rod to take the place of the flats.
-
It is cool! But my taste would requir different wheels. Hell, it's a free country (sort of)-we should all have fun.
-

How to get stock height with a 400 SBC?
RebekahsZ replied to swtjames23's topic in Gen I & II Chevy V8 Tech Board
Can you post pictures? Maybe you got a tree growing thru your parts car? Do you know for sure that your springs haven't been cut or heated? Shocks shouldn't affect ride height. Could be wheel/tire combination. Help us help you-post up some pics. -
Put a window in your block (on purpose), it is a shame to hide those rods. Works of art!
-
It might not be crap, my Nissan version just looked better made. If both rods are too short for you, you're gonna have to pay a welder. Shouldn't be expensive. Drop in, suck up and you'll be out of there in 15 minutes take a twenty and if you are really good at sucking up, you may still have it in your pocket driving home.
-

Just starting my ls1/t56 build!
RebekahsZ replied to CableSrv's topic in Gen III & IV Chevy V8Z Tech Board
No, mine was perfect out of the box. He's great and will shorten it for you. Just a hassle to box back up and send it. It won't cost much, but this stuff happens-try not to have an argument over who's fault it is. Building cars...shit happens. Better too long than too short! -
If I recall, the Tilton rod is LONGER than the Datsun rod. But the aftermarket clevises tend to be el-cheapo in construction. So, change the nut in the Datsun clevis to put the nice Datsun clevis on the longer Tilton rod. It requires a dremel tool to cut the weld that retains the metric nut to the clevis and a spot weld to affix the SAE nut.
-

LS/T56/240z Project Mentor Wanted
RebekahsZ replied to RebekahsZ's topic in S30 Series - 240z, 260z, 280z
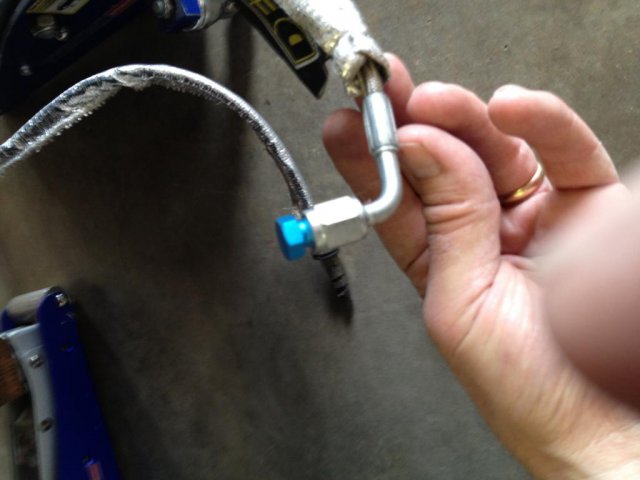
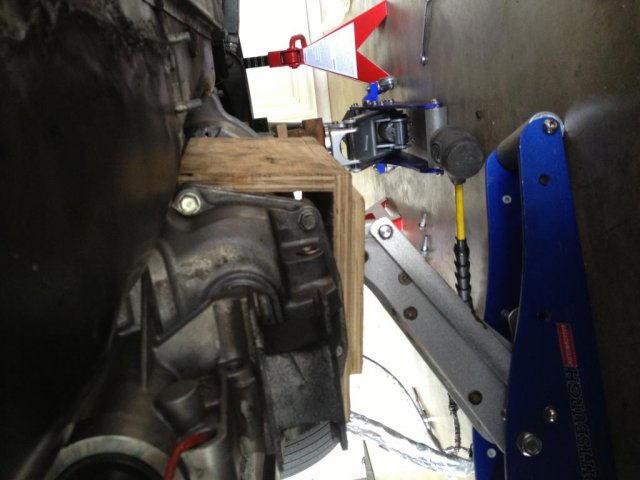
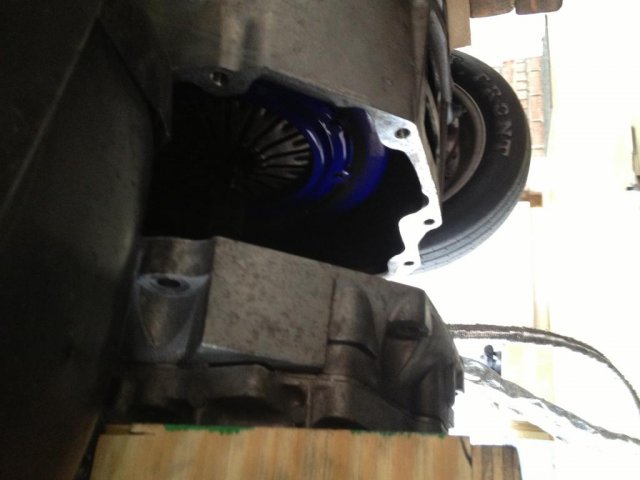
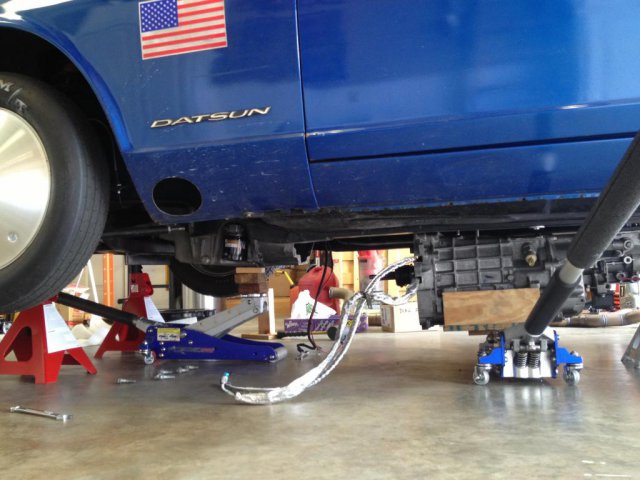
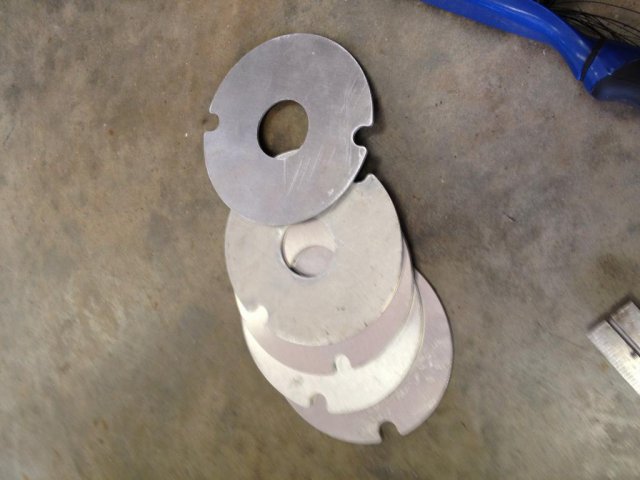
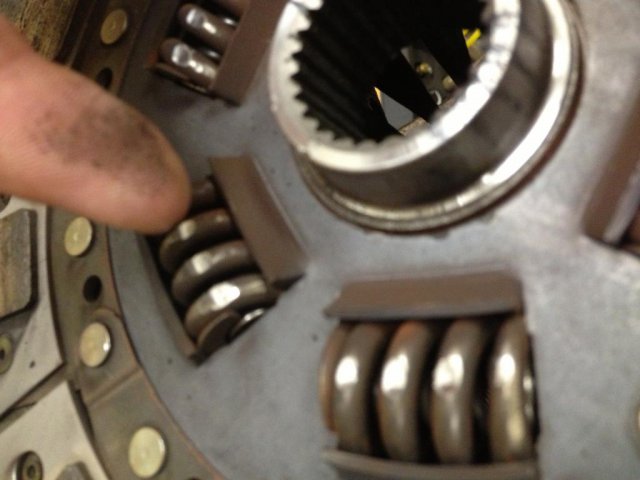
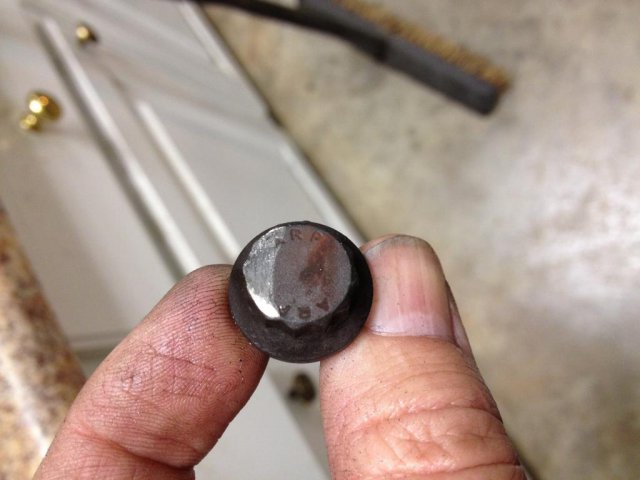
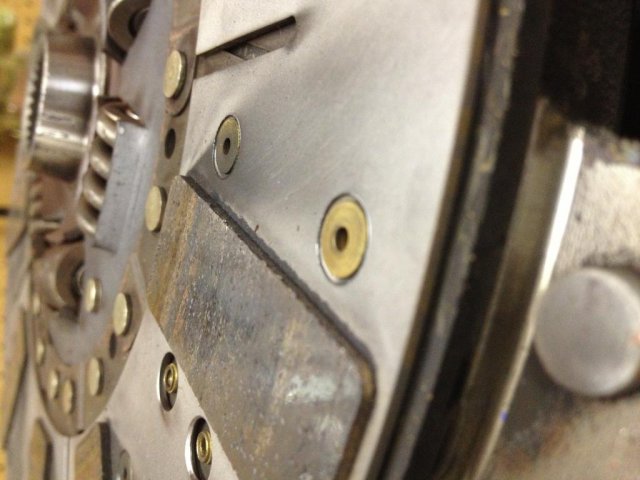
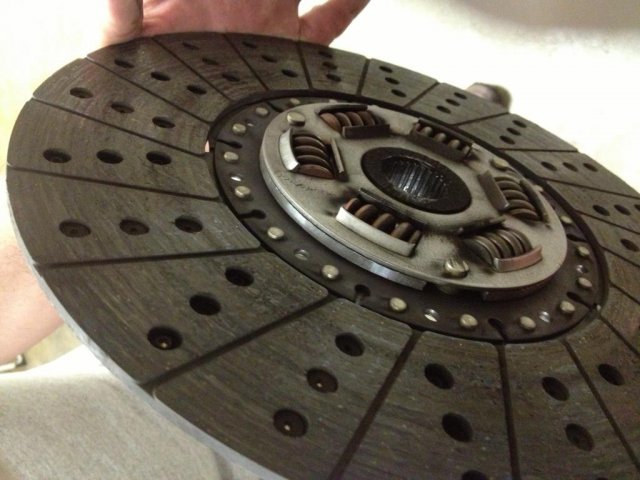
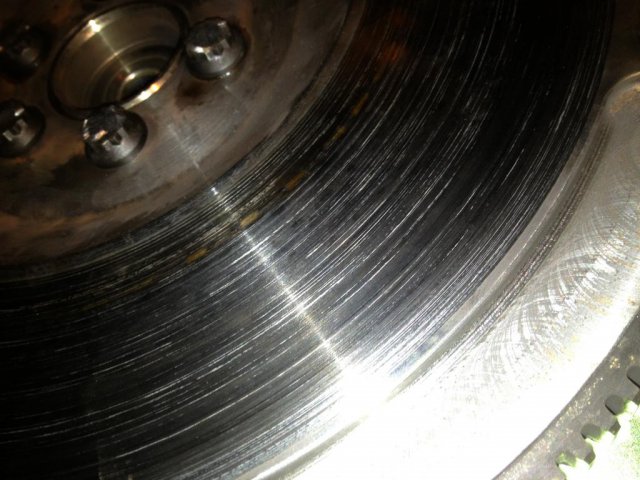
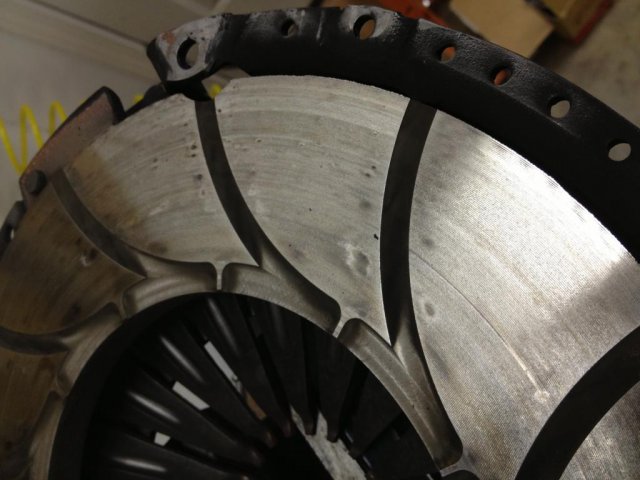
Pulled trans down and removed clutch and pressure plate to install Quick Time SFI bellhousing(BH). Tried capping the master cyl and line to limit bleeding requirements after the job. Inserted a spare yoke into the tailpiece to avoid spilling all my expensive Tranzilla gear oil. Made a wooden cradle that contacts the "ears" and keeps the trans from rolling off the jack. The BH needed clearancing around the starter. It also needed some machining burrs cleaned up. The irregular hole in the back of the BH made it impossible to index with a dial indicator, so that pretty well killed progress while I figure this out (see related thread in Gen III forum). Found out that one of my $9.99 Harbor Freight torque wrenches is out of calibration by pulling the threads out of the BH on one bolt hole. All the bolts similarly susceptible will get a back-up nut for insurance-the steel in this BH is SOFT! All the parts are on order to finish up this coming weekend. I inspected my clutch assembly: flywheel looks great with nice even wear. Metallic side of clutch disc looks almost worn out-I emailed Mantic to see if the pucks were thin from the get-go, I honestly can't remember. Organic side looks great. There is evidence of contact between the flywheel bolts and the clutch disc springs. I shaved the heads on a new set of ARP bolts on the grinder to try to stop that, although i wonder if this is related to the thin metallic pucks. Pressure plate looks fine with normal wear. Compared heights of old BH to new BH; by my logic I need to install a shim under my slave cylinder, got that done. Had the shims on hand from when I was having trouble with my truck's clutch. Back to waiting on parts. -

Installing Quick Time SFI Bellhousing with T56.
RebekahsZ replied to RebekahsZ's topic in Gen III & IV Chevy V8Z Tech Board
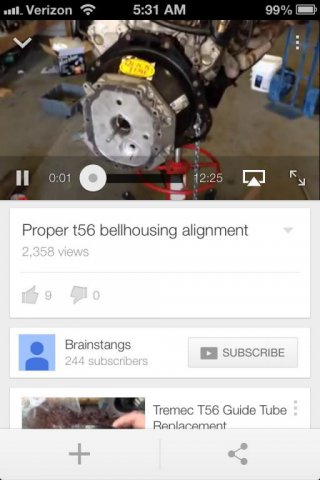
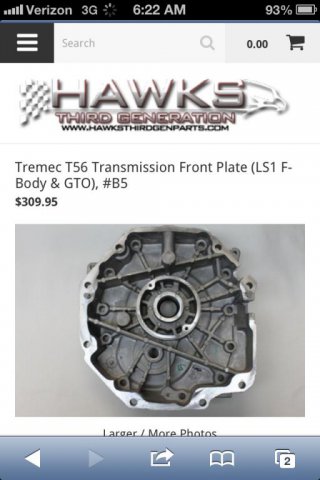
There's a guy in another sub-forum who asked the question: "how do I learn to work on cars?" My answer would be: " buy one and learn from your mistakes." Or the mistakes of others. This may be all about nothing if when I check the bellhousing alignment it all checks out perfect. But that has not been my experience in the past. So I found a video that answers most of my questions. It seems that since the QT BH has no machined center hole to measure from, we can recruit the front plate of the transmission, bolt it on and measure from the center hole in it. Not wanting to open up another can of worms (that should be my avatar name: "Can of Worms!"), I ordered a T56 front plate from Hawks Third Gen, and a complete set of adjustable dowel pins from RobbMc Performance. He said that I could return any unused dowels. I called QT and got the part number for their T56 hardware kit then ordered 2 sets from Summit. Time to tear it all back down and wait for parts. BTW-the QT BH for LS is part no: RM-8020. I sent mine back to QT to have their "window mod" done. There were big time delays involved in coordinating this "factory mod" caused by the fact that QT does no direct retail. I have found holes in my BH helpful for inspection, trouble shooting, and dust clean out. I eish the window was bigger, big enough to get a hand in there. The hardware included in RM-8020 is for attaching the BH to the block; bolts to attach the trans to the BH are in a separate kit, RM-170, avaiiable thru Summit. By the way, for all you sophomores: BH is bell housing, not butt hole-hehe. Best to do all this before you install your engine, rather than on your back as I am doing. -

(suspension tard) what's happening here?
RebekahsZ replied to thedarkie's topic in Brakes, Wheels, Suspension and Chassis
Try marking it with a dab of paint so that you can see it loosening early? -

(suspension tard) what's happening here?
RebekahsZ replied to thedarkie's topic in Brakes, Wheels, Suspension and Chassis
Good place for a lock nut? -
This was not fun. Two of the groups that I race with require a SFI bellhousing, otherwise this would go in the "not worth it list." Lets start with no instructions with the item to include no torque settings. Next is design issues, like: impossible to index with any confidence in being correct. Bolt kit incomplete wirh no instructions or inventory list to know how to use the hardware that IS included with the bell. The big hole in the rear of the bell, that I assume is where I should run a dial indicator, but the hole is irregular and has thick powder coating on one side and barely any on the other. After wasting most of my day trying to verify indexing to the crank. Finally I said "screw it" and bolted it together-hope it is right. The bolts that come with the kit are a few threads short, but the next available length is so long that they bottom against part of the bell housing. So I went with the shorter bolts (we are talking 2 threads). The steel of the bellhousing is soft-I had my first known torque wrench failure and I over torqued one bolt before I realized that the wrench was understating torque. I pulled the bolt thru the bellhousing. I think by a strike of luck that I can back that bolt up with a nut and salvage the situation. Will go on hardware search tomorrow to find the proper size nut. Also worth noting is that by measurements, I needed a slave cylinder shim (which by another miracle I had in hand). If anybody has successfully indexed this bell with confidence I want to hear from you. By ls1tech statistics, less than 50% of guys check index at all, but those who do check it always find an issue.

