clarkspeed
-
Posts
878 -
Joined
-
Last visited
-
Days Won
49
Content Type
Profiles
Forums
Blogs
Events
Gallery
Downloads
Store
Everything posted by clarkspeed
-

IMSA GTU vintage racer build
clarkspeed replied to clarkspeed's topic in S30 Series - 240z, 260z, 280z
I had to put the gussets in after cutting the cross member. It's an OBP floor mount pedal set I think I got through Pegasus. I will have it mounted soon so you can see it. The rack is a square Coleman racing unit with adapters. I think there are some pics earlier in this thread. -
IMSA GTU vintage racer build
clarkspeed replied to clarkspeed's topic in S30 Series - 240z, 260z, 280z
That is an interesting thought. I may think about that more for a future project. For this car, the fenders pop off and the strut top falls in your lap after you take the strut nut off. I am going to leave some relatively long flex lines to the brakes so they don't become the only support. I think I can change springs real quick at the track. -
IMSA GTU vintage racer build
clarkspeed replied to clarkspeed's topic in S30 Series - 240z, 260z, 280z
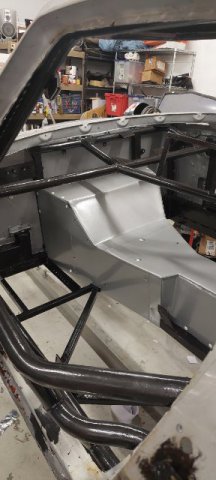
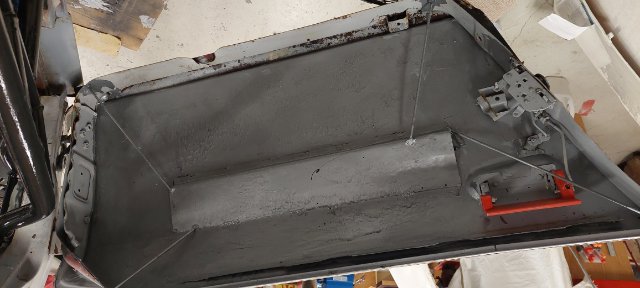
Firewall installed with interior panels. Started to weld it but decided to rivet instead. Everything sealed with 3m seam sealer and holes around the cage penetrations blocked with aluminum tape. Can't see any light peeping through. Getting there. I decided to order master cylinders and mount the floor pedals before I place the belly pans. Not required, but I'm lazy and that is what drives efficiently.
-
240z SCCA vintage race car, restoration
clarkspeed replied to AydinZ71's topic in S30 Series - 240z, 260z, 280z
Yes, do tell. -
IMSA GTU vintage racer build
clarkspeed replied to clarkspeed's topic in S30 Series - 240z, 260z, 280z
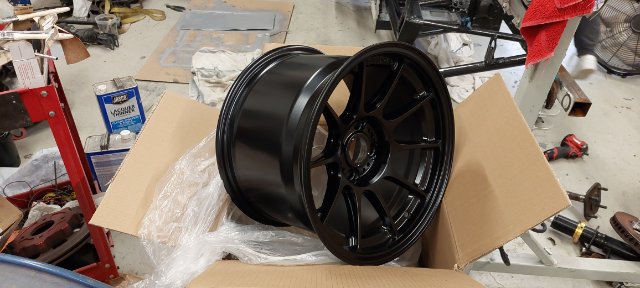
And look what the UPS dude brought last week. Some sweet 15x10 wheels that only weigh 14lbs/ea.
-
IMSA GTU vintage racer build
clarkspeed replied to clarkspeed's topic in S30 Series - 240z, 260z, 280z
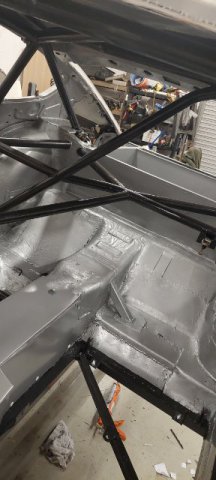
Pretty pretty panels. I think this an official milestone. I still have some fab to do once off the rotisserie, but I am now "assembling" a car
-
IMSA GTU vintage racer build
clarkspeed replied to clarkspeed's topic in S30 Series - 240z, 260z, 280z
Long time since post. Been fairly busy with painting panels. On a separate note, I sold the Bob Leitzinger tribute car to a chap in Salk Lake City. He intends to modify some and run the Peking-Paris rally with his son. Pretty F'ing cool. I hope he makes it. THEN totally by coincidence, I bought a 77 Alfa Spider for my wife to make local trips with. It needs some TLC but has been under a cover for years, wears original paint, dry rotted tires, and 24k miles. I fell in love with it immediately. It is like a slow motorcycle with the top down.
-
IMSA GTU vintage racer build
clarkspeed replied to clarkspeed's topic in S30 Series - 240z, 260z, 280z
All the bars are brush painted and panels are sprayed. -
240z SCCA vintage race car, restoration
clarkspeed replied to AydinZ71's topic in S30 Series - 240z, 260z, 280z
That's where I am at with the tube car. So I am maximizing all the other rules to compensate. I will run efi also, because I can. It will never compete with the 700hp monsters that show up in this class, but I plan to embarras a few people. And the monster cars don't show up for every race, so I have that also. -
240z SCCA vintage race car, restoration
clarkspeed replied to AydinZ71's topic in S30 Series - 240z, 260z, 280z
Whew, you will get as many opinions as there are assholes! I can throw in my experiences: 1. I have never run 50mm carbs, but others I know have struggled with tuning them. Could be their fault. 2. We ran 45mm carbs on a 3L fairly well. 3. Keep in mind that DCOE carbs have a neck down venturi to 34, 36, 38, etc. They need this to make vacuum. 4. A 40mm EFI ITB flows much more than a 40mm carb because of the venturi. 5. A 45mm or bigger ITB is not a good mix for the street. Like an on off switch. Fine for racing though. 6. I think most all the time a well tuned EFI system will make more hp and torque than carbs. Lots of posts in Hybrid on that. I don't have definite proof, but that has also been my experience. Even at WOT with same F/A ratio. I assume it is the venturi. Again no experience with 50 carbs. 7. I don't have much experience with single NA TB on ported Nissan EFI manifold in a race application. I have started to do it a few times. Would save a little money, but I can't believe it flows better than ITB's. Not sure a custom intake would flow better. Fine for turbo apps. ITB's have such a straight shot to the valve, they don't make any vacuum. You most likely can not run a map sensor with ITB's. 8. No experience with the Jenevy's. They look super cool. Maybe for future project. I use the TWM (borla). The new Chinese stuff looks decent also. 9. You should port match what ever you end up with. The manifold is kind of independent to ITB's and carbs on head side. 10. Price? I don't know. EFI has gotten cheaper and carbs parts are expensive x 6. -
240z SCCA vintage race car, restoration
clarkspeed replied to AydinZ71's topic in S30 Series - 240z, 260z, 280z
To the cage is fine. -
240z SCCA vintage race car, restoration
clarkspeed replied to AydinZ71's topic in S30 Series - 240z, 260z, 280z
Yes, finally someone who mounts a cell where it should be! Below the deck. If you can remove cell from the bottom you only need a tiny little trap door for fueling. And yes " metal" between cell and driver. So maybe aluminum foil is legal? Just kidding, but thick enough so it doesn't crumble. -
IMSA GTU vintage racer build
clarkspeed replied to clarkspeed's topic in S30 Series - 240z, 260z, 280z
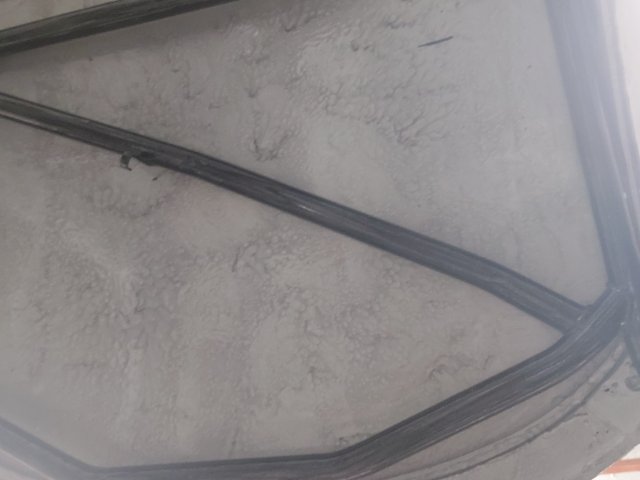
Another paint pic. Getting closer.
-
240z SCCA vintage race car, restoration
clarkspeed replied to AydinZ71's topic in S30 Series - 240z, 260z, 280z
Gauge panel looks great! -
240z SCCA vintage race car, restoration
clarkspeed replied to AydinZ71's topic in S30 Series - 240z, 260z, 280z
I just googled a Toyota Marai is car? No you will not tow with that. Best to think big picture here. Race school to see if this works for you (using a school car). Then set your goals. If hooked and comitted you will find the best path forward. Could be sell and find something faster? Could be finish for another class? Could be EP for me baby. And could be ronoffs, then pro. Or could be this is so expensive, not worth it. Alternative is start doing open track days with someone. Drive to and from. But that will be such a nice car I suggest the former. -
IMSA GTU vintage racer build
clarkspeed replied to clarkspeed's topic in S30 Series - 240z, 260z, 280z
Another cool product I have found is the "Steel it" stainless steel spray paint. I think i will use it on some suspension parts. Kind of a dull silver finish, but durable as hell. A can is Expensive and does not last long but it is a great coating. I bought mine from McMaster Carr. -
IMSA GTU vintage racer build
clarkspeed replied to clarkspeed's topic in S30 Series - 240z, 260z, 280z
Dont worry, you are on right track. I'm just trying something different with the paint. Experimental for me where you are doing what I usually do. Think about that paint blowing right back in your face when painting and you get the drift. Runs on the near parts, light fog on the far parts. I use safety glasses that I immediately throw away after. It's tough. But I am finding brush is tough also. It came with the cage when I bought it. 3 horizontal on both sides. But so little left of this car, I look at it more for rigidity than safety. REALLY not much left of the original shell. Maybe 250 lbs? -
240z SCCA vintage race car, restoration
clarkspeed replied to AydinZ71's topic in S30 Series - 240z, 260z, 280z
Of and I use the Novus cleaner and polish on polycarbonate. Expensive but lasts forever. Only problem I ever had was dropping some goop solvent cleaner on it one time when I was cleaning tire marks off the roof. It stained immediate. Yes tire klag gets kicked all the way to the front roof line. -
IMSA GTU vintage racer build
clarkspeed replied to clarkspeed's topic in S30 Series - 240z, 260z, 280z
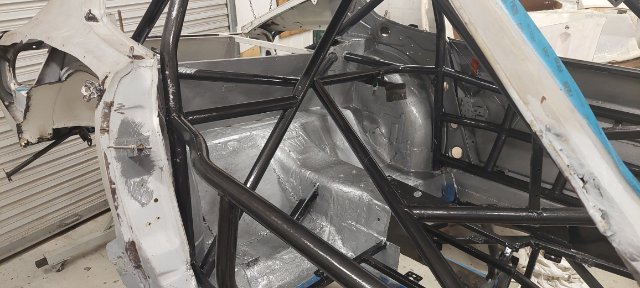
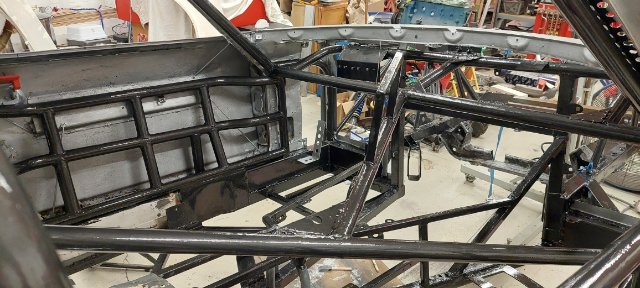
Been there, done that. been doing bodywork for a long time and have lots of equipment. . I am trying something different this time on interior. I saw a lot of cars online with this hammertone paint that look pretty good. So I have it a shot. Pretty durable after a week cure. Goes on over most anything. No brush marks and super easy to repair. Plus I decided to coat the cage a different color. And there is no hell worse than spraying the interior of a race car! But so far I have a mixed review. This stuff lays so smooth and looks incredible on the roll cage tubing. Looks decent on all the square tubing. But it gets pretty damn funky on flat panels. Not sure I like it. May try another coat to see if it evens better. And brush painting is pretty damn difficult also, but at least the paint is only in my hair this time, not my eye lashes. Here are some pics from tonight.
-
240z SCCA vintage race car, restoration
clarkspeed replied to AydinZ71's topic in S30 Series - 240z, 260z, 280z
Yea, dumb idea. Just kidding, its been done many times. A drag race friend of mine pushes car out to highway and callsAAA for a tow If something beaks at track. I suggest renting an open trailer from Uhaul when you go. Really not that expensive in the big picture. Me and feiends rent them to transport cars around. You might be able to find someone who will rent out cheaper. Yea, I can do some more stacks. I print in either nylon or carbon nylon so the heat is not a problem. I will get you a price. I'm glad my photo inspired you! Not that hard. You could weld up some sheetmetal if you like. Every scca car has some custom fab thing in there. The box is easy, getting air filtered from a high pressure zone is not so easy. -
IMSA GTU vintage racer build
clarkspeed replied to clarkspeed's topic in S30 Series - 240z, 260z, 280z
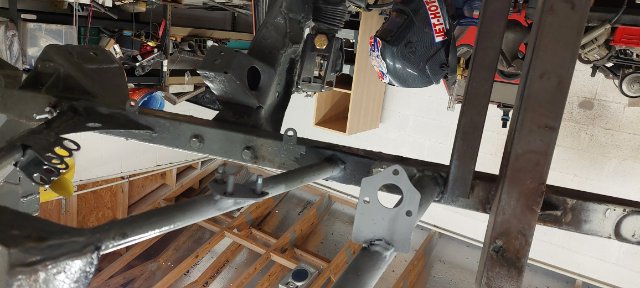
Some of the final welding of ground lugs, tie down brackets, and some mounts in engine bay.
-
IMSA GTU vintage racer build
clarkspeed replied to clarkspeed's topic in S30 Series - 240z, 260z, 280z
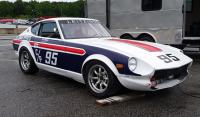
Oh and the Bob car I have been racing for the last few years is for sale on Facebook.
-
IMSA GTU vintage racer build
clarkspeed replied to clarkspeed's topic in S30 Series - 240z, 260z, 280z
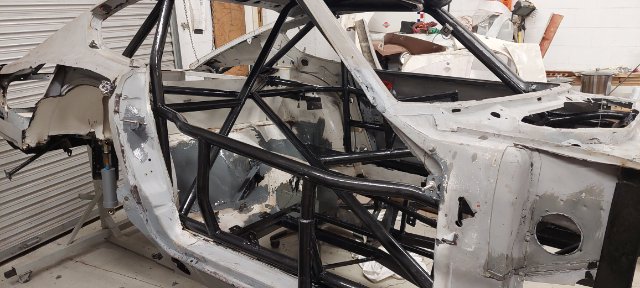
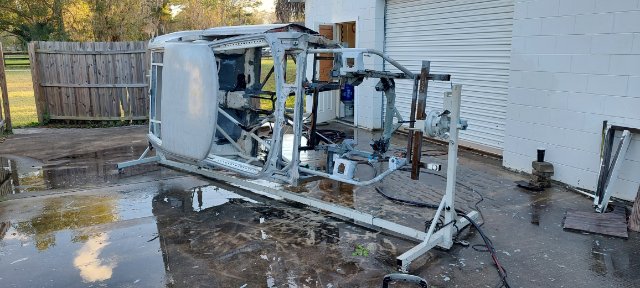
Finally got the chassis outside for some vitamin D and a good pressure wash. I quickly found out the grey Por15 is NOT the same as black. I used it over a number of parts to protect from rust and pressure wash blew it all off. The black held firm except a few spots where it covered some red rattle can primer. Over grey primer, bare metal, and light to heavy rust the black held fine. I tried plenty of different things during assembly, but I think ospho first to etch bare metal and convert any rust is still best way to start. So now back inside for painting and panel installation. Rolling and off roterssere soon!
-
240z SCCA vintage race car, restoration
clarkspeed replied to AydinZ71's topic in S30 Series - 240z, 260z, 280z
That is becoming a seriously nice looking race car! And I have seen quite a few. My suggestions to your questions: 1. No one really runs a speedo (more weight, doesn't make you faster.) Could be a data point to check if you have improved on corner exits, but tach does the same. 2. Dash and gauge design can be whatever. Just sit in the seat and see if you can read it. Tach doesn't have to be in center. 3. I just googled around for local plastic/composite suppliers. No shipping needed. My local guy has 4x8x1/8 in stock and can order anything else. Just get straight polycarbonate, no special coatings needed as long as you take care of it and use proper materials to clean it. Not a bid deal to cut and mount. 4. I could not find anything either. I designed a 3d printed "kit" design if interested. And a SU velocity stack also. Pretty simple, uses 3/4 aluminum angle from HD and aluminum sheet which you probably already have. Attached is a pic. Let me know if interested and I will see if I could put another together and what it would cost. I have a ton of shit like this I intend to sell some day when I get more time.
-
240z SCCA vintage race car, restoration
clarkspeed replied to AydinZ71's topic in S30 Series - 240z, 260z, 280z
I have never found a need for the blade style bars. And that is a direct statement to my level of driving and sensitivity. I normally adjust with 1/2 holes until I feel oversteer, then back off one adjustment. And never touch again unless something else changes. There are a lot of suspension details burried in above statement, but it's a pretty good start point. Maybe I am naive, but it doesn't seem you need to be so close on on roll spring rate to justify the added expense of a cockpit adjustable bar.