-
Posts
227 -
Joined
-
Last visited
Contact Methods
-
AIM
CarJway
Profile Information
-
Gender
Male
-
Location
Maryland
Recent Profile Visitors
9233 profile views
CarJway's Achievements
Newbie (1/14)
0
Reputation
-
BJSZED: how did the swap turn out? Were you able to confirm some of the questions you had when you did it? Redfogo: I had to use a newer pulley, as mine wasn't a one piece unit, but a two piece pulley. (two halves) I made a video, and get into more of the details there.
- 6 replies
-
- alternator
- maxima
-
(and 1 more)
Tagged with:
-
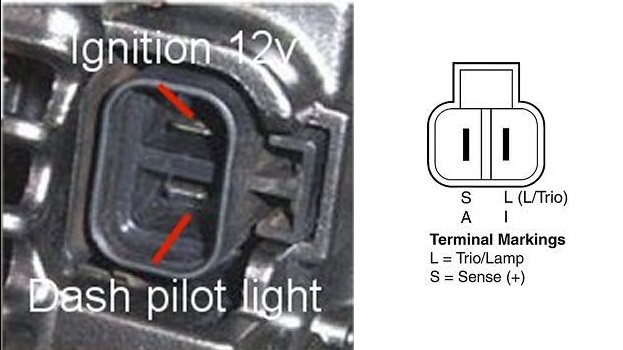
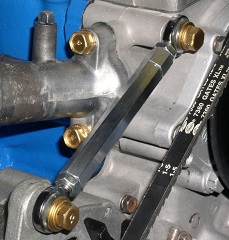
Sooo, I thought of doing a small write up after I did this today, so this will not be my best write up... Pictures will suffer, but I tried to pull all the information together. I have added some generic pictures, and how to re-wire your car to use an internally regulated alternator. (not my instruction on how to rewire) First things first... WHY do I need to upgrade?! Well, if you're like me, I now two fuel pumps, two electric cooling fans, blah blah blah... When my car was at idle, I could hear the pumps complaining, and if my fans came on, forget about it. Was it a grounding issue? No, my car has a full painless rewire, and I have more grounds then girls you stalk on instagram. My initial upgrade was to an 84 maxima alternator. While this put out 60 amps, it definitely did not put out enough amps at idle. I am not sure if this lead to the death of 3 Odyessy batteries, but I will soon find out. On to what you came here for. My first want here was bolt in, as in no cutting, making a brackets. (I have power steering and didn't want to undo a bunch of stuff) This ruled out the GM alternators, as you have to cut up the stock bracket. I spent a few hours on rock auto searching for all the combinations, amp, ear locations and have come up with the below. 1994 SOHC Nissan Maxima GXE Alternator (i believe this starts in 1991 up to 1995) 1990-1995 Nissan Pathfinder Pulley OR 1990-1995 Nissan D21 Pick up Pulley (I ordered a 1992 pathfinder pulley and i know this works) The Maxima Alternator puts out 90 amps, but at idle put out 58 amps! I looked at the Nissan Quest, and while it puts out 110 amps, it only put out 41 amps. So the clear winner for me here was the Maxima. Plus, it would take no fabrication to "bolt in". (the idle amps may vary, but this is what i found after buying a whole heap of alternators at once) The Pulley: almost all the higher amp alternators use a ribbed belt, vs a V-belt. After much searching, the best combination was to find, purchase, junk yard the v-belt pulley from a Pathfinder and put that on the 90 amp Maxima alternator.I used an impact to swap the pulleys with a little red loc-tite. The Wiring: I didn't need to do this due to my Painless harness install, but if you are still stock read the following site! Or search how to swap to a later Datsun alternator for more details on going from an external regulated alternator. (if this applies to you) Alternator rewire - click me There is now a plug for the Light/Sensing wire. Below is the diagram of the pins for that plug. You can either buy this connector/plug online for a few bucks or use spade connectors. I had bought the plug, and misplaced it, so I used blue female spade connectors. The adjustment bracket: I had already bought one of these adjustable guys yearrsss ago, so it worked well with this. You may be able to use the stock one with slight bending or buy/make one of these adjustable guys. I believe the guys over on Ratsun have a how-to on how to make these, or I could just be mixing that up with another site. Otherwise, just buy one them... As always with electrical work, ensure you unplug your battery, etc. I take no liability for you setting everything around you on fire, etc. When upgrading anything electrical, be sure all wire upstream are in good shape. I cannot stress this enough; higher amps is not going to fix an electrical system with hacked up wiring, bad grounds, etc. Be sure everything electrical is in good shape before doing this!
- 6 replies
-
- alternator
- maxima
-
(and 1 more)
Tagged with:
-
Thanks a lot for all the responses guys!
-
Looking to see who has a heater core thats in good shape. Would be great if you knew it didn't leak! If you know where to get brand new one as well, I'd appreciate the info!
-
I'm writing up a detailed 'How-to' with part numbers, and tons of pictures. I should have it up later this week.
-

Air Dam Ducting with Intercooler
CarJway replied to CarJway's topic in Windtunnel Test Results and Analysis
Thanks for all the positive comments guys! It hasn't rained yet, but it shouldn't as their are small slots for my intercooler supports to pass through which should drain it. And while driving down the road I figure most will get sent through the radiator. I am actually making exactly that. I am going to block off most of the front with a sheet of ABS, then make the "square tube" you mentioned above, to duct the air into the intercooler/radiator. Thanks for the link, its good to see some real world data. And for the undertray,I have a 4x8 piece of alumlite. I will be building more of a splitter than an undertray, and will make another thread for when im done with that as well. I will be dropping the splitter a bit, to get it closer to the ground, and heres a link of what I will be going after. http://blog.365racing.net/2012/04/02/evo-front-splitter-part2/ -
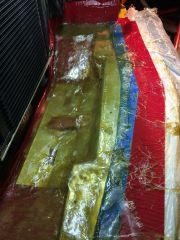
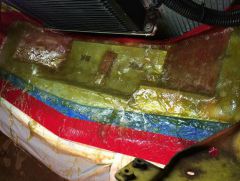
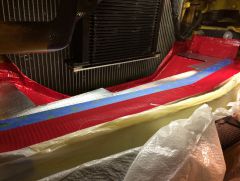
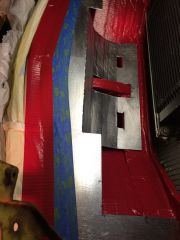
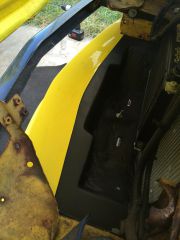
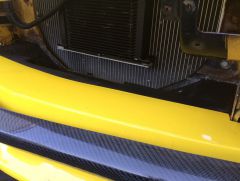
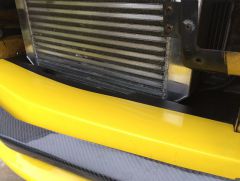
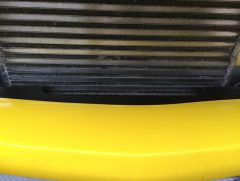
There seems to be quite a few posts about ducting the front air dam, but not many have an intercooler. I always saw pictures of a flat sheet going to the core support, and thus making it pretty easy to do. Since I have an oil cooler, and a pretty large intercooler, I knew this wasn't going to be a simple home depot run... After going back and forth, and not wanting to weld up new end tanks/intercooler piping I was left with the challenge of working around my intercooler. I had a few requirements of ensuring I fully blocked off air from escaping and going directly under the car, and ensuring all the intercooler saw air. I also wanted a small portion of the air to bypass the intercooler, to go straight into the radiator. I came up with the below... I started with a large 24x24 sheet from home depot, and really only ended up using 2/3rds of it. From the pictures below, you can see my main goal was to keep as much of the metal as I could, and fill in the rest with fiberglass. So what I really made was a skeleton shell out of the metal sheet. I followed the contour of the core support diagonals, and used cardboard to make the angles. Yes, I know there are drips, and such, but my intercooler almost rests on those areas so I let them be. All the areas which are visible, saw a small coat of bondo. This also ensured that this mated perfectly with my air dam. I let the pictures speak for themselves, and please feel free to reach out with questions. As far as holding this thing in place... You see a stud in the middle of the duct; this pretty much holds it firmly in place. Since I fiberglassed it on the car, it molded/contoured it self in place. I pretty much sat there alone. There were four holes on the core support, which I used plastic push clips to further hold it in place. You see that there are some holes drilled and empty for them. I am not done with the front end; it will be getting blocked off with a large sheet of ABS. This will further channel the air, but wanted to post small updates as they came. A rear diffusor with pics is also coming as well...
-

Techno Toy Tuning Strut Brace
CarJway replied to dreco's topic in Brakes, Wheels, Suspension and Chassis
Thanks for sharing! Just ordered mine! Below is the link for the Tri-Bar itself. https://technotoytuning.com/nissan/240z/z-front-tri-bar-add -
I second the Black Dragon ones are trash. The car never left my drive way, and they were dry rotted before a year passed.
-
I know its a long shot, but looking to see if anyone is willing to sell their PDK Strut bar. Picture below for reference.
-

Bolts for bumper steer spacers
CarJway replied to Hypertek's topic in Brakes, Wheels, Suspension and Chassis
When I purchased RCA's (Bump Steer Spacers) I asked if I was sent 8.8 hardware by mistake. (Instead of 10.9) I was told that in this specific application he would rather have the fastener bend then break. Implying that the 10.9 fastener could possibly break before the 8.8 would bend. There are other members that have much more fastener knowledge than me, and could further clarify/elaborate on my comment above. -
Great build! I see you have poly bushing in your Tension Rods... Might want to take a look at the thread below, as there have been some rod failures due to them... http://forums.hybridz.org/topic/22762-scary-tension-rod-failure/


