Austenp405
-
Posts
124 -
Joined
-
Last visited
Content Type
Profiles
Forums
Blogs
Events
Gallery
Downloads
Store
Everything posted by Austenp405
-
I don't know if it's what 260DET was referring to but the freelance site I hear most often is fiverr.com .
-
These were done on a Stratasys Objet 350 polyjet printer in Vero clear. The pattern is modeled in just as it was printed.

-
Cages - Experiences wanted
Austenp405 replied to EF Ian's topic in Brakes, Wheels, Suspension and Chassis
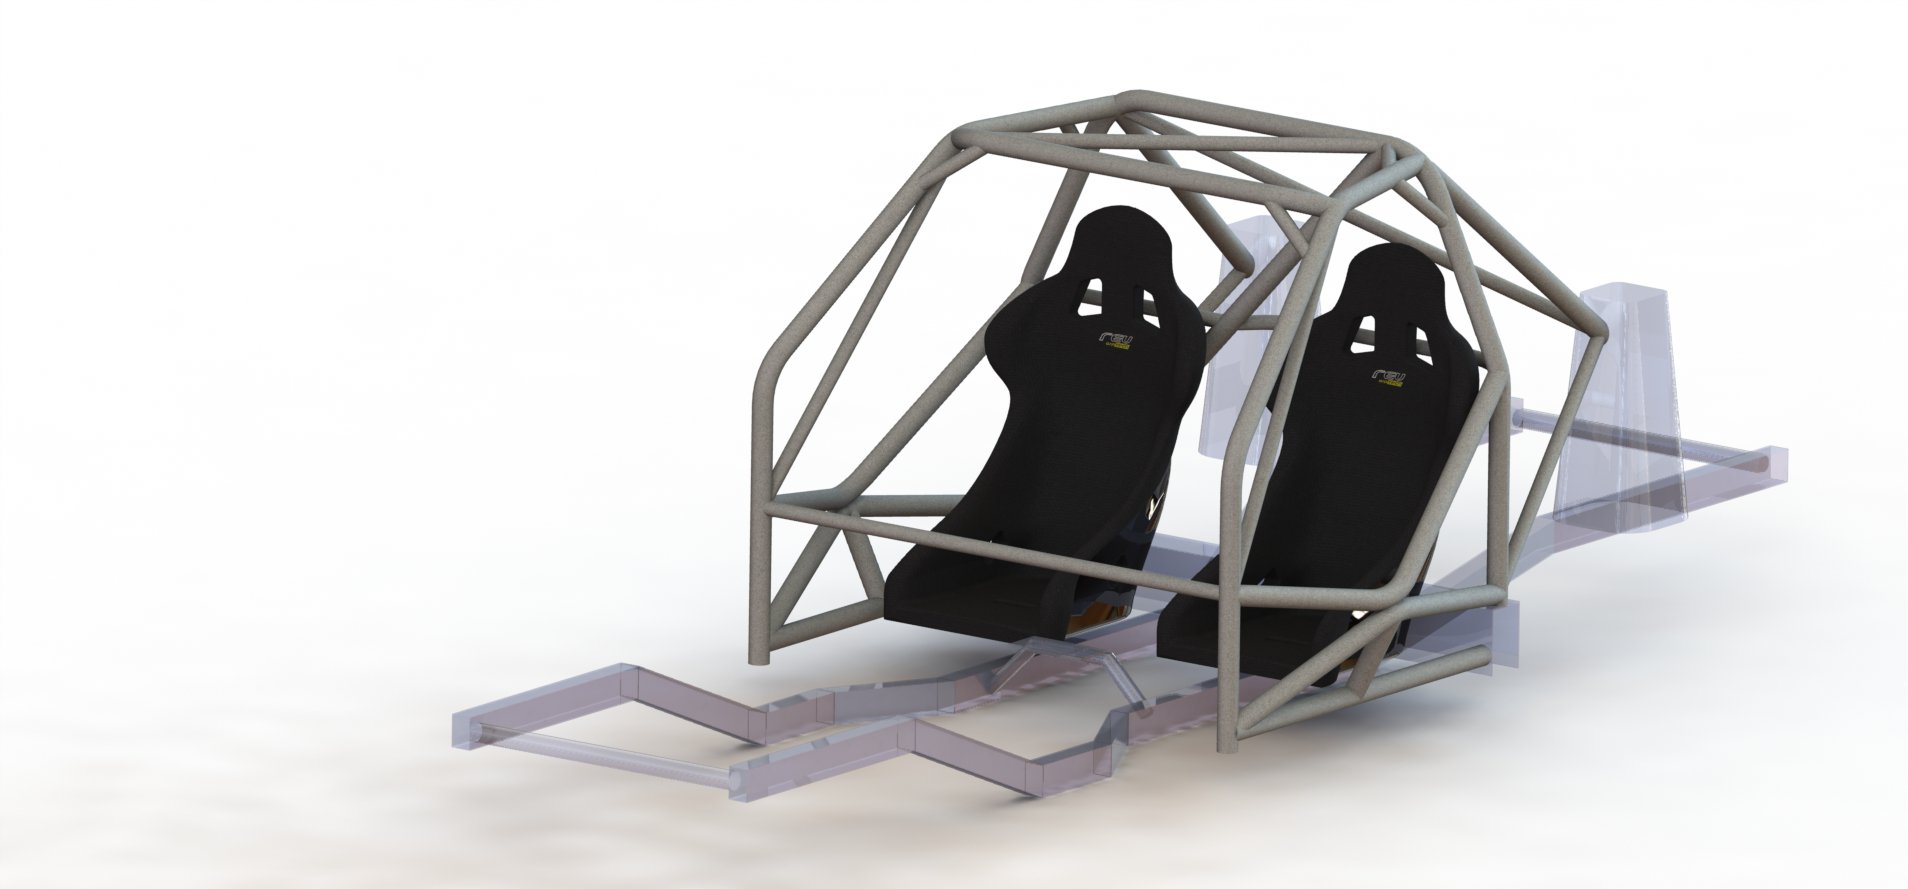
This is the design I've settled on after months of analysis; it wouldn't be THAT difficult to remove the forward components and make a roll bar. I think just as important than the design is the quality of construction. Having large gaps around the main hoop perimeter with no tie-ins to the body the gains you see will be negligible.
-
Thanks for the inut G-Tech and others. I was concerned with flow first, looks second. Good to know 260DET's experience matches what I suspected would happen.I didn't run a sim with the louvers reversed, but there definitely is not as much room in there, plus garbage gets funneled into your engine bay when stopped. My design won't stop that happening but it won' encourage it, either. Now, onto something solely cosmetic, I've been working on 3D printing some turn signal lenses. Slightly ricey but pretty wanted to try something with the clear filament.
-
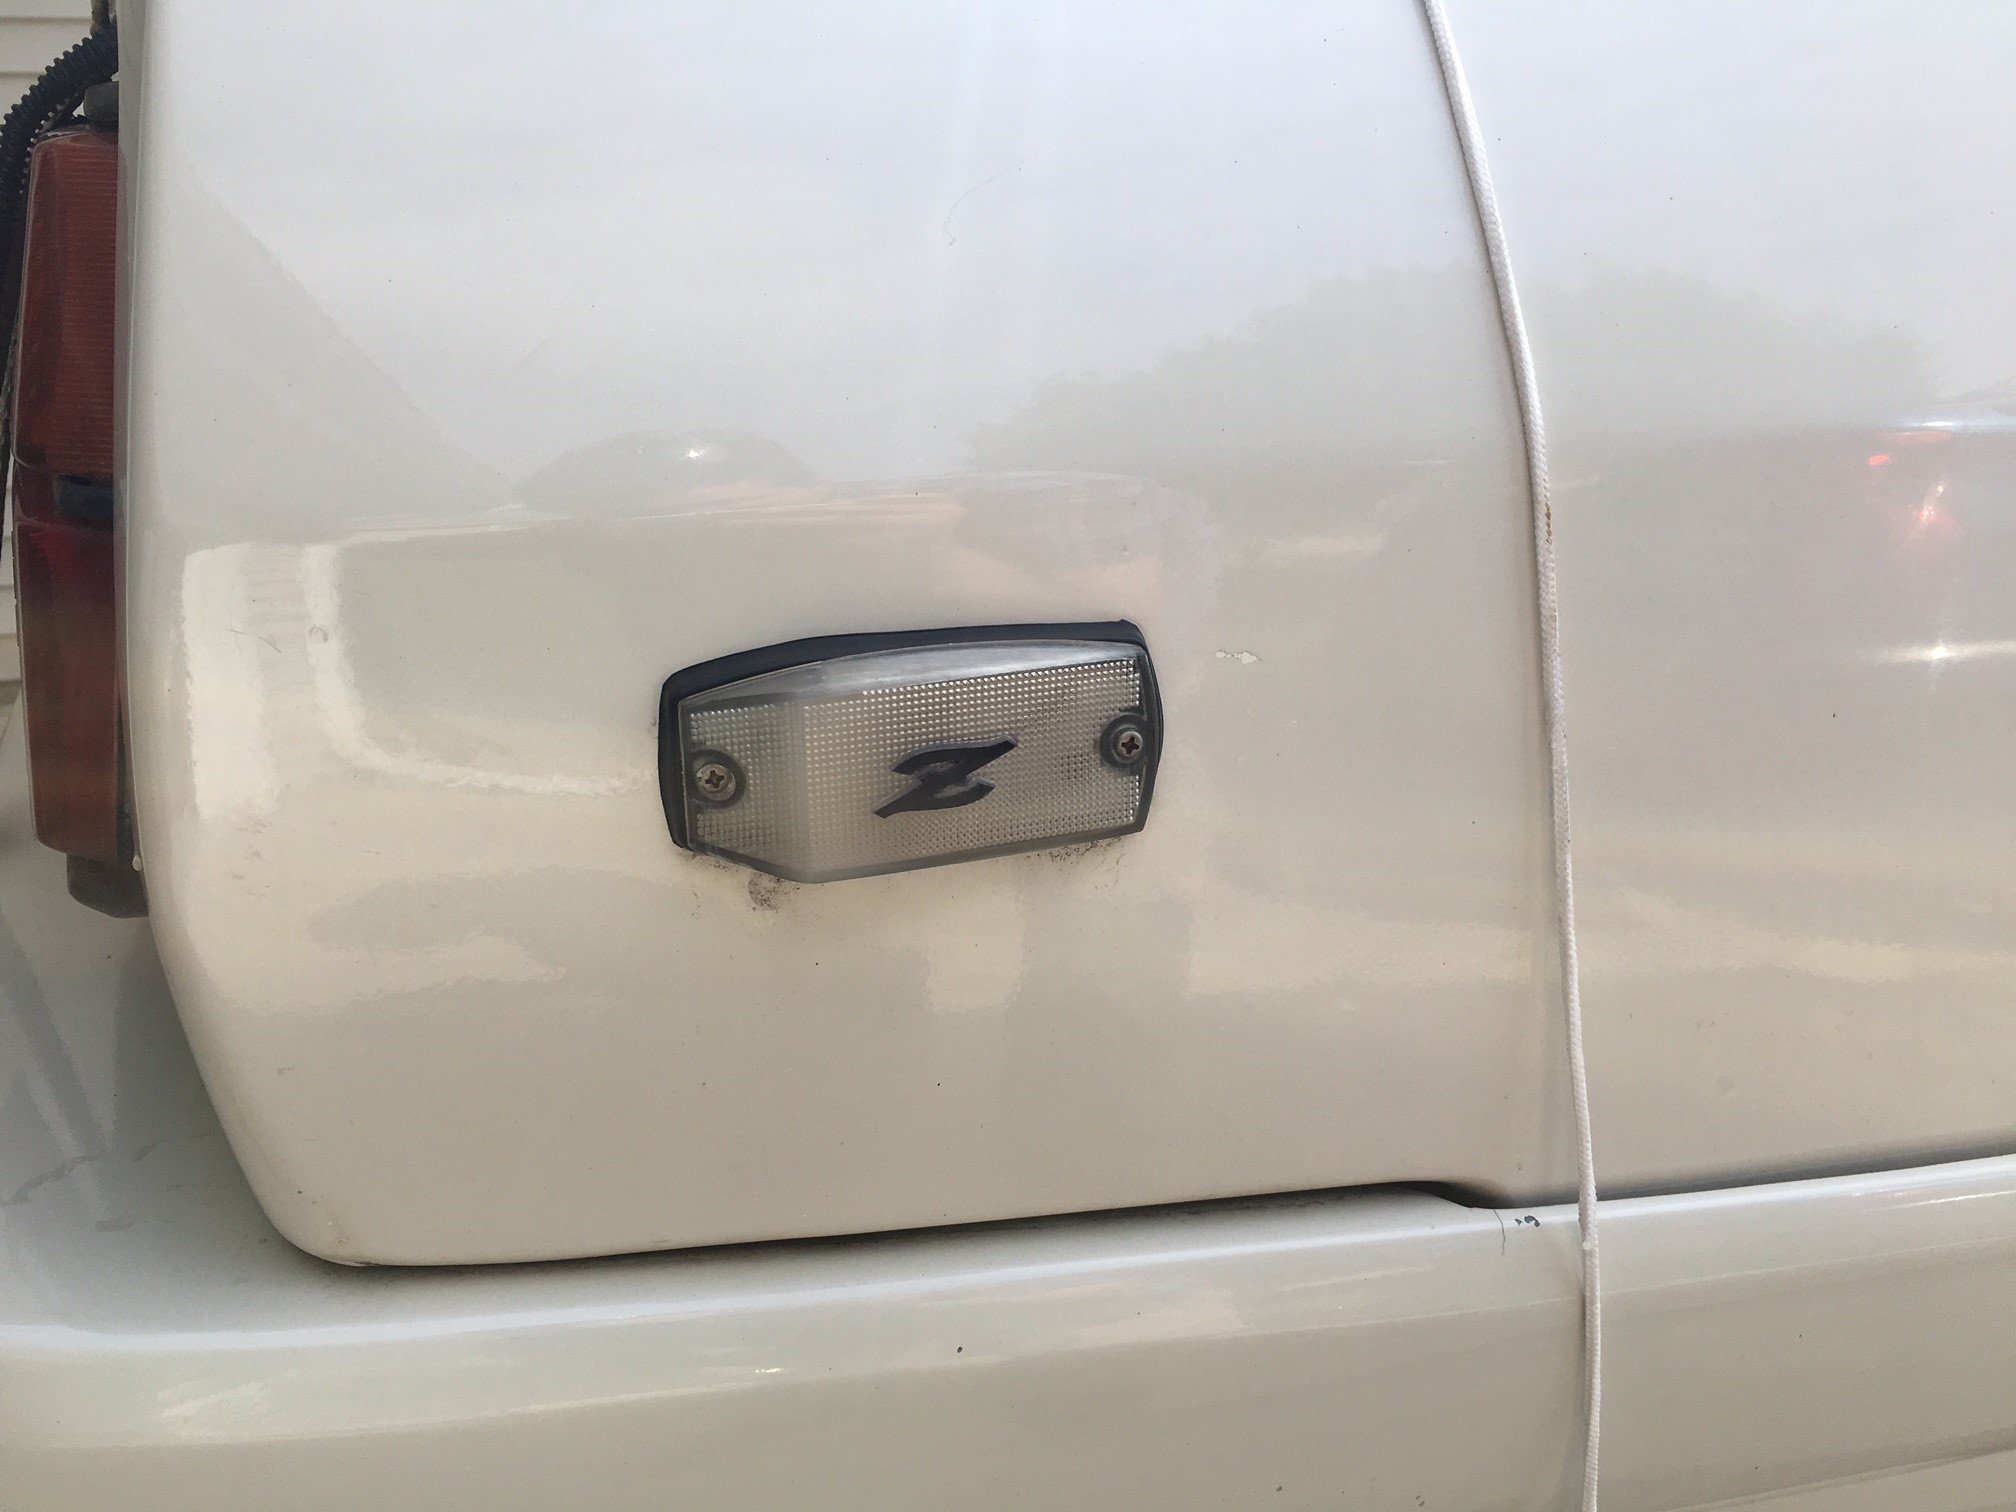
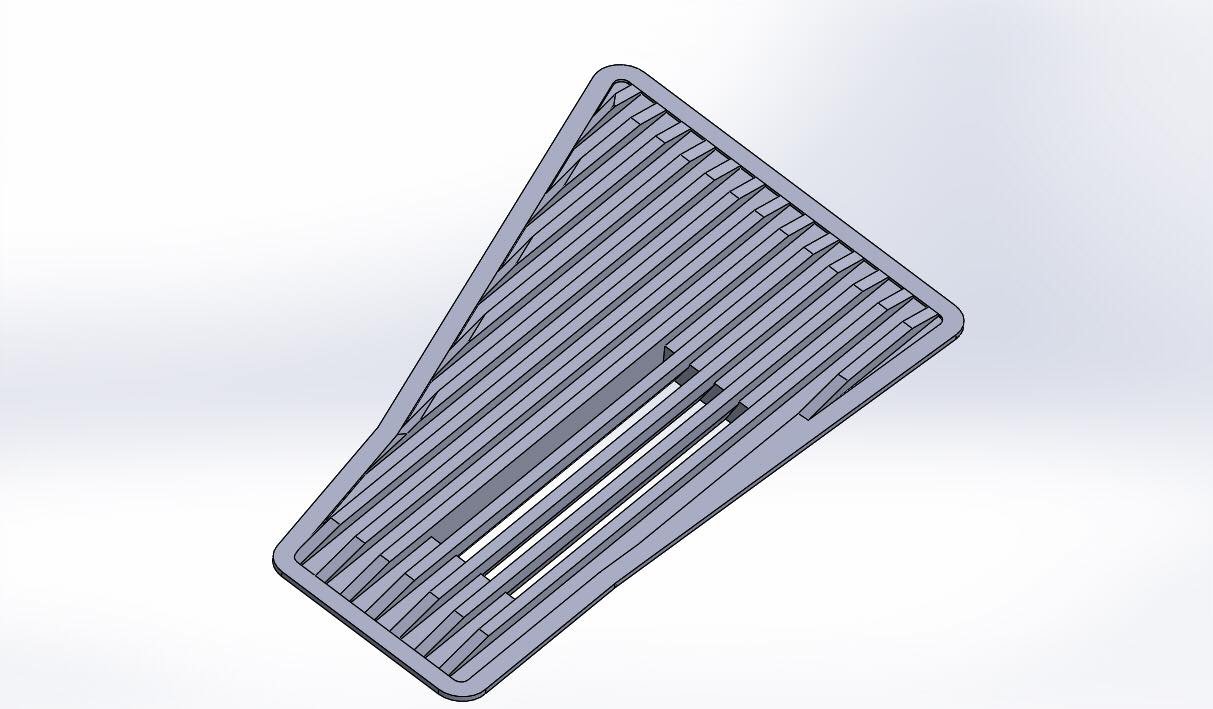
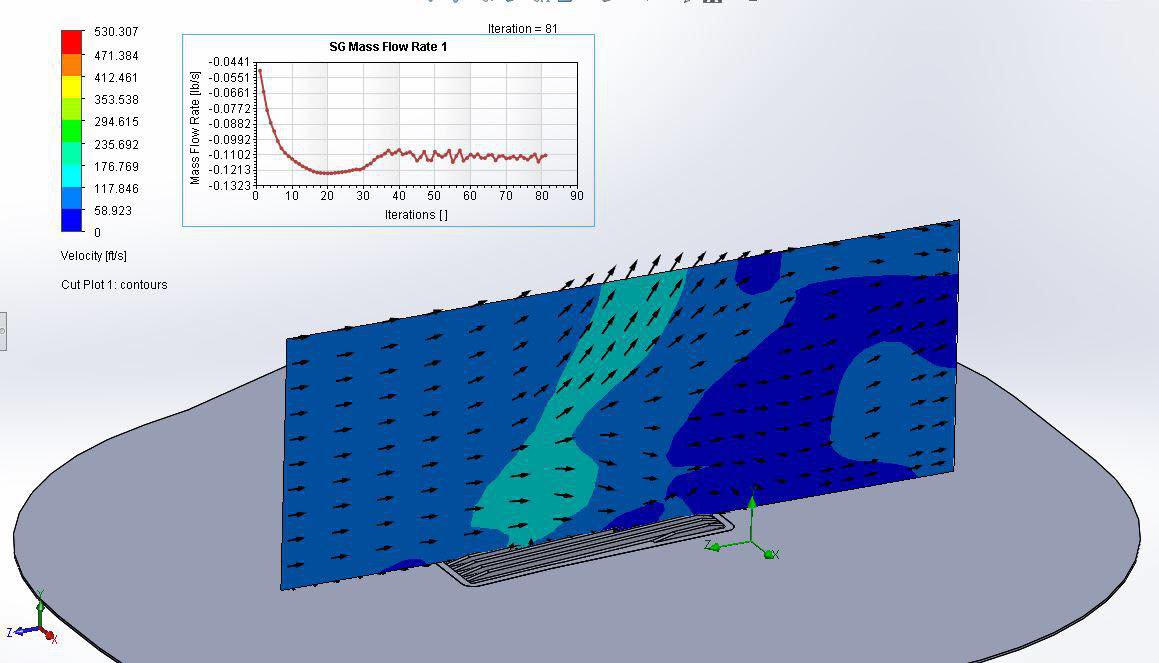
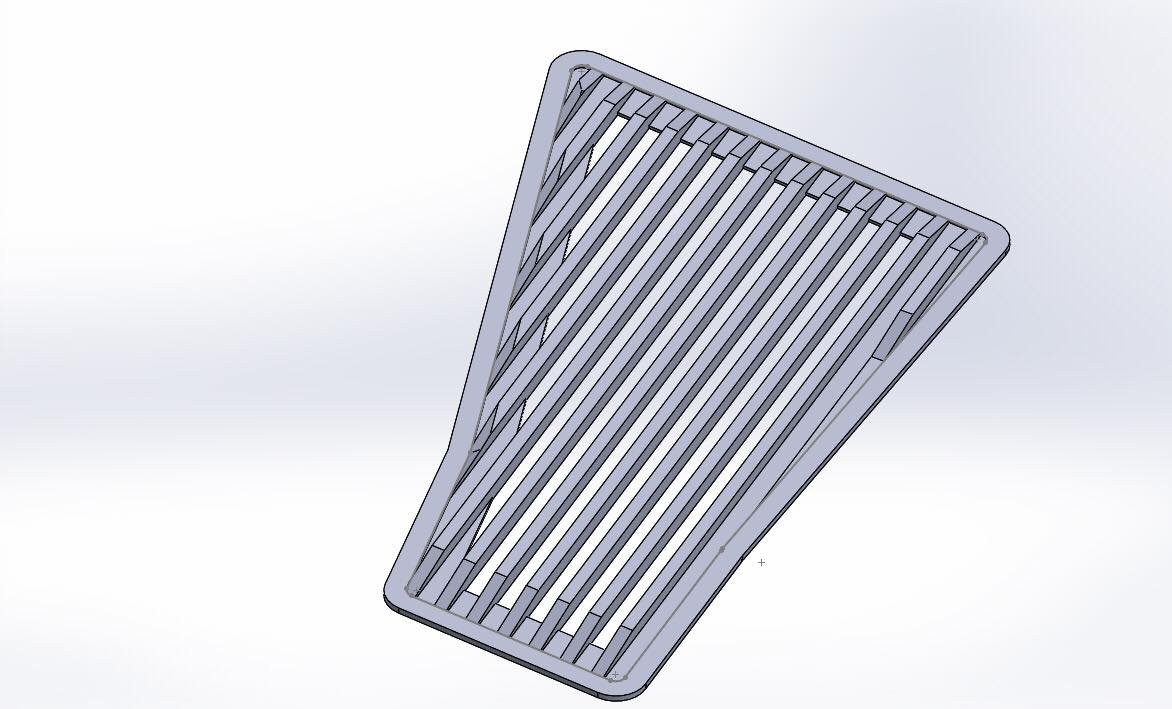
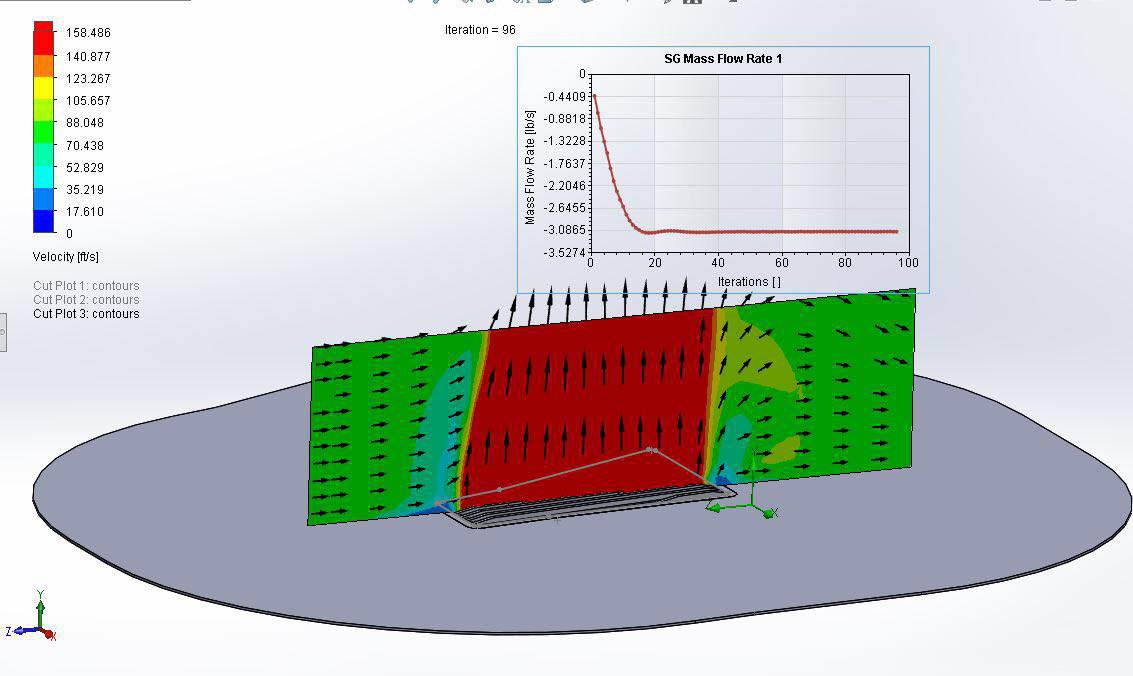
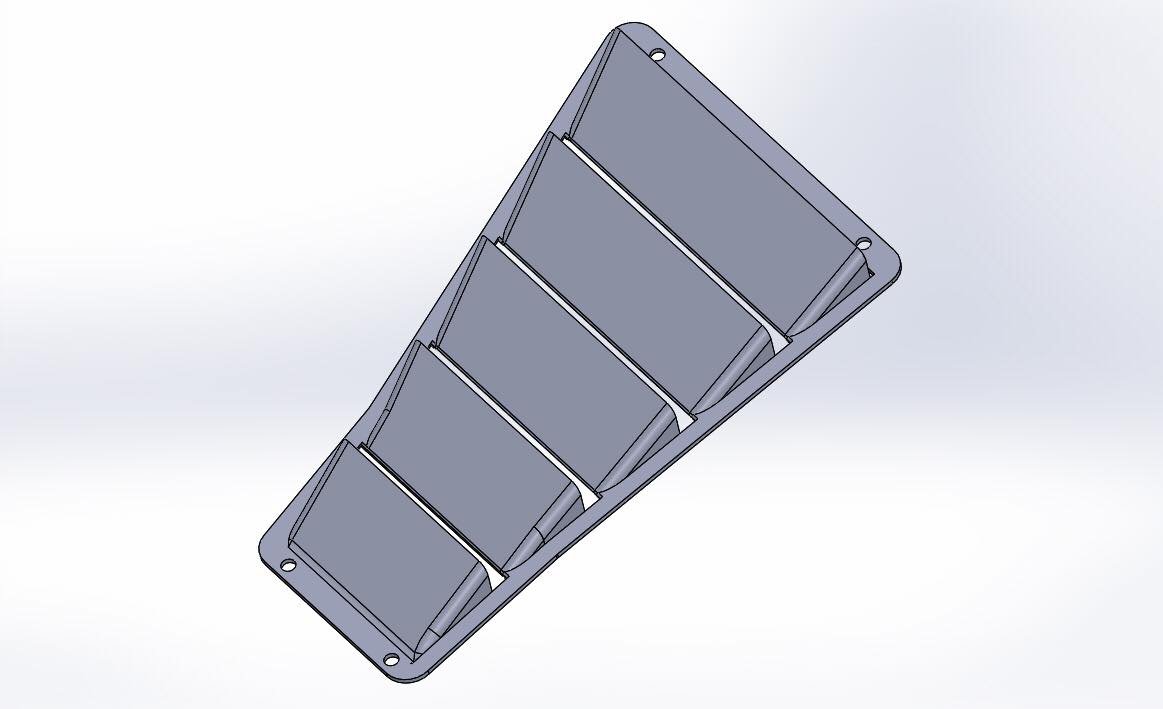
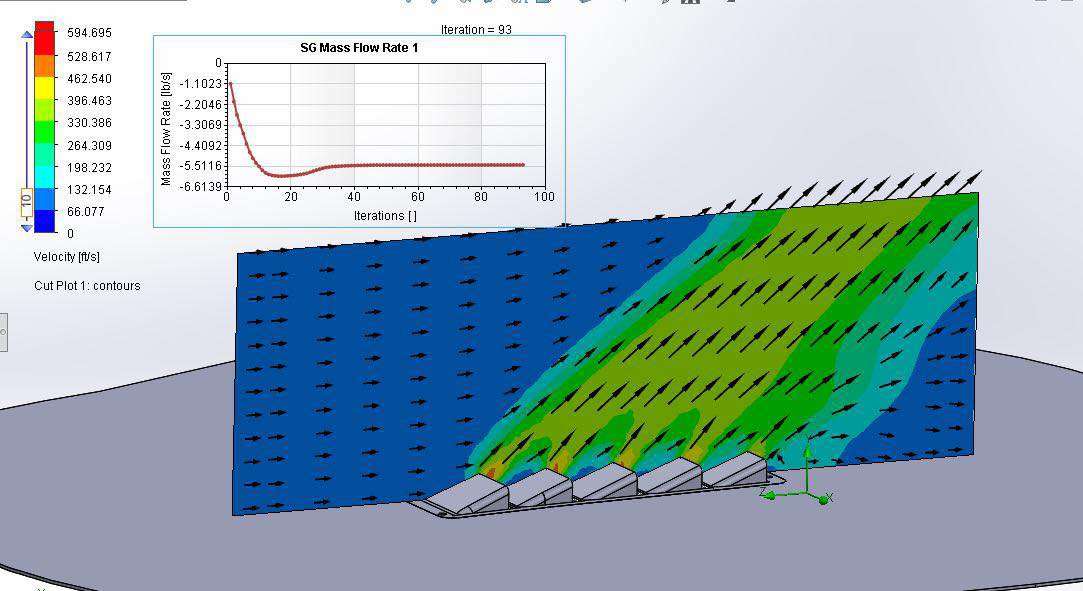
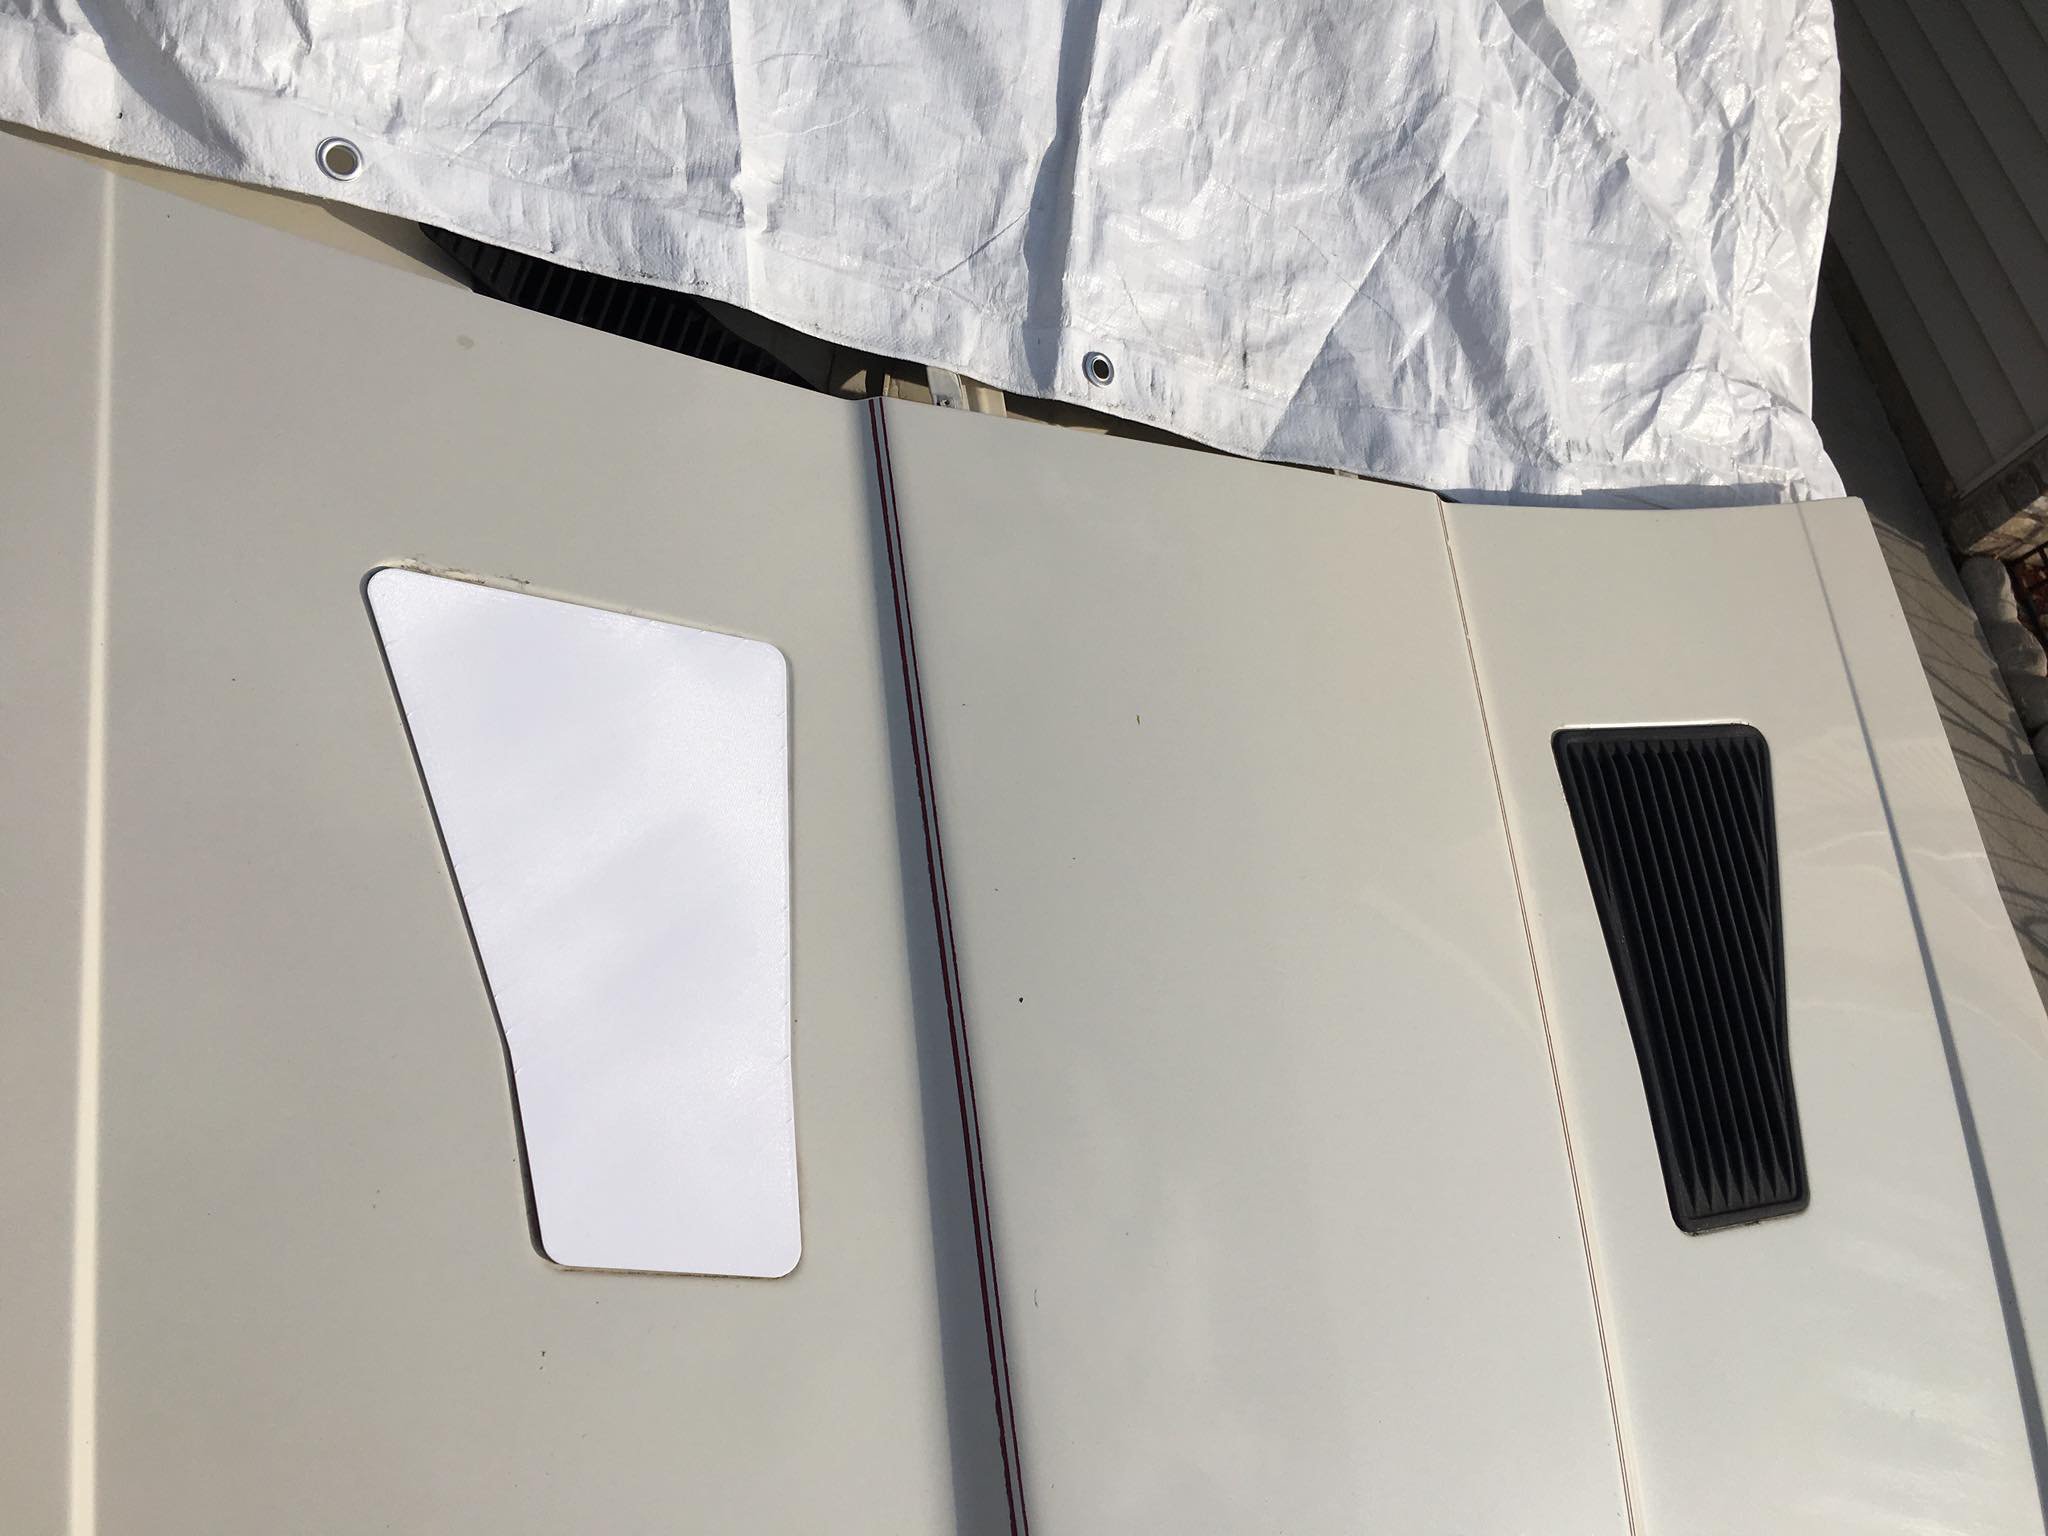
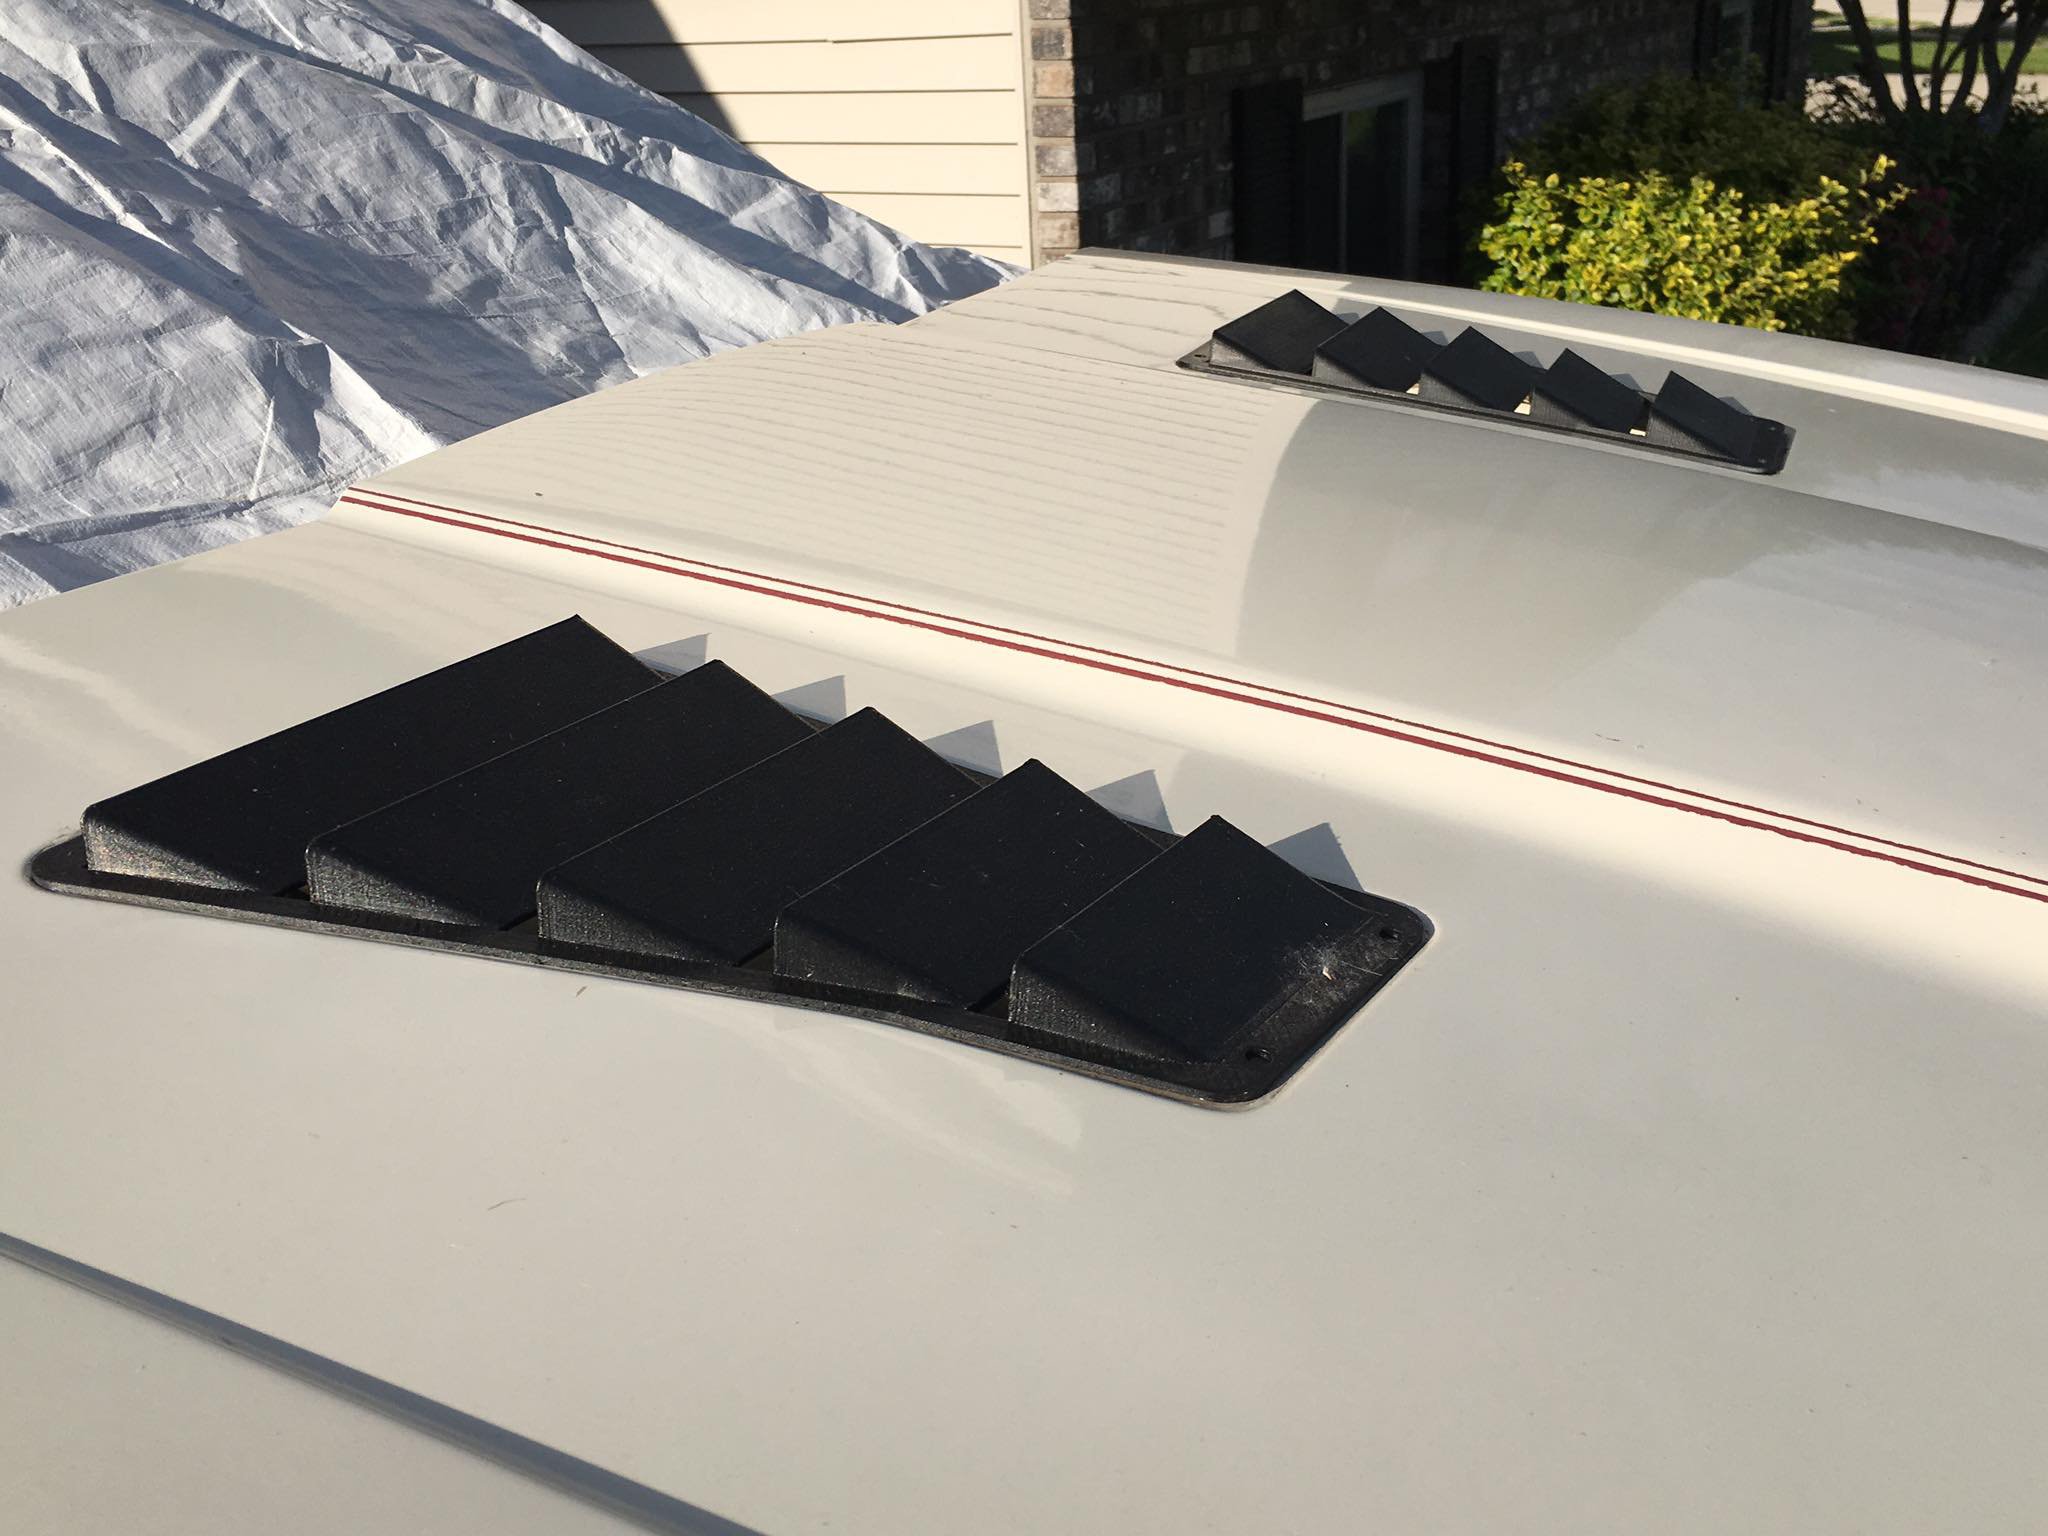
Lately I've taken aim at designing a better hood vent setup for the 280zx. First I created a blank template to ensure I got the shape correct (pic 7). The stock vent passenger vent is mostly cosmetic, with a very small actual open area for airflow (pics 1&2). Opening all the vents releases much more air (pics 3&4) but sending it straight up creates all sorts of turbulence issues. Flow: +178% Putting louvers over the opening starts the air moving the same direction as the outside air (pics 5&6). A roughly 20* angle appears to get the best Venturi effects. Flow: +400% You can see from the cutting\drilling guide how much more area will be opened up to airflow. I 3D printed a set, slapped some black paint on them and they're ready to be installed. I did add a small ridge around the border to stiffen them significantly.
-
Just Vinyl Wrapped my 240z... Here are my thoughts
Austenp405 replied to supershanesta's topic in Body Kits & Paint
Good Job SS! I've seen a couple pro installers and there is definitely an art form to it. It may be a 20 footer but looks way better than what you started with. -
Some recently famous Z's playing around
Austenp405 replied to seattlejester's topic in Non Tech Board
That was pretty good. Two thumbs up. -
Not mine, but very interesting. Looks really well done: https://denver.craigslist.org/cto/5234802626.html
-
Thanks Lance. It's not designed to work with any of the stock pieces because there's not much of the original panels left on my car. I'm sure they'd be popular but I really don't have desire to make for-profit parts; this project is my way to test my limits and have a little bit of fun, money be damned.
-
So, in the process of rewiring the whole car I wanted to simplify all the electric controls to one panel in the center console. Originally I planned to CNC mill it, but thought I'd try a different approach: Drew it up in SolidWorks and exported the stl file for printing: Print in-progress. The hexagonal infill pattern keeps materials and weight down while still being super strong: After printing, the toggle switches were added and the wiring started: After the toggle switches are done, add a kick ass starter button, slap on some paint, and voila!
-
In addition, several times I've been able to use the starter with the clutch out to move the car when the engine wasn't cooperating. Handy, to be sure.
-
^^^ That's how to write a how-to post.
-
In my experience, sanding on printed ABS doesn't work terribly well, it just chews it up, especially when the part is intricate. I have been getting amazing results with acetone vapor baths.
-
Similarly, I use a Suburban. I know you said you don't like trucks, but it's awfully nice to lay the seats flat and sleep comfortably for a couple hours on a road trip.
-
Thought you guys would appreciate this. We had to test some new CNC software at work so I figured why not do something cool? Drew up a roughly 1:24,000 scale map of Laguna Seca in SolidWorks and milled it out. The new software worked perfectly.
-
I saw it too! The wife just rolled her eyes as i rewound it a couple times. Looked similar to the one posted but had a spoiler on back. I don't remember what hood it had on it.
-
After fighting the machine for a while, I finally got the lid finished. Don't know if I'll powdercoat it to bring out the engraving or just leave it as-is.
-
Thank you. Yes, they're all mine, from design to construction.
-
found an awesome metal fabrication forum...
Austenp405 replied to OlderThanMe's topic in Fabrication / Welding
Another first time poster; this thread is like a flame to newbie moths. That being said, metal meet is almost as good for killing time as HybridZ. -
Dash lights, tail lights, reverse lights are out.
Austenp405 replied to Dannyweaver95's topic in S130 Series - 280ZX
Agree with the above. In my experience, those are all usually on the same circuit. -
I did my own for a couple different cars:
-
Lol, doesn't get much more clear than that. As another layer of protection I'll be using these connectors so the terminals are encapsulated: http://www.waytekwire.com/item/75281/MINI-RELAY-CONNECTOR/
-
Yes, I did think of that; I'm going to coat it with plastic before final assembly in case anything should come loose and short. Also, each circuit will be wired with circuit breakers before entering the box.
-
In the process of rewiring my car, I decided that anything worth doing is worth doing to complete and utter overkill, so I made a billet aluminum box for my relays. Squaring the billet. Milling out the pocket. Mounting posts for the 4 relays, countersunk and threaded from the back, plus the cutout in the bottom for wiring. The only thing left to do is CNC engrave the cover.
-
Seems like such a simple idea. If it works, I bet people will flock to it.