-
Posts
3202 -
Joined
-
Last visited
-
Days Won
18
Content Type
Profiles
Forums
Blogs
Events
Gallery
Downloads
Store
Everything posted by Gollum
-

280zx ignition module with Megasquirt - is it necessary?
Gollum replied to supernova_6969's topic in Nissan L6 Forum
Well after finding that my prebuilt didn't have the bip373 ign out installed I cursed a bit, had a few bad ideas, then settled on this: https://photos.app.goo.gl/QlcUhLBIDLYAfdx93 Trigger wheel + new coils + new plug wires + wire clip kit came in around $170 shipped. Spent another $20 or so on mounting hardware.- 30 replies
-
- megasquirt
- ignition module
-
(and 1 more)
Tagged with:
-
I think 1200 is perfectly doable depending on what you're willing to do. For yanks that's about 2650lbs and I anticipate my L6 turbo '75 landing in around 2200-2300, and that's with all stock steel body. The main reason you might not reach 1100 kgs (or 2425 lbs) would be creature comforts and sound deadening. A lot of weight people end up fighting is the weight of power escalation running 4 times stock tire, huge brakes, etc. It all adds up. There's some damn light s30 builds out there if you look around.
-
I think the most immediate challenge we're facing is the cost of the underlying infrastructure. This lead to the rise of asymmetrical broadband speeds and has now given rise to monthly volume caps. I'm in the minority that thinks the largest rout of the problem goes all they back to the initial design of TCP/IP which broke the OSI model and split the protocols the wrong direction. If multipathing and multihoming worked natively at the network layer (or specifically if network traffic worked like interprocess traffic on your OS) then we would never have seen the need for massive companies to invest in essentially owning all the backbone in order to turn a profit. The stories of early fiber failures are a comedy of horrors that show just how broken this has always been. I think blockchain is solving a wholly different issue, and that's okay (and I'm glad for it). But it's still needing to run on existing infrastructure. Any way you slice it, sending video content from a single source to even just dozens is impossible on current asymmetrical links, and theory of scale doesn't solve anything because of how large the entire block is to replace something like youtube. Study Netflix global bandwidth consumption and usage patterns. We'll never replace that with current home ISP offerings, current routers, and current consumer-based storage systems. Eventually, the TCP/IP model will die. It might be 10 years, or it might be 50. But it will...
-

Wheel size for handling
Gollum replied to Jesse OBrien's topic in Brakes, Wheels, Suspension and Chassis
Necropost because racecar. So cute to see how Jesse's grown.... Literally (as far as contact patch goes at least) -

280zx ignition module with Megasquirt - is it necessary?
Gollum replied to supernova_6969's topic in Nissan L6 Forum
I'm a few weeks away from installing my Megasquirt setup finally. I don't plan to use the ignition module. It's just a basic transistor to amplify the signal and that's exactly what the MS board had if you have the stated ignition output stated in the diyautotune article (which means most units built unless it's ms1 or you build it yourself). Have you done in depth ground testing and experiments? My first guess if your AFRs are sliding around would be sensor noise. Get some log exports and share them. Maybe someone can dig in and see if there's a lead up to missed ignition events.- 30 replies
-
- megasquirt
- ignition module
-
(and 1 more)
Tagged with:
-

Engine assembly - #1 cyl at TDC how accurate? Important?
Gollum replied to turbogrill's topic in Nissan L6 Forum
Well for ignition timing your crank pulley and timing mark NEEDS to be God, because it's the one absolute reference you'll have when tuning. The megamanual goes over this, that you configure your settings then with the engine running you use a timing light to see how "off" you are and adjust the trim until what you see on the light is matching what you see in the logs. Now your crank and megasquirt are in sync and unless your mark on the front moves you can trust your tune to be accurate to the mark. -

Engine assembly - #1 cyl at TDC how accurate? Important?
Gollum replied to turbogrill's topic in Nissan L6 Forum
Tim is right in that there's a lot you can learn by doing it "right" and you can document with certainty what your cam spec is as well as advanced/retarded nature. That said, I hate degreeing a cam while the engine is in the bay. If that's the case, then odds are I'm just going to assemble and run, especially if I'm using all OEM parts. Now, if I bought an aftermarket cam or was using adjustable cam gears, that's another matter entirely. There's a reason people use the tensioner lockup tool in order to avoid pulling the front cover... I think more to Tim's point though, is that doing this once you'll teach yourself a lot and that's worth it. It's like the first time you do anything. Spend the time to learn so that when you do it quickly down the road you have a clear picture in your head as to what's going on. Edit: For feedback sake, those pics look fine. Being a touch advanced is fine as long as you check it semi often for stretch. Also, be sure to check again once you have the crank back to TDC according to the OEM indicator. This is also why I said move the CAM once you assemble, knowing your bottom is close to TDC (when I don't want to pull out my dial indicator I just feel for the "popping" out of the deck that only happens for a very narrow window. You'll see that with anything useful as a rough straight edge. -
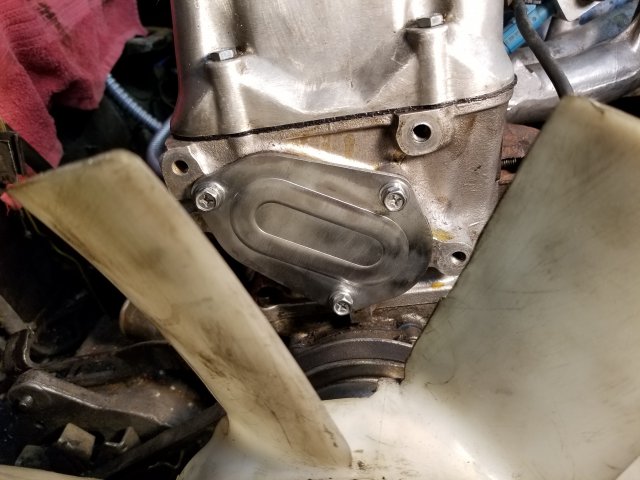
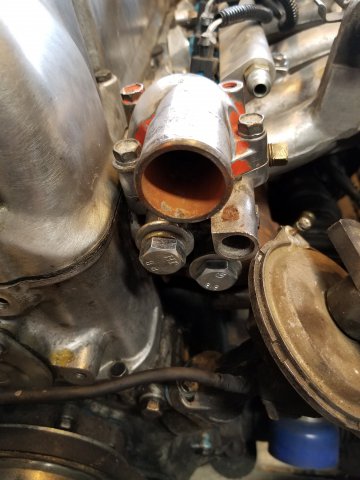
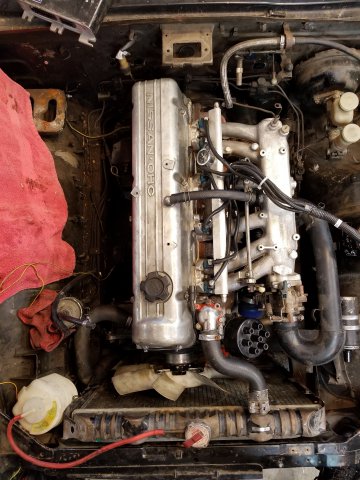
Small update: So I've found my missing cam inspection cover as well the thermostat housing. Also reconnected the coolant inlet at the rear of the head. Dizzy cap is back on, as well as the coil. I'll be using MS's built in ignition driver so I've removed the OEM ignition module from the bracket. Radiator is back in too. Little by little.
-
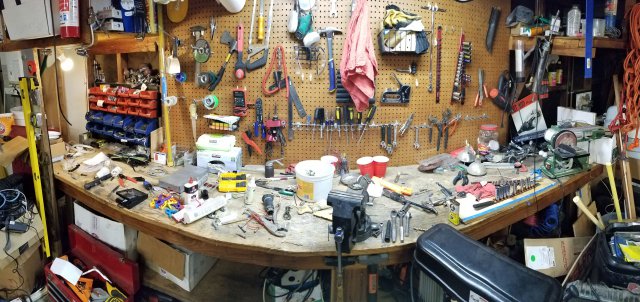
Not much done tonight but I spent some time cleaning. The below pic represents a lot of work, despite a lot left to do. I also started going through the first parts bin and found a lot of things I'd need, so that's hopeful. A lot of things just need to go away. Garbage bin will be full this week...
-
You mention that the chambers were welded, how much quench pad is there? If a lot, then a thicker gasket might be hindering more than helping. Google quench pad and quench distance to learn more. Also, pics are always nice.
-

Engine assembly - #1 cyl at TDC how accurate? Important?
Gollum replied to turbogrill's topic in Nissan L6 Forum
Correct, make sure the piston is visually at the top (it actually pokes OUT just a touch if you look closely, but don't worry if you're not that exact) which make the marks easy enough to align. Make sure the camshaft lobes on the #1 piston are both "up" and you'll be in the ballpark on the head. Then use the lighter color links on the chain to be "sure" timing is right. -

Engine assembly - #1 cyl at TDC how accurate? Important?
Gollum replied to turbogrill's topic in Nissan L6 Forum
Is the front timing cover off I assume? Then it doesn't matter to be "exact", it just gets you in the ballpark for the marked links on the chain. One mark will go on the crank sprocket and the other on one of the three marks on the cam (which allows for stretch adjustment). Usually once I get the crank side on and the cam sprocket in the chain properly I use a wrench on the block section in the middle of the cam to adjust the cam a degree or two as needed so the sprocket slips on. Then you can put the tensioner on and reassemble the front cover. -
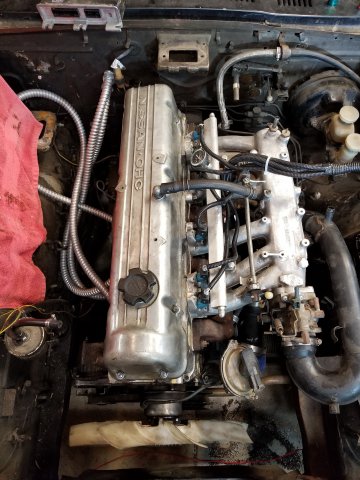
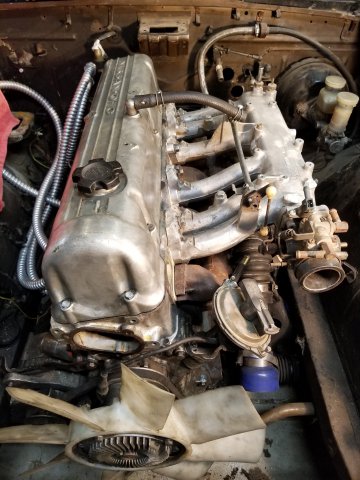
Tonight's update: got the manifolds torqued to (my) spec (oem is too low imo and prone to leaks at raised boost levels), fuel rail installed, and tossed on the j pipe for a more complete look. I'd have tossed on the thermostat housing... if I could find it... Same with that damn front cover for the head. So I spent about as much time cleaning/organizing as I did working on the car. I feel like there's a box of parts hiding somewhere. Probably time well spent still.
-
-
Yeah, downright SCARY how fast time flies. I can measure time since my car ran by the age of my eldest. But yes, still local. I'm no longer in North Vacaville though, I'm on the south side now. Feel free to PM.
-
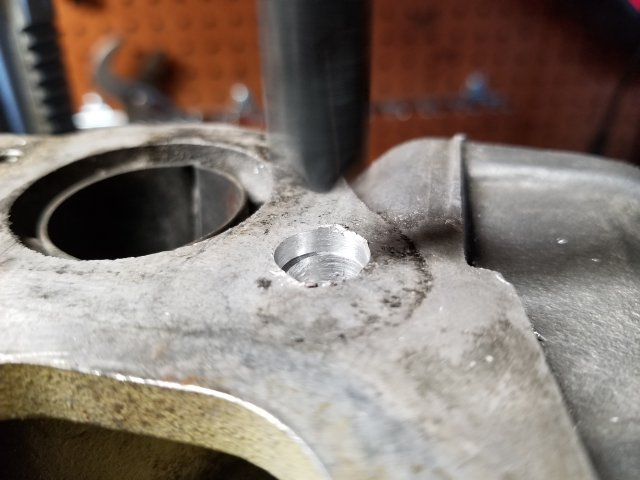
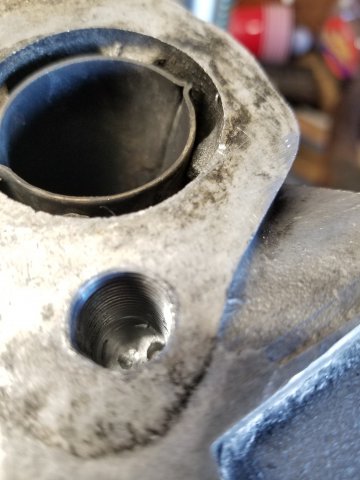
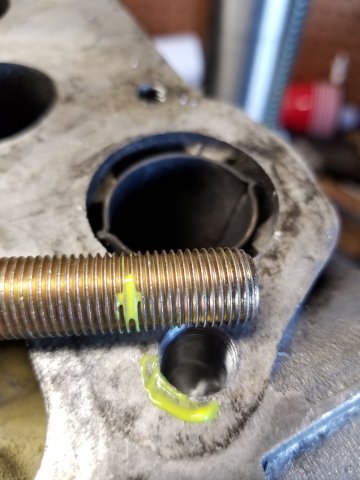
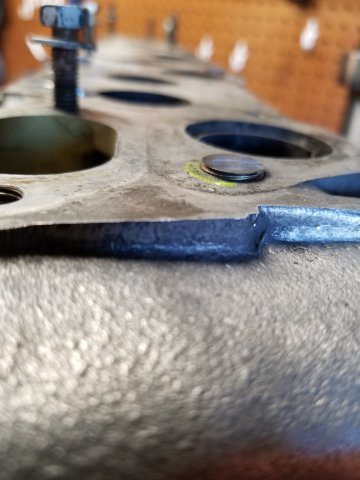
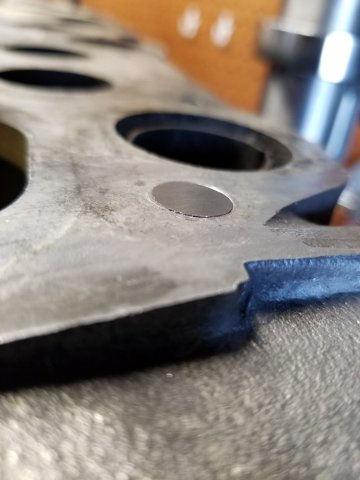
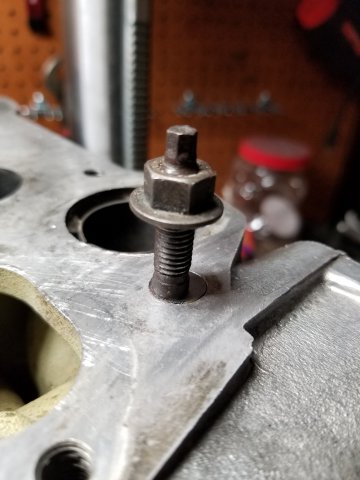
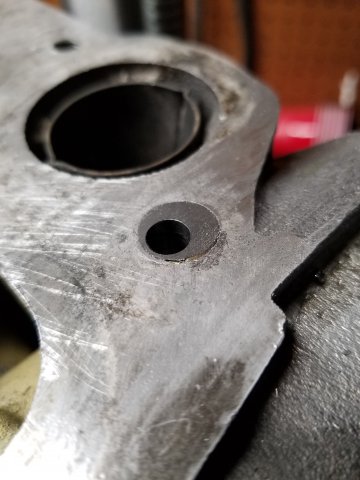
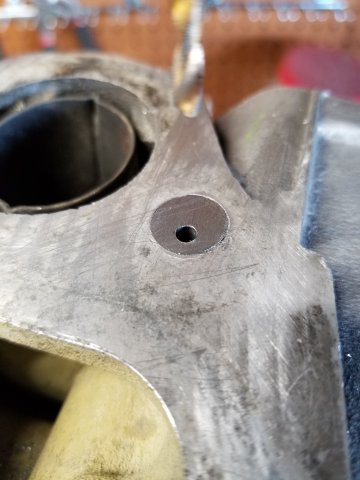
Holy lack of update batman! So July 2016, I was prepping the MN47 and removing one of the exhaust studs and it broke... A good 1/4" under the surface too. So, pull out the drill, put a hole in it. Done. Make it as big as you can comfortably get. Done. Use an easy-out to extract it and make sure to use one that is getting good depth. SNAP! MO#@)*I)$$ That sent me into a bit of a spiral and the project stalled. A few months later we were looking at buying a house, and in October 2016 we purchased and I moved the garage and such. Between family life and work I just wasn't motivated to solve the problem. I felt the best option was to just drop it off with a machinist, but local labor rates are high, and I don't want to gamble with what could be a "quick" $250 solution, or a $500 "OMG Stop spending my money and give it back!" because they couldn't remove it all after the first two hours of labor. Come last summer I felt like I needed to really give it a go again, so I did what any good DIY'er would do. I worked up the motivation and spent most evenings out in the garage while the kids played out front standing over top of my head on the bench with a drill. Drill for a few minutes, check progress, sharpen bit. Drill for a few minutes. Check progress, sharpen bit. Eventually (about two weeks later), I got all my failures and tears of sadness removed from the head and was left with a not-so-round 3/8 hole. This was now a solvable problem, but I'd need a drill press or milling machine to get a TRULY round hole and not wobble another oval into the head. Another few months passed, mostly due to work transitions, and eventually (about two weeks ago), I bugged someone about borrowing his bench height drill press. I went out, bought a tap and corresponding bit and went to work. It was a bit butt clenching at first but after I felt success the motivation momentum drug started taking effect. In one week I had the hole round again, tapped, plugged, new hole drilled and tapped with a fresh stud ready to go. Now the head is back on and torque, manifolds are on ready for final torque down and I'll be finishing the last of the prep work before doubling down to do the EFI. Which brings me to the major changes. I'm on a big "forget all while I'm at it's" kick right now, and I'm forgoing sequential fuel and spark in the name of running. I'm just going to control the OEM dizzy directly (same as the DIYautotune write up) and run batch injection. E85 can wait. Boost control can wait. Sequential fuel can wait. Coil on plug can wait. Those are all things I'll be far more motivated to do, once I'm driving this thing again. ...pics to follow.
-

Twin cam head for the L6 from Derek at Datsunworks
Gollum replied to Derek's topic in Nissan L6 Forum
Yes, the "high 10's" was in reference to 1/4 mile times. Not sure we ever put it on the dyno. Best guess was it was making about 350-400hp without the nitrous. Quite a lot of HP for an OEM longblock, with a fairly decent compression ratio, and not even basic port work. I'd imagine we were giving up a lot of power, if only just under the curve, in system optimization. But landing in the 10's NA is a good safe spot. Not leaving piles of power on the table for pump gas, and leaves room to go either way down the road (force induction or higher compression pistons). -

Twin cam head for the L6 from Derek at Datsunworks
Gollum replied to Derek's topic in Nissan L6 Forum
Word. I cut my teeth on a turbo B16 with nitrous for good measure. Ran high 10's in a del-sol on a good day (slicks, no street rubber). Was running stock pistons and head. -
I'll give you my address
-
BTW, if the ad is accurate (and the pictures match imo) then I'm not far from the area. Would gladly go look and talk to the owner for anyone. About a 30 minute drive and a bridge toll, but in the area I grew up, so I know it well.
-
$6k isn't bad for that little piece of history.
-
Been working on the car in tiny bite size bits, and it's coming along. Both headlights are wired up now, I have some interior lights wired in, but I don't have them on a switch yet, but I'm getting close to done for the chassis wiring. I didn't like the OEM horns much, so I picked up some new ones yesterday. I really like how well this worked out with such ease.
-
More wiring: https://youtu.be/y8IMRUvtMGY
-
Switch panel got wired a while ago now, just hadn't posted: And then tested a thing: https://youtu.be/GKPC6T2eQQE
-
Right, point taken. The REALLY expensive route is to just buy a case of 190 proof everclear. You can also get tax-paid 190 proof for about $500 for 4 gallons.


