-
Member Statistics
33060
Total Members2821
Most Online
All Activity
- Today
-
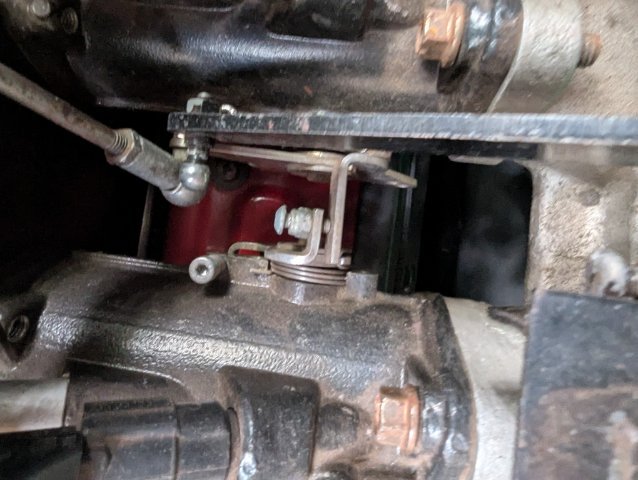
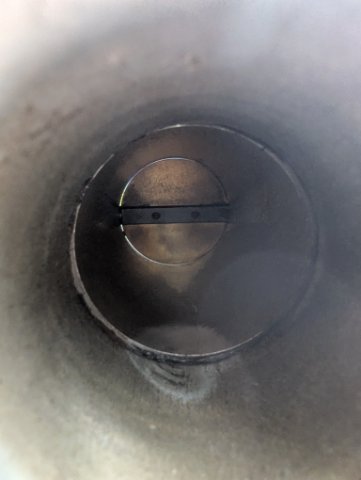
There should be adjuster like this between each, to make each pair flow the same, and the bleed screw is to balance flow within a pair. If the bleed screws don't have enough, then hold the throttle body up to the light with the throttle closed. You'll probably see the butterfly isn't perfectly centered because they weren't assembled very carefully. So they flow different amounts of air. You can slacken the two fixing screws and recenter the butterflies to balance them. But.... Why does the first need more air on yours? That doesn't sound right.

-
I guess I don’t know how that’s done and what it does . I run cable that moves first ITB that moves the rest . The first ITB needs more air but there’s no way I can see to adjust its linkage without moving the others . I hooked up the cable and this engine started and idled great - so no real complaints !
- Yesterday
-
I've used this one a few times. Didn't subscribe or do any group drives, just picked a map and went. https://rallista.app
-
If you have a Z car, this is a required modification as soon as you want to put a larger front sway bar on the car. Reinforcement plates. Without these, the larger sway bar will literally pull itself out from the treads and cause major issues. No one told me, I managed to just see them, and once I looked in to it, I was shocked! https://zcardepot.com/products/sway-bar-mount-reinforcement-plate-front-240z-260z-280z?variant=32170183262321¤cy=USD&utm_source=google&utm_medium=cpc&utm_campaign=google%2Bshopping&gad_source=1&gad_campaignid=17820837536&gbraid=0AAAAADgHqXunKXwkRdKYJKxJH-WU_4VvI&gclid=CjwKCAjwruXBBhArEiwACBRtHZNWcNIiwbMvUrypRpviE3xNi1UuajMNdG7ffhovH9Z5NiwuNSG0IhoCQwYQAvD_BwE
-
Den the only table you needed to flip the Warm bit at 175 is the WUE table all the other can have a higher temp values. Looking at the log the idle RPMs is on the higher side at startup and is lean. It could make the car stumble if you're driving it when it's cold. Since we are so close with our required fuel, between the two. I tweaked the startup and idle settings. Give this tune a try. 001_Startup _and_Idle_2025-05-30_05.55.19.msq
-
I don't really remember I'm afraid, but I know there wasn't a lot of adjustment available. Have you looked at recentering the throttle plates to see if you can get more consistent air flow when closed?
-
It's been a while but I've been getting back into the build this week. Since the last update the chassis is waiting to be scheduled in for restoration hopefully next month and I got busy with house projects, which coincidentally led me to South Florida where I picked up a Nissan competition oil pan from motorsports legend Greg Ira. The oil pan has seen better days with some motorsports style clearancing and a bunch of JB weld slathered over the side which after torching turned out to be covering a large crack. I think it's an interesting piece worth saving, and as the pan needs work it seems fitting to further modify it. The plan is to repair the cracked area and also weld some reinforcement along with a -10AN turbo oil drain. I'll try my best to straighten everything out then have it re-zinc coated. I also received word that my r34 GT-R geared Q45 OSG LSD diff is done so I'll dedicate a post to that when it's back in my garage.
-
If this car only inspired, I'd feel pretty good about it. As it sits, planning to go up to Packwood WA for an auto-x event in late June. Basically, doing what I should have done in 2023 and actually shaken the car out before driving it on a race track! From there, I'm hoping to get back to The Ridge in July with OnGrid for an HPDE day, and then up to Area27 in BC for a couple days with a buddy. That's going to be a great event, so I'm pretty stoked on that one. Got material coming tomorrow, should be a good weekend of welding!
-
Here's some visual food for thought. Looks like lots of space. Maybe no problem? Found the picture on eBay. I'd share the link but they put way too much stuff in it. There's an extra T. Don't know if it matters.
- Last week
-
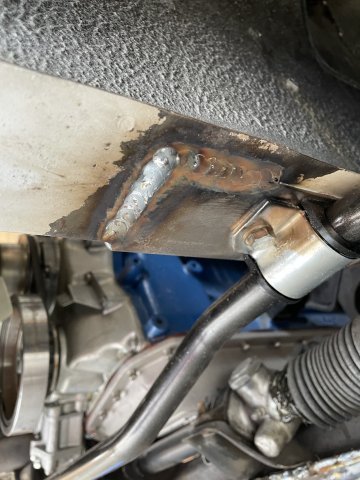
I think the OP said that the motor mount was obstructing the steering linkage.
-
I don’t need much and it’s just on the first ITB. Maybe really have to crank out the bleeder to get anything out of it ?
-
A lot of work for sure, getting me pumped for my own build!
-
That is a lot of work. Cool to see this come together and can't wait to see it run on the track.
-
Ran across the Roadstr app on youtube. Seems to be bigger in Europe than in the states, but shows a lot of groups here. Its one of those apps that you can make a route for a drive and share it only to your group, and everyone can follow it. Anyone here have any feedback on it or any similar apps for group drives?
-
Yes I did on the FAJs, I just about got the amount of adjustment I needed.
-
 Hello! Do any of you have the Chase Bays master cylinder that eliminated the brake booster? I have been looking at them, and wondering if any of you guys have one. I'd love to hear about it, thanks!
 -
Hello everyone, I'm getting ready to start my engine for the first time in the next few weeks hopefully. This is an L28 build using MS3X and I would really appreciate any base tunes or configuration files from those with similar setups so I can have a good starting point. Here's a summary of my engine: L28 using forged pistons, P79 professionally ported head, 10.2:1 compression Isky L6 grind, .540 lift & 270 duration ITBs with TPS and utilizing large balance tube GM MAP and Ford IACV connected to balance tube Crank Trigger and Jeep CAS GM-style coolant temp & oil temp GM-style IAT Electric fans using PWM controller 32 lb/hr bosch injectors GM LS COP If you've got a similar set-up (ITB, MS3X etc...), I'd appreciate if you can send me your .msq file and a recent datalog if available to get a sense of timing, VE, AFR and idle control settings. Thanks in advance! I'll be happy to share what I come up with once it's dialed in. I have also posted this request on FB Church of L Series.
-
Wow....that pic above is a great solution but is the starter really in the way on OP's car?
-
Did you have to use the air bleeds to balance ports ? I tried opening one up and didn’t get any response in the air .
-
steveoexige joined the community
-
I'll try to see if there's any voltage surges, I just don't have a multimeter with me
-
I'd guess that it is a 1970 - 1977 Z. Could be a bad regulator. How about some ammeter numbers? "Jumping" is not enough. Even better would be some voltage numbers at the battery. A good opportunity to get some practice with a meter. Good luck.
-
Car: 1974 260Z S30 So today I started my Z and the cranking was incredibly slow, it took 20 seconds of very slow cranking and the car started. Then I drive it for a bit and It seems to be fine. I went to O'Reilly's afterward and have them test my battery and alternator, the machine at O'Reilly says it's a bad alternator and battery. I'm worried that the alternator regulator is zapping the battery because on my ammeter I see rhythmic jumps on charging only when idle. When I turn on my headlights or start driving a little faster, the jumping goes away. My alternator is the old style with external regulators and after cleaning The regulator a little bit, I started the engine again and the jumping is less but still exists. I seen on fourm that it is normal but I have my doubts. My fuel gauge recently went out as well which I have a suspicion that the regulator zapped it. I'm quite confused to what is happening but I would like some pointers to what do you guys think is the best thing to do now. I can go back to O'Reilly's and have them check it again after I clean the grounds n contacts (The regulator insides look pretty clean but have extremely corroded screws so I gave that a clean, sanded some paint off my mounting point for better contact and cleaned up the screws), or I can replace the battery but I am worried that it's going to be zapped again. Or I can replace the alternator with an internal regulator version but I really don't have money for that currently. TLDR: My ammeter is jumping and has been for a while (I think I always had it) when idling. My fuel gauge recently started freaking out, and today I had a weak starter due to the battery being bad and relatively new. Please let me know what is the best way to proceed, thank lads! VID_20250527_194359223.mp4
-
Thanks, Tom. The idle is smooth/predictable, without any oscillation. 1. WUE is changed per your config. I set it at 175F. 2. I left the EGO correction above 1300 rpm since my original thought was to prevent it from making changes to my VEs keeping a specific AFR there (13.5 - I am running batch injection, engine runs great with a healthy vacuum). Should I lower the EGO rpm limit from 1300 to 1100? I am still fiddling with the IAC stepper to lower my initial warmup idle. It jumps to 1600 rpm, I might move it to 1300 rpm by cutting the number of stepper steps. 3. Adjusted my ASE settings (percent/taper) I noticed that when the engine is hot, and I restart, my AFR is about 14.7-15 during the first 30-45 seconds. Then it goes back to my 13.5-13.9. Should I leave it alone or instead (this is my OCD is 'talking'), increase my ASE percent adder to a higher number to add a little more fuel (for ex., at 175F, from 9 to 15)? I will take the car for a test drive this week-end, will do a data log. Appreciate your suggestions! 2025-05-27-ASE-changes.msq 2025-05-27_17.45.45-hot-restart.mlg 2025-05-27_17.33.07-cold-start.mlg
-
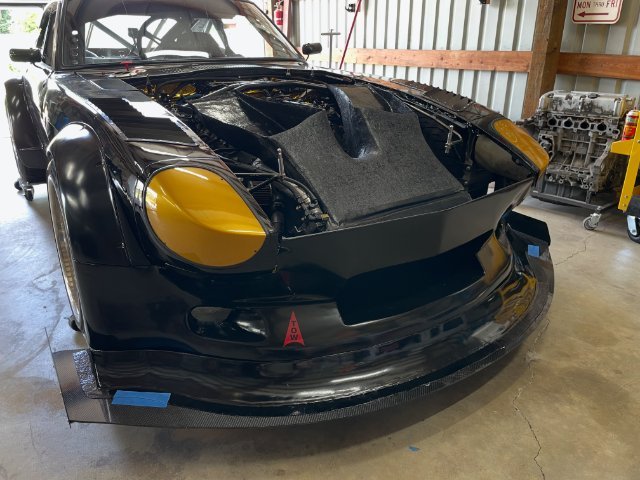
Good progress over the long weekend. Paint, bondo and fiberglass is mostly a waiting game which is pretty annoying. Got the duct glued together and painted so it looks like something. Trimmed it up a little and we are in great shape! The holes in the hood are a little bit large, but that's ok, and will likely get solved with a new hood (fiberglass) or something on top. Also got the transition piece painted which is exciting! This will help blend the splitter into the air dam, and will get taped onto the splitter once I put some trim on top of it. Need to get to work on the new intake pipe as well, going to put the filter over near the wheel for now. In the future, I'll flip the manifold and pull air from the cowl/wiper box area, but that's a bigger lift in terms of fabrication. Can't tell you how excited I am to have a metal fabrication project after 10 months of composites.
-
Years ago, I had to add an extra u-joint to get around my headers. I used a Sweet Manufacturing U-joint and a rod end. This was way back in 2003, so I don't remember the specific part numbers. You do need to add the rod end as an additional support. You need to align the universal joints so that they are phased properly.


-
Who's Online 2 Members, 0 Anonymous, 854 Guests (See full list)