-
Member Statistics
33261
Total Members5167
Most Online
All Activity
- Past hour
-
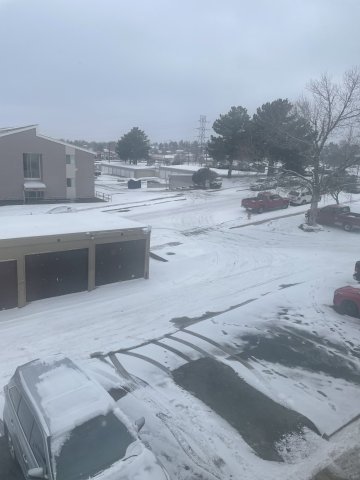
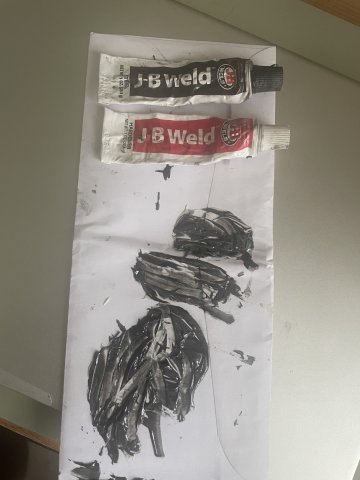
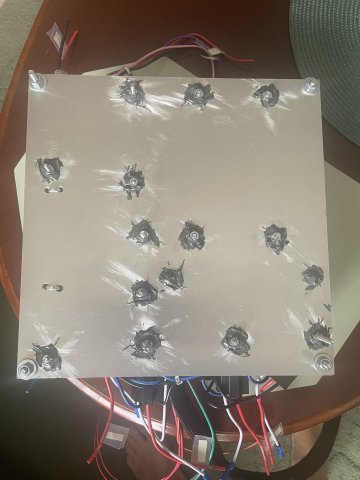
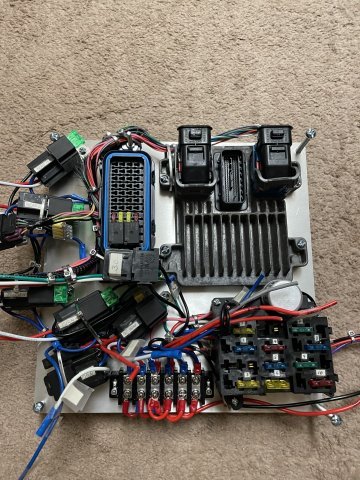
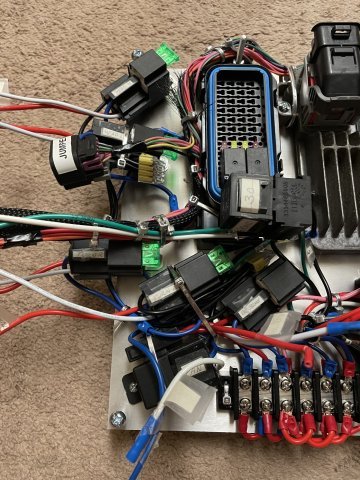
01-25-2026. Winter weather continues! And so, the work I can do inside for the 4200 swapped 260Z.....continues God willing. I flipped my electrical "Central Station" over and sanded the aluminum around each nut and sides of the nuts down to make it so the JB will stick and then coated them to make the nuts permanent. The idea being, I don't want to have to lift this back off once installed. PICS:

-
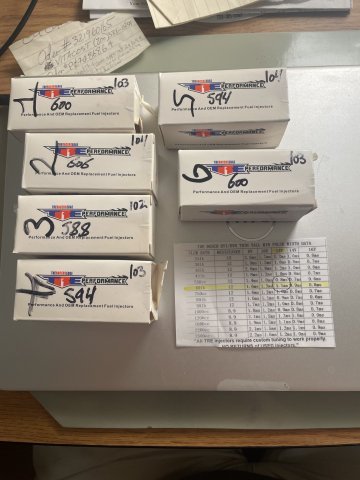
Ok, so according to TRE the numbers I mentioned are static and Dynamic values for each injector, and are used by the tuner. Cyl Static Dynamic 1 - 600 103 2 - 606 104 3 - 588 102 4 - 594 103 5 - 594 104 6 - 600 103 Interesting. Glad I took the time to keep track of which one is in which cylinder.
- Today
-
 Thanks for bumping this thread, good read and some good resources for me to follow up on. I will be getting to the aero parts of my build soon and this already has given me some new ideas. Balance is definitely the big thing that can be missed and tire sizing comes into play here too which I’ve already been thinking about. Most likely going with a wide square set up for the track, so increasing oversteer with just tire set up.
 -

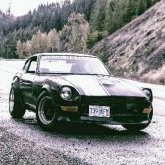
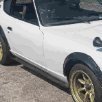
A 2026 SEMA SHOW 260Z Build all the way from Great Britain
toolman replied to toolman's topic in Body Kits & Paint
Part 5-Liberty Walk Body Kit Installation This video covers the preparation for the installation of the Liberty Walk Body Kit. The 2026 SEMA Build starts to take shape. -
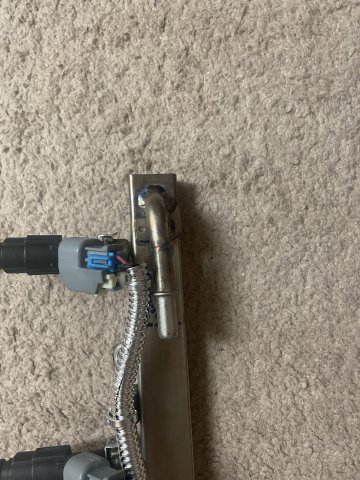
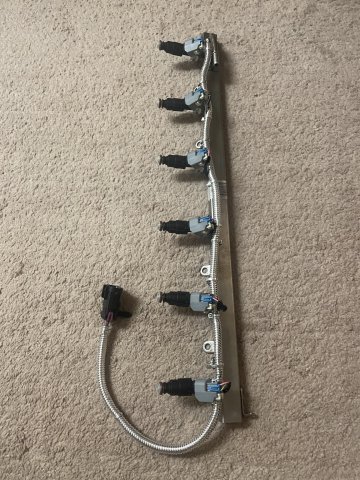
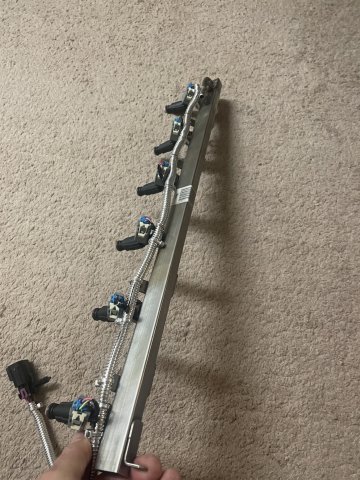
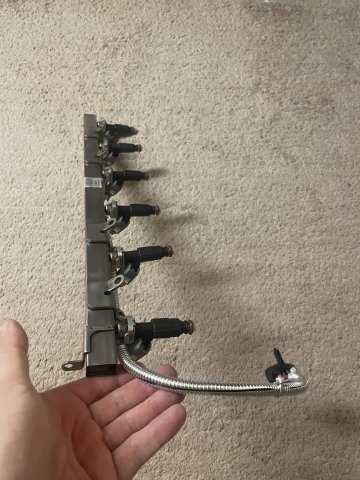
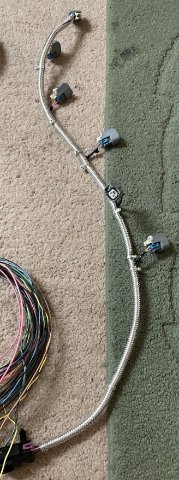
01-24-2026. Well, I went ahead and put my fuel rail together today. My factory rail I had the port for the fuel line hookup cut and custom welded on by Wagner Fabrication here in Colorado Springs, CO, for a cleaner look, and the wiring was custom made by Jemery at Lime-swap. Injectors are Siemens DEKA 60 lb EV6 injectors from TRE. You can see I put the chrome wire loom on as well and used some chrome tie wraps to make it look half decent. PICS:
-
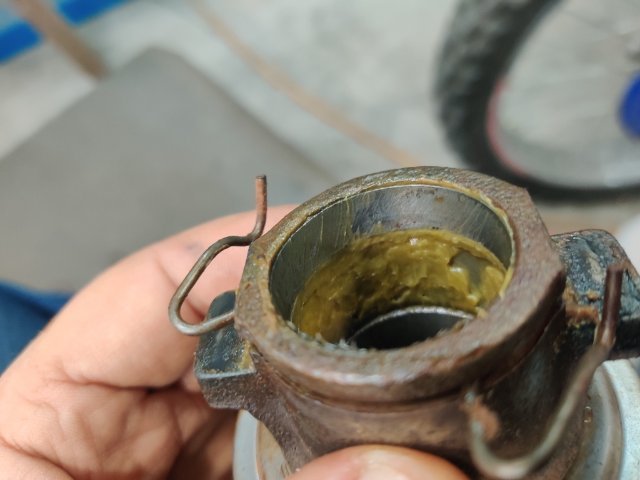
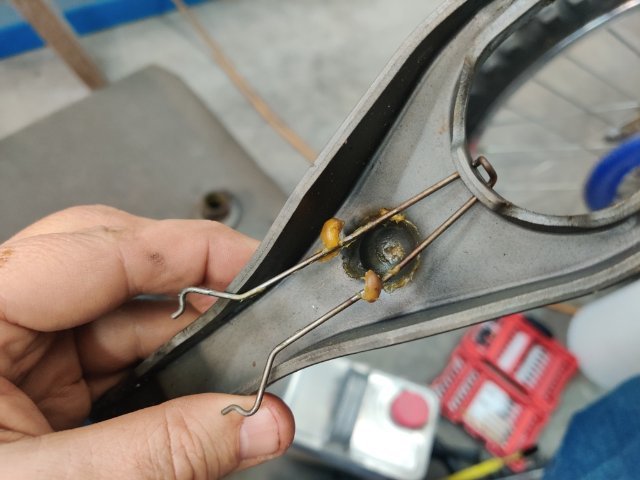
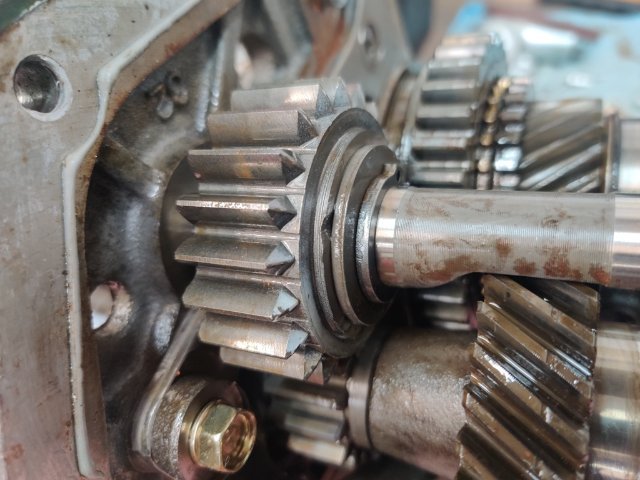
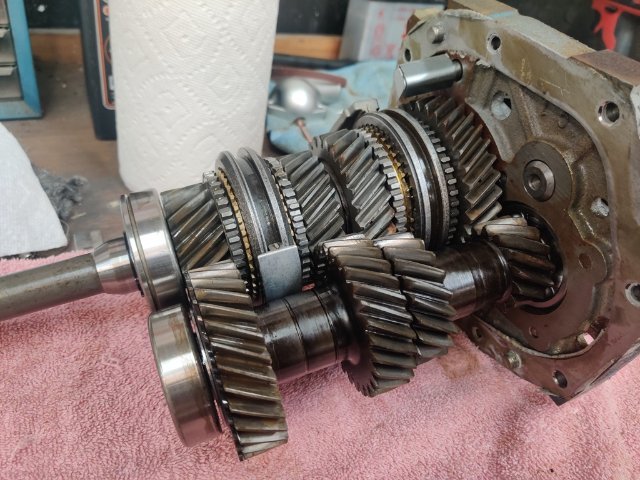
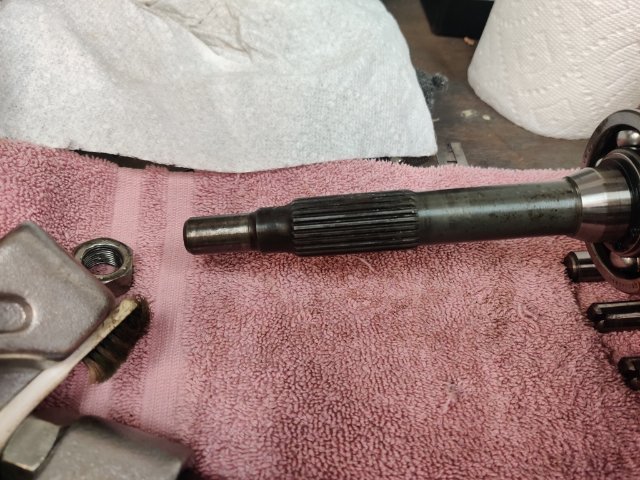
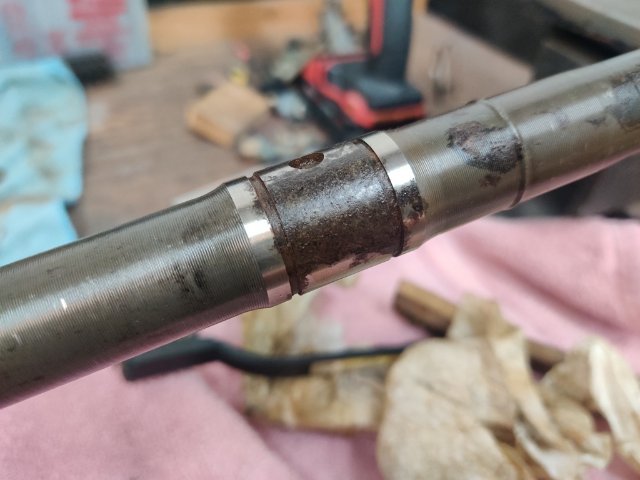
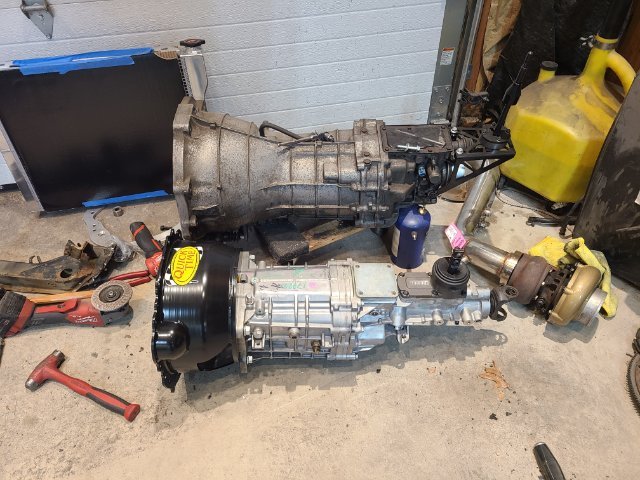
I think I scored with the purchase of a 240sx transmission. When talking to the salvage yard, they said the transmission came from a crash test car and it had 28 miles on it. Well... I was quite dubious, but they only wanted $100 more for it than one with 77,000 miles. So, I bought it. Today, I took the gear assembly out of the front and rear housings. The clutch release bearing sleeve has no visible wear marks and is packed with clean grease. The same grease is present at the clutch fork pivot. And, the reverse idler gear in this transmission which I have typically seen is chewed up on one side in used transmissions, looks like new (see the third pic)! Unfortunately, it has some specs of rust in a few places. There is one badly rusted spot on the main shaft under the speedometer drive gear (third pic) on about 1/2 of the surface on the diameter there. But, having looked it over pretty good, I think this will be a great transmission for the car. I don't need to use the speedometer drive gear because the car will now be equipped with a GPS triggered Speed Hut speedometer. I think I will just need to replace the rear most bearing (due to some light corrosion there), and give the gear set a thorough cleaning, and it will be good to go!
- Yesterday
-
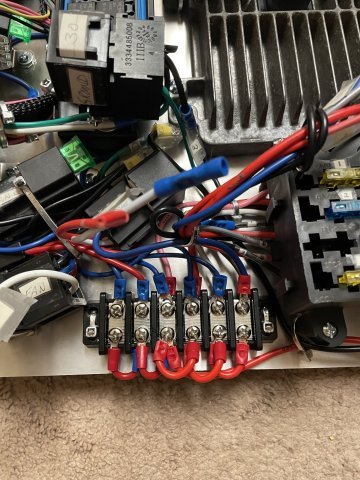
some pics of the setup:
-
Here is a video I made for my wiring "central station". click below" V1.MOV
- Last week
-
Ford Super 8.8 irs swap thread. Rear brakes too
Invincibleextremes replied to Invincibleextremes's topic in Drivetrain
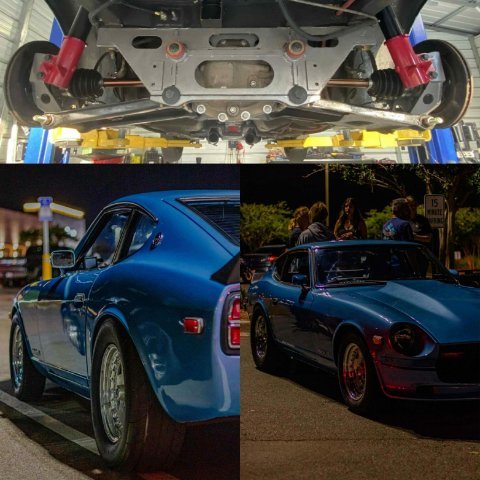
2016 camaro front struts from Strange were adapted to fit Justin Gilberts 1,xxxx hp build for maximum adjustment 2 way.
-
The Video is the most detailed Rebuild of the Power Brake Booster Unit. As the 240Z family goes older, aftermarket rebuild boosters are getting harder to find. In some cases, they are impossible to find so rebuilding maybe the only solution.
-
FYI -- I've confirmed with SuperDan that the site certificates have indeed been updated. Some users may need to refresh their browsers to update the cache or empty the browser cache. Cheers.
-
This matches my experience too - a lot of aero “common knowledge” starts to fall apart once you actually try to measure things. The front-vs-rear balance point really stood out to me; I always assumed any lift was bad, full stop. Makes me rethink how careful you have to be adding splitters or diffusers without addressing the whole car.
-
AxtoFenway joined the community
-
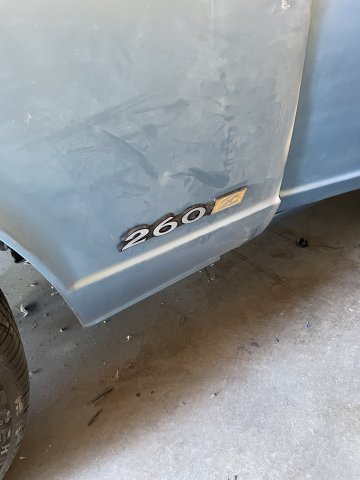
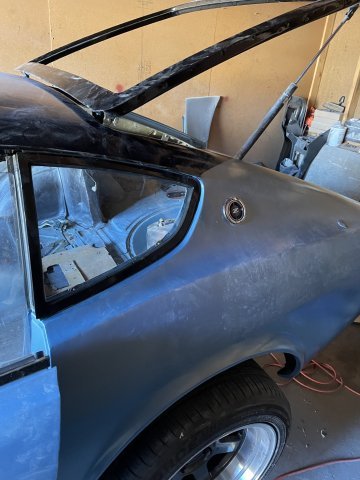
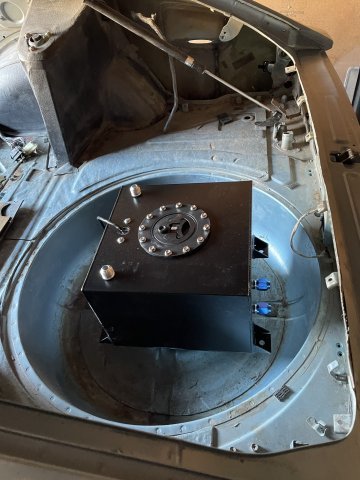
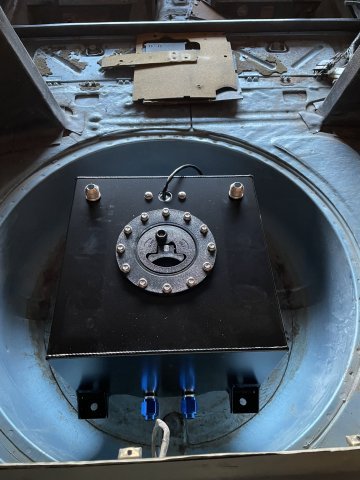
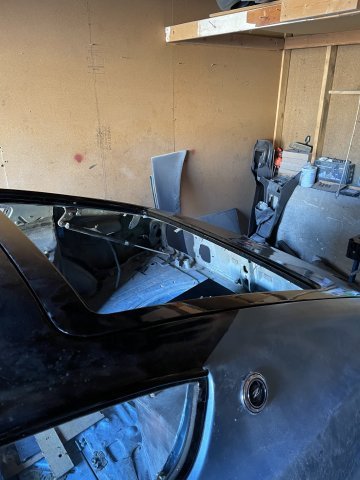
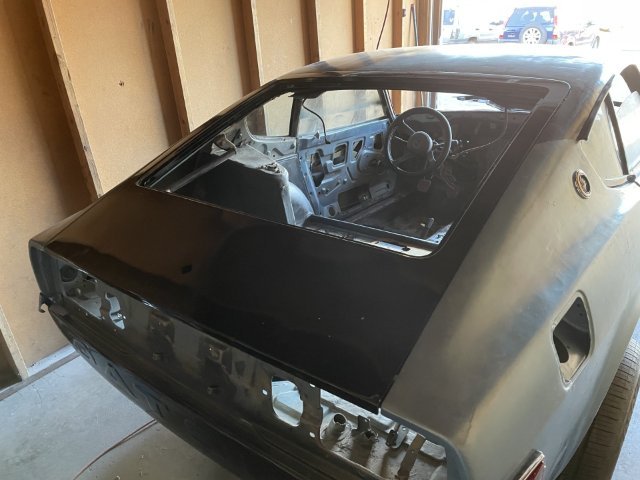
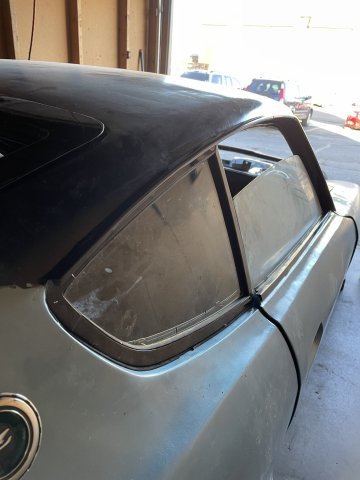
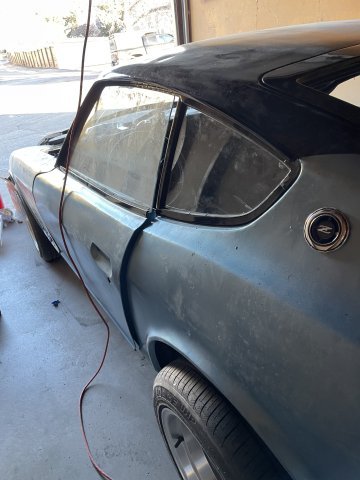
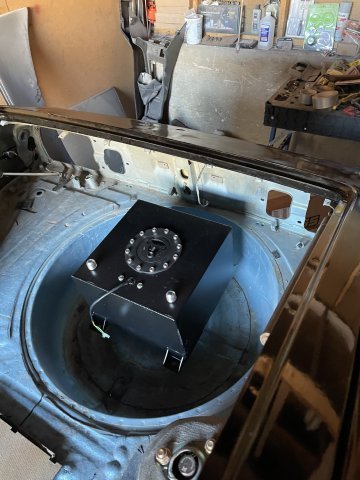
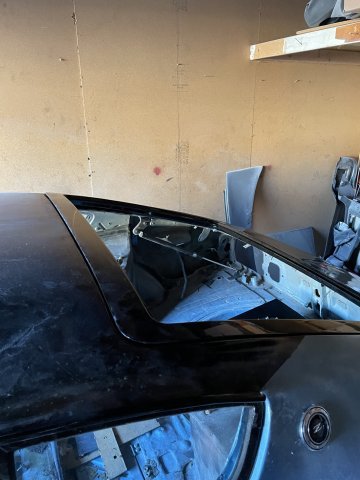
01-21-2026 UPDATE: I started the day vacuuming out the entire interior......A ton of bondo dust, and junk.....finally got it out. Later I will just have to mop it out and a light vac and it will be okay. I then installed my quarter windows, the drip rails, and the rear hatch. Installed the inspection doors and then installed the new parking lamps I got off of eBay, the sail panel emblems, and front fender emblems. A tad bit of clear caulk to help keep them tight against the metal like I want. I was also able to clean out the garage, throw away a lot of stuff no longer needed, empty boxes, etc. I set the 5 gallon fuel cell in the spare tire well for a quick look, it will be on a rack holding it up a couple inches and offset towards the driver's side to offset the weight of the battery which will be to the right of the spare tire well. PICS:
-
 curlyhairedcarlito joined the community
 -
 maxaril47 joined the community
 -
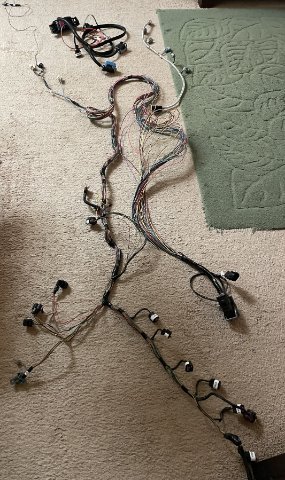
01-20-2026. Engine wiring harness. So, today I took my custom Lime-swap wiring harness for the ATLAS, and stripped off the looms and tape, so I tailor can fit everything and cut the wires down for a good, hidden fit. it's quite a bit of work removing the plastic bracket that originally held it on to the valve cover, straightening it all out, getting it all ready to be installed and then separated and cut and spliced back together correctly. I have these special splices they advertise that melt with a heat gun and solder the center.....I thought I'd try them. Some exposed wiring parts will have the chrome looms I bought over the wires, as you can see in the Injector wiring in the separate pic.
-
Ford Super 8.8 irs swap thread. Rear brakes too
Invincibleextremes replied to Invincibleextremes's topic in Drivetrain
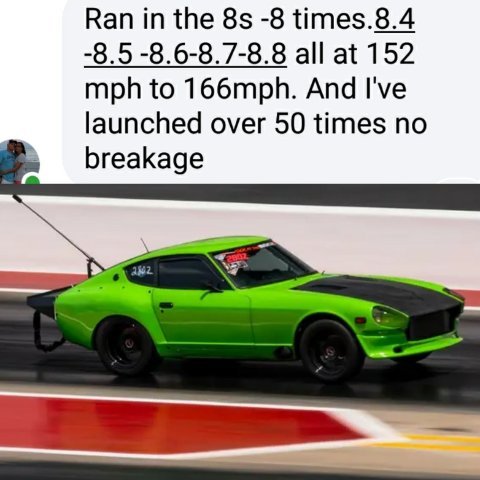
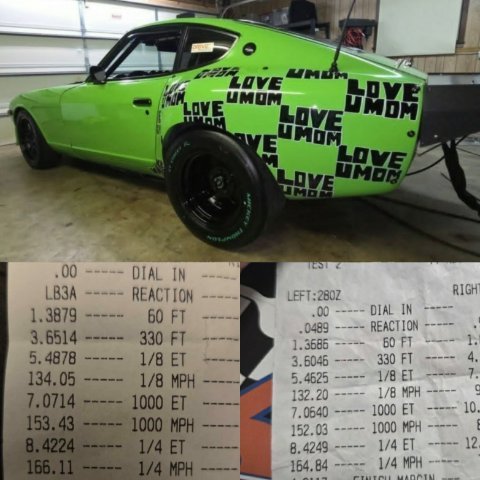
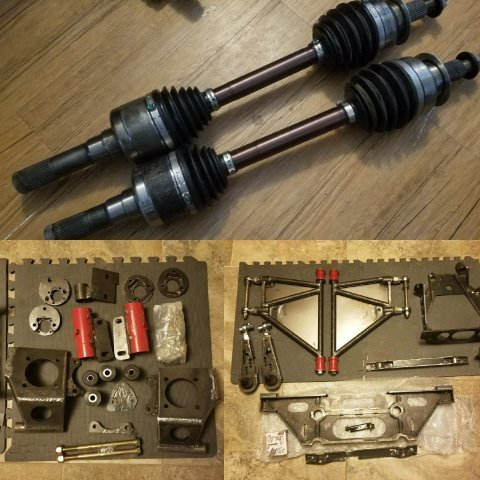
Unless somebody has a faster timeslip, fastest IRS s30 (barely) so far is Terry Garmon with 8.42 @ 166 mph in the 1/4 mile. Also included is a picture of Rick dunns 700hp car with the newest version of the rear swap, and a picture of all the components laid out, including the axles. The setup has evolved over the years, but even the earliest versions are out there putting down thousands of miles with all kinds of high and medium hp levels.
- 282 replies
-
- 1
-

-
- disc brakes
- suspension
- (and 7 more)
-
 rjsicard joined the community
 -
 GetRishBish joined the community
 -
 Infest1382 joined the community
 -
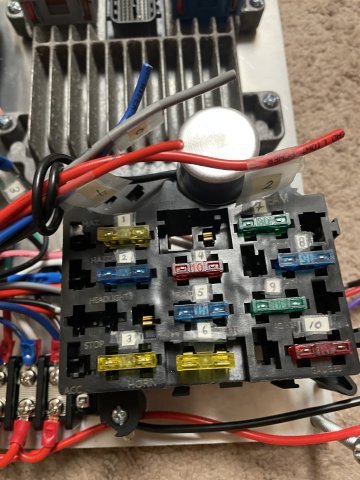
Another pic of the toggle cluster I am putting in my Atlas Z. fused and the start toggle is a momentary switch. when you flip the ignition toggle it will kill all power to the stand alone engine harness that the fuel pump runs through. I love the old school look. The quality of these toggles when you operate them you don't see often these days anymore....I got it at Summit and yep, the price is high, but the quality is A+.
-
01-19-2026 First survey of my customized stand along wiring harness for the GM Vortec 4200 / ATLAS 4.2 engine swap. Keep in mind If I had kept the auto trans there would be more....I also deleted 90% of engine functions as well....only kept the cool stuff like gauge feeds, etc. At least I have a wireless throttle! enjoy the video. 01-19-2026 harness video.MOV
-

280z 1jz track build from a pile of parts
flatout replied to flatout's topic in S30 Series - 240z, 260z, 280z
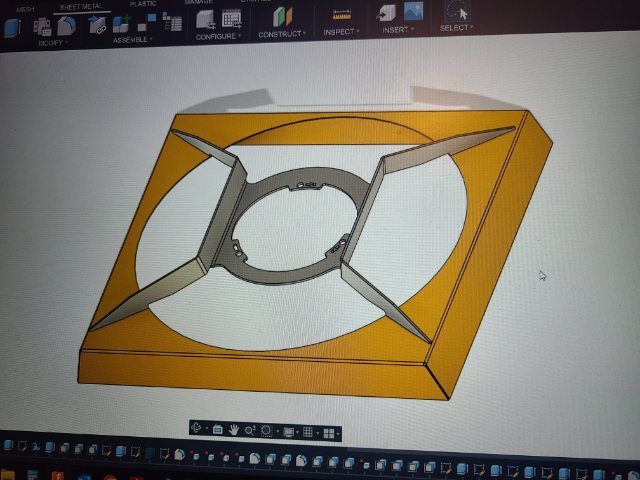
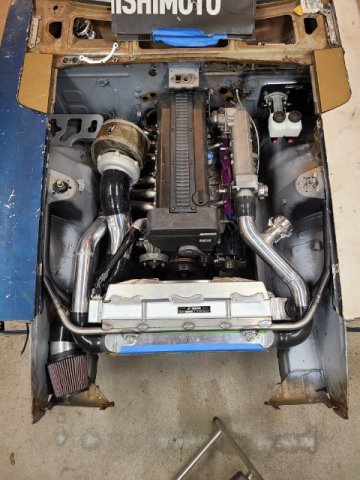
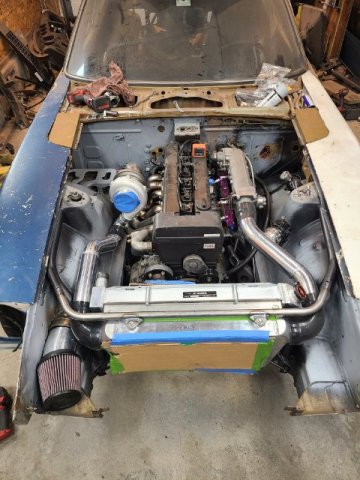
Next order of business was electric fan and shroud, and radiator hoses. I chose the 2016-2019 Camaro single SPAL 18" fan. it will be PWM controlled and is a very popular choice according to the internet as it can flow 5000CFM. Although I cut up the factory shroud to "work" I felt like I needed something fancier. modeled up a base to start working from and had my friends at laserbros in NC laser cut and bend it up. Should have gone one or two AWG thicker so added some bracing as well as some mounts and very happy with the final product. Cut down the radiator and inlets and outlets on the engine and welded on some -16an bungs, made up a couple hoses. in the last photo of the "hose installed" you can see the end of the pipe for the intake I welded into the chassis I mentioned in the previous post. Also decided to move the alternator to the other side of the engine to get it away from the heat. When i pull the engine to paint the bay i'll design and make a bracket to permanently mount it over there.
-
280z 1jz track build from a pile of parts
flatout replied to flatout's topic in S30 Series - 240z, 260z, 280z
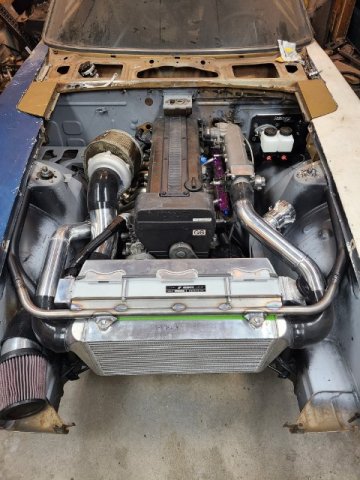
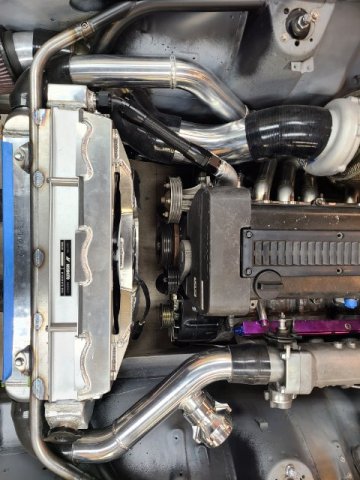
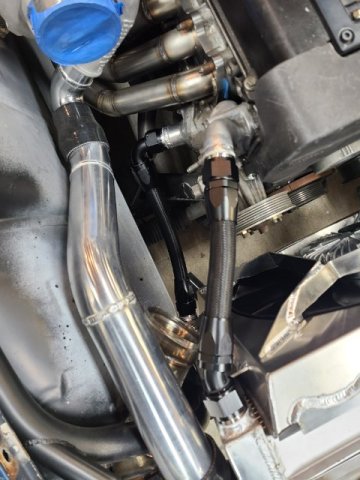
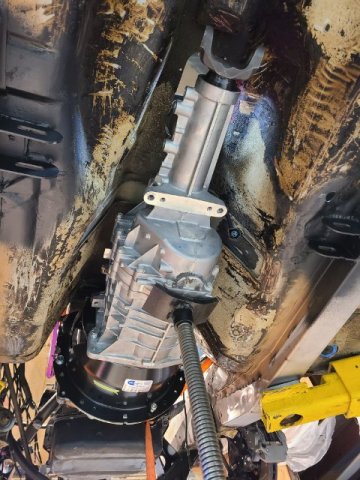
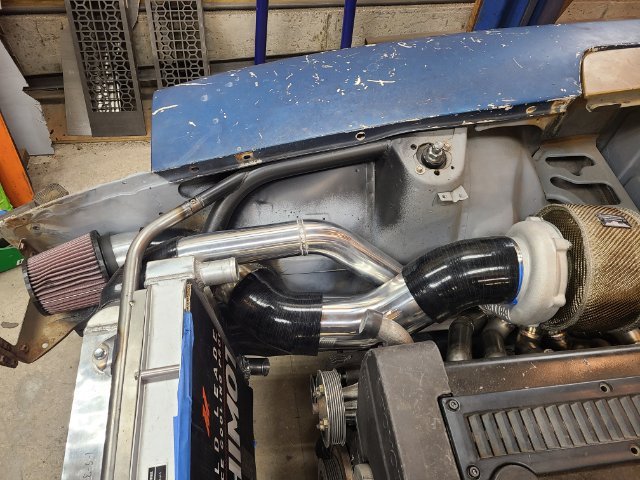
over the christmas break I got the rest of the turbo hot side plumbed. the manifold is like 3/4 welded up. My purge bottle was getting real low so instead of risking it i held off and started working on the rest. Notched a hole in the "wheel well" to go around the new added strut support bar I did that allowed me to run the 4" intake tube thru the front end and put the filter out in fresh air. Just made a piece out of 4" stainless exhaust, notched and welded it into the chassis. welded an elbow to the turbo. simple intercooler pipe made up. tial BOV on the throttle body side. have the downpipe fitted and tacked together back to about the bellhousing. Forgot to note. ditched the 350z trans for a tremec TKX. The size, weight, and gearing of the 350z transmission were all turnoffs to me. having run the tremecs in other cars i knew it was a good choice for this build. Much smaller. better gearing and options for a saftey blow shield made it my first choice. The car already had the factory trans mount cut out (poorly) so i cleaned it up and added a new mount system off the full frame rail pieces. that were also "added" They are so poorly welded that i used "added". I'll finish welding them in.
-
280z 1jz track build from a pile of parts
flatout replied to flatout's topic in S30 Series - 240z, 260z, 280z
Thanks, Im trying my best to build something fun, reliable and something I'm proud of. -
The Actual Chinese Reproduction of Toyota A86 Body was purchased and examined by several individuals who expressed their opinions about the body. The owner will attempt to assemble the vehicle with available Aftermarket Parts( tail lights, interior parts,etc. This body was the same one at the SEMA Show so time will tell its quality and parts fitment is up to the OEM Standards. This body came from the same factory as the 240Z body at the Sema Show. I checked this at the Sema Show and after watching this video, my opinion on this car is there is a definite lack of quality control in the welding of this car. There seems to be a lack of spot welds on some of the panels. On Utilized Body Cars, spot welds determines the strength of structure. Normally, the original manufacturer would use Robot Spot Welders on the Assembly Line. On this car, the welds are not close together thus not providing a strong panel. Another major flaw are the Front Strut Mounting Holes are oval not round as they should be. This shows a definite quality Control Issue. It seems that assembly of this car was rushed and put together just for the show. The Collision Industry has a established Standard -ICAR which provides proper methods of assembly of Body Parts. A ICAR Body Specialist should inspect this car before it is put on the road or used as a race car.
-
280z 1jz track build from a pile of parts
Novice Petrol Head replied to flatout's topic in S30 Series - 240z, 260z, 280z
Fantastic build so far! My favorite thing about this forum is learning new ideas for my build from more experienced builders. I always learn something from the different ways the rad and front supports are built to improve on the factory design, but I also love adding the small stuff to my list, like the gussets on the pedals. Great idea, that I would never have thought of. -

A musician's therapist (The $300 Z)
Zetsaz replied to Zetsaz's topic in S30 Series - 240z, 260z, 280z
Part of the move is definitely to keep the rolling diameter closer to oem. Separate from that it's really just about tire selection. I have lots of adjustability with all my parts, so other things are less of an issue. - Earlier
-
A 2026 SEMA SHOW 260Z Build all the way from Great Britain
toolman replied to toolman's topic in Body Kits & Paint
Part 4-Making the Right Side Gull Wing Door and Detail Work Duplicating the Gull Wing Door to the Right Side Door. Also, some detail work with the CAD Laser Cutting Machine for some Artistic Designs. -
280z 1jz track build from a pile of parts
flatout replied to flatout's topic in S30 Series - 240z, 260z, 280z
Its so much fun being in the pits and having the Porsche guys come over and be so surprised how fast an old car can be. "I expected to blow right past you and I did everything i could to even keep up". We get it all the time in my uncles GT40. Hopefully this year we can have both cars out there doing the same.


-
Who's Online 2 Members, 0 Anonymous, 693 Guests (See full list)