-
Member Statistics
33277
Total Members5167
Most Online
All Activity
- Today
-
I agree with Mitchel. You need to decide what end setup will make you happy and build towards that. With that being said you don't need to go all out and put yourself in debt to do it. If the purist in you says you need it to be nissan powered than that seems like it should be a priority. Do some research on the VQ. There are a couple good versions and a couple that you should avoid. I'm personally not a huge VQ fan but power, weight, balance, etc, should be great in a older Z. Modern electronics make a lot of these swaps easier. companies like wiring specialties or similar, should make generic "swap" harnesses for these engines and will require little integration into the chassis wiring if your not that comfortable with wiring. ApexEngineered makes engine mounts. Transmission options aren't ideal. CD009 are strong but gearing and shifter location isn't ideal in my opinion. I got one for my 1jz swap and didn't like it so went a different route.
-
The money is a big consideration but the main point is more what it’s worth to you. Do you want a particular setup and is the money more secondary, is money a primary driver, do you want to slowly upgrade or go all at once. I see a lot of people mention only the costs of the build but if somebody is really passionate about something then it doesn’t matter as much. For example the fuel injection on my ’77 280z isn’t in the greatest shape, she drives good enough but the AFR readings aren’t the best (extremely rich at idle and slightly lean at open throttle). The economical thing to do is to just swap over some triple Webber carbs, but since I would like to keep the fuel injection I decided to, eventually, slowly upgrade the fuel injection with a new ECU and a set of ITB’s. I might spend 3 to 4 times the money but I’ll have a car that I want, as I like it.
- Yesterday
-
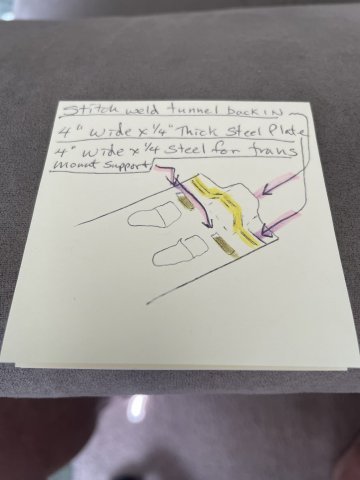
ATLAS Z: Sometimes, it's easier to remove the obstruction to get stuff in, then re-isntall and mod as necessary. As mentioned, I am reinforcing the tunnel and floor with a 4 inch wide steel plate from one side to the other, welded in at the door jamb on both sides, welded across the floor, up and over the tunnel, one solid weld. steel is 1.4" thick. Add a massive amount of reinforcement for the power level. When I re-welded my radiator support I did the same thing....took the time to reinforce it and make it stronger than before.......same concept your body uses when you break bone, it repairs larger and thicker. I showed the jack pick for shock value....hehe it was a last resort, and again, I didn't get UNDER it.........I had the trans on a jack all ready to go, so I just pushed it under there to it was in the well then lowered it back on to the jack stands.

-
Mitchel0407 gave you some decent advice. If it's all about the dollars, either rebuild what you have and perhaps go to a manual transmission. Next better choice would be a new GM crate engine. Small block GM engines are reasonably easy to work on and more or less stock crate engines can be had from many sources that don't cost an arm or a leg. I have had many z cars over the years with stock engines, V8 GM powered, stroked out big cam four br carbed car and a high hp, zillion dollar track car to mention a few. I sure had a blast with all of them!!! Like someone once said " if I had all the money I ever spent on Z cars, I'd spend it all on Z cars".
-
I would love to have an L28 as well, but most L28 engines I have seen are well over 200k plus miles and I’m not sure where to get parts for it to rebuild a the engine. I have seen the California Datsun L28 rebuild kit, but heard it’s not worth it. If I were to get a used L28 and rebuild, which isn’t a bad option. Where can I buy the parts for it?
-
I really like the L28’s as they have a lot of character and an amazing sound but a used VQ would also be a great option. I don’t know exactly what you would need but It may be a good idea to get a wrecked donor 350z and use its drivetrain components together with the Pro Touring or Track Attack suspension kits from Apex Engineered. That may be the easiest route if you want to go VQ or even RB (there subframe accepts loads of different engines). But if costs are a driving factor then finding and even building another 350 might be the best option. A swap done right can run you $10k to $15k easily as it’s not just the engine you need to swap but also the driveline, suspension components and electronics.
-
Swap in an L28. They're a Nissan engine, cheaper than RB and pretty easy to swap into an S30.
-
The V8 has a blown head gasket. I have always wanted to go back into a Nissan engine, but the RB's are too pricy. Would it be easier to find a used car that has everything or or find a little bit of everything from somewhere else.
-
What are the reasons for wanting to go to the V6? I would think it’s just as easy (or hard) going to the V6 from a stock car vs the modified V8. You’re going to need a lot of new parts either way. You’ll need a way of mounting the engine, new transmission, driveshaft and engine management system. More computers and sensors on the V6 will be a lot more wiring.
- Last week
-
bodazos76 joined the community
-
I have a 1972 240Z Chevy 350 small block with 3 speed automatic that I’ve been thinking about swapping for a while now. I’ve been thinking about getting a VQ35DE/HR. I don’t have a lot of knowledge and this will be my first time swapping anything as I bought the Z with the V8 in it. I’ve heard that if I want to swap I should just get another stock Z instead of swapping the V8. What I want to know is that would it harder to swap with a current V8 in it? And what are the parts that I need for a complete swap?
-
Reviving an ooooold thread but wanted to give it a try as this is the only case I found that somebody worked on getting a Bee-R rev limiter to work on a L-series. @GabeDiaZ27, have you managed to get it working? I got a Bee-R lying around but cannot find a way to wire it up to a L series running a ZX distributor...
-
Dash cap is on! next is gauges and center section install. run the wires so once installed the wires are right there and can be easily wired. Speedo is GPS. Speedhut gauges. Made in USA, cost is like sending a kid to college
-
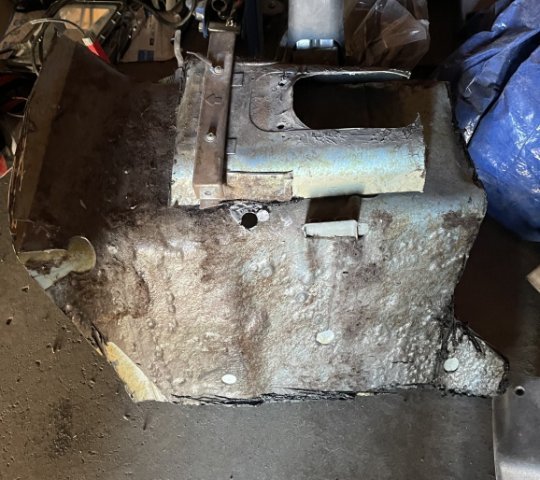
I removed the rest of the list of items so I could mount the car on the rotisserie. With the glass still in the car, the center of gravity is quite a bit higher than the other Z I restored. When I went to rotate the car body, it got away from me and flipped upside down even with me trying to hold it. Luckily there was no harm done, and after adjusting the height a bit, the rotation of the car is easy to control now. As you can see, the floors are bare metal. They have been like this for about 15 years, but the car mostly has just been stored inside, not driven. It has been a major item on my to do list for this car to address a few rust though areas on the floors and to repair the dented up frame rails and floor. I will also be installing some plates for the safety harness belts. It will be very nice to get the floor fixed up and get the floor protected from the elements again, finally. The original frame rails are pretty bashed in. And the right side one is missing several inches of length at the rear because it rusted and I cut it off years ago and did a partial repair on the floor panel at that same location. I am using both a spot weld cutter tool and a die grinder to cut through the spot welds. The die grinder bit I am using works quite well. Same for the spot weld cutter. I worked on removal of the right "back half" of the frame rail yesterday for about 2 hours. I am only about 20 minutes from finishing the removal of it. Then I will remove the driver side one.
-
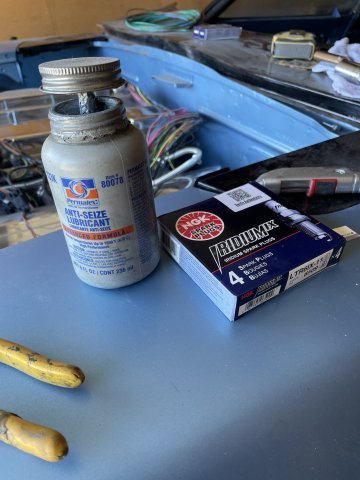
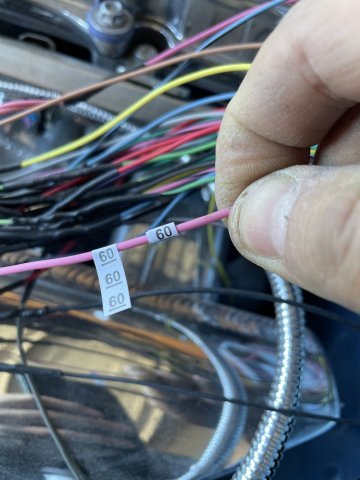
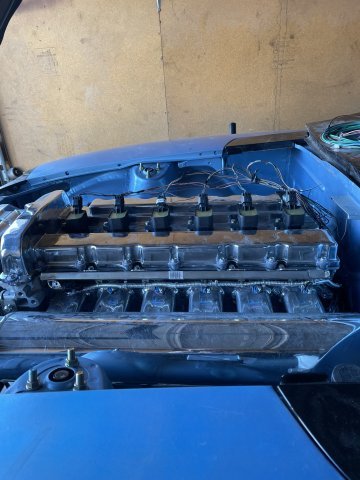
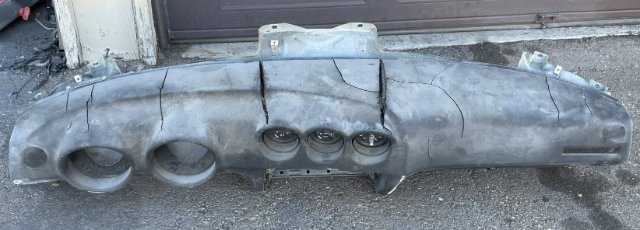
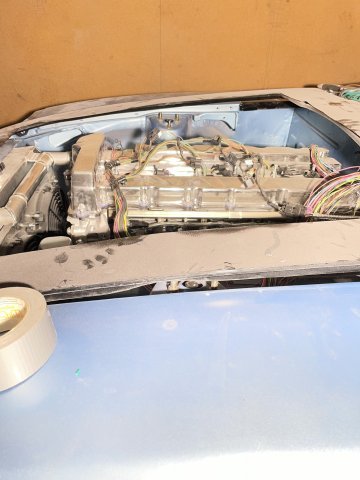
02-15-2026 ATLAS Z UPDATE: Started off pulling the plugs, putting the transmission in neutral and putting a wrench on the crank balancer. I wanted to ensure it turns over easily and thus I know that the trans is together correctly. It's perfect . I then swapped the AC Delco plugs it had for some NCK Iridium plugs as recommended on the 4200wiki pag., but put a daub of anti-seize on them. the old plugs were tough to get out! Dissimilar metals and all. Then I installed the coil packs and got them sitting in their flush. I then decided to grab the wire numbering book and start separating and numbering wires and then cut them at strategic points to cut back on the number of splices needed. after that I spend quite a lot of time pulling the wires out straightening them out, only for them to snarl again, So I then used tie wraps and not fully tight but enough to hold them and then I was able to separate them, move the majority of the wires that go on the driver's side over there just laying across the bellhousing behind the engine for now. Then I took some measurements to begin the process of making a trans mount. I then went ahead and drug out the dash and center console, and by a quick trial and error was able to cut out the floor of the console, leaving a lip around the edge so I can make a metal floor to put in there with some nice finished bolts and paint the metal, probably a matching hammertone black like the dash center I did earlier. Then I took the dash, the gauges, and the cover inside and then cleaned up the dash with Lysol cleaning wipes and then took the tube of Silicone the cover come with, and having done this before I remember how to do it. You want to ensure the silicone is in the places with direct contact, around the gauge faces in the deep pockets, etc. After that, it is a process of using duct tape and pushing to get the cover on tight and then the duct tape pulled tight to hold it tight overnight. It looks funny, but one of the last pics shows how I grabbed whatever was around with some weight to it to put on the top to assist the tape. Tomorrow I can pull the tape off and it will be ready for gauges, God willing. PICS:
-
I don't really want to. I want to make this work. Thanks.
-
@rand Did you ever find out the problem? I am in the same boat. If you remember...
-

ANOTHER Datsun Z/LS3/T56 Swap Thread
Ironhead replied to Ironhead's topic in S30 Series - 240z, 260z, 280z
Oh yeah, I know. But even without a helmet, I would rather bang my head on FIA padding than on a steel tube. -
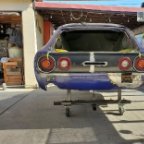
@Oki570Z Quite a bit of work. I wanted the tail ligths to fit like if tho it rolled out of the factory line.
-
Some modern cars run CV joints but the transmission usually has a fixed output flange. I've never seen a CV joint slip yoke. What angle is the engine sitting out? can you get away with tipping it back a couple degrees?
-
Anyone have any experience getting a custom driveshaft with CV joints? That is the way forward for me.
-
steeper driveshaft angle. U joints will have a short life. Oh well!
-
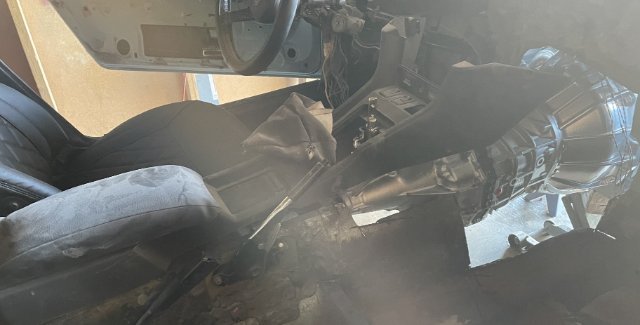
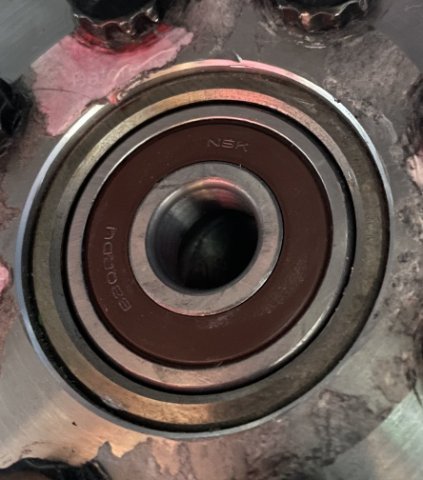
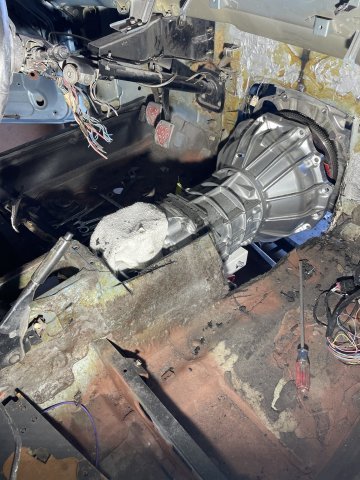
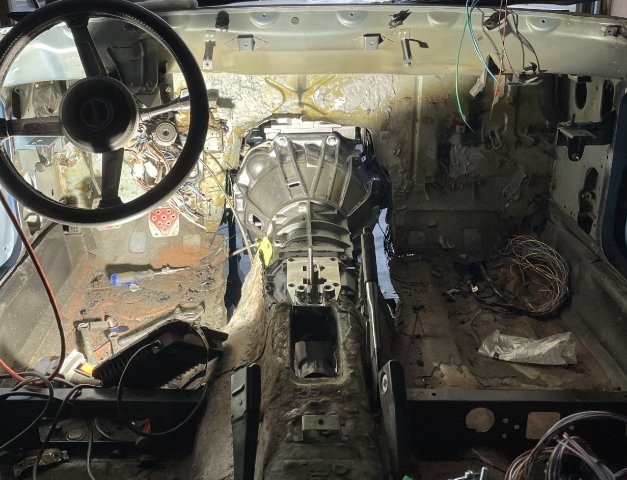
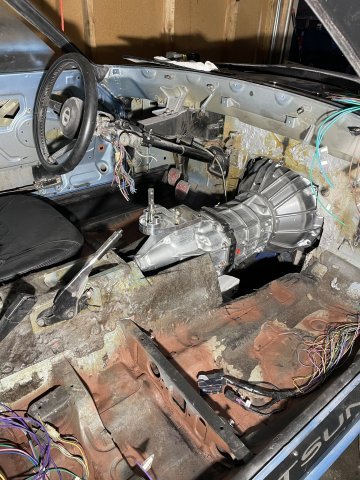
02-14-2026 Happy Valentines Day! Today I got the transmission in. Took a long time. I left the pilot bearing in the freezer overnight, and I was able to tap it in easy. After I installed the clutch and made sure to use the ARP lube on the bolts, I started prepping the trans tunnel. I had to cut off the factory trans ears and grind them smooth and gave them a quick coat of paint. Then the hard part started. After trying and trying, I realized the trans tunnel just wasn't going to let it happen.....so I started cutting it out from the firewall back about a foot or so, then more and more..... little at a time, as I needed the room. I did keep the pieces cut out, As I will cut and modify and have a mobile welder come and weld them back in AND while here weld a thick steel flat plate about 3-4 inches wide the trans area and passenger floors to add more reinforcement for the power level of the engine. I was able to use a floor jack and level the engine up, and now you can see in some of the pics, what it looks like level.....yeah, dusty but you can still see it. My center console will be modded with the center floor cut out leaving a small ledge on both sides so I can make a custom aluminum floor. The shifter mechanism will be left fully exposed, I love look. It makes the shifter throws SO SHORT! So, big day. All in, now need a trans mount underneath that will bolt through the floor into plates to hold it, the reinforcement plates across, and eventual console mod. I got VERY dirty! Cheers! PICS:
-

ANOTHER Datsun Z/LS3/T56 Swap Thread
tube80z replied to Ironhead's topic in S30 Series - 240z, 260z, 280z
Back in the early 90s, I had the fortune to chat with an engineer from a IMSA World Challenge team. I had noticed they had done a ton of stitch welding to the shells and was curious if this was done for increasing torsional strength. He told me on the new shells they used saw no improvement from this, and they did so they could easily repair crash damage. He did say that for an older car it would most likely show improvements, but you'd need to test before and after to get any idea of the improvement, but he didn't expect it would be all that much. One easy improvement can be done by gluing in the windshield rather than using the stock style rubber gasket. I helped a friend do this on a 280 used for Chumpcar racing. With the stock seal the chassis would understeer and after it oversteered. From a feeling change it was like adding a triangulated front strut bar. @Ironhead I know you've accepted the risk of driving the car with the roll cage, but I did want to point out that FIA padding is meant to be used with a helmet, not your noggin. -

A 2026 SEMA SHOW 260Z Build all the way from Great Britain
toolman replied to toolman's topic in Body Kits & Paint
Part 6-Major Problem delays SEMA PROJECT A major problem occurred in using a late model 370z suspension into this SEMS SHOW car. Its wider size and different mounting points created a a major obstacle in this condstruction, https://www.youtube.com/watch?v=PhZrC-0JPWQ&list=PLi4p-ATl-NoVr3H2ww92Lj9Y8y -
hello im touching base about this to see if you have anymore info about silvermine motors kit a long with the adjustable control are set up for the r200. did you have luck?


-
Who's Online 0 Members, 0 Anonymous, 1192 Guests (See full list)
- There are no registered users currently online