-
Member Statistics
33230
Total Members5167
Most Online
All Activity
- Today
-
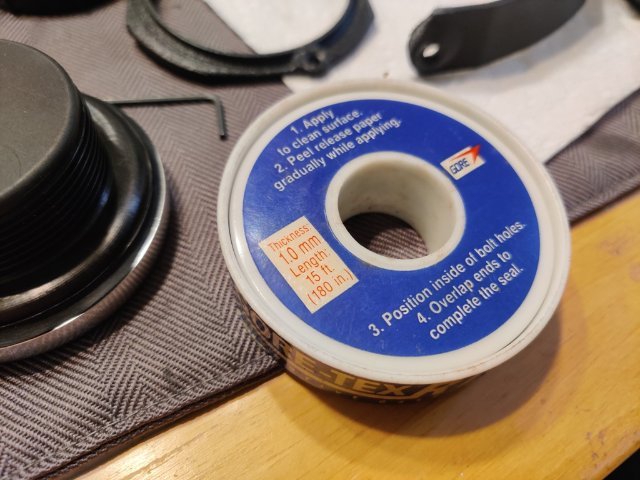
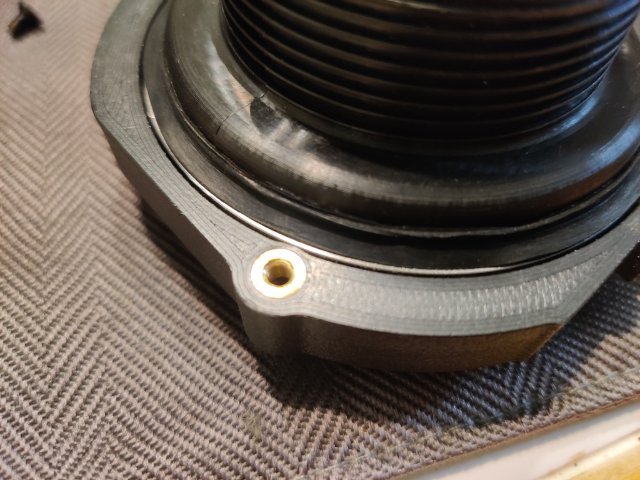
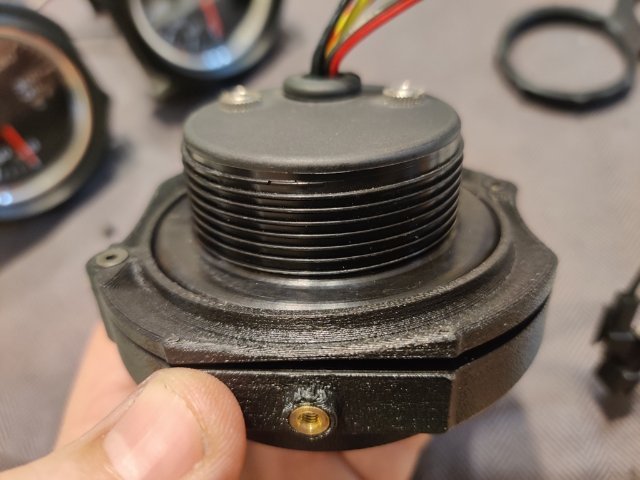
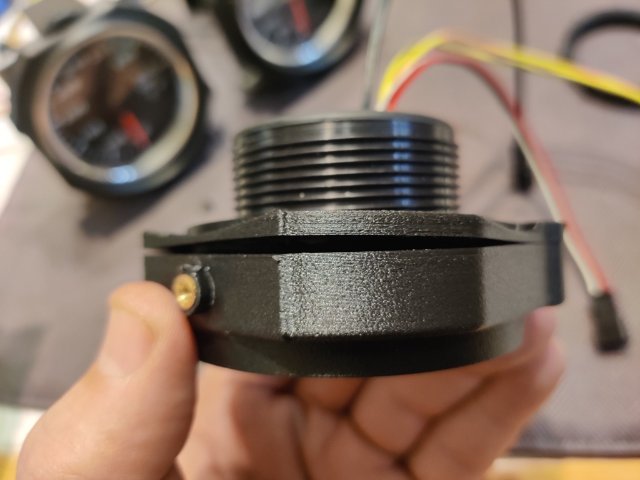
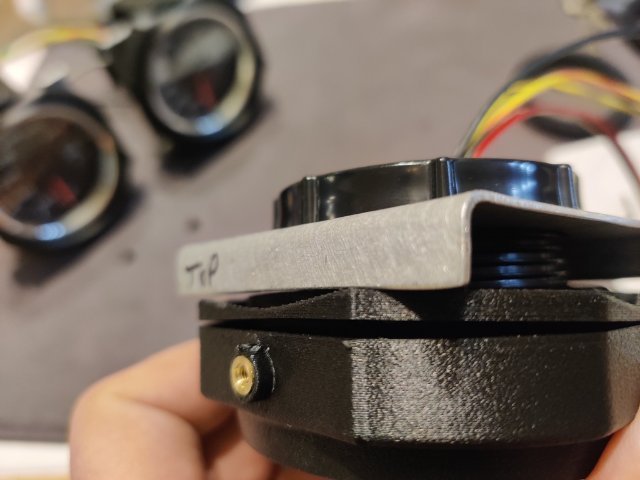
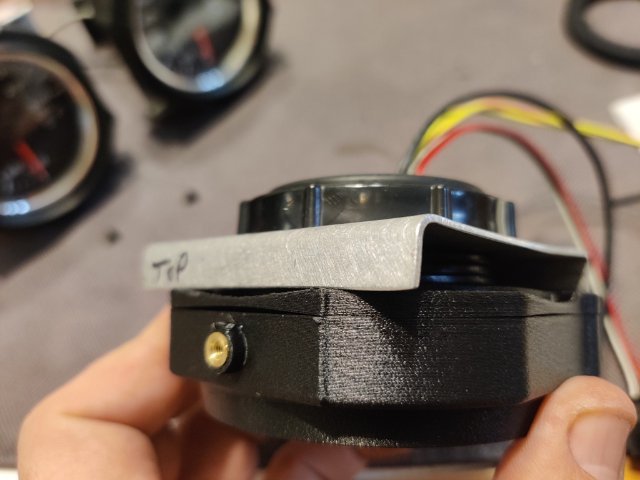
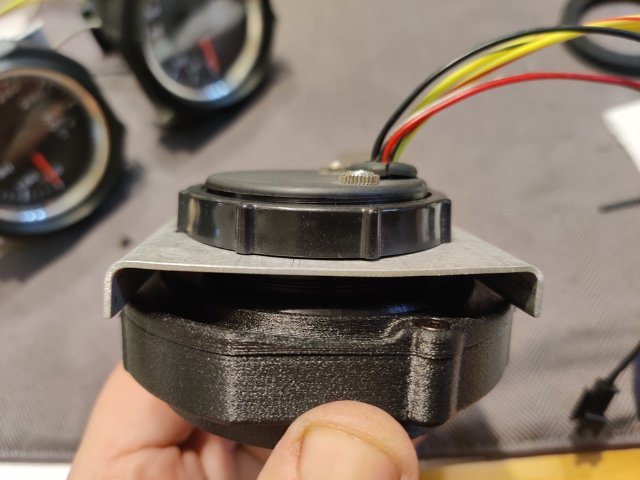
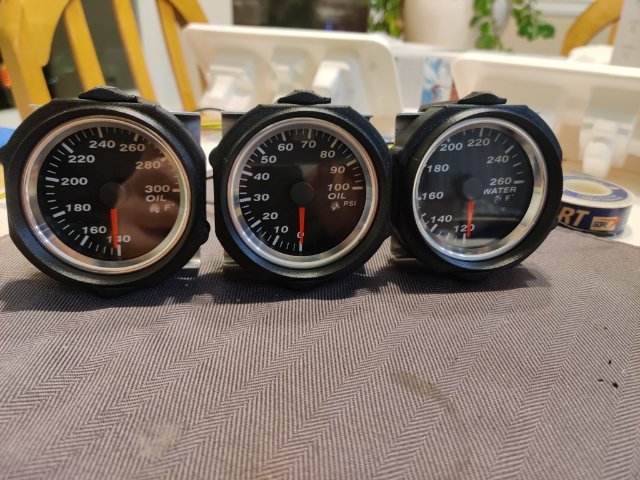
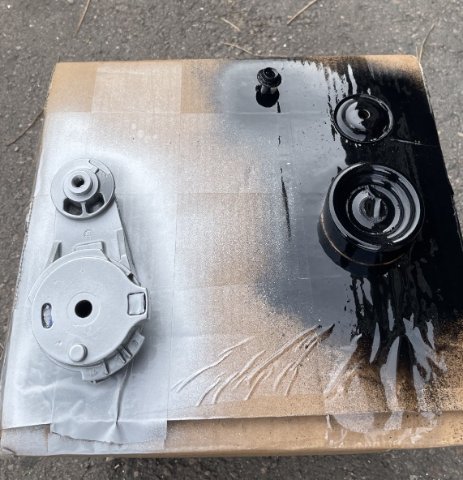
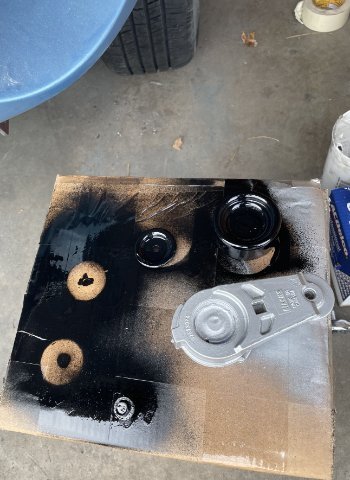
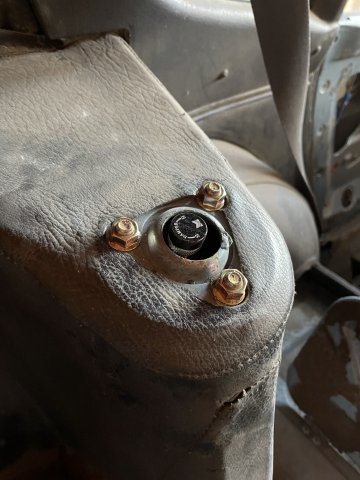
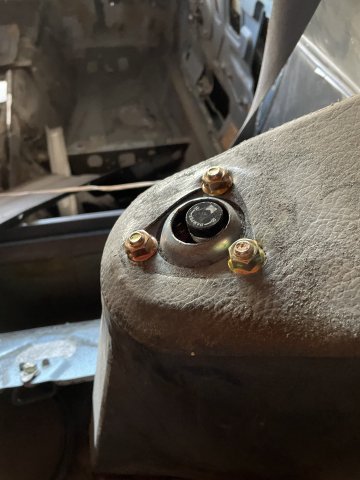
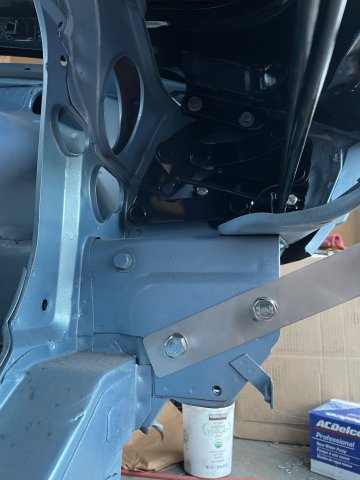
I purchased some gauge mounts for the three middle gauges in the dash from a seller on eBay. They are 3D printed items. The design is pretty good. The plastic seems sturdy. And they incorporate metal thread inserts. The screws have a taper head, so they self center, and fit of the various parts is very good. However, I found that the gauges were loose when fitted to the housings with the backplates (which hold them in the housings) bolted tightly in place. The gauges rotated easily in the housing as there was no clamp force against the back of the gauge to hold the gauge forward against the "stop" portion that the bezel of the gauge is supposed to fit up against. After thinking about solutions for a bit, I pulled out some ancient Goretex I have. Basically, it is rubber gasket material with an adhesive on one side. It comes in handy for a lot of things. In this case, I cut a strip and ran it around the back of the bezel on the gauge. I fitted the gauge and then pressed the backplates against the new rubber gasket. I then briefly removed the gauge and took this second picture which shows how the new gasket deformed under "crush". Third pic shows that as well as the metal insert in the gauge housing. Another issue to overcome though was that the backplate only has two screws to clamp it to the housing. After I put the gasket in place and assembled the gauge in the housing, the backplate only pulled tight against the housing where the screws are located. See the first and second pics just below. I realized that I could take the aluminum mounting brackets I had already made and flip them 180 degrees... and use the Speed Hut gauge mounting rings to resolve the situation however. See the third pic. These aluminum brackets ended up coming in handy. I simply screwed the Speed Hut mounting rings tight, which pushed the edges of the aluminum brackets against the plastic backing plate, which pushed against the points of the backing plate which were not against the back of the housing. So, with a redistribution of forces, I was able to resolve all the issues. I see now that I didn't take a picture of the other part of the gauge mounts. There is an arm that attached at the top and the bottom of the housing in the same fashion as with the stock 240z gauges. I hope I won't have any issues with that part, or with the gauge housings fitting in the dash holes. I will probably check that out this weekend.

-
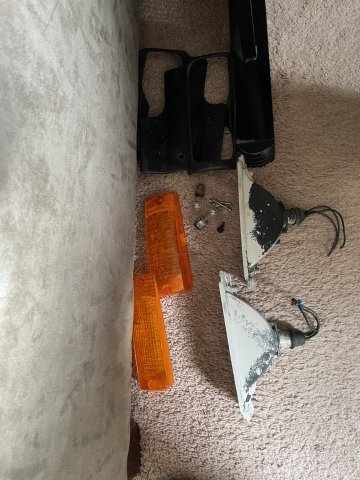
I was talking about the dashboard frame, that the dash pad attaches also to. It's HEAVY. 12-11-2025. I got a nut and bolt run in today, got some painting going, ended up with a run on one side of the cowl, so once dry I will sand it out and repaint that side. I also started on a restoration of my front turn signals. PICS:
- Yesterday
-
dont swiss cheese your frame bro. the weight savings is not worth the time and you need that strength. Hell, with the atlas power your going to need more frame rigidity. look into some rectangle tubing for frame to rear body of car frame rail extension. i dont know what its called but theres a lot of info on the frame rail upgrades on these cars. i bought bad dog frame rails but by the time i did it all and the time spent on fitting etc, your better off just fabbing your own imho you may want to have some 8-10" long angle iron welded to the front sway bar mount area for extra support. thats an easy mod. just a piece of angle with 2 holes drilled in it.
-
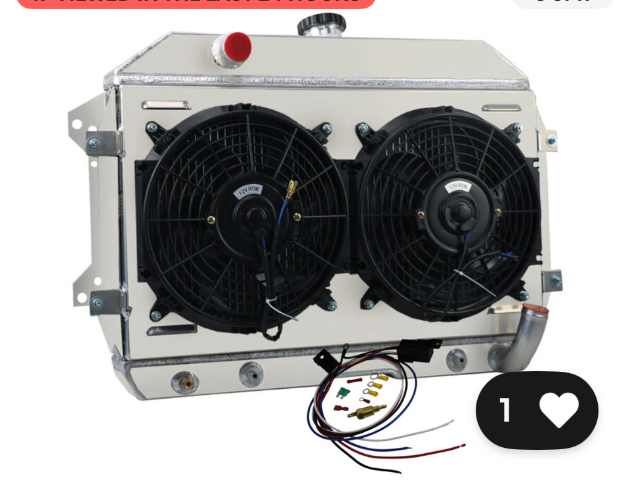
you may want to look into sourcing new Spal or Maradyne fans to replace those. I bought a similar setup for my c10 ls swap and the fans did not perform good enough. i was running 220+ and then temps climbing in traffic. This was dead of summer in Cali central valley heat so 105 hot as ballz. If it doesnt get as hot where you live you may not have that problem. I ended up going to the wrecking yard and getting slightly larger spal fans and enlarging the shroud holes a little larger to fit the fans. The Spal fans sucked WAY more cfms then those off brand. They dont pull/push to the specs they claim. I will be running dual pass 2 row on my z build. i currently have the 4?3? pass on the truck and i'll be redoing that again in the future. more passes is not better imho. bigger tubes for more heat displacement is what i'll be going for. live and learn lol. The powder coating looks great! if you dont mind me asking, what did that set you back? Powdercoating is expensive where i live. i have often considered this amazon setup. https://a.co/d/6zwvorr I think a turkey deep fryer base with a metal disc blade with grooves plasma cut into it to use as a heat deflector and then a metal trash can wrapped in rockwool, for the oven may work! idk. ive got all kinds of whacked ideas. Seems like that gun setup works best for budget setup though. i also seen where a guy used a shop diesel heater and then blew that into a metal duct into a box and that worked also. you only need to hold 400 degrees for 20min to set the powder coat. I was thinking sheets of plywood wrapped in tinfoil would work also. i've seen pigs roasted in those for hours and thats similar temps. also was thinking that if door hinges were used on the corners to hold it together you could just pull the hinge pins to dismantle and store all the pieces. still would need to wrap in rockwool i think. anyways, sorry to ramble at you, i just got a lot of parts i want to powder coat also lol i like the color you chose.. Rustoleum has a similar spray can color called "dark steel". ive been using that a lot to. i did my engine block and motor mounts in that so far.
-
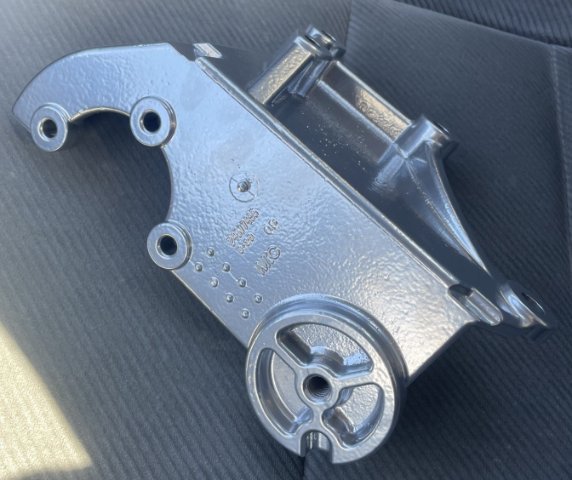
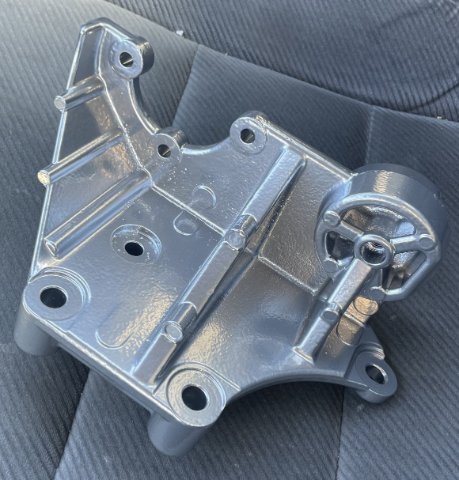
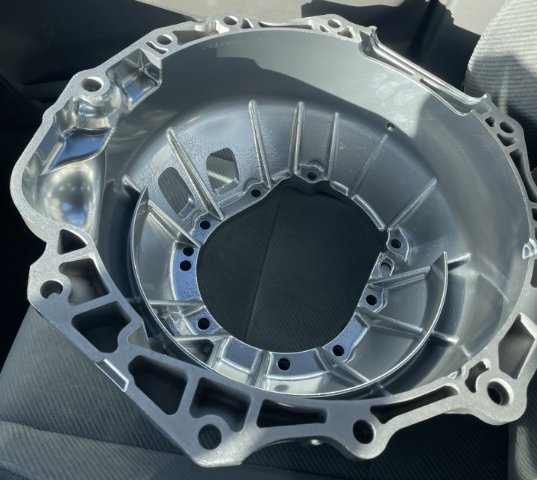
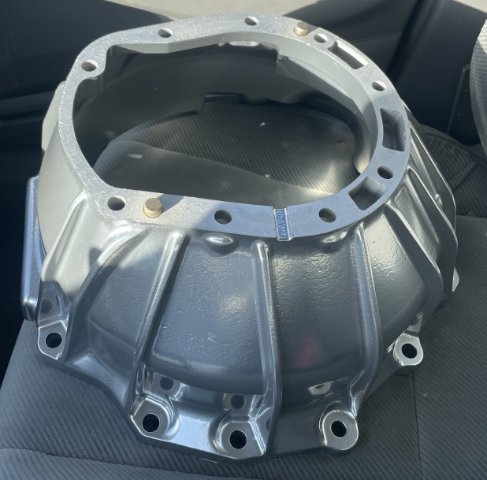
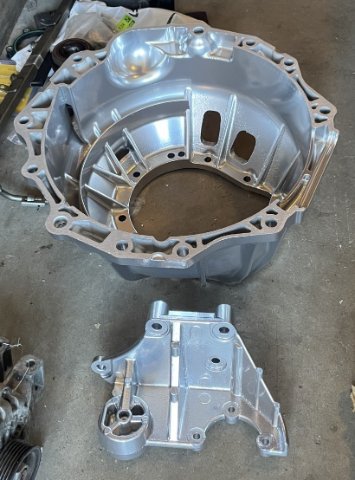
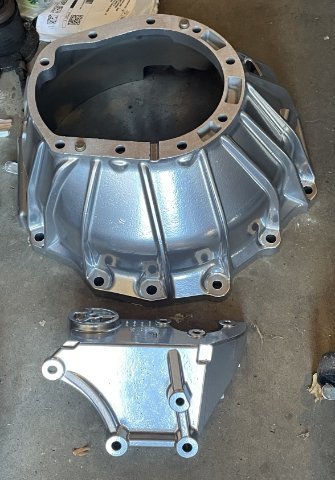
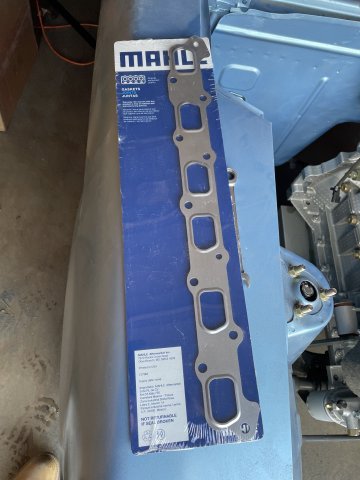
I picked up my bellhousing and serpentine bracket for the 4200 engine today from the powdercoaters. The finish is called "polished aluminum". I had them done because frankly both pieces were ROUGH....really rough. R&S Powdercoating in Colorado Springs came through for me again. Sandblasted it out, masked off the gasket surfaces and did their thing.
- Last week
-
I bought the same parts to do DBW months ago - my AEM Infinity ECU supports it as does the RusEFI ECU that I'm also playing with. Got harnesses built, just haven't installed the hardware - so that video is going to be very helpful.
-
Could anyone tell me the total length of a 350z pinion cheers
-
thanks. I just picked up that drum sander they sell. It comes with a 40 grit drum but I also grabbed a 120 grit drum for it also. I got a good deal on this. 4 core with dual fans made to fit the 260Z I am building. It's an eBay buy. Read up on and decided to try the sanding blocks and tape sold by Eastwood that connects you your shop vac and is supposed to eliminate most of the dust from blocking. Here's to hoping THAT works!
-
Hello everyone, I’m reaching out to see if anyone has a set of SSWorxs flares for the S30 that they ended up not using and would be interested in selling or trading. I’d also be open to acquiring patterns if someone is willing to share or help out. I’m planning to weld on metal flares and really like this more squared-off (non-tapered) style. Thank you!
-
Hi, I'm trying to swap my rb20 head to rb26 camshafts. I noticed the hydraulic lifters have an oil hole on top for the cam lobe but solid lifters do not have the hole. Do rb26s have a different cam oiling design than the hydraulic rb20? Similar to how the L-series can have a drilled cam or an oil spraybar? Also are valve springs different from factory between hydraulic and solid lifter rb25s? Thank you
-
Fantastic! Excited to see how this project unfolds.
-
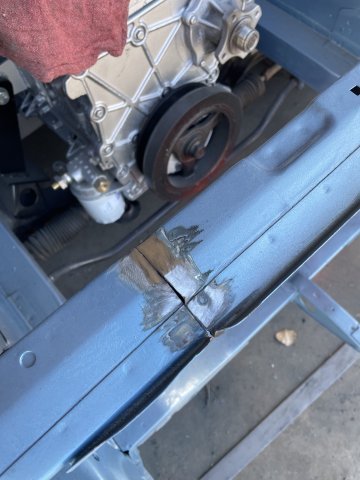
Really cool stuff....very nice. I like the "refurb" on the front crossmember, as well! 👍👍
-
I want to turbo my 280z using the CXracing turbo kit that includes the turbo and intercooler, but I can't find much about it. Any help? Link:Turbo Intercooler Intake Manifold Kit for 75-78 280Z Fairlady Z L28 L28E Engine 500HP
-
Been a while since I posted any updates. Been moving along. For the Turbo car I decided to build my own wheels. Ill CNC machine the center sections myself and have the lips and barrels spun for me. I really like the old SSR RS8 wheels but finding them in the correct bolt pattern, offset, and caliper clearance is impossible. I fould a set close, from Japan and had them shipped over. Since this car uses Z31 hubs and such, the spacing is out much more than a standard Z so I need a bit more positive offset. I dissasembled the wheels and scanned the center section into my computer and reverse engineered the shape. Next I re-assembled them and had the 245-45-16 tires Im going to use mounted. I test fitted them to the car, and close, but not good enough. This is the fist time this chassis has been rolling on its own wheels in 27 years. Its been on a cart or a lift. Felt good to see some progress now that the suspension, brakes, and cross-memeber are finally complete Scanned this complete assembly and put it in CAD. Now I have the exact shape of the tire on the rim. Cool cross section of it. Finally I scanned the side of the car, put it into CAD. Now I can adjust my wheel center offset for caliper clearance, and adjust it to work with new Lips and Barrels I will order for the proper offset and fit to the car. Having it in CAD alowed me to look at it from every angle and check all clearances, for calipers, springs wheels lip, ect. Even compressing the suspension to make sure I have fender clearance at full travel Final wheel spec is: Rear - 5 lug = 245-45-16 on 8.5" width rim- 27mm positive offset, 2.25" outer lip on the rim Front - 5 lug = 245-45-16 on 8.5" width rim - 31mm positive offset 1.75" outer lip on the rim Next I need to find some time to program the CNC and start cutting chips. But I got distracted on the NA car, so that update is next.
-
At Harbor Freight they have carbon stipping discs for the angle grinder. It takes the paint off like nothing and does not damage the panels at all. it actually polishes the metal so don't forget to hit with some 80 grit to get the mechanical bond back. I also have the drum sander version from HF also and it strips paint like nothing!! https://www.harborfreight.com/4-12-in-non-woven-paint-and-strip-abrasive-wheel-70419.html great job on the progress!
-
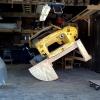
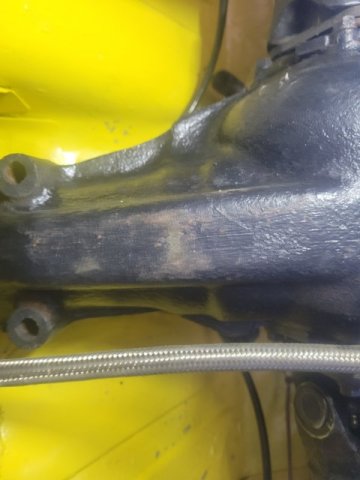
Just from those photos, I'd say you've got an R180. The 200 has a much more "bulbous" carrier case and rear cover. This video does an quick and dirty job illustrating the differences and distinctions: https://www.google.com/search?q=identifying+r200+vs+r180+with+pictures&client=firefox-b-1-d&sca_esv=b960a84cc5c43ab2&ei=haU1afOCFb_m5NoPmuGuoAY&ved=0ahUKEwiz2Zen7auRAxU_M1kFHZqwC2QQ4dUDCBE&uact=5&oq=identifying+r200+vs+r180+with+pictures&gs_lp=Egxnd3Mtd2l6LXNlcnAiJmlkZW50aWZ5aW5nIHIyMDAgdnMgcjE4MCB3aXRoIHBpY3R1cmVzMgUQIRigATIFECEYoAEyBRAhGKABMgUQIRigATIFECEYoAEyBRAhGKsCSOYbUNoGWOUZcAF4AJABAJgBdKAB5wqqAQQxMS40uAEDyAEA-AEBmAIPoAKQC8ICChAAGLADGNYEGEfCAgUQIRifBZgDAIgGAZAGApIHAzcuOKAH0zGyBwM2Lji4B4ELwgcIMC4yLjEyLjHIBz2ACAA&sclient=gws-wiz-serp#fpstate=ive&vld=cid:1284de3c,vid:s3egG-klPBg,st:1151 For a more detailed and in-depth discussion of the technical differences between differentials, see this Pinned post here: Just as an FYI -- you have posted in the "FAQs" section, which is typically reserved for posts of an informational/educational nature. Kind of like a repository, or library, of technical information. I would suggest moving this thread to the "Drivetrain" section down below: https://forums.hybridz.org/forum/11-drivetrain/. These sub-forums are intended for open and freeflowing discussions. You can move the thread yourself; or I can do it for you, if you prefer. Your choice. LMK if you need any help. Hope this answers your question. Cheers.
-
greetings: I have a 74' 260Z manual transmission. I'm not sure if it has R180 or an R200. attached pictures...thoughts?
-
OKGMC4 joined the community
-
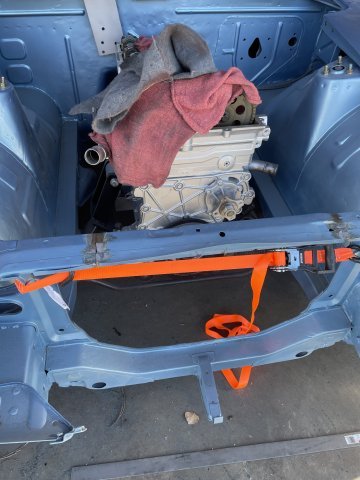
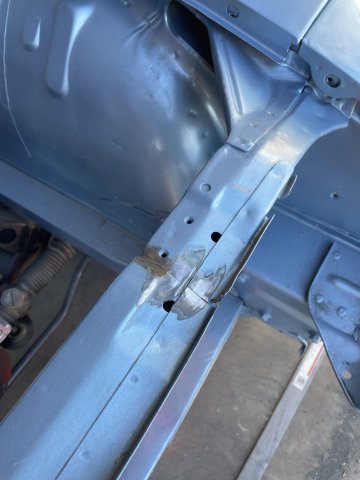
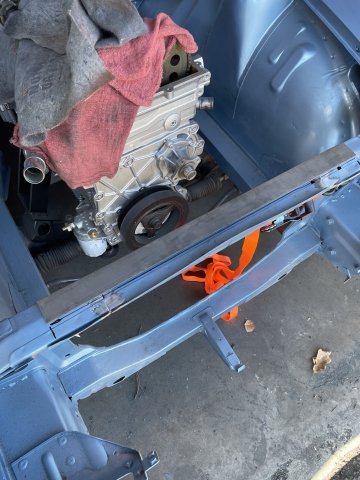
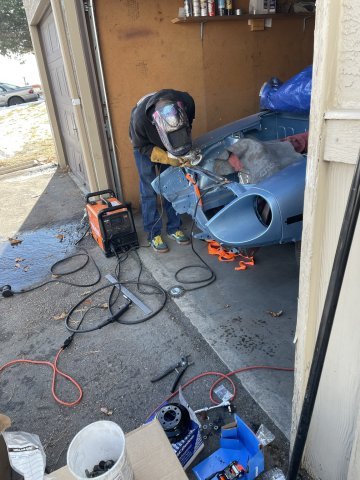
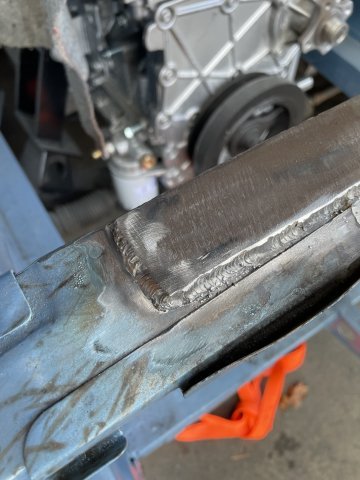
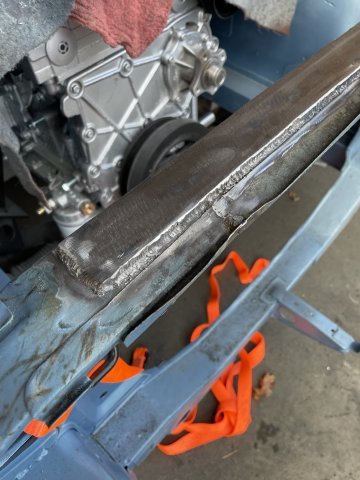
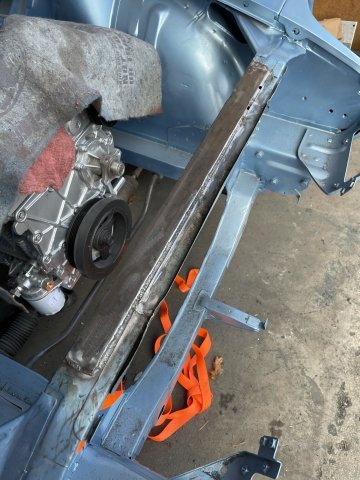
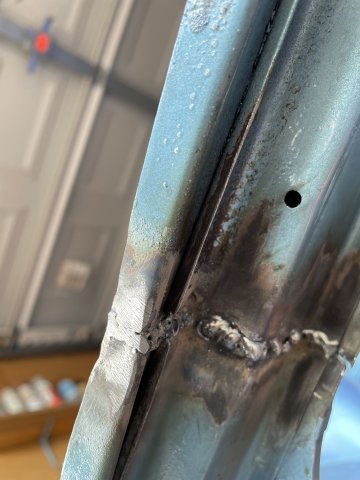
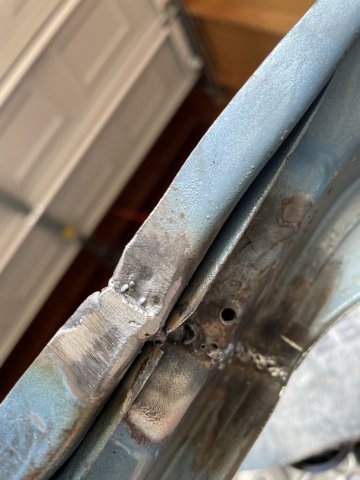
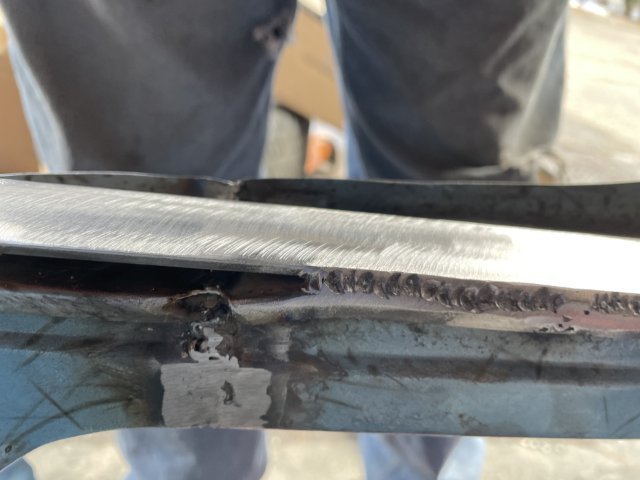
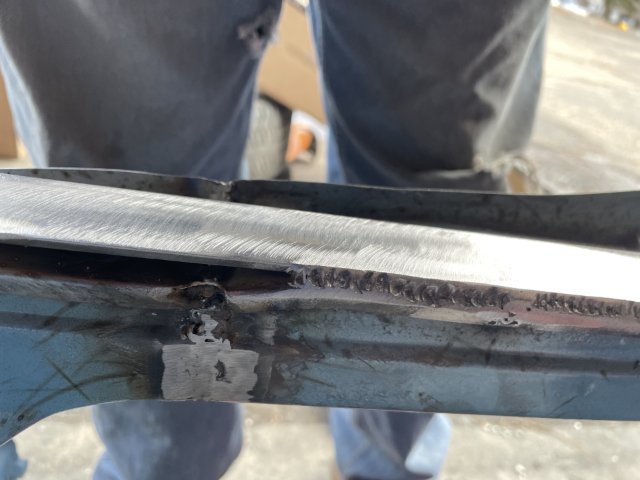
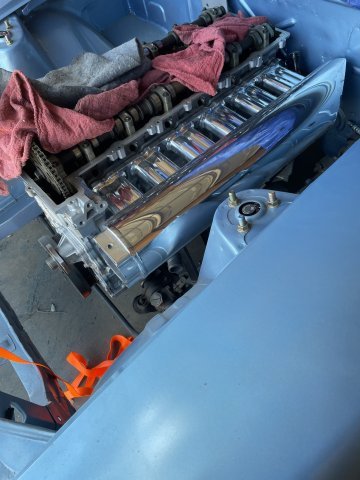
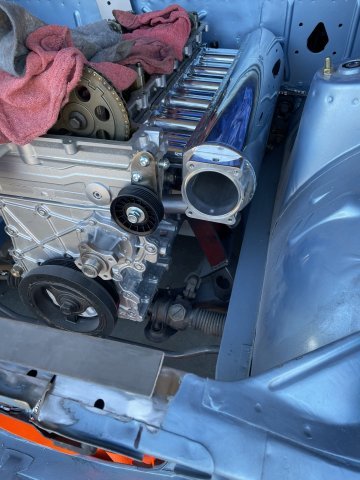
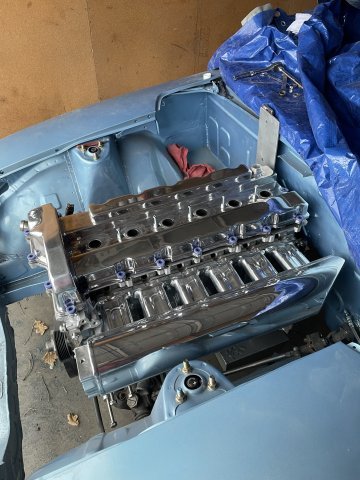
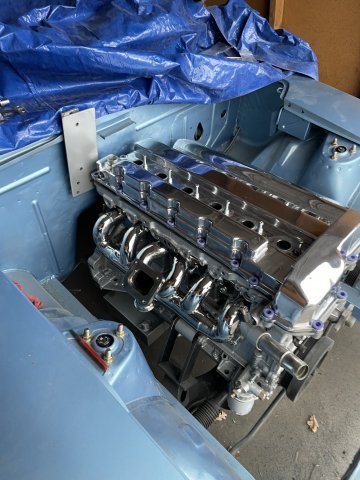
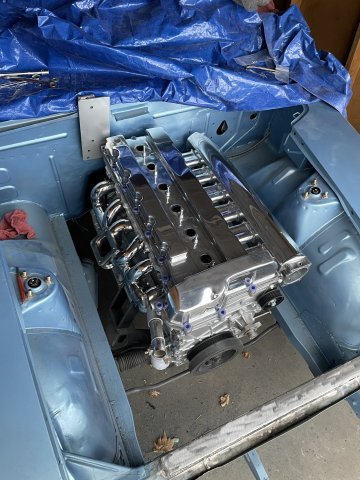
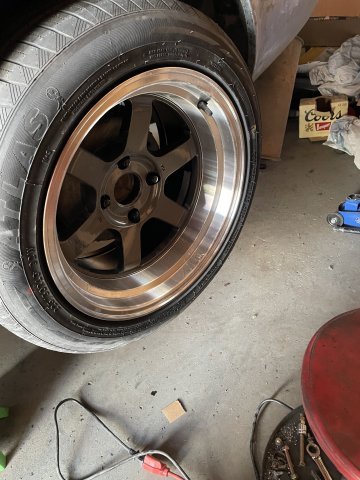
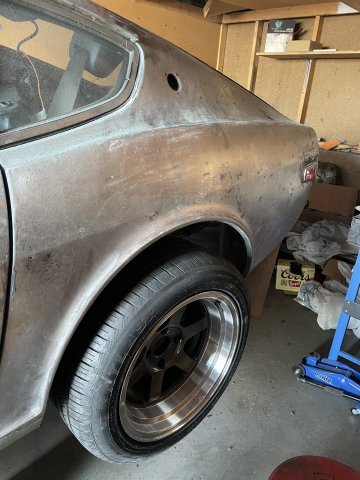
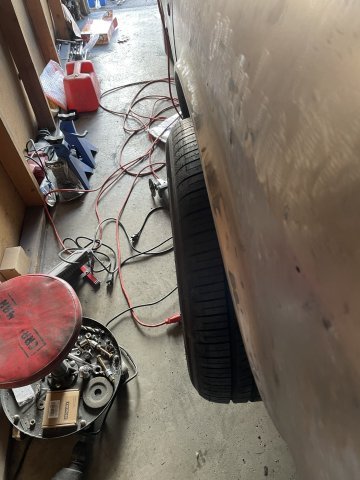
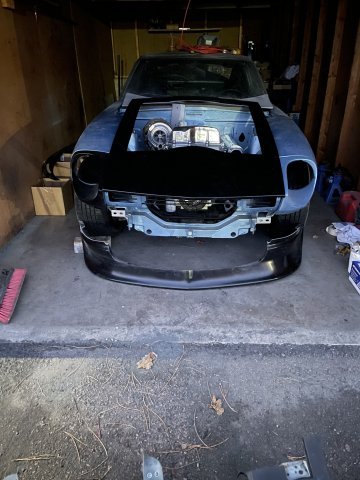
12-06-2025. I have boxes and boxes of stuff I have bought for the car, and today was the day to start throwing all the stuff on and make some room back! First, I had the mobile welder stop by and weld my radiator support back in, and while here, I had a thick steel plate welded on to the top. It is stronger now than it ever was. Then it was time to start installing parts on the engine, getting the hood on, rear suspension back in and all 4 new wheels. I took the dash down from the rafters so I could start on it on very cold days indoors, and it is a lot heavier than I remember......I am going to swiss cheese the frame and lighten it up a bit......I don't need that weight! Pics:
-
do you have a part number or year for the Civic wiper motor? thank you!
-
This is an awesome build thread! Thank you for documenting your progress. I am just beginning this journey with my 260z LS/T56/8.8 swap. You have provided lots of valuable information to assist which really helps with the motivation. 🍻
-
thanks. It's a very expensive hobby I have.
-
Looking good
-
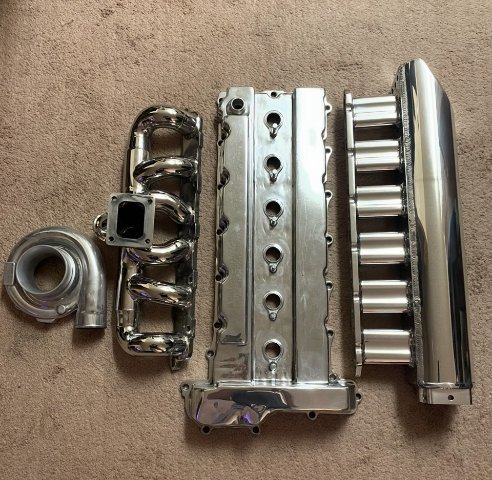
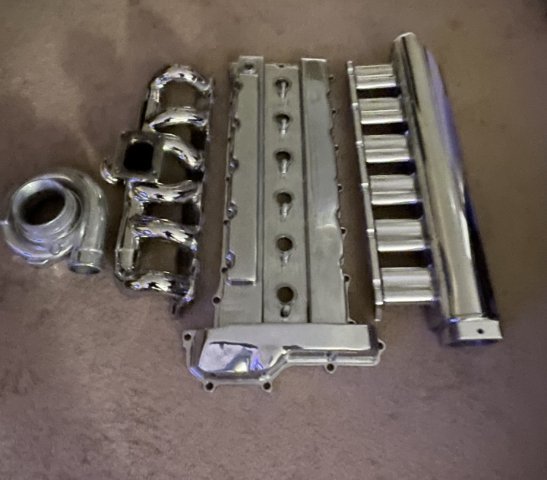
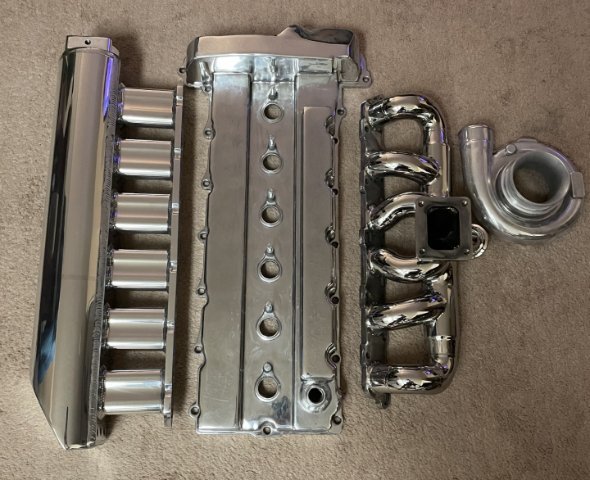
ready for installation:
-
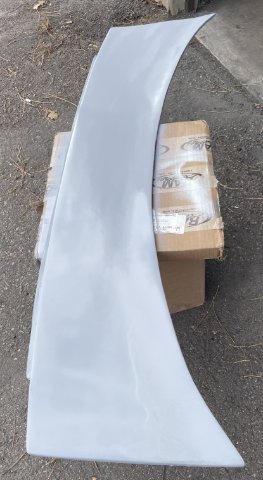
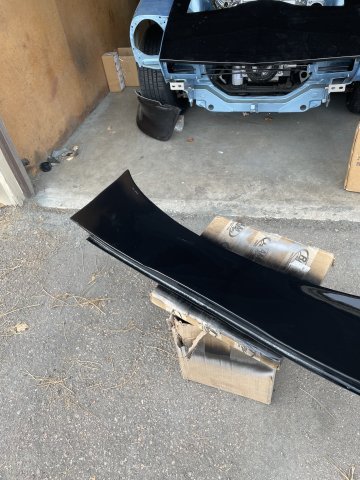
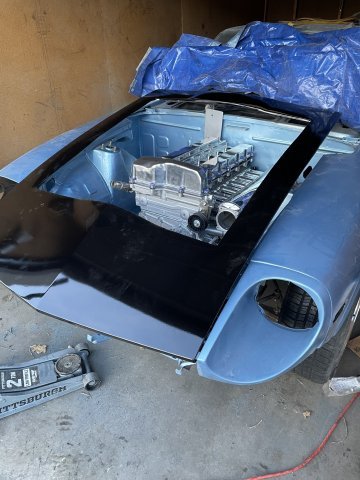
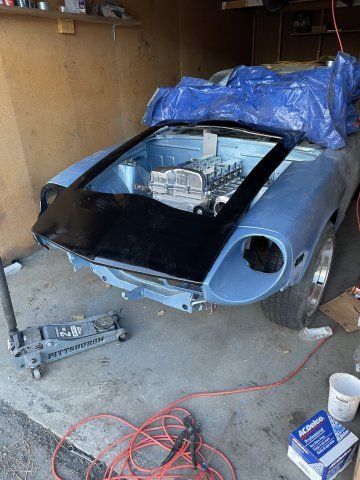
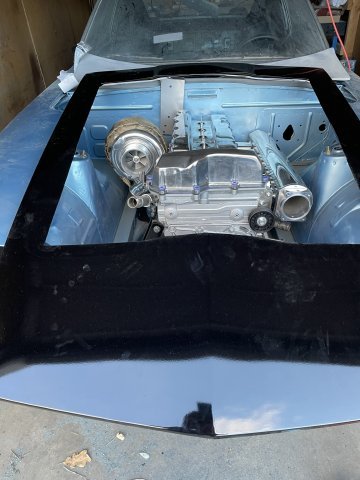
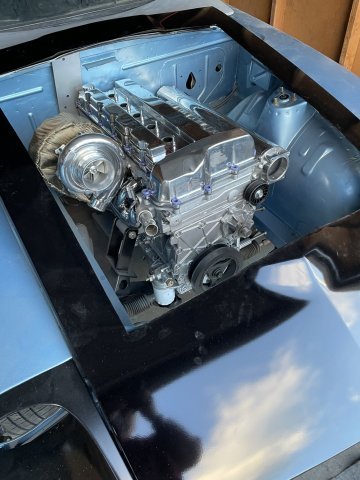
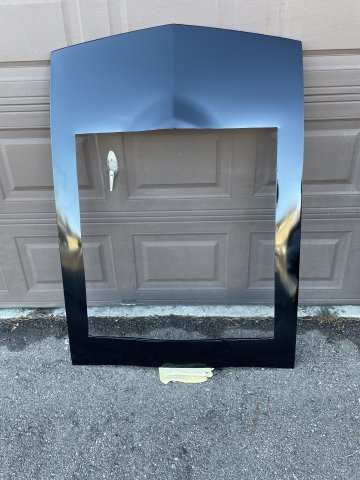
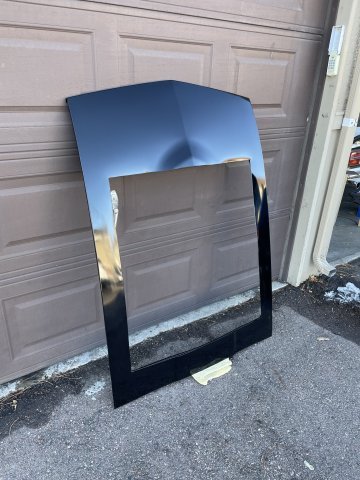
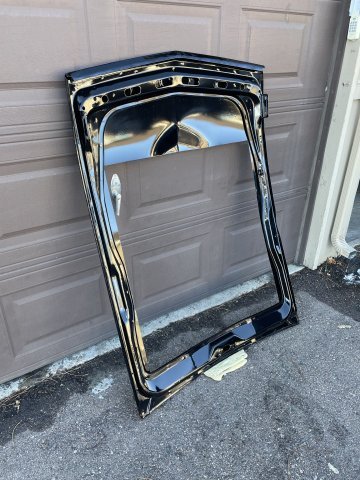
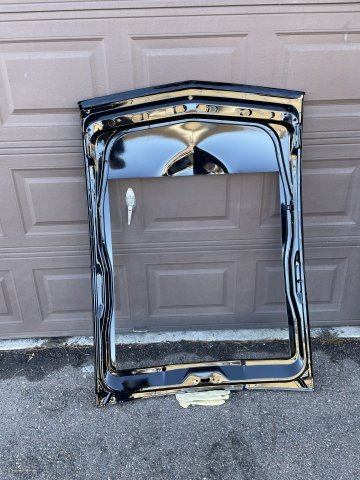
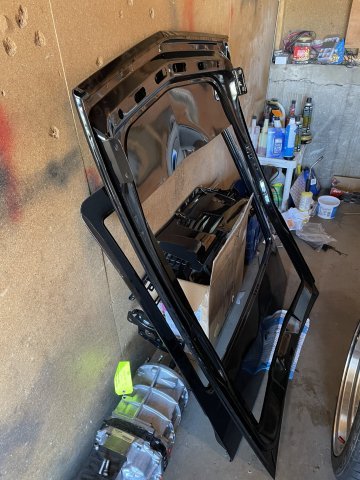
On the hood for my 260Z project. I will give some clarification. It is meant to be a picture frame. I want an open engine compartment. no hood at all looks unfinished. this is mean to close off the stuff that is mundane and let the engine shine through. black but blue underneath and a fully polished out engine. So, maybe once done you will understand what I am going for. The Behemoth at Z Car Garage has the same deal.....but the blue engine compartment, shaved, will really contrast with the black picture frame.
- Earlier
-
12-04-2025. Today I picked up the hood from the powder coaters. R&S Powder Coating in Colorado Springs


-
Who's Online 1 Member, 0 Anonymous, 504 Guests (See full list)