-
Member Statistics
33207
Total Members5167
Most Online
All Activity
- Today
-
Betto joined the community
-

Heavy Duty frame rails and connectors
toolman replied to toolman's topic in Gen III & IV Chevy V8Z Tech Board
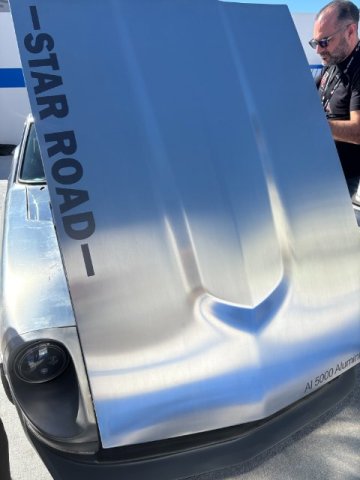
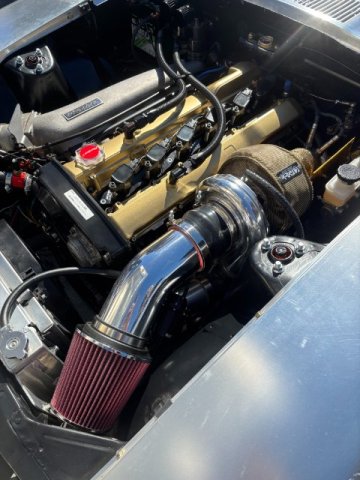
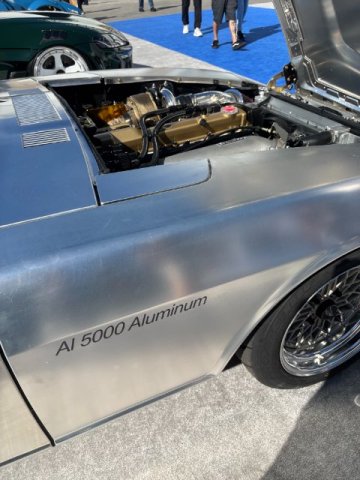
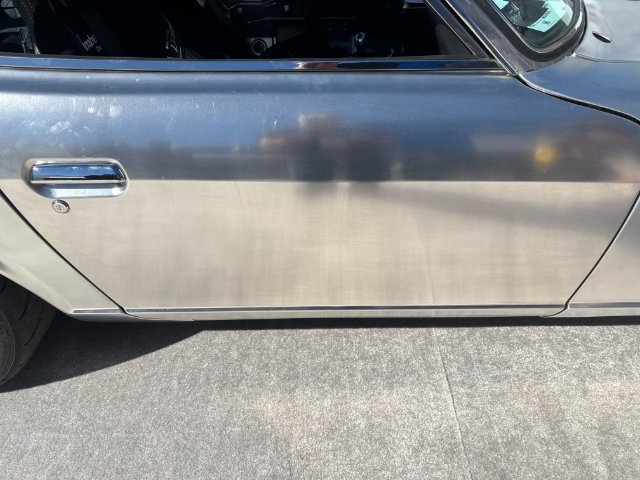
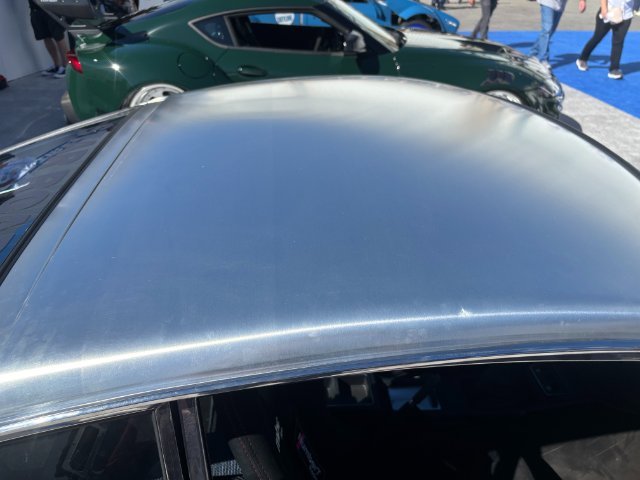
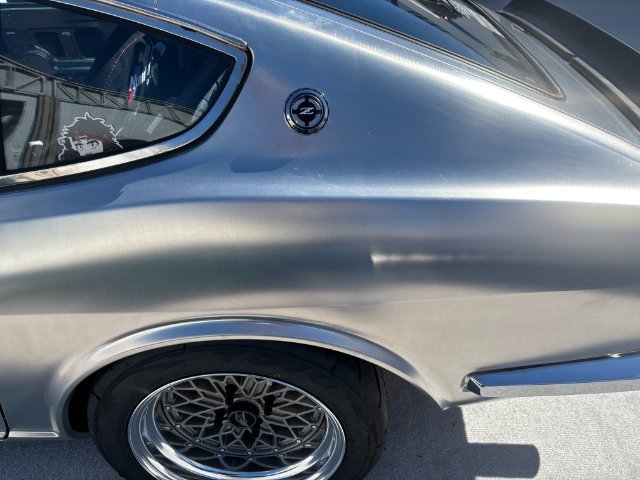
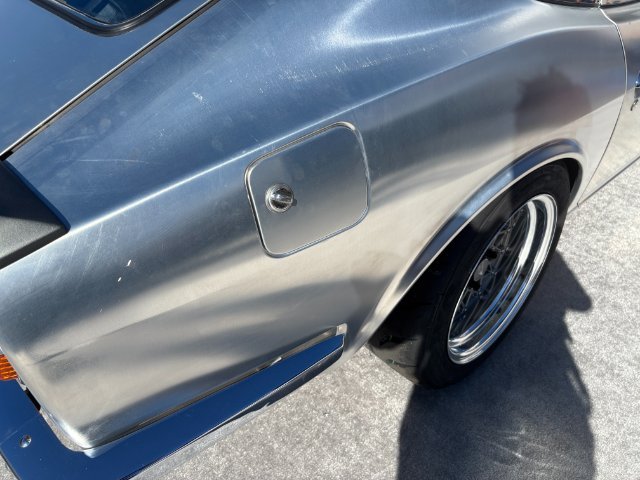
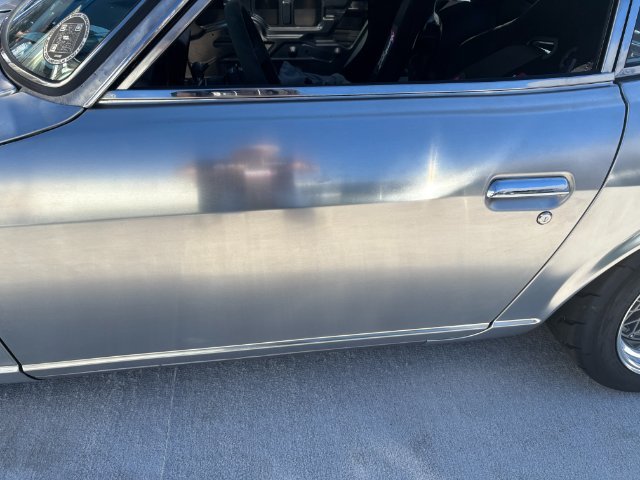
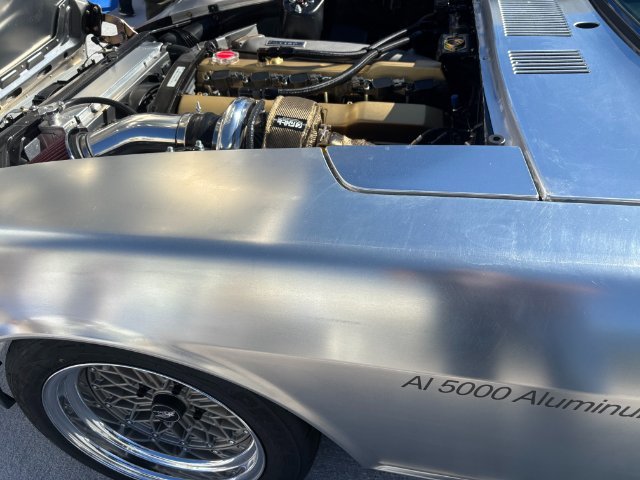
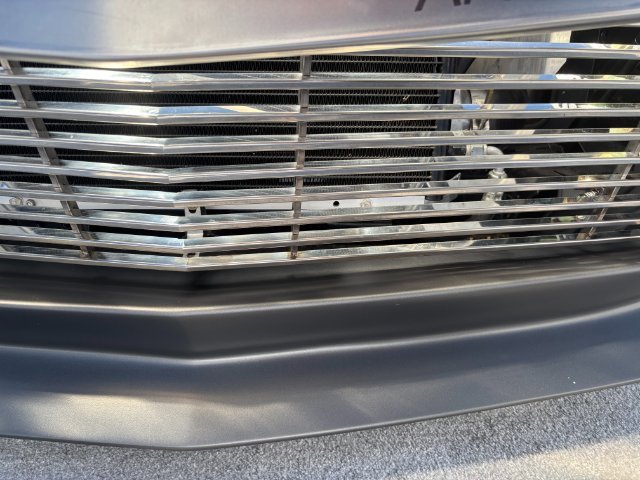
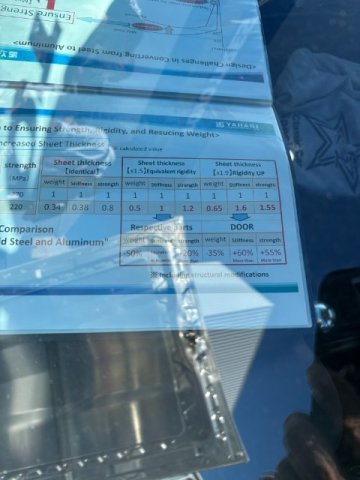
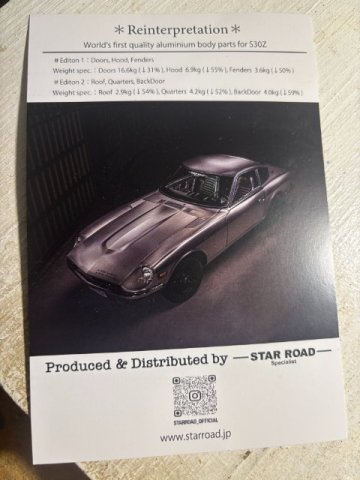
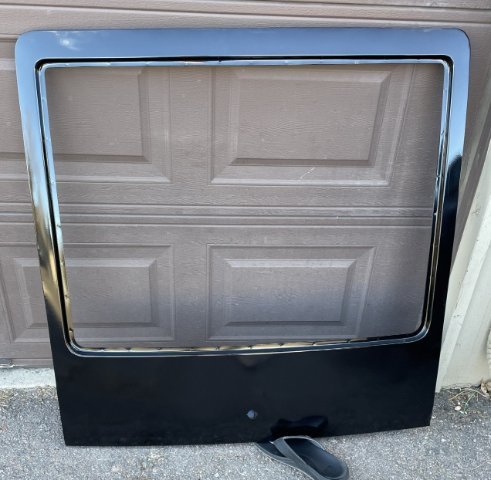
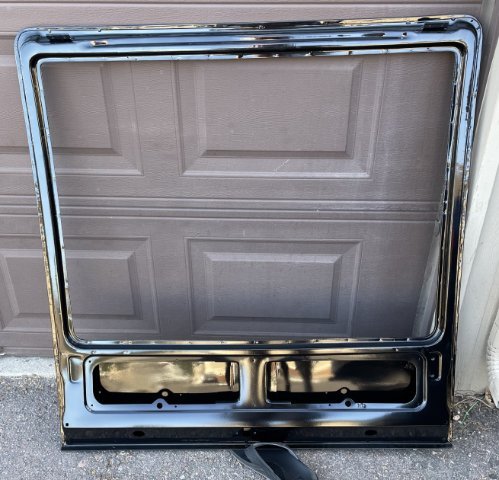
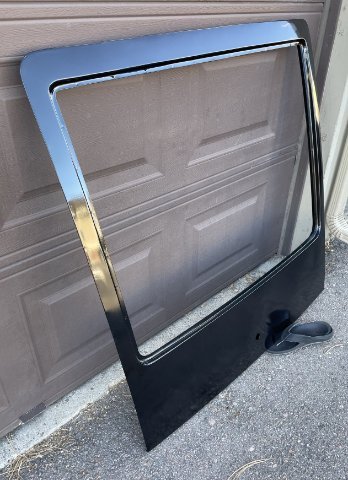
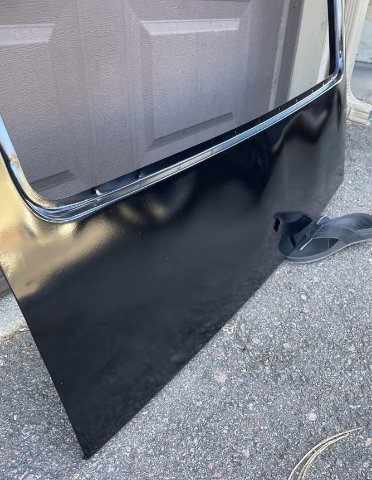
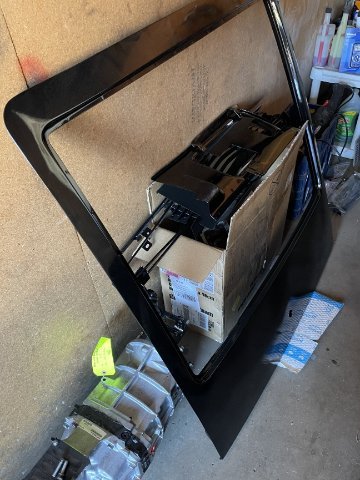
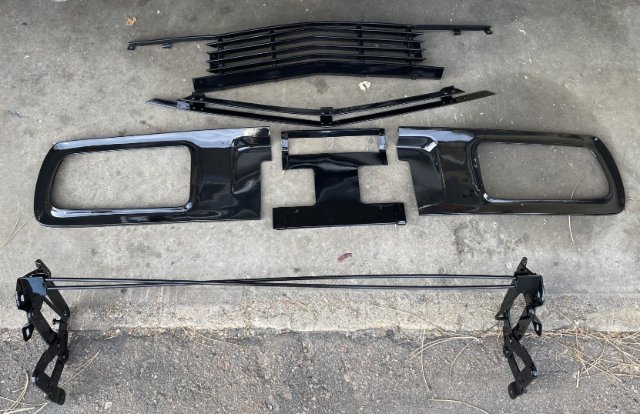
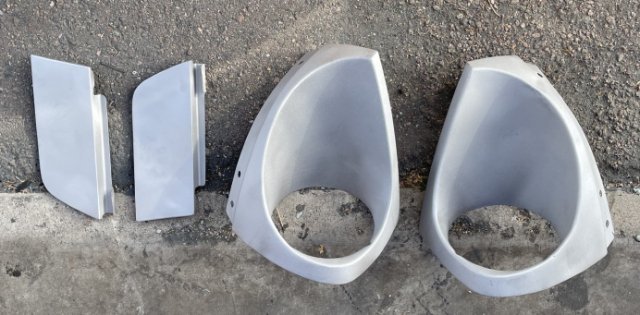
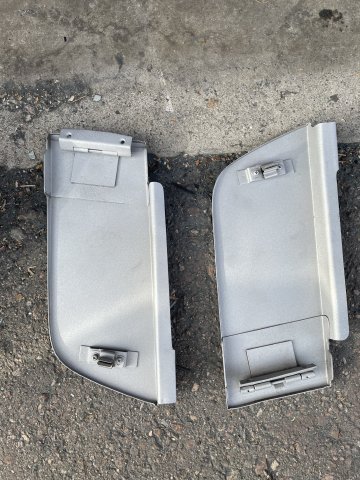
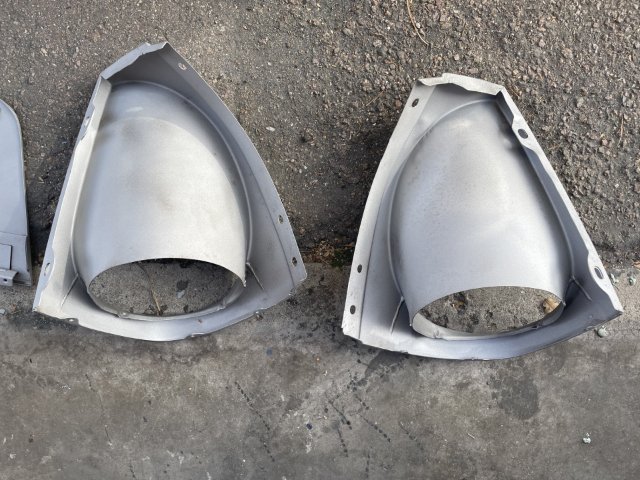
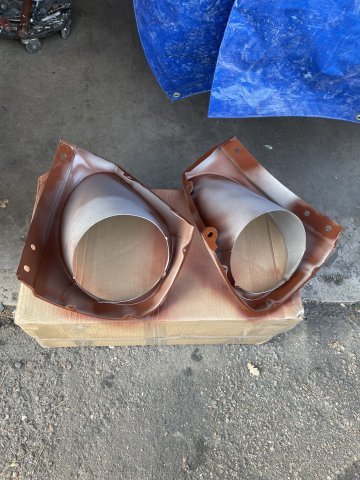
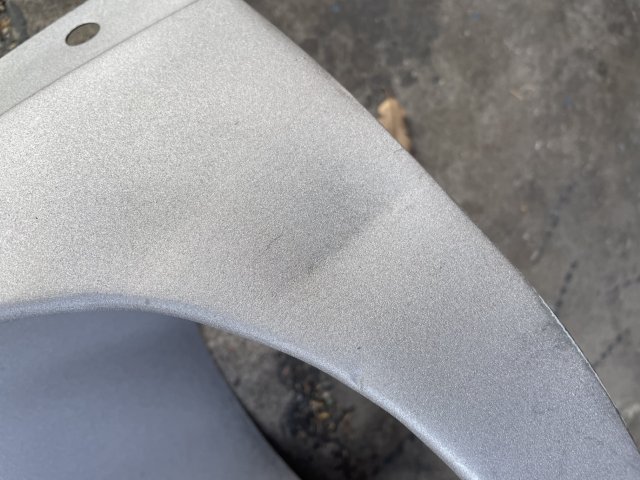
Aluminum Body Panels of 240Z manufactured in Japan These 240Z Aluminum Body Panels are originally manufactured by Yahagi Industry Company in Japan. They will be marketed by Star Road Specialist in Tokyo, Japan. The body were installed on a private owner's car for the Sema Show 2025. I hope they have a video of the installation process so we can see how to done. That way, potential customer can determine whether their body shop can duplicate the installation. Working with Aluminum is not an easy task and requires some specialized expertise and tools. This vehicle was on display at the Toyo Tires Booth at Sema. Pic of Hood Bottom of the Hood the Hood Skin was riveted to the Hood Ribs. the Engine was a Turbocharged Nissan Motor. View of the Front End Rear Hatch Lid Right Side Door Rear End Panel Roof Panel Left Rear Quarter Panel Right rear Quarter Panel and Fuel Tank Door Left Door Left Rear Quarter Panel Left Front Fender Front Cowl Section Front Grill Section Headlight Section Information Sheet Weigh Saving Information Card These Aluminum Body Panels are very well made and looks great. It will provide a another option for restoring 240Z and save many Zs from being scrapped. i talked to the guys who actually manufactured the aluminum panels with the little Japanese that I know. They told me that right now, they plan to run only a Production Run of 100 body panels. Star Road is handling the sales side. But they would not give a price yet. I think they are waiting till the Tokyo Auto Salon Show occurring in January 2026 in Tokyo.
-
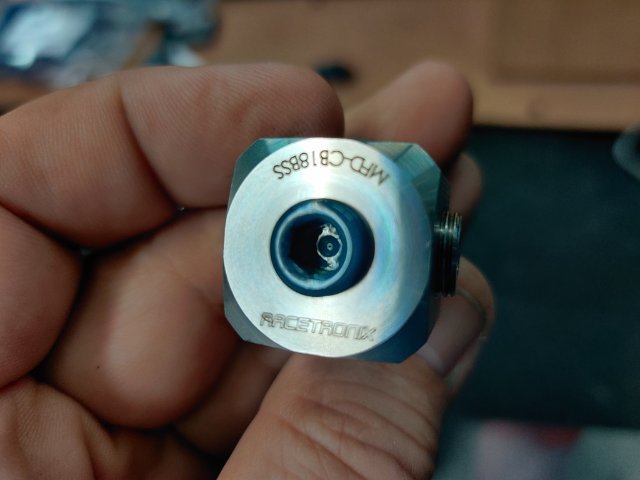
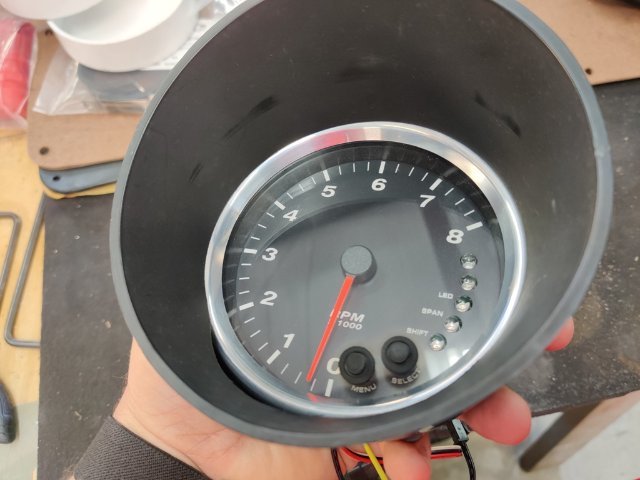
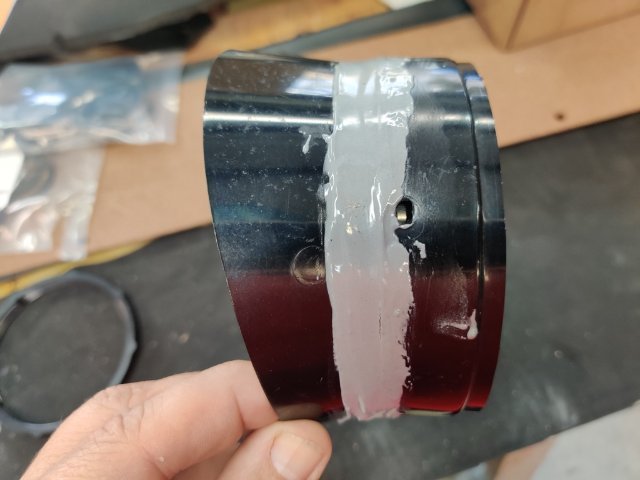
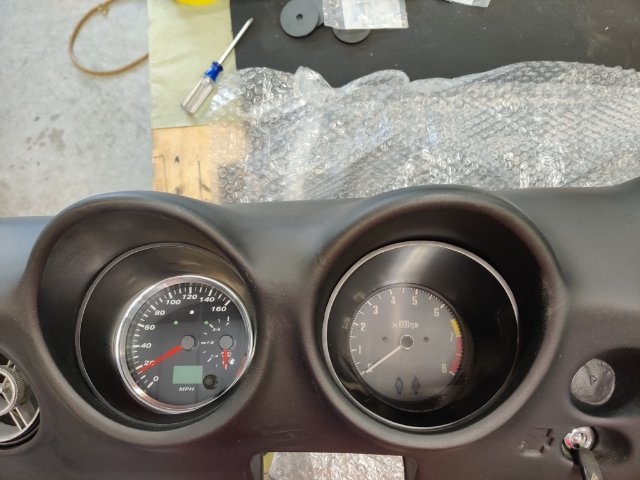
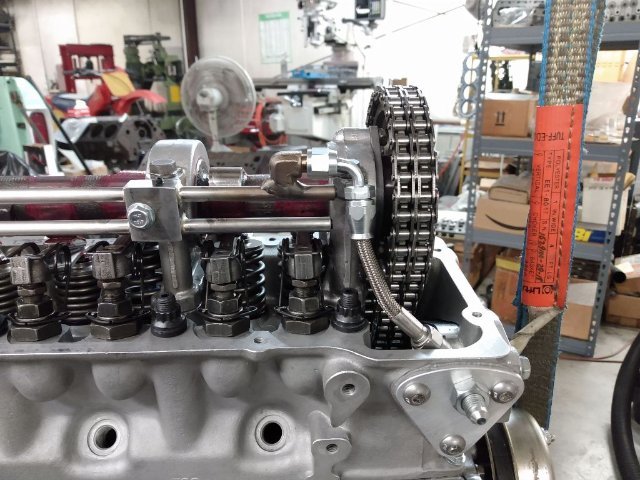
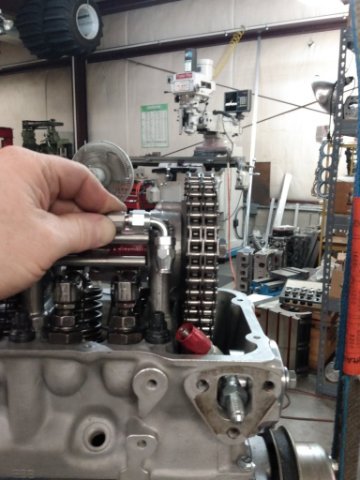
I switched gears a bit this weekend. I have started working on mounting the SpeedHut gauges I bought several years ago (during a Black Friday sale). At the block, I installed this distribution block. Pretty cool that it has 1/8 BSPT male threads to go into the block, and 4, 1/8 NPT outlets (and one 1/8 BSPT outlet). The black, 90 swivel in the picture is going to supply oil directly to the cam spray bar. Pictures from my engine builder when he was making the spray bar and fitting it to the engine: Getting the speedometer and tack mounted... has been very involved. I wish I could say it wasn't a difficult job, but the problem with adaptors that are available is they compromise the look of the finished installation. I like the look of the polished aluminum bezels that I chose. And to get them to show somewhat properly, I had to modify the stock pods a ton. For the first one, I bought some pvc pieces Home Depot. I had to whittle them down to nearly nothing and glue them to what remained of the pod plastic housing. It's not worth describing how I did it as there has to be a better way. For the second one, I was able to repurpose some of what I cut off from the first pod... but still not easy, and not worth sharing what I did specifically, as no one would want to spend the amount of time and effort I did here. Anyway, I hope to finish mounting the gauges in the dash (removed from the car yesterday) today. Because the new gauges are much shallower, I needed to make a sheet metal bracket to support them from behind. The only way I could think of to do that was to make a large ring to go around the OD of the gauge (the speed hut gauges mount using a large trim ring). To the flimsy ring I made, I spot welded another bracket I made. I was able to bend each of the edges of this part about 45 degrees using my metal brake which added some rigidity. The final thing I need to do is drill holes and mount some threaded studs. When done, I will be able to secure the gauges to the dash using the stock mounting locations and hardware. The new gauges will not sit as far back in the dash. Again, due to their OD and fitting to the stock pod, I moved them forward a bit to get the bezel visible - this depth is where they look best.
-
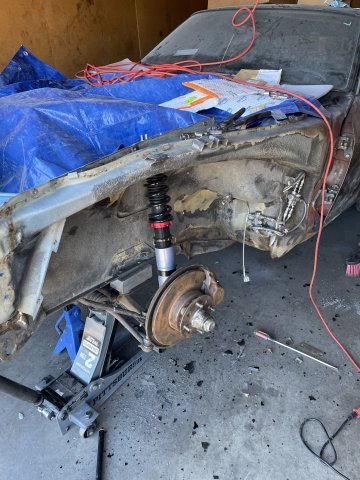
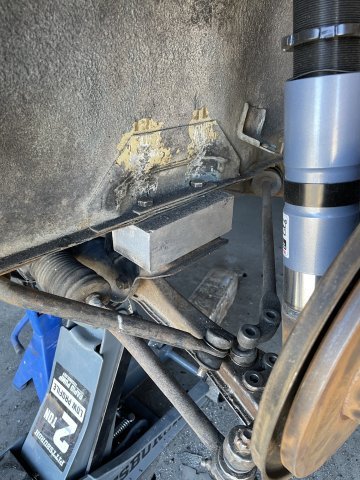
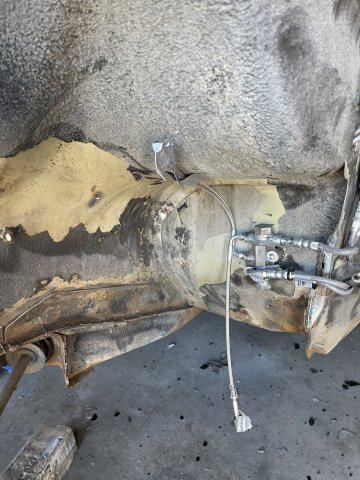
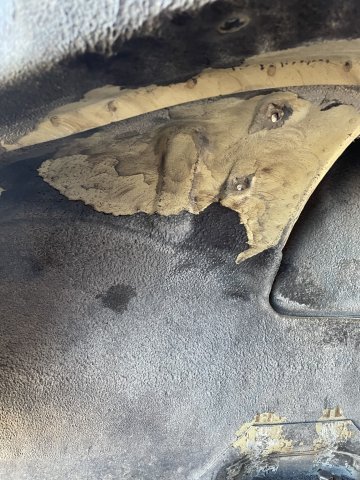
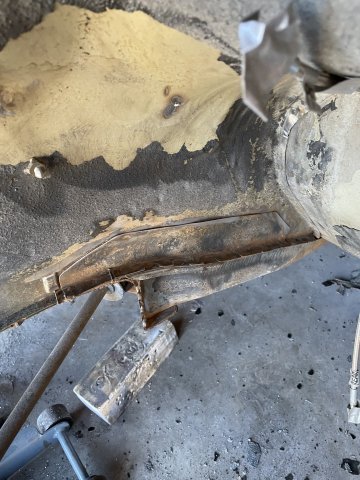
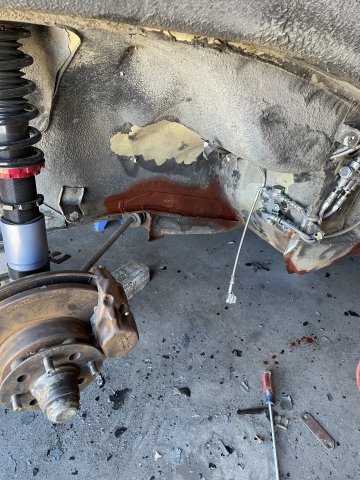
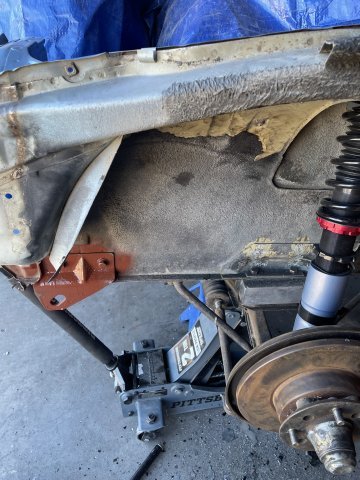
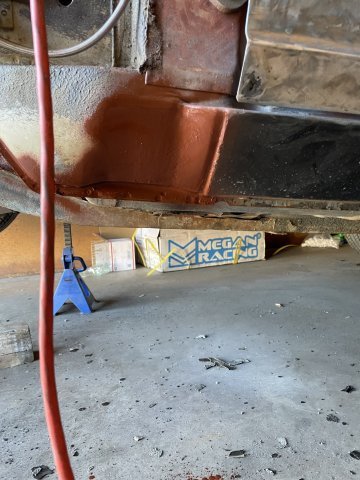
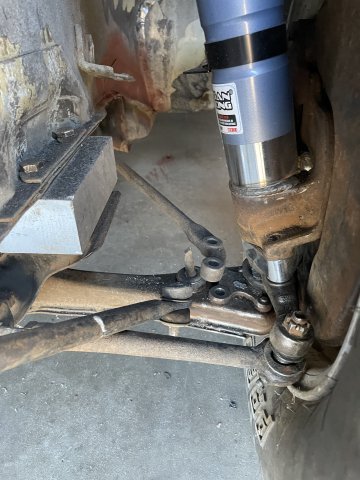
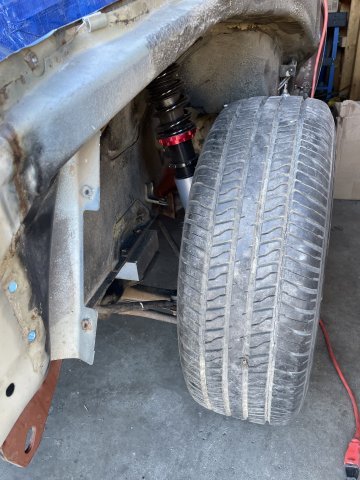
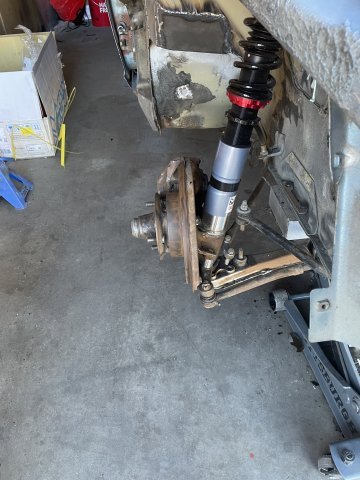
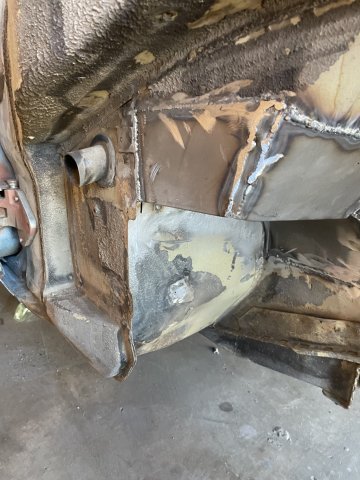
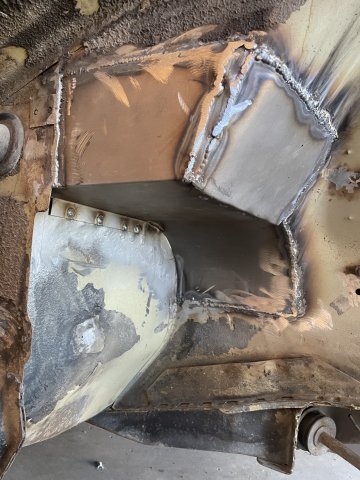
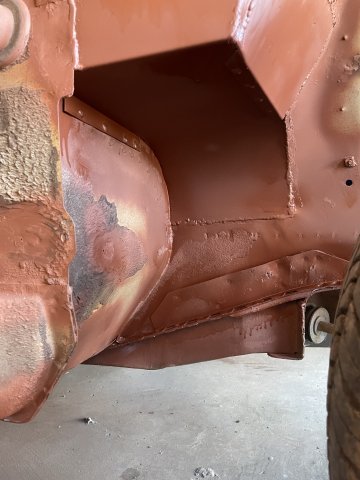
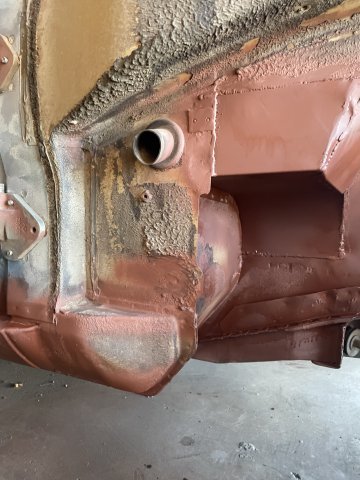
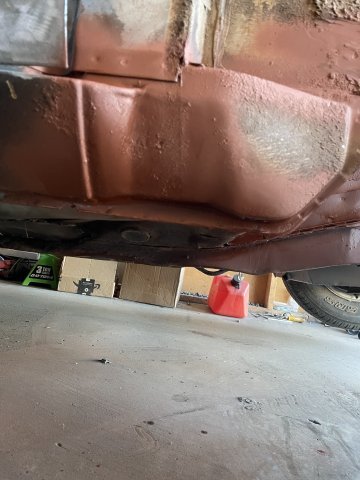
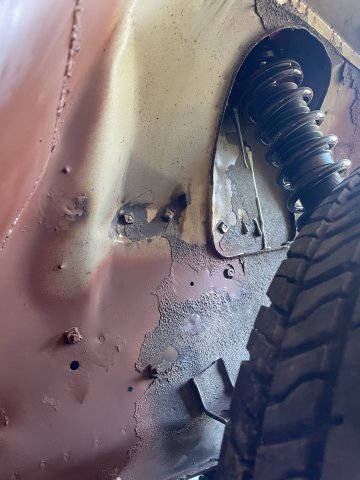
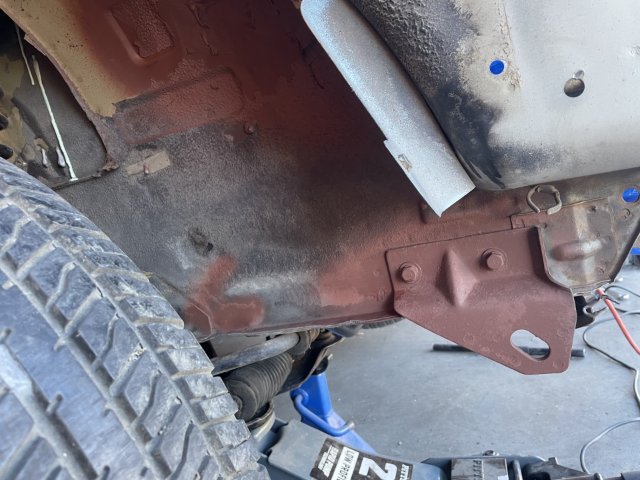
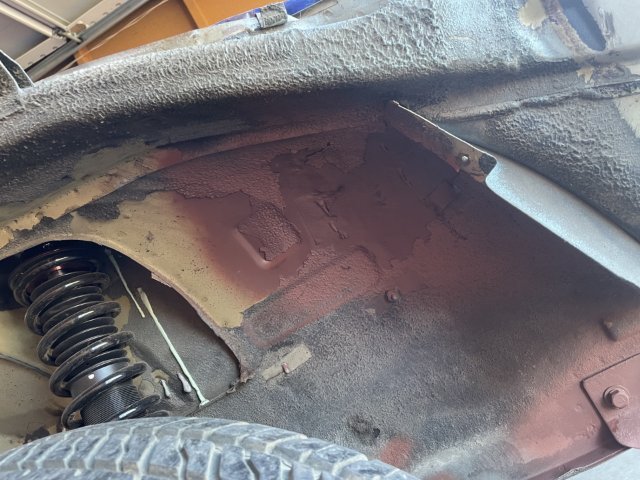
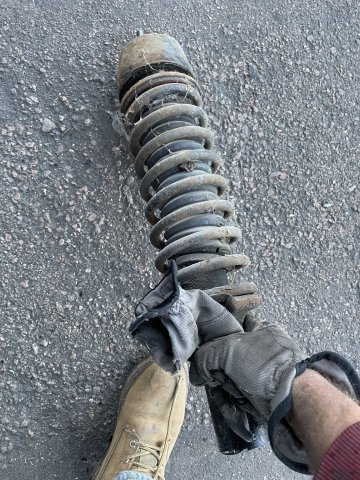
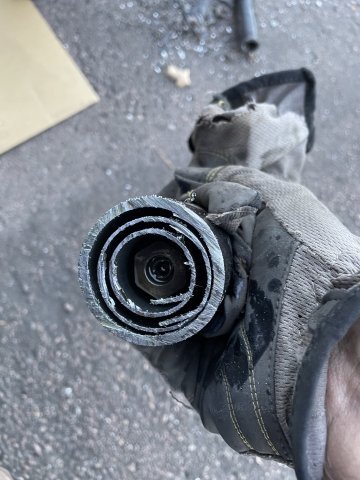
11-22-2025: Today I finished getting the front end together, as least enough to roll it around. The shims between the frame and rails are really aluminum blocks. I started with a 2 inch thick block, minus the factory plate I removed so they give about a 1 7/8" drop to the crossmember and engine. This is to get a starting point. With the front end together, I have 2 3/4" worth of adjustment left in the front struts to lower the nose down further with these plates in there. I have at least 4 inches if not more of clearance between the bottom of the cross member and the concrete. I installed some 1" thick bumpsteer spacers, and from the pics you can see the bottom arm is level, so pretty good for a starting point. I will now work on modifying the motor mounts to drop the engine 1-1.5 inches and see how it goes. With the block in there, and lowering the motor mounts, I believe the engine will fit completely under the stock hood. However, it will be necessary to get longer bolts and put spacers between the TC rod and arm to get the TC rods to bolt back up, and the sway bar end links were shot anyway, so they need replacement. I found that with the bump steer spacers, the factory wheels hit the steering rack end links. With the factory wheels, you would have to run wheel spacers for clearance, as even after grinding the ends down, they were still hitting.......will my 16" wheels clear? will be interesting to see. After this I removed some of the remaining factory undercoating that was peeling off and spot painted some spots with rustoleum primer to keep things from getting rusty. the pale yellow you see in the pics is actually the factory metal primer!! I then jacked up the rear, and removed the wheels, the 3 nuts on the top of each strut and then stood on each drum dropping and pulling out the rear struts. Because of their length, I had to go ahead and chop them in two in the car to finish getting them out. hydraulic fluid leaked and made a mess, but I got them out and after a cleanup with some shop rags and g@s, we are back to making progress. I have a mobile welder coming soon to weld on the collars in the rear and then I can put the rear suspension back together and get the car back up on 4 wheels. At that point, it will be time to pull the windshield and remove what's left of the paint and start prepping the Sheetmetal for the body and paint guy. PICS:
- Yesterday
-
Impressive work! I have most of the T3 stuff and their brakes but I bought bit by bit over many years so I'm always a little bummed I never got to lay out all my suspension like you have. It's fun to see all the shiny new parts in one place RB was my dream too before I had a deal too good to pass up on my L28ET. Love to see it
-
got my shims in today. that is VERY hard to do with the engine in, etc. Got a real nice drop on everything. I will also mod my motor mounts for some drop there also.
- Last week
-
 Mchasev9 joined the community
 -
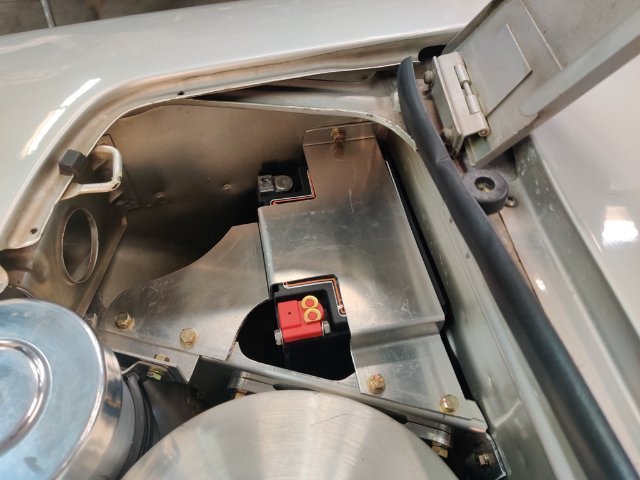
Your work looks great. There isn't as much activity here anymore, but some of us are still watching closely. I really like the battery bracket. The more spread out the support is, the more secure you can make the battery without damaging it. I've always disliked the common OEM-style hold down bar.
-
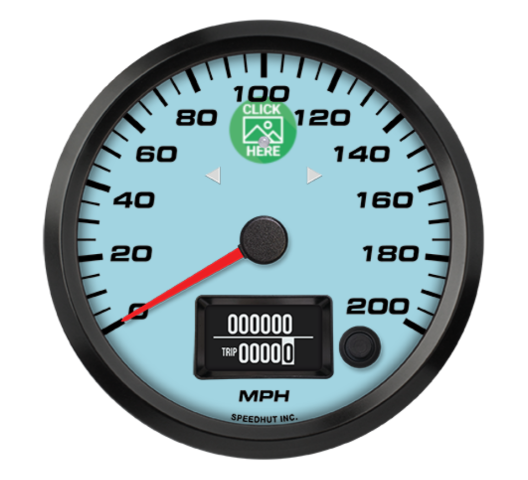
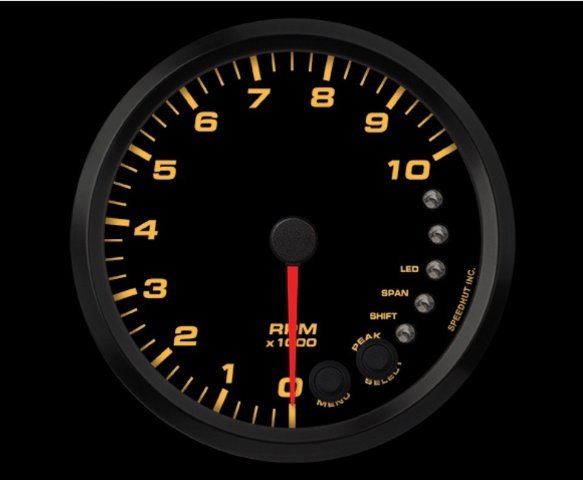
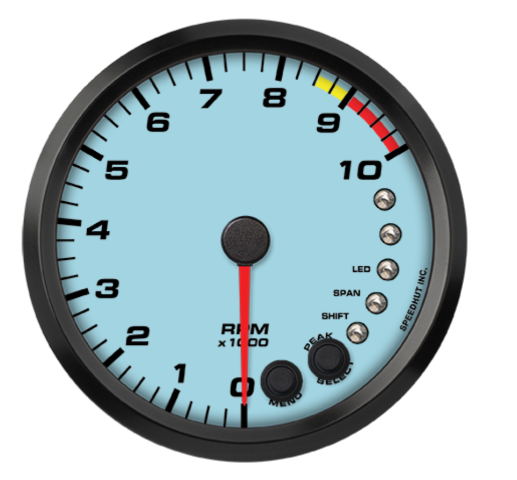
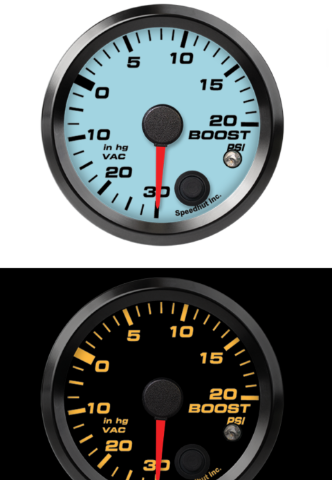
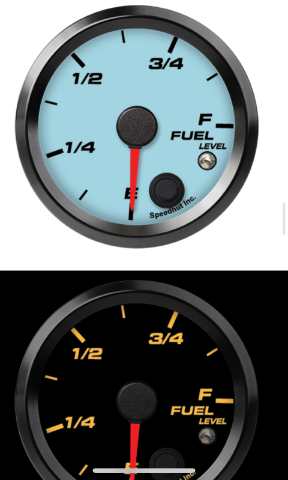
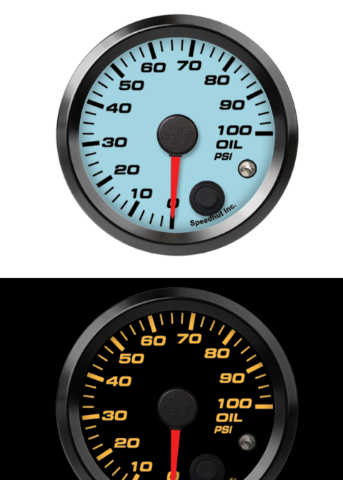
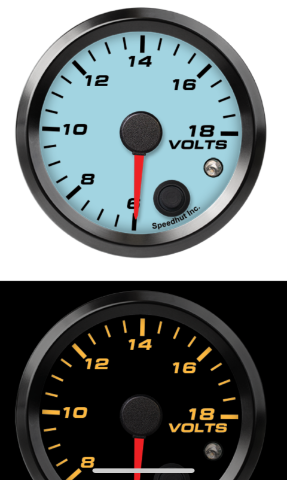
11-20-2025. Well on the 260, interior, especially dash is a LONG way down the road, but all these black Friday deals going, and talking to speedhut they cut me a great deal, I went ahead and got the gauges I wanted for this car. They will go in my dash with a full cap, and the center section will be a blocked off plate and will house 2 gauges from speedhut along with some switches. At any rate, The gauges are going to be "Gulf Racing Blue", in modern script, and show black with orange lit numbers at night. I have some pics here but they don't show the "z" script I am having added to the faces. it is just the thin black outline of the original "Z" badge. Anyway, here is what they will look like, without the Z, there is a pic of the script at the end. These things are crazy expensive. I love that the speedo is GPS. Pics:
-
 VandyZ joined the community
 -
 paulf77577 joined the community
 -
Great work so far! I’m sure this will be an awesome build. I suspect you will be running fender flares or a wide body kit seeing as your wheels are poking out a bit?
-
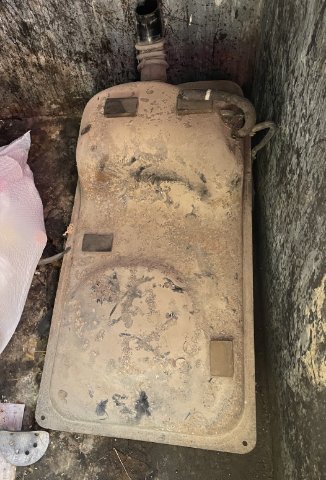
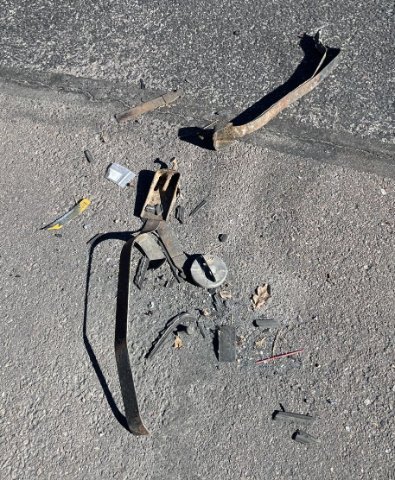
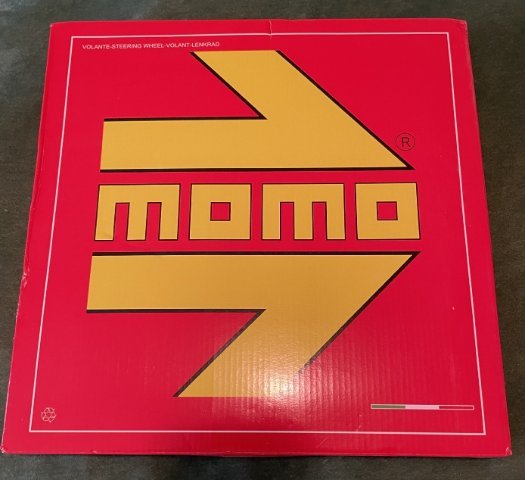
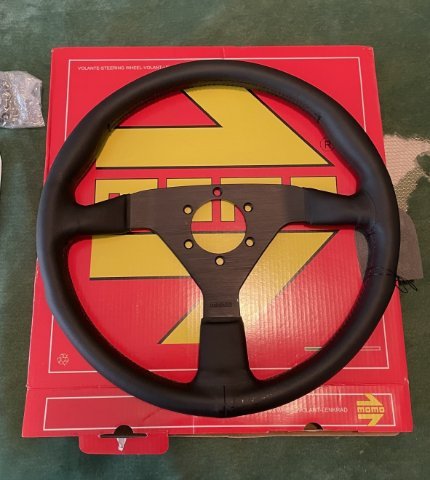
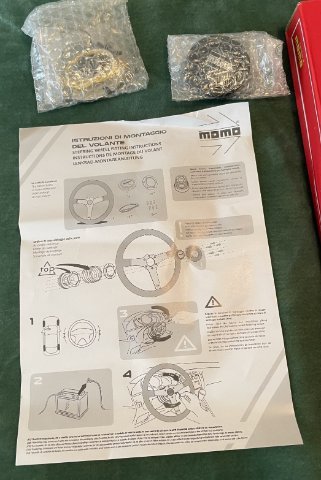
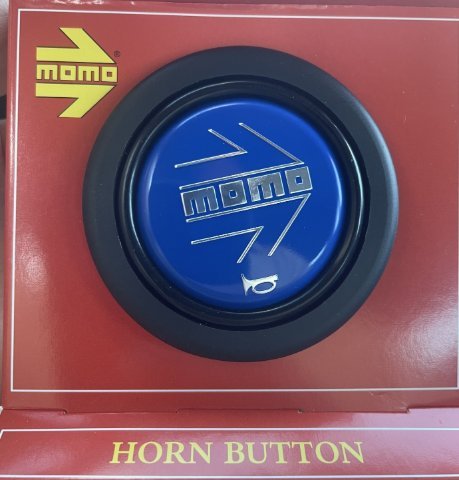
11-19-2025: I dropped the fuel tank and got rid of it. I also did some prep to get ready to install the shims under the crossmember and put the front suspension back together. My MOMO steering wheel, adaptor and a few other bits also arrived. Pretty cool.
-
Sold everything to a guy on zcar.
-
Hi All! I've owned a few s30's in the past and finally decided to build one. My car background is a lot of JDM cars including Supra's, AE86s, S13s, Skylines, a Stagea 260rs, etc. I have always loved the style of the s30 (don't we all), the aftermarket support for it and the random people who would stop me and tell me about their "Z" story. The story of this build started over a year ago when I purchased this 1978 Datsun 280z. The story behind the car (that I know of) was it is an American car that was brought to Washington and held at a speed shop awaiting restoration. Then was bought and stored in a heated warehouse for years in BC before i bought it. A little side story, I originally purchased a 1971 240z from the same person and they also had the 280z for sale but was well out of my price range. I would have loved to restore the 240z but unfortunately the amount of work it needed was well beyond my budget and experience just to get it to a useable condition. If you looked at it funny, rust would fall off the car. Mistakes we made. I was sold on what it could be but not what it will take to get there. almost a year later the 280z was still for sale, and the price was a little better. With some luck, i was able to convince the owner to trade back the 240z and cash for the 280z. Success!...Now, it seems the 280z was re-sprayed a British racing green but wasn't done the best and was flaking so i believe that's why it originally underwent the restoration in Washington. The car was just a rolling chassis, the front end had been primer epoxy'd and luckily had everything in boxes and labeled like "driver door guts", or "Rear hatch slam", which was nice to see. Now the goal of this project was to be a fun drivers, resto-mod car. It will be getting an RB26 from an r33 GTR, an RB25 transmission, DBW for the factory ITB's, Techno Toy Tuning full suspension, brakes, differential swap kit, running a Haltech S3 ECU and Wiring Specialties Harness, Poly fuel tank with an r32 skyline Radium hanger and Hellcat fuel pump. The bigger ticket items like turbo/manifold, radiator/fans, and then some smaller things are missing but most of the project is there now. I do plan of re-wiring the whole car considering I'm spending money in every other area. Now, just like anyone, I did set out with budget but considering since I last built a car, prices have gone up for parts which I stupidly didn't account for. Also a lot of, "well if i'm already doing this, then i might as well do that", and "since i have this off, i might as well get that." So the budget has been blown....but at least I'm happy! (maybe). BUT as it stands, the suspension and diff swap kit is in and the car is currently at the body shop getting the sunroof hole patched as well as some of the smaller trim holes plugged and a few small rust spots taken care of. Here are some pics throughout the build and as it stands. Any questions, advice or help for some "gotchas" will be welcome!
-
 As listed in the post above I did order those parts. Shipping is indeed expensive but that’s not Apex’s fault, they use UPS and when you fill in your address you just get a direct calculation from UPS. I don’t know where you live in relation to Apex (Milwaukee Wisconsin) but I know that shipping across Europe can reach the same prices. As for me my shipping came down to $284,50 which is a lot but still respectable. Unfortunately I also need to pax an extra 4,5% import duty and 21% tax on top when my package arrives at customs. The kits don’t come pre assembled but they do have great product installation videos on their website which make installation basically a step by step tutorial. I don’t mind at all, installing car part is basically a very expensive version of adult Lego.
 -
Today I picked up some sandblasting and powder coating from R&S Powdercoating here in Colorado Springs: And......you seem to always find hidden damage once everything is stripped off, huh?
-
 What transmission are you planning on running?
 -
Did you end up purchasing the parts? With black friday sales I was considering their rear control arms. I don't love having a third heim that can wear out compared to others but i like the triangulated design and the motion it allows. As far as the shipping. just the control arms are like $60 to ship inside the US. can only imagine all those parts crossing the ocean would be costly. Maybe the kit comes assembled? would be weird but possible.
-
SLA S30 Front Suspension Conversion
flatout replied to baby_Carlton's topic in Brakes, Wheels, Suspension and Chassis
Love to see the scans and some thought behind the design. I was thinking the same thing about the limited motion of the apex shock. My car came on a set of coilover struts that has similar travel so i've been looking at options. If you need any assistance with CNC machining, I may be able to help out. -
Yep, that's the correct part number (and the same one I bought for my Z). Looks like it's still available from multiple sources.
-
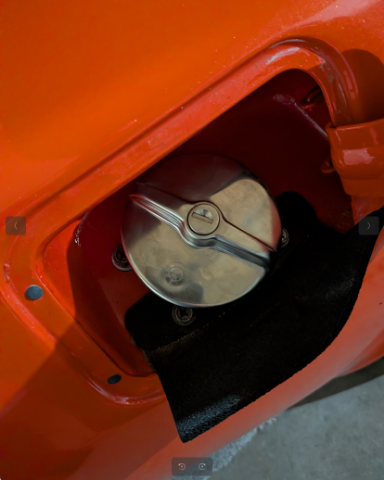
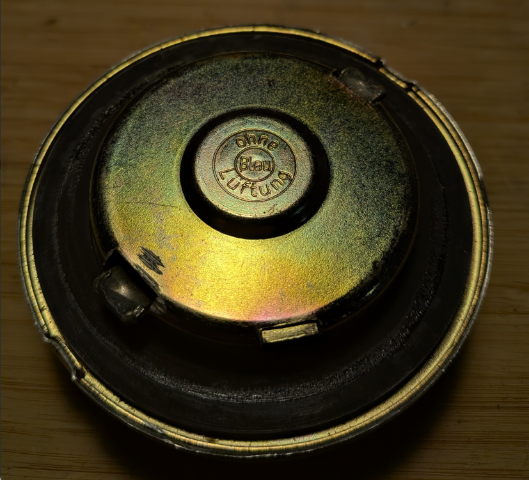
I believe this is the part: https://www.autohausaz.com/pn/16111103603 or here: https://www.fcpeuro.com/products/bmw-fuel-tank-cap-2002-2002tii-1602-16111103603-1
-
sent you a message
-
Thank you., JHM . Appreciate the offer. But if you had any kind of sloshing out on the street, then no, it won't work for the track. With a full tank and 40 tread wear tires up to temp at a place like Streets of Willow, every left turn with the car's physics fully loaded right sends a cascade of fuel out of the cap, down the fender, and gets me black flagged off. Darom -- I think that's the cap that's now out of stock. Unless you have a source for it we don't know about?
-
I installed 10-12 years ago, the fuel prices were high and there was some gas theft going on in my area. I needed a lockable gas cap
-
Similar to what @darom did, I located one of those old Bimmer locking gas caps and gave it a try. It does indeed have a tight fit on the Z's gas cap inlet; but I found that gas could slosh up and leak out through the internals of the cap during hard cornering when the tank is near full. IIRC, it's an internally vented breather-style cap. It didn't work for my intended application; and I don't think it would work for yours. However, if you want to give it a try, I can dig through the garage to see if I still have it....LMK.
-
Annular discharge 😆
-
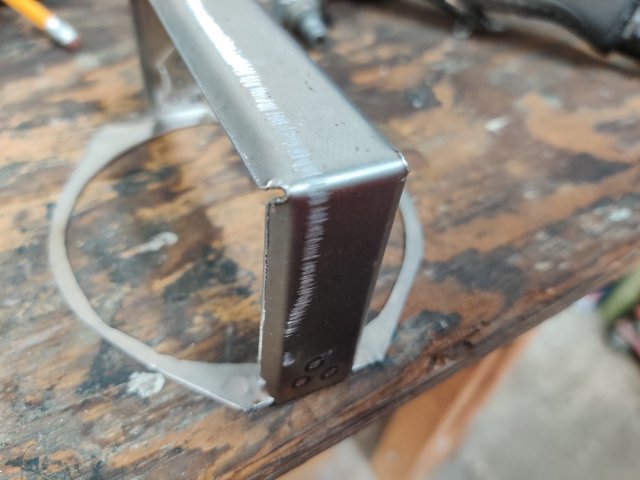
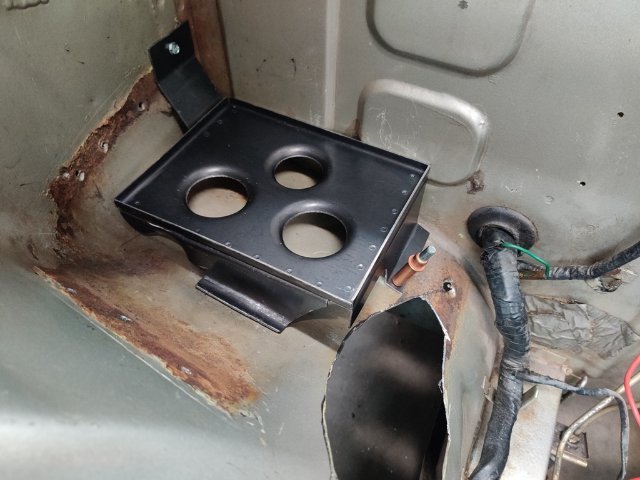
@tube80z - so I have done what you suggested here: I put lips on the battery tray to keep the battery from shifting at the bottom: The battery hold down "plate" has a couple of jog bends to capture the angled bracket that the tank mounts to. I just need to secure this plate I made (what I was referring to with the red outline above) to the main plate to finish this up.


-
Who's Online 0 Members, 0 Anonymous, 682 Guests (See full list)
- There are no registered users currently online