
gvincent
-
Posts
663 -
Joined
-
Last visited
-
Days Won
2
Content Type
Profiles
Forums
Blogs
Events
Gallery
Downloads
Store
Everything posted by gvincent
-
LT1 is alive! sort of...Need Help!
gvincent replied to gvincent's topic in Gen I & II Chevy V8 Tech Board
Yes it was the injectors, I took a chance and tested my other injectors on the other LT1 and found only 4 that would click with power applied and swapped 2 of them over to the engine, it runs on all 8 cylinders now!!!!!! Amazing that the injectors just clog up like that from just sitting for a year, they were running just a year ago. Now I still have the two codes to clear: #43 Electronic Spark Control #29 EAS Electrical Failure I tested the new knock sensor and it is reading fine, right at 3300 ohms I do not have the 5 Volts at the connector. I am going to have to get the ECU back out from behind the dash and check for the 5 Volts at Pin D22 dark blue wire on the "D" blue connector, if present there I will have to run a new wire as there must be a break in it somewhere. If not present I am not sure what to do, possibly a bad PCM? or should I suspect the Knock module in the PCM? should I just get an LT4 module? http://shbox.com/1/1995_pcm2.jpg According to Freescan I am registering knocks and it does occasionally retard the timing so is the sensor working? I don't get it.... test proceedure is here: http://shbox.com/1/4th_gen_tech2.html#knock_sensor On the air pump code I am not sure what to do to clear this code, I do not have the relay or fuse wiring left for this circuit. I guess the PCM senses the coil resistance of the relay?? Other forums say just put the relay and fuse back in and the code will clear but I eliminated all that wiring so can I just measure the relay coil impedance and just put a resistor on that pin? See pin A14 in the diagram http://shbox.com/1/1995_pcm4.jpg SO I have the SES light on and the fan runs constantly but according to Freescan it does go from open loop to closed loop the temp is usually around 178 and I have a 160 thermostat Will my fan operate normally when I get rid of the SES light trouble codes? I am almost there I am so close to driving this on the street! I think my Mallory fuel pump may be acting up, I already had it sent back to Mallory once already, it is LOUD and sometimes sounds funny and fluctuates pressure. Is everybody else running one of those Walbro pumps? My Mallory is an -8AN but all my lines are -6AN what size is the Walbro units and what model should I order? Thanks, Greg -
Sanderson/JTR headers, gasket or no gasket?
gvincent replied to gvincent's topic in Gen I & II Chevy V8 Tech Board
Thanks Deja, I installed the header gaskets, they seem to work great! thanks for the advice. It was a pain doing the passenger side but I got it done without having to remove the alternator, it took a little creativity in having only enough room to get 1 arm in there. Greg -
Sanderson/JTR headers, gasket or no gasket?
gvincent replied to gvincent's topic in Gen I & II Chevy V8 Tech Board
Hi Deja, thanks, I went and ordered a set from Amazon.com for $35 I have a feeling this will help clear up my code 43 Knock sensor, with the leaking headers I am sure some of the 9000 knocks had to do with the exhaust leaks, I am sure the O2 sensors will be happier also. I drilled and mounted the knock sensor on the JTR adaptor plate. Now to get cylinders 3&4 to fire. Thanks again, Greg -
Hi Curious as to how many ended up using a gasket with their Sanderson headers. I have the CC105 "D" port for the LT1 motor, they sealed with no leaks on the Aluminum head LT1, but then I never got a chance to drive that motor, but on the Iron Head LT1 they leak really bad and I am going to have to pull them off and use a real gasket or re-do the RTV gasket. (Driving the knock sensor crazy I think) How many just used the 1/8" Permatex Hi Temp RTV that Sanderson reccomends and how many used a real gasket and if so whose gasket did you use and if you actually doubled up used more than 1 gasket per side. Thanks, Greg
-
Well the second LT1 is running kind of. I had to swap out a brand new Opti with my Opti off the first motor to get it started. There was no continuity on the brand new cap from the coil wire feed to the rotor button. I'm getting good at Opti swaps, done in 2 hours. Now for the problem: It runs like crap, #3 and #4 cylinders are not firing for some reason, this is what I have done so far: 1. put a spark tester on each spark plug wire, all test ok 2. Resistance check each injector, all test ok 3. apply 12 volts to each injector, some were stuck but all were clicking after tapping each solenoid with 12V they were all clicking. 4. bought a NOID light kit, all tested OK as receiving the negative pulses. 5. Fuel pressure is right at 45Lbs while running although bleeds right off. I found out I need to hook the Air bleed line in with the return, I will get this done after my AN adaptor and "T" fitting get here today. 6. Bought a compression gauge and removed all the spark plugs and did a compression check the results were: Cylinder #1 200Lbs Cylinder #2 195Lbs Cylinder #3 200Lbs Cylinder #4 190Lbs Cylinder #5 200Lbs Cylinder #6 193Lbs Cylinder #7 190Lbs Cylinder #8 204Lbs Now after testing and putting the plugs back in I noticed that I forgot to wire the throttle wide open during the test. Each cylinder would increase it's pressure on each rotation. 7. While I had each brand new plug out I looked at them and all 6 plugs that had fired were black with a grey tip, the #3 and #4 cylinder looked like they had never fired, a little slight dis-colorization but that was it. 8. I went to hook up my Autoxray XP240, but half the LCD screen was not working so I couldn't read half of what it was reading in capture mode. My Son had borrowed it and now it doesn't work, what else is new! A few days earlier it read the following codes: #43 Electronic Spark Control #29 EAS Electrical Failure #91 Shift Light Fault #97 4K Pulse mile fault The capture read: Loop-Open 800 Idle 800 RPM 166.5 coolant 86.9 Manifold air MAP 1.33V Throttle 0.56 Throttle angle 0% Mass 10gr/sec CCP duty cyc 0.0 Battery 1.6V BAR Pressure 4.90 Left O2 83 Right O2 193 Bl cell 16 Left block value 128 right block value 128 Integra value 128 Left Injector pulse 4.2ms Right Injector pulse 4.2ms Idle air meter 44 steps Learned Idle 32 steps Spark advance 22 degrees Knock retard 0 Knock Sensor 245 EGR 0.0% Fan 1 on Fan 2 on Air switch off Last night I ran it longer to see if it would go into Closed loop and used the laptop with PCM Communicator. Closed loop Water temp 173 RPM 775 RPM Variation 1.66% Air flow 9gm/sec Desired Idle 800 Left O2 249mV Right O2 688mV Throttle position 0% Left O2 BLM 128 Right O2 BLM 128 Left O2 Del 138 Right o2 Del 138 Battery 12.6V TPS volts 0.57 IAC Pos 28 Baro 102kpa In air temp 80F Learn disabled Spark 23 degrees Knock retard 0.0 Knock count 9905 MAP 33kpa Left pulse width 4.75ms Right pulse width 4.82ms BL Cell 16 Gerr -1 Input trans mode-performance Input no TCC brake sw Input no spark retard Not power enriched no kickdown pattern no injector fault both fans 3rd gear A/C temp 40 A/C pressure 0.02V Again I have a these 2 codes: Code 29 EAS Electrical Fault (ODM) Code 43 ESC failure I can erase these 2 codes but the keep coming back, My factory manual say that code 29 is an air pump code and code 43 is a knock sensor code? Both scanners say the same code number but a different description than the manual??? I did replace the Knock sensor, and I have exhaust leaks with the Sanderson headers, I need to install gaskets. How much harm am I doing to the motor by running it on 6 cylinders? What would cause cylinders 3 & 4 not to fire? Sorry for the long post, but I wanted to get all the information down. Thanks, Greg
-
I just watched your old videos....... Has to be the most fun you can ever possibly have with your pants still on! Greg
-
Greg, would you happen to know whether or not there is coolant flowing through the intake manifold. I need to pull and reseal it
-
LT1 Won't stay running
gvincent replied to lgoodson@pacbell.net's topic in Gen I & II Chevy V8 Tech Board
Did you do the VATS delete? How about the fuel pump relay, it needs to see the VATS and oil pressure from the ECM to stay on. -
I had to put my LT1 D port angle plug Sanderson headers on a Straight plug Iron Head LT1, my Taylor wires are really close or touching, I installed the stock LT1 aluminum heat shields on the Taylor 90 degree boots, the aluminum shields touch the headers but I haven't started the motor yet to try them out, I'll let you know when I do and if the Taylor wires melt or not with the LT1 aluminum shields.
-
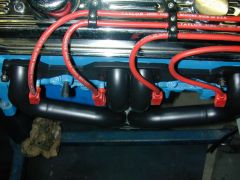 straight plug Caprice Iron heads with Angled plug Sanderson headers, Close!!, Ill use the stock aluminum heat shields and see what happens.
 -
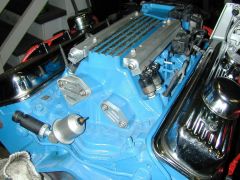
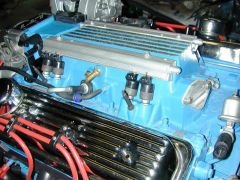
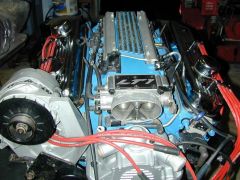
Welded fuel rails on LT1#2 Modified oil pressure sender 2 port
gvincent posted a gallery image in Members Albums
-
-
-
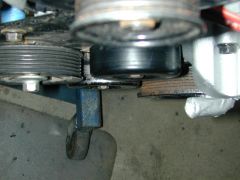
Mis-Alignment of Caprice pulley on F body accessories
gvincent posted a gallery image in Members Albums
-
-
-
-
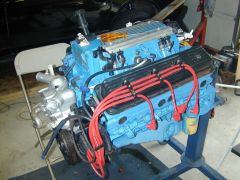
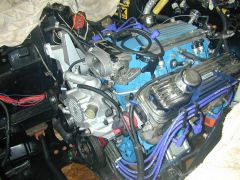
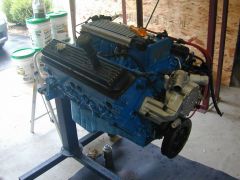 Getting the second LT1 ready to swap out
 -
They probably are and a lot of people on this site have used them, I am just a little uncomfortable bolting anything through the thin floor sheetmetal that wants to twist as the motor and transmission do. Greg
-
The stock rails will work fine, just adjust the height in the inside.
-
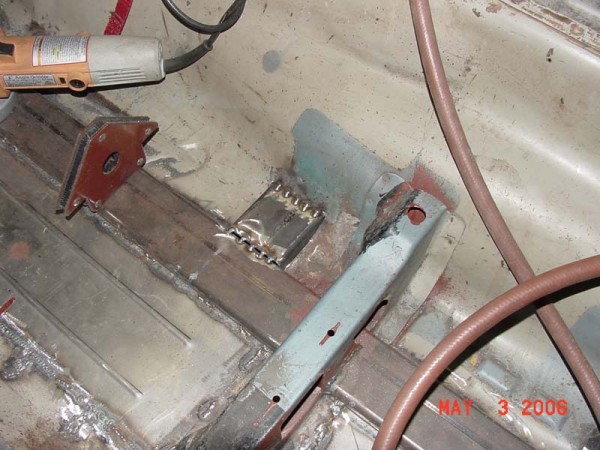
Item 7 is just a flat plate for bolting up the drivers side of the removeable mount, Items 8 & 9 do the same for the passenger side, although we had to play with the angle a little to get it to match the tunnel angle. I thought about cutting up the stock firebird T56 crossmember but it would of been a bitch to get any type of exhaust pipe through there, although I ended up not needing all that nice clearance this mount gives you, but iI can if I want to run duals out the rear someday instead of my sidepipes Greg
-
I'll second that, any idea what let go to cause that? the balancer start to spin off? I always worry abit about no key and keyway...... I was also interested in your build on the motor, I was going to PM you after I tear down my other LT1 and start to rebuild it. WOW serious damage! Greg
-
I have 2 40" 4" glasspacks with 3" outlets as sidepipes. I have pics in my gallery if interested. Greg
-
I researched this heavily and decidecd on this mount as being the best one and plenty strong enough and added stiffness to the body as well by being welded to the frame rails and floor pan. It bolts and unbolts very easily, I have had the engine and trans in and out twice and this mount was the best choice I made. I forgot where on this site I got the info from but I am posting the plans and the original pictures that I kept. You might have to do a little grinding to mate the floor pan perfectly as there are some variations between the 280-260-240 floor pans. Just adjust the drawing for your actual distance between the frame rails, I had reinforced Baddog frame rails so my were actually shorter. I will take some pics of my install if you want more pics, but it looks basically the same, I used the Poly trans mount for the T56 as well. It leaves plenty of room for your dual exhaust as well, Although I ended up going with side pipes as I love the old school look. Hope this helps. Thanks, Greg 280Z_T56_XMEMBER.pdf

-
Hey Mike, Do you have any pics of the hose splicers? According to all recent LT1 swaps the majority of the swaps have the vent tee on the top radiator hose now, Is JTR in agreement with this? Will I still have the cobbled looks of radiator/hose/reducer/hose/water pump and radiator/hose/reducer/hose/tee fitting/hose/water pump? There has got to be a cleaner way to do this. It looks like a rotor rooter tiller with all the hose clamps right now. Greg