
Miles
-
Posts
2393 -
Joined
-
Last visited
-
Days Won
37
Content Type
Profiles
Forums
Blogs
Events
Gallery
Downloads
Store
Everything posted by Miles
-
Has anyone used Eibach Progressive springs on their V8 Z? How well do they perform? Our V8 Z will be a street car. I Think the Eibach progressive springs are 69/150lb/in front and 86/303lb/in rear, and I am concerned the fronts may bottom out with the V8. As an alternative I was thinking 200lb/in front and 250lb/in rear. I want the ride firm. but not like a skate board. Seems like JTR suggested 175 spring rates all the way around. Any input would be appreciated. Also, what is a good cheap reliable source for springs and shocks? Thanks Miles
-
MACH5: I used the MSA V8 mounting kit on my son's 72 240Z V8 conversion. You can see photos of the installation on my picture site below. The advantage of the JTR kit is that it sets the engine in lower and further back in the engine bay. The advantage of the MSA kit is that it bolts in the car with no modifications except for drilling a few holes. The JTR trans mount requires pounding the floorboard flat and I have gotten the impression that some of the JTR installs have problems with driveline phasing i.e. getting the driveline and differential properly aligned. The MSA trans mount slips up in the tunnel. I put an angle finder on the output shaft of the trans and moved the trans up/down with a floor jack until I got the desired angle and then drilled and bolted the trans mount into position. I have zero driveline vibration problems with this set up. The engine mounts are easy to install with only one hole to drill on each side. By the way, the MSA trans mount is designed for a 700r4 auto trans, but I used it to install an 89 Camaro T5 five speed trans. The MSA mount bolted to the T5 like it was made to order-no mods. If you use the T5 trans be sure to hammer the trans tunnel (corner of floorboard just under the gas pedal area) to provide clearance for the throwout arm movement. I plan on using the MSA kit when I convert my 72 240Z to a V8 this summer. If you are going to run a lot of HP and want the engine in as low and far back as possible go with the JTR mount. The JTR engine and trans mounts are well designed and will probably take more abuse. The MSA printed instructions/pictures are unreadable, but the MSA phone techs helped clear things up. If you decide to go with the MSA mounts email me and I can give you some tips on the install. As an incentive for starting your project, driving a V8 Z is the second best feeling in the world. Miles
-

Allignment Problem? Pulls to the Right
Miles replied to Miles's topic in Brakes, Wheels, Suspension and Chassis
Lone What is a good source for crate engines in Sacto? I plan on using a crate when I convert my 240Z. We weren't able to bring my son's 240z to the meet as I still have to rebuild the front brakes. Hope we can have another Hybrid meet in Rio Vista soon. Miles -
Allignment Problem? Pulls to the Right
Miles replied to Miles's topic in Brakes, Wheels, Suspension and Chassis
Lone Thanks. I'll have the shop check the toe adjustment. I have just installed all new rear brake hardware. They seem to be ok. I am in the planning stage on what spring rates to use when I get around to replacing the old ones. I was considering progressive springs, but they may be too soft for a v8 Z. May go with 200lb/in front and 250 l/b/in rear. The car will be for street use 95% of the time so I don't want to get too stiff with the suspension. Also, I thought I saw your car at the Rio Vista meet. Looks good. Liked your seats. Did you use a crate engine? Thanks Miles -
Our 72 240z v8 pulls to the right when you let go of the steering wheel. An old Z guy at the allignment shop says it is most likely the tire that is causing the problem and that there is no adjustment on the Z to correct the pulling problem. He also said that it could be from worn parts, but was not specific about what may be worn. I also noticed that the right front spring sags about 1 inch as compared to the left front spring. What could be causing the pulling problem? Thanks Miles
-
Fixed the lean surge problem. Changed out the Edelbrock metering rods one step in the rich direction and it accelerates fast and smooth. Although at idle the engine speeds up and slows down slightly now. Thanks Miles
-
Stock Proportioning Valve Adjustment?
Miles replied to a topic in Brakes, Wheels, Suspension and Chassis
Testing and replacing stock brake proportioning valve in a 72 240Z: I recently tested my proportioning valve per the Haynes manual. Took the car up to about 30 mph and braked hard. The rear wheels locked up, but the fronts did not lock. The Haynes manual says to replace the proportioning valve if the front brakes do not lock first. Also, my 240z owners manual suggests that the proportioning valve should be replaced at about 30,000 miles as preventive maintenance. Has anyone replaced the stock proportioning valve ($86.00)? If so, did it improve braking performance by preventing the rear brakes from locking first? Thanks Miles -
I need to replace the window regulator and door mechanism in a 72 240Z. I have located a complete 73 240Z door. Is the the 73 door mechanism and window regulator interchangable with the 72 door? Thanks Miles
-
Help! Why is a 240 this way?
Miles replied to Dave's topic in Brakes, Wheels, Suspension and Chassis
Dave Do you know if Nismo makes springs rated at 200lb/in Front and 225lb/in Rear for a 72 240z? What are the prices like for the springs you looked at? Thanks Miles -
We were having the same problem with the driveshaft hitting the e brake when mashing the pedel. We replaced the stock rubber front diff mount with a solid mount from MSA. No more clunks or driveshaft hitting the e brake. The solid mount did not increase the noise level in the car except for when in reverse. In reverse you can hear the gears meshing up. Miles
-
Newby Q's - what to look for in a V8 Z?
Miles replied to DCZ's topic in Gen I & II Chevy V8 Tech Board
You want to minimize correcting other peoples mistakes. Here are some problems we found with a converted Scarab V8 Z my son bought: Check the wiring: Make sure that wiring modifications were done correctly. We found that most of the engine bay wiring was chopped up and installed wrong. It took many hours tracing schematics to rewire the car. Check the suspension: While rebuilding the rear brakes we discovered that the drivers side rear strut and brakes were from a later model Z and did not match the passenger side strut/brake assembly. We had to replace the driver's side strut and then proceed with rebuilding the rear brakes. Confirm parts installed or work performed on the car: I could not confirm most of the claims the owner made about the car. Look at the craftsmanship of the conversion. If it looks like a chop job you may have problems. If it is a manual trans has the clutch been rigged correctly? We had planned on rebuilding the car when we bought it, but the above items had to be corrected/changed along the way adding to the time and cost to complete the project. The engine was in the scarab position with a four speed trans that had the shifter positioned right up against the dash. We set the engine back and lowered it from its' scarab position and added a Camaro T5 trans and a Datsun R200 differential. The car is a now real joy to drive. For my own conversion project I bought a very clean stock 72 240Z. Everything works on the car so I can focus on the fun stuff. Miles -
This raises some other questions for California cars. Do we have to retain the original Datsun fuel evap controls i.e. the evap tank, hoses and purge line that connects to the intake manifold? Also, I noticed from my Chilton manual that in 74 GM added EGR to the sbc engine which means, I assume, that I would need headers with holes for the EGR connections. Seems like I should use a 72-73 SBC engine for my 240z conversion in order to avoid the EGR requirements. Also, is an air pump required on 72-73 sbc engines? Miles
-
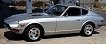
Finally got a photo of the MSA transmission mount while the exhaust was being installed. The MSA mount was designed for a 700r4 trans, but bolted to the 89 Camaro T5 trans without any modification. Click on the photo site below. http://www.netsnapshot.com/pickalbum?IanZ Miles
-
I agree that in time the mount may loosen up and it does look a bit flimsy. I had considered a doubler plate where the trans mount bolts to the tunnel, but don't have any welding equipment. We're not running much HP and the differential is solid mounted. So far the drive train is tight and there are no clunks or vibrations when banging through the gears. In the meantime I'll add checking the mount to my periodic drive train inspection. Thanks for the feedback Miles
-
Our 350 sbc surges. It has a new Edlebrock carb. It's not like a hicup. More like it speeds up slightly then slows down so it feels like a pulse. It is most noticable when holding constant speed in first and second, but can be felt in all gears. Initial throttle reponse is slightly slow once the engine is warmed up. Fuel pressure runs about 3psi average. I was thinking it might be fuel pressure related, but when I floor it hard it really takes off without any hesitation. It does not seem to be starving for fuel. Any help would be appreciated. Thanks Miles
-
Looking from the bottom of the carb turning the wheel clockwise will richen the mixture. I turned mine all the way in full rich until the adjusting knob stopped and then backed it out in full turn increments. Mine seems to run best at 2.5 turns out from full rich. Check for air leaks in hoses and gaskets.
-
Rear Wheel Cylinders Part Numbers/Source
Miles replied to Miles's topic in Brakes, Wheels, Suspension and Chassis
John Thanks for the part numbers. Miles -
What is a good source and part numbers for 72 240Z right and left rear wheel cylinders? I have been to several parts stores in Sacramento and their wheel cylinders don't look anything like mine. Mine have a left and right side E brake/adjuster mechanism configuration and the hard pipe connects to the cylinder at an angle off of the forward facing end of the cylinder. Some of the replacement cylinders I have looked at have the hard pipe connecting to the center of the cylinder. The Nissan dealer has the wheel cylinders, but wants $80.00 each. The car was manufactured 5/72. My other 240Z was manufactured 9/72 and has the identical wheel cylinders. Thanks Miles
-
Rear Brake Parts Mis-Match 72 240Z
Miles replied to Miles's topic in Brakes, Wheels, Suspension and Chassis
Davy Thanks for the info. I picked up a complete 72 240z driver's side strut assembly complete with traverse arm yesterday. Cleaned it up today. Have all of my rear brake parts except for the wheel cylinders. Local parts stores having difficulty matching my cylinders. I'm going to try MSA Monday. If someone knows a good part number for the left and right wheel cylinders let me know. My cylinders have the hard pipe that connects at an angle from the front and the adjuster ratchet mechanism on the bottom. My z was manufactured 5/72. Thanks Miles -
In the process of replacing rear brakes on a 72 240Z with all new parts. It appears a previous owner mis-matched shoes and cyliders from different year Datsuns. Here is what I found -shoes on driver's side have a slot for an adjusting screw that sits above the brake cylinder between the cylinder and the hub. -Driver's side brake cylinder does not have the adjuster wheel built into it. The adjuster is a rod that runs between slots cut in the shoes. -Access to the driver's side adjuster is though a small slot in the backing plate. - The only shoes I could find to match the driver's side (with slots for adjuster) are for a 77 Z. These 77 shoes also fit the passenger side, but the adjuster slots are not used because the passenger side wheel cylinder has the adjuster built into it. - The passenger side wheel cylinder has the adusting wheel built into it. There is no adjustment slot in the backing plate. Adjustment is through a hole in the drum. _ The hard pipe connects to the passenger side wheel cylinder at an angle from the front (angle towrds the front of the car) of the wheel cylinder. The stock wheel cylinders I looked at all have the hard pipe connecting at a right angle in near the center of the wheel cylinder. UPDATE checked the Chilton manual more closely. Our 240Z driver's side has a strut and backing plate off of a 77-78 Z. The passenger side is a stock 72 240Z. I measured each strut from the bottom of the spring to the bottom of the strut tube. The 72 strut is 12 1/2 in. and the 77-78 strut is 13 3/4 in. long. The shorter 72 strut has spacer blocks wedged into the spring I assume in attempt to make the struts of equal length. This is a total PITA. Looks like I'll have to find a 72 240Z strut to replace the 77-78 strut and then rebuild the brakes back to stock on both sides. This has to be the Frankenstein of all brake set ups. Any help would be appreciated. Thanks Miles
-
Which lengthLokar cable? 24" or 36"?
Miles replied to QWKDTSN's topic in Gen I & II Chevy V8 Tech Board
Nion The Lokar kit came with the bracket. It was identical to the bracket on my previous Carter set up. Miles -
Which lengthLokar cable? 24" or 36"?
Miles replied to QWKDTSN's topic in Gen I & II Chevy V8 Tech Board
Nion I used the 36 in. Lokar cable. The installed cable is 17 1/2 in. long from the fire wall to the connection on the carb. Add another 2 to 3 in. where the cable goes through the fire wall and connects to the gas pedel. I heated the gas pedel and bent it back about 10 to 15 degrees to get the travel right. I could have used the 24 cable, but wasn't sure how much the bends and a little slack in the cable would require so I went with the 36 in. Also, per JTR I cut about 1 1/2 in. off the bottom of the gas pedel so it would not catch on the carpet. However, at a stop sign, the pedel did get caught once on a mat and was full throttle. Gets your attention real fast. There is no longer a mat on the driver's side. You can see a pic of the cable on our photo site below. Miles -
Pulled the diff mount apart today. Found that two washers were placed between the bottom of the solid mount and the cross member effectively raising the nose of the diff crunching it into the E brake lever arm. Miles
-
I just went through the stuck drum ritual. I tried all of the various tricks and techniques. The driver's side drum pulled off very easy. It was deeply scored inside. The passenger side drum would not come off. So after two days of frustration I took a 3/8 drill and drilled through the drum right around the hub. It came off after I made the full circle of holes around the hub.This drum is now history and will never frustrate anyone again. I then wire brushed both hubs to remove rust and scale. see your Haynes manual brake section as it mentions the hole in the drum. The hole in the drum is actually for inserting a screw driver to adjust/slacken the brakes. On my 72 240Z there is an adjuster hole on the back side of the backing plate on the driver's side and no hole in the backing plate on the passenger side. On the passenger side you have to adjust the brakes through the hole in the drum. There is a flat piece of metal (cog) that allows the adjuster to turn in only one direction each time you set the E brake. In order to slacken the adjuster wheel you have to reach in though the hole and push the flat piece of metal (cog) away from the adjuster. This was a PITA since I could not see the cog and had to fish around for it. Make sure the E brake is working as it adjusts your brakes each time you set the E brake. Otherwise you will have to adjust them through the holes provided in the drums/backing plates. UPDATE I discovered yesterday why my 72 Z has an adjuster hole on the back of the driver's side backing plate. The previous owner replaced the stock strut with a 77 Z strut/brakes. I am now replacing the 77 strut with the proper 72 strut. This was a potentially dangerous situation as the 77 strut is longer than the 72 strut and there is no provision for the E brake adjuster to work creating an asymetrical strut/brake set up. Lesson learned...you can't assume anything is right when you buy a 30 year old project car. Miles
-
Ticking Noise Under Valve Cover and Timing Question 350 sbc
Miles replied to Miles's topic in Gen I & II Chevy V8 Tech Board
I'll tighten up headers and try the oil treatment. I't will be a while before I can get back to this. Right now I am trying to resolve the differential yoke hitting the E brake lever arm in the tunnel. Just put in a solid front diff mount and the driveshaft yoke is now right against the E brake lever arm. One step forward and one back sometimes. Thanks Miles