-
Posts
936 -
Joined
-
Last visited
-
Days Won
33
Content Type
Profiles
Forums
Blogs
Events
Gallery
Downloads
Store
Everything posted by Zetsaz
-
You should consider your use for the car as well. 9k rpm sounds ludicrus on an L series, but if you're in a mostly street car you'll rarely get opportunities to get even close to that unless you're on freeway on ramps. My L28 is a pretty much stock block but with improved accessories and MS3x with sequential fuel and spark. It drives great even though the acceleration isn't like modern cars, but I rarely get chances to go past even 5.5k where the power starts to fall off in the stock motor.
-

A musician's therapist (The $300 Z)
Zetsaz replied to Zetsaz's topic in S30 Series - 240z, 260z, 280z
Alignment done today. Left side was WAY out but somehow I got the right rear dead on. Found out one of my local datsun friends did the alignments at a Les Schwab nearby and got it done through him. He took the time to pull the spindle pin for the rear of each control arm to ensure we got the toe as close as possible. Camber all got suprisingly close too! All of it ranges from about ~ -1.3 in the front to ~ -1.5-1.8 in the rear. My current ride height is perfect and doesn't need excessive negative camber for good clearance, but it seems like the rear right tire has been rubbing slightly on the lip on the way out of hte carport, so I'll probably do a mild roll on the back for better clearance. -

A musician's therapist (The $300 Z)
Zetsaz replied to Zetsaz's topic in S30 Series - 240z, 260z, 280z
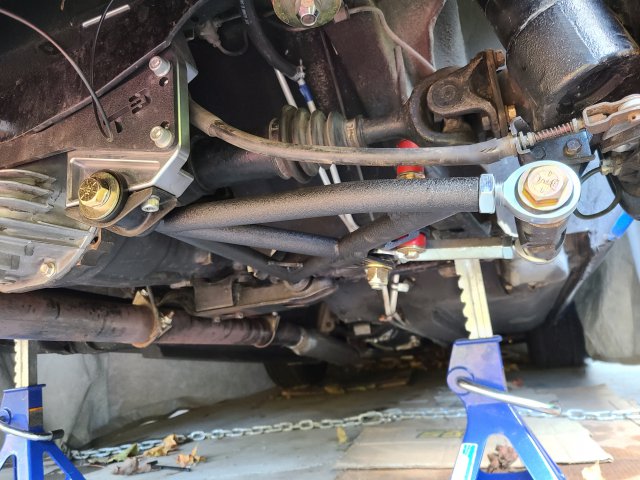
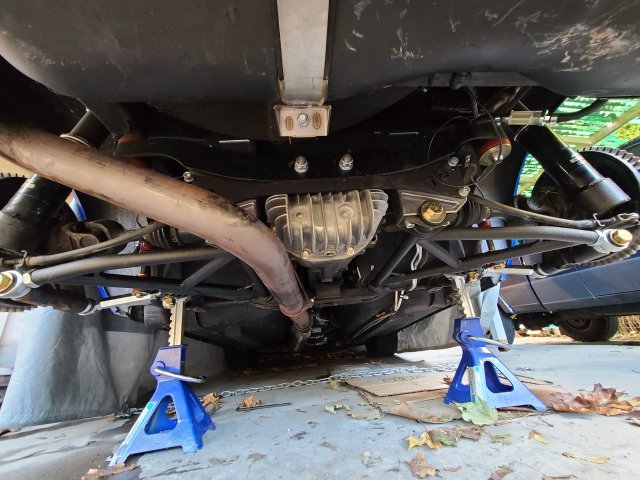
Finally had a reprieve from the rain and took advantage. Control arms are in. Whole assembly is very adjustable so it's now in desparate need of an alignment. Was having a rough time with the C Clips on the half shafts. Took them to a shop and they said they'd basically have to go to a machine shop. They're basically chemically welded from the rust at this point. I could grind them off, but considering I only found play in one joint and it was almost completely unnoticeable, back in they went. They'll be staying as is until maybe spring. Would rather spend the money and effort just going straight to CVs at this point -
This is exciting to see! Was talking to a friend recently and have started reconsidering the VQ as a swap. Since I care more about something fun, than all out power, and I'm aiming to for a modestly lightweight but daily driveable car, the VQ fits the bill perfectly. VQ37 even more. I love the responsiveness of the VVEL system, though I know aftermarket support isn't the best. Most I have in my G37s is an Ark Grip exhaust and I honestly love the sound. It's a far cry from the "trumpety" reputation VQs have from cheap 350z owners straight piping their cars.
-

A musician's therapist (The $300 Z)
Zetsaz replied to Zetsaz's topic in S30 Series - 240z, 260z, 280z
Well, we're getting extensive rain this weekend, but I'm fairly determined to get the back end put together even if I can't do the Vintage Air this weekend. We'll see how far I get. i moved the Z over to the more elevated side of my carport but it remains to be seen how wet things will be. -

A musician's therapist (The $300 Z)
Zetsaz replied to Zetsaz's topic in S30 Series - 240z, 260z, 280z
Probably by this weekend. Back end is already on jack stands and taken apart, have just been a bit lazy finishing up other stuff. -

Unnatural Aspiration Z is gonna be famous.
Zetsaz replied to stony's topic in Gen III & IV Chevy V8Z Tech Board
Time stamped the intro for you -

A musician's therapist (The $300 Z)
Zetsaz replied to Zetsaz's topic in S30 Series - 240z, 260z, 280z
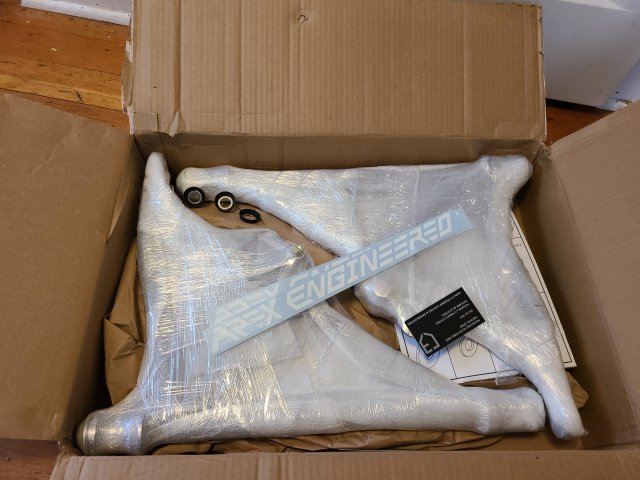
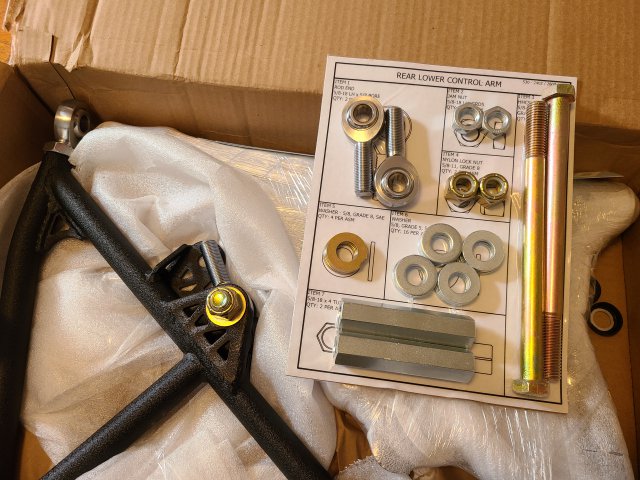
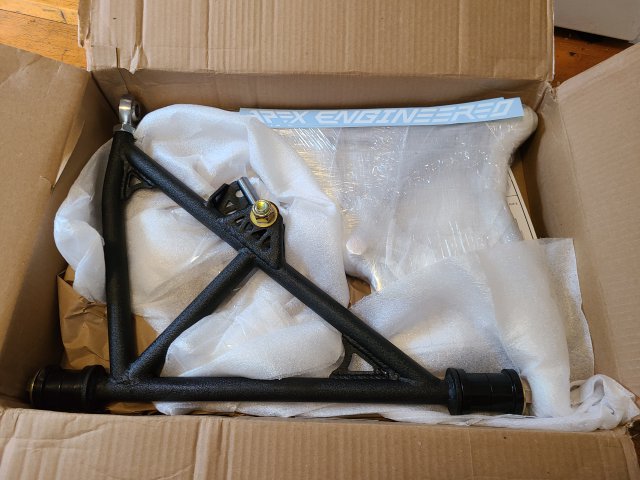
Apex rear control arms arrived today! Got good communication from Ohm,and I sprang for them after asking about set backs and his honesty about new products and outsourced axles being the main set back. Products like this are in stock. They shipped last Sunday but I got cheap shipping so they only just now arrived. Vary satisfied with how everything was packaged and I got a prime example of their new packaging on hardware to make sure everything is included. All in all, I really like these and I'm happy to support small businesses making parts for these cars. Plus! The best part about new parts... Free stickers haha -
Yeah we've talked about the side drafts vs ITBs haha. Huge horsepower JZ engines are all the rage, but it's nice to see more out of the box stuff like this being more seriously considered. I think a lot of people get too caught up in numbers games and often don't even finish their builds or lose sight of the fact that modest engines with fewer issues and less $$$ can be so fun. Keep updates coming on the progress Chatapokai! excited to see it.
-

280Z build w/ LS3 and 2015 Mustang spindles/8.8
Zetsaz replied to 280Z-LS3's topic in Gen III & IV Chevy V8Z Tech Board
I've seen the exact Jalopy thread you're taking about probably, and other posts I've seen make me remain skeptical -

280Z build w/ LS3 and 2015 Mustang spindles/8.8
Zetsaz replied to 280Z-LS3's topic in Gen III & IV Chevy V8Z Tech Board
I had just the ceramic and sound control on before I painted (no dynamat), and I drove from Seattle area to northern Utah and back in the middle of July. Was ALMOST better to have windows up the whole time until greenhouse affect started taking place and I rolled them down for circulation in Idaho after 6-8hrs of driving when it got to the hottest part of the day. Don't have any HVAC even now and it aside from a tiny bit of sweat on my brow it was dramatically better than I expected. Far more impressed with it's effect on heat than I was with sound, but if you're running resonators like I now am in my L28's exhaust, most of the noise is just from wind or poor aero. If you're concerned about weight and just want to get away from droniness and want to be able to have a normal conversation without raising your voice noticeably, I would recommend ceramic coating for heat, then a couple decent coats of their sound control OR dynamat, but not both, along with resonators. If you apply it properly in key areas that should take care of most issues. I will say adding a resonator was probably more noticeable than adding the dynamat on top of already having Lizard Skin SC, at least in the RPM ranges I was getting drone. If I'd had the resonator, and all my seals properly installed on the drive back, along with AC, it honesty would have been about as pleasant as you can get for a 13 hour drive. EDIT: Quick notes on weight, Lizard Skin ceramic control, pound for pound, will be more effective against heat than something like Dynamat. As far as sound goes, the Dynamat "megapak" shipping weight is a bit over 30 lbs, and I think the dry weight of 2 gallons of Lizard Skin Sound Control is somewhere in the 20's. Having experience with both, I think unless you're going for about 3 gallons of it, Dynamat will be the more effective sound deadener for the weight. I did 2 gallons of Ceramic, 2 of SC, and the Dynamat Megapak. Probably added 60-70 lbs total, but I also dropped however many pounds the original tar stuff weighs, on top of losing the heavy bumpers, emissions stuff, and moving to Vintage Air which weighs less than just the OEM fan unit, on top of getting rid of dated electronics/vacuum canister. I'd say I'm still ahead as far as weight is concerned. -

280Z build w/ LS3 and 2015 Mustang spindles/8.8
Zetsaz replied to 280Z-LS3's topic in Gen III & IV Chevy V8Z Tech Board
I have lizard skin sound control and ceramic in mine. Definitely helps deaden the panels and reduces resonance of big flat panels dramatically, but it won't be "quiet" per se. Not like even modern commuter cars at least. For that you'd need carpet at a minimum on top of it and possibly foam materials. I now have Dynamat on top of lizard skin and even that isn't as quiet as I want. if I was doing things again (weight goals aside) I'd do Lizard skin ceramic to get full coverage against heat, top it with dynamat at least on large flat areas, then some closed cell foam on the floors on under carpet. -
What you want is Kazuaki Kadowaki's build. It's so goooood. He was in an accident that totalled the car a few years back, but I've been following his progress on Instagram for a long time and it's coming back better than ever. You'd be able to understand some of his posts far better than I can, but I enjoy seeing his progress pics. https://www.instagram.com/kazuakikadowaki/
-

Progress on my insane VQ35HR 240Z project
Zetsaz replied to markrolston@mac.com's topic in Nissan V6 Forum
Despite the insanity of your current build, this one remains one of my all time favorites -

A musician's therapist (The $300 Z)
Zetsaz replied to Zetsaz's topic in S30 Series - 240z, 260z, 280z
I considered it, but between the cost and reflecting how I use the climate control in the Infiniti I figured for most situations I'm a "set it and forget it" person so this will be fine -

A musician's therapist (The $300 Z)
Zetsaz replied to Zetsaz's topic in S30 Series - 240z, 260z, 280z
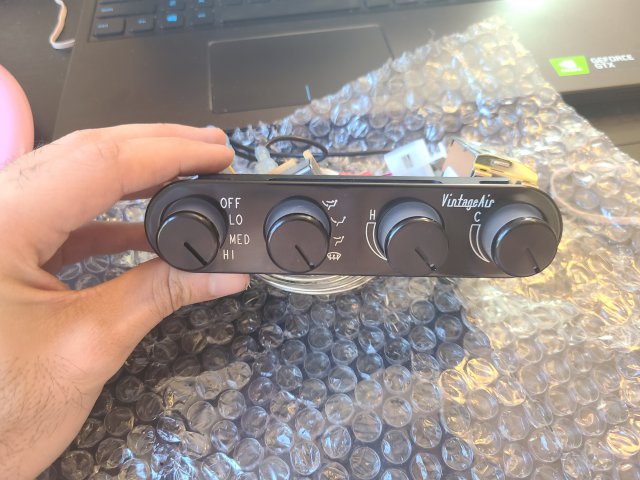
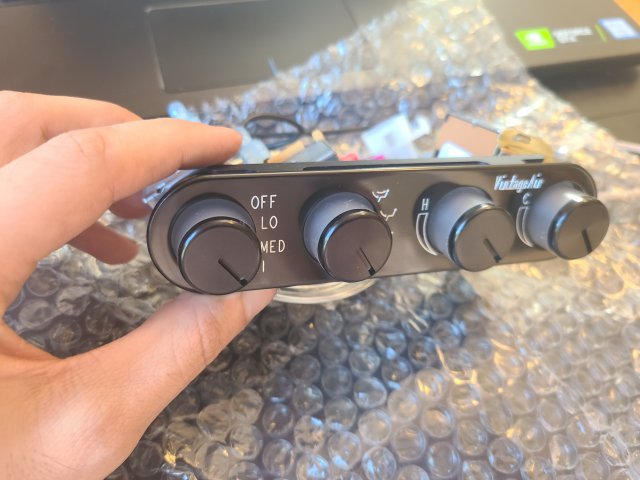
First big arrival is here Everyone and their mom has seen the gen 2 mini so I didn't bother with photos. I'm excited about how much lighter it is than origin components, but I'm more excited about how nice the controls feel. The brushed aluminum look is nice but seems to suit American restomods more, and the old style levers I wasn't a fan of since they'd require a lot of work to fit. This should slot nicely right where the original controls were I opted for these as they're most in line with the OEM+ look I'm going for with everything. They have super satisfying motion and clicks between positions. Will need to figure out a good way to mount once the unit is in since the 280 controls were mounted directly to the original heater core and not to the removable plate on the dash. -
I have a 3.9 rear with an '82 zx transmission. 3k rpm is right about 70 and I find that it's actually a very happy spot to cruise in. For an NA engine that hasn't had a ton of work done aside from megasquirt, I'd say the 1st-3rd gears are actually in great spots, but I can imagine they might feel too short in a turbo engine.
-

A musician's therapist (The $300 Z)
Zetsaz replied to Zetsaz's topic in S30 Series - 240z, 260z, 280z
Recently purchased and soon to arrive: -Replacement U joints -Vintage Air AC and most dash side accessories I'll need (I hope...) -Adjustable rear control arms Pictures to come -
Quietride.com seems to have some precut kits that match the original of that's what you're really aiming for. Unfortunately don't know if they only use Dynamat, or some mix of their own materials and dynamat in specific areas just resold as a universal kit. https://www.quietride.com/catalogpdfs/datsun_z_catalog.pdf
-
Vintage air under the dash, and then your lines will have to be custom. Same amount of work as anyone putting AC into a 240z.
-
I emailed because I am still interested in their control arms. For what it's worth, I did notice most people's issues and delays seem to be with the included axles and I got a response back first thing in the morning
-

A musician's therapist (The $300 Z)
Zetsaz replied to Zetsaz's topic in S30 Series - 240z, 260z, 280z
Z car garage has some nice quality ones designed specifically to be bolt in but they're pricey. For a 240z without upgrading the stub axles, they'd probably break before the half shafts, but on my setup the bolt in cv axles would probably work well. The expense is probably not worth it now though. Will just go new quality U joints and call it good -

A musician's therapist (The $300 Z)
Zetsaz replied to Zetsaz's topic in S30 Series - 240z, 260z, 280z
I mean... if I wanted EASY I could always just get Z Car Garage axles that bolt in, but that's a $1500 endeavor and would cover most of the rest of what I'm looking at doing haha -

A musician's therapist (The $300 Z)
Zetsaz replied to Zetsaz's topic in S30 Series - 240z, 260z, 280z
Haven't done checks while prying, but I already have a rebuilt CLSD, with an RT style diff mount and double checked all mounting points and nuts/bolts were tightened. Noise is also happening if let off throttle at low speeds and go back and forth between coasting/loading the engine downhill. Can hear a bit of thunking every time I let off the gas or hit it again at lower speeds. Doesn't happen at cruise or if I only shift at higher RPMs. I had assumed that had to do with all the load already going one direction on the joints and them not having much slack on them to move back and forth at that point. -

A musician's therapist (The $300 Z)
Zetsaz replied to Zetsaz's topic in S30 Series - 240z, 260z, 280z
Appreciate the input! The big question with the U joints is, do I just replace them with more heavy duty new U joints, or spend the big $$$ on CV axles? I'm not running much power, but I care more about a smooth and reliable ride. EDIT: For the price of good CV axles that don't require modding or other mixing and matching, I can probably get new U joints, the interior vintage air stuff, and control arms which is making me rethink some things.

