winstonusmc
Members-
Posts
451 -
Joined
-
Last visited
-
Days Won
2
Content Type
Profiles
Forums
Blogs
Events
Gallery
Downloads
Store
Everything posted by winstonusmc
-
WRX power steering install
winstonusmc replied to winstonusmc's topic in Brakes, Wheels, Suspension and Chassis
The steering ration seems to have stayed 2.7, but I believe the 240z is 2.6. Which with the added angle, kinda works like it should. -
WRX power steering install
winstonusmc replied to winstonusmc's topic in Brakes, Wheels, Suspension and Chassis
Not sure, seems a lot of the Suby stuff is the same. The only difference seems to be in the years, which is the larger tie rods in the later years. The write up I read was dealing with older GC chassis WRX, and my rack is from the GD chassis. Not sure how they cross with the Forester. I found more Impreza racks on Ebay anyway. -
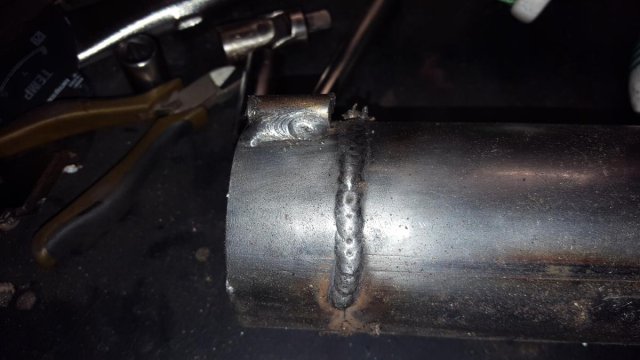
Been working on power steering. I decided on a 2004 Subaru WRX steering rack. I did some measuring to make sure everything would work. First I needed to figure out how much to cut off the steering rod. In steering, the pivots are the key to getting it to handle correctly. The stock pivots on the 240z steering rack is 616mm. The WRX rack is about 634mm. Some individuals use older Celica inner tie rods with the stock Subi outers to get everything to fit, but my rack is the "late" Subi rack. The threads are larger, M16 x 1.5, on the "late" Subi rack and the Celica rods didn't fit. I did some online research and found that 2000 Hyundai Sonata rods had the correct length and thread. The added bonus is that the inside of the Hyundai rods are vented and stepped to allow for more steering angle without shortening the outer tube of the steering rack. The step did have a lip that had to be ground down though. The step on the Hyundai rod is 5mm which adds 10mm on the travel on the steering. So, while I cut 18mm of the rod, it reduced the travel by 8mm. Stock 240z travel is 120mm, Subi is 132mm. Now the travel is around 124mm because the measurements are not perfect. So I added a little travel, hopefully it doesn't bind the steering knuckles. Here is a picture comparing the shortened Subi rod vs. the 240z rack. The final measurement was 576mm for the steering rod. Then I mounted the subframe on the engine to check clearances . In this swap, the engine mount perch has to be clearanced to make room for the angle of the Subi steering shaft. Also, the subframe has to be clearanced for the rotary valve and lines. Also checked the clearances with the A/C compressor mounted and to plan the pressure line. I cut the end of the steering shaft off to weld the Subi U-joint to the 240z steering shaft. I just shaved the weld and pulled the shaft out the Subi joint and the 240z shaft diameter was exactly the correct diameter to push inside and weld. I think it looks better that the stock Nissan weld, and that lasted 45 years. Hope I didn't cook the grease out of the joint when I welded it. There wasn't much smoke, so I think I am good. The stock Subaru rod ends ended up only having about 12mm of thread engagement when the alignment was roughed in and I wanted more. I did some research and figured out that 2003-2009 Mazda 6 tie rod ends are 7mm longer than the WRX ends. They are curve and have a left and right though. The taper on the stud seemed to match the original Datsun rods as well. Now I have plenty of thread engagement. I used compression fittings to move the hydraulic lines to where they would fit around the subframe. They worked out well and only one needed to be tightened up. They are 1/4 inch fittings. This is how much I had to cut out of the subframe. Metal was added to strengthen the subframe. If the engine mount becomes a problem, then I will gusset it. I used the RB25 (R33 non HICAS) pump, which is the same as most 240sx pumps. I built the pressure line out of -6AN Fragola PTFE hose with a M16 x 1.5 banjo metric adapter and the M14 x 1.5 power steering fitting for the rack. I did kinda skimp on the reservoir though and will switch it with an OEM style later. I used a 120 degree end on the rack side so it will clear the A/C pump later. Should have used a 150 degree though. The feel is great and feels about as a power steering car should. I dont have too many bumpy roads around here, so I cant fully test for bump steer. Havent felt any yet and we do have some railroad crossings that I have tried. There arent too many curvy roads either, but parking lots seem to be way more tolerable. The steering ratio seemed to stay about 2.7 and without a degree wheel to measure it, will stay "about". If there are any questions, let me know and I will ad them in the first post to help keep everything together.
-
The vent will introduce oil before the turbo. Pull the intake pipe off the turbo and look. It should be just as oily. It's normal and a catch can will remedy this. The only place that I can think of that oil and coolant can mix is the head gasket. Check the oil in the pan to see if it's milky, mixing occurs bother ways.
-
What does the vent from the intake go to? Does it go to the stock rubber intake pipe? That's a common place for oil to come from. RB motors never had a stock catch can, so they commonly get oil in the intake on hard turns.
-
Twin cam head for the L6 from Derek at Datsunworks
winstonusmc replied to Derek's topic in Nissan L6 Forum
Yeah, my RB25 with ITBs sounds nothing like that. I don't have the duration of cams this engine has though. -
Some hybrid cars are a direct drive like the new Accord or the koenigsegg agera. But maybe you are thinking of no clutch or torque converter.
-
Do you have the wideband hooked up to be able to log it with the Megasquirt? Take a look at both the AFR and the injectors pulse width at the same time. The two values should almost correspond with each other, as one moves, so should the other. If this the case, then you need to figure out what is causing the fluctuations, could be MAP or RPM reading inconsistencies. Also, post up your tune for everyone to see.
-
What brand of gauge is it? Is it a wideband?
-
~73 Turbo L28 to N/A RB25 240z Project~
winstonusmc replied to ~KnuckleDuster~'s topic in S30 Series - 240z, 260z, 280z
The two flanges are a good idea. Mine are also two pieces but it's an RB26 head. The RB26 had two 3cyl manifolds originally so the flanges I have are for two separate manifolds. The autech header is this way because it's also an RB26. I figure your flange is warped because the two collectors would pull on things different on the front and rear. Cutting the flange should relieve the stress. -
~73 Turbo L28 to N/A RB25 240z Project~
winstonusmc replied to ~KnuckleDuster~'s topic in S30 Series - 240z, 260z, 280z
I am glad that header fit. What are the primaries on that? My header is only 1.5. Not that it's the limiting factor in my power. -
My 91 R32 Skyline took a piss , need gurus HELP
winstonusmc replied to PLATA's topic in Miscellaneous Tech
Is it HICAS? I am sure the seals inside are similar to an Z32 unit if you want to have it rebuilt. The HICAS part in those tend to leak and can be bypassed quite easily. -
'72 240z RB25DET, no more ITB
winstonusmc replied to winstonusmc's topic in S30 Series - 240z, 260z, 280z
It was across the road from SPAWAR, MCRD San Diego. I left there about two years ago. The Datsun misses Cali, it suffers with rust. -
Hey Mario, tried to email you, but it didn't go through. Looks like I will buy yours. PM me the details. I will PM you my address.
-
Mine is missing. Trying to button up the center console.
-
I will let you know if the other guy falls through.
-
Looking for a shifter from a 240z. It's got two 45 degree bends in it unlike the 280zx, that is more straight. Doesn't have to be in the best of shape on the bottom because it's getting modified. Thanks!
-
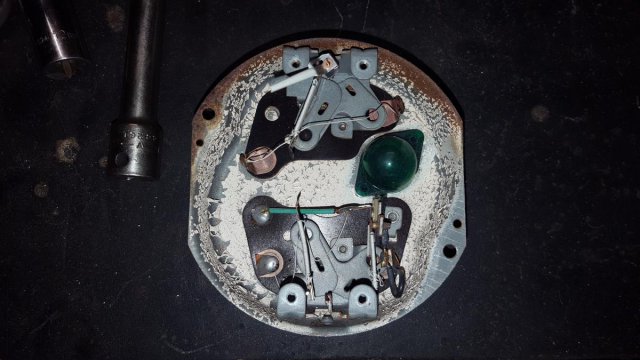
Its the second spool of wire to the right of the oil gauge. Although they are simple, they are not that accurate. I have my Megasquirt controlling the temp gauge through the RB25 temp sensor. It has a dead spot like a newer gauge that sits in the middle during normal operating temps. Works quite well, but it does move around a little due to changing temps in the cabin.
-
-
'72 240z RB25DET, no more ITB
winstonusmc replied to winstonusmc's topic in S30 Series - 240z, 260z, 280z
Got everything back together tonight. I had to shorten the exhaust to match. Took it for a drive and the shifter is in a much more reachable position. Still need to purchase a 240sx lower shift boot to seal up the trans tunnel. I kinda threw the old crusty vinyl shift boot in there and it is amazing how much sound it removes from that area. Oh, I cant claim the "CAD" comment. Its from Bad Obsession Motorsports. Project Binky is worth the watch! -
New RB to 240z engine and trans mount (71c transmission)
winstonusmc replied to winstonusmc's topic in Nissan RB Forum
The passenger mount is longer to tilt the engine 10 degrees to the left. If you flip them, it will tilt the other way. And the bolt holes are not in a regular pattern, they are "keyed" so they can't be simply turn them around, the bolt holes wouldn't line up. -
New RB to 240z engine and trans mount (71c transmission)
winstonusmc replied to winstonusmc's topic in Nissan RB Forum
Yeah, the drive shaft was shortened 2.5 inches, which is compatible with both sets of holes. -
Decided to move the engine back 2 inches to make more room in the front for accessory belts. I also am tired of the shifter hitting the center console and not being centered in the hole. I originally used the R32 mounts for the RB25 and factory transmission mount on the 71C RB transmission (RB20/25DE). For those who dont know, the stock mounts move the engine pretty far forward, so far that the power steering belt wouldnt clear the fans. I put these pics on my build thread for those who have seen them already. First step was to build a jig with the old R32 mounts. The jig was designed to allow the bottom to be shifted 2 or 2.5 inches. Then mock them up in CAD (cardboard aided design) Left Mount: Right Mount: Then Transfer to metal, 3/16 plate steel: A comparison in between the 240z mount and the partially fabbed new mount. Note the drop is greater to correct the pinion angle. Done and painted Here is how everything sits now. The head is about 2 1/4 inches from the firewall.

