rossman
-
Posts
1384 -
Joined
-
Last visited
-
Days Won
12
Content Type
Profiles
Forums
Blogs
Events
Gallery
Downloads
Store
Everything posted by rossman
-
Get a Kameari Engine Works (KEW) timing chain setup (tensioner and adjustable cam sprocket) and you can avoid shimming the cam towers if you want to shave the head. There are several HZ threads on the subject. Oh and get the books that grannyknot recommended
-
Gotcha, also budget is a factor. If you have $2k to spare I would consider at Garret g25 series. Garrett has guidelines for selecting a turbo for your engine. For my ported and high lift cam 3l L6. Turns out that the g25-650 is a good match. I currently run a first gen gt35. It works ok, boost hits around 3.5k but only because I'm running a .64 a/r turbine. The small a/r chokes the engine at about 6k where torque falls off.
-

A musician's therapist (The $300 Z)
rossman replied to Zetsaz's topic in S30 Series - 240z, 260z, 280z
Clunking can be caused by many different, seemingly unrelated issues. Mine was clunking and it was driving me bat shit crazy. Turned out to be a loose right front lca pivot bolt. Tightened it up and BAM, problem solved. -
"Better" depends on what you want. What do you want the replacement turbo to do. Help the engine develop more power? Less lag? Describe your setup too so we can help you. Is it a stock engine or is it heavily modified 3.2, fully race ported head and a high lift cam?
-
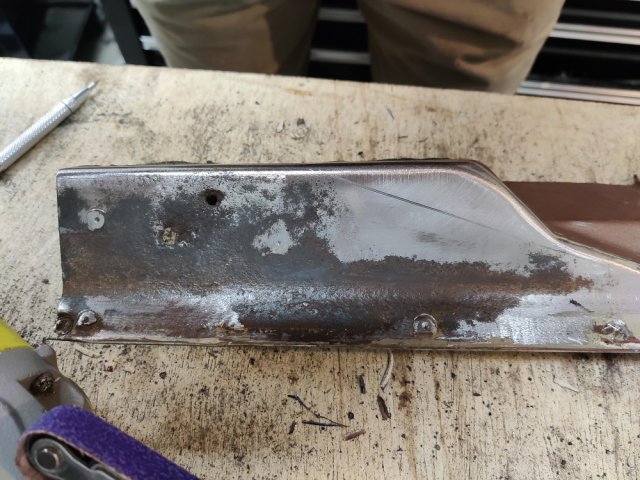
Thanks grannyknot! I'll have to try that out. Progress has been slow the last few weeks. I got bogged down trying to decide how to repair the right curved section behind the tail light fascia where the top of the quarter panel and hatch come together. I was debating custom sheet metal vs. welding in the existing pieces I had on hand. I went with the existing pieces and I think it turned out pretty good. luckily it's a place that will be hidden for the most part so nobody but me will know it's there if it looks like crap after painting. This area was pieced together from 3 different sections. two pieces from this car and one from the 280z donor. I took it really slow to minimize warping and avoid blowing holes in the thin sheet metal. The next step will be to match cut and weld up the top part where it's currently overlapping - resulting in a butt-weld. Followed by grinding flat the welds and spot welding the dozens of remaining pin holes. I also welded up most of the 280z donor where I match-cut it to the existing sheet metal. Again, I took it very slow and moved around from one area to another to minimize warping. Thanks for looking!

-
GETTING HARD TO FIND 280ZXT CV-Joints, Stub Axles and Companion Flanges
rossman replied to G-Tech's topic in Parts for Sale
Message sent -
car is loose in rear end?
rossman replied to springtimemotors.jason@gmai's topic in Brakes, Wheels, Suspension and Chassis
^Miles nailed it. Ron Tyler mount or RT mount. -
car is loose in rear end?
rossman replied to springtimemotors.jason@gmai's topic in Brakes, Wheels, Suspension and Chassis
Three letters...LSD🙃 -
ANOTHER Datsun Z/LS3/T56 Swap Thread
rossman replied to Ironhead's topic in S30 Series - 240z, 260z, 280z
Yah but socket head bolts looks so cool! 😄 I used to work for an engineering firm who did not typically allow high strength (a.k.a. brittle) socket head bolts in structural applications. They had encounters issues with the heads twisting off during torqueing. Its nice to see someone finally is mass-producing a rear end sway that has good, strong supports for the diff. I agree with comments regarding the use of thick hardened washers. Looking good! -
It's good to know that I'm not alone, suffering thru this job! Actually, I kind of like doing it though. It's almost like I enjoy working on it and talking about working on it more than driving it. I never thought about it too much but along the lines of quick, hot spot welds, I tend use .030 MIG wire instead of the thinner stuff. It seems almost counter-intuitive to use the thicker wire for such thin metal - but it works for me.
-
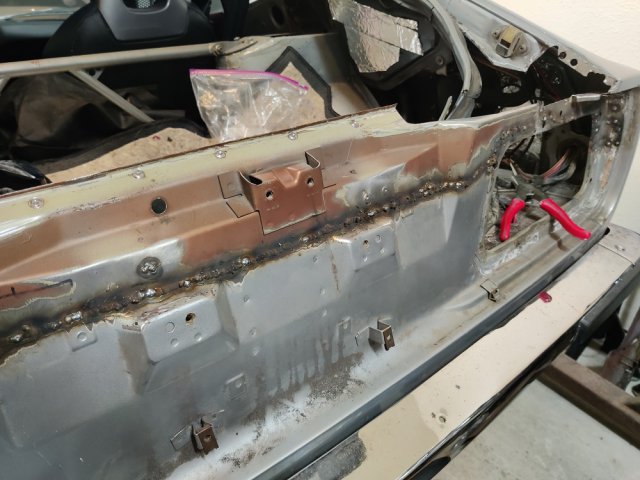
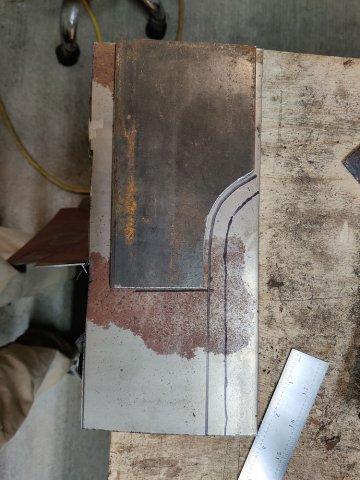
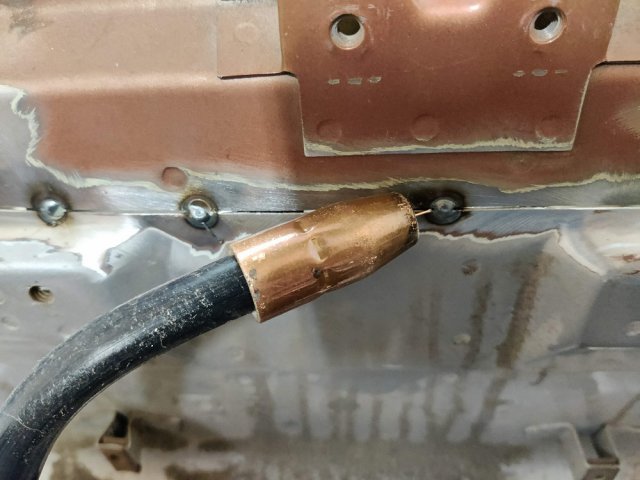
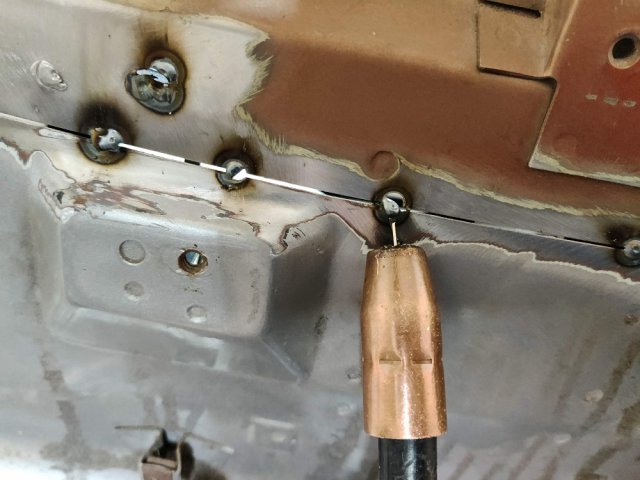
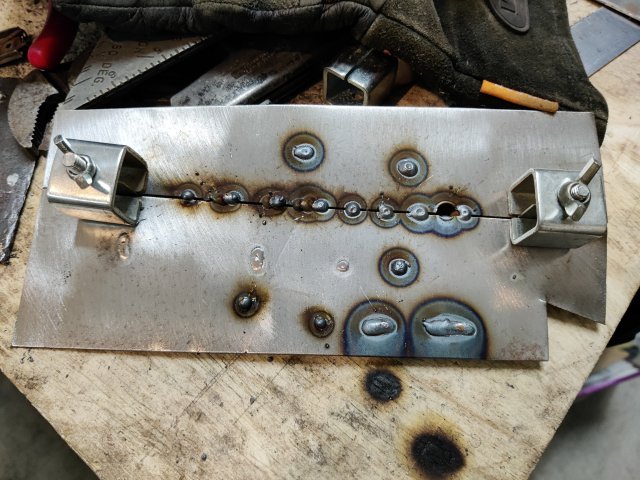
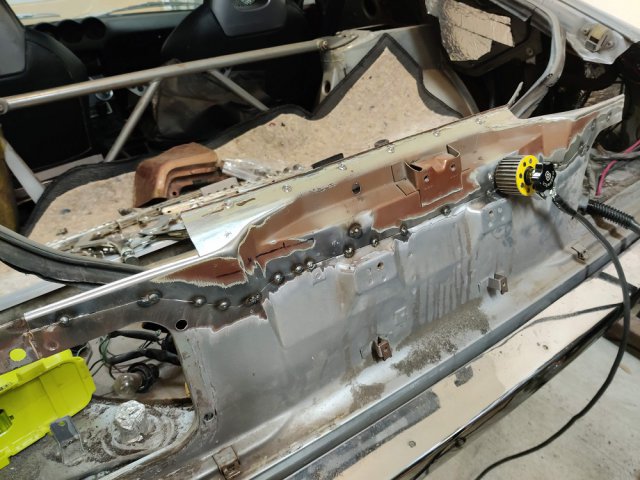
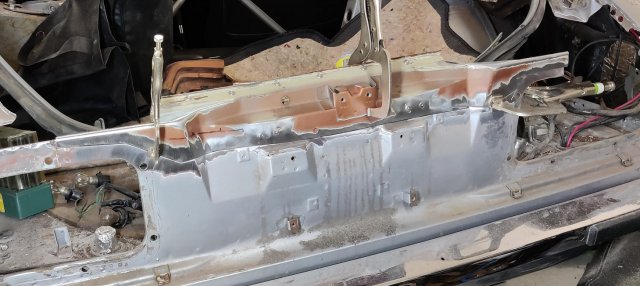
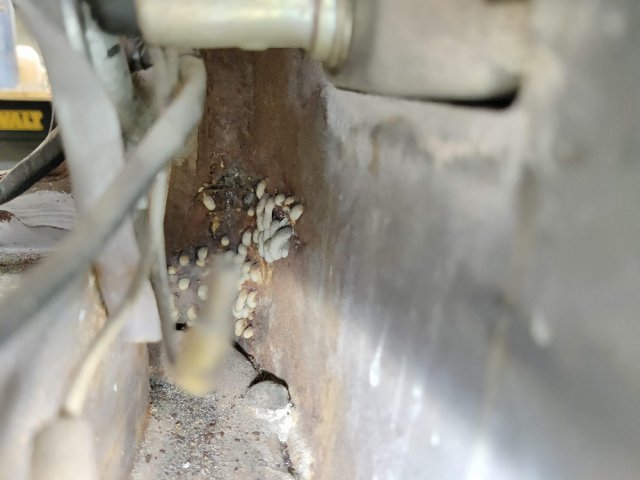
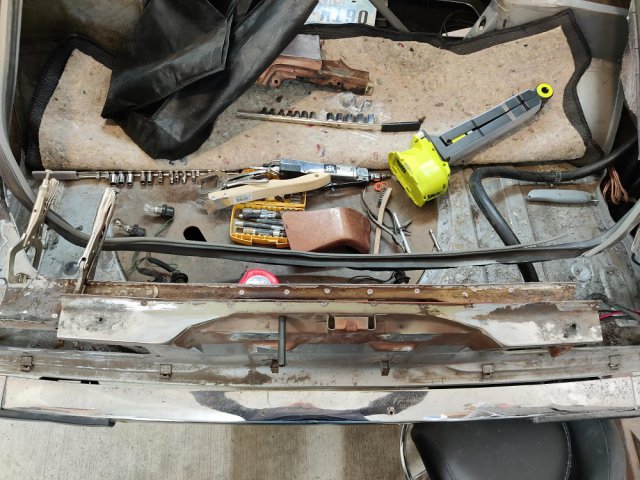
It's been a nasty cold day, so I spent this afternoon working on the car. I made a little progress. The center panel is tacked in. I had almost forgotten how difficult it is to weld on this old car. The metal is like ~22 gauge. The 280z replacement panel is slightly thicker ~20 gauge. Several of those spot welds blew right thru the metal. I had to relearn the technique I previously used on the floorboards a few years ago when I replaced them - angle the MIG gun and pull back to modulate the heat when needed. I fired up my trusty MIG welder for the first time in a while. Before I made my first weld, I took a sheet of 20 gage and set up the welder and practice prior to welding on the car. The welds progressively get better towards the right-most clamp. The first weld on the left was done the settings recommended by Miller - which were too cold. The last one was using my technique of angling the weld gun to effectively lower the heat. The welds are far from perfect but good enough since most of the weld will be ground off flat when the panel gap is completely filled with weld. This spot weld was made with the gun at an angle to the plane of the panel, similarly to what's shown below. This hole/weld was made with the gun pointed more perpendicular to the the panel. I also used a magnetic copper backer to "dam" the back side of the joint and absorb some of the heat to minimize blow-thru. I didn't get a picture of the tool but you can find them on Amazon. Once there is a tack weld there, it's easier to add more weld adjacent to it. The existing weld serves as a little heat sink making the panel more resistant to blow thru. It will still blow-thru if you're not careful but much easier to weld. The process is slow and a pain in the ass but it works if you're patient, and take your time. I also made a little mandrel so I could form patch panels for the curved lip that holds the hatch seal. This was prior to smoothing out the inside of the radius. I then cut out a piece of 18 gauge for forming. The offset line is where I cut for the panel to make the lip. Here is the formed piece. It's not perfect but it's much better than the replacement panels that I can find on-line...which don't exist. The lip is tall but it will get cut ground down to match the stock lip once all the panels are welded on the car. It matches fairly well with the old rotted piece it's replacing. I will not be stepping/lapping the joint as the original was done. Next up will be to tackle this mess and weld in the replacement panel.
-
A musician's therapist (The $300 Z)
rossman replied to Zetsaz's topic in S30 Series - 240z, 260z, 280z
Nice! I like the red lighting. Did it come standard like that? I have the chrome version but it looks out of place in the interior so I never installed it. -
They ALL have hidden rust. It's just the extent of the rust that is the question. The only other spot that I can see from the outside is also on the left quarter panel where they rolled the lip - at the very top of the arch. Hopefully it's minor but I'm not holding my breath on that one! I have done some snooping around and found evidence of filler on the right dogleg behind the door. I don't see rust there from the outside but I'm sure there is at least some surface rust. The whole reason I have been putting off doing this body work is because I just enjoy driving it more than anything. But, it's time, I'm going to start stripping paint soon.
-
Thanks for the kind words but I'm just implementing what I have learned over the years. This is what I got so I'm going to work with. It will never be a perfect concours car. I knew that when I purchased it back in 2008 for $4k as a running/driving all original 240z. There are more body issues - so there is more to come after this repair. I'm already planning how to undo and fix the damage around the quarter panel and tail light. The current plan is to hand-form a piece of sheet metal and butt-weld it in. I'll take pictures as I go...
-
A musician's therapist (The $300 Z)
rossman replied to Zetsaz's topic in S30 Series - 240z, 260z, 280z
I'm pretty sure the stock compressor fittings are non-standard too - at least with readily available hardware here in the US. -
Are you referring to these tabs? They appear to be in good shape, although at lease one of the clips that grabs the tail light surround is spread open so it doesn't clip onto the surround panel. I seem to remember that the clip is separate from the tab that's welded to the body. If so, it could just be replaced. Either way, I'll probably just bend it closed.
-
A musician's therapist (The $300 Z)
rossman replied to Zetsaz's topic in S30 Series - 240z, 260z, 280z
Man that sux. It would have been nice to have that stock look. Are you using the stock compressor too? Someone might make adapters, it's worth a look around. You might also be able to cut and flare the hard line to mate up to an adapter. -
Did a little more work this weekend. I'm ready to start welding this week. The the right side of the replacement center section patch was cut and is ready to weld. Before: After - didn't get a picture of the rusty metal cut out of the replacement panel. The center section is cut and ready to weld to the car. I match cut both panels while the replacement was clamped on top of the original - worked great. I learned this trick from Fitzee's Garage on YouTube. Thanks for looking!
-
Lookin' good Leon!👍
-
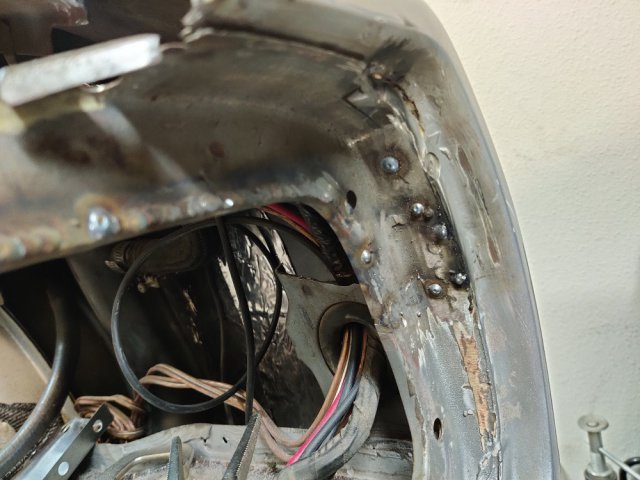
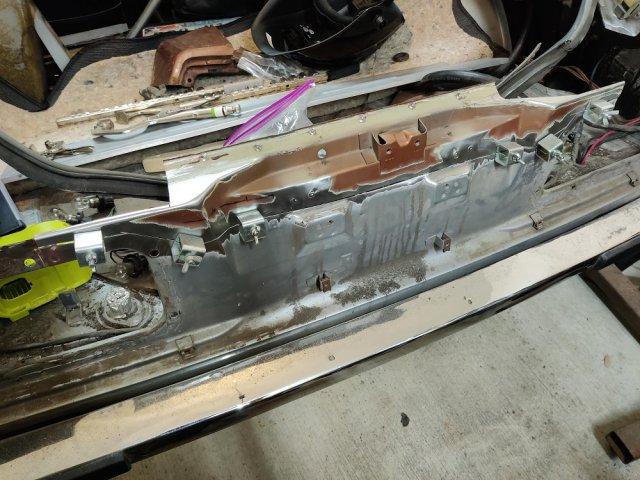
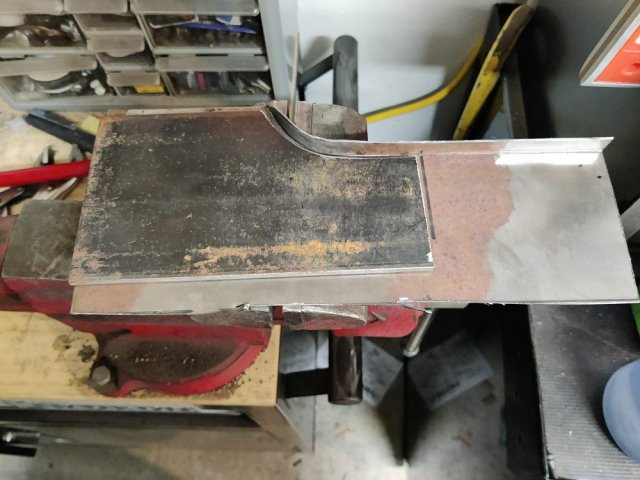
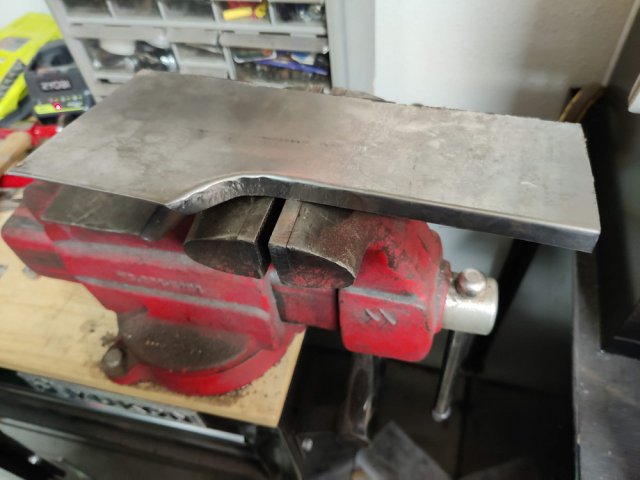
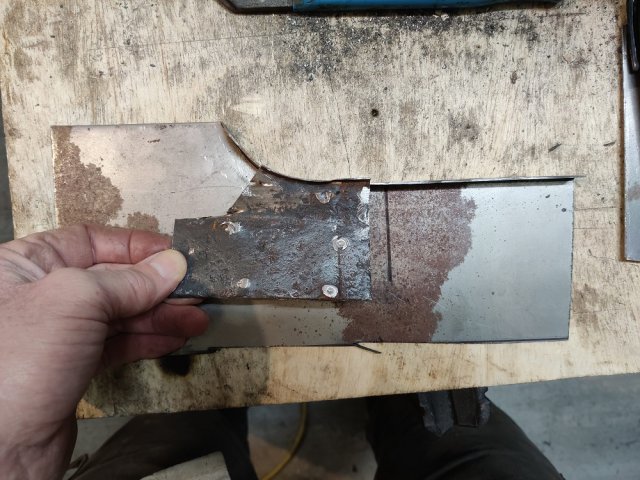
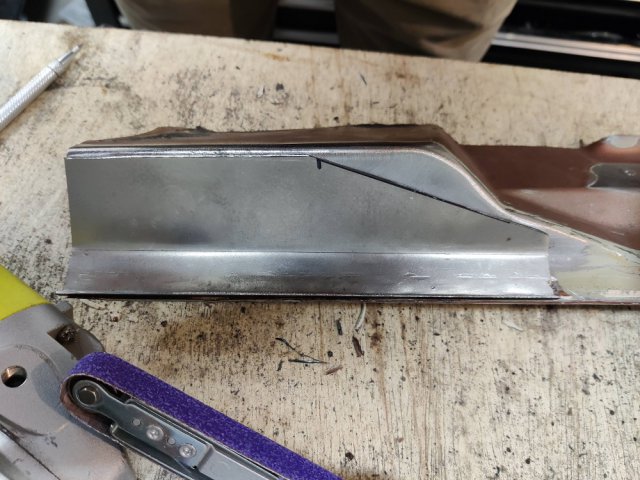
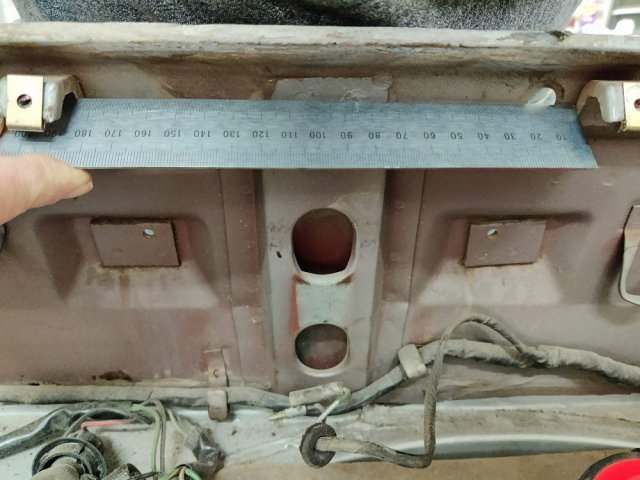
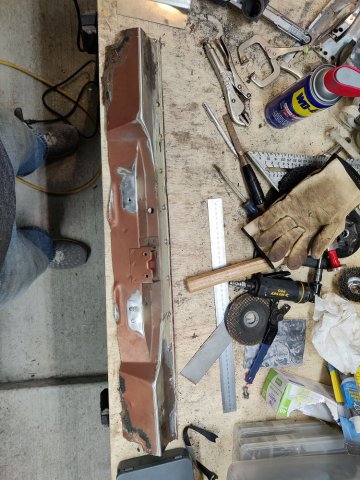
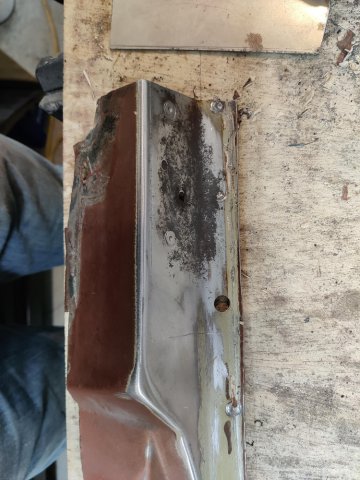
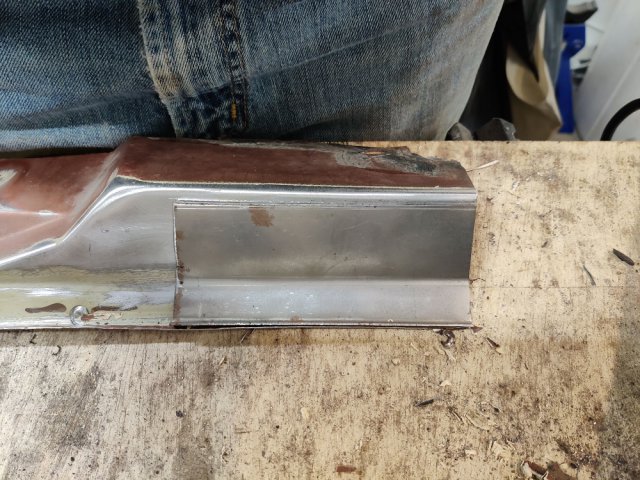
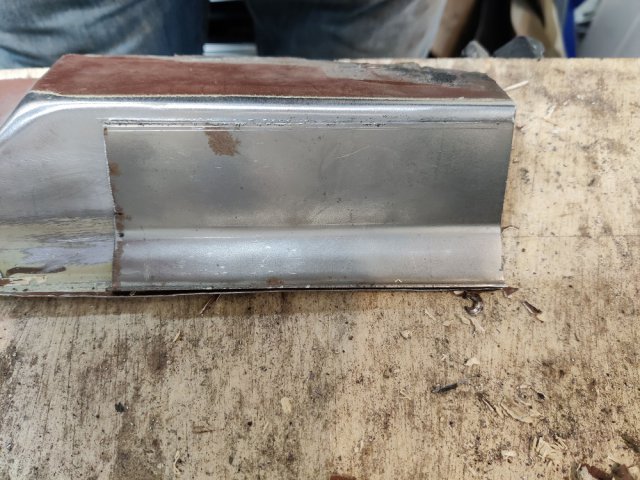
Did more work yesterday repairing the center section of the sacrificial replacement panel. Sounds weird I know but it has enough rust that it's thinned out in some sections. Using this piece will be much easier than trying to repair the original, completely rotted part. I also found evidence of more shoddy repair work on the left (drivers) side rear quarter panel that will eventually need to be cut out and fixed correctly. I don't think anyone makes reproductions of this panel (the exposed metal that surrounds the tail light surround). I'll be on the lookout for someone parting out an s30 to see if they can hack off this section for me. Here are a few pictures of the sacrificial panel (this is the part under the top, lower hatch plate just above the latch/license plate) As you can see, it's not perfect. Both sides will need to be fixed. Here it is on the car. There is a nice 1/2" hole on both panels that I used to align the parts with a center punch. I didn't get a picture but later, I removed the original latch mount so the parts laid flat so I could verify they were identical. Here is the start of the repair panel. I'm using 18 gauge metal to replace the thin 20 gauge stock metal. Here is the completed patch panel. It was all done by hand using an angle grinder, body hammer, vice, and stock tension rod to make the large radius bend. I eyeballed the whole thing and it seems to match up nicely. I also started measuring the distances between the interior clips as a reference when I get all the panels welded into place. The 280z tabs are different. Anyone have a better idea to get the tabs to line up properly? I suppose I could make a template but maybe there is an easier way. Another option may be to use the panel as a guide but I won't be able to see the tabs with the panel in place. Any ideas? Here are a couple of pictures of the inner side of the left quarter panel. These were taken from the inside of the hatch looking back towards the tail lights. You can see the body filler that oozed thru the holes they used to pull out a pretty significant dent from a rear end collision. Top. I actually have this replacement piece already but it doesn't capture the bottom section pictured below. Bottom, you can see rust and curled up structural support (behind the out of focus connector) Here is the right (passenger) side for reference. Note the surface rust. I will be treating this as best I can with rust converter. Thanks for looking!
-
I live near Houston. The AC is cranked up to 11 in July/August
-
I too suffer from the a similar problem. I call it "analysis paralysis." Have to constantly fight it. Sometimes it's a loosing battle.😆
-
I'm trying, good enough is how it usually goes. A good example is the guy complaining in your thread that the VA ac duct is horrible for air flow. That's probably true but the VA stuff is "good enough" in my book and has the benefit that it's much easier to work with. Now, if we were engineers designing climate control ducting for Nissan, we'd probably choose something better...but were're not and I don't know about you, but I don't really have the time or budget to spend on fancy ducting when cheap flex duct just works. That said, I was hoping you found something better and so I could steal the idea :).
-
Thanks for the feedback and links. I've used muriatic acid (diluted hydrochloric acid) to remove mill scale - it works well and does leave a good surface for painting once it is washed off and dried. I'm not sure it chemically bonds with the steel like phosphoric acid does to leave a neutral exposed layer. So it's probably best to coat it again with another rust converter like you did with Rust Reformer. How did that work out for you?
-
Reading more on the testing I found using Rust Reformer, they compared it with Ospho, Corroseal, and other treatments that were meant to be top coated but they did not top coat them. The study was to only test the capability of the converter by itself. Of the products they tested, only the Rust Reformer was meant to stand alone. This is probably why it did well compared to the others. Ospho is normally my go-to rust converter. Since it is supposed to be rinsed off afterwards, I am concerned that if it gets into the existing seams it will be impossible to rise off completely given that the cavity is sealed up and I'm not keen to introduce a water into an already rusting cavity with no drainage. I may look into drilling drain holes if I go this route. I did use POR-15 rust preventative paint on some floorboards that were pre-treated with with Oshpo. So far it appears to be holding up well. I've been doing more research on Finishing.com. This is a pretty well respected forum full of metallurgist and materials engineers. Phosphating bare or lightly rusted (a.k.a. surface rusted) mild steel (with products like Ospho or other phosphoric acid solution) seems to be the most common recommended process. Ideally this would be followed by a chromate primer . Unfortunately chromate is toxic to people and our environment and it being slowly phased out. We use Super Koropon two part epoxy primer at my work to protect aluminum (after conversion coating - similar to phosphating) but it also good for steel. It's probably the best rust preventative primer on the market but it's expensive (~$200/gallon) and highly toxic. Toxicity is manageable for us since we are not in a production environment - we design/build mostly one-off and experimental type aerospace engineering products. Anyway, as they say "perfect is the enemy of good enough," so I will need to just pick one that is deemed good enough.