-
Posts
13742 -
Joined
-
Last visited
-
Days Won
68
Content Type
Profiles
Forums
Blogs
Events
Gallery
Downloads
Store
Everything posted by JMortensen
-
Diff crossmember structural rigidity questions
JMortensen replied to Zetsaz's topic in Brakes, Wheels, Suspension and Chassis
Shit. Now you got my brain rolling on this. Thanks a lot. I don't think there is room for this front brace, I think the oil pan and bell housing would be in the way, but I'm thinking the rear one would definitely work. Maybe if there is too much crap in the way up front I could make a single horizontal bolt in xmember possibly bent to go under the oil pan, and then I could do the sheet AL on the bottom. -
Diff crossmember structural rigidity questions
JMortensen replied to Zetsaz's topic in Brakes, Wheels, Suspension and Chassis
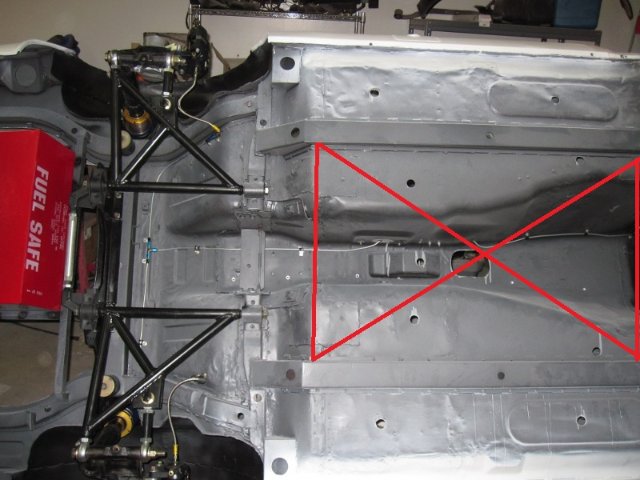
Yeah, I think all of this hit home when Cameron (heavy85) was building his car for Pike's Peak. When you have to consider rolling off of a cliff, then suddenly your cage looks like it protects from top impacts but does almost nothing for bottom ones. I think really a full tube chassis is the way to go if you want bottom impact protection. If you're just looking to stiffen the chassis though, a butterfly brace on the bottom would probably do a lot. Would love to see this tested in FEA. My plans include eventually doing a flat floor, and if I ever get there I'd like to incorporate a simple bolt in brace between the subframe connectors. Maybe just a big X across the bottom with a front and back straight member. There isn't a lot of room on my car and it's really low so was thinking about something like a .5" x 1" rectangle tube, and then just welding some angle iron feet to the corners that would overlap the SFCs and bolt on, then attach the flat floor to the bottom of the brace. I also had the thought that I would use sheet aluminum between the frame rails (non-flammable) and that alone would probably stiffen things up quite a bit. Again, some testing would make this less guesswork, but I have zero cad drawing experience and not much desire to figure it out, so will probably just do what should work and see what happens, just like the rest of the car... This is all cribbed from the Flying Miata braces. https://www.flyinmiata.com/default/flyin-miata-butterfly-brace-v2-0.html -
Diff crossmember structural rigidity questions
JMortensen replied to Zetsaz's topic in Brakes, Wheels, Suspension and Chassis
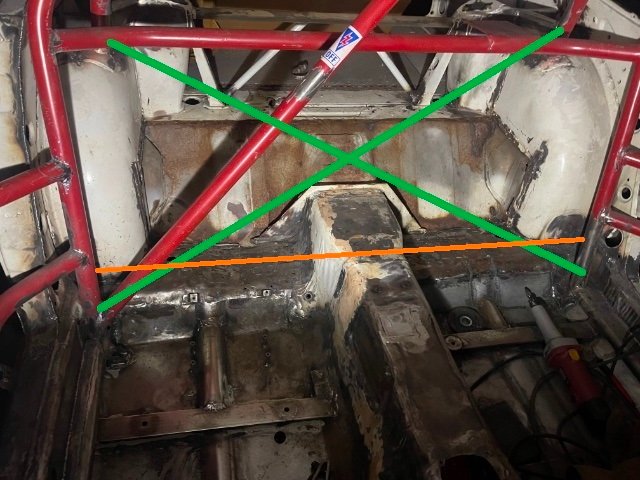
We're getting off topic, but what I did to strengthen this area was to run an X from the strut towers to the bottom of the main hoop like so. In retrospect if I had to do my cage over I'd put a horizontal bar across the top of the trans tunnel as well, I think that would give a lot of strength in a side impact. The main diag and the X would have to move up. Might have to make huge plinths to make this compliant so the cage attached to the "floor." -
Diff crossmember structural rigidity questions
JMortensen replied to Zetsaz's topic in Brakes, Wheels, Suspension and Chassis
Yeah, I asked that question in the past. I don't think I got a firm answer from anyone else about it. I ended up running monoballs instead of bushings, and welding the monoball holders into the chassis, so I didn't need the crossmember. What I ended up doing was using a piece of 1" square tube across the span, just to tie the chassis together. It's lighter and straight so probably more rigid. If you wanted more clearance for exhaust, could make a short little crossmember that bolted in at the strap mounts, on top of the RT mount, and get it a little further out of the way of the exhaust pipes, not sure if how much that gains, but I think the stock crossmember is probably 1.25" or 1.5" tall and those bolts are higher than that, so might be worth it. If you're just street cruising, I think you can live without the crossmember and use your bolt on caps. The RT mount won't add much if any rigidity, that's not what it's meant for. -
The old school bubble flares were shaped in such a way and tall enough that you could get a lot more wheel movement, but I don't know a current supplier. The other option would be a flared quarter panel. For a narrow one, something like ztrix's Subtle Z or 940Z, or even the old California Z kit from Jim Cook Racing. For a wider one could do ztrix's YZ or IMSA flares, or one of the old box flare setups (most people find these ugly). There are other makers too, but it's really hard to find a good fiberglass supplier and ztrix.com actually ships orders in a reasonable time with good quality.
-
Way back when John Coffey fixed Amir's car. I can't remember Amir's screen name, but he had an SR20DET swap in a 260 I think. Anyway he was chewing up the rear tires on track, brought it to Beta Motorsports and John moved the flares up quite a bit. The problem is that the ZG flare is styled to be installed the way that Amir had it installed. It fits the body line when mounted too low to be functional. So I would suggest if you want functional, find a flare that has room for the tire to move. Not sure if the pics are still here of Amir's car, but that would be the place to look for how to do it. They look weird installed higher though, and if you have sectioned struts you'll probably still have issues. I would assume that Stance struts have travel similar to a sectioned strut. The way to check it is to pull the spring and compress the suspension and look for interference. I had my car cut for flares, did that test while setting up some new control arms and found major interference. Had to cut again. Second time I cut all the way to the top of the wheel well arch. If you do that, ZGs and probable most other smaller flares are not going to have enough vertical space for the tire to move. So again, the best way to solve the problem is to limit the travel, or get better flares.
-
Business is great, thanks. You get that anal fistula sorted out yet? Seems like not yet...
-
Yeah, you're right. Which got me thinking, how the hell did they make that work? So I searched for a picture, and found one. Looks like the front doesn't need the flare at all, and the rear is going to cut the tire, just like all the people running ZGs today. So ZGs never really worked correctly for the intended purpose. https://dattosankureiji.wordpress.com/2013/12/02/some-datsun-racing-history-goodness/ Thanks for piquing my interest. Always a pleasure.
-
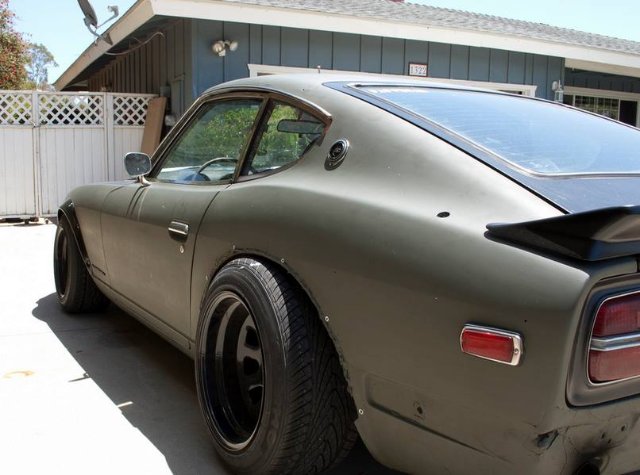
The purple car above, and 99% of the ZG flares people install have this problem. The have the tire all the way out to the lip of the flare in hella flush style, and because of the shape of the flare there is no way for the suspension to move an inch without the tire hitting the flare. On ZGs in particular people tend to mount the rears too low and not cut enough of the fender. I think this is because the flares were originally useless: the old 70s Japanese Zs that ran them had wheels and tires that fit into the stock fenders anyway. Why they put them on in the first place is beyond me, but I don't bolt fake vents or scoops on my cars either. https://www.sportscarmarket.com/profile/1972-nissan-fairlady-zg [img]https://www.sportscarmarket.com/wp-content/uploads/2016/08/1972-nissan-fairlady-zg-drivers-front.jpg[/img] Looks like putting the image tags in doesn't work, but there's a good shot of an original ZG at the link and you can see that the flares are totally unnecessary. If you were inclined to go hella flush, I'd suggest you run a huge stack of packers and a big foam bumpstop so that the suspension rode on the bumpstop all the time and the packers kept the suspension from compressing so far that you'd smash the tire into the flare or cut it on the not trimmed enough original fenders. Lots of newer cars ride on the bumpstops all the time, or as soon as there is any body roll at all. You can do that pretty well, surprisingly.
-
There is a similar video of the Janspeed car with the hood blowing up like a balloon: Love the duct idea, did it myself. Louvers work too, if you can do that too...
-
ANOTHER Datsun Z/LS3/T56 Swap Thread
JMortensen replied to Ironhead's topic in S30 Series - 240z, 260z, 280z
I have the front crossmember 2.5 inches off the ground and the pan is slightly higher. I made my mounts so if you're using off the shelf stuff YMMV. My goal is to eventually run a paneled bottom. I had to raise the drivetrain because the T56 was hanging down below the frame rails (Bad Dog SFCs). 280 rails are taller so there is a little wiggle room there. -
ANOTHER Datsun Z/LS3/T56 Swap Thread
JMortensen replied to Ironhead's topic in S30 Series - 240z, 260z, 280z
I did the 2.66 Woodward rack. I don't drive it on the street, but I would. I don't think it's too sensitive, although you might be in trouble if you were leaning down to get something off the floor and weren't paying attention. Much nicer in slaloms. I also did the Holley 302-2 and and Improved Racing baffles and a 3qt Accusump. I have a 30 lb low oil pressure light, haven't seen it come on when autoxing on 14" wide slicks. More info on my swap here: -
I was out of town, thanks for posting this info Arttu. I have this end: https://www.ebay.com/itm/381257941708 which came off of a sway bar for an E46 that I bought used for an extremely good price. Here are some details on my blade end from Hoerr Racing Products: "The GC1042 blade is a 950L blade which is the longest one we offer. The .310 thickness is a bit heavy for a 1 ¼” dia bar, a .270” blade would be more ideal. Let me know which direction you end up going with, I’ll be glad to help out if you choose to buy new items." So that would be 7.75mm thick, tapers more dramatically, and is also shorter at 190mm. Now I'm mulling selling and buying the thinner .270 blade which is 6.75mm thick, or just making an adjustable bar end and leaving it be. I'd love to have the in cockpit adjustability, but not sure how much effort I want to put into it.
-
240z SCCA vintage race car, restoration
JMortensen replied to AydinZ71's topic in S30 Series - 240z, 260z, 280z
What size blade are you running, on what size bar? I bought one used and am debating running it or reselling. -
240z SCCA vintage race car, restoration
JMortensen replied to AydinZ71's topic in S30 Series - 240z, 260z, 280z
Return them and get steel, then chop the ends and do boxed sheet? -
240z SCCA vintage race car, restoration
JMortensen replied to AydinZ71's topic in S30 Series - 240z, 260z, 280z
I got my bar from colemanracing.com, but aside from spline count variations they're basically the same idea, and my understanding is that we can buy arms from other suppliers like Speedway and as long as the spline count is the same, they'll fit. Coleman sells a 48 and a 49 spline, mine are 48, FWIW. -
240z SCCA vintage race car, restoration
JMortensen replied to AydinZ71's topic in S30 Series - 240z, 260z, 280z
Different material but I tried bending the steel ones with BFH and got nothing. Put in my 12 ton press and was able to deflect the end about 1/8" before I gave up for fear of my life. Then found a machine shop with BIG machinery and they put the arms in a 50 ton press and bent them easily. Your standard auto shop press ain't gonna cut it. The double shear end link mounts are so that I can use a clevis and not have to worry about the clevis leaning in the hole. Pro-tip: if you're making them double shear, take a piece of plastic from the last tool you bought, or a razor or anything that comes in a blister pack, and put that between the rod end and the arm. That will give you an extra .005" or whatever and it allows the rod end to slide easily into the mount. Last time I did this I didn't use a spacer and it was a real bitch to get the rod ends into position for the clevis pin. Will probably clunk a little, but hey, racecar. I think AL is stiffer and more brittle. Someone mentioned spring rates, and the higher the spring rate the less sway bar you need, so you can get away with less strong arms as a result. Before I decided to make boxed arms, I had an engineer friend I used to autox with 20 years ago suggest milling down the arms to 3/8" thick so that they could be bent more easily. That would be another way to fix and would reduce weight. The strength of the arm as delivered is more than capable of withstanding the thickest sway bars that you would use on a 3000 lb dirt track car with soft springs and (WAG) 7" of travel, so a lot more force on those arms than what they'll see in a stiffly sprung ~2500 lb car that moves a couple inches at most. -
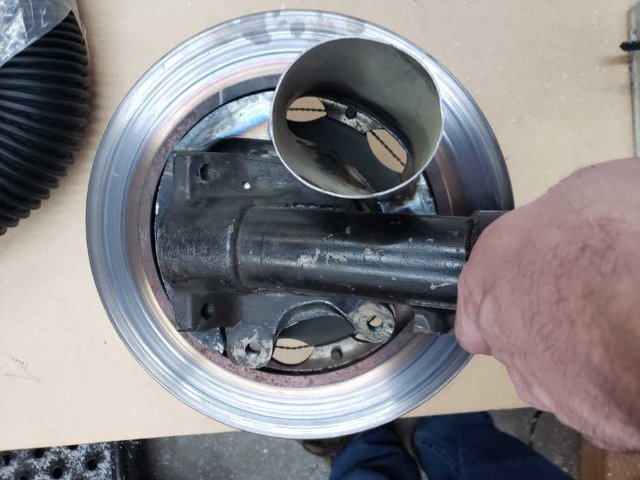
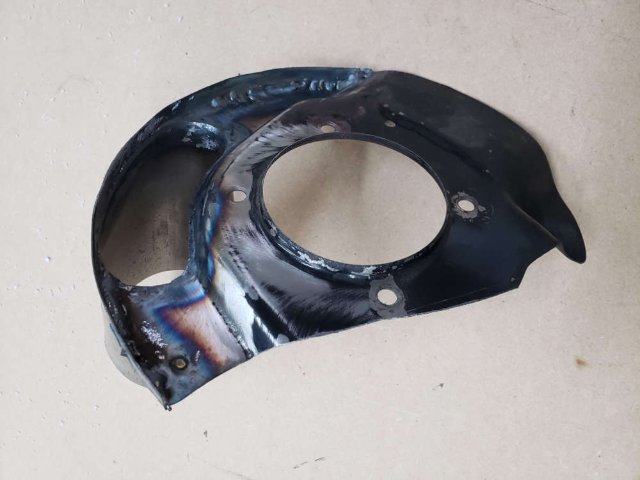
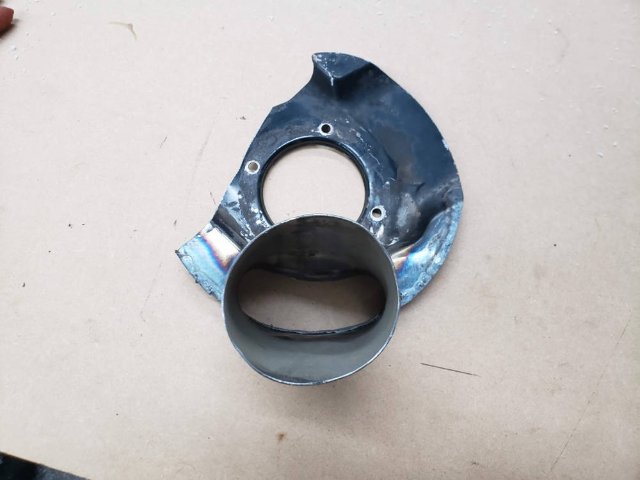
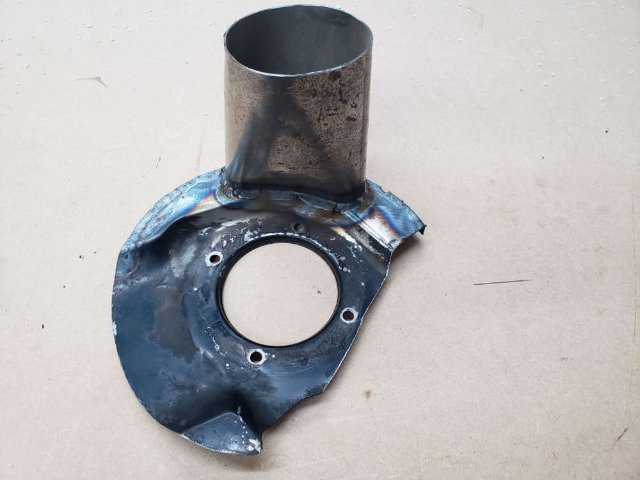
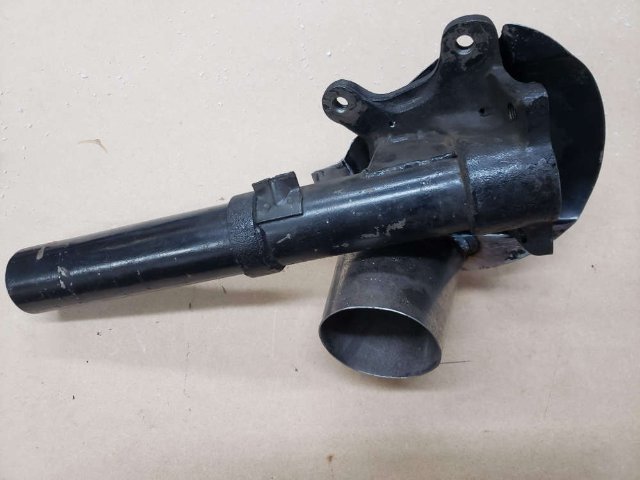
My impression is that you don't want the backing plate to cover the face of the rotor as that prevents the heat from dissipating as quickly, which is why my mine fit into the center of the hat. I'll leave it to Keith to comment on that. His setup was for a solid 240Z rotor with different considerations, but IIRC he moved on to E36s after he left the Z scene so I'm sure he'd have some other race cars to draw from.
-
IMSA GTU vintage racer build
JMortensen replied to clarkspeed's topic in S30 Series - 240z, 260z, 280z
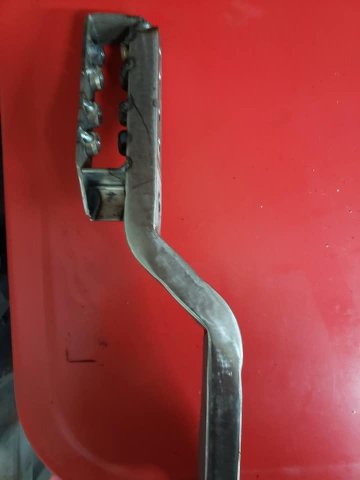
FWIW, I have a similar style bar and Cary and Richard suggested making boxed sheet arms for it. Those freakin arms are HEAVY. It's on my list of things to do. Idea is to cut an inch or two after the spline and weld the tube arms to that. I think it will be pretty easy to drop 10 lbs. Maybe more. Was surprised that my tubular bar with the solid ends was a couple lbs heavier than the 1" MSA solid bar I was using before. -
I made some a couple years ago and still haven't redone the feed tube into them, which interfered with the sway bar. Supposed to be on the schedule for this winter...
-
240z SCCA vintage race car, restoration
JMortensen replied to AydinZ71's topic in S30 Series - 240z, 260z, 280z
I agree with you guys and think it's the pushing back that makes the urethane ones sag in the middle, not any pushing down. Likewise I had a fiberglass airdam with a rubber piece about 3" tall on it, called a Flex-dam. Made in CA in the 70s and 80s. Anyway a friend of mine snapped a pic on the front straight at Buttonwillow, which is not that fast, and the rubber was flapping up and letting a good amount of air under the car. Replaced with plastic lawn edging to fix. Whatever you do, test to make sure it works after you've done it. -
Can't really see what you're doing on the bottom, but also blocking off the entire area between the front valance and the rad support helps to minimize air that goes through the grill and then down under the car. I expect you're aware of this already.
-
Fitting zg flares on rear- determining flare height
JMortensen replied to fusion's topic in Body Kits & Paint
I assembled the suspension without springs, used a ratchet strap around the A arm to compress, then I think I measured from the hub to the fender. -
Fitting zg flares on rear- determining flare height
JMortensen replied to fusion's topic in Body Kits & Paint
Looks like Onesight1 and I are late to the party, but I think the main thing is that you want the suspension to have as much bump travel as possible and simultaneously want the rear tires to not hit the insides of the fenderwells. If you line the flares up with the bodyline like most do, then you will not have enough clearance for the tire, particularly if you have taller tires or run the car lower, or both. Taller tires and lower ride height seems to be the thing to do these days. Mounting the flares high enough to allow for the tire to move means installing the ZGs at a pretty awkward height, unfortunately. John Coffey had a good thread 20 years ago about Amir's SR20DET powered Z, and how he had to move the flares up to keep it from eating tires. I also shared my experience cutting and then redoing it to get enough clearance for 24" slicks with gigantic IMSA flares. I don't remember whose car this is, but it's an example of what NOT to do IMO. -
Do I need to repack rear bearings to add a bracket?
JMortensen replied to mutantZ's topic in S30 Series - 240z, 260z, 280z
Why do you have to pull the hubs? Bracket goes all the way around? Just cut out the bottom section and bolt it on.


