AydinZ71
Members-
Posts
1073 -
Joined
-
Last visited
-
Days Won
27
Content Type
Profiles
Forums
Blogs
Events
Gallery
Downloads
Store
Everything posted by AydinZ71
-
-
Damn... wish I read this before I bought a Braille for both my cars 😂
-
My only suggestion is to pepper them with contact. E-mails, phone calls etc. they don’t need to be angry (even though you are certainly entitled to be). Eventually they will want you to go away and they know there is only one way to do it. I would throw in the statement “further action” if you need to. Does not need to be specific.
-
240z SCCA vintage race car, restoration
AydinZ71 replied to AydinZ71's topic in S30 Series - 240z, 260z, 280z
Clark, I looked online and saw some of those “sweet” units. They looked like the most sophisticated units at a reasonable price on the vendor sites Jon mentioned. Il have to take more time on this topic. Purchased the Tilton pedal box and two tilton master cylinders + reservoirs for $400. Probably a month away from tackling that yet. continuing to add metal to the cowl area. Trying to make the existing surfaces rigid before closing the gap. Don’t want this section to warp since the hood and cowl sit here. IMG_6055.MOV FullSizeRender.mov -
IMSA GTU vintage racer build
AydinZ71 replied to clarkspeed's topic in S30 Series - 240z, 260z, 280z
It looks heavy, but good point on whether it’s heavy enough to make a difference I bet you could shave out at least a pound or two if you replaced it with a tubular crossmember. You could always cut it out cleanly, weight it, and weld it back in if you change your mind. It’s not like your welds will be any weaker than the sporadic resistance spot welds Funny thing, the drip rails double as resistance to deflection in the vertical plane. Still, with the cage in there you already have so much added rigidity, I bet you can cut them out and seam weld cross. If I remember right, the drip rail is two 20-22 gauge sheets spot welded together so adding a weld along the length will be important if you cut the spot welds out. Are you restricted on cage mounting points in your class? I would tie the body to the cage in more places than the standard 8 if you could. For example, adding a rib along the windshield sill to the cage risers nearest the windshield. If you eliminate a large amount of independent motion between the tub and your cage, it will make a HUGE impact on tub rigidity. I still need to explore the idea of how rigid is too rigid. I suppose the number one sign of a body that is too tight would be unmanageable vibration. Steel flexing even in minute amounts will limit how bad vibration will be if you near the natural frequency of the structure. You might notice at one specific RPM the whole car starts feeling like a tuning fork LOL. -
IMSA GTU vintage racer build
AydinZ71 replied to clarkspeed's topic in S30 Series - 240z, 260z, 280z
Looks good!! Does your class require the outside dimensions of the car to be OEM? If I was building something nearly from scratch as you are, I would raise the floor bottom by a 3/4". After the exhaust and crossmembers, the floor pan support rail is the next interference point for lowering a car in my experience on the street car. Maybe I would mock it up and change my mind. Fun to kick around the idea. Another thought I had recently was to replace the heavy crossmember that runs behind your head. Its what has your rear hatch mounting points. it seems to me the method of stacking stamped sheet here made it heavier than it needs to be. I would replace it with a tubular crossmember and rebuild the hatch mounts. In EP we are not restricted on cage mounting points, so I would use the nearby cage (overhead loop) as the reinforcement. eliminating weight at this height will help lower the CR quite a bit. -
IMSA GTU vintage racer build
AydinZ71 replied to clarkspeed's topic in S30 Series - 240z, 260z, 280z
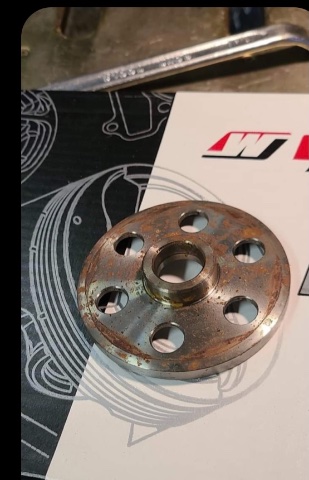
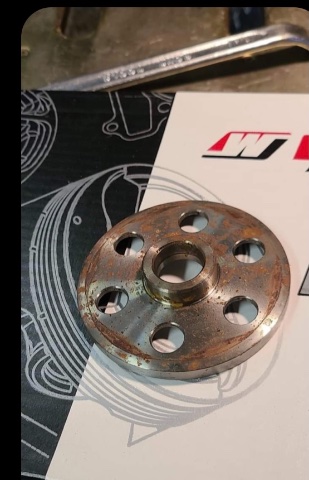
That is a cake job on a lathe. Since it is not rotating, you can get away with a mill Start with round stock. A fly mill could do the job if you vary the radius of the cutting head several times. Center hole can be done in a drill press. Thinking of 6061 AL? It machines easier than any other cost effective billet in my opinion. Steel is cheaper but you have to keep it constantly lubricated, which stinks up the place. Also heavy. eastwood sells a wicked mini-lathe for $750. Might find a used one around for half as much! let me Know if I can help! I used to design and draft fabrication drawings when I was a junior engineer. Spent hours working with our machinist to optimize designs for cost effective fabrication. -
240z SCCA vintage race car, restoration
AydinZ71 replied to AydinZ71's topic in S30 Series - 240z, 260z, 280z
ahh! If you were to go with an A/M vendor for a steering column, who would you go with? It seems the adaptation would not be awfully difficult. It’s not like it rotating at speed so an adapter coupling would not need to be very precise. I gotta say, the OEM steering column is a beast! Very heavy, and mine is not in the best condition. I also don’t like how the firewall transition is at a fixed angle. I would replace this interface with a spherical bearing if I fab’d my own. Interesting that you had the room to move your seat laterally by a whole 1.5”! My used carbeu seats fit with only MM’s of clearance on each side. -
240z SCCA vintage race car, restoration
AydinZ71 replied to AydinZ71's topic in S30 Series - 240z, 260z, 280z
nice! Doesn’t look awfully difficult. I’m going to go with the Tilton box but that looks like an elegant solution! previous owner hacked off the front of the pedal box so he could mount the steering column lower (using the cage as support). Jon, did you lower your steering column to account for the lower (I’m presuming) seat mount location? Previous owner mounted the seat directly to the floor. I don’t like that, so I will do the same thing on the drivers side as I did on the passenger side. New seat crossmember with mounting surface 1.5” above floor pan. -
240z SCCA vintage race car, restoration
AydinZ71 replied to AydinZ71's topic in S30 Series - 240z, 260z, 280z
Well thanks Clark! I thought myself to MIG weld over the past 6 months so novice is certainly the word that comes to mind. I appreciate everyone’s patience as I become more accustomed to the terms and techniques. Greg told me he “ran sep MC’s”. Took me several web searches before I caught on 😂 Tilton’s website was a big help. There are so many ways to skin the damn cat. I mean, as soon as you think you found “the” solution, you catch onto something that is more sophisticated. I suppose that’s how we end up with performance parts for sale over time. He was intrigued with my fresh air intake flange and engine bay vent idea, so it encourages one to keep exploring new solutions. -
Wire Question - Where do they go?
AydinZ71 replied to Gotham22's topic in S30 Series - 240z, 260z, 280z
I would use a test light and use the ignition diagram in the Haynes manual. There are not many leads that connect to the coil and/or distributor. If your wiring is OEM, the wiring diagram may have the color of the conductors. I know my Z31 Haynes manual did. -
IMSA GTU vintage racer build
AydinZ71 replied to clarkspeed's topic in S30 Series - 240z, 260z, 280z
I just picked up another pair of GC bolt-in camber plates for the fronts this time. Price has jumped $50 since the last set I bought in nov. I do appreciate how they keep the spring concentric with the shock insert. I’m a fan, but they are not inexpensive, and I had to custom make a socket to fit the tight space between the 14MM threaded nut and the surrounding body. PS: I have four of the original spring perches that come with GC’s coul-over kit anyone needs them. The camber plates come with their own. -
240z SCCA vintage race car, restoration
AydinZ71 replied to AydinZ71's topic in S30 Series - 240z, 260z, 280z
Hey thanks! Do you go by Clark? Since the tilton box by itself is only $300, I don’t mind fabing up the mount. I actually prefer it, since my cowl box/plenum/chimney is a rusted nightmare, and I was anxious about how I was going to rebuild the OEM pedal box mounting points. The last $100 is for MC’s which I would need anyways. He runs a 7/8” up front and 1” for rear. I’m most anxious about getting used to no brake booster. Yeah Greg has been super generous with his time. I text back and forth with him to get his opinions on ideas I have. I don’t ever see myself getting into EP on the national level (kids, job, money) Il be lucky if I enter regionally. Still need to get my novice license at Willow Springs after I get the car finished. Il save $500 just by running my own car in the class vs. theirs. No need buying the fire bottle and harness till she is closer to track days, but the existing fire bottle apparatus is in working shape. I picked EP since the car was already built for SCCA vintage before me, and by coincidence (or design) she already meets the GRC’s for EP. I like that the rules seem very clear and thorough. you, and everyone else responding to my thread have all been super helpful! Always open for more feedback! I’m certainly green/amateur. -
240z SCCA vintage race car, restoration
AydinZ71 replied to AydinZ71's topic in S30 Series - 240z, 260z, 280z
Agreed. This is for a road racing application. This is also my first experience with a lightweight application. My experience has been mostly OEM, and double pressure plate with a 6-puck unsprung for the turbo car. -
240z SCCA vintage race car, restoration
AydinZ71 replied to AydinZ71's topic in S30 Series - 240z, 260z, 280z
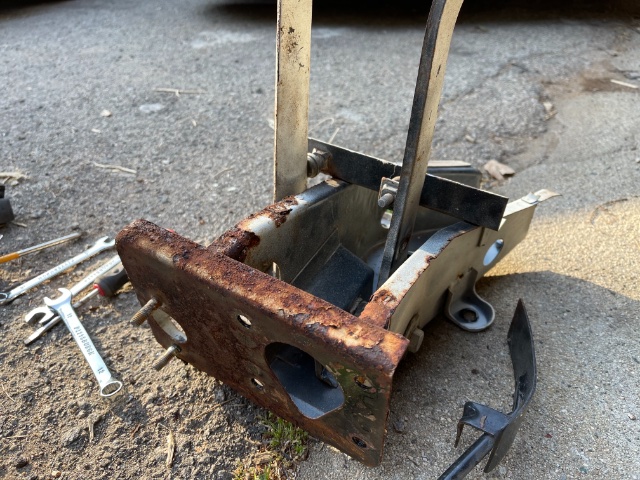
Chatting back and forth with Greg Ira. He recommended the Tilton pedal box which is designed with two independent masters (one for front, one for rear) and a balance bar between them. He prefers this approach over the hydraulic proportioning valve. I already have the whole area apart and still doing metal fab so this very much doable for me. Also in my budget since the pedal assembly + cylinders is about $400. My OEM pedal box is rusted pretty bad, and it weighs 8lbs. The Tilton unit is 4lbs. Him and I also discussed flywheels/clutches. He has a design assembly with Quartermaster for ~1k which mounts to a flexplate and a crank adapter. He calls my 10lb "lightweight" steel flywheel and Exedy clutch super heavy. Il speak more with him and see if I grasp the full scope. also added some pics and vids of updates on the car from the weekend. -
Sorry, wish i could help ya. I have only owned 70-71 models. Have you considered an entirely universal aluminum pedal box? The S30 OEM unit is quite heavy and crude.
-
240z SCCA vintage race car, restoration
AydinZ71 replied to AydinZ71's topic in S30 Series - 240z, 260z, 280z
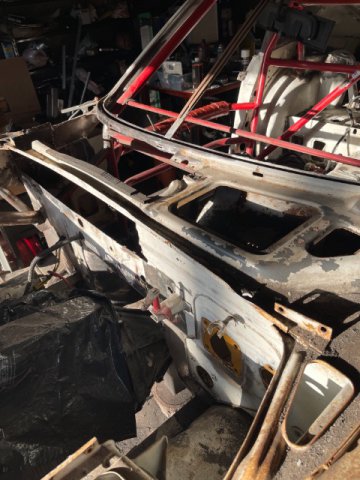
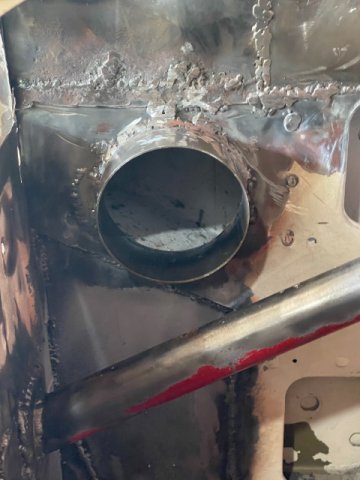
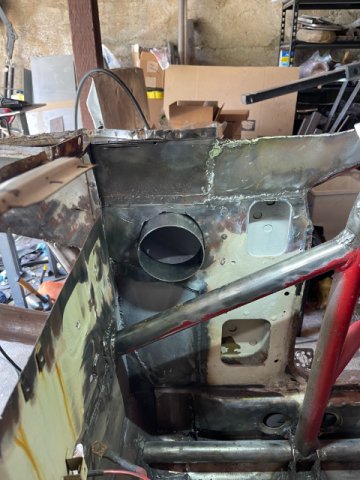
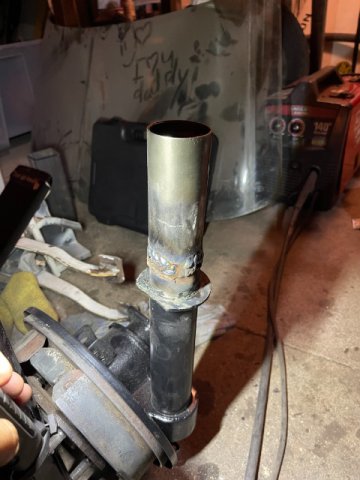
Primer and epoxy coated (white) the rear strut mount so I don’t paint over the bolts when the coat the whole interior. Moved back to the cab in the meantime. OEM fresh air intake is old and brittle, so I created a new flange from 4” steel thin wall tube. Worked out pretty well. Now I can mount ducting to the driver when the car is nearly complete. The white stuff is weld-through primer, and deeper in the air box is 2k epoxy sealer. -
240z SCCA vintage race car, restoration
AydinZ71 replied to AydinZ71's topic in S30 Series - 240z, 260z, 280z
Thanks all!!! I have the ground control bolt-in units. I can rig something up if I need .25-.5” more droop Probably weld-on some custom cut fender washers into the plate and get longer bolts, but for now I’m happy -
240z SCCA vintage race car, restoration
AydinZ71 replied to AydinZ71's topic in S30 Series - 240z, 260z, 280z
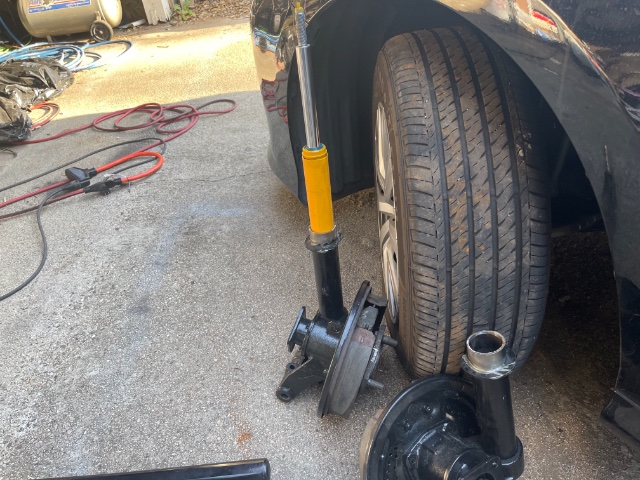
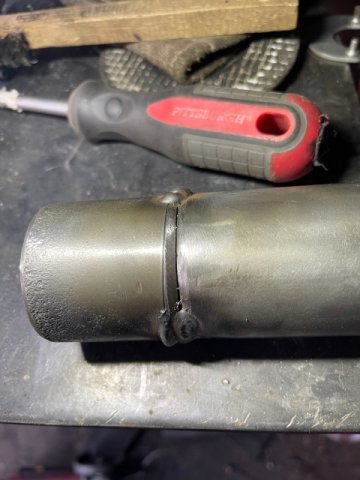
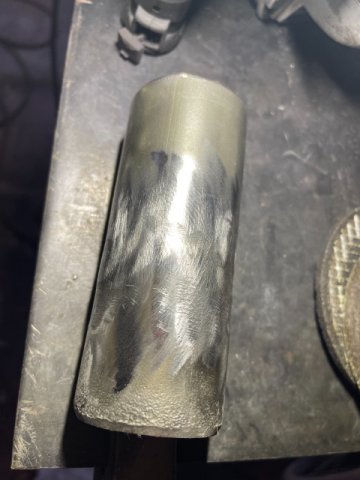
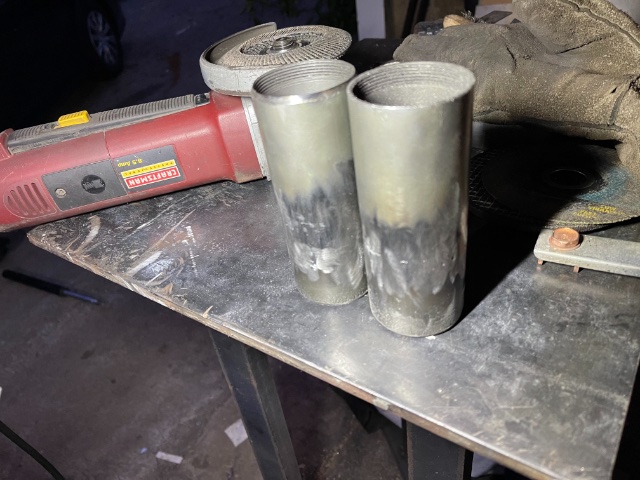
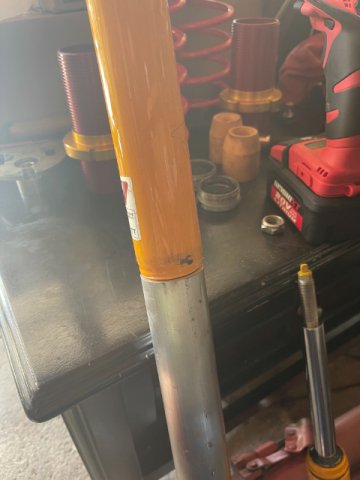
Done re-sectioning the struts! I added as much tube length as I could, but still only ended up with a 1.65” and 1.7” spacer in the bottom of the tubes. If I need to add anymore, il have to Bush the camber plate mounting to the tower. Should be much better than before though! -
Can you afford a wideband gauge? I could give you some tips on using that to tune your AF. You can tune the RPM fuel increments while idling at various RPM’s, and will need to be on a deserted road or mostly empty freeway to tune the manifold pressure fuel increments since you need the load. Stick to 4th gear which is 1:1 on most transmissions. Glad you got it to idle better. Definitely check your timing with a light. Suggest using factory settings to start. I can take a picture of my 280zx Haynes manual if you need the numbers. Always room to tweek the timing after you get your AF right. There is a small relationship between AF and timing (where richer mixture will allow for a bit more timing advance) but you are not there yet. For now just assume they are 100% independent variables that don’t effect each other.
-
ANOTHER Datsun Z/LS3/T56 Swap Thread
AydinZ71 replied to Ironhead's topic in S30 Series - 240z, 260z, 280z
Yeah man... plywood sounds cheesy but it is super durable. The wood is laid in alternating grain so it is uniformly strong in both axis. Great stuff for an application that will see a lot of vibration, rocks, flexing -
240z SCCA vintage race car, restoration
AydinZ71 replied to AydinZ71's topic in S30 Series - 240z, 260z, 280z
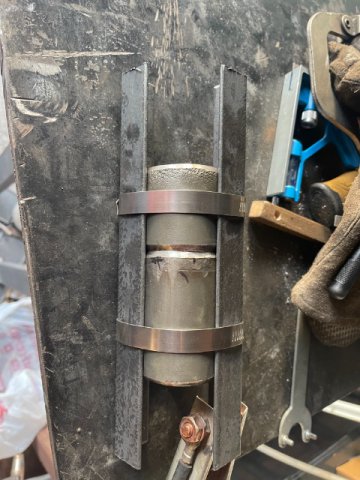
Thanks as always Ben! Then I’m going for the Exedy and the 10-lb forged steel flywheel. Zcargarage has one listed for $350. Anyone have any experience with them? Back to the rear suspension. Got one completely welded. Wow this was a lot of work, but @JMortensen’s technique for keeping the tube concentric worked like a charm. Strut slid in and out. The weld is messier than I wanted, but I had to be sure I did not penetrate the tube. I did get some 1/16” bead penetration in some spots, but I was lucky it was on the short side. I was able to use a die grinder to clean it up. I also welded a bunch of pitting that had accumulated at the base of the bottom OEM perch. Soon onto the fronts. The GC directions call for a 5” gap between the bottom of the strut tube and the bottom of the coilover perch. Do I need a spacer for my Koni’s in the front? -
I have seen them posted for $800-$1200 on offer-up mostly (in the LA area) depending on condition. I think the stroked L28 crowd are the ones who are willing to shell out for one. If you want to move it quick, search every platform (especially Facebook) and price yours $100 lower than everyone else’s. Someone will buy it.
-
240z SCCA vintage race car, restoration
AydinZ71 replied to AydinZ71's topic in S30 Series - 240z, 260z, 280z
While I scavenge the time to re-section my rear struts, I thought I would look forward a bit to the flywheel/clutch scope. I’m pulling the short block and 4-Spd soon so I can check what flywheel/clutch the previous owner had on there before I rush into buying new parts. I already hear from you all that I should go with the lightest flywheel I can. I’m looking at the 10-lbs steel unit sold by a handful of sources. How about the clutch? Given the modest torque of even a race-prepped L24 on SU’s, are there any reasons to run a A/M clutch for a racing application? I chatted a bit with Greg Ira on this topic, and he thinks the exedy OEM unit should be just fine since you are t really slipping the clutch that often during a race, and should be rev-matching on downshifts anyways. naturally, he runs a lightweight high performance clutch but he also has sponsors. what are your thoughts? OEM clutch OK? -
240z SCCA vintage race car, restoration
AydinZ71 replied to AydinZ71's topic in S30 Series - 240z, 260z, 280z
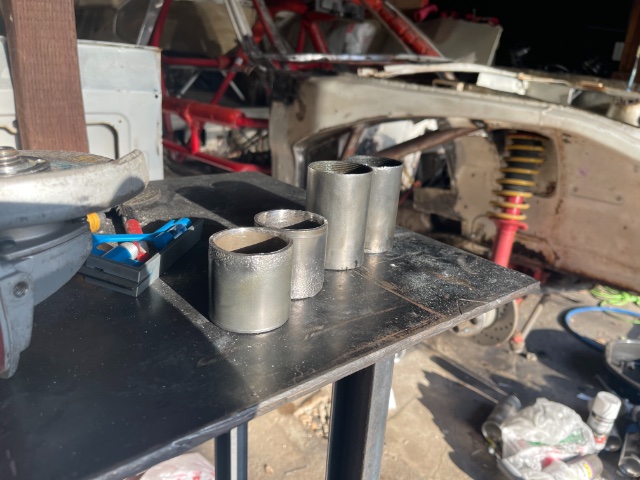
Update. Everything disassembled again, and bought some angle stock per Jmortensen. For the spacer, I went with 1-5/8, 0.14 wall 6061 AL. Fits pretty well (see pic). I didn’t want to go solid stock since I don’t want to flatten the natural curvature of the strut inserts bottom. Hollow also helps with concentricity. figure this is dead weight and only in compression, so why not AL. Stuff is practically free in my metal supplies discount bin. Let me know if you guys see an issue there.
