AydinZ71
Members-
Posts
1073 -
Joined
-
Last visited
-
Days Won
27
Content Type
Profiles
Forums
Blogs
Events
Gallery
Downloads
Store
Everything posted by AydinZ71
-
I blew up my kid's 240.....sorta
AydinZ71 replied to jvandyke's topic in Gen I & II Chevy V8 Tech Board
If you are still looking for a cheap solution: Check out this item on OfferUp. https://offerup.co/AI289AzAkhb -
Sounds good! Just a word of advice, being in the process of restoring and upgrading a race car myself. Keep your car as a daily driver, and buy a separate 240z as a race car that may not be titled, have missing parts, no interior, etc. You will be tearing the car apart and spend months performing structural improvements, seat mounts, etc. Best to do this on as cheap and incomplete a chassis as possible. Almost nothing on the suspension will be left untouched, so anything on the car today that is "upgraded" or in good shape will likely be replaced with something that is adjustable and specific to your racing class. Just make sure the chassis is straight, and be ready to perform rust replacement of new metal as you reinforce. -Aydin
-
Rule of thumb is 10:1 for an L-series on pump gas. You can try 10.6 but its a risk. I see you are in the UK, and all my experience is from US 91 octane. If your fuel out there is higher equivalent octane or uses more than 10% ethanol, you should do your own research for equivalency. Detonation is not an all-day thing when you are borderline. It will show up on hot days, high load, with ignition timing advance, etc. If this is a daily driver, I would go dish pistons for a near 9:1. As a matter of fact, I would not change the cam either. You could look for a factory "C" grind.
-
Well... you hit the jackpot my friend. Good for you. The engine is the least of your worries. If she is really free of most rust, you cant ask for more. Not a fan of the styling, but you can change all of that. You have a series 1 RHD. Can't ask for much more than that state-side. Only thing I would want more is a JDM 432R. Spend some time thinking about what you want out of her and we are here to help. Just FYI, check out Bring a Trailer for pricing on restored series 1 cars. If you want to make some serious cash or as an investment, original restoration would be the way to go. No judgement if you go restomod. good luck.
-
I blew up my kid's 240.....sorta
AydinZ71 replied to jvandyke's topic in Gen I & II Chevy V8 Tech Board
The Z32 LSD is known as a "Short nose". It will require a whole lot of fabrication to make it work, including a custom driveshaft, mounts, and structural stiffening of the subframe. Probably not worth the trouble if you are looking for a quick, cheap solution. The 280Z diff w/mustache bar looks right -
I blew up my kid's 240.....sorta
AydinZ71 replied to jvandyke's topic in Gen I & II Chevy V8 Tech Board
Do you weld? If so, yes. You can cut a chunk out and not only re-drill the correct hole pattern, but also compensate for any offset necessary (moving R200 forward-aft). However, I don’t recall if there is an elevation change in the mounting of the R180/200. Playing it safe would be to get the right mustache bar but if you are a skilled fabricator everything is possible! Just remember to think in 3 dimensions. -
I blew up my kid's 240.....sorta
AydinZ71 replied to jvandyke's topic in Gen I & II Chevy V8 Tech Board
Yup I had that happen to me. I swapped the pinion flange from an R180. Pull-off the flange before you junk the broken unit just in case. Impact wrench and a light-duty gear puller Will do the trick. -
I blew up my kid's 240.....sorta
AydinZ71 replied to jvandyke's topic in Gen I & II Chevy V8 Tech Board
Yep that’s a 3.545. You can swap in another r180, got nothing to lose! The only time I destroyed my spider gears in my R200 is from “rocking” between on-and-off throttle too quickly. The driveline inertia cause the crunch, not the torque. Question: don’t you struggle with traction issues? I was sliding all over the place with 300ft-lbs of torque. -
I blew up my kid's 240.....sorta
AydinZ71 replied to jvandyke's topic in Gen I & II Chevy V8 Tech Board
@jvandyke 1) you already have the curved tranverse link mount. Check. No need to change that. 2) yes, the mustache bar is the bar that mounts to the rear cover of your diff. R200 has wider mounting stud spacing. The right bar comes from a 280z. 3) in your last picture, your front transverse link mount/crossmember has been removed. You need to eventually put it back but remove the actual diff mount attached to it (the rubber/steel brick with the stud molded into it). You will be using the top-mount from the RT kit. 4) double-check the forums if you need a 280z driveshaft as well. I thought the r180 vs r200 driveshafts where slightly different lengths and/or yoke mounting bolt pattern but I could be totally wrong. -
I blew up my kid's 240.....sorta
AydinZ71 replied to jvandyke's topic in Gen I & II Chevy V8 Tech Board
+1 on the taller gear ratio and “RT mount” The oem mount will tear apart within a year with the amount of torque you have, so go with the top-mount and ditch the OEM bottom-mount. You are going to struggle with traction with that much torque. A taller geared diff will help by reducing the mechanical leverage of torque to the rear wheels, and give you lower rpm’s at highway speeds. 3.545’s are more prevalent than 3.9’s anyways, so you should be able to snag one for cheaper. just as a sample for cost, I sold my 3.545 r200 w/ shafts for $350 4 months ago, and my 280z r200 mustache bar for $80. you can go with an R180 if you like, but if you search the forums you will find that they will inevitably break with V8 torque. The more traction you have (LSD, wide STICKY tires), the sooner it will break. -
Is that panel leading or just freshly ground steel? Looking good . fresh.
-
differential removal question
AydinZ71 replied to jvandyke's topic in Gen I & II Chevy V8 Tech Board
Yeah the OEM R180 can not handle the V8 torque if you can get the traction. Look into an R200 with an LSD center section. ~$300 for the carrier core, and $1000 for the LSD insert. you could just plop in an R200 open diff (99% of the R200 “long nose” diffs are open), but without an LSD you will have one wheel spin prematurely. to swap an r200LN into a 240z, you will need the following parts from a 280z. NOT 280zx, only the diff from a 280zx will work: driveshaft, halfshafts (axle shafts), mustache bar, and the rear lower control arm crossmember (if the 240z one you have is not “curved”). R180 was OEM on the 240z, and 280z was an r200. Chassis mounting points are the same, so swapping the parts from a 280 into a 240 is bolt-on. -
I blew up my kid's 240.....sorta
AydinZ71 replied to jvandyke's topic in Gen I & II Chevy V8 Tech Board
Looks to me like the retaining pin for the spider gears sheared off? I think I stated earlier, the spider gears are the week point if it fails under torque. Good luck friend! -
240z SCCA vintage race car, restoration
AydinZ71 replied to AydinZ71's topic in S30 Series - 240z, 260z, 280z
@clarkspeed Thanks for the incredibly comprehensive response Clark!! 1) 100%. Have GC coilovers at each corner w/ GC bolt-in camber plates (to maintain EP spec). Will adjust ride height after the exhaust is in. 2 & 3) You have given me a lot to think about here. Car came with 3/4"" spacers, so I'll have to measure and possible buy more or taller spacers once I have the ride height set. Greg runs 3 1" spacers stacked, and has one machined to make-up for the effect on camber/angle of the LCA mounting surface. 4) 10-4! I am allowed 2" extra track total (1" on each side). I will achieve this by: a) modifying stock LCA w/ heim rod-end w/part list recommended by John. b) Futofab TC (on order) c) either Apex s130 front "low profile" tie rod kit, or fabricate my own with parts from McMaster. All three parts will work together to achieve the +2" plus track I need. 5) I am running #350 springs in the front. Il be able to add the negative camber w/ the camber plate, and the addition of track. I am targeting -2 degrees, but might go less as you suggested for the heavy springs. 6) The Futofab TC's should solve this concern, but Il look at it more clearly when they are in-hand. I need to become more familair with the geometry. 7 & 8 ) agreed! Will be looking into heim rod ends for sure, regardless of something I fab or purchase. It is frustrating that the A/M suppliers done explicitly state the weight. Not sure why... I weigh every OEM suspension part I remove from the car so I can keep track of the net +-. 9) yeah I will use the stock knuckles for now With all of your help, I have a much much better grasp on the front suspension geometry and modifications. Il have to play around with the roll center a bit, but besides that I think I have it squared away! Thank you again for your help Clark, Ben, John! -
Very much recommend the main power disconnect switch, if you are adding a lot of new electrical components to your Z. I determined after a year of use that my alarm (reluctantly installed after my 2nd break-in in college) had developed a worsening drain over time. The switch will allow you to park your Z in your garage for several weeks without worrying about your battery, and the annoying process of disconnecting your battery terminal between use. It will also help you diagnose current drain easily, my measuring voltage across the terminals w/ switch on/off at any time.
-
Best 280z rear end for lots of torque
AydinZ71 replied to 280cummins's topic in S30 Series - 240z, 260z, 280z
+1 100% If you go with @Invincibleextremes kit, I'm pretty sure you can install the mustang stub axles into his uprights. That will also give you a 5-lug wheel hub. That is what I will be doing with my L28et car. -
240z SCCA vintage race car, restoration
AydinZ71 replied to AydinZ71's topic in S30 Series - 240z, 260z, 280z
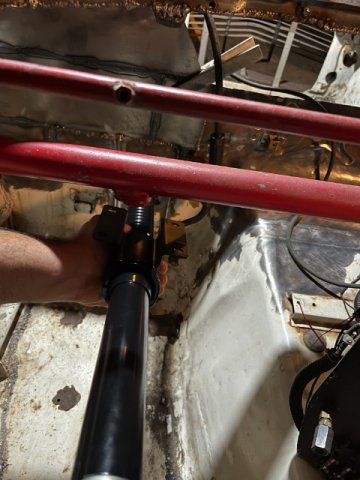
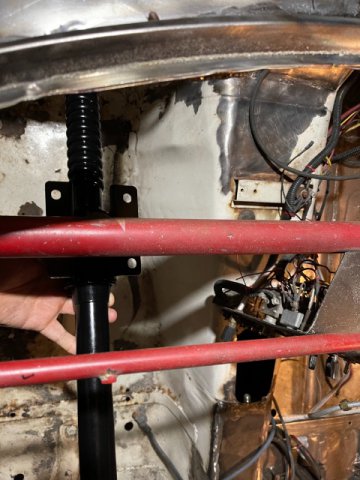
A parallel challenge! I was looking at re-mounting the steering column 100 which-ways. Nearest attachment point is the roll cage cross bar directly in front of the driver. Thinking heim joints, all sorts of complicated stuff. Then I found this product. DUH! The OEM steering column is 1.5", but it balloons to 2.38". If you remove the flanged coupling, its down to 2.25". I will wait till the driver floor pan is replaced and seat mounts are in before I settle on a final “drop” height. I wish there was an easier way make the bulkhead flange (where the column passes through the firewall) a spherical bearing other form of pivoting joint. Then I could add steering column tilt adjustment. https://www.amazon.com/2-1-Billt-column-drop-4-1/dp/B079QQNQDS/ref=sr_1_15?dchild=1&keywords=column+drop&qid=1623818944&sr=8-15 -
240z SCCA vintage race car, restoration
AydinZ71 replied to AydinZ71's topic in S30 Series - 240z, 260z, 280z
@jhm thanks again for the detailed and comprehensive response John! I just did a bunch of research on roll center on a mcphearson strut suspension geometry. I now understand the bump-steer spacer and roll-center correction spacer are in practice the same thing on an S30. I had seen those terms repeated throughout the forum, but didn’t truly understand them. I’m looking at it now and scratching my head on how Greg got a 3” spacer in there, but il grab a pic from him when his car is back. I will definitely send you a message on the part list for the LCA fab! That will help my anxiety on using an A/M LCA, knowing Greg also uses a modified OEM unit. With your recommendation on the Futofab TC rods, I’m going to go ahead and purchase. I already have a ton of stuff to fab so il take advantage of a proven existing product when I can! I’m going to use the stock steering knuckles for now, since this is an easy swap in the future. Might as well get the “feel” of the car first, and as many mentioned it’s not as necessary if turns aren’t tight. I plan on running Willow Springs since it’s only 90 minutes away, and it’s a pretty fast track. thanks again for the wealthy of info!!! Sorry all for the amateurish questions. -
240z SCCA vintage race car, restoration
AydinZ71 replied to AydinZ71's topic in S30 Series - 240z, 260z, 280z
@Ben280 thanks Ben! I definitely have read and re-read the rule book quite a bit. The stock attachment points must be used (hence the OEM front crossmember), but methods for adjusting track/camber/caster are allowed. As long as you are not changing the attachment point itself, hence the bolt-in camber plates and using OEM subframe bolt holes. I checked with EP champ Greg Ira on this as well. He uses square tube steel for the front CA’s w/ a heim on the crossmember side. I was curious if any folks preferred the A/M parts for a particular reason, but really it’s just an arm with attachment points, as you said. Greg’s roll-center spacer is 3” tall, so il have to look into that. Car already came with wheel spacers in all 4 corners. Already got rid of the rears with the help of the Apex CA’s (added an 1” to each side) I got on the used market. I would definitely prefer to get the extra track with the CA itself than live with the rotational inertia of the spacer. fun fact... I did not appreciate how fast it is to pull an engine on a race car. I went from disconnecting wires/hoses to setting the block and trans on blocks in less than an hour. Gotta love the perks of less s***! As always, thanks for all your i our folks. Really could not have gotten myself up to speed so quickly without you all. -
240z SCCA vintage race car, restoration
AydinZ71 replied to AydinZ71's topic in S30 Series - 240z, 260z, 280z
thanks Clark! I will be running 15X7” wheels. Tires I had in mind were 225-50R15’s, but I am open if there is a size with larger availability. Sounds like I have to do more research. I was eyeing this book, but il take any other recommendation you may have. front springs are #350lb, and ride height will likely be dictated on my final exhaust deck (as the lowest part on the car). I feel like I got a pretty good grasp on the rear suspension now that it is assembled, but admittedly I’m new to front suspension especially for a racing application. I really appreciate all your patience! Race Car Design https://www.amazon.com/dp/1137030143/ref=cm_sw_r_cp_api_glt_fabc_1VCD1Q4DQ9E1SVMX7N21 -
240z SCCA vintage race car, restoration
AydinZ71 replied to AydinZ71's topic in S30 Series - 240z, 260z, 280z
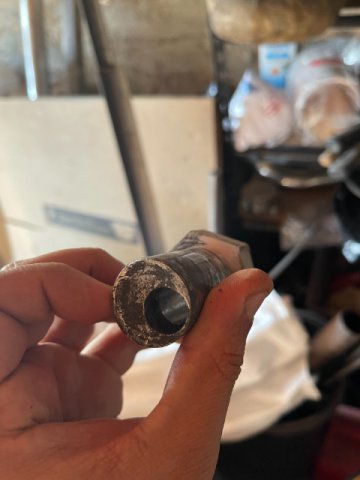
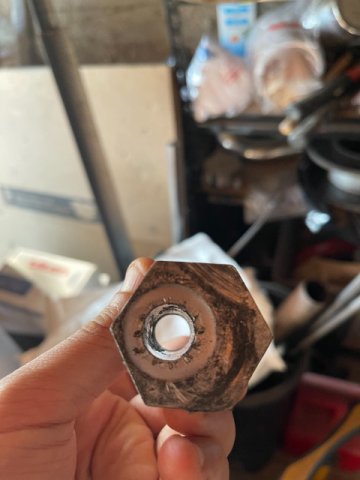
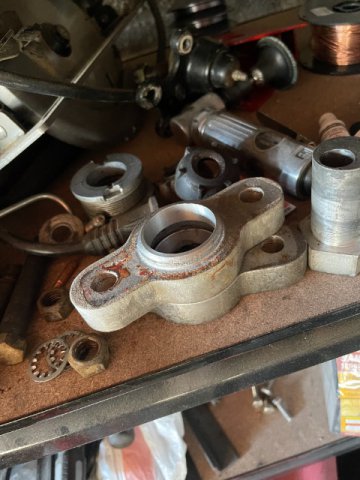
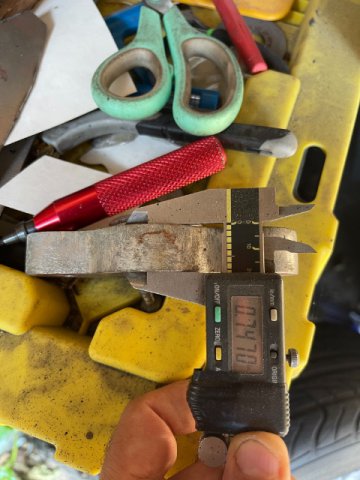
Hey guys! So I got a ton of work done this last weekend. Got the block/trans pulled, removed the whole front suspension and steering crossmember, and finished the drivers-side firewall. Question for the friends who are racing like @jhm @JMortensen @clarkspeed @gnosez @Ben280 I’m sectioning the front struts w/ GC coilovers w/ 350lb springs and Koni 8610’s + GC bolt-in camber plates. everything else is a blank page! Would love to hear your recommendations for tie-rods, co tell arms, bump-steer spacers etc. I saw a few of you modified the OEM CA’s to include heim joints and adjustable end links/turnbuckles. Wondering what worked best for you, and how you would do it if you could from scratch. Would you bother buying a product on the market? Here is what was on the car (not removed since 2001). Snapped a pic of the bump-steer spacer and what looks to be a bushing offset that was pressed into the OEM bushing sleeve. I guess this moves the stock track out by an inch or so? I’d be looking to gain 2” more than stock. -
Best 280z rear end for lots of torque
AydinZ71 replied to 280cummins's topic in S30 Series - 240z, 260z, 280z
Doood... 1000ft-lbs. only guy on here I know who has that kind of experience for a rear end is @Invincibleextremes. I don’t have drag racing experience, but from an engineering perspective this is a challenge. I would be looking into a driveshaft designed a built by a shop that works on off-road vehicles. They snap axles and shafts like twigs, so they should have a good handle on what will last. I would Be tearing that car apart and reinforcing the chassis throughout. That’s way too much torque for a stock chassis, especially if you are launching and have grip. I’d also get a full weld-in roll cage and read-up on drag racing safety systems like a chute etc. What transmission are you using? These torque beasts often have a ton of inertia, so there could be a lag between “oh shit” and the torque letting off (auto trans). The Apex Engineered or Techno (T3) stuff won’t work for you. You are in a whole different league. None of their systems have been stress tested to my knowledge, and I have not seen any published data. -
Where to Order Stainless Tubing and Vbands
AydinZ71 replied to Dat73z's topic in Fabrication / Welding
Can’t go wrong with Vibrant. Honestly, for an exhaust system cheap Chinese V-bands are probably fine. Just read-up on the reviews. Certainly less finicky than old-school 3-bolt flanged connections with gaskets. If a V-band leaks enough to notice on exhaust, something went terribly wrong. As the exhaust system heats up, the V-band design pushes the flanges against one another with more force. I would be much more careful to find quality couplings for intercooler piping for instance, where the pipe is actually pressurized. Also, stay away from 316SS. It’s overkill, and used in engineered applications where chemical compatibility and is important (like food or medical applications). Go with 304. If they don’t specify, it’s probably 304 anyways. It’s going to be pricey though. My joint sells CS for $1-1.5 per lb, whereas stainless starts at $3.50. Are you going to weld this yourself? -
Where to Order Stainless Tubing and Vbands
AydinZ71 replied to Dat73z's topic in Fabrication / Welding
local industrial steel shop will have the tubes of metal. Here in socal we have “industrial metal supply” warehouses. I get v-bands on Amazon and stainless bends from an inner cooler piping online store for $15 each. -
IMSA GTU vintage racer build
AydinZ71 replied to clarkspeed's topic in S30 Series - 240z, 260z, 280z
@clarkspeed looking good, Clark! I have seen a few folks on here say the friction from PU bushings adds an undesirable static friction to the CA’s (and suspension) travel. Is that why you went Delrin? In my experience, delrin work-hardens so you might end up with a little bit of slop over time. Your bushing is pretty long though so the cross-axial forces should zero out the slop. Good luck, and let us know how she feels!! I am finally making my way to the front suspension and trying to decide between modifying my own adjustable LCA’s or buying them from these bolt-on dudes. My only reason would be to save time. Ok already bogged down on sheet metal replacement.

