AydinZ71
Members-
Posts
1073 -
Joined
-
Last visited
-
Days Won
27
Content Type
Profiles
Forums
Blogs
Events
Gallery
Downloads
Store
Everything posted by AydinZ71
-
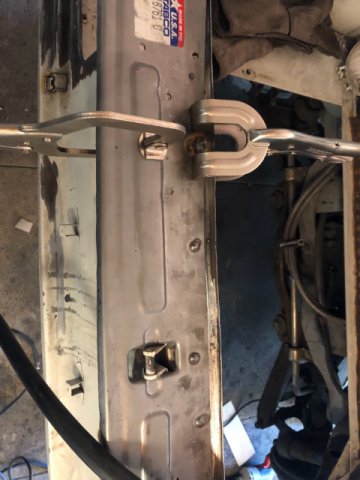
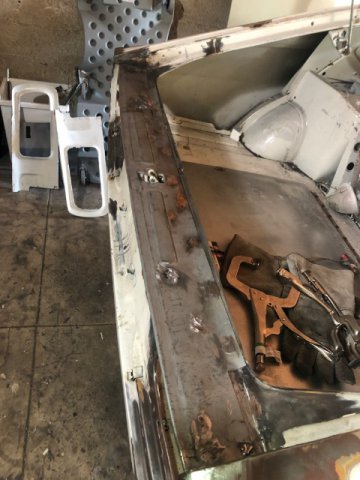
@rossman looks like we got the same replacement panel. Galvanized steel? I had to “work” min to fit as well. I didn’t use panel bond. I drilled 1/4” holes every 4-6” in a zig-zag and plug welded the top plate to the bottom support. I then ground the plugs flush.
-
When it comes to welding equipment, you definitely get what you pay for. The only anomaly seems to be HF. I know several people who own their mid-range welders and are happy with them. I don’t TIG yet as I’m only doing sheet steel and structural welds at the moment (MIG for now). I have a Lincoln Electric unit now and much happier than the cheapo unit I used to have.
-
240z SCCA vintage race car, restoration
AydinZ71 replied to AydinZ71's topic in S30 Series - 240z, 260z, 280z
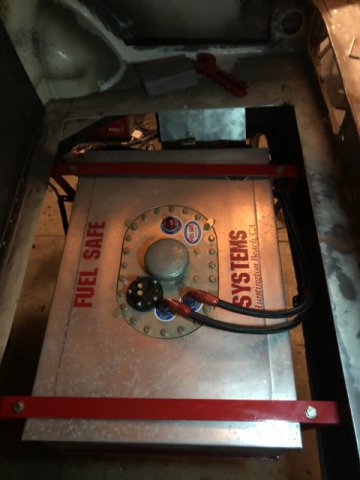
I like the box idea! Yeah this fuel cell is as low as it should go. About 2” below the rear valence. Only thing lower is the exhaust. I have a large aluminum cover now with butterfly self ejecting fasteners. I’d like to put down a seal to keep some of the fumes out after refueling. Appreciate the encouragement! -
240z SCCA vintage race car, restoration
AydinZ71 replied to AydinZ71's topic in S30 Series - 240z, 260z, 280z
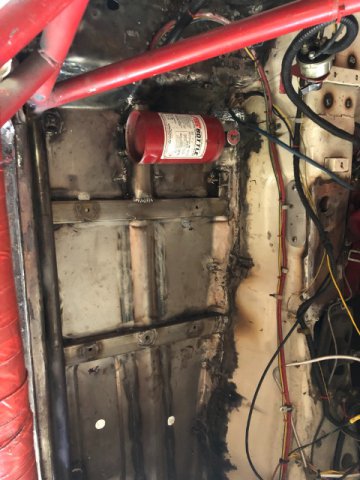
Fuel cell is back in. Fuel lines are complete through the transmission tunnel. Now I can finish the brake lines and get the rear suspension back on. IMG_5899.MOV -
Question about potential engine swaps
AydinZ71 replied to Projectcarguy's topic in S30 Series - 240z, 260z, 280z
Just an FYI: With those power numbers you will be struggling with traction. Not intended to dissuade you, but you will likely be spinning around in first and second gear, when torque hits. An LSD, wide rear tires and a sticky tire Compound will be absolute necessities. Just remember, these cars are light and most of the weight is biased towards the front of the car. In the end, you will likely be running less power until you dial-in your traction, or run a boost controller that progressively increases pressure as you up shift. I have not done this last technique myself but the technology is available. -
IMSA GTU vintage racer build
AydinZ71 replied to clarkspeed's topic in S30 Series - 240z, 260z, 280z
Super excited to follow, and learn a few things! Good luck 👍🏽 -
hey there. I have an L28et in my 71’. Never saw any dedicated mounting brackets. The turbo is held in place in 2 ways: from the exhaust manifold 4-bolt mounting flange, and the downpipe which is connected to the exhaust system which is mounted to insulators on the underbody. Not sure if more support is sufficient, but you would need to be very careful if you do add it. Needs to be supported by the block, not the chassis. The block vibrates quite a bit relative to the chassis so mounting to the chassis is not ideal. You could add more Isolation mounts from your intake to the compressor and to the exhaust leaving your turbo, if you are concerned about the lack of support. Don’t forget the turbine housing and manifold get red-hot so I wouldn’t mount anything directly to those two.
-
It may have been to ensure there’s as a pressure-bias towards the turbo, since as you said the filter provides back pressure. Without consistent flow, the oil will cook in the turbo bearing (especially non water-cooled oil bearings) within seconds of boosting, so momentary oil starvation to the turbo is even more sensitive than the broader engine (which operates at lower temperatures). This “cooked” oil will foul the bearing and reduce the lubricating and cooling effectiveness of oiling over time. It may also be nothing more than convenience. The turbo oil feed comes from the main oil galley where the pressure transmitter is mounted. This is an existing external tap into the galley, where the NA and turbo block are identical castings. There is the Siamese piston sleeve difference between some L28’s but that is mut regarding oiling systems. The ends of the main oil galley have plugs, but are not exposed/accessible outside the engine when assembled. it is a true statement that the oil eventually gets filtered through re-circulation, and I am Unaware if there are any clear issues people have experienced with the oil supply not being pre-filtered. if you were to go dry-sump oil pump, the diagrams I have seen all recommend the oil be filtered prior to any use, including the turbo, so this may again have been a convenience consideration over deliberate.
-
Can't Remove Differential Fill Nut 78 280Z
AydinZ71 replied to Mayolives's topic in S30 Series - 240z, 260z, 280z
You know we have all been there when you get three similar responses to a problem within a few hours 😂 when I was young and dumb(er), I once lowered my car onto a breaker bar to loosen the tranny fill hole. I don’t have a dedicated full hole on my r180 cover (from a Subaru STI) so I drain completely then fill with a specific volume from the axle shaft hole. The spec is easy to find with a quick search online, or from any type of service manual. -
Front fender scraps from a flare installation
AydinZ71 replied to wingwalker's topic in Body Kits & Paint
It might still Be a while for me 😕 Give these two other options a shot! -
Can't Remove Differential Fill Nut 78 280Z
AydinZ71 replied to Mayolives's topic in S30 Series - 240z, 260z, 280z
It is common for the steel plugs to get stuck in the aluminum diff housings. Also common on the transmission. Borrow or buy an impact wrench. Electric if you don’t have an air compressor. That’s your best bet. You can warm up the housing with a torch but you might burn the diff oil inside which will stink pretty bad. Be careful not to burn the gasket from the inside-out. AL expands roughly twice as much per degree as steel, so this should work. Torque spec is 25lbs when retightening so don’t get carried away. -
@rossman nice work! I completely rebuilt my rear hatch slam panel as well. Had to build the underside support, since you have now noticed it is several sheets of thin metal spot welded with lap joints. Pain right!?
-
Agree 100% with @JMortensen Just imagine selling 20-100 units of something a year (if you are lucky), and pocketing only dozens or hundreds of dollars per order. If you do the math, you realize its very difficult to quit your day job. For the most part, I think we (the community) need these handful of vendors more than the potential profit could support. For example, where are you going to find a 12mm stud for a diff cover with 1.75 pitch on one side, and 1.25 pitch on the other. You could spend an hour or more searching online to find out Zcardepot is just selling a subaru PN, or you can just pay the $5 mark-up and save the hour. The best part is YOU as the consumer decide when it is of value for you to purchase the part outright, or make/find it yourself. It's a win-win.
-
240z SCCA vintage race car, restoration
AydinZ71 replied to AydinZ71's topic in S30 Series - 240z, 260z, 280z
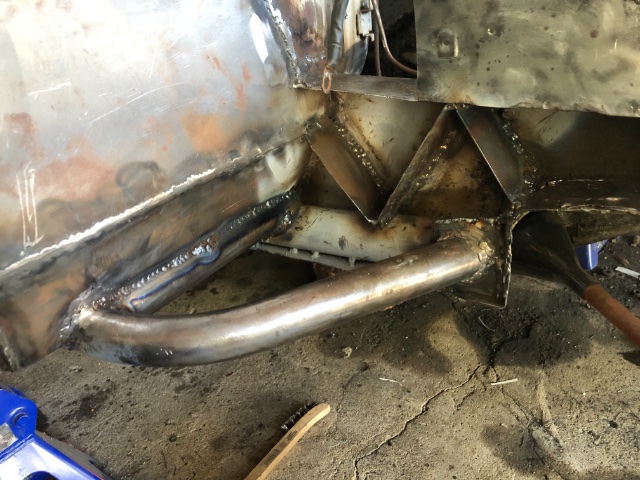
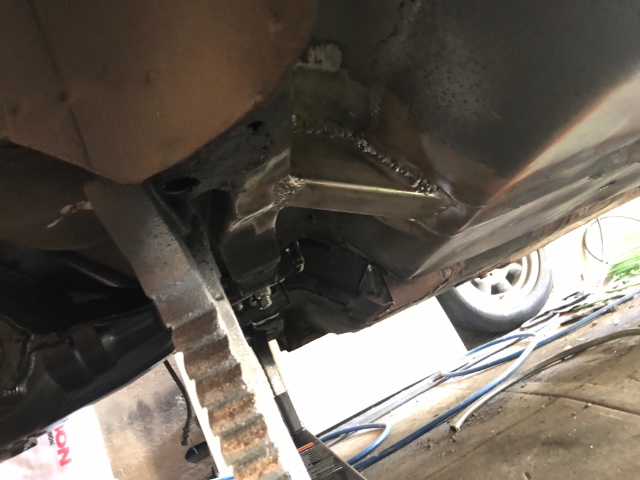
I have not performed any analysis or modeling. I spent a bunch of time speaking to other folks who have raced (some competitively, and successfully) with S30's. Beyond that, I am using intuition as a mechanical engineer. The important thing to consider is that Every addition of material has 2 components to consider: 1) How effective will the addition be to the aiding/resisting existing stress/strain of the body. 2) how much weight am I adding in the process. The most efficient means to reinforce the existing body is to determine where the most flex/strain is taking place, and brace that point from another point that is already well reinforced. The roll cage is by far the thickest/heaviest structural support on the car, so adding bracing that translates stress back to the cage is an efficient way to add rigidity. The gauge of steel used on the S30 unibody (both for subframe shear walls) was very thin compared to modern sports cars. The means of attachment was also poor, as they are mostly lap joints with resistive spot welds holding things together. Not many gussets, ribbing, etc. Its just stamped steel spot welded together. With that said, I am blown-away daily at how elegant and well thought-out the design was given the lack of CAD modern resources. The subframe really is an elegant and beautiful design, with some potential improvements with the benefit of hindsight. On the passenger side you see one short tube I added to brace the rocker extension to the upper subframe (which also happens to be the air duct for the passenger cabin vent). This was convenient since it also attaches to the roll cage terminal at the fire wall mid-way. The second support is from the end of the roll cage terminal on the firewall to the passenger strut tower. The strut towers (all four), along with the tie-rod mounting box (the thing I just finished) are going to be seeing the largest force inputs from breaking, cornering, and changes in inertia. I could do a video explaining what I was thinking if there is interest. Also, by no means am I a professional. There are certainly more efficient and improved ways of adding rigidity. Still, I am happy with the results so far. -
Can't argue with this statement. This business is HARD. It has got to be right every time, and you must provide equal customer service to new, as to old orders. Heck, even Derek chose to sell his stellar product through Godzilla precisely because he recognizes how much time and effort goes into customer service. I do have a pair of their rear control arms that I plan to throw on the race Z. Looking forward to the experience.
-
Gosh the worst part hearing this story for me is reaffirming my belief that if you "want something done right, do it yourself". I always have a sneaking suspicion that the passion us folks have for our cars (and those of the community) is far greater than the marketing of some of these shops can live up to. It's hard for me to believe that the tolerance on an S30 is that awful that you could be off by an entire 1/4". There are times I am working on my Z and think "I could never afford to pay someone the $$ they would be entitled to put in this much attention to detail". I am sorry about your experience @05plsrt4 I hope you are able to have an equally positive experience with your Z, to help you assuage your frustration. I am glad we have this forum as a platform to air such experiences, and ideally reward excellent vendors and avoid shady ones. On a positive note, I have had great experiences with "Ground Control". They only design/build minimal components for the S30, but they are another small-scale suspension fab shop. If I am lucky enough to retire before I croak, id like to design/build some well-engineered components for S30's for the community. For the passion really, since I don't fundamentally believe the market can bear the cost of the design plus some profit margin that could pay the bills. PS: I did have to hammer my "techno versions" diff mount quite a bit to get it to work. Still, it did work in the end so no complaints!
-
240z SCCA vintage race car, restoration
AydinZ71 replied to AydinZ71's topic in S30 Series - 240z, 260z, 280z
Here is a try at a video. Let me know if it works well! IMG_5860.MOV -
Front fender scraps from a flare installation
AydinZ71 replied to wingwalker's topic in Body Kits & Paint
previous owner put on JDM flares but did not cut away the OEM steel. Il be cutting that away in a month or so. I’d be happy to send you the scraps. -
Thanks guys! Yeah the stock gland nut seems to work OK with the Koni's, but its not a perfect fit. I suppose its only job is to compress the shock just a bit to keep it from moving in the strut tube. I will try without the boots. Thanks for the feedback!
-
Silly question: I have seen folks with boots over their shocks, and many without. Not sure if those folks had worn ones and just took them off. To put the record straight, do you need dust boots on your shocks? I suppose if dirt gets into your shocks dynamic seal (the surface the face of the shock goes in and out of), it will prematurely wear out the shock.
-
240z SCCA vintage race car, restoration
AydinZ71 replied to AydinZ71's topic in S30 Series - 240z, 260z, 280z
I have a complete play-by-play on Instagram @240z_restomod Naturally, most people I respect (including myself) have mixed feelings about social media so I created this page It’s just so convenient to use, I overcame my misgivings. Here are some photo’s of what I’m working on right now, and the completed passenger compartment. I also added a pic of a steel tube section that connects my passenger floor pan support with the rear subframe crossmember that holds the front of the rear control arms. The passenger seat supports connect to the tunnel on one side, and the inner rocker on the other end. do posting videos here work well for folks? If so, I have plenty of those! -
Plates around bell-housing - racing application
AydinZ71 replied to AydinZ71's topic in S30 Series - 240z, 260z, 280z
possibly. I didn’t see anything in the rule book about it for SCCA production or general spec. As someone mentioned, it’s more commonly found in drag racing with dangerous amounts of torque. -
Hi all! Restoring a rusted 240z series 1, SCCA vintage race car. Car last raced in 02'. Currently rebuilding to group EP spec's. I figured id start a new thread summarize my plans and progress. Il just add progress photo's to this thread. Thanks for reading! Engine: L24 Block – OEM bore, stroke. OEM materials. Not modified Head – N42 core Modifications: polished bowls. Valve seat de-shrouded. Minor reliefs cut around seats, but within ID spec of gasket. Chambers polished and de-burred. Deck machined to reduce chamber volume to 38.5cc's. Piston-deck clearance is -0.35mm, so with a fel-pro gasket (1-1.25mm), it should net a static CR of 10:1 Intake ports matched and polished within 1” of mounting surface. Same on intake manifold. Valves – OEM intake. Exhaust and seat are custom turned down to 33mm (L24 spec) Valve springs: Custom single bee-hive, with custom machined narrow steel retainer Cam: Exhaust and Intake are symmetric. 320 duration, 234 @ 0.05. 0.500 lift. 109 overlap Carbs: Stock SU's. Will purchase SM needles Exhaust: MSA 6-1 header w/ O2 weld bung, Eastwood header paint, and fiber wrapped. Anticipate using Borla XS straight-through muffler. Will consider adding resonator if I have room. Materials acquired for full 2.75” 304SS exhaust Ignition: Distributor with electronic pick-ups. This came with the car, so not familiar with it. Looking into crank triggered ignitions system for better resolution and tuning. Standard coil, NGK spark plugs and wires. Racing dampener/pulley Stock flywheel. Remote oil filter w/ copper/AL oil cooler mounted in front of radiator 3-row radiator No radiator fan at this time Notes: since class rules allow 12:1, intent is to install domed pistons during the next block rebuild. 10:1 with existing flat-top pistons should currently work for 91 octane. Will use wide-band O2 to log A/F with SM needles to gather data points for needle modification. Transmission – series 2 240z OEM Nissan 4-speed Clutch/Flywheel: Have not pulled transmission since purchase, but presume OEM. OEM driveshaft Differential: 17' Subaru STI helical LSD, 3.545 Half-shafts: Datsun restomod custom CV shafts with integral diff input shafts for STI R180 Have a spare 4.11 R180 but have not ponied up the money to transfer the helical center section. Fuel 12 gallon poly/aluminum fuel cell with steel support bracket. Came with two fuel output ports and one vent. I recently installed a level sending unit so I no longer need to use a dip stick. Dual (redundant) low pressure fuel pumps with outboard check valves, leading to single Y header. 3/8” galv/steel fuel hard-line being installed in tunnel. -6 AN fittings and new nylon/SS braided lines throughout for connection from hard-line to fuel cell and carbs. Generic FPR set to 5psi, feeding SU floats. Currently dead-heading but im looking into the need to install a return line. Brakes Proportioning valve installed in tunnel, protruding into center console for access while driving. OEM rear drums OEM front calipers. Cross-drilled rotors Suspension OEM hubs Struts sectioned with Ground Control coilovers. Eibach springs 350lb/in front, 300 rear Koni 8610 RACE adjustable shocks Ground Control custom bolt-in camber plates Urethane bushings throughout Rear has Apex Engineering control arms (got a good deal on offer-up) Rear sway bar Front is OEM at this time Wheels – Diamond steel racing wheels, 16lbs, 15X7” No tires mounted on racing wheels at this time Chassis Race prepared, lightened, and all trim/accessories removed 8-point “NASCAR” style cage. Door sectioned with only outer surface remaining. Chassis reinforcing Custom rocker reinforcing, utilizing 14 gauge axially and 20- gauge for stiffening ribs rocker to over-fender frame reinforcing (tube) Tube steel reinforcing between roll cage termination on fire wall, through to strut tower. New passenger seat mounting supports. Mounting point 1.5” above floor panel. Custom extension of floor panel stiffening support, through to unibody subframe directly behind floor panels. 2X corbeau 1-piece racing seats Fire suppression E-pull installed, with fire bottle mounted behind passenger seat on floor panel. expired 5-point harness solid/welded rear strut bar. Custom made, removable front strut bar 11lb Braile AGM battery with custom SS battery box, mounted behind passenger seat. Fiberglass rear hatch
-
Plates around bell-housing - racing application
AydinZ71 replied to AydinZ71's topic in S30 Series - 240z, 260z, 280z
Oh I I’ll likely be driving between 5-7500rpm with this head. Il just need to get used to getting back into that range if I drop off for some reason. This is my first long duration cam so it will take some getting used to. -
Plates around bell-housing - racing application
AydinZ71 replied to AydinZ71's topic in S30 Series - 240z, 260z, 280z
Your points make total sense from a rotational inertia perspective 👍🏽. I feel like the lightened flywheel is a double-edged sword with a lopey cam (benifit outweighs the drawbacks). I don’t have the experience so I’m just surmising. on one hand, with a big cam like the one I have (320dur, .500lift) a lighter flywheel may make the lower RPM’s more unstable to maintain on/off throttle. On the other hand, the poor torque in the lower RPM bands will benifit from lower rotational inertia, by reving into the torque band sooner. Although, if you are keeping the rpm’s from dropping too low (consistent downshifting), the unstable lower RPM band becomes Mut. What are your experiences with that? I’m still working on chassis work so don’t have her running yet. Getting closer every day.
