A to Z
-
Posts
1121 -
Joined
-
Last visited
-
Days Won
46
Content Type
Profiles
Forums
Blogs
Events
Gallery
Downloads
Store
Everything posted by A to Z
-

Fast Floridian's 240Z Track Build
A to Z replied to FastFloridian's topic in S30 Series - 240z, 260z, 280z
make sure you reinforce the sway bar mounts in the front. -
clutch master. the rod that goes into it isn't going in far enough. the clevis needs to have a nut welded on to the end, with the thread aligned, and then the rod screws in only to the end of the nut. That little bit....3/8 of an inch, is what is keeping your slave from pushing far enough to work correctly. I had this problem and after asking and asking, I finally figured it out. Put a nut on the rod that you can run down and tighten against the welded on nut (screw the rod through the nut AND clevis THEN weld nut, so threads are aligned, then remove the bolt)

-
My Z car log....small jobs done and fun things
A to Z replied to A to Z's topic in S30 Series - 240z, 260z, 280z
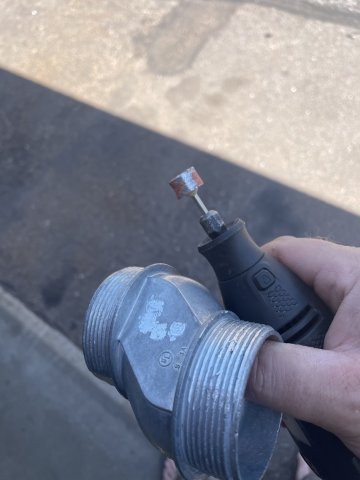
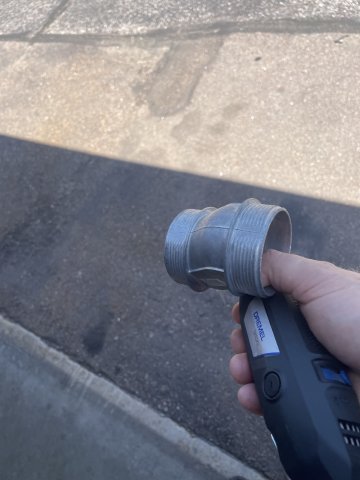
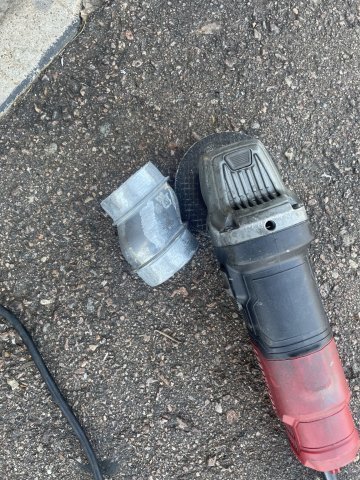
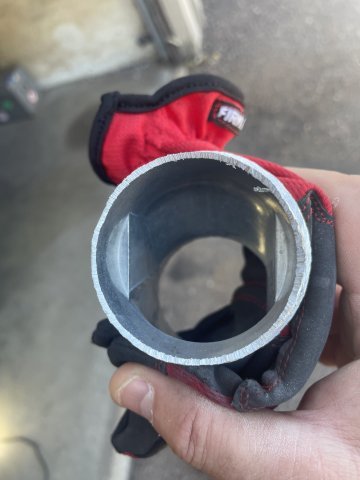
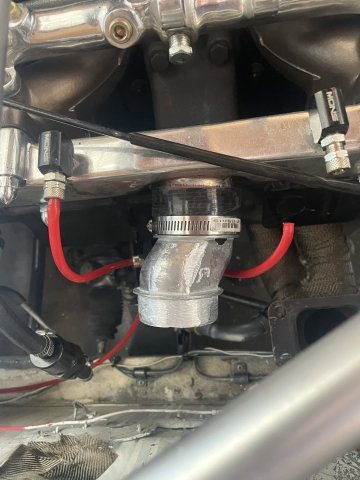
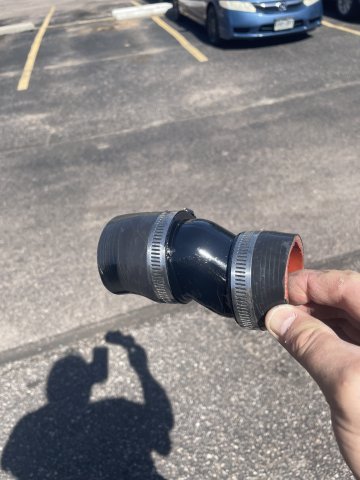
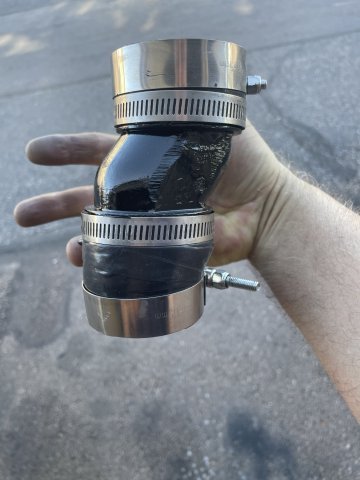
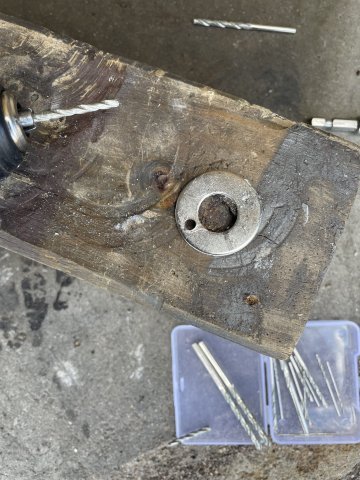
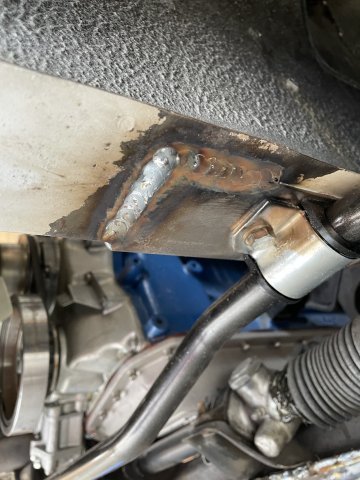
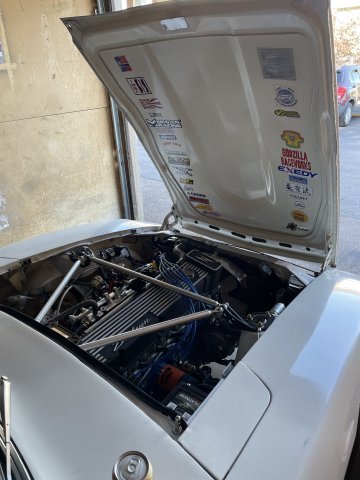
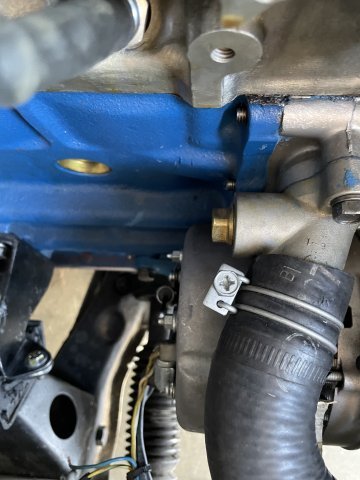
6-21-2025. I went ahead and tackled the inlet to the engine from the turbo. I had just an offset hose between them, about 3 inch gap....and then I learned that turbos can pull hoses in. So I had put a clamp around it so that the hose could only be collapsed so far.....but with the work I am doing, it was time to fix this. With a 3 inch space and needing an offset, and being ar etired electrician it was simple. Use a 2" diameter offset nipple! It has 3/4 inch of offset in a 3 inch long configuration. Of course the need to clean it up and make it look good versus a cheapo home depot looking fix, I ground it up in spots, and then ground the threads down flush on both sides. then it was a case of measuring it against the hose, and getting the right length of hose for both ends. from the pics you can see there was some porting I had to do and one small spot a ported too much and had to patch it with some JB weld, no big deal. once assembled a good coat of gloss black using the 2K paint from Rustoleum with paint and primer together really works nice. then I worked on engine bay cleanup a tad where the turbo sits and can't be done once it is back on, and then lastly the push rod for the brakes. I got it down to where I have the exact right size, but it won't it in, unless I take the brake master back off, put the rod in, and then bolt it back down.....that is next time. Pics follow. Cheers!
-
The Rebello/BHD damper single groove pulley was made to tame the V07 Diesel stroker crank. I have one. works well. Make sure you blow out the holes before putting the bolts back in, it almost looks like the threads are galled from foreign matter being in the holes when you assembled it. The cam should be able to be heated and straightened by a machine shop.
-
the work will outweigh the benefit.
-
it can seem like the page is dying off.....but we actually get new members every day, and if you scroll to the bottom and look at the numbers, we get a lot of visits daily.
-
Help me evaluate this car for sale
A to Z replied to z_noob's topic in S30 Series - 240z, 260z, 280z
10 bucks this guy is selling because his wife gave him an ultimatum. There is absolutely no reason to sell one having done this much work. -
Help me evaluate this car for sale
A to Z replied to z_noob's topic in S30 Series - 240z, 260z, 280z
New to Z cars....man, I would buy a complete driving car, and buy the nicest one you can afford. You don't even know if the Z car bug is going to bite you or not. A project like this is for someone who has been a Dat-Head for a long time, has the room, the money to fund it, and wants a project to fix. The worst thing a guy can do is get a project car and tear it all to pieces. for 99% of the people out there, the project just becomes too big, too overwhelming. Fix things on a car a section at a time, and I would recommend buying a car that really doesn't need anything.....at the age of these cars, they will always need something as you go along. -
one last thing to do. take all of that apart and paint and detail it, K member, everything, to include the engine compartment.
-
My Z car log....small jobs done and fun things
A to Z replied to A to Z's topic in S30 Series - 240z, 260z, 280z
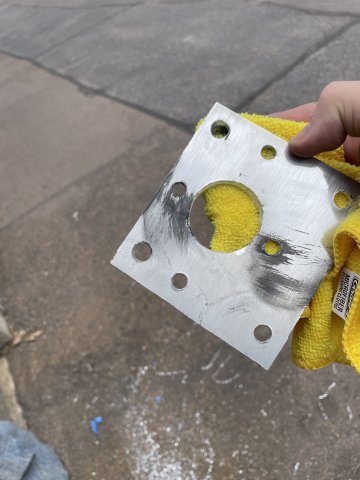
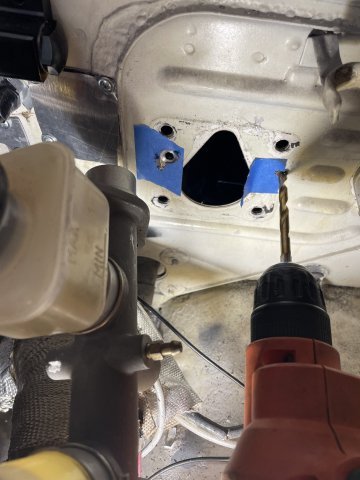
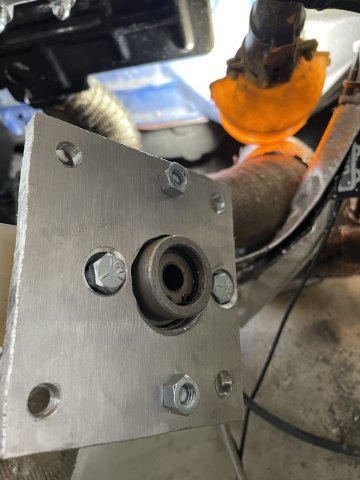
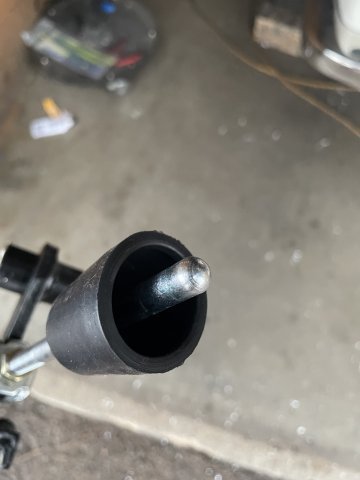
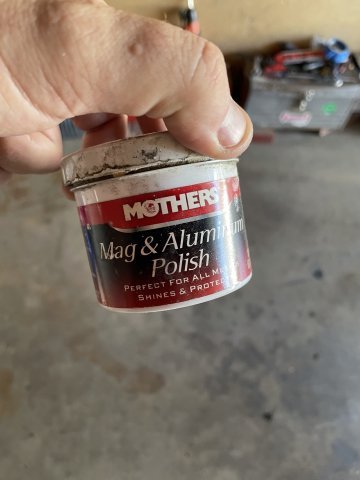
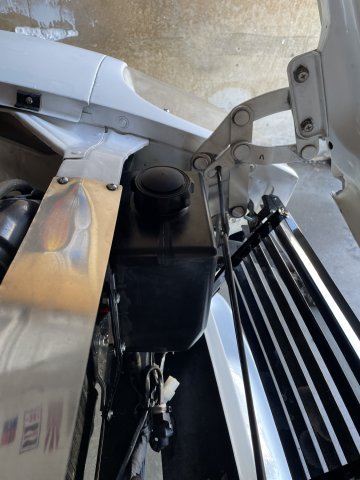
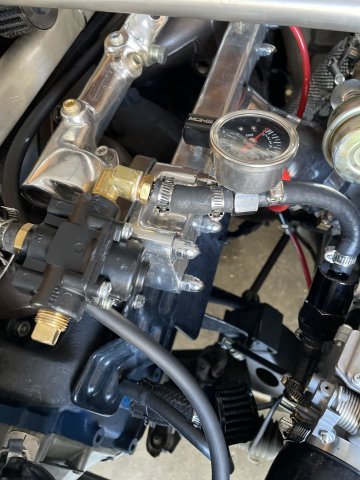
06-14-2025. I have decided to try out a manual brake master cylinder, i.e. no booster. If it doesn't work out I can put the booster back on......I researched into using the Chase Bays master cylinder that replaces the master cylinder and changes the pedal ratio from 3 or 4 to 1 to 6 to 1. In their instructions they talk about raising the master cylinder 1/2 inch. So I started reading about pedal ratios and come to find out....raising the hole on the pedal shaft 1/2 inch raises the pedal ratio to 6 or even 7 to 1! So, I got a piece of 1/4" thick aluminum plate and went about making a plate where the master cylinder was 1/2 inch raised fup from the center line. I then removed the pedal and drilled the hole 1/2" raised up for it, and I have an aftermarket rod setup, that I will have to cut down to use, but in playing around and albeit some yelling in pain I got the master back up and mounted with the new plate. I made sure to use my polishing wheel and some Mothers Mag wheel polish to give it some shine. It was a pain, and I am still fighting the brake pedal getting the bolt back in after getting the return spring on and then pushing it up and getting the big bolt through. the car is small and I am big, so there is some yelling going on, and coming out to wipe my face off and keep trying. I decided to stop here for the day and let my mind work on it mentally for a bit. Pics follow. Cheers!
-
My Z car log....small jobs done and fun things
A to Z replied to A to Z's topic in S30 Series - 240z, 260z, 280z
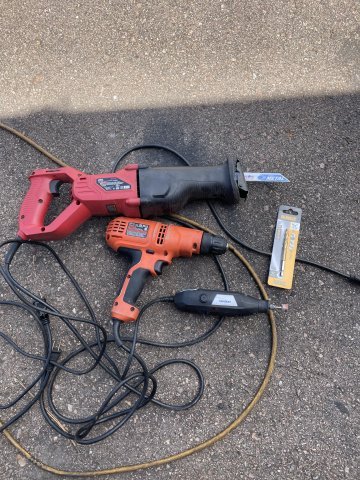
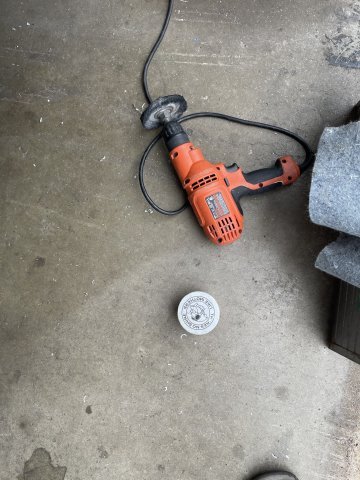
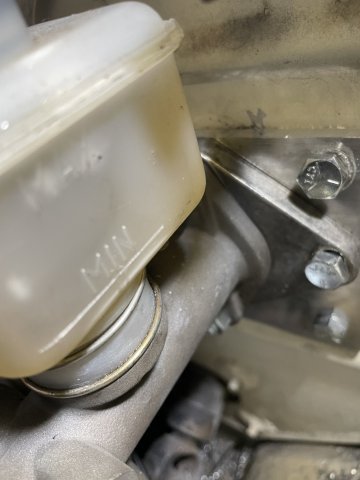
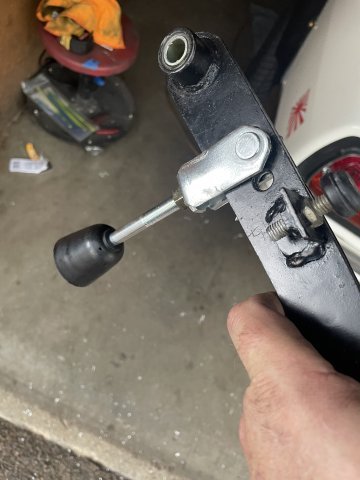
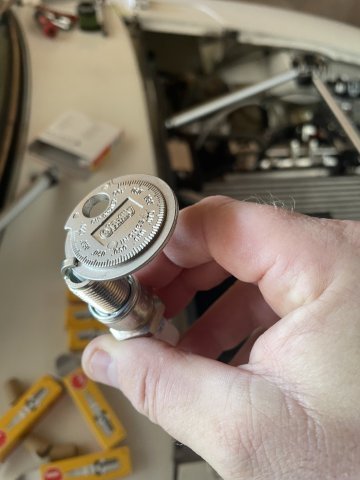
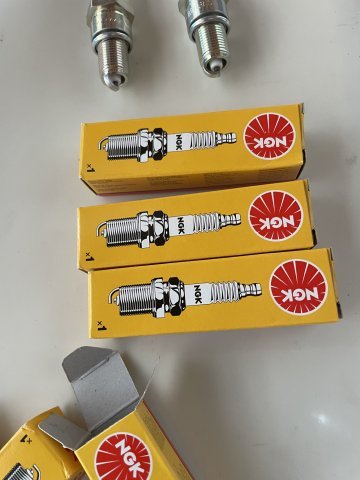
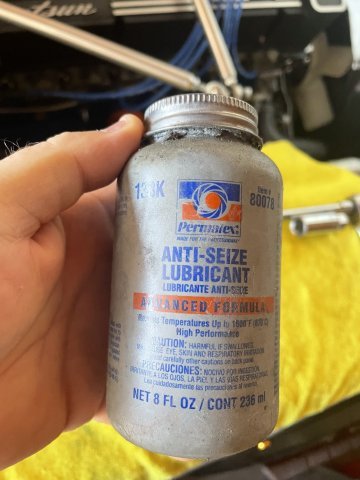
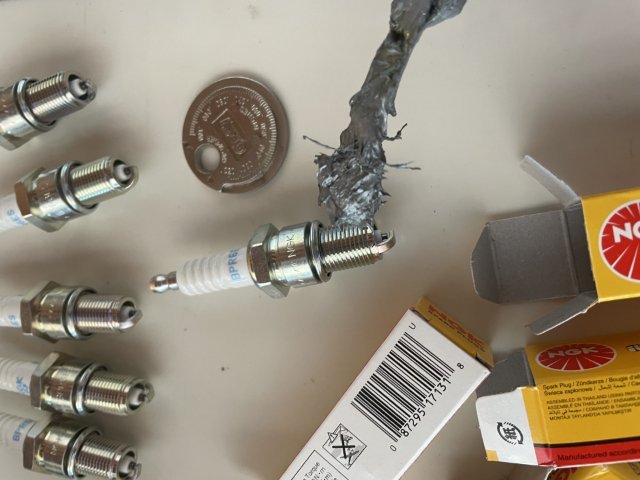
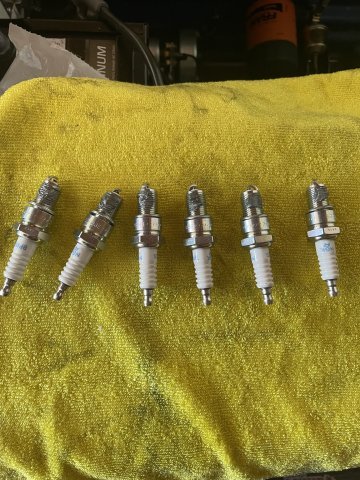
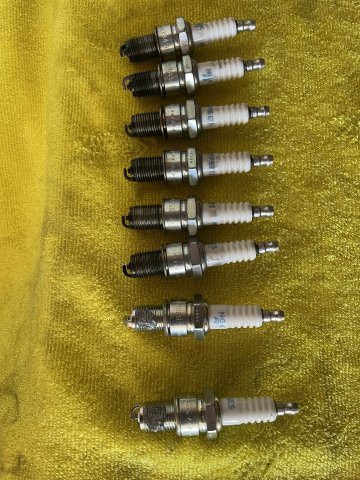
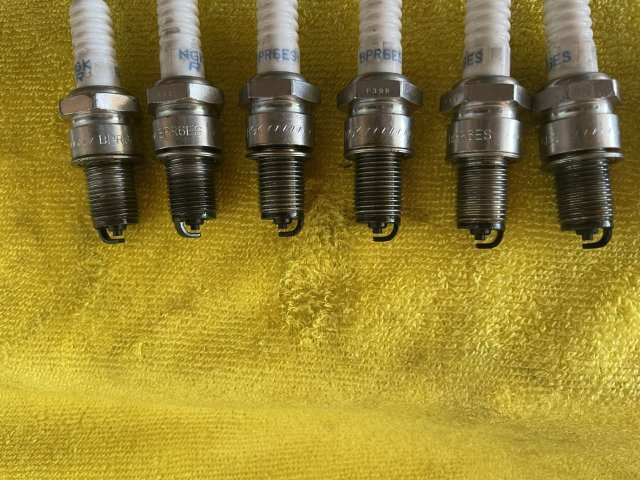
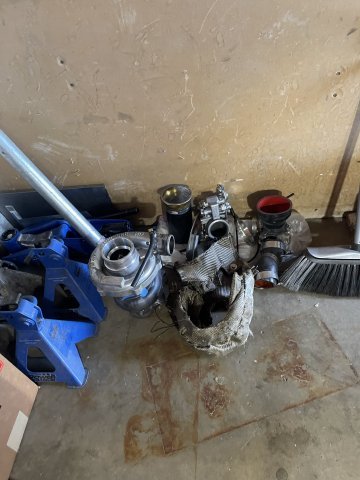
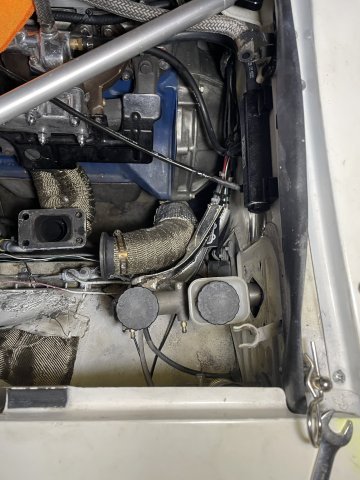
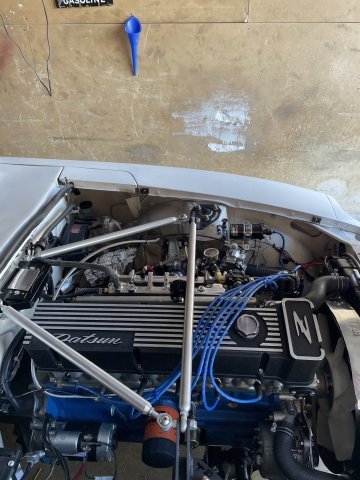
06-07-2025. More work on the Z car. Swapped out some fouled plugs for a new set of NGK BPR6ES plugs. Gapped at .032 and I put a daub on anti-seize on the threads to make them easier to take out eventually. Then I swapped out my thermostat, and started the car and it works! After that, a long item waiting project.....drilling a second set of holes in the stainless steel washers I use with my hood pins. They have 6/32 screws holding them in place. After getting everything on the engine sealed up, I started it and it smokes like an old 2 stroke SAAB. The back firing situation that blew my hoses off apparently blew out the carbon seals I had in my turbo, so the turbo had to come off so I can get it fixed. at the same time, I removed the brake master cylinder and booster. Initially I was going to eliminate the booster and enjoy all that space, but results are very mixed on doing that, save for the professional setup made by Chase Bays, that costs $750 for the master Cylinder and then you need flexible fines to go from the master cylinder to the proportioning valve. I have decided to re-drill mounting holes and move the booster and master cylinder over to the right about an inch. This will give me the much needed room to put in a heat shield between the master cylinder and the turbo and exhaust. To keep the pushrod for the brake booster straight, I will take a piece of thick steel and drill 2 holes, 1 inch apart with a hole drilled in one side where the original rod will go through with a nut on the front side that will be welded to the plate and then tack the rod flush with the steel plate. Then the other hole will be 1 inch over and will be where the clevis will hook on to the brake pedal leg. saves me some money, get to keep the nice brakes and look much better etc. in the engine bay. Pics follow. Cheers!
-
Im going to drill holes and move it 1 inch to the outside
-
Hey everybody, I have removed the brake booster on my 1972 240Z. Mainly because I need the room for my turbo, and since this is a weekend cruiser anyway, I don't really need it. For those who have removed the booster but kept the stock master cylinder, where did you source the push rod that goes from the pedal to the master cylinder? Any lengths, etc. or advice would be greatly appreciated. Thanks, Joe
-
My Z car log....small jobs done and fun things
A to Z replied to A to Z's topic in S30 Series - 240z, 260z, 280z
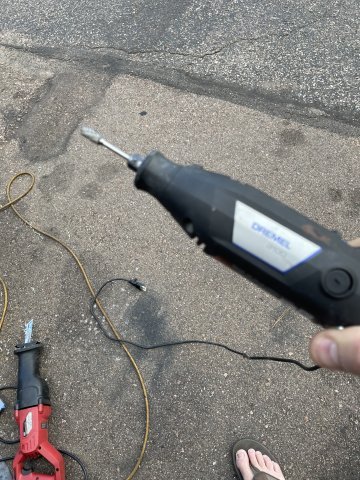
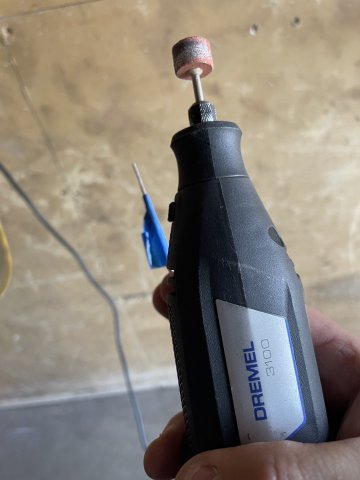
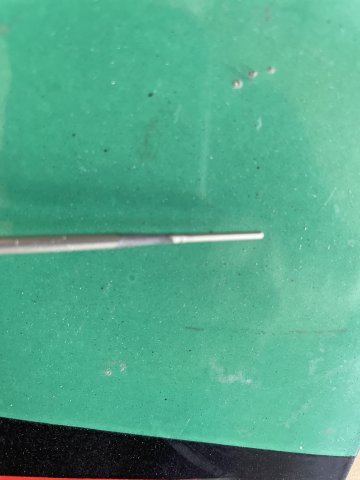
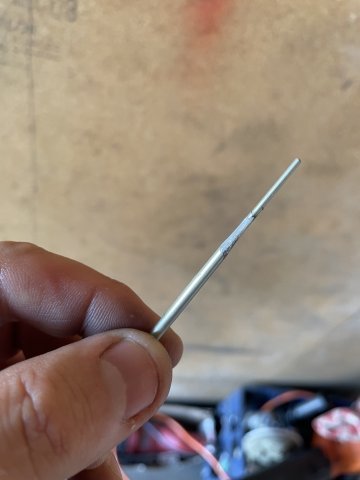
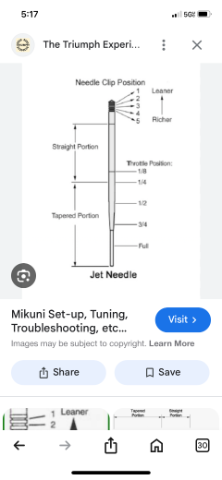
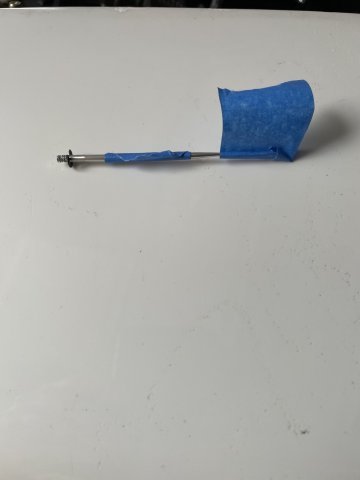
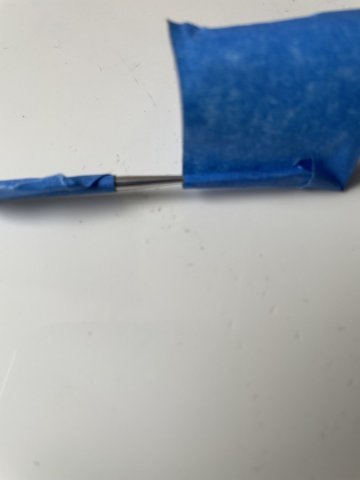
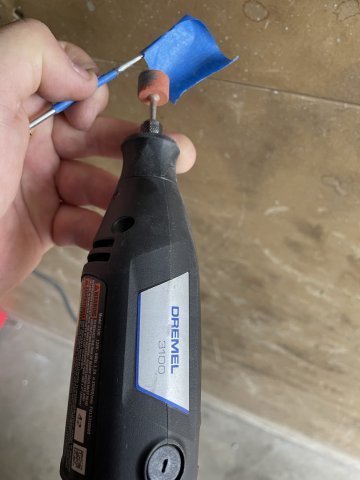
05-31-2025 Test and tune. I ordered some richer needles and today they were here so it was time for more trial and error. The needle rides inside of a "needle jet", and the one that was in there a "Y-8" was one step richer from the stock "Y-6" jet. Well, I went to the next richer size needle jet a "Z-0" and that is the largest one they have. then I took my new needle a "95" the richest needle they make and set it on the lowest (richest) setting. I went and drove it and it added about 50% of what I needed more of to make it just right. I ordered 2 needles, and so I taped off the other 95 needle and with my dremel began modding the needle. I added fuel in the 1/8 th throttle to 1/2 area, and then polished the ground area to make it smooth and put it in the carb and went for another run. Out of the 50% more improvement I needed it gave me another 25%, so just a little more.....pulled the needle back out and lengthened the area to grind down towards the tip a little, re-polished it and installed it....now she runs GREAT! only in one area was it not giving quite enough fuel, 2000-2500 RPM in second gear....roll on the throttle to the floor...... so I went back to my shims I had made to go under the choke and trial and error got me at 2 shims. It is now just right. feels good. strong and smooth, with a 3000+ RPM power band to redline. I did have a bit of a problem, as I wanted to simulate DYNO conditions, i.e. 4th gear, 2000 RPM, floor it and see if it would pull clean, the second time I did it I got a loud POP, and lost power. I started limping home and had to stop at one light, and it started smoking blue, then went to almost white for a second, then all smoking went away the rest of the way home. NO MORE SMOKE ?!? Initially I figured I had blown a head gasket.....but it wouldn't have quit smoking. looking under the hood, the vacuum line for the power brakes and the vacuum line for my vacuum advance on the distributor were blown off. Apparently I had put the car in an almost lug condition under load with full throttle, which shot the boost as high as you can imagine, and I LUCKILY had these hoses blow off, instead of the head gasket. These hoses are not clamped on tot heir ports so the boost was able to just push them off. I also found that one hose connection was leaking at the end, so I sealed it up and will give that 24 hrs to cure. DISASTER AVERTED! Those NISSAN factory Head Gaskets really are top quality. I highly recommend them! When I take it to the DYNO, I will just let them know not to full throttle it in 4th until 3000 RPM. Gradually add fuel until you are at WOT by 3000 RPM. here are some pics of the needle mod.
-
If you have a Z car, this is a required modification as soon as you want to put a larger front sway bar on the car. Reinforcement plates. Without these, the larger sway bar will literally pull itself out from the treads and cause major issues. No one told me, I managed to just see them, and once I looked in to it, I was shocked! https://zcardepot.com/products/sway-bar-mount-reinforcement-plate-front-240z-260z-280z?variant=32170183262321¤cy=USD&utm_source=google&utm_medium=cpc&utm_campaign=google%2Bshopping&gad_source=1&gad_campaignid=17820837536&gbraid=0AAAAADgHqXunKXwkRdKYJKxJH-WU_4VvI&gclid=CjwKCAjwruXBBhArEiwACBRtHZNWcNIiwbMvUrypRpviE3xNi1UuajMNdG7ffhovH9Z5NiwuNSG0IhoCQwYQAvD_BwE
- 1 reply
-
- 1
-

-
Hello! Do any of you have the Chase Bays master cylinder that eliminated the brake booster? I have been looking at them, and wondering if any of you guys have one. I'd love to hear about it, thanks!
-
My Z car log....small jobs done and fun things
A to Z replied to A to Z's topic in S30 Series - 240z, 260z, 280z
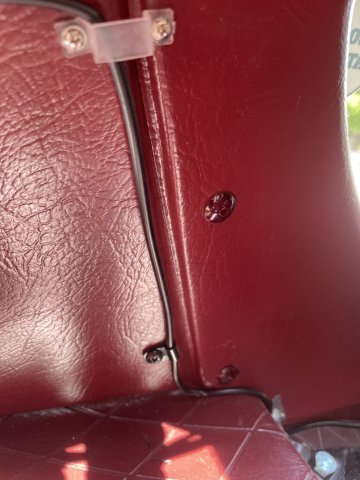
05-24-2025. I got the clips and screws to finish up landing the wiring down for the lighting I added, and got other little things here and there taken care of, I installed the plaque I had made to label the switches on the dash, then I went to the carb, and changed out my accelerator pump nozzle to a larger nozzle, from a 70 to a 90. a custom 90 that is made by V performance development. car is still lean below 3000 and giving it any more that 1/8 throttle below 3000 it just falls flat, so I took the needle out and taped it off and did some grinding on it and re-installed it.....MUCh better but needs just a hair more. I took it out and ground on it, but I think I left it too rough, as it doesn't want to move cleanly in the needle jet. I went ahead and ordered 2 needles for the carb in the richest one they offer.....stock is 97, these will be 95's. I will put one in the carb as-is drive it, and mod the second LIGHTLY and gently and keep playing with it. Everything is great except for the transition from the pilot jet to the needle....TOO LEAN, so it's just trial and error now. Pics follow.
-
1978 Datsun 280z No Acceleration Above 4000 RPMs
A to Z replied to Kad77's topic in S30 Series - 240z, 260z, 280z
Sure, no problem! again, when putting the needles into the piston, it is recommended to use a straight edge and set the needle at the level of the piston, not the indented place where the needle goes. ~Joe
-
angle iron is about 1/8" thick in a 90 degree bend. incredibly strong. It is just an idea. you lay the piece against the car with spacers so the body is a few inches from the bar. centered is where it is either welded or bolted to the center post of the rotisserie. It might be a good idea to go to YouTube and type in how to make a car rotisserie. Some guys have used 2 engine stands, that have been cut and lengthened, so they are taller. You could buy a rotisserie but they ARE pricy. how to make a car rotisserie - YouTube Good luck! be careful. New a fire extinguisher in the garage, gloves and eye protection, and do NOT rush! This kind of stuff can lead to divorce.\
-
angle iron. Drill the holes such that the rotisserie is dead center. Use grade 8 bolts for safety.
-
1978 Datsun 280z No Acceleration Above 4000 RPMs
A to Z replied to Kad77's topic in S30 Series - 240z, 260z, 280z
"SM" needles. They are made specifically for this issue. I had the same problem as you, changed to these, and no more problems. They give you more fuel up there. here is a link to some I quickly found on eBay for you. when installing the needle height, you want to use a straightedge to make sure the level is correct and not too far "in" before tightening. Datsun 240z SU Carburetor "SM" Race Needles Triumph TR3 .100 | eBay Butterfly shaft leak, you may be able to smear a thin coat of grease around the shafts. to stop the Leak, if you take your time, it won't even be noticeable to the naked eye. Let me know how it goes. Please. -
1978 Datsun 280z No Acceleration Above 4000 RPMs
A to Z replied to Kad77's topic in S30 Series - 240z, 260z, 280z
Update, please. -
My Z car log....small jobs done and fun things
A to Z replied to A to Z's topic in S30 Series - 240z, 260z, 280z
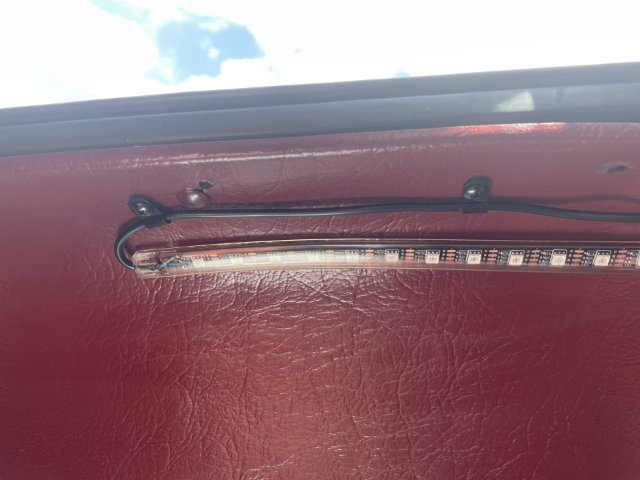
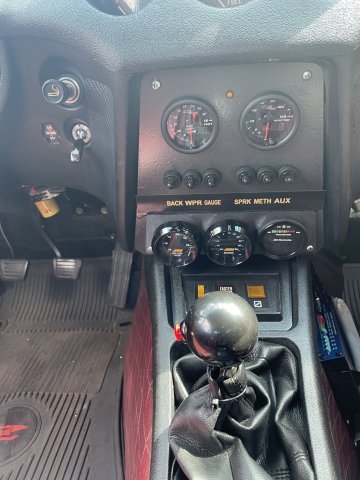
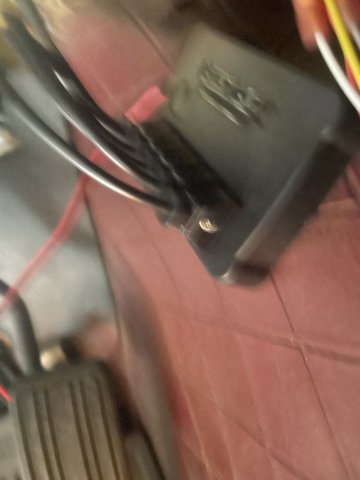
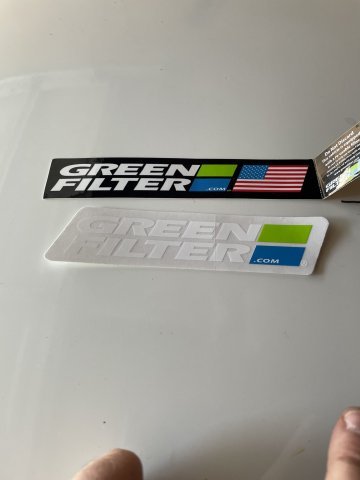
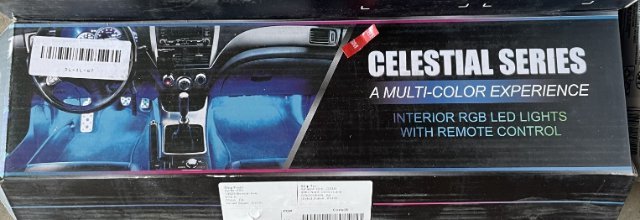
05-17-2025. Today I installed a light kit in the engine compartment and another inside the car. I got both from Amazon. I also went ahead and installed a "Green Filter" on my block breather tube. As soon as I tightened it, it crumpled the green part a tad. It would have been great if it had not done that, but oh well. Here are a few pics. Videos, click below. Video's (click below) : Facebook Facebook
-
My Z car log....small jobs done and fun things
A to Z replied to A to Z's topic in S30 Series - 240z, 260z, 280z
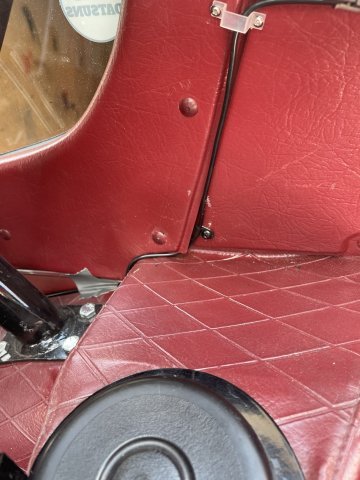
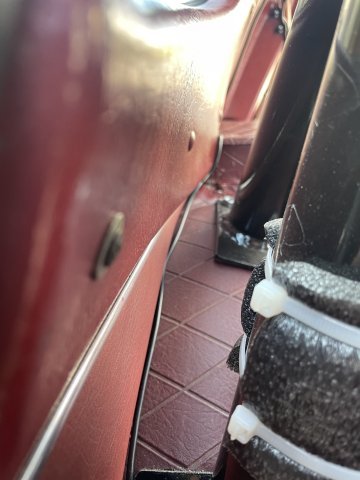
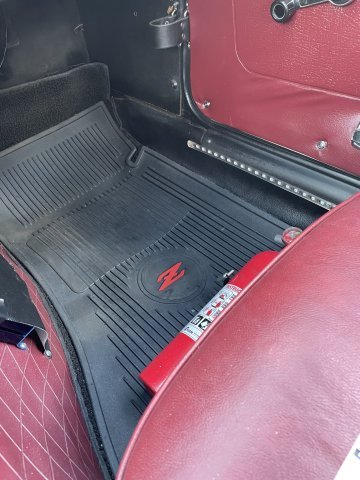
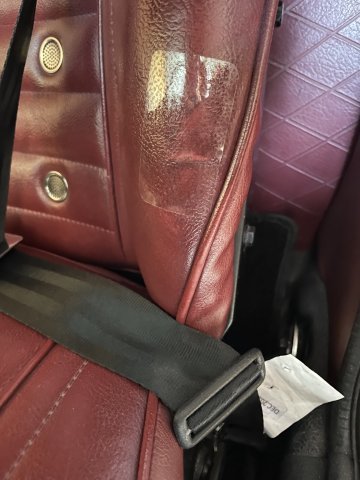
05-10-2025. I did a lot of odds and ends today.....little things put off.....I just went around and fixed as I saw them. I used the clear PPF film over the carbon fiber on the inner fender as it was getting real ratty looking on the edges. I also cut some pieces, and put it on the 2 spots the seats are showing wear from being a big guy getting in and out of the car. Will they work on Vinyl? Not sure, but I need something there. Seams showing some cracks due to my poor bodywork skills, this seals them so I can just forget about it and enjoy the car.t Tuch up painting all over the place, then vacuuming....I guess you could call it spring cleaning. I went back to a novel way of richening up the carb a little....washers under the choke know to add fuel everywhere and buy add a washer at a time I have been able to make a lot of progress on getting it right. The other way would be to buy a richer needle, but this is easy, cheap, I already have the parts, and it works. In short it was just a nice sunny day and I got stuff done. I did take A LOT of pics, so the pics I will put on here.....it's pics heavy. so you are forewarned. Cheers and God bless.~Joe
-
My Z car log....small jobs done and fun things
A to Z replied to A to Z's topic in S30 Series - 240z, 260z, 280z
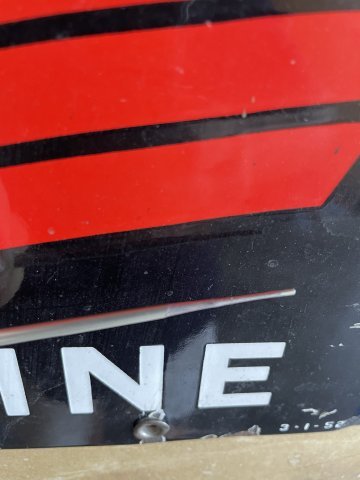
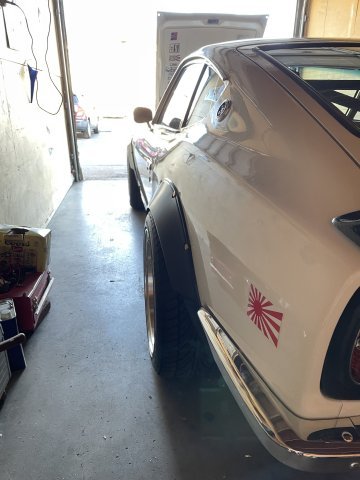
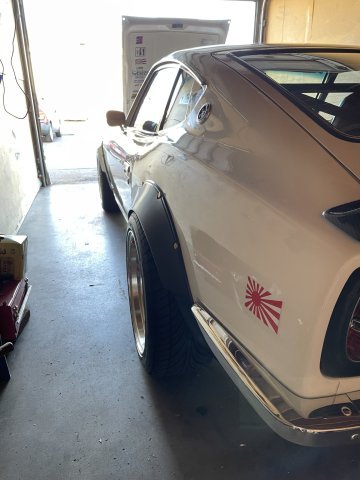
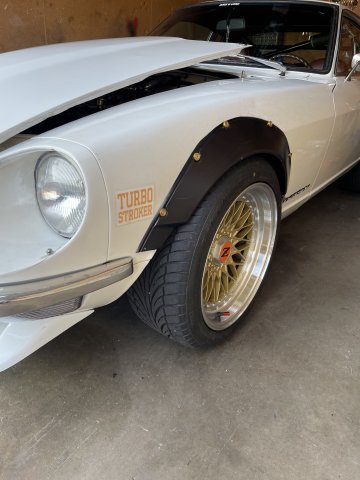
05-07-2025. My custom ordered fender stickers came in. I covered them (and the rear stickers) with some PPF clear to make them permanent.