RebekahsZ
-
Posts
5399 -
Joined
-
Last visited
-
Days Won
58
Content Type
Profiles
Forums
Blogs
Events
Gallery
Downloads
Store
Everything posted by RebekahsZ
-

LS/T56/240z Project Mentor Wanted
RebekahsZ replied to RebekahsZ's topic in S30 Series - 240z, 260z, 280z
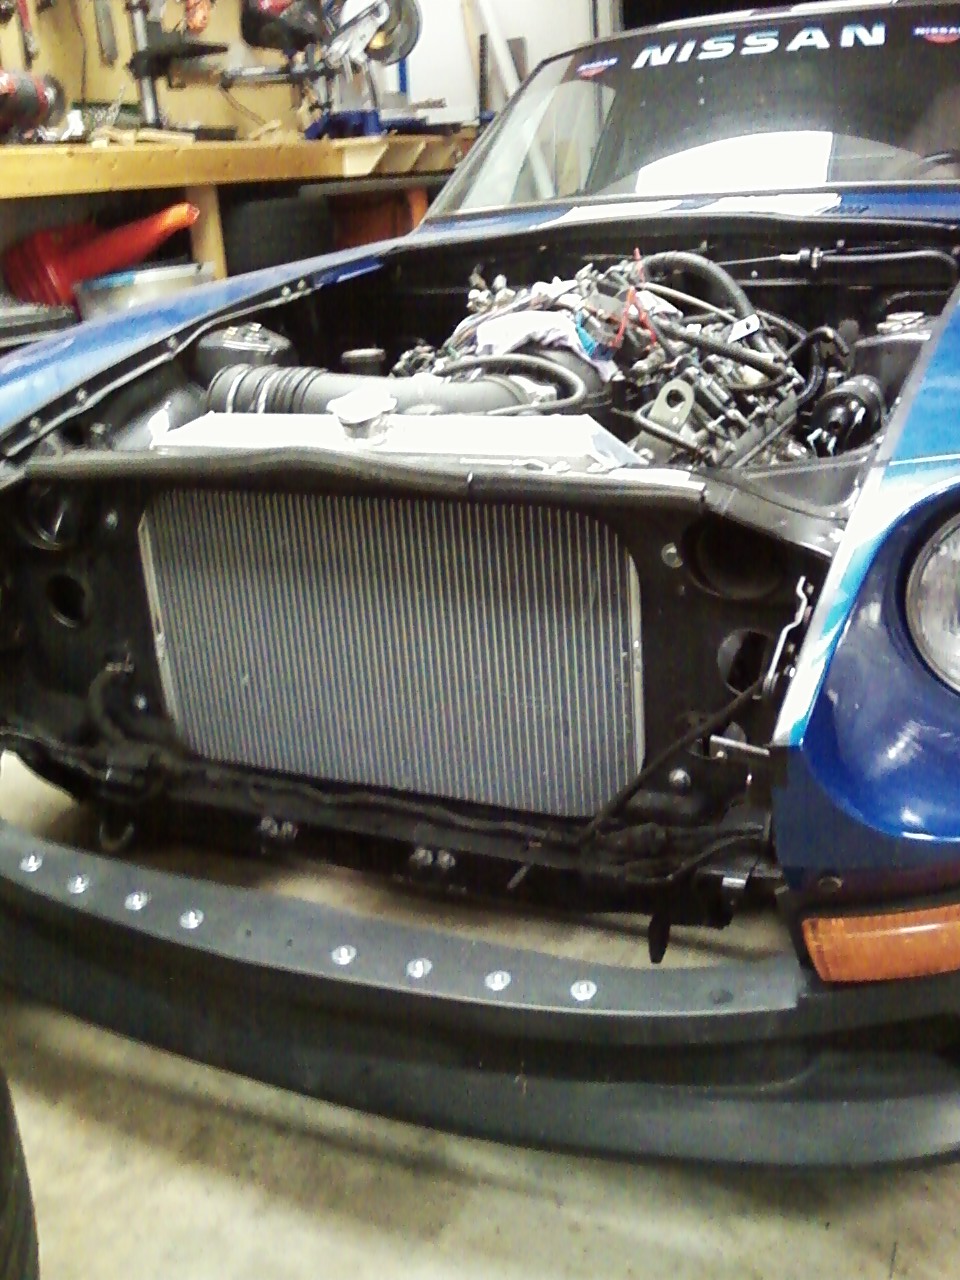
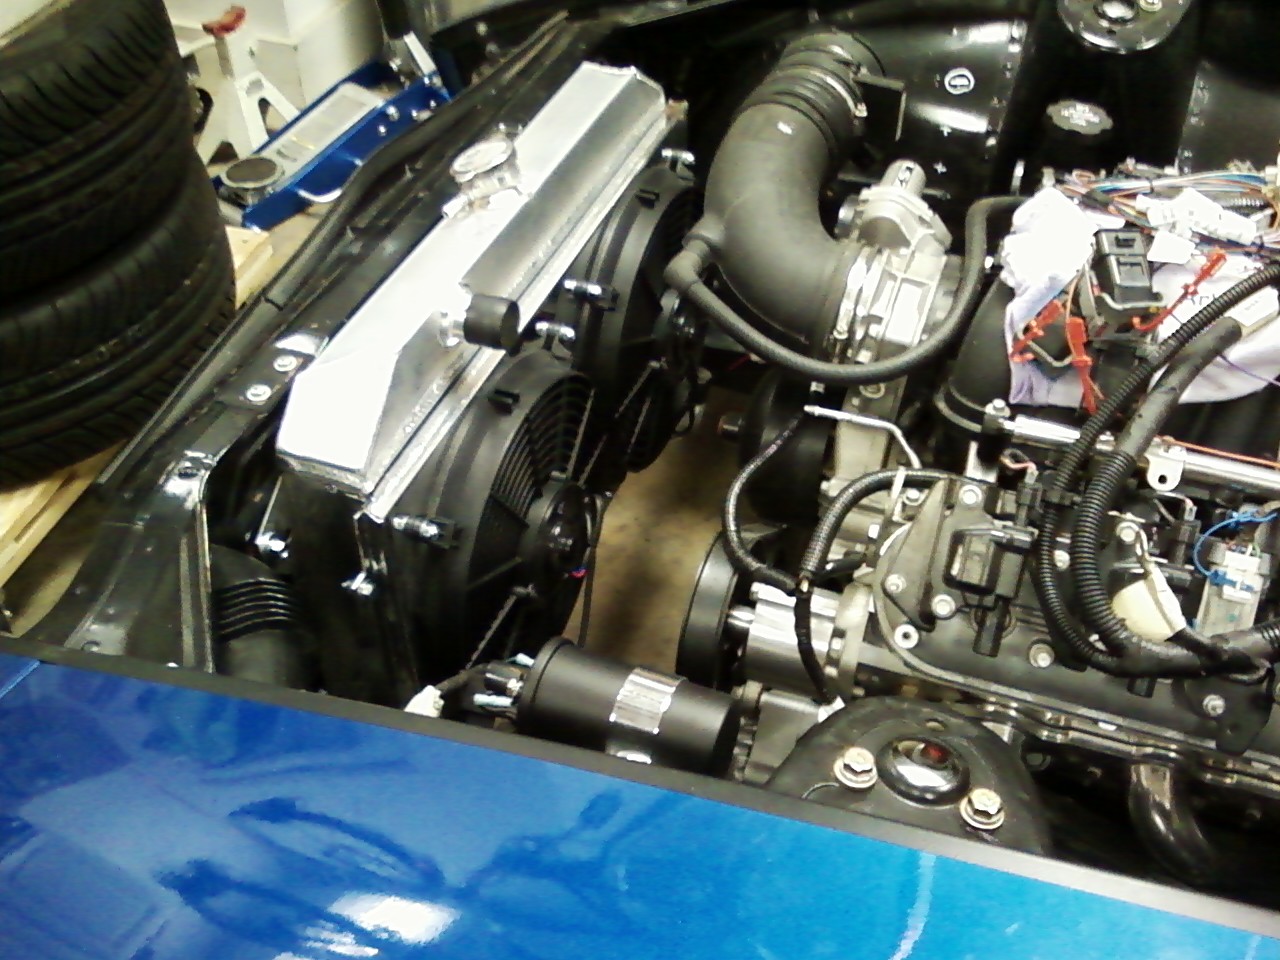
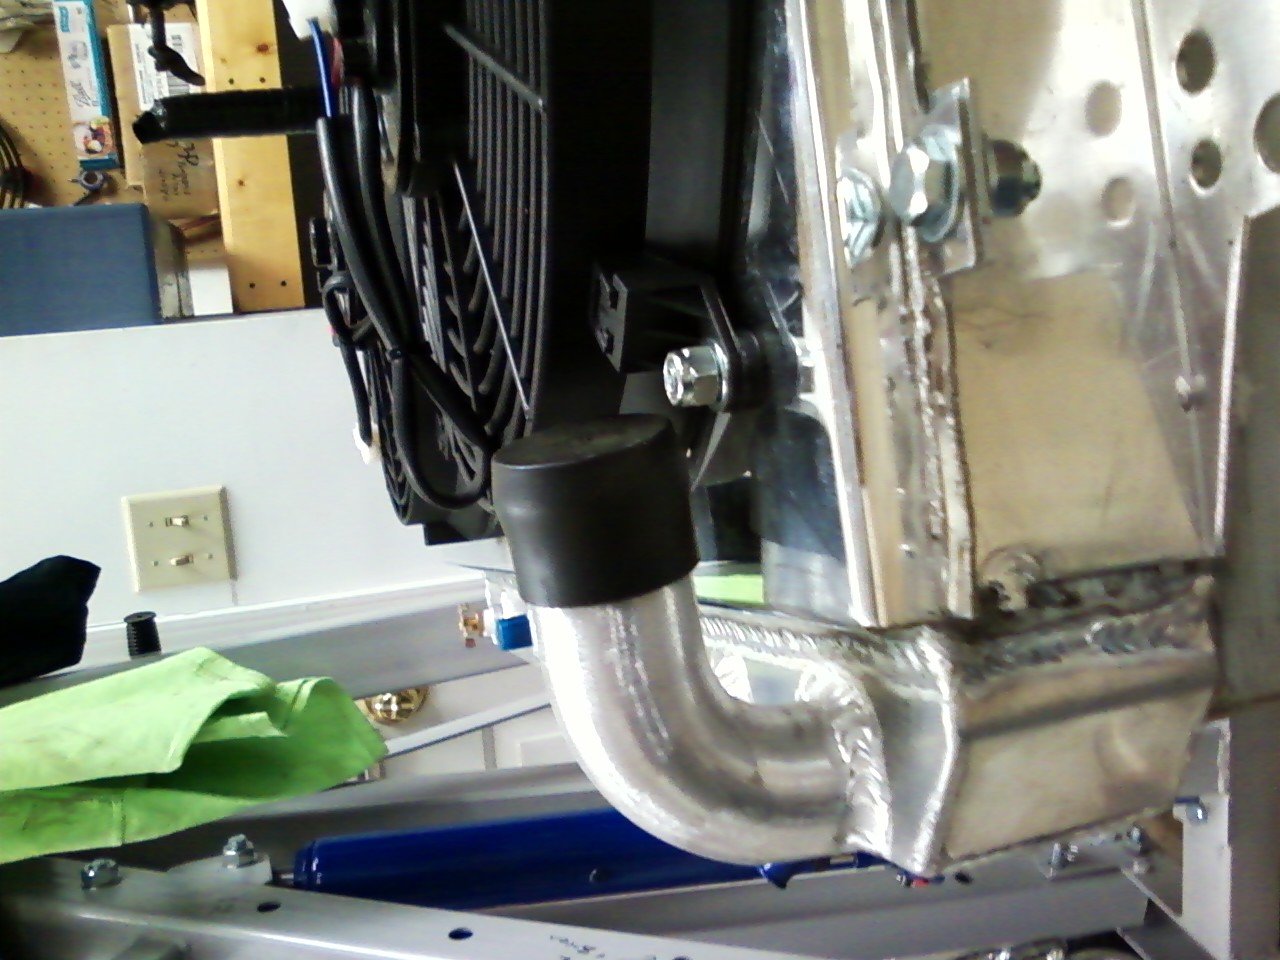
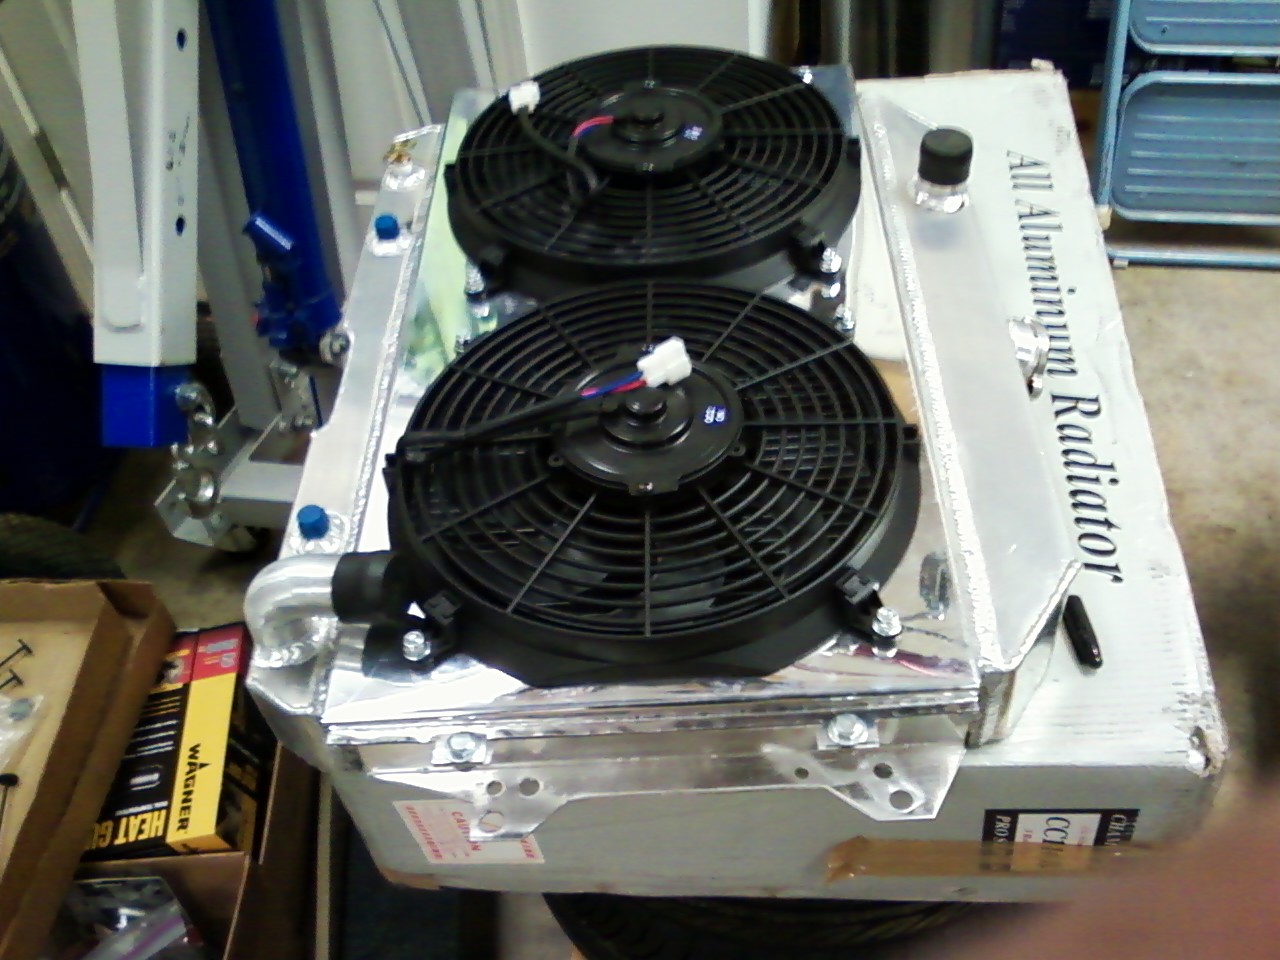
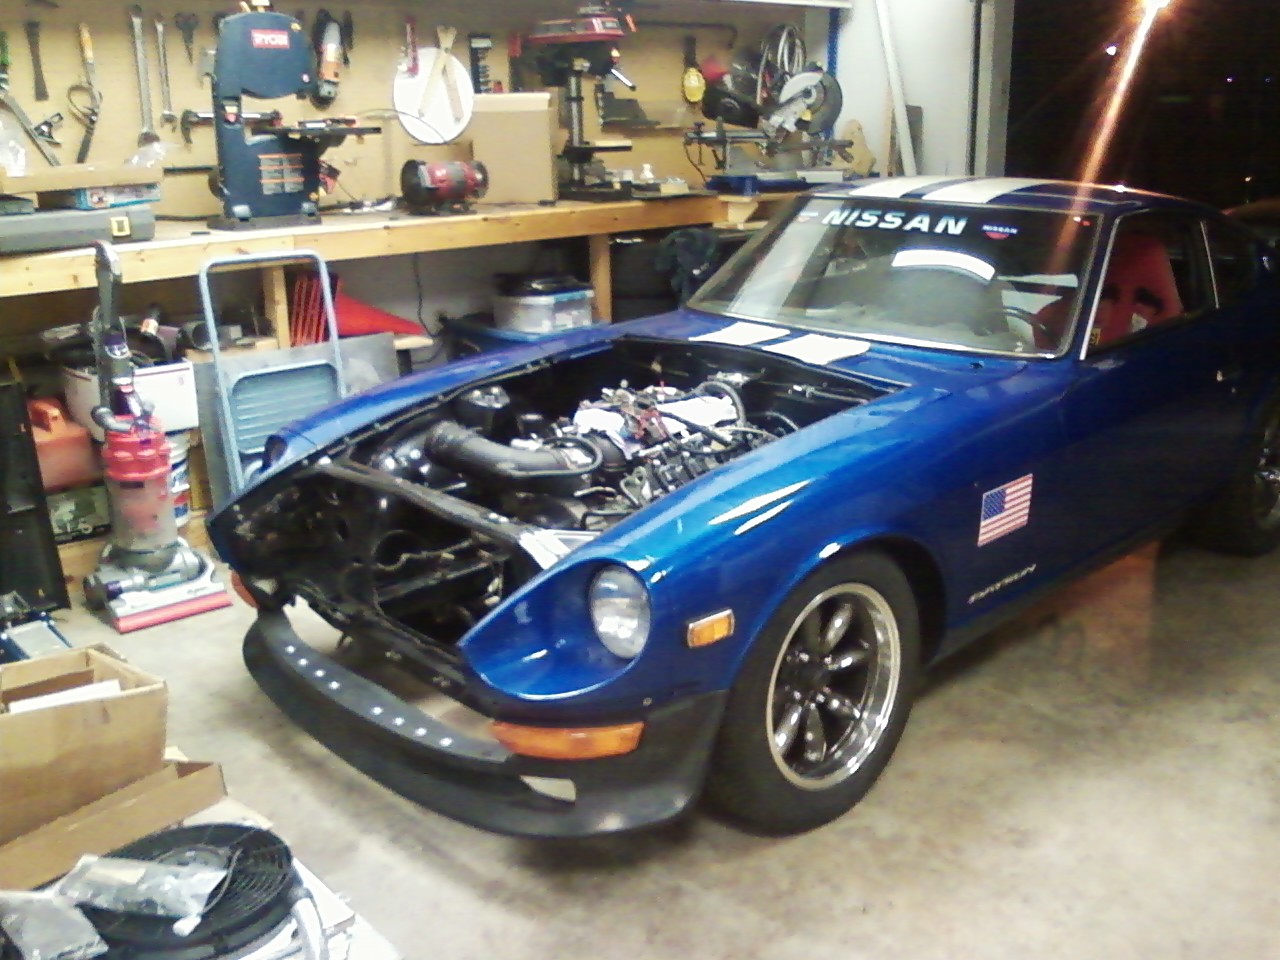
Made more progress today. My buddy came over and helped me get the tank in-what a PITA. I've pulled the tank down about 5 times since I've owned the car (20 years) and it doesn't get any easier. I'm never confident that the rubber fill pipe is on adequately, but it has always sealed in the past, so I'm optimistic. Fuel lines are all hooked up and ready to go. Checklist: Motor mounts-done, drivetrain-done, suspension and brakes-done, fuel system-done. Moving on to cooling system and cold air intake. The Champion radiator kit I bought needs a lot of finish work. The shroud didn't fit and had to be tweaked and drilled to mount the fans. The lower radiator hose tube is going to conflict with the right-sided fan, so I need to have that changed. I will have a flange made on the same trip to allow the cold air tubing to be bolted to the radiator support. Got radiator in for first test fit/mock-up. My emergency brake handle was very sun damaged, so I cut off the faded plastic, drilled out a Hurst pistol grip and epoxied it to the old handle.
-
Why is it necessary to ground the fuel filter?
RebekahsZ replied to RebekahsZ's topic in Gen III & IV Chevy V8Z Tech Board
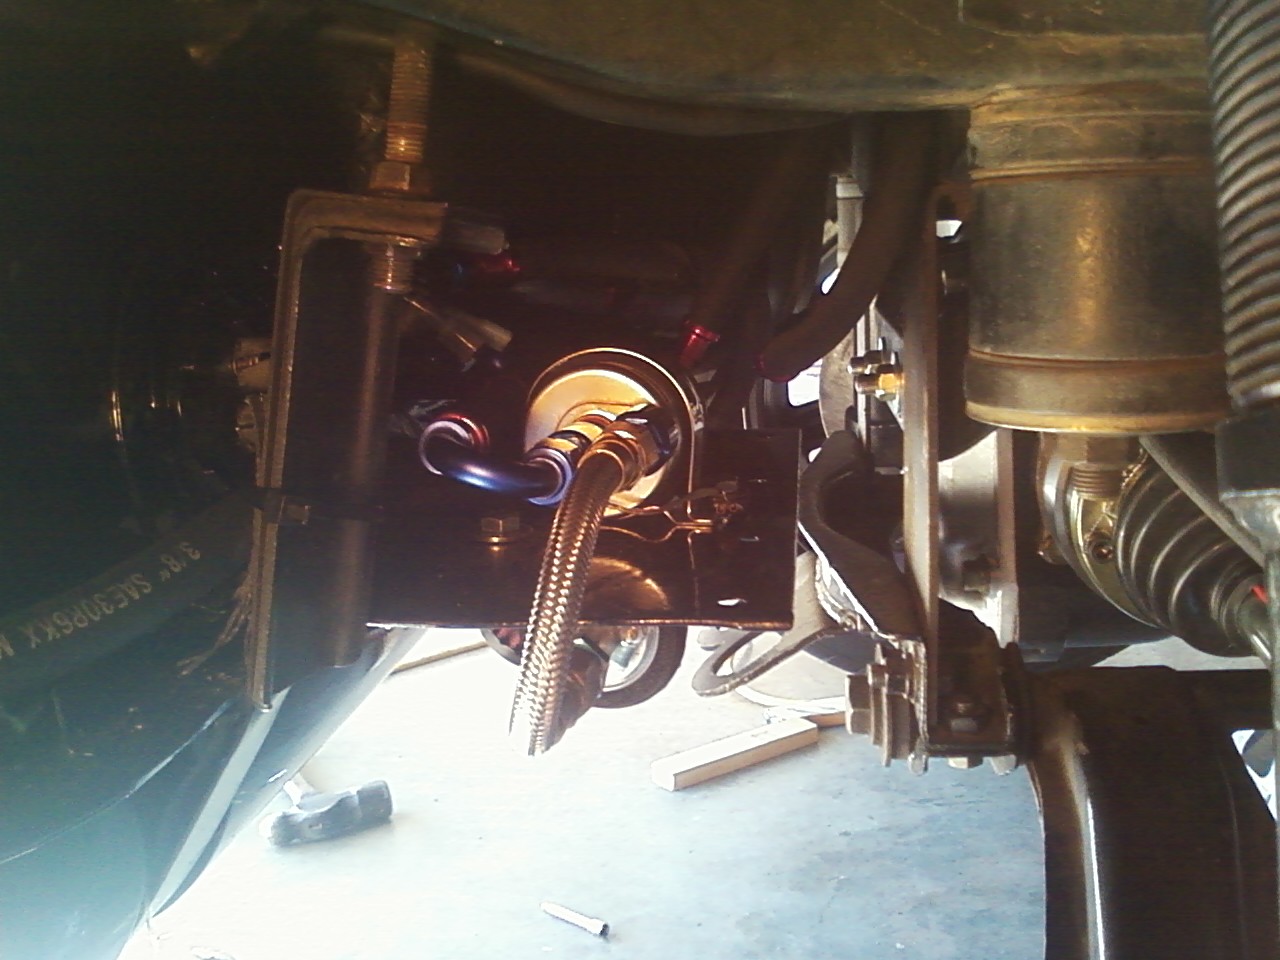
Thanks. Yes there is a return line. Thanks for the advice and kudos. Anything worth doing is worth doing twice..... -
The corvette FPR has a grounding wire from the fuel filter cannister to the mount. I have the filter regulator and the fuel pump mounted on rubber insulators to try to reduce noice a little (wishful thinking?). So, in effect, the filter/regulator is not gounded. Do I need to do something about this, or am I ok? Why is a grounding wire needed anyway, static electricity? None of my metal fuel lines are grounded??
-
LS/T56/240z Project Mentor Wanted
RebekahsZ replied to RebekahsZ's topic in S30 Series - 240z, 260z, 280z
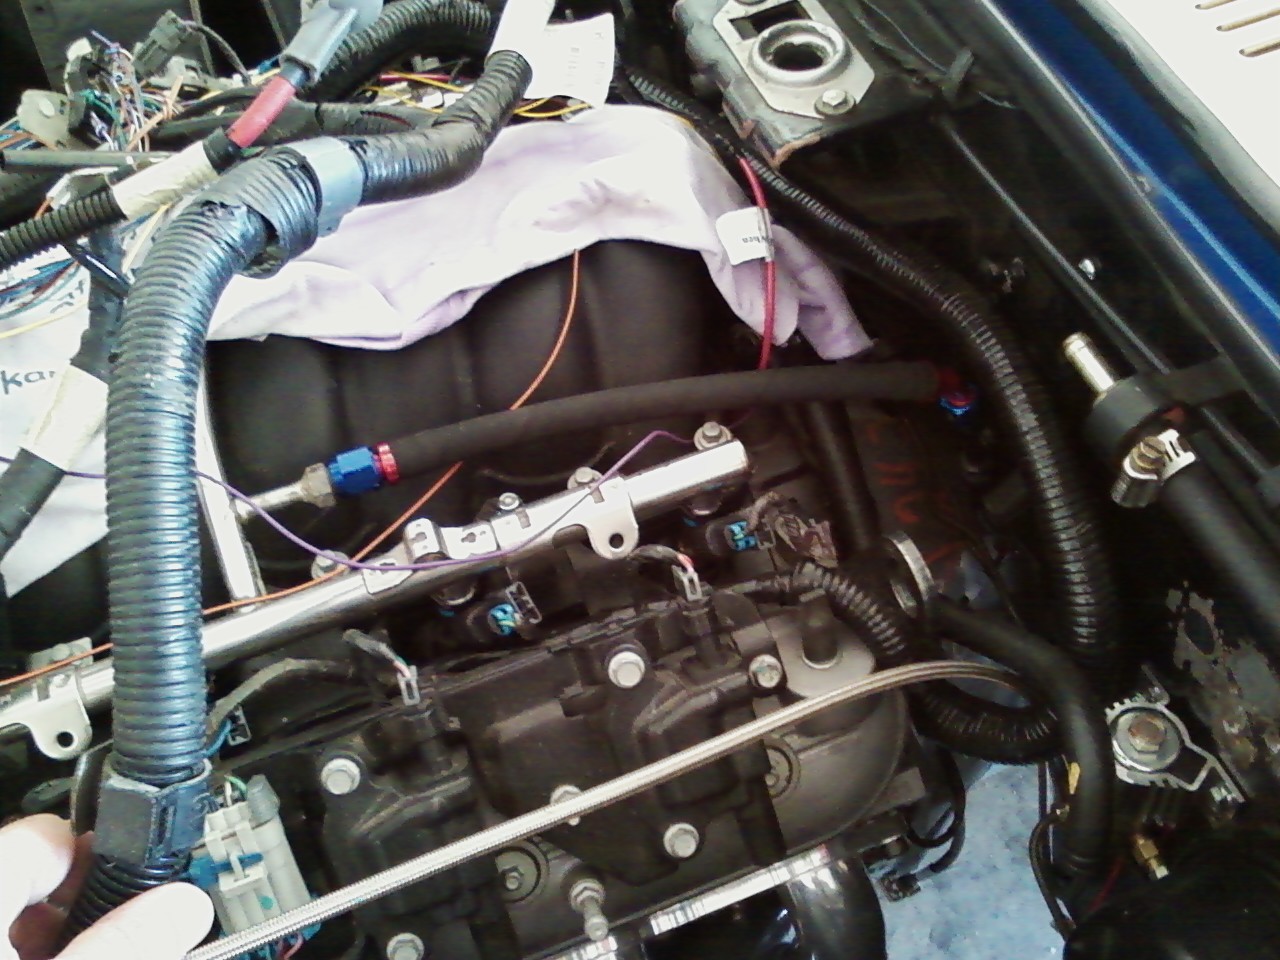
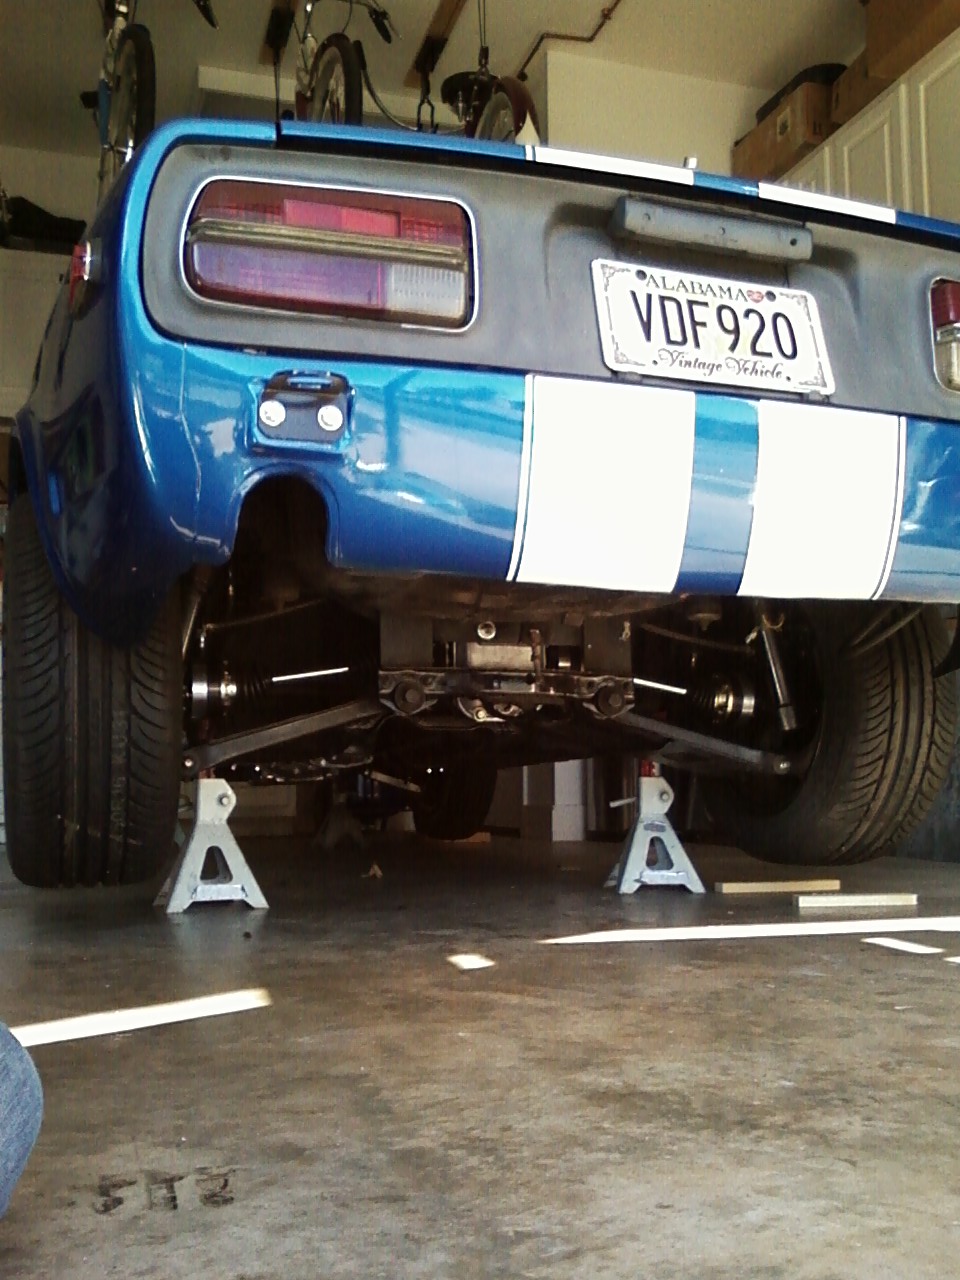
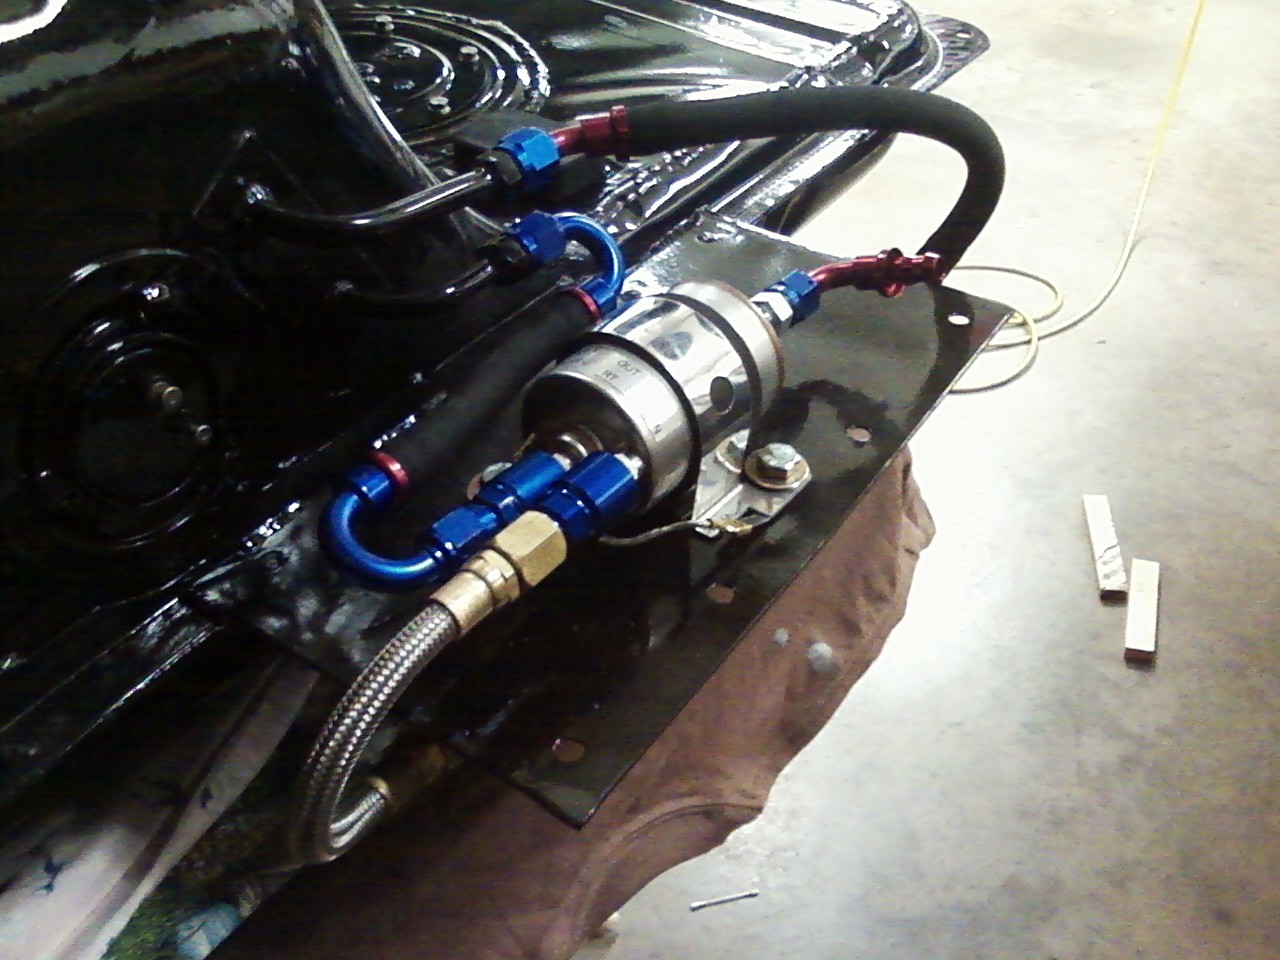
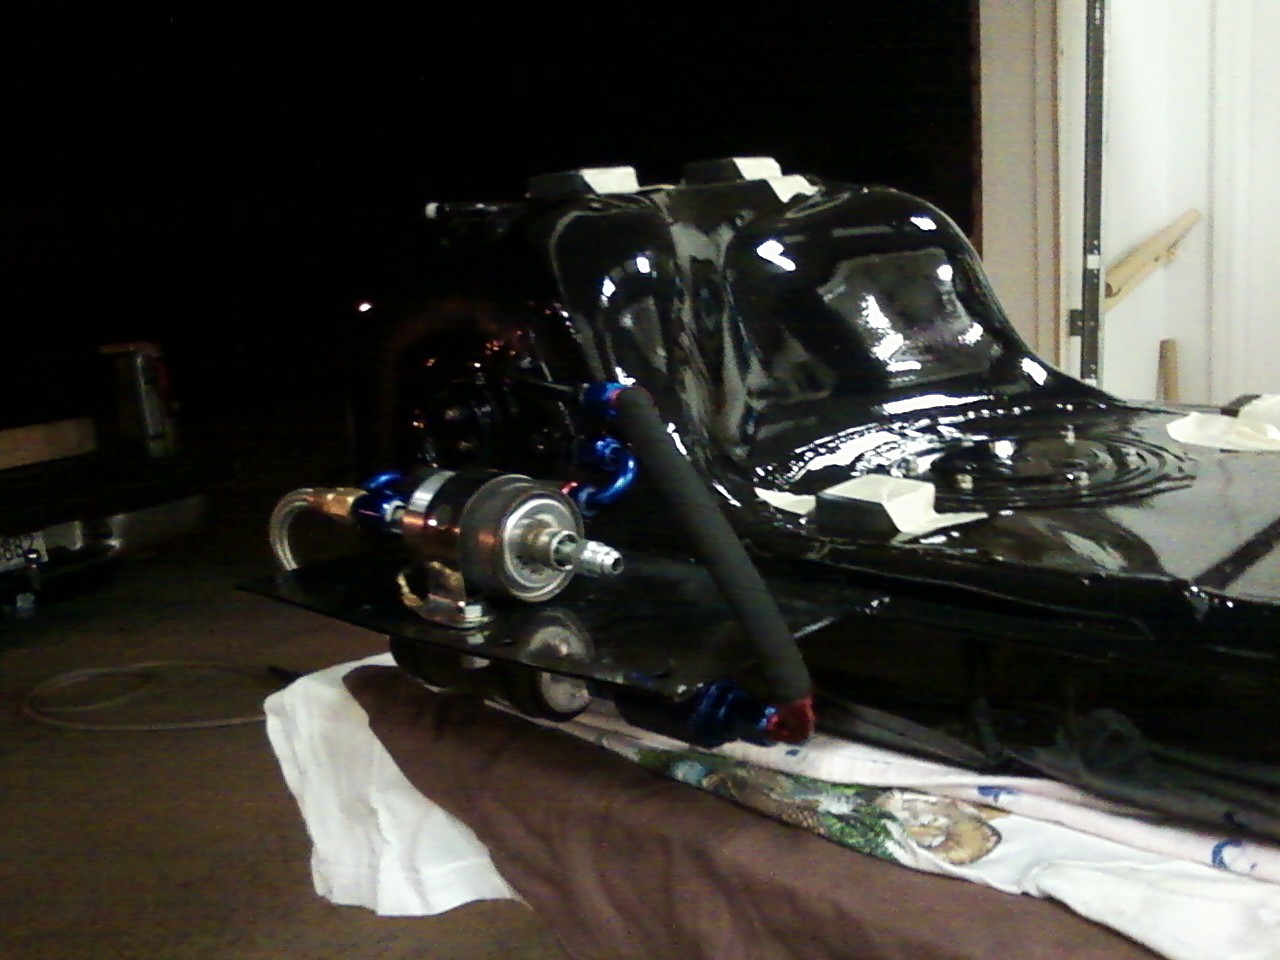
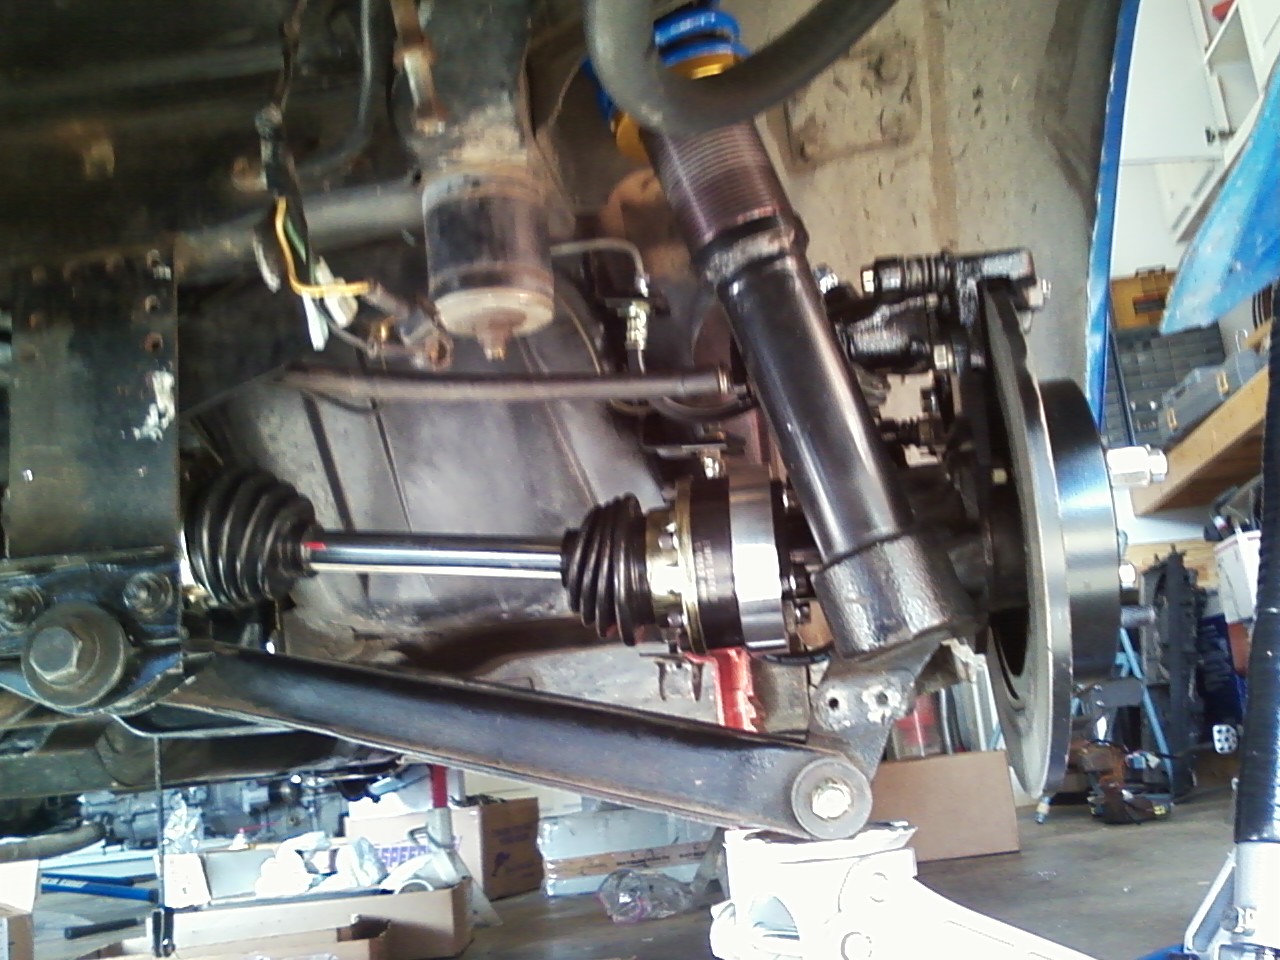
A few pictures of this weekend's progress. Wolf Creek axles in. Yes, that is still a CLSD R180, hope to upgrade to LSD R200 this winter, but I have to stop the insanity and get the car running first! Limitations I see with the Wolf Creek axles: weak link is the hardware. To install, the 40 year old stub axle nuts and bolts are re-used on both ends of the axles. I will be worrying and inspecting them for nut rotation after every event. When I do the R200 conversion, I plan to change from the 8mm stock bolts, which I red locktited, to castleated nuts on 5/16 grade 8 bolts with cotter pins. Perhaps then I won't be so worried about dropping an axle. Fuel tank module is together with Jegs pre-filter (for the big chunks) Walbro external pump (I understand from the forum that this thing is loud), Corvette FPR. AN6 fittings from Speedway and a combination of black push-on high pressure hose and a braided line (due to tight bend radius) I had fabbed locally. The push on hose was SO easy to work with - I hope it holds up. Fuel tank was sand blasted and painted basecoat/clearcoat black. An internal sump was welded in and a larger supply line was added to feed at the base of the sump. An access panel was added to aid in future clean-outs. Source for access hole was a 300zx which was cut out of the donor fuel tank and welded in. The access cover is the top of the 300zx fuel pump with the holes welded closed. Spent a lot of time cleaning out the sandblasted tank. Even after lots of wrinsing to get out sand, I wound up having to use lots of duct tape, ala tack rag, to get as much silica out of the tank as possible. I'm going out now to start fighting the tank into place under the car. Mother-in-law in hospital, so I may not get much else done.
-
Weber jets??All who live for their triples please read this
RebekahsZ replied to datfreak's topic in Nissan L6 Forum
Run it a little rich so it will start fairly easy and not backfire too much-then just run it like a dog and enjoy how they look and sound (including the occasional part-throttle backfire). Lift your hood a lot and enjoy the pleasure of the view, but not the pain in the butt that comes with it. My 240z has had SUs (10 years) and Dellortos (basically Weber-style) for 10 years. If you have triples, you will either get used to them being unpredictable, or you will LIVE for them. After 20 years with this car, I have other things to live for. I'm going to computer controlled EFI, because here in Alabama, the weather changes daily. Try not to be too picky with side drafts or you will go nuts. If you have to be on time to work in the winter, buy a second car or you will be late to work from time to time. -
Poly engine mounts for LS swap
RebekahsZ replied to RebekahsZ's topic in Gen III & IV Chevy V8Z Tech Board
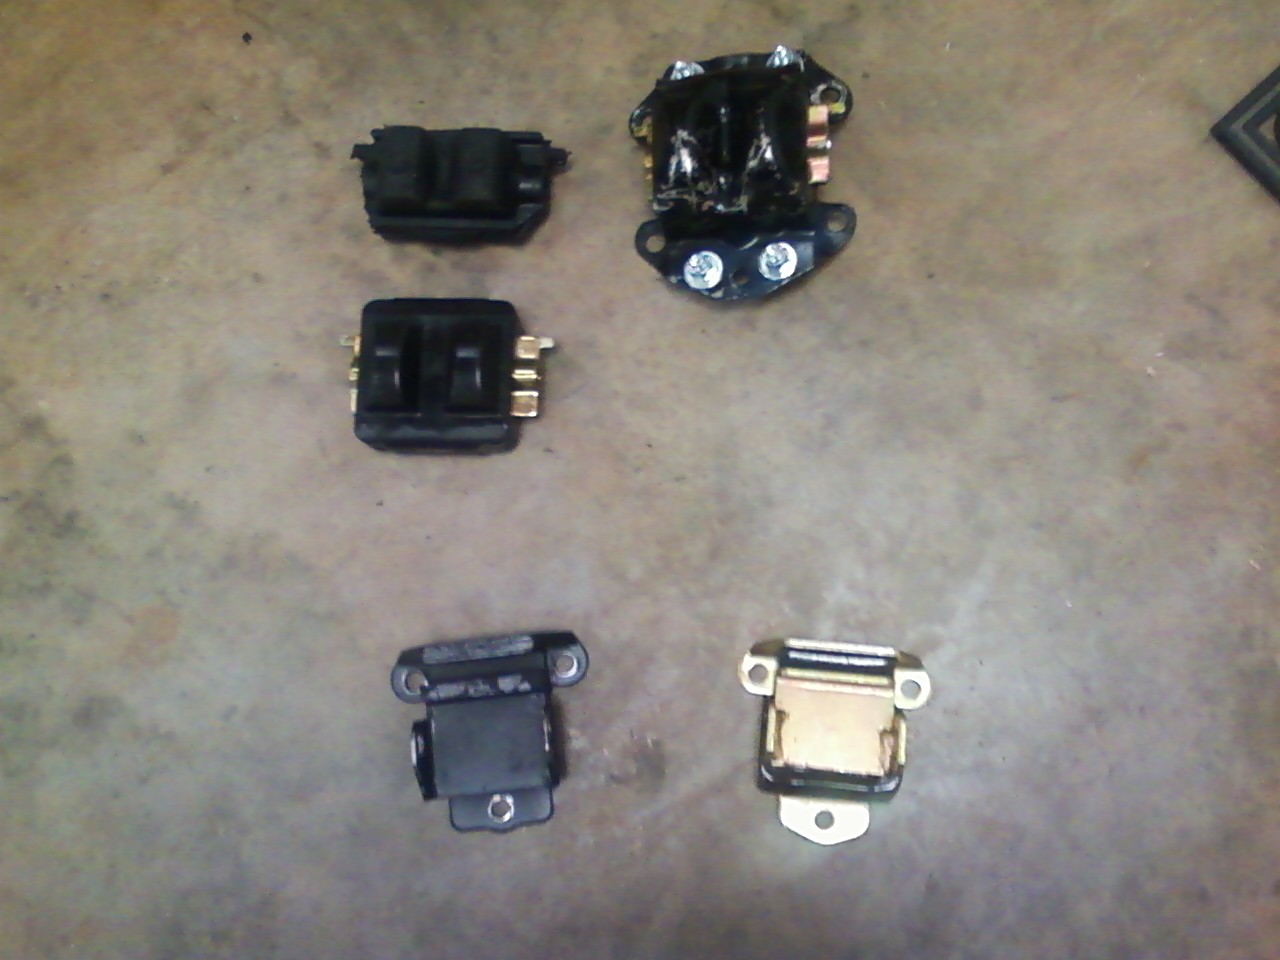
Poly motor mounts installed. Left side (clamshell) is Prothane from Summitt, right side is Energy Suspensions from AutoZone. Right side went in easy. Left side requires drilling out rivets in Camaro clamshell mount and swapping all the rubber stuffing. That went pretty easy. Putting the poly stuffing into the clamshell required trimming the poly a little because some of the rubber indentions do not exactly align, but after that it went together fine with the bolts supplied in the Prothane kit. The wings on the right side had to be bent out a bit, and the length of the metal tube in the Prothane mount had to be shortened a bit with a grinder. I had go take my oil pressure sender off to get the engine mount bolt in on the left side and it took a bit of pounding and loosening of the mount-to block bolts to get it all lined up, but it went together pretty well. I am glad I am making this change now-it would have been hell with a header in place to work around.
-
Rayven14-my panels arrived yesterday. Thanks!!! Keith
-
1tuffz-follow Mr. Coffey's advice - you need more front camber. That is what the pushing and rounding of your tires is telling you. You go to the track more often than I do, but I solved the problems you describe really easy over one weekend with camber plates that allowed 3-degrees of neg camber. Totally improved cornering. Talk to John C about his bolt in camber plates. I have EMIs in the front (there seems to be a problem getting these) and I have DPs in the rear, both bought thru BetaMotorsports.
-
Send us a photo.
-
I had same problem. Try running a tube from the master cyl bleeder screw and the reservoir to get all that air out. I had to take off my rear calipers and bleed them while rotating them at multiple different angles to get all the air out. Does anybody know if stock 240z FRONT calipers have to be rotated around like that to get all the air out-or is the stock location ok for bleeding?
-
LS/T56/240z Project Mentor Wanted
RebekahsZ replied to RebekahsZ's topic in S30 Series - 240z, 260z, 280z
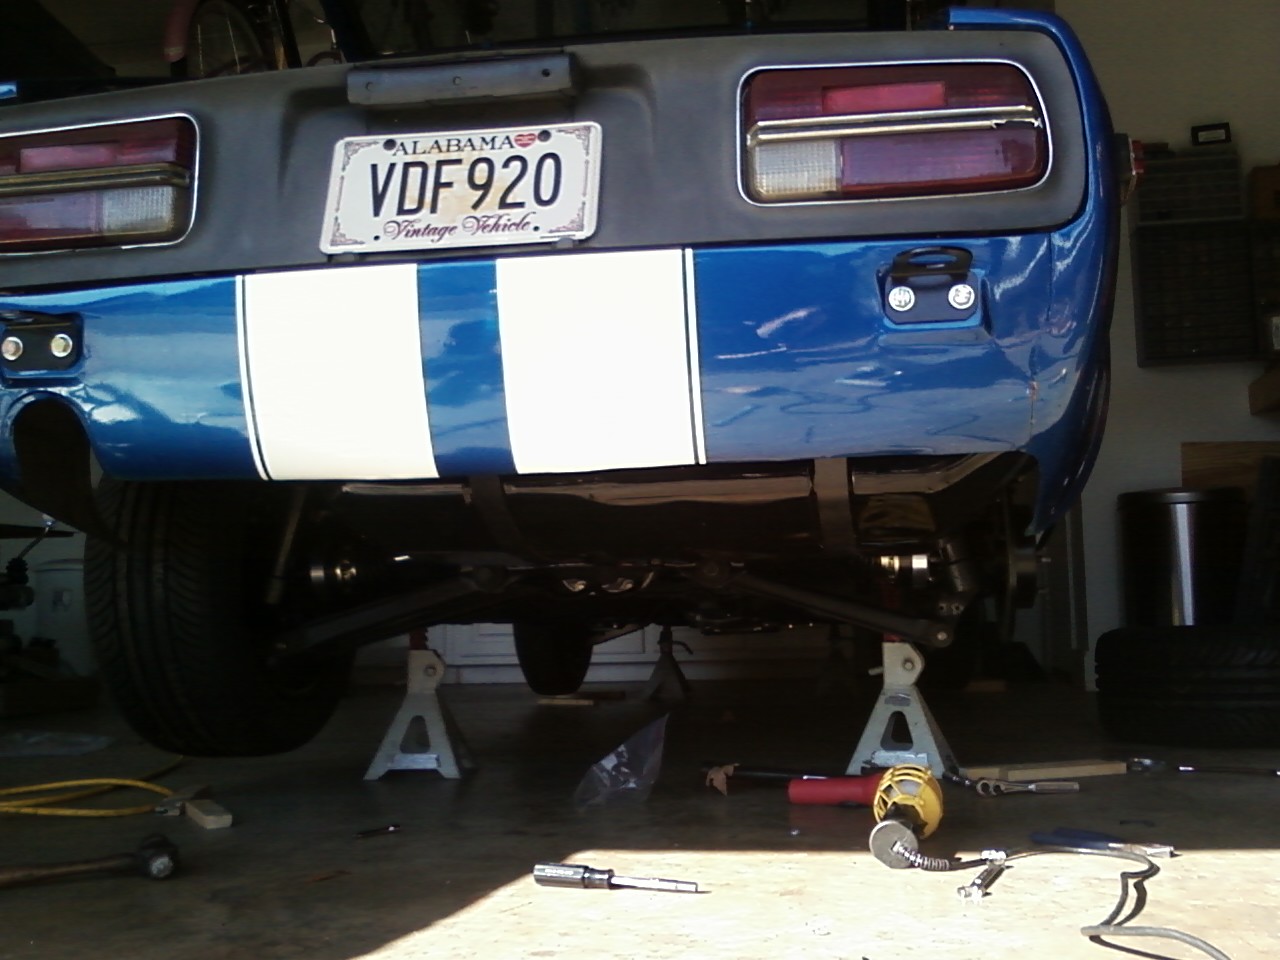
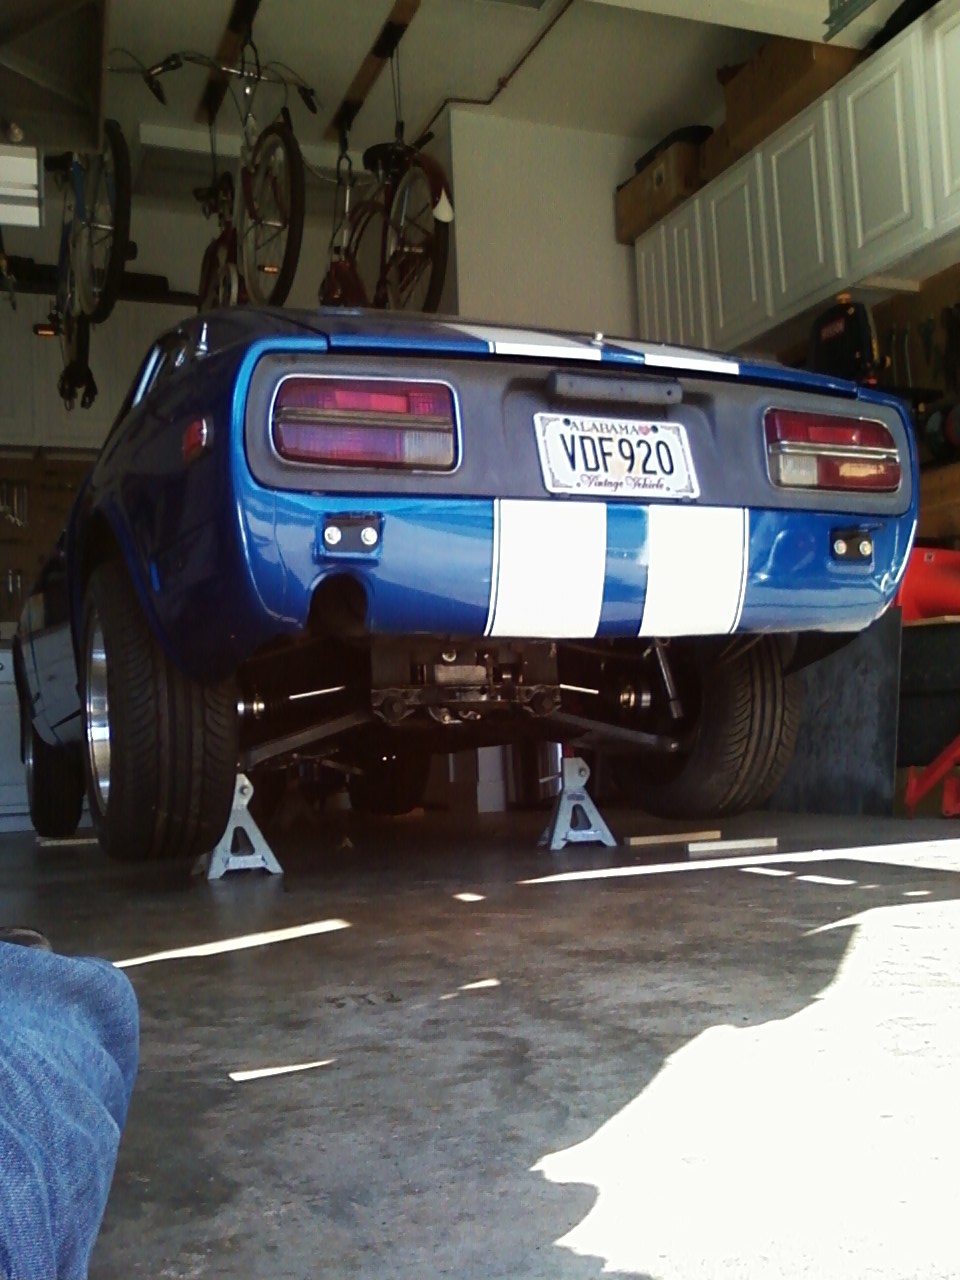
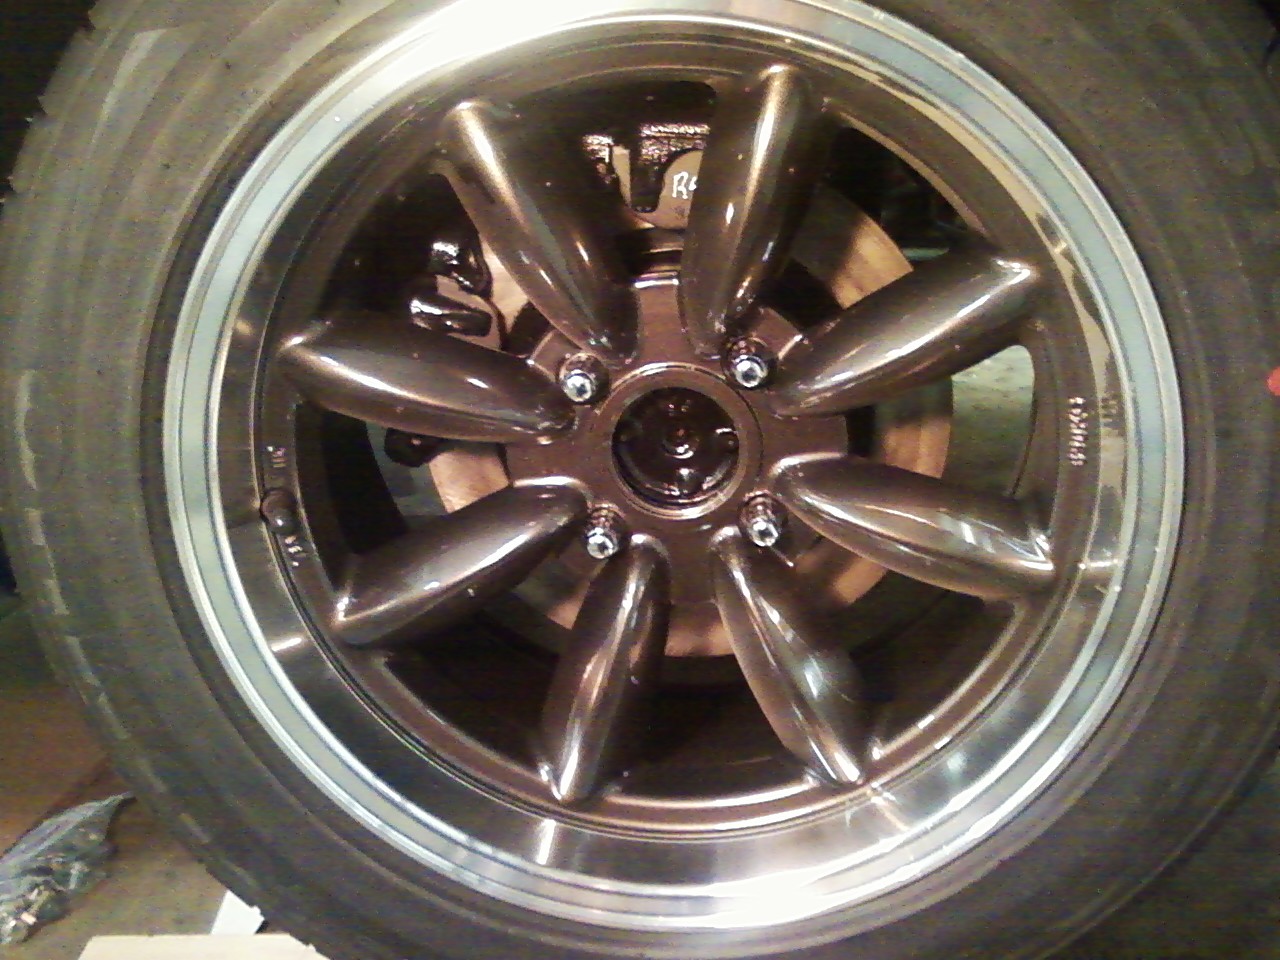
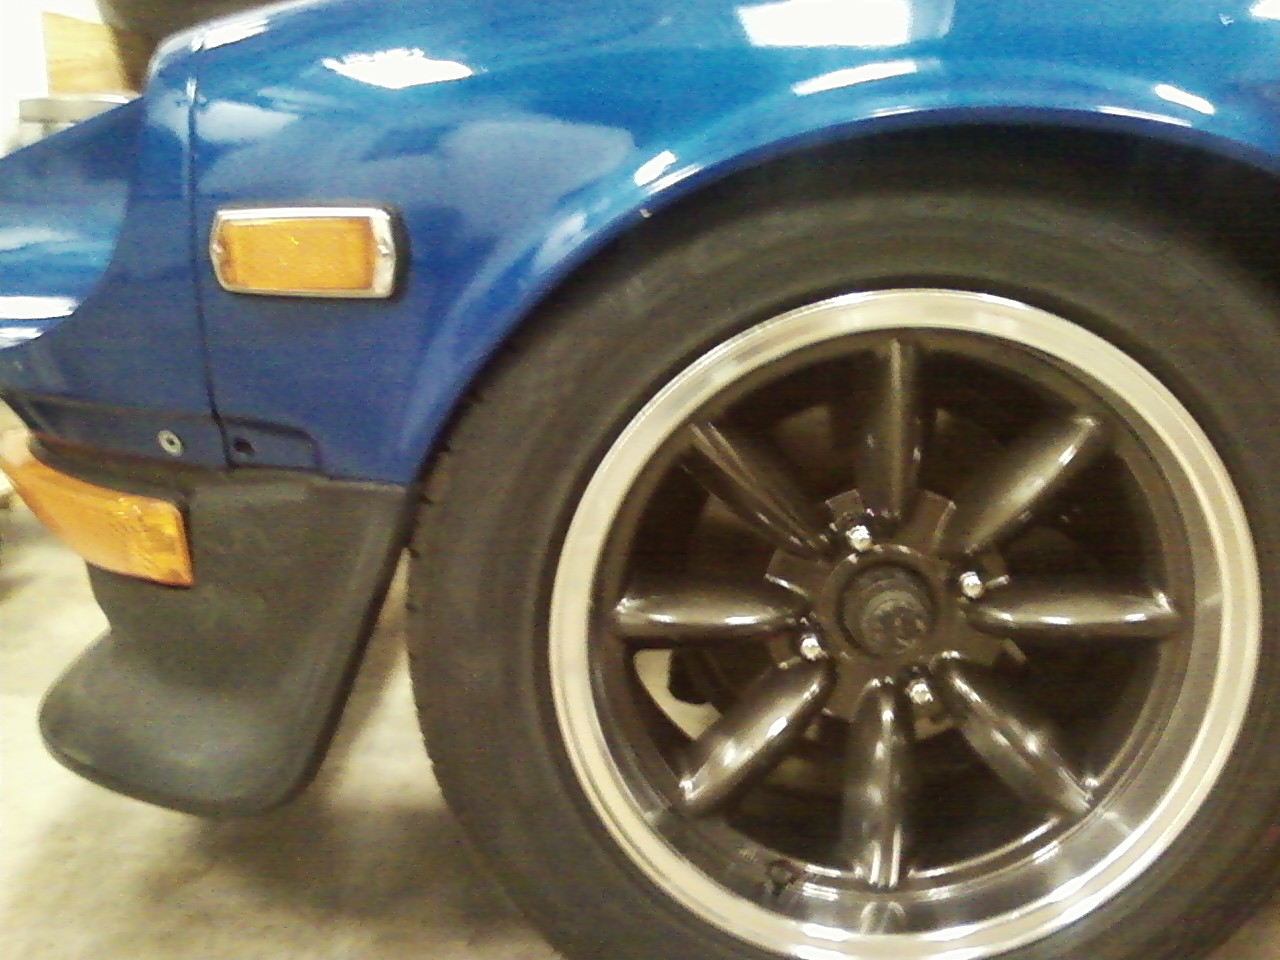
Worked 'till 4am Sunday night and got a lot done while wife was out of town. Rear suspension is DONE: Re-use my old coilovers with 250# rear springs, DP camber plates, Tokico Illumina struts, R180 WRx CLSD diff with John Coffey output flanges, RT diff mount, poly mustache bar mount, Wolf Creek CV axles, Maxima disc brake conversion with cable e-brake, hydaulic "drifting" hand brake with dedicated brake plumbing, 280z stub axles, new bearings and seals. Front suspension is (almost) DONE: Re-use my old coilovers with 225# springs, Technotoys adjustable LCAs, Adjustable TC rods, EMI camber plates, rebuilt stock front brake calipers. All brakes pads are Porterfield. Hurst Linelock is re-located. 3/8 hard fuel line is plumbed inside the trans tunnel running from firewall to gas tank. Installed Rota-RBR 16X8 and set it on the ground to admire and ouch!: front tires rubbing on airdam. Gotta change the length of my TC rods. See pics of all. Motor is in (for now) on Prothane and Suspension Techniques poly front mounts and I even bolted up the driveshaft and installed MGW f-body short shifter. Hope to start mocking up radiator in between things this week, then install fuel tank and all flex lines this weekend.
-
Drifting handbrake (hydraulic handbrake)
RebekahsZ replied to RebekahsZ's topic in Brakes, Wheels, Suspension and Chassis
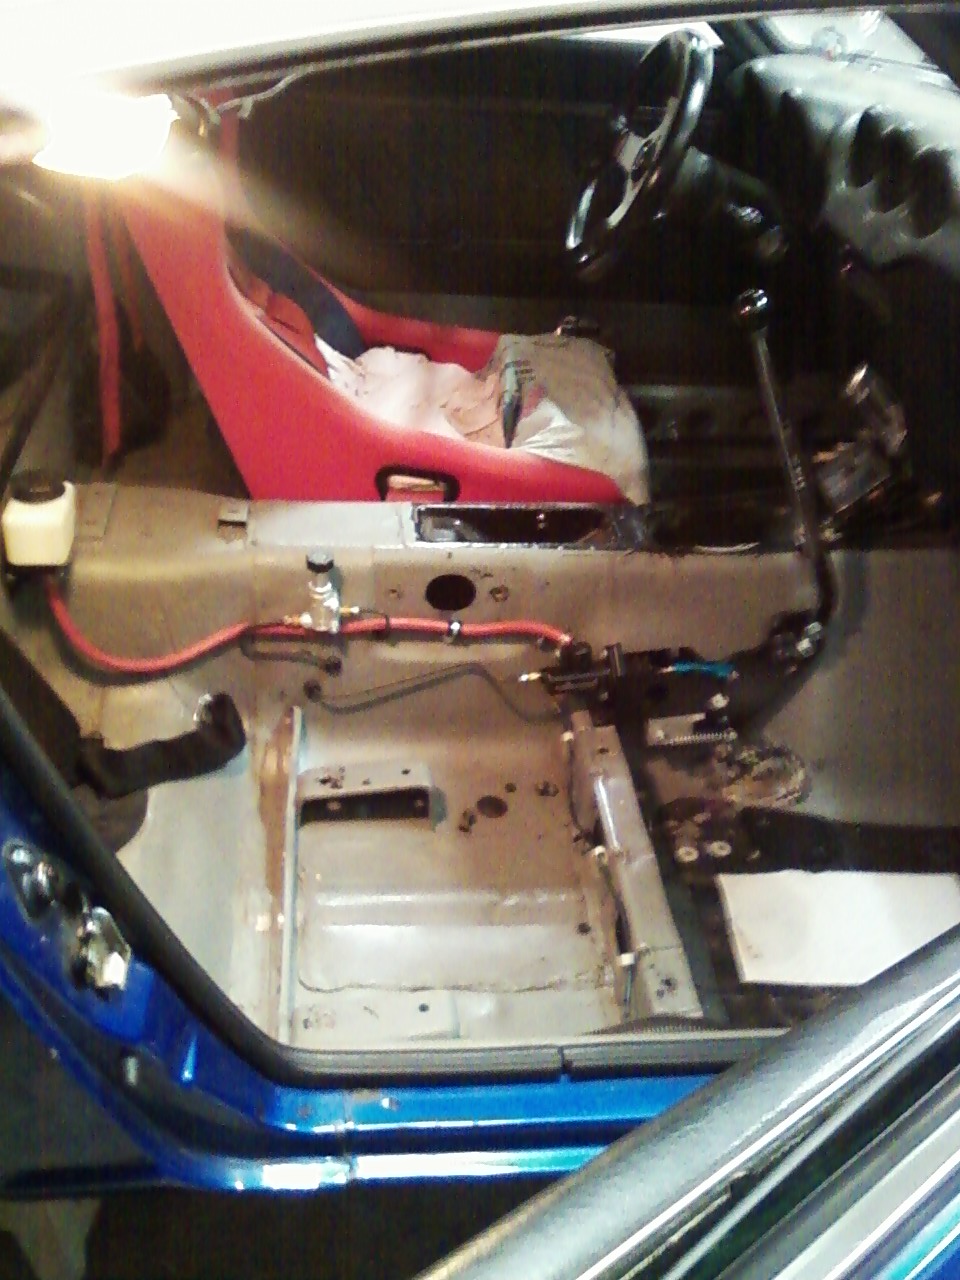
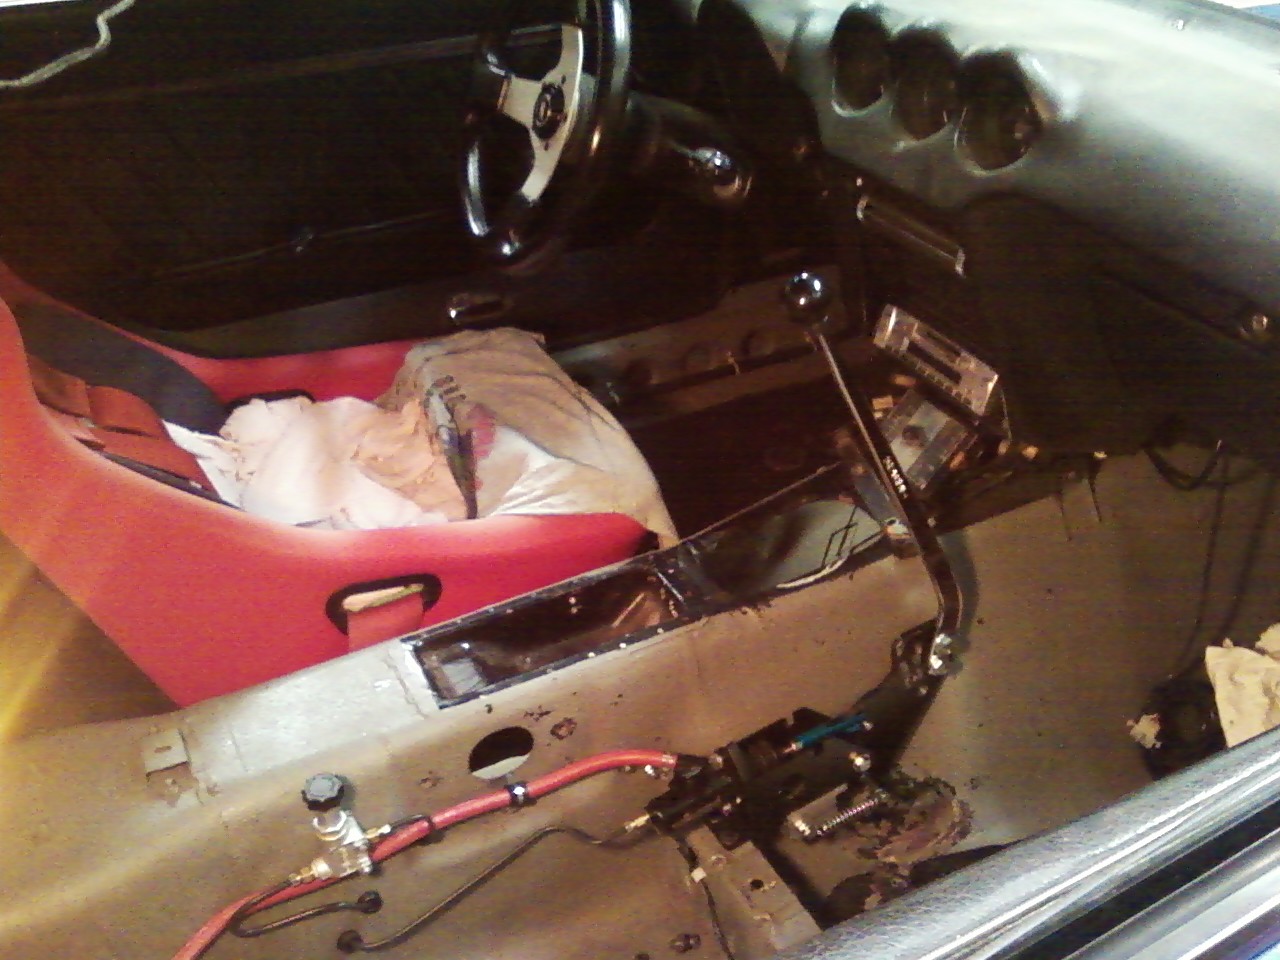
I have two totally independent systems of MC, lines, calipers. The only part of the system that is shared is the rotor. Study the center picture and follow the red line between the master cylinder and the remote brake fluid reservoir - I did just exactly what you are suggesting-wilwood MC with remote reservoir-it all comes in their kit. I started this with a K-sport internet chinese piece of junk kit then started modifying from there, the only thing left from that kit is the bracket. I would not do it the same way in hindsight. I would start with a CNC hydraulic handbrake - google that and you will find a MC/bracket/lever kit designed for sand rails. It is a much better kit. Thanks for reading my threat! -
383 piston, 6" rod with stock sbc stroke?
RebekahsZ replied to wheelman's topic in Gen I & II Chevy V8 Tech Board
With my curent gearing setup redline (6300 rpm) is at ~68mph in 2nd gear. I want to be able to run a little over 70mph without requiring a shift to 3rd, so redline needs to be >6500rpm. I already have high rev valve springs but don't trust the stock rods to handle 6500+ rpm very often. This is an auto-x car, thats why I'm trying to optimize the redline for 2nd gear operations. I normally shift to 2nd shortly after launch and stay in that gear for an entire run. Going to 3rd is an option but costs time and I'm not good at downshifts so reliably increasing the redline a bit is the goal. Would you consider going to taller wheel/tire combo to get more speed with same engine RPM? -
Runing wire from cabin thru cowl into engine bay
RebekahsZ replied to rossman's topic in Ignition and Electrical
Make sure you plan for the size of any wire-end connectors (and not only the wire bundle diameter) when you plan for the size hole to drill. I have an LS2 ECU and wiring harness - the connectors are HUGE. I'm gonna leave my ECU on the firewall just to keep it simple. -
Suspension / Brake Recommendations
RebekahsZ replied to SUNNY Z's topic in Brakes, Wheels, Suspension and Chassis
Try to find out which machine shop he used, and use them. I tried that and the machine shop I took my control arms to bent my rear control arms and I had to find new (used) control arms and start over. I wound up having to burn out my bushings with a torch then very carefully cut the sleeves out with a hand-hacksaw. Then, i tried the same thing on my mustache bar only to find out that on the mustache bar you burn out the bushing, but leave the sleeve in-another job I had to do twice. As a compromise, get a buddy to help you who has done it before. -
What fuze block is that sitting on the inner fender? Can I contact you for wiring advice later?
-
Suspension / Brake Recommendations
RebekahsZ replied to SUNNY Z's topic in Brakes, Wheels, Suspension and Chassis
My thoughts on a car that is street driven mostly, dragged and autoxed occoasionally: the sticky referred to is well researched, based on the experienced racing and absolutely spot on, but I think it is ok to do less work and get a pretty good result for those of us who are more just having fun. SUSPENSION: The single best mod I every did to my car's driveablity was to install poly steering rack bushings and a ABS platic steering coupler. These are cheap (like $40-ish) from MSA and Long Motor Co and really improve steering, changing a soupy car to a slot car. I just bought a set for my buddy as a gift and he installed them over the weekend and his otherwise totally worn out car felt much safer than it did on Friday-very noticeable improvement. Replace worn out ball joints and tie-rod ends, inner and outer, although tie rod ends are getting very tough to fine-inspect them and if they don't have play, leave them alone. Next I would go to lowering springs and new shocks-don't go very low or you will regret it-floor pans and exhaust scarping all over town and struts bottoming out on every concrete seam is no fun. I cut my springs when I first got my car and that made it drive like total garbage-it looked great, but bottomed out even on little dip and bridge crossing-I quickly developed cracks in my a-pillar and b-pillar-don't let your car bottom out. Lowering springs are less than $200 and you could probably get away with parts store strut inserts since these springs aren't really that stiff. Having replaced my own bushings, I would not rush to replace any bushing because of the huge time and labor requirement-it is way harder than it sounds, and do not try to pull your rear spindle pins unless you ablsolutely have to-that job is a totaly nighmare and you will want to shoot yourself before you finish. My rubber bushings looked terrible where they were exposed to air and light, but inside the parts (which is the part of the bushing that counts) they were like new. Z-car bushings have metal sleeves and there really isn't that much rubber content in them to get squishy. You will find out just how durable they are when you try to get them out-that job sucks. BRAKES: I got great advice from John C about my brakes: leave them alone! He recommended Porterfield R4S pads, and they stop the car great, but are very dusty. Autozone ceramic pads noticeably helped my truck and are a lot less dusty. John also recommended drilling a couple of 3/4" holes in the aluminum brake drums to MANUALLY adjust the rear brakes 'till they rub a good bit-that mod cost nothing and made a noticeable improvement. Stainless lines didn't really change anything noticeable-I just went back to rubber because the metalic brake lines burn really well when a spark gets on them from welding nearby. TIRES (which are both brakes and suspension): Discount/on-sale 225/50/15 on a 6 or 7-inch rim - '81-'83 280zx turbo wheels are great and have perfect offset; clean shiny ones cost, but dirty, corroded ones are cheap and give the car kind of a combat-ready look. Make sure you get the lug nuts with them (they are special) and get the center caps if you are into that-they are expensive to replace. You car will likely understeer until you get camber plate, but that is another expensive and time-consuming mod. Understeer will only be a big issue if you do a lot of autocrossing, and on those days just enter turns slow and accellerate out of the turns. Wait to do camber plates until you go to a coil-over system (in which case I can later tell you what components to buy instead of buying a kit), but again, that is a really big job and will keep you from driving and enjoying your car for many weeks. Budget about a thousand bucks for all the mods I recommended plus a stock alignment and you'll have a great driving car. DRIVETRAIN: I love my LSD; if you don't have one, you will bless the day you got one-it is a major game changer on street and both strip and autox. DRIVER CONTROLS: Racing seat and seatbelts and smaller diameter steering wheel (even a cheap Grant from parts store). You can't drive well if you are falling out of your seat, but a racing seat is hard to get in and out of; you will love it when you are young, but kind of hate it when you hit your 40s and your high school athletic injuries start to nag you. Have fun. -
Drifting handbrake (hydraulic handbrake)
RebekahsZ replied to RebekahsZ's topic in Brakes, Wheels, Suspension and Chassis
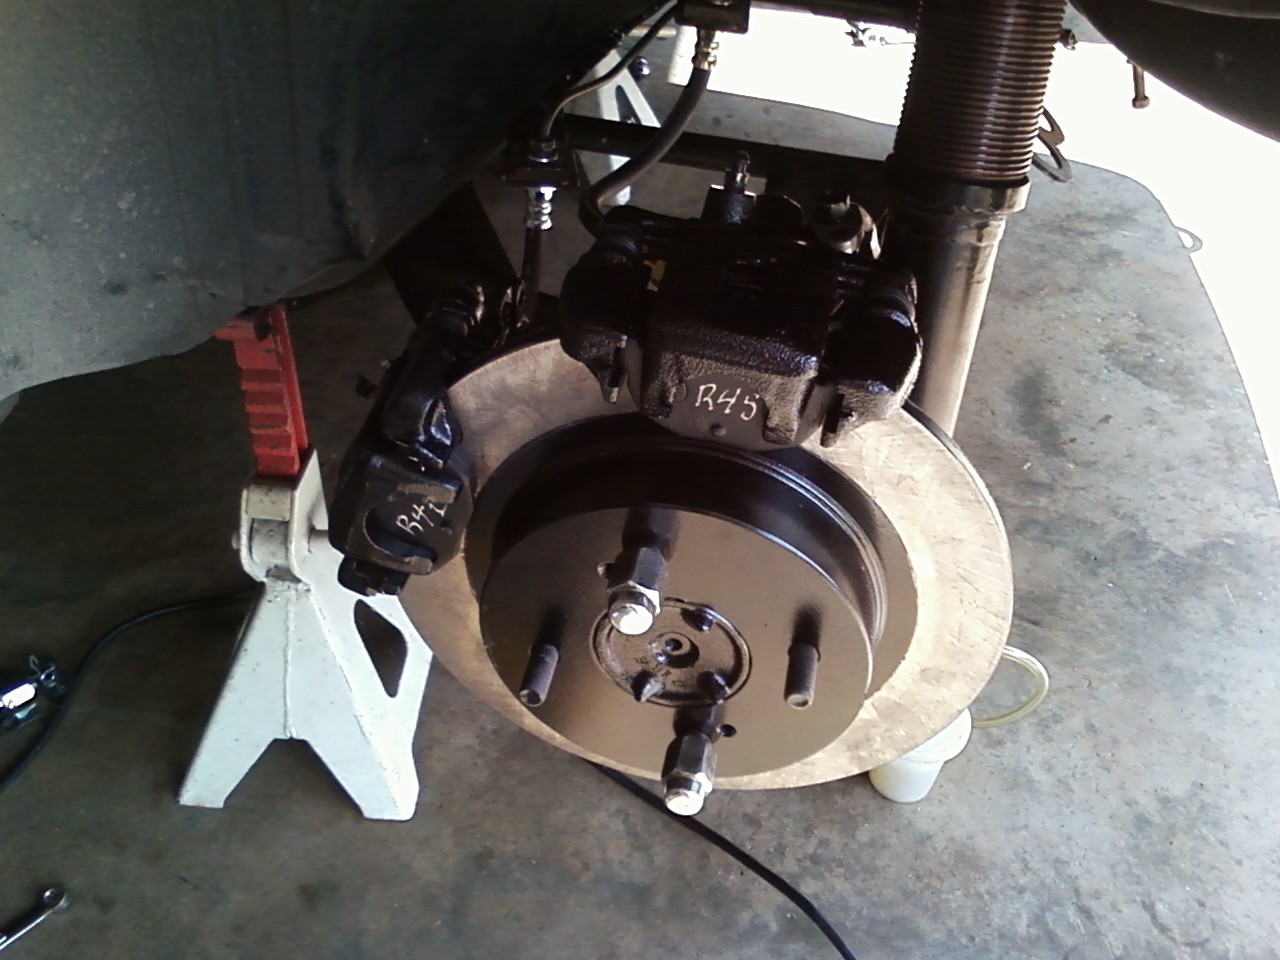
Hydraulic handbrake system is finished-well at least as finished as anything in my garage. All installed and bled. Still need to optimize e-brake cable routing as it currently rubs on mustache bar, but it works great. We'll have to wait until this winter or spring for test drive impressions. It is based on a cheap internet "drifting brake" system that quickly fell apart. The only part original to that system is the master cylinder bracket and some of the linkages. In hindsight I would have gotten a CNC hydraulic handbrake for this part of the system and had a friend weld in some short of bracket on the side of the tranny tunnel. My system uses a wilwood master cylinder with a remote reservoir for passenger seat clearance. Plumbing is independent of the footbrake system. Proportion valve is not part of handbrake, it goes with footbrake system. It was very hard to adjust brakes when the hydraulic handbrake was originally plumbed in series with the standard braking (footbrake) system. Now the only part the two systems share is the rotor. I have changed the stock drums for a dual-1985 maxima system from Shaun Schlapi with a custom dual caliper bracket I had made locally. It all works great - in the garage. Road test later.
-
Unusual Brake Bleeding Issue
RebekahsZ replied to Miles's topic in Brakes, Wheels, Suspension and Chassis
I just got finished doing a Maxima rear disc swap into my 240z. I thought I had all the air out of the system but my pedal was still spongy, then I took one bolt out of my calipers and rotated them to make sure that the bleeder nipple was as high up as possible. Re-bled them and got lots more air out of it immediately and my pedal firmed up. Had to use a piece of wood to simulate the shoes and the rotor, but that was no bid deal. I never would have guessed that the attitude of the caliper would make such a big difference, but it sure did. -
LS/T56/240z Project Mentor Wanted
RebekahsZ replied to RebekahsZ's topic in S30 Series - 240z, 260z, 280z
Brakes finished!!!!!!! Had to re-flare 2 lines. Found out that Maxima rear disc calipers are positional when bleeding, just like people described with lots of other calipers. Rotate that caliper to place bleeder absolutely skyward and stick a piece of wood in it to replace the pads and rotor and LOTS more air comes out. After 2 days of fighting it, like magic I've got a firm pedal! Started on Wolf Creek axles and got CV adapters in and torqued before calling it quits at 4am. I think I'm taking a break from the car for a day. -
Rayven14, I'm following this thread, but I'm confused. Are you going to sell both versions: with speakers and without speakers? If so, I want to get on board with the no-speakers list. I tried to PM you so as to not upset the flow of the thread, but your address was blocked. Please PM me with response with a reply address, or if you prefer, I can just work from this forum thread.
-
LS/T56/240z Project Mentor Wanted
RebekahsZ replied to RebekahsZ's topic in S30 Series - 240z, 260z, 280z
Got a good weekend in the garage. Changed to 280z stub axles due to bent stub axle on one side-that job was much easier due to the tips learned on this forum. Wrapping up disc brake conversion and hydraulic handbrake combo. Chasing leaky lines and trying to get all the air out of each brake system. If anyone has tips for bleeding brakes on calipers that leak fluid around the bleeder nuts and bleeding a wilwood master cylinder that doesn't have a bleeder screw, I would appreciate any advice you have. Put wheels on car and rolled it out into the sun for the first time in about 6 months; nice to have brakes and axles. The dust on the car had gotten so thick I was worried about scratching the paint. Washed that car up and it looks great. Back in the garage up on jackstands hoping to get differential and axles installed next weekend.
-
Maxima rear caliper hardware
RebekahsZ replied to RebekahsZ's topic in Brakes, Wheels, Suspension and Chassis
Thanks-that is perfect. I kept wanting to install them like anti-squeek pads (go figure)! I'll go start putting it together. It will be months before my car is on the road, but I'll try to let you know how it stops. Keith
-
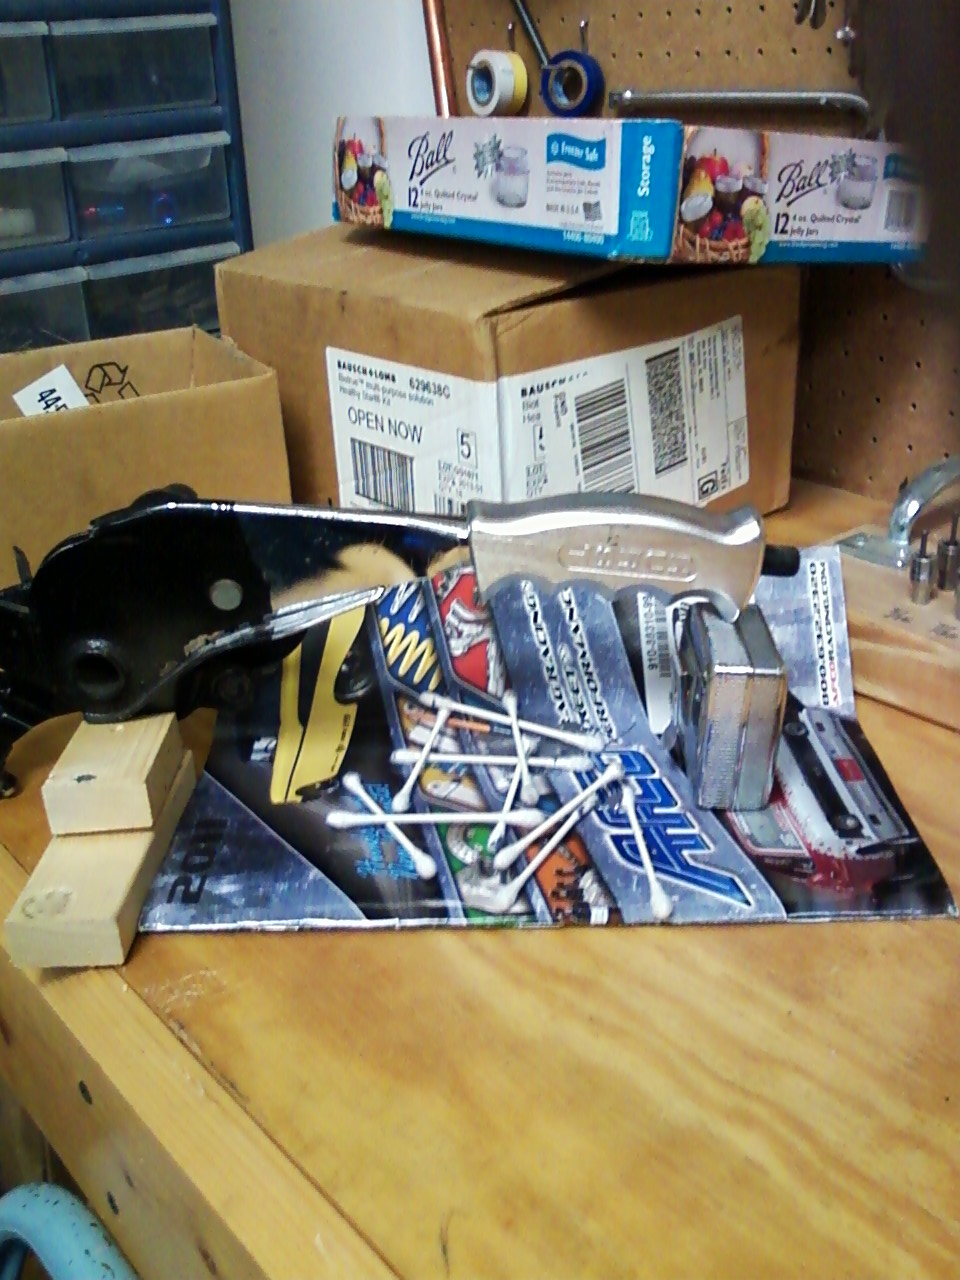
Maxima rear caliper hardware
RebekahsZ replied to RebekahsZ's topic in Brakes, Wheels, Suspension and Chassis
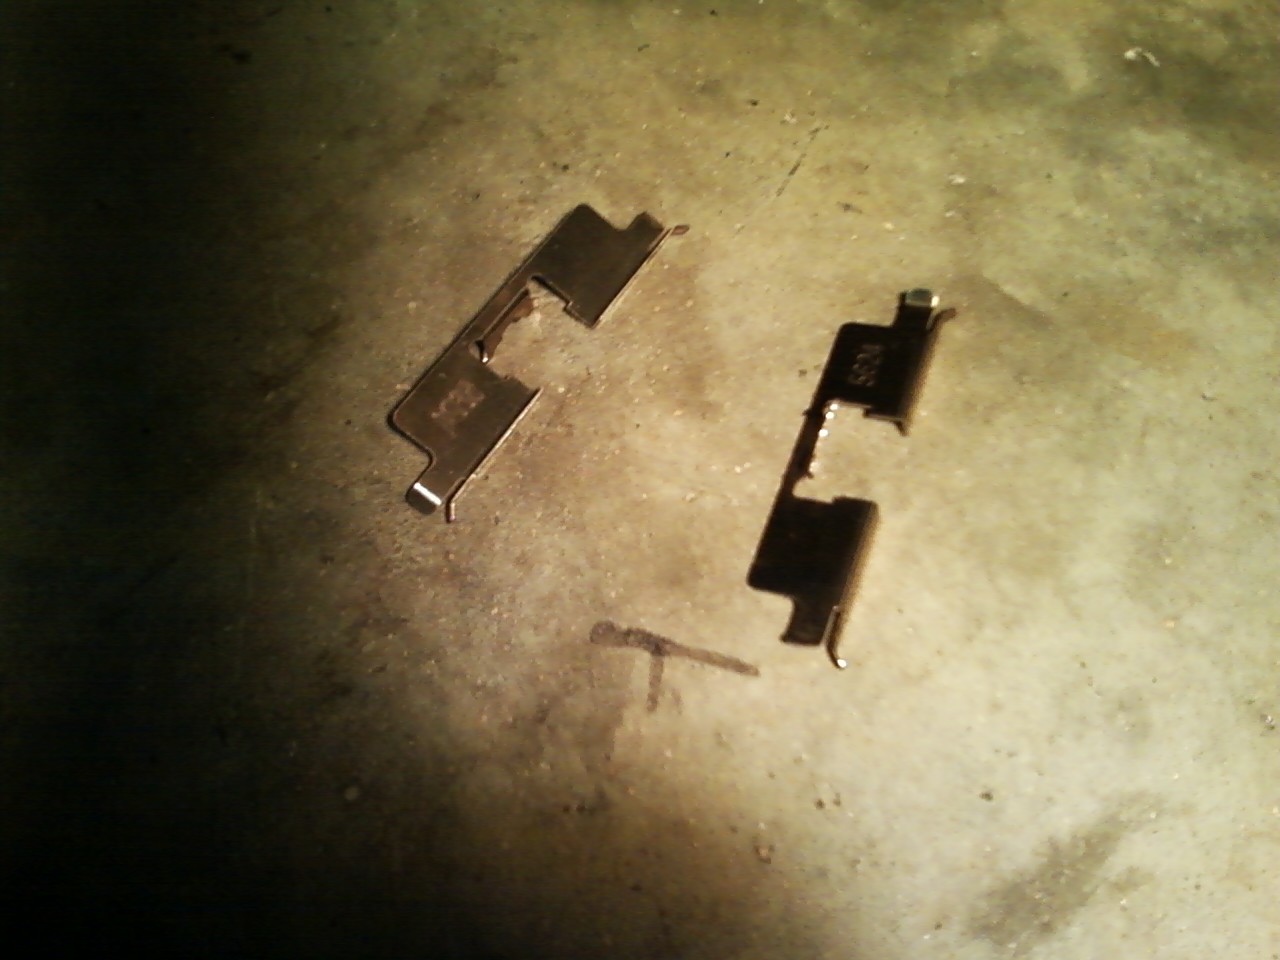
got a picture? -
Doing a maxima rear caliper kit onto my 240z. Please let me know where these little pieces of hardware go????? Maybe I don't use them? I clipped the big bat-wing piece of tin into the caliper, cause it was pretty obvious. See picture. Trying to finish this project this weekend.