Cable
-
Posts
1087 -
Joined
-
Last visited
-
Days Won
2
Content Type
Profiles
Forums
Blogs
Events
Gallery
Downloads
Store
Everything posted by Cable
-
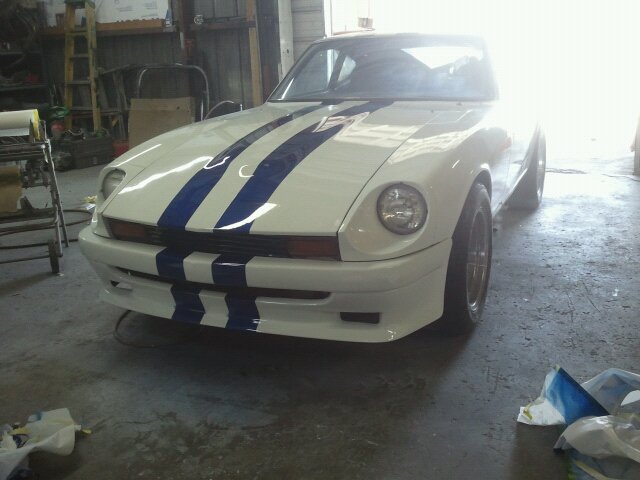
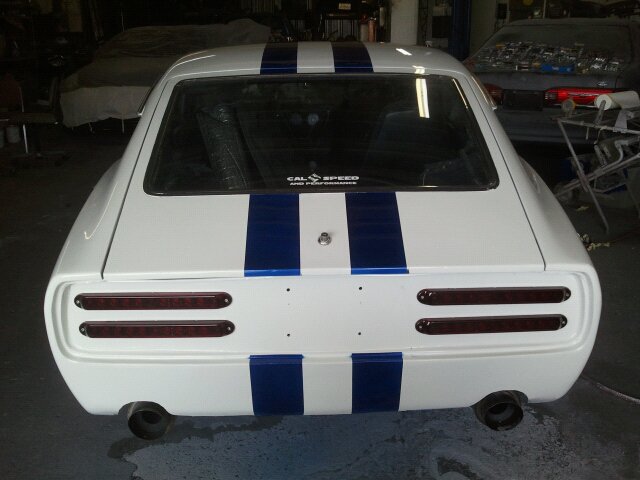
My Z is finally painted.... Details: http://forums.hybridz.org/index.php/topic/95230-lsz-is-finally-painted/

-
Finished yesterday, it was mostly a DIY job. I did most of the bodywork and a buddy sprayed the paint in his shop (no booth). The paint is GM gloss with single stage urethane enamel with House of Kolor custom mixed cobalt blue metallic Rallye style stripes. In a month it'll get cut and buffed to improve minor flaws. Its not show worthy, but good enough for my daily driver and will always be kept clean, garaged, and polished/waxed. Enjoy!!
-
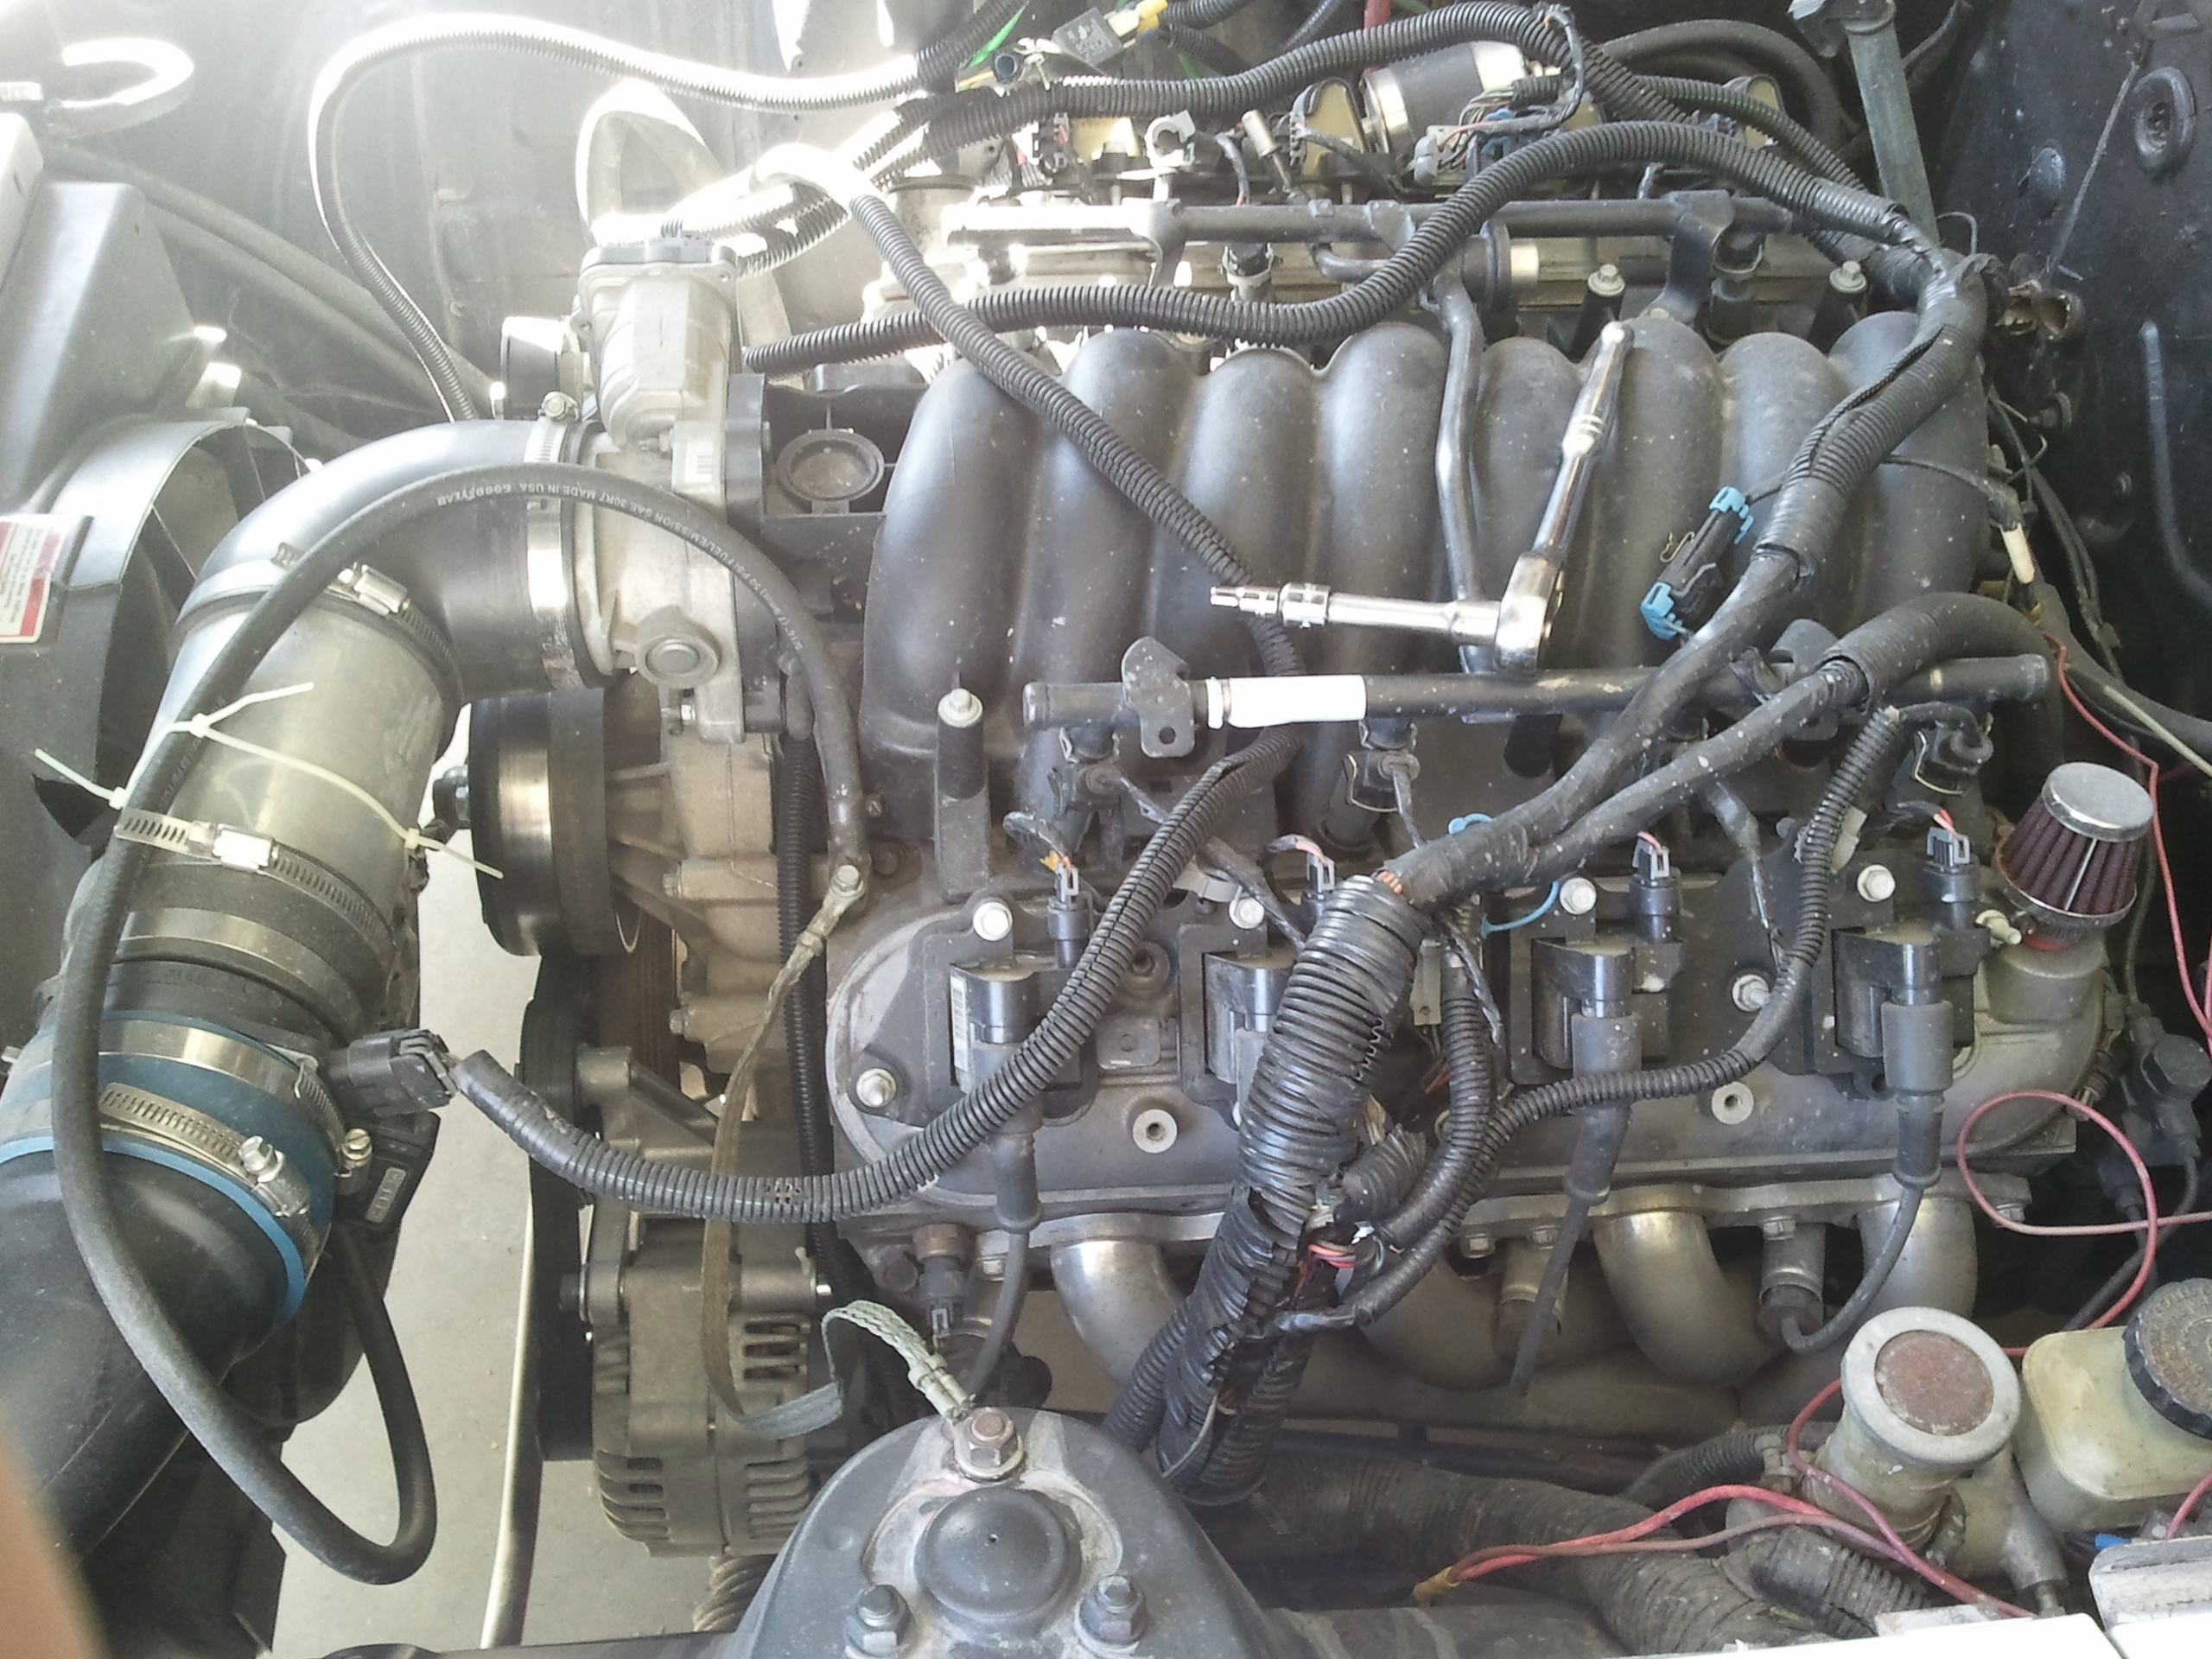
Hey guys, I thought I would share a cheap and easy solution to clearence issues with the stock hood using the truck accessory drive. This will also require a car style intake manifold in order to use a stock, unmodified hood. I recently began bodywork on my S30 to get it prepped for paint. As some of you know I have/had a stock hood with a 4" fiberglass cowl installed. Well my wife is just over 5' tall and would have issues seeing over the cowl. I always planned to go back to a stock hood, but the truck accessory setup places the alternator high on the driver side and prevents the stock hood from being closed. I knew of two solutions for this. One is to swap the whole accessory drive over to a '98-'02 F-Body crank pulley, tensioner, idler, alternator, water pump, and alternator brackets. The second is an aftermarket setup from several vendors and prices start at $1000 and up from there. Since I didn't want to spend alot of money replacing my entire accessory drive setup, I started to think about a third option that is cheap as possible, reuse as much of the existing equipment, and still be uber reliable. Anyway I bought a stock (front) piece of F-Body alternator bracket from the local dealer ($20) and confirmed that the truck alternator will work with the front F-Body bracket, but the stock F-Body rear alternator bracket won't work with the truck alternator (no mounting boss on the truck alternator). However, using the front bracket alone is plenty strong. The trouble is the bracket won't line up the alternator with the rest of the truck accessory drive since the truck accessories are placed the farthest forward. So the alternator is reused which is prob the most expensive part on the accessory drive, but will require the bracket to be spaced from the block just about 3/4" in order to work with the rest of the truck accessory drive. Next I went to bolt the bracket onto my iron block to discover that one hole on the upper driver outside hole isn't drilled and tapped. So I bolted the bracket with the single lower bolt and marked the spot to drill for the undrilled/untapped hole. After marking the mark I drilled a 1/8" pilot hole, then took a 11/32" cobalt drill bit and drilled the rest out about inch into the block. Then I threaded the hole using a M10 x 1.5 tap. After using some aluminum stock scrap I made 3/4" spacers to be sandwiched between the alternator bracket and the block. I needed 2 M10 x 1.5 bolts that are 140mm long (about 5.5") and I used Allen headed bolts due to the standard large 17mm hex headed bolts were too close to the belt for my comfort. Now I needed to address the idler pulley. Since the belt routing will have the belt going over the top of the idler instead of under it as it does in the stock F-Body setup, the smooth idler needs to be replaced with a ribbed one. The same type used on the stock upper tensioner ribbed pulley will work fine, so you'll need to buy one of those as well, I got mine for $10 at the local auto part store. Using a few washers on the backside is needed to get the correct belt alignment. A straight edge is very helpful for this. So now I needed a belt. After a few trips to the local parts store, I figured out that a 55" x 13/16" belt is ideal. I also needed to un-loom some of the alternator harness (minor) to allow the alternator pigtail/weather-connector to reach the new (lower) alternator location. After getting the length needed I re-loomed the harness with everything looks stock again. I also noticed I have a decent amount of clearence between the positive power post on the back of the alternator and the engine tower that I have read some of had issues with their S30's using the F-Body accessories. This is due to the alternator being spaced forward in turn gave an unexpected, but not undesired bonus for the conversion using the truck accessories over using the whole F-Body accessories which would place the power post alittle too close to the engine tower for my comfort. It all worked great and now my S30 is painted and a stock hood is in place. It should be noted that if you haven't converted from a stock truck intake manifold to the car type intake manifold yet you will need a car manifold, car fuel rail, and car injectors. If you have a DBW (drive by wire) throttle body (like I do) you will need a car style water pump due to the upper water neck running into the throttle body. If you have a drive by cable style throttle body, all is needed is a minor tweaking or twisting of the upper water neck for throttle body clearence. Anyway, if you have a DBW throttle body you have a few options. First is some truck water pumps (usually pre '04) use the same casting as the car water pump and allow you to drill the correct size hole in the water pump boss and pipe tap and plug the stock truck hole after the neck is removed. The second option is to buy a car water pump, have the stock pulleys removed from both the car and truck pumps by a machinist with the correct tools and skill and have the truck pulley pressed onto the car pump. The third option is what I did. I found an uber rare early Corvette (Y-Body) water pump that has the pump pulley bolted on like an older SBC/BBC. I removed the pulley and spaced it out about 3/4" (outward/forward) to align with crank pulley using spacers and longer bolts. My pump came from a '97 Y-Body that I picked up from a guy on LS1Tech.com for $40. I tried finding one at the parts stores, but every pump I found had the pressed on pulley instead of the bolt-on pulley which interchanges on the Y-Body setup. I am sure I forgot some minor details, so if you have questions, feel free to ask. I just hope some other guys here can use this as a cheaper alternative to pricey aftermarket or swapping entire factory accessory drive. Take care!!
-
I was wondering if you knew the AR of the compressor and turbine on your GT45 turbo?
-
automatic transmission cooler question
Cable replied to kenwood guy's topic in Gen III & IV Chevy V8Z Tech Board
Ditto, that is what I did, -
Hey guys, I want to remove all the factory A/C and heater equipment from under my dash (nothing works anyway) and wondered if there is anything special I should know before proceeding? I hope that I don't have to remove the dash, can anyone confirm this? Thanks!!
-
260z Frame & rollbar support (Blower application)
Cable replied to Dans toy's topic in Gen III & IV Chevy V8Z Tech Board
Just as it came from the factory. -
I just weighed my 280z (specs in sig) and it was 2700 lbs on the dot w/o me. My buddy also weighed his '73 240z at the same time and his car has similar specs (his has a 5.3) and it was right at 2620 lbs.
-
Hella vs Cibie vs Bosch vs AutoPAL H4 Housings
Cable replied to 240Z_Master's topic in Miscellaneous Tech
I bought a brand new pair of Autopal H4 E-Code housings today. Hopefully I can get the H4 Autopal housings and 6000k HID kit installed before Saturday evening (monthly Z Meeting). If I am really lucky the Z will be wearing its new gloss white paint job too. -
260z Frame & rollbar support (Blower application)
Cable replied to Dans toy's topic in Gen III & IV Chevy V8Z Tech Board
I guess it might depend if you have an early or later 260z. My last 280z had a Big Block Chevy 454 swap and it made a boat load of low end torque. I never felt the need to install a roll bar or cage due to structural concerns even when racing with drag radials. Although some might disagree, I don't believe adding door bars would add much in terms of structural support. You need to step up to a full cage w/halo in order to gain a decent amount of structural strength increase. -
I have two pics, the first is my old S30 with a 454 Big Block Chevy shoehorned in the car (BBZ) and now sold to another Hybridz member. The second is my current S30 with a LSx 6.0 swap (LSZ).
-
Nothing special to flip the fuel rail. If you have truck coils (like I do) you will have to do a slight bend on the inlet tube to clear one of the coils, but that is nothing. Leaving the Corvette regulator/filter in the back is the smart choice, its how I do all my swaps now for customers, but my Z was sort of a test platform for several things related to LSx swaps for me.
-
Me too. Sent mine about 40 days ago, so much for a 12 turnaround....
-
Another run at the top...
-
donor vehicle Vs Parts Gathering
Cable replied to kenwood guy's topic in Gen III & IV Chevy V8Z Tech Board
If money is no issue, then by all means. If you want to save your money, send your computer and harness to www.wait4meperformance.com and he'll convert everything for stand-alone operation for $360 with return shipping included. Turn around is usually a week. -
Hella vs Cibie vs Bosch vs AutoPAL H4 Housings
Cable replied to 240Z_Master's topic in Miscellaneous Tech
Figures. I had no idea... They are 35w if that makes any difference. -
Hella vs Cibie vs Bosch vs AutoPAL H4 Housings
Cable replied to 240Z_Master's topic in Miscellaneous Tech
I bought one of those eBay HID high/low kits with 6000k bulbs. Suppose to get here today, I still have to get some H4 conversion housings though. I will report back after I have everything installed. Thanks!! -
Dead link...
-
Bump...
-
donor vehicle Vs Parts Gathering
Cable replied to kenwood guy's topic in Gen III & IV Chevy V8Z Tech Board
I have never bought a complete car/truck for the LSx swaps, but if the price is right, go for it. I haven't needed to because most of my LSx swaps for customers have been 5.3's and I get those with every single item (down to the sensors, PCM, harness, starter, accessories, TAC module, DBW pedal, etc) that could be used from the donor truck without buying the whole truck for $600 out the door. -
Agreed. Although I ALWAYS have a small set of tools in my Z, regardless if it ever breaks down on the side of the road. Just like my mobile phone, I don't leave home without either.
-
The LS1 F-Body gas tanks have build in regulators. I didnt know that and I plumbed in a '02 Corvette filter/regulator in the engine bay and used the existing Datsun fuel lines for the feed and return to the tank. The weird fuel fittings are commonly called 'quick connects' and they do need a special tool, but the tool is less than $10 atbthe local AutoZone. I usually buy quick connectors that are adapters with barbed ends for use with fuel injection rubber hose. Those fittings are about $5 each at Napa.
-
When I started this Z project (my second S30) I did it with the simple goal of the car being able to daily drive this carb if I needed to. I bought the car in July 2009 and it running a month later. In April 2010 I was laid off. Last month I sold our extra car (Jeep) and motorcycle. Now my wife continues to drive our Escalade and I drive my Z. I did upgrade the brakes with parts I already had. Otherwise the car is pretty much the same when I finished the LSx swap a year ago. I get pretty decent mileage, mid to upper 20's on 50/50 mixed city and highway driving. If I had a decent stereo and functioning HVAC system I would be happy as a clam.
-
1/4" line seems small. My Z has 5/16" from the factory.... The stock pickup on your Camaro tank should have 3 nipples. Output (3/8"), return (3/8"), and vapor (5/16"). I used most of Z's original fuel line. I bought some quick connect fittings from Napa that adapt from the stock 3/8" (outlet and return) on the pickup to allow use of a 5/16" barb. I used two small lengths of 5/16" Goodyear fuel injection rubber fuel to bridge the gap between the pickup and the stock Z hard lines using 5/16" fuel injection clamps. Up front I am running a stock LS1 intake/fuel rail and flipped the fuel rail so the input is on the passenger side to avoid having to plumb everything to the drivers side.
-
I don't think we are talking about the samething. I just need the rubber with 3 studs that sits on top of the of the spring.