-
Member Statistics
33328
Total Members5167
Most Online
All Activity
- Yesterday
-
04-30-2026 ATLAS Z UPDATE: I changed up my air intake to a 4 inch pipe setup, with 45 degree bends to get around the engine obstructions, and I realized I really needed to add a Blow Off Valve (BOV) for my turbo. I went with the compact Turbosmart unit, which is a 50mm piston with a 1.5" discharge diameter. Today I got the pieces cut, but still need to do some more before taking them for welding and then more than likely go back to getting them polished out. PICS:

-
320 to the wheels is really not that much. I had 400 for a while, then 600, now back to 300, all this with no form of structural bracing. Did I ever launch on slicks on a prepped surface, no, but surprisingly I never had any issues putting the power down. If I were to pick I'd say around 500whp is the most I'd ever want to be. For 425whp, just get an LS3 and call it done.
-
Welcome! Always great to have a new member and another project. What kind of modifications are you planning?
-
Did I see you putting anti-seize on your spark plugs? YOU HEATHEN lol Looks great so far. I am impressed how low the atlas ended up sitting. Though too bad the hood still needed modification ( I am guessing it is the length versus the point where the hood slopes down faster? That's what I kept running into when I was sizing swap options. A few people doing other swaps pulled their engines into the cabin, but... I kind of want to minimize cutting. That chrome paint did a really good job.
- Last week
-

280Z Restomod Progress
dmoralesbello replied to dmoralesbello's topic in S30 Series - 240z, 260z, 280z
Hello again forum friends. It's been a good while since I've posted, basically because I've just been enjoying my amazing Zcar and only doing basic maintenance. However, I think the time has come to consider moving on and letting someone else (very lucky) enjoy this wonderful vehicle and all my work and effort. I have contacted BAT to put my 280Z up for auction. If anyone is seriously interested in the car before it goes to auction, please let me know. It would be great if a fellow forum member would be the next owner. -
Man, I was literally on this thread right now. So if that is where you get the oil pressure for the gauge, where do you get the oil pressure for the ECU? Where do you get the Oil Temperature for ECU and for gauge? I have 2 temp sensors and 2 Pressure sensors for ECU, and Gauges.
-
👀
-

Getting the right oil pan for a big HP RB swap in a 240Z is not easy!
ZT-R replied to primaz's topic in Nissan RB Forum
do you have pictures to share? i need to redo my external pickup baffled and trap door McKinney pan as im getting oil starve when hard on brakes on long straits. -
i run my remote oil pressure gauge off that port, that's directly what the oil galley is seeing.
-
Ill take a set of the doors if your selling. I have me a custom cf wide body but its very subtle. everything will be painted too.
-
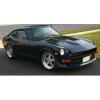
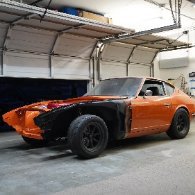
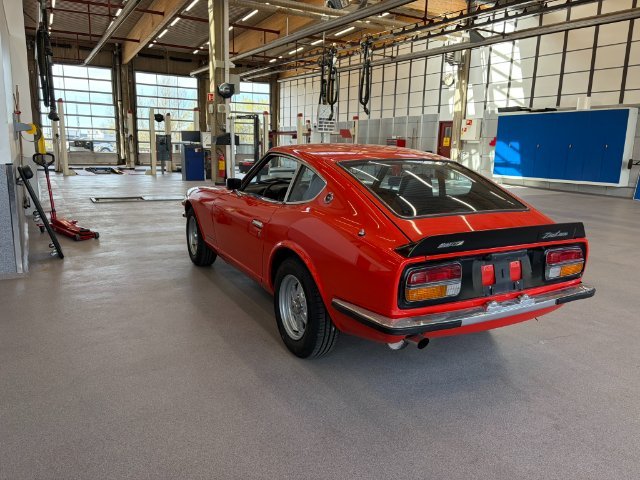
Hello fellow enthusiasts! A family man from Norway here. I got into full-size cars late in life and have been part of the vintage Porsche scene here in Oslo, Norway for around a decade. A project I recently completed is a 5-year nuts-and-bolts bare metal restomod of a 1985 Porsche 944. But now I got myself a 1973 Datsun 240Z. For a long time, I've been Japan curious. Dreaming of visiting the country. Enjoying Japanese cuisine, Studio Ghibli films, various Asian art, the Initial D anime, and following Larry Chen and other Asian car culture YouTube channels. But being in my fifties I am not identifying with huge turbos, vivid car liveries or oversized exhausts. Eventually landing on an older icon. The 240Z. I am a self-taught car restorer and mechanic. And everything I know I've learned from online web forums and old static web pages. I am establishing this thread on Hybridz as I feel a desire to give back and contribute to the continued hub of knowledge and insight in car culture in general, and to the Z-car community in particular. I want to share a full journey, that is readable as a full story. I find that the continuity is harder to do properly on Instagram, FB or similar. But I am planning on sharing updates both here and on Instagram. The car I am now the owner of was first registered in Switzerland in June 1974 and has all the features of what is described as a "Final European Spec". I do not have any written documentation on the Swiss registration. But I -do- have what looks like an original dealer sticker in the rear windshield. And the letters "SWI" written with a crayon on the glovebox mount bracket. The car has lived in the Netherlands since 2001. And now it has moved to Norway. I have little written documentation on the cars life, but the dealer told me it has been sitting for several years, before it now was put on the market. Tires were like hockey-pucks, hoses are dry, bushings are worn, shocks are shot, seatbelts are missing, and there are some rust issues. The car is now red, and the original color is orange 918. But the car is what I describe as "complete". Most the original components are there, apart from the front lip. And it has not been "wrenched to death". I am really looking forward to a long journey with this car. Here are a few images of the car when it was delivered to me. And from today's visit to have the car approved and registered into the Norwegian vehicle registry systems.
- 1 reply
-
- 1
-

-
Ditto. Seems slower to load than previously -- I've also noticed it's worse with some web browsers vs others, depending on what operating system you have. I'm only guessing here...but it may be due to the fact that our hosting site has certain updates available, but they all cost $ and we don't have the funds to pay for them. Dan's been running the forum on a shoestring budget for several years now (often paying for operating expenses out of his own pocket); and as a result, our software's not fully up to date. Anyone wishing to make a donation to help keep HBZ up and running can do so here: https://forums.hybridz.org/clients/donations/
-

Heavy Duty frame rails and connectors
toolman replied to toolman's topic in Gen III & IV Chevy V8Z Tech Board
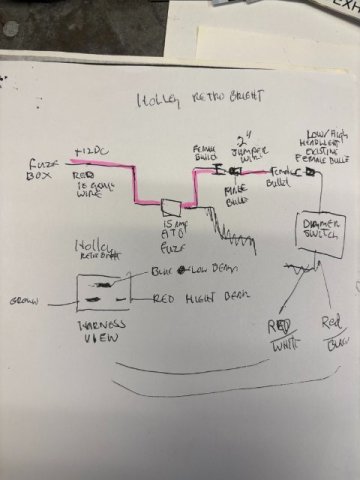
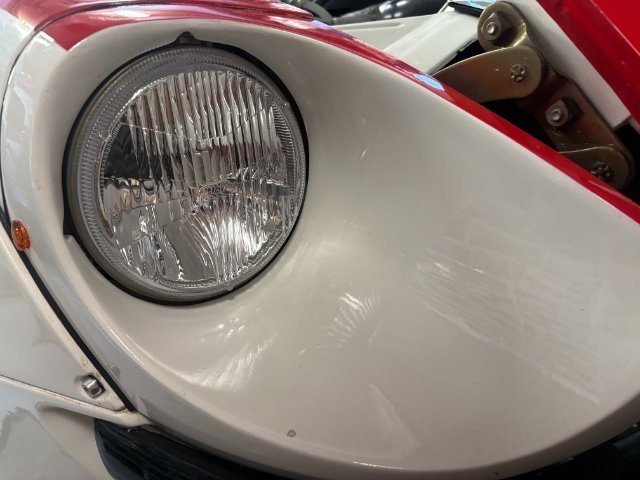
Holley Retro Bright LED Headlights Installation- I decided to improve my Night Driving by installed Holley Retro Bright LED 7" Round Headlights. Although they are expensive at about $500 for a Pair. Safety is very important and driving at night needs good lighting. These Holley LED light were tested todraw only 6 amps on High and only 4 amps on Low. Power consumption was only 25 watts. Just imagine if your alternator failed only producing low voltage while you were driving in some remote road, your headlights would still perform while regular headlights may not provide any light. The Retro Bright 7" Round Headlights match the Original Look which seals the Deal. Actual Driving at night really shows the difference -Its Wide and Band of Bright Light makes Night Driving much better. I found this posting on HybridZ-that gave detailed info on installation of Hlley Lights and used it.
-

280z 1jz track build from a pile of parts
flatout replied to flatout's topic in S30 Series - 240z, 260z, 280z
I heard back from APEX and they are making and sending me a new set of arms that is correct. Not sure what happened but mistakes happen. Not ideal for timeline since I need to roll the car out of the shop next week so I'll have MacGyver the stock arms back on with mismatched hardware to make it a roller for now. -
280z 1jz track build from a pile of parts
flatout replied to flatout's topic in S30 Series - 240z, 260z, 280z
Got all the suspension bits unboxed and layed out. Have a combination of APEX and techno toys. Choose parts based on what I liked the designs features of and the car came with most of the techno rear bits. I am currently working with APEX to find out why the mounting points on the rear control arms are 1/2" shorter than the stock ones so they aren't a bolt in deal with the techno drop brackets. I actually don't think they would work with a stock setup either so assuming there is a defect so well see what they say. I can modify them if needed but for $500 id rather not have to so well see. Machined a ridiculous set of caliper brackets. I was talking with a local motorcycle racer and he said hed had some large pieces of titanium hed donate if i wanted to make my brackets from Ti. So a little redesign and a good amount of machine time later we have these ridiculous caliper brackets for the wilwoods.
-
The tire temp data is great! That's high level race team stuff.
-

Does anyone remember a member with the username that contained "Nivlac"?
calZ replied to pparaska's topic in Non Tech Board
Looks like around 2010 he was drag racing a Z. If I had to guess just based on how forums (especially this one) used to go, he probably shared some of his videos here and got flagged for that. -

Does anyone remember a member with the username that contained "Nivlac"?
jhm replied to pparaska's topic in Non Tech Board
Hey Pete- Good to hear from you. I still enjoy your website after many years. I don't know how much significance is attached to those member ranks and titles anymore, now that the forum has matured and is well past it's heavy-growth period. You're not crazy...there used to be a user here "nivlaC". He joined Nov 2011 and last visited Sep 2012. At some point, he was flagged as a spammer; which is why his profile and posts are no longer visible to forum users. I don't know why that happened; but maybe some of the other OG members will have more insight. We've been playing with different ideas on how to re-stimulate HBZ, so please feel free to chime in if you've got suggestions. Cheers! -
 O.k., so I'm freaking ancient and don't spend any time here. I know that I'm listed as a "Newbie" but I joined on Feb 9, 2000 and have 5088 posts. I still have my 240Z, and I still pay to keep my website active AlteredZ.com I don't drive it - it's been off the road for some rewiring and to put a Holley HP ECU and Terminator TBI on it. But I watch a lot of youtube. (I haven't watched TV in 25 years). There's a channel I watch by a guy named Calvin, and he goes by "NIVLAC57" Really sharp guy that does a lot of tech. He just recently started doing YT full time. Anyway, I could have sworn he was a member long ago. I don't see "Nivlac" anywhere and no member with that name. Am I just ancient and confused? ~Pete Paraska
 -

Fast Floridian's 240Z Track Build
FastFloridian replied to FastFloridian's topic in S30 Series - 240z, 260z, 280z
-
Fast Floridian's 240Z Track Build
FastFloridian replied to FastFloridian's topic in S30 Series - 240z, 260z, 280z
No, they look really good, have a little metal in it, and have some rtv type material around all jets, not paper. -

Fast Floridian's 240Z Track Build
74_5.0L_Z replied to FastFloridian's topic in S30 Series - 240z, 260z, 280z
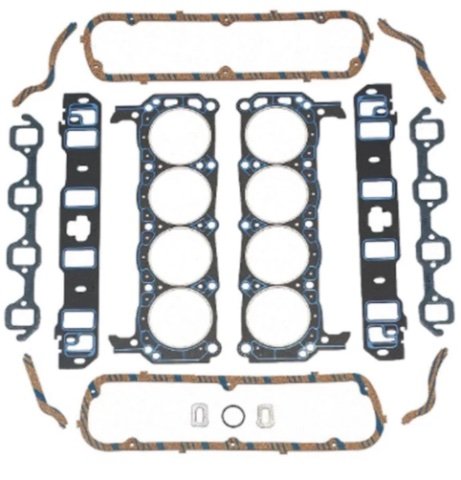
If they have the standard paper intake gaskets, throw them on the garbage and get the FelPro S3 gaskets. -
Fast Floridian's 240Z Track Build
FastFloridian replied to FastFloridian's topic in S30 Series - 240z, 260z, 280z
Good tip. I’ve got trickflow heads, so I got their gasket kit. -
Fast Floridian's 240Z Track Build
74_5.0L_Z replied to FastFloridian's topic in S30 Series - 240z, 260z, 280z
What intake gaskets do you intend to use? I like the FelPro 1262S3 or 1250S3 depending on the intake part size. The S3 version of the gaskets are much more durable than the standard Felpro gaskets. I also apply a really thin smear of Right Stuff RTV around the water jackets when I install the gaskets and lower intake. -
280z 1jz track build from a pile of parts
flatout replied to flatout's topic in S30 Series - 240z, 260z, 280z
finished stripping and cleaning the underside and inner wheel wells and sprayed with some raptor liner. The raptor liner is popular around the youtube builds and I can see why. sprayed nice, covered nice, cured up nice and looks great. Taping up the fresh paint was a pain but came out great.


-
Who's Online 1 Member, 0 Anonymous, 829 Guests (See full list)