-
Member Statistics
33135
Total Members5167
Most Online
All Activity
- Past hour
-
 Not dumb at all, though I definitely prefer rubber bushings over poly & solid in a street car even if its tracked 1-3 times/year.
 - Today
-
Small update, I've moved to a new thread on designing my own front SLA suspension. Regarding the OTS kit from AE, its nice, the tubular front cross member is perhaps the best of its kind on the market. Part of me wishes they used slot-nuts instead of their current configuration but its not a huge deal. Interesting, sorry to hear. I find their rear suspension pretty well designed, the rocker ratio is 1:1 which is not great but nothing you can't fix by making your own. Though for $4000, I feel it should've been disclosed at the very least. Their new packaging system for hardware is great, though their shipping packaging is quite bad. Their customer support offered to replace some parts that were damaged in shipping, need to follow up to check what the ETA on those RMA'd part is. Regards to you giving them feedback, not surprising. I've also tried starting a technical discussion with them that they didn't seem super interested in, understandable they're running a business and are more concerned with keeping the doors open than answering questions from a guy that already paid them lol. Definitely not my favorite flavor of business practice out there but its what it is. These guys are developing kits for a bunch of Datsun/NIssan chassis, and now the E36 chassis so I doubt they have a lot of time for guys like us.
-

72 or 73 240z Japanese / Euro Tail light wiring
brianZortiz replied to brianZortiz's topic in S30 Series - 240z, 260z, 280z
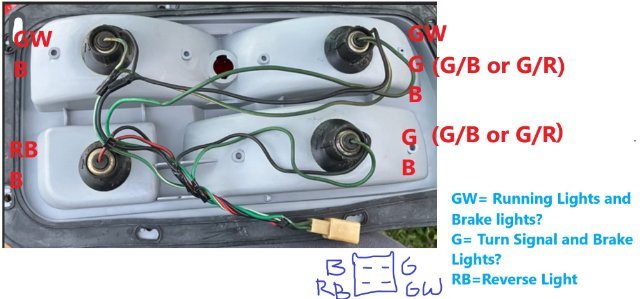
Oh, I think I figured it out. I do need a 3 wire bulb on the inner upper bulb to make the top two lights as brake lights. Per my first picture the 3rd wire on inner upper would be G which is shared with outer upper and outer lower, this is how early 240z's are. I need to snip top two G wires and run that to the brake output wire which I changed to GY on the picture which is Green / Yellow the color of brake switch output wire. Should look like this to make it work:
-
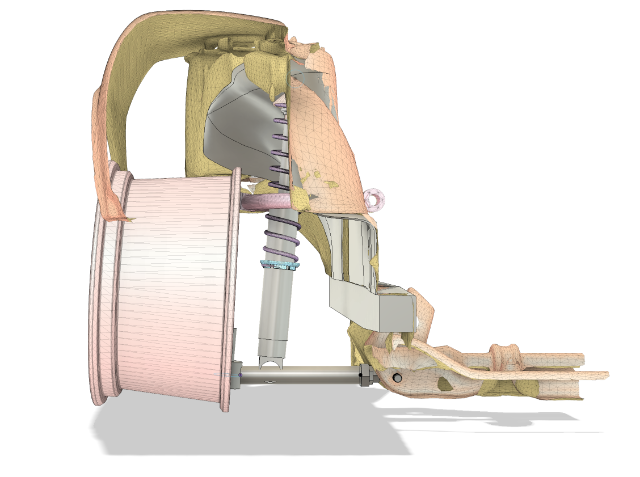
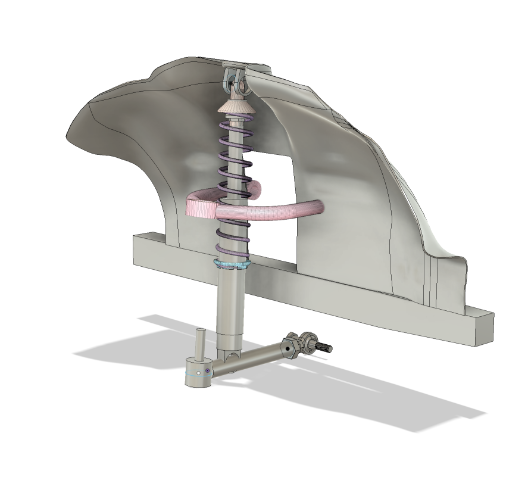
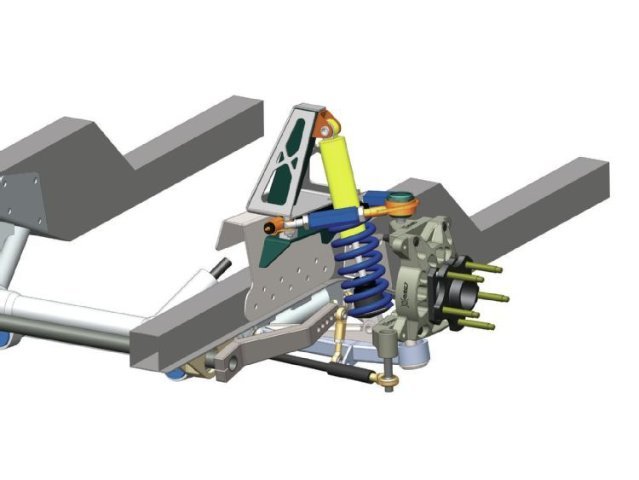
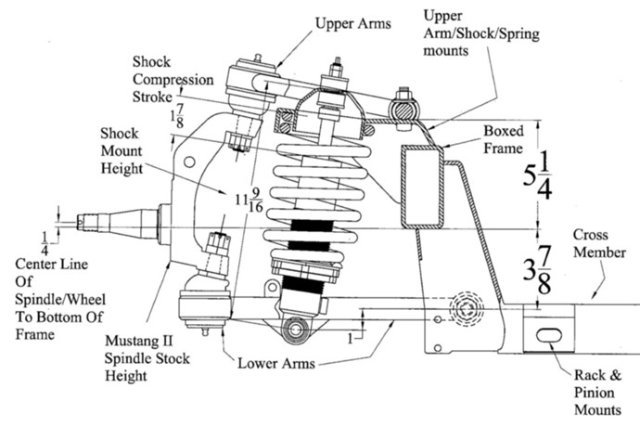
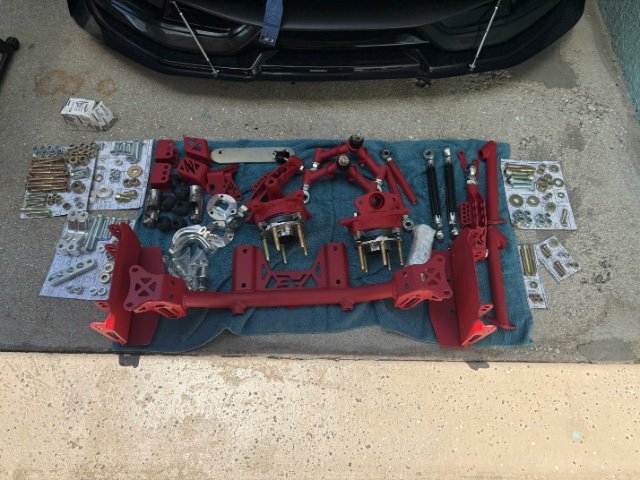
Hi HybridZ, Some of you have already seen my Apex Engineered Track Attack information/discussion thread here, I've decided after reviewing the design of the Apex Engineered front suspension kit, the best solution moving forward is to design my own. In this thread I will be documenting my progress and hopefully gaining knowledge on suspension design from you guys (or from what's left, f**k Facebook groups). To start... Why don't you just use the AE kit? It was $4000, you're just gonna waste $4000??? (Yes) Not enough shock travel, that's pretty much it. Once I received the shocks from Viking I realized immediately that 3.20" of stroke was not going to be enough and thus set out on a fool's errand to find alternative solutions. Viking shocks, from what I've found, have the most shock travel per the physical dimensions of the shock that I've seen so far. They're compact and the adjustment knob is well-designed to take the least amount of space with respect to the rest of the shock body. Very nice, but I will ultimately use either JRi's Mod series DA shocks or Penske's 7800/8300 series DA shocks as now, getting a shock long enough to reach between the strut tower and the LCA is more important. Design (pictured with 17" diameter wheel) The most prominent feature of my SLA design is the UCA pickup being located within the engine bay. The shock tower must be cut and a box structure is welded to the frame rail. This design is based on both the Maier Mod 2 design and Cortex Racing SLA kit seen here: Maier SLA Design Cortex SLA Design The reason I moved the chassis pickup for the UCA inboard was to extend the length of the control arm which should allow for a more compliant spring than the offerings from Apex. Mike Maier inferred the reason for the obscenely high rates was to keep the super short UCA from camming over and ruining the geometry. Fine for a super stiff autocross car but for a road-course car with kerbs, burms, and undulations in the track surface? Unacceptable. With this shock, I'll be looking at around 7-8" of total shock stroke travel. The remaining part of the design lies with the spindle (not shown) and the boxed-structure (also not shown). The boxed-structure was fairly straightforward to design - shout out to @Ben280 for sending me frame rail measurements while my car's been at the body shop. The boxed structure welds to the chassis frame rail located in the engine bay which the cross-shafts then mount to. The spindle is obviously not straight forward, fortunately for me there's plenty of resources on the LocostUSA forums for me to look at as well as Chassis Design and Race Car Vehicle Dynamics by Milliken and Milliken. Once the completed version 1 of the design is done, I’ll begin FEA with a safety factor of 1.15-2.00 at some lateral load to make sure everything should work without buckling. Until then, I have two separate designs, one utilizing Mustang II style cross-shaft mounting structures and one using Maier’s. The main difference being the orientation of the cross-shaft mounting bolts to the boxed-structure with the Mustang II’s bolts facing down, and Maier’s facing sideways. With the bolts facing sideways relative to the longitudinal axis of the chassis, side load is transmitted into the boxed structure through the bolts on their axial axis as opposed to their shear axis. Bolts do not like shear, however the Mustang II design is insanely popular so I suppose I could be overthinking this. Maier Cross Shaft Mounting Design Cortex/Mustang II Cross Shaft Mounting Design Methodology Starting with a 3D scan of the 240z that I re-topologized into ~10000 quads, I modeled an accurate-enough solid body of the fender well and shock tower. From there, I (roughly) modeled the Apex Engineered LCA (will probably try to use the T3 ones I currently have installed on the car as they are boxed structures), the Penske 8300 coilover at ride height, and upper control arm. You may have noticed the bottom of the shock clipping into the LCA, please ignore that, you didn't see that. In regards to swaybars, I will try to get the OEM sway bar design to work with my suspension, however due to the bottom of the shock being mounted on the LCA roughly where the swaybar links, this may be difficult to engineer. I could copy Maier’s LCA design, using a bent-tubular lower arm picture here: Moving forward, it might be easier to design my own boxed structure and try to mount a blade-style sway bar instead. Procurement While there's going to be a lot of custom laser cut metal from SendCutSend, I wanted to keep this kit as OTS as possible. I am not particularly interested in spending buku-bucks on one-off billet parts nor am I keen on dipping my feet into scaled automotive aftermarket product design & manufacturing. That being said, the spindles will likely need to be entirely custom if I can't find an alternative OTS. If I can find an upright on the market that fits my criteria I will definitely go for that, I’m trying to avoid using a Mustang 2 spindle as its shorter than I’d like it to be and completely wastes my steering knuckles and 370z spindles supplied from Apex Engineered (though steering knuckles and spindles are relatively cheap). Next Steps The complete version 1 of this design will be complete soon. Once I've finished my spindle and boxed structures the real work starts, articulating the design through all of its axes of rotation and movement will reveal conditions of binding and the dynamic geometries of the suspension. I started work on this project about a week or two after I placed my order for Apex Engineered SLA kit and have been doing it in my free time which is quite difficult to come by. God willing I shall endure.
-
Hi All, I am close to finishing up my 72 240z and doing finishing touches, the last being JDM/Euro spec amber tail lights. Since the car is not going to use many functions going to the rear of the car I decided to wire it myself just for tail lights, rear side markers, and license plate light. The issue I am running into is how to wire a 72 or 73 4 pin 2.8mm spade connector tail light sub harness? A lot of the information online seems to be for early z cars with a 4 pin 6.3mm spade that has 3 wires on each of the upper bulbs. I know that I need to run an independent wire from the brake switch output wire that goes into the turn signal switch. The wire is Green / Yellow; all good there, but not sure how to modify the tail light sub harness. A post on ClassicZ by Arne: https://www.classiczcars.com/forums/topic/32228-modify-us-240z-rear-turn-signal-wiring-jdm-style/ is helpful, but the first reply from OniZ mentions to make the lights work I need the early 240z 3 wire bulb socket on the inner upper bulb... Is that correct? Picture attached is my 72 240z sub harness and as you can see the inner upper bulb is 2 wires only. I know Green / White is running lights, but not sure if it's brake light too. Also, Green wire on the sub harness is Green / Red or Green / Black on the main harness which are the turn signals, but also not sure if they are brake lights also. Can anyone help? Do I need 3 wire upper inner bulb or can I make my current sub harness work? Looks like I need to snip G from upper right bulb so only 1 wire goes to turn signal for Amber which is bottom right, but not sure about anything else. Goal is to have running lights and brake lights for 2 upper bulbs and just turn signal light on bottom right.
- Yesterday
-
riva03 joined the community
-
Hello @Austenp405! Really impressive work there. Do you sell the files?
-

Fast Floridian's 240Z Track Build
FastFloridian replied to FastFloridian's topic in S30 Series - 240z, 260z, 280z
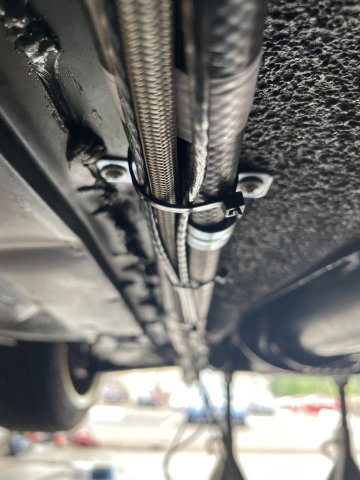
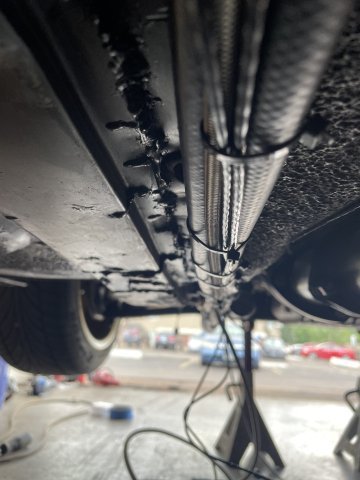
Jam nut for toe arm came in, dumb that it’s the only hardware that doesn’t come with the kit. New brake lines came in too. I might take this Friday off to finish up the suspension, and hopefully start on brakes.
-

Heavy Duty frame rails and connectors
toolman replied to toolman's topic in Gen III & IV Chevy V8Z Tech Board
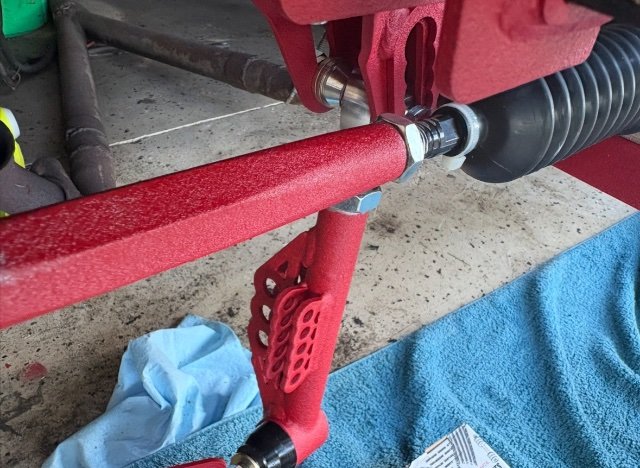
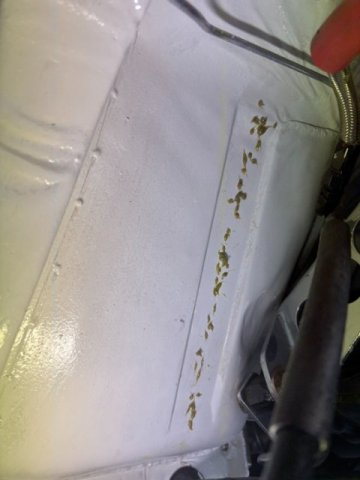
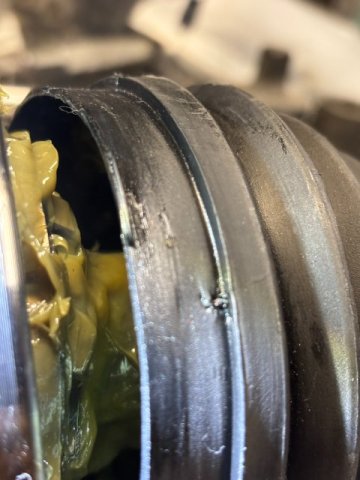
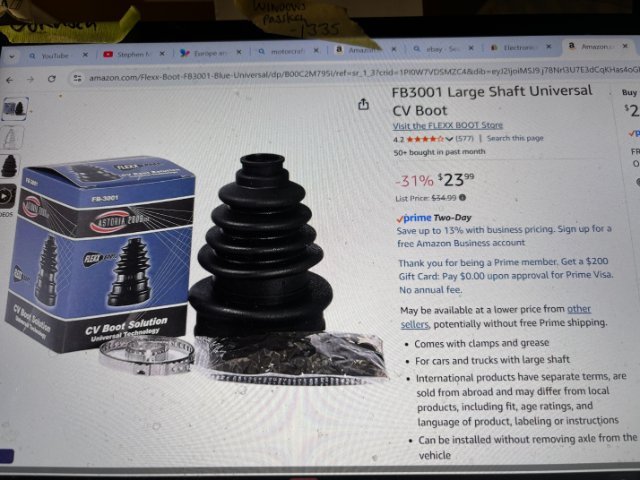
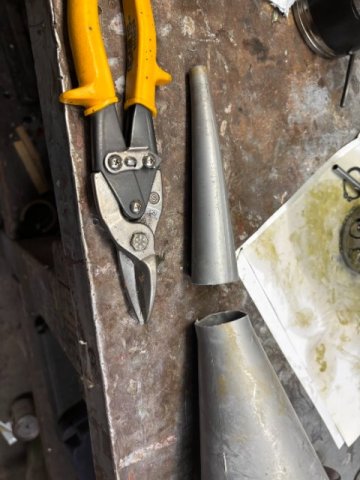
Road Test and -Comments- The Firsr Road Test after the 8.8 Conversion went Fine. Normally, the car under under hard acceleration, a Shift into Secong Gear would cause the Right Side to break loose and the Rear End would start to come around. So I would have to back off the throttle or risk a Spin Out. With Torsen Gear, the torque was applied smoothly and evenly. The car handles well and controllable. However, when I returned to my garage and check underside of the car, I noticed a trail of grease above the Left Rear CV Axle. This grease trail was directly over the Left Inner CV Joint. So I jacked up the rear of the car, Removed the Left Inner CV Axle. After inspecting the CV Axle , I found a Small Tear in the CV Booot. The Hole was under the CV Boot Clamp so I figured the person who assembled the CV Axle must have cut it The bigger problem was finding a replacement CV Boot. I tried my local Ford Dealer, NAPA, OReilys, Auto Zone, Rock Auto and even Ebay. Nobody had it. Then, I remembered those Universal CV Axle Boots that allowed the mechanic to replace the Damaged CV Boots without completely removing the CV Axle. It saved the mechanic alot of Labor Hours. Those boots were pretty universal. An inventory of 4 to 5 these Universal Boots would fit many Front Wheel Drive Cars and even ATV. Even Snap On sold these Universal CV Axle Boots. Afrer Removing the Rubber Boot by taking the Boot Clamps off, You just remove the Large Snap Ring. Then remove the CV Joint. Once the CV Joint was removed, The Universal Boot was installed by stretching the boot over the axle. I just cut the bottom section of a oil funnel. With a little muscle, pull the Boot over the axle using the funnel to make it easier. The messy part was put the CV Axel Grease into the new boot. Finally , install both CV Clamps. Then, take the car for another test to check for more leakage.
-
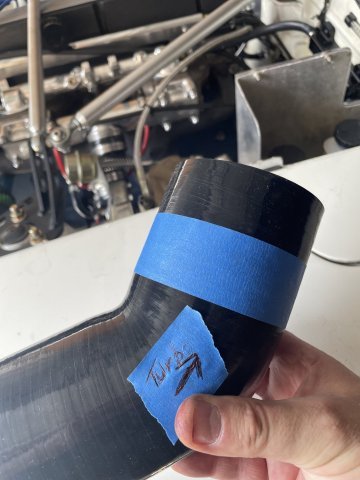
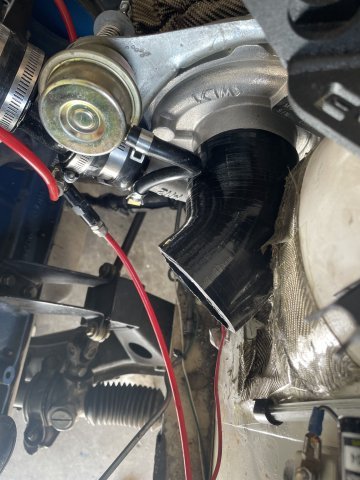
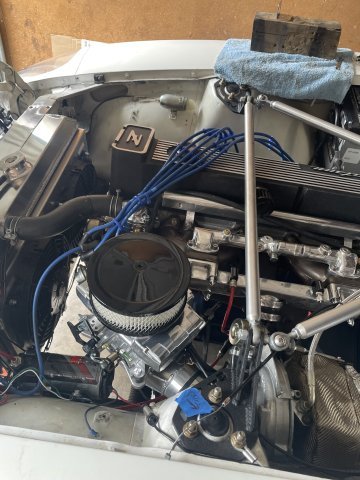
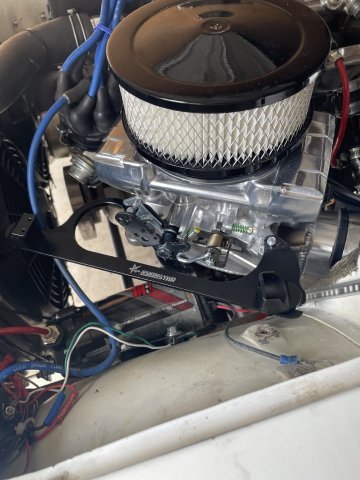
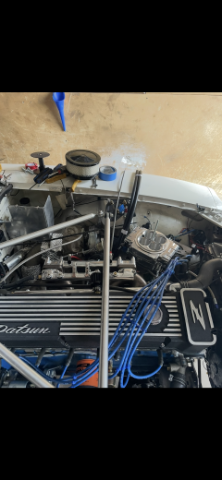
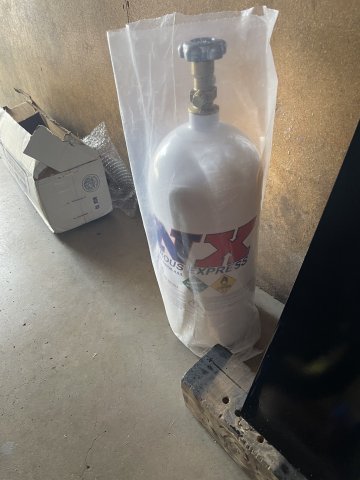
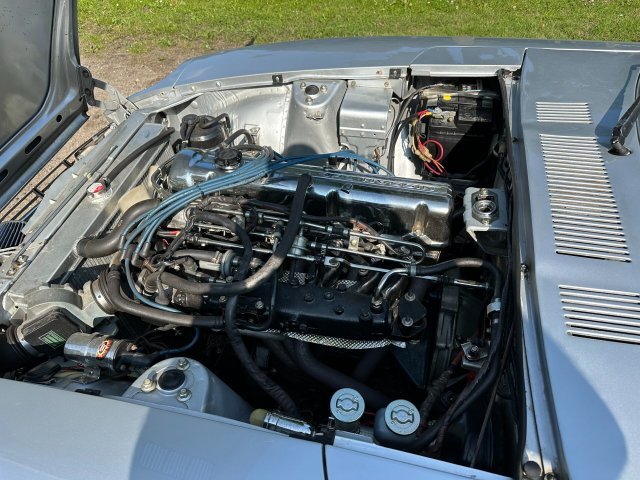
 Well, thanks! I appreciate it. it's a build in progress, from SU's on a stroker, to a Crown turbo kit in pieces..... that I customized the majority of for a DIY setup using a motorcycle Mikuni HSR 45 with a flat slide, to now EFI. I am just improving the system I have had, 1 step at a time. The Nitrous is just for looks. If I were to use Nitrous with the turbo, I am not sure the engine would survive......its fully forged, but throwing 2 power adders at it at the same time?.........Eh
 - Last week
-
 Just curious, what made you go with a draw through setup instead of port injection? That saying I love the clean installation!
 -
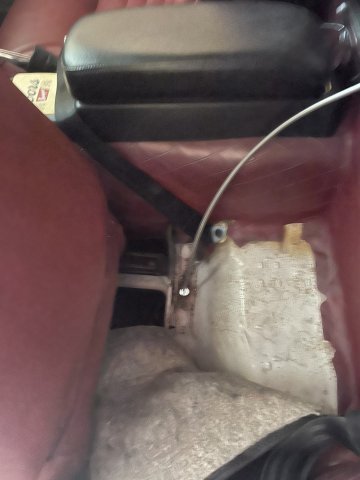
Can anyone provide copies of the build sheets for an Alpha 1 GTO kit? I bought mine in 1992 as installed on a '78 by Automotive Concepts in NC. For some reason the cowl cover was filled in to the surround so it is not removable and access to the cowl is limited to a slot from the engine compartment. Now I have water leaks to the interior and need to figure out the intended drain routing and/or alternatives. Would like to make the cover removable again, but don't know why it was done this way originally. Also, I installed a SBC over a number of years (I am a retired engineer, do my own work and had to replace floor pans, redo wiring, clean up the engine compartment, etc., etc., etc.). Now I need to recalibrate the tach with limited access behind and would like to know how the kit dash was put together and installed. So, build sheets would be very helpful for these and other "opportunities" to come, plus to add to my massive files. I have worked through many issues on my own and can provide suggestions and pictures to those interested. Thank you.
-
Fast Floridian's 240Z Track Build
FastFloridian replied to FastFloridian's topic in S30 Series - 240z, 260z, 280z
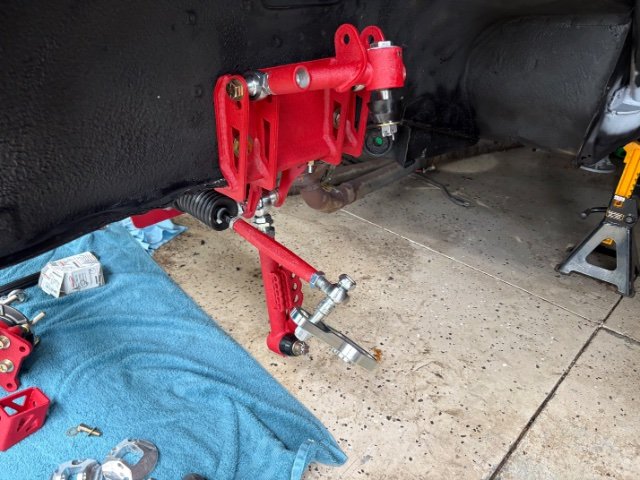
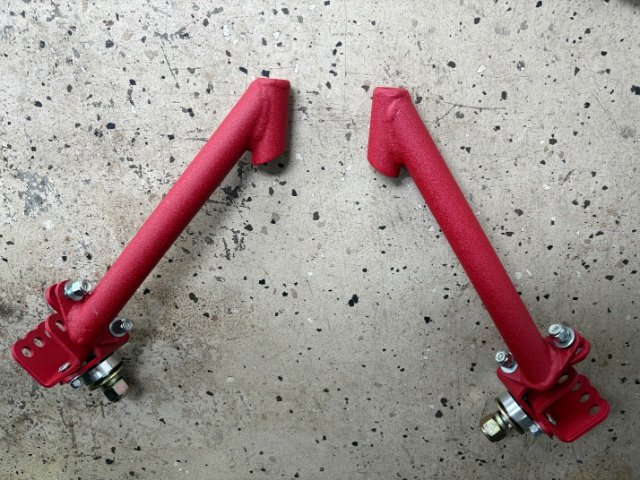
Got a few more things on today. This kit has tons of adjustability, just making some initial guesses on caster, bumpsteer, etc. a little bit of a puzzle with the hardware, some things you only needed if keeping stock subframe or other stock parts. I hope to have the rest installed next weekend.
-
 KingLuisZ joined the community
 -
My Z car log....small jobs done and fun things
A to Z replied to A to Z's topic in S30 Series - 240z, 260z, 280z
Day 1 of installation. almost a 12 hour day and made some good headway. see below pics. click on pic. -
Day 1 of installation. almost 12 hour day and got a lot knocked out. Pics below:
-
Fast Floridian's 240Z Track Build
FastFloridian replied to FastFloridian's topic in S30 Series - 240z, 260z, 280z
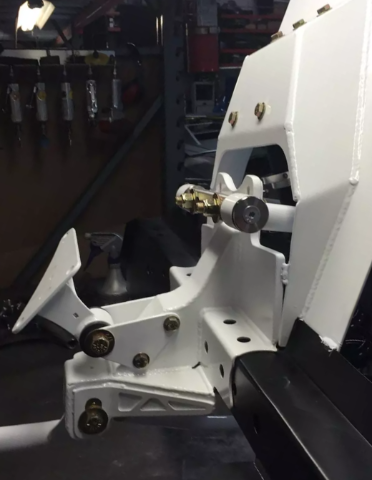
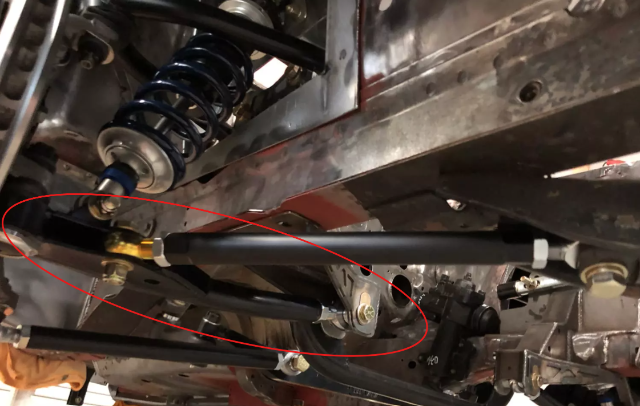
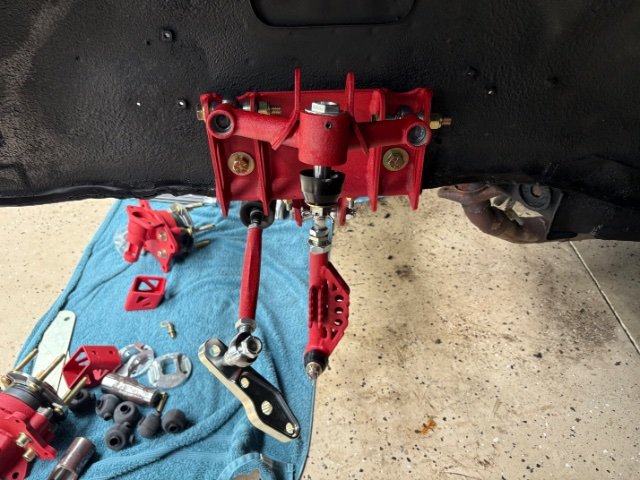
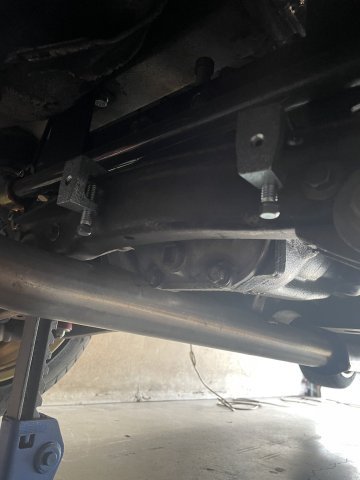
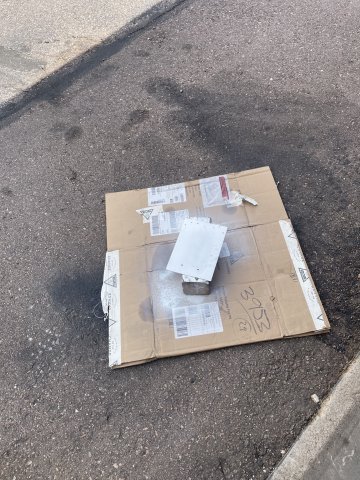
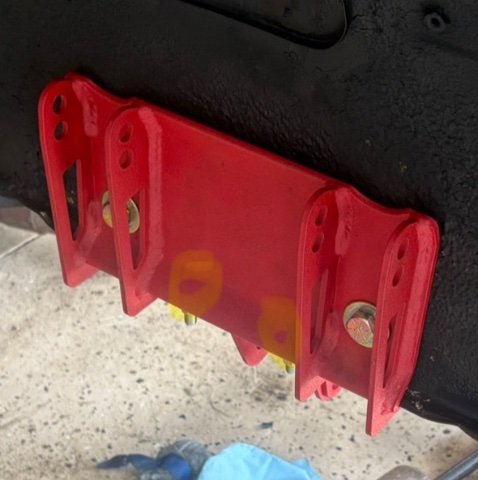
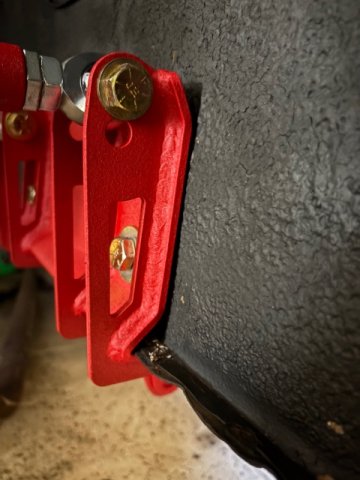
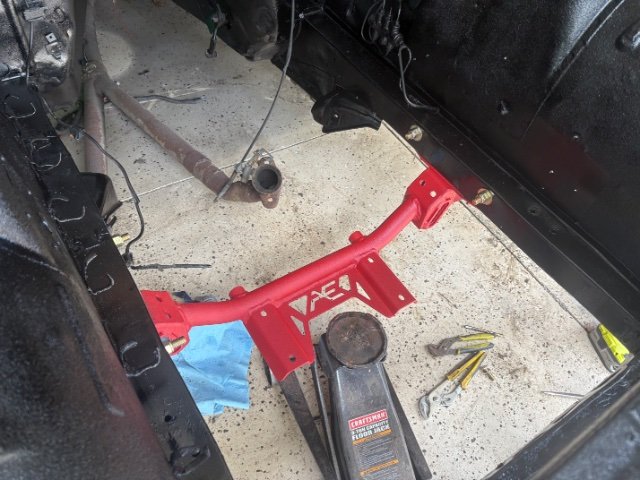
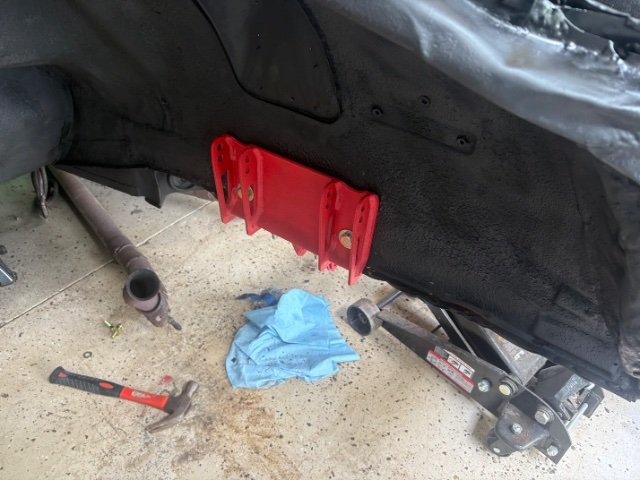
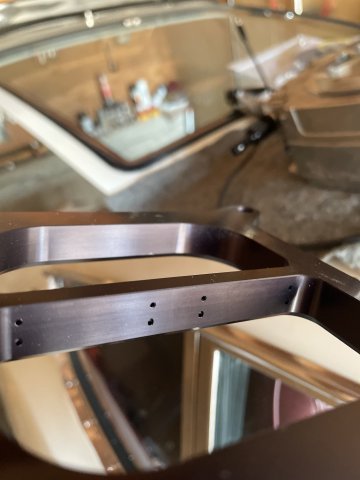
Here’s a few more pics of that plate with the impossible carriage bolts, I circled where they are. They definitely could have designed that better.
-
Fast Floridian's 240Z Track Build
FastFloridian replied to FastFloridian's topic in S30 Series - 240z, 260z, 280z
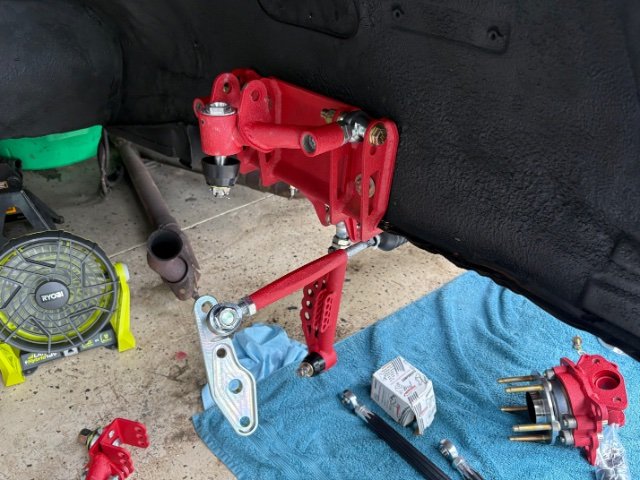
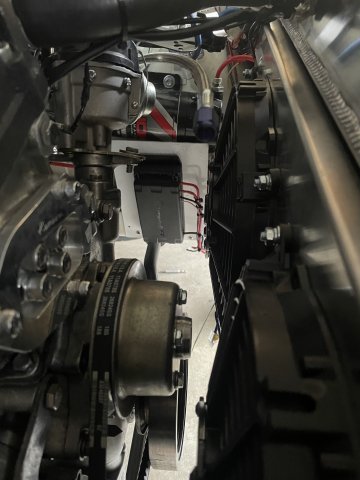
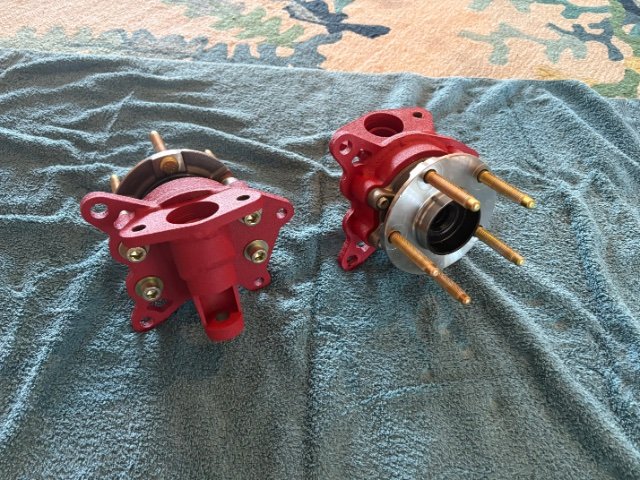
Heat advisory today, and I believe it, damn it’s hot. Started off replacing studs with APR extended studs then attaching 370Z wheel bearings to the custom spindle, did all that in the AC. Then to the outside, unboxed all the front suspension and got subframe, new plate for control arms and upper control arms up. Stupid plate was near impossible to install. It’s perfectly shaped to frame, bolt holes don’t align when carriage bolts are up, and plate doesn’t align and fit on when carriage bolts are down. Took forever halfway adjusting it, having my dad tap carriage bolts from top while I’m holding and aligning from bottom. Nightmare, but finally got it on. Hopefully the rest will go smoother. Did I mention I’m exhausted
-
just finished +6000km euro trip, whew it was hot down there. Would have been sweaty in datsun. found this type of momo steering wheels on sale in germany but they didnt ship to finland. ordered leather and suede versions to my friend in berlin and pick them up later.
-
My Z car log....small jobs done and fun things
A to Z replied to A to Z's topic in S30 Series - 240z, 260z, 280z
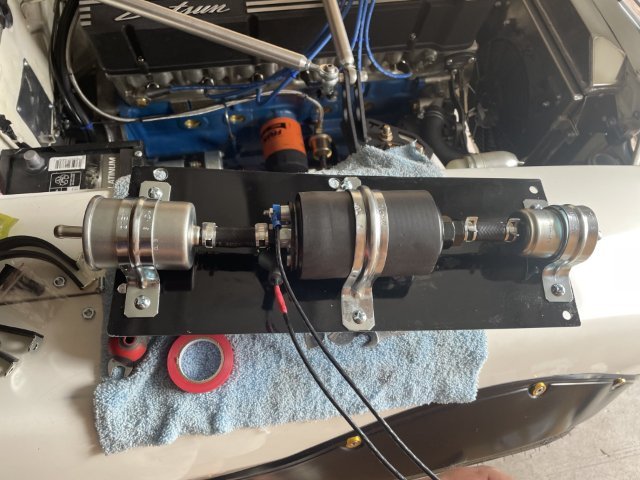
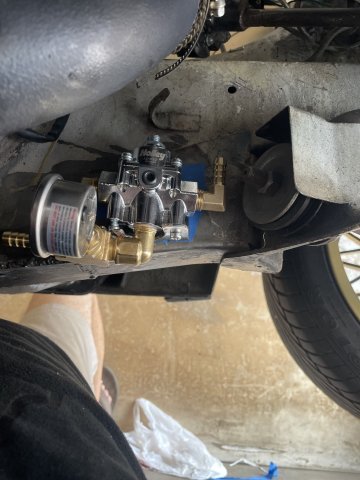
08-15-2025. Again, more parts arriving and I got a piece of 16 ga. steel painted up and then assembled my fuel pump and filters and laid it out and marked for drilling.
-
1977 280z driving project from the Netherlands
Mitchel0407 replied to Mitchel0407's topic in S30 Series - 240z, 260z, 280z
Came with four almost brand new tires and the original wheels on also pretty good tires. The original wheels good use a repaint tho. -
1977 280z driving project from the Netherlands
FastFloridian replied to Mitchel0407's topic in S30 Series - 240z, 260z, 280z
Beautiful Z, it’s in great shape for an almost 50 year old car. I like those wheels too. -
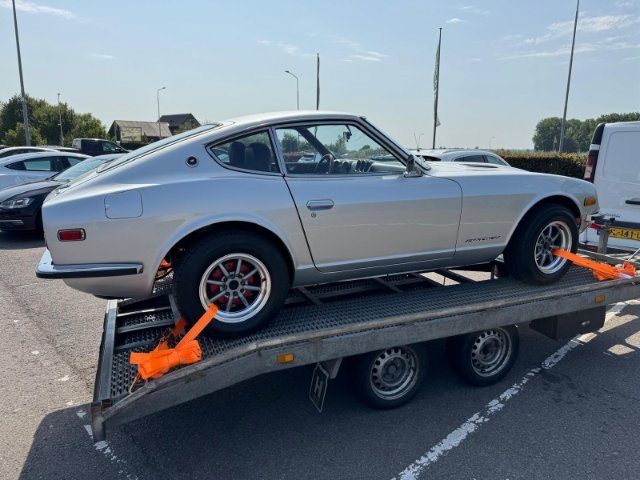
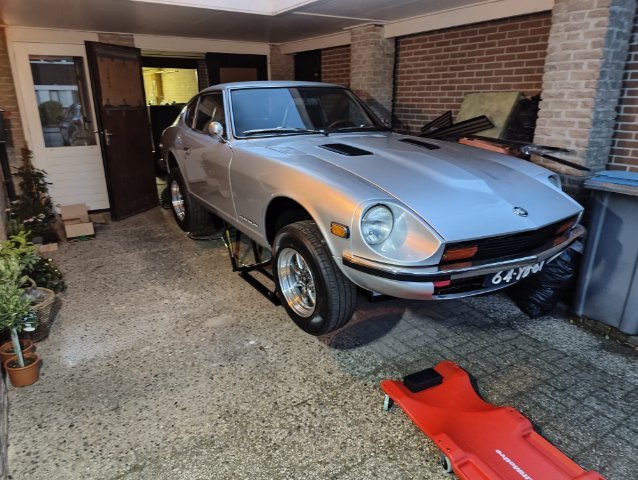
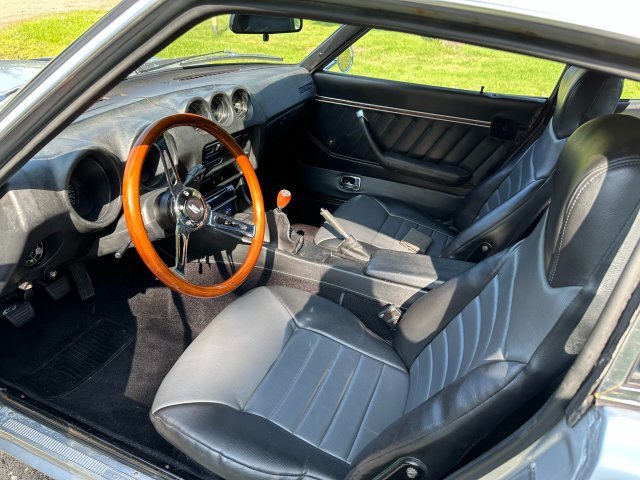
Hello everyone and welcome to my 1977 280z project! I will be using this thread to document my journey with this car and all the little thing that will be done to it to ultimately restore and modify it to be my dream car. I bought the car last week at auction for the decent price of €20.500,- kind of on a whim as this has been my dream car ever since I first learned of there existence (thanks Wangan Midnight and the Devil Z, I know its cliché). Yes €20k is a lot of money but a mid-condition one sells for over €32k here in Europe nowadays. (You can see which side I tied up and which side my dad tied up 😂) What drew me to this car was the paint (absolutely not perfect and needs a repaint at some point but looks good enough for now), the goodies like new wheels and tires, new wooden steering wheel, factory 5 speed gearbox, R200 diff and the claim that the engine was rebuild 10 years ago. Although when picking up the car it turned out there was no documentation what so ever. The car runs and drives and is in fairly decent condition but currently has no valid inspection (called APK in the Netherlands) as the previous owner stats it’s because of the car running rich. Of course it has a cracked dashboard, some small surface rust forming and is missing bolts all over the car but these are all thing that can be fixed over time. For now my main goal is the fix some little stuff and get her on the road so I can start to enjoy the car. So naturally I placed the car on my Quick Jack lift and ordered a bunch of parts from Z-Services EU in France. There are a few thing I like to address before taking it in for inspection. The hood doesn’t open as the cable brackets are missing, the door hinges need rebuilding as the doors won’t close properly, some general maintenance and fixing some sweating oil seals around the car.
-
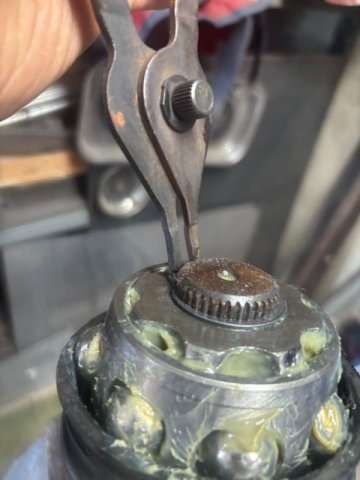
Actually, it appears you can still buy kits! https://www.dkhardware.com/asp-a-16-105-auto-keying-kit-product-4838272.html?srsltid=AfmBOopXhi66Ub5objUsVLlPIOtGXJCK2Tf8aZSSusaSLkTvPvIAvVgg https://www.locksco.com/buy/product/New-keying-kit-for-Datsun/CLENC8ae41abfed476c50acd2d7916a7fb627 If neither of those are in stock or don't ship, Star Road sells a kit with blank tumblers and a file. https://jdm-car-parts.com/products/key-cylinder-re-key-kit-for-datsun-240z-260z-280z-make-matching-key-on-your-own
-
Original locks can be rekeyed, but I know at least in the US, there are very few locksmiths that still stock the tumblers. If you're lucky you could maybe find an old school locksmith, or if you're very lucky you could find an old kit. If not, you can always file your own tumblers out of some brass sheet. Here's a write-up on the process of rekeying Datsun locks. https://ratsun.net/topic/47412-how-to-dissasemble-datsun-510-ignition-switch-and-rekey/
-
My Z car log....small jobs done and fun things
A to Z replied to A to Z's topic in S30 Series - 240z, 260z, 280z
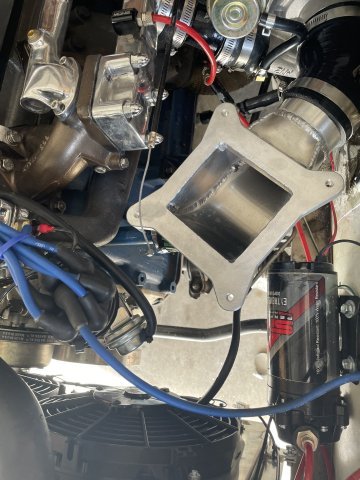
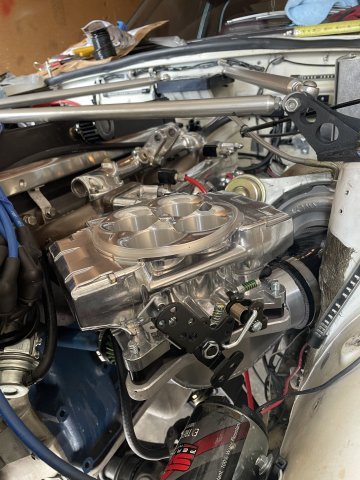
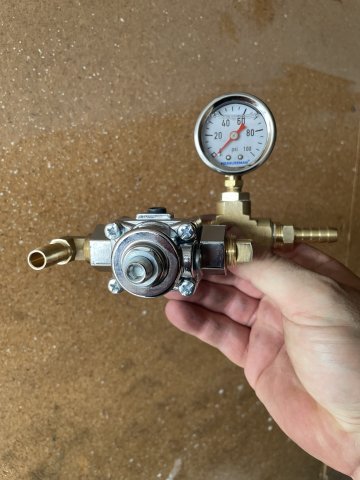
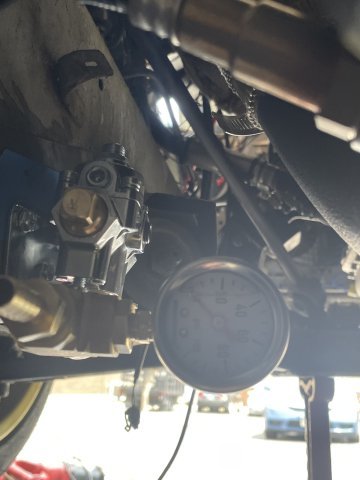
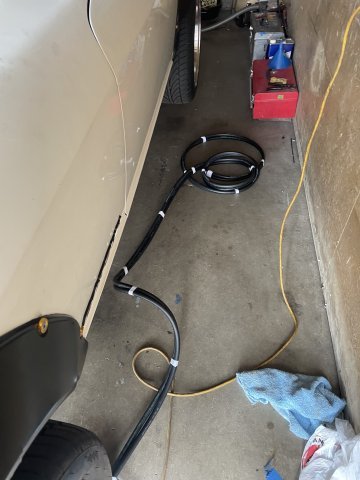
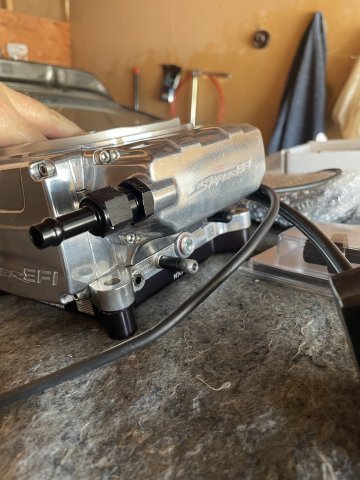
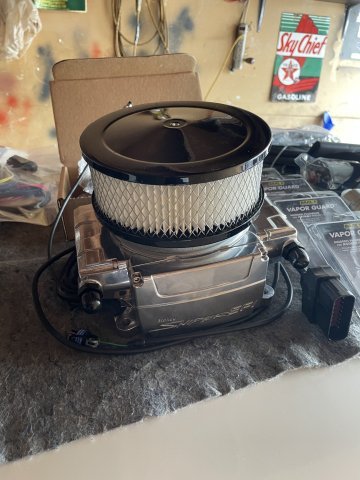
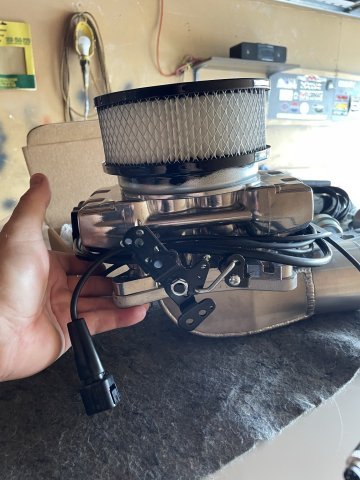
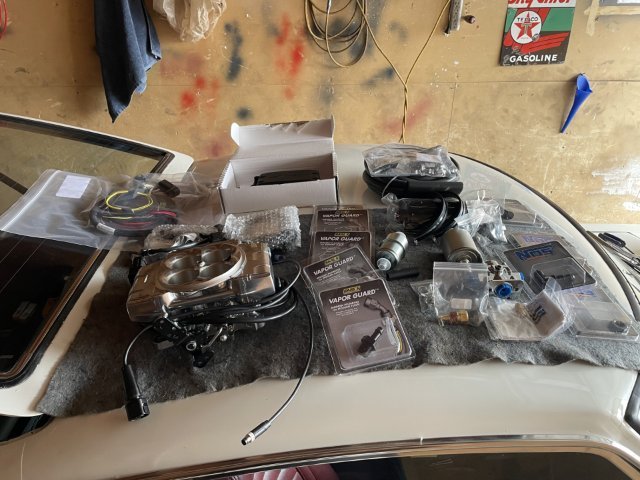
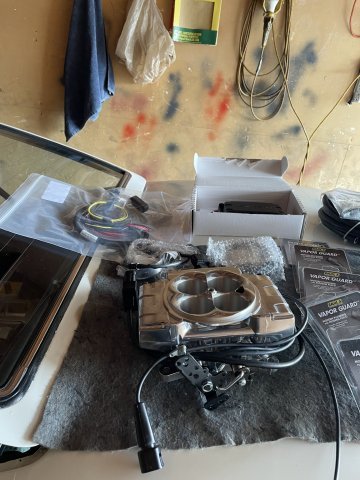
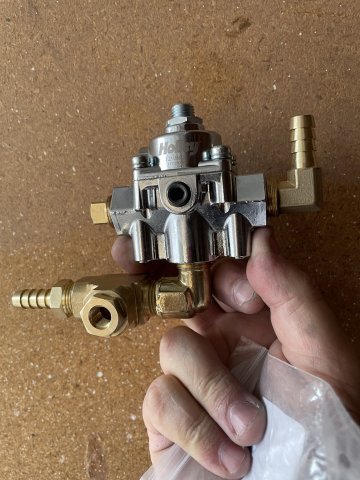
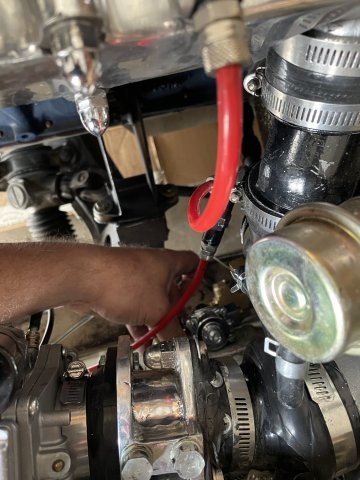
More parts came in today. Sniper 2 arrived, laid it all out, took some pics, and went ahead and used some thread sealant and put the pressure regulator together, and tried to take a pic of where it will be mounted. Psi gauge still in the mail. It will be "fun" making room for this HUGE sniper. There is a "hole" there, just have to get a couple cuts just right so everything fits. Took a few pics, first one is the "Master Kit" which is the fuel system, and it came with some NOS fittings.......then the entire deal and held it up on top of the intake and air cleaner....looks like I will be getting a thinner air filter to go in it, to clear the hood.
-
Cool but expensive. The chronograph is $3k USD.


-
Who's Online 3 Members, 0 Anonymous, 345 Guests (See full list)