-
Member Statistics
33303
Total Members5167
Most Online
All Activity
- Past hour
-

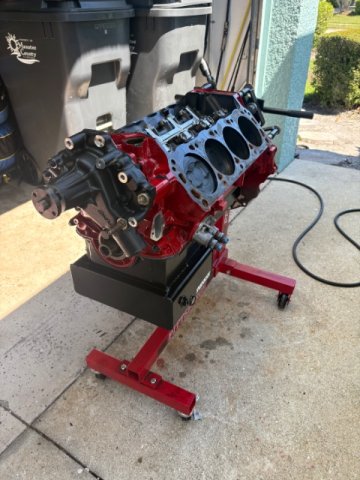
1977 280z driving project from the Netherlands
Mitchel0407 replied to Mitchel0407's topic in S30 Series - 240z, 260z, 280z
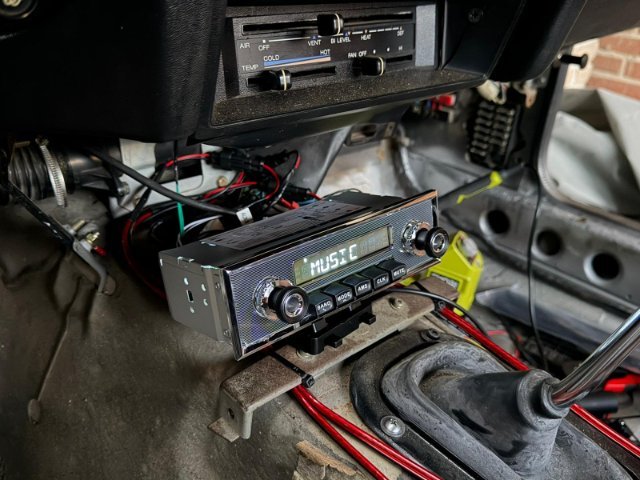
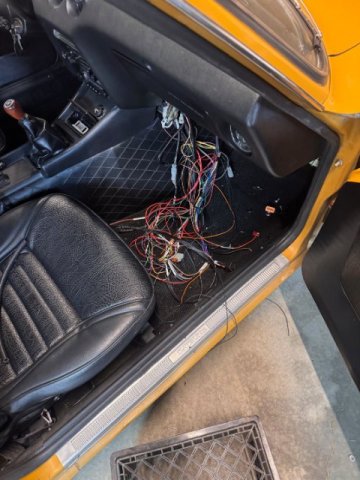
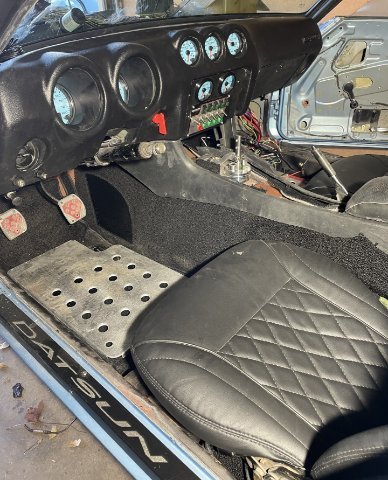
A bit more time has past and a bit more work has been done. I have been trying to complete the body work and paint on the doors but I shamefully have to admit that exterior bodywork is not my strong suit. I did get an appointment at the body shop for next week to replace the frame rails and install the Apex front fender braces and asked them to repaint the doors and wiper cowl as well. I guess you win some and you lose some, and boy I lost this one (please don’t judge to hard). I moved on to some other small tasks and replaced the radio antenna for an aftermarket powered one. I did have to solder on a new connector as I don’t have the same connectors and plugs as the factory harness uses but I made sure that any changes are reversible if necessary in the future. I also ran new speaker wires to the aftermarket JBL speakers that came with the car as the existing wires where all corroded from the inside. Here again I used new aftermarket connectors on both sides so the speakers can be easily disconnected or switched from audio channel. The body shop would like the car to stay somewhat drivable under it’s own power so they can easily load her on the trailer and move her around the shop. So I threw on the trickle charger so the battery will be full and see if she will start after a couple of months of sitting still. After a bit of cranking she came to live. After letting her warm up a bit I checked the AFR gauge and to my surprise it was sitting at 14.5 idle! With a bit of gas the AFR rose to 12.3 under power and then settled back down to 14.5 at idle. Did the 280 just fix itself over winter? As the car will be off to the body shop soon I don’t want to just sit around and do nothing until the car is back as I would really like to be able to drive the car somewhere begin May. So I decided to look into the possibility of removing the dashboard while still being able to drive the car. After studying the electrical schematics for a bit I really didn’t see a reason why this shouldn’t be possible so as with anything I just tried it. Worst case scenario I have to put the dashboard back in. Turns out that the dashboard really doesn’t have anything to do with the 280z EFI system. If you disconnect the three big connectors in the passenger footwell and then take the dash out the car starts just fine. So now I have the hilarious combo of a stripped out but still drivable 280z. The car does feel really sad and empty now but soon she will be stronger then ever with some nice suspension upgrades, a new radio and a freshly restored dash and interior panels!
-

Can the L28E start and run without a dashboard?
flatout replied to Mitchel0407's topic in Nissan L6 Forum
I was hesitant to respond as i've never had a "stock" Z but this makes sense. Some newer cars need the cluster to have the alternator charge but glad it worked out on the Z. - Today
-
Can the L28E start and run without a dashboard?
Mitchel0407 replied to Mitchel0407's topic in Nissan L6 Forum
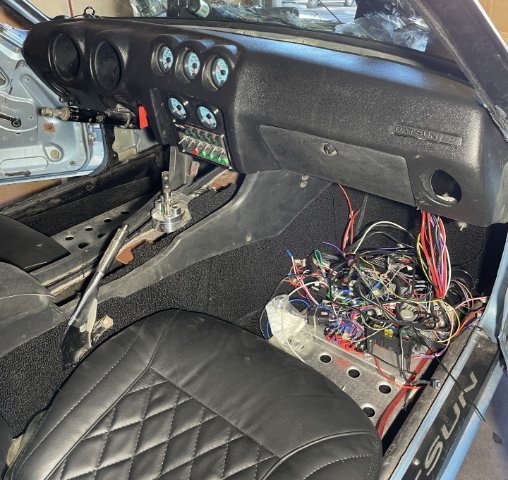
Yesterday after work I decided to just try and remove the dashboard and see what happens. Worst case scenario I have to put the dashboard back in place with a few bolts till she’s back from the body shop. But fortunately I didn’t have to! From what I could understand from the wiring schematics and pictures online the dash shouldn’t have any components or connections preventing the stock EFI from starting and running the engine. The dash just receives signals from the sensors but doesn’t send them. The only wiring connected to the dashboard where three connectors connected to the white panel in the passenger footwell. I disconnected these took out the dashboard and tried to start the engine. She had some trouble as the engine was cold and hasn’t started in a few weeks but after a few seconds she came to live and ran perfectly.
- Yesterday
-
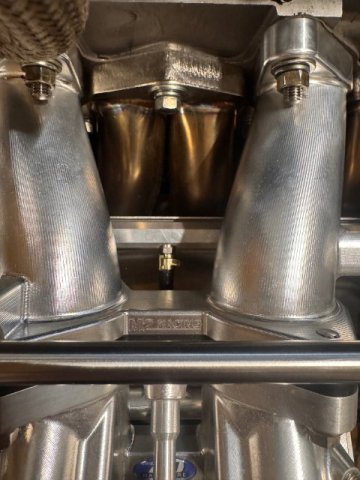
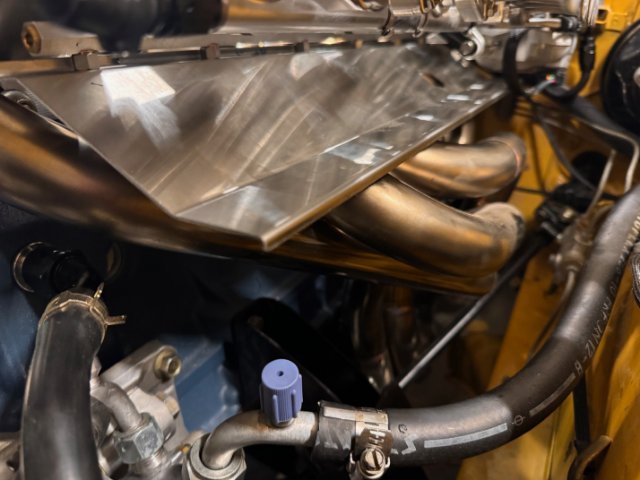
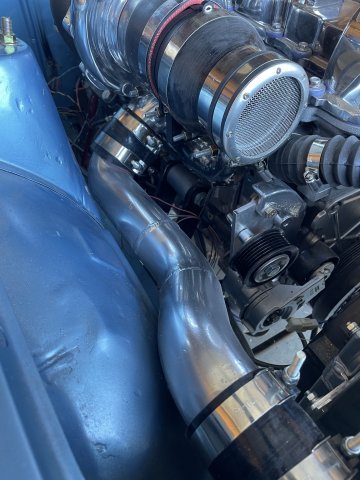
Finally found some time and finished up the engine bay for my new ITB setup! Next is finalizing my rat nest or wires. Swapping ecus and adding a few circuits made a mess. I’m happy with how it’s turning out.
-
As the title implies I want to find out if a stock 280z with the L28E (fuel injected) can start and run without the dashboard. My 1977 280z will be dropped of at the body shop next week for new Apex Engineered frame rails and front fender braces. The body shop would like to have the car running so it’s easier to move around the shop. In the meantime I would like to restore my dashboard and replaced a few tings like the bulbs and the speedometer. But for that I need to know if I can remove the dashboard and still be able to start the car. Does anybody know if the 280z can be started without a dashboard?
- Last week
-
You might find more info in his build thread.
-
I was thinking of putting one in my Truck, I didn't realize it would also fit in the Datsun... Might be nice having two vehicles with the same engine. Do you have any thoughts on what throttlebody you will use? or are you changing to electronic?
-
Everything is verified and accurate and I'm running slighty rich actually. I'm just putting this info out there to help others. So many people scratching their heads replacing head gaskets all the time, this is why. Meanwhile my engine is running 14PSI with stock head gasket, no deck work, no head studs, everything stock with no issues.
-
 NissanFairladyZ changed their profile photo
 -

A 2026 SEMA SHOW 260Z Build all the way from Great Britain
toolman replied to toolman's topic in Body Kits & Paint
Part 9-Middle Connection Frame Rails are fabricated and installed. In this this video, the Frame Rails connecting the Front and Rear Frame is being constructed and installed. It is pretty heave duty but besides acting as a regular Body Frame, it must also support those Gull Wing Doors. As the Roof will have be cut out for the doors too, extra support must be provided for door operation and replace the roof structure. I imagine the roll cage have a strong Center Roll Bar Section to accomplish this task. The Doors will be a major problem with sealing and allowing adjustment of the Gull Wing Doors; -
DFW or TX area
-
Looking at your pictures make sure that the oil pickup is parallel to the oil pan bottom. With it angled like that its going to be a ways away from the bottom of the pan.
-
Im using the stock maxima oil pan. The diesel maxima pan should work also. It actually has more volume i believe and has a place to drain your turbo into also!!!
-
If your extending your oil pickup you can not drill the front dipstick tube hole. it goes straight through the oil galley. I was able to do it as i plugged mine first. You will have to make a dip stick tube holder in your oil pan. I drilled my block as Im way better at machining than i am at welding. What are you working on that you are front sump?
-
Something is not right if your getting knock out of boost. Have you verified timing with a timing light and not just gone off what the computer says it is? or your running way lean.
-
I believe the offset is zero.
- Earlier
-
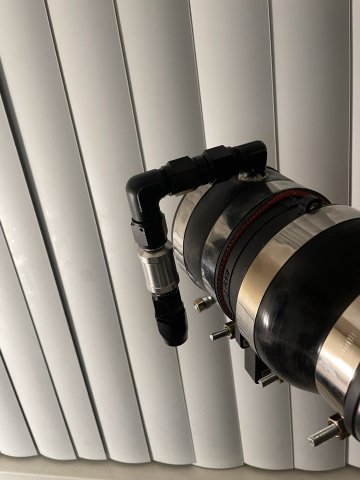
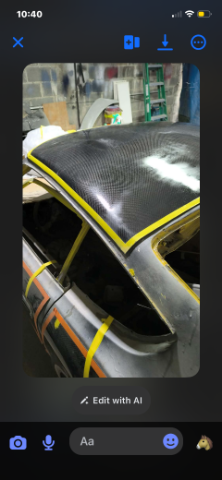
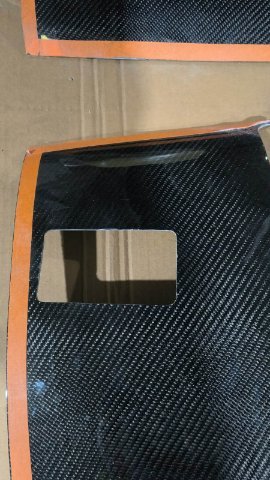
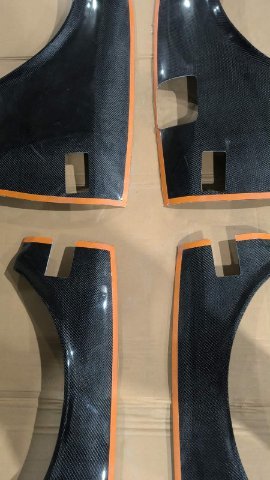
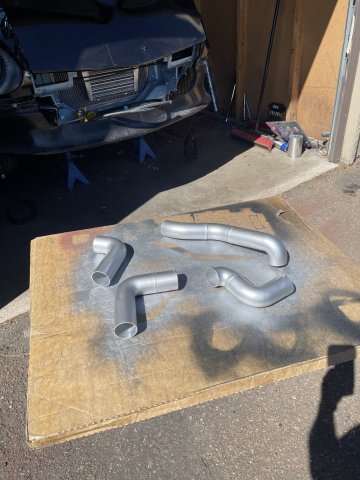
03-25-2026 ATLAS Z UPDATE: I got some of the fittings in I need for my crankcase pressure to catch can to intake setup. Also tall of my carbon fiber panels have been cut, final polishing on roof section then ready to ship to me and bond them on! Then make the borders shiny!
-
Damian_GTX joined the community
-

Fast Floridian's 240Z Track Build
FastFloridian replied to FastFloridian's topic in S30 Series - 240z, 260z, 280z
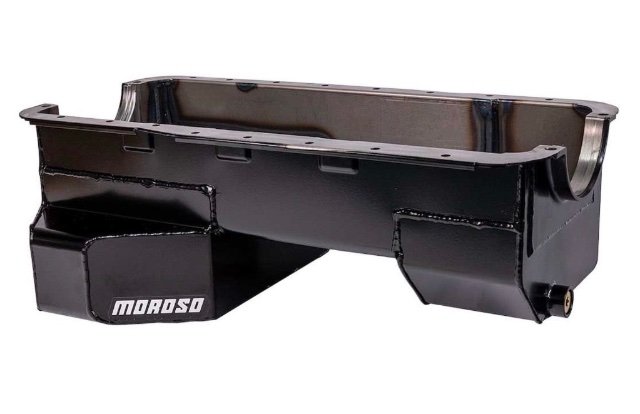
You caught my screw up. Unfortunately that oil pan doesn’t work, gonna have to replace it 😤. I ordered, basically the same thing, but a rear sump. Hopefully I’ll get it on this weekend. I went with a moroso baffled oil pan. I should be able to make this one clear the subframe.
-

Fast Floridian's 240Z Track Build
74_5.0L_Z replied to FastFloridian's topic in S30 Series - 240z, 260z, 280z
What oil pan are you using? You'll have to set the motor back really far to get a front sump pan behind the front crossmember. I'm using an Aviaid Mangusta pan on mine and I needed a custom crossmember to get the front sump to clear. -
A 2026 SEMA SHOW 260Z Build all the way from Great Britain
toolman replied to toolman's topic in Body Kits & Paint
PART 9- ROLL BAR WELDED IN AND FABRICATING SQUARE TUBING INTERMEDIATE FRAME Thing are really moving along now. The Roll BAR is welded in and a frame connecting the existing front and rear frame rails is being fabricated. Excellent metal fabrication is demonstrated. i can for see that the original Transmission Tunnel will have to be removed to provide clearance for the Mercedes transmission. e Firewall probably have to be widen also. -
My efforts to get this other Z back running have expanded quite a bit beyond the rebuild of the 3.0 stroker motor. At the moment, I am working on repairing some rust in the floor panels. I have been watching a number of "Make It Kustom" videos on Youtube by Carl Fisher. In one of them, he creates some forms out of 3/8" plate to create a "hammer formed" part. Additionally, he uses a hydraulic press to "stamp" a recess into the battery tray he is making in the video. The rust in my floors on this car is not extensive. It is generally in the area of the large oval depression in the floor panel (on both sides of the car). Yesterday, I spent a few hours cutting out and grinding/filing on part of the form I plan to use to replicate the depression. On the right side floor, I only need a small portion of it. On the left side, I will attempt to make a full piece to replace the depression. I've never done anything with forms likes this, so we'll see how it goes. I will be using my 12 ton press because it is what I have to attempt to make the replacement part. But, I have been watching facebook for a suitable upgrade, perhaps a 30 to 45 ton press.
-
03-21-2026 ATLAS Z UPDATE: After painting the intercooler piping silver yesterday, I didn't think it had enough "pop" to it, so today I I put a couple of coats of chrome spray over the top....I like it much better. I was able to get all the intercooling pipes installed. Then I went ahead and vacuumed out the car, and installed the carpets from Newark Auto I got on eBay. some carpeted pieces I am not installing, as I will leave the vinyl 260Z pieces that the car has from the factory. I dropped in my heel plates from Skillard and then mounted my dashboard and then set the console in to see what modifications would be necessary. The pics of the shift knob on the steel show that I am ready to hold it to the shifter, mark it and then cut out a shifter so that the shift knob is right where I want it. PICS!
-
Fast Floridian's 240Z Track Build
FastFloridian replied to FastFloridian's topic in S30 Series - 240z, 260z, 280z
Windage tray and oil pan on. I had to take the oil pick up off to slide in the windage tray.
-
02-20-2026 ATLAS Z UPDATE: Today I got my intercooled pipes back from being welded up, and I decided to see how they would look painted. I used the Duplicolor silver engine block paint. I also was able to finally get the right length of hose for the lower radiator hookup. When time comes, I will tighten it up and assemble the intercooler piping! PICS.
-

Progress on my insane VQ35HR 240Z project
calZ replied to markrolston@mac.com's topic in Nissan V6 Forum
One of the best builds ever on the site. I'll be sad if this is the final update, but I have a feeling it won't be. There's always something to fix or change! -
It's been one of the busiest years of my life but the turbo build continues in the background. Since the last update, the circuitry has been mapped out so I visited the chassis to start installing the mil-spec bulkhead and radlok connectors. Generally, the plan is to run Haltech for ignition control, knock detection, etc. and ditch all piggyback systems which I'll probably recycle on another ongoing turbo project. Only the best for the Z 😉. The resto shop is doing a fantastic job with great attention to the details. They've installed the sweet Capital Metal Works full length framerails and started massaging bent OEM sheetmetal back into shape, along with continuing to metalwork other detailed aspects of the chassis.
.jpeg.897d6e25aa2671d839e0093a23d6e7db.jpeg)
.jpeg.7c73fa8d176074d8d7de6c14e7b29355.jpeg)
.jpeg.c53e25f8b3e0de1cb94b4d687c321f1f.jpeg)
.jpeg.2d2baabb2f901b526c559ead0bc9c9ed.jpeg)
.jpeg.b71f3ad5a2eef96596fe80ea3fe2fa78.jpeg)
.jpeg.a8100be6efe2f1804f652d24d7636329.jpeg)
.jpeg.591b47668c4a22d3f1981213137b8ed0.jpeg)


-
Who's Online 2 Members, 0 Anonymous, 1520 Guests (See full list)