-
Member Statistics
33138
Total Members5167
Most Online
All Activity
- Today
-

Fast Floridian's 240Z Track Build
FastFloridian replied to FastFloridian's topic in S30 Series - 240z, 260z, 280z
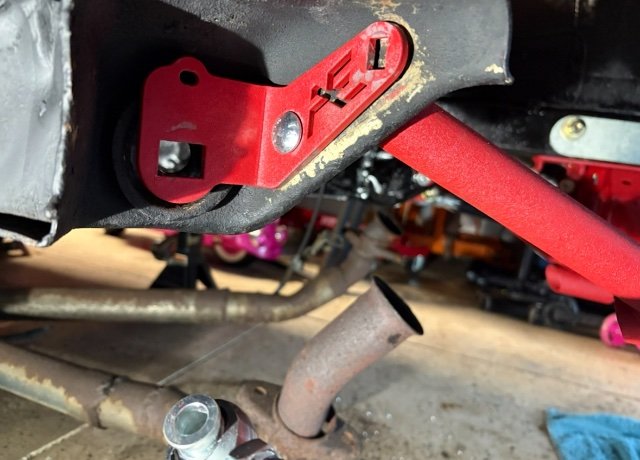
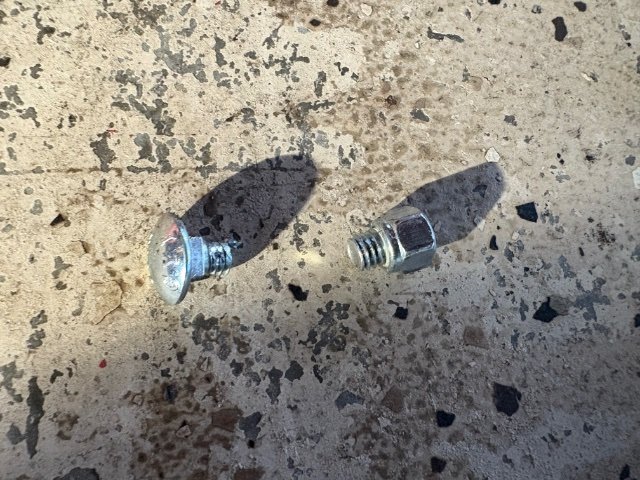
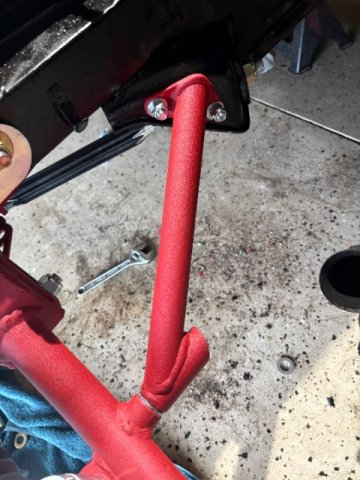
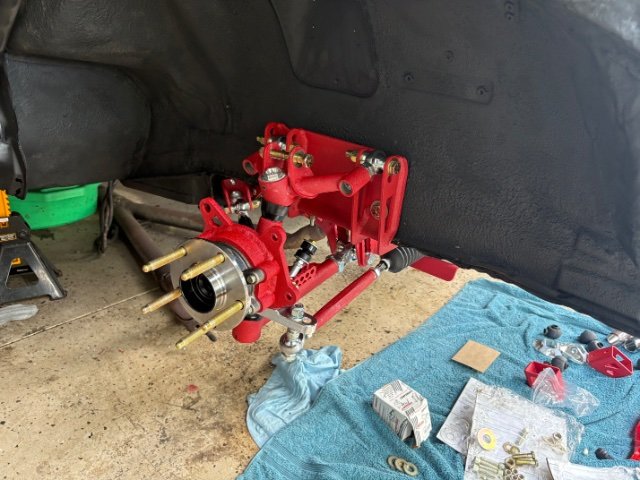
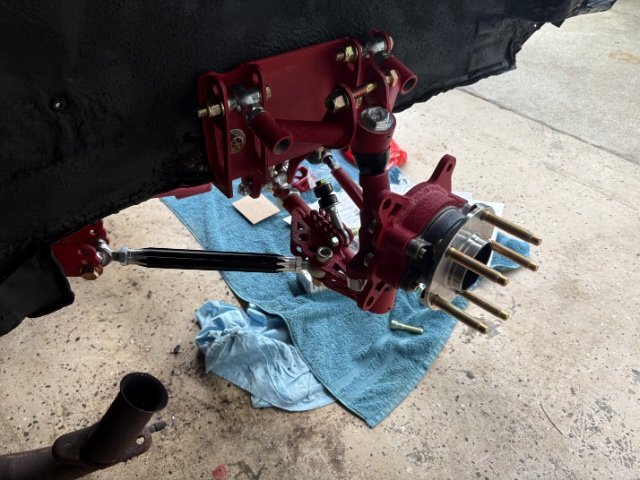
For the track attack upper control arm plate the carriage bolts are a must because of their plate design, it completely covers the bolts, so no way to tighten. But some of the others are iffy. The two I broke, didn’t need to be carriage bolts, but it would have tight if they weren’t, and the tension rod bracket was probably needed for clearance to the bushing. Their brackets could have been designed to use regular bolts if they made them a little bigger, but that’s what they went with. Over all I’m pretty happy with it and how’s it’s coming together, but there are still some improvements they could make for easier installation. -

Fast Floridian's 240Z Track Build
jhm replied to FastFloridian's topic in S30 Series - 240z, 260z, 280z
Apex's choice of carriage bolts is unusual....can't say I've ever seen really seen them used in custom suspension builds before. Do you think they were chosen for convenience, with the self-locking features in the mounting brackets? Great progress.....really enjoying your updates! Keep 'em coming!! 👍👍 -
Fast Floridian's 240Z Track Build
FastFloridian replied to FastFloridian's topic in S30 Series - 240z, 260z, 280z

-

1977 280z driving project from the Netherlands
Mitchel0407 replied to Mitchel0407's topic in S30 Series - 240z, 260z, 280z
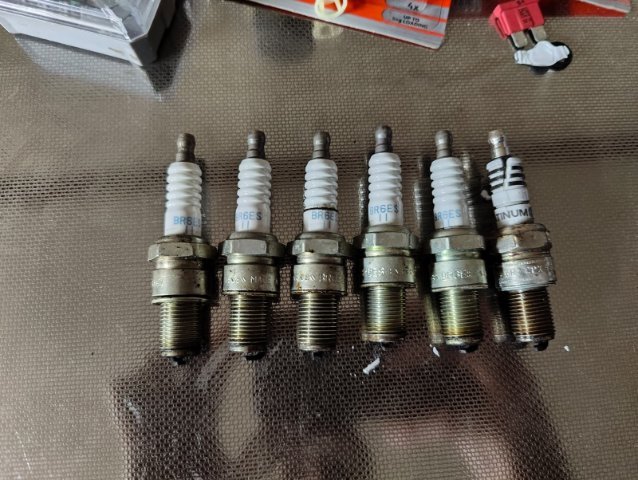
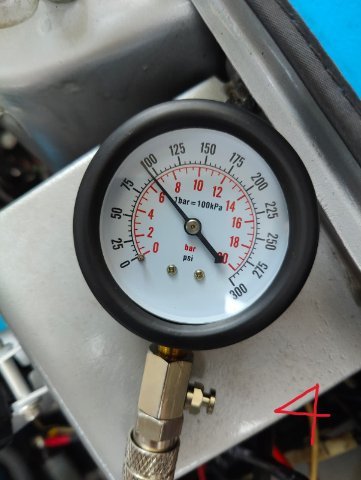
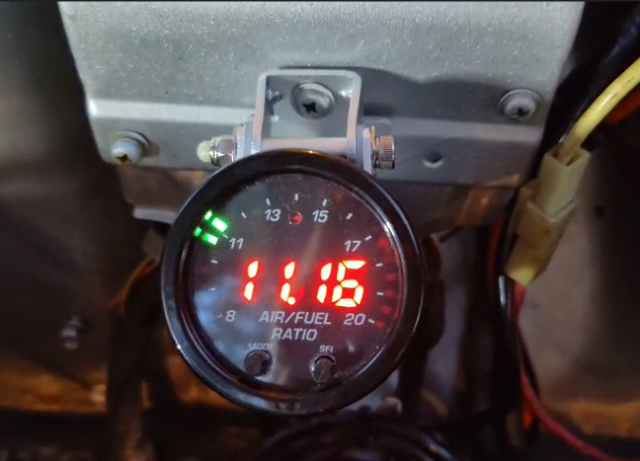
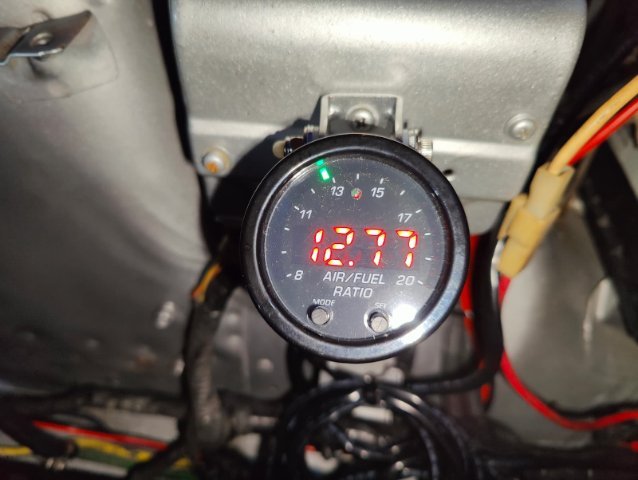
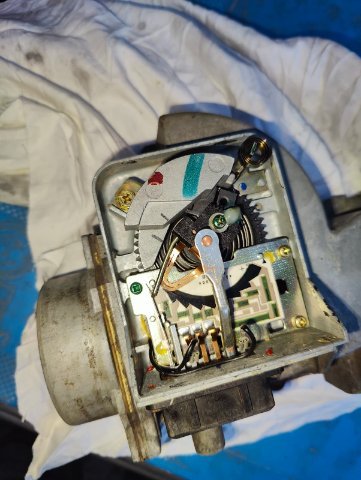
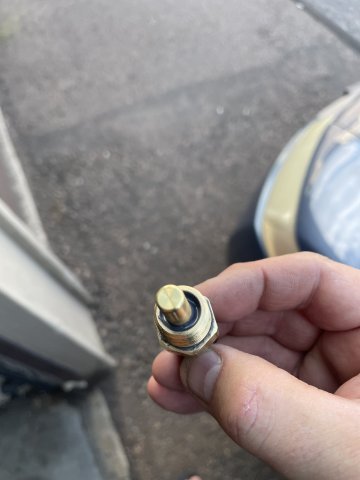
Had a busy weekend working on my girlfriends car (brakes, oil, alternator, water pump and timing belts) but yesterday I had some time left to work on the Z. The car was running rich so I ordered a cheap AFR gauge to measure the air-fuel ratio of the car. I installed the gauge in the engine bay for now with the power wires just clamped to the battery as I can’t drive the car till I get my inspection done. I read some threads about the EFI Z’s running rich or running rough in general so I cleaned the contacts on all the electrical plugs and readjusted the throttle position sensor. The contacts of the AFM and the cold start valve where actually pretty corroded but cleaned up nicely. For good measure I also decided to change the spark plugs and do a compression test. O boy was I glad I did that. The spark plug in the number 1 cylinder turned out to be a different one without a manufacturer name. It was also heavily cracked and the spark plug wire wasn’t even attached! (am I glad I ordered new once). The compression was pretty consistent from what I could tell but my battery and probably also the alternator are dying, only to be caped alive by my battery charger. The engine cracks very slow with the sparkplugs in (even only one) and when dialing back the idle the engine can’t keep a consistent rpm. It even died after a while. I the end I just jumped the battery with my girlfriends car witch helped a lot. After the cleaning the car also ran much better with an AFR of 11.2 and after warming up for a bit it changed to about 13. When revving the car to about 4000rpm the AFR changed to about 15. I’m not very familiar with AFR ratios but 13 at idle (after warmup) seems pretty good to me and hopefully lets me pass inspection. But for that I still need to wait for some backorder parts from Z-Services.
-
New lock set or rekeying?
Mitchel0407 replied to Mitchel0407's topic in S30 Series - 240z, 260z, 280z
I only have one of each key and nether are original keys. I ended up ordering original blank Nissan keys from Z-Services for the ignition and a new door lock set for the ’77 280z. About all Z’s coming with two keys is wrong by the way. As outlined in a article from S30 World some early and late Z’s actually came with only one “reversible’ key. https://s30.world/articles/overview-of-keys-and-ignition-locks - Yesterday
-

SLA S30 Front Suspension Conversion
baby_Carlton replied to baby_Carlton's topic in Brakes, Wheels, Suspension and Chassis
Completely agreed and I am by no means a suspension expert. Following the fundamentals of suspension design is pretty straight forward when everything is static. Once parts start getting loaded up and components start moving around, things get a lot more tedious (which where I’m at right now). S54B32 shortblock, stripped head, and crankshaft with machine work done by Flying Colors Racing. Super happy with the quality of the work done here and I’ve always wanted to throw one of these in the Z. If it gets you driving the car more then more power to you. I don’t trust drivers in my area and the mountain roads are infested with double yellow-crossing IS250 drivers and morons in daddys Audi flying off cliffs. For a fun street car I want airbags and actual crumple zones so I’m trading the street for a controlled envrionment. -
Fast Floridian's 240Z Track Build
FastFloridian replied to FastFloridian's topic in S30 Series - 240z, 260z, 280z
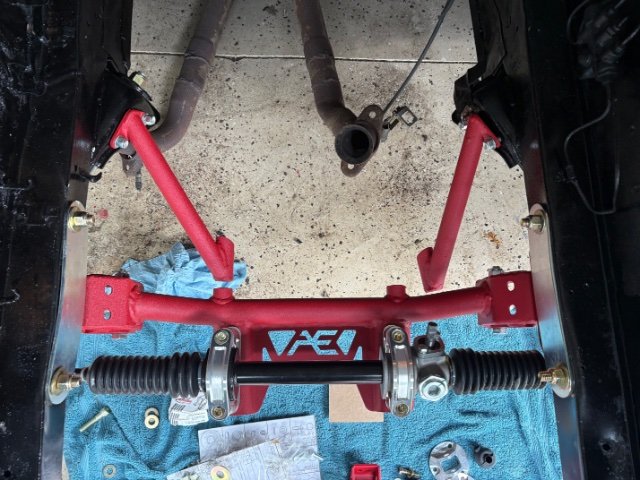
Got the subframe braces on, seemed simple but ran into some issues. Bolt to the subframe is too long, bottoming out in the brace, I cut the bolt down and used a spacer to help with alignment. Then tightening up to where it connects to tension arm bracket and snapped those bolts. Alignment from where I drilled the holes was off a little and I was over tightening them, ugh. Luckily I had two more bolts. Had to take the tension arm off to get one of the carriage bolts on. But it’s complete now, nice and sturdy. -

SLA S30 Front Suspension Conversion
Zetsaz replied to baby_Carlton's topic in Brakes, Wheels, Suspension and Chassis
There's a reason I defer to "experts" for most things. You can be relatively knowledgeable about a lot of things, but no one can have truly extensive knowledge of more than just a few things. True expertise and experience just requires so much time and commitment. What engine is that?? Very exciting! After many roadtrips in my car and realizing it is fully a street car, I've been brainstorming going fully the opposite direction as you and focusing on making it more comfortable, even if it means moderate sacrifices to handling. -
 Day 3 EFI install, almost done!
-

IMSA GTU vintage racer build
clarkspeed replied to clarkspeed's topic in S30 Series - 240z, 260z, 280z
Got the sensor figured out. It is idling around 130-140 F. Should be OK. I have to post a video. Sorry but I think this thing sounds bad ass. I have an insert in the exhaust so I dont need earplugs. -
So I took my Z to C&C -150 mile round trip. Engine ran strong but not right. Afrs were off between the banks. Thought I had a sync issue but I believe I have an injector issue. One plug looked rich and that was the bank running rich. #4 valve clearance checked and compression test is good. I've swapped injectors around to see if it follows. Weird thing is the AFR,s smooth out under more load-its worse under light throttle. It seems more than what a small butterfly sync issue , but maybe not . Used my new airbox also. It does quiet down the stacks. Speaking of stacks can someone buy me some TTT horns ? lol My 50's look to small in the box
-
My late 70s build had an ignition key, and the door keys fit the hatch.
- Last week
-
daveone23 joined the community
-

New lock set or rekeying?
Mike Mileski replied to Mitchel0407's topic in S30 Series - 240z, 260z, 280z
Z cars came from the factory with two keys. One key was for the ignition and rear hatch and the other was for the doors. -
SLA S30 Front Suspension Conversion
baby_Carlton replied to baby_Carlton's topic in Brakes, Wheels, Suspension and Chassis
Update: after speaking to Cortex and getting some spindle dimensions from them for CAD mockup, looks like I’ll be using their Radial X spindles. Very exciting stuff, I am a bit weary about using aluminum spindles but the car is a track car and last weighed at ~600# over each front wheel so I think I’ll be alright. Thanks! Excited to share my progress with you guys. I’d eventually like to make my work/design open source and see what more talented suspension engineers can do with it. If I didn’t just buy one of these yesterday I’d offer to trade you a complete kit for one of them KN20 heads XD. A bummer indeed, just another bump in the road! Funny you mention Stock Car blade-swaybars. It’s basically all I’ve been looking at for switching over to that design. Plus the parts are pretty cheap & standardized. Thanks everyone.
-
SLA S30 Front Suspension Conversion
jhm replied to baby_Carlton's topic in Brakes, Wheels, Suspension and Chassis
Wow, cool stuff. That's a real bummer about the AE kit, considering the investment; but I guess this approach gives you the freedom to go wild and do whatever you want! I like your idea of an adjustable blade-style sway bar...this has been on my to-do list for a couple years, and just haven't gotten around to it. You may want to consider the NASCAR-style mounting, above the engine. Makes the adjustment linkages and hardware a lot easier to engineer and fabricate. Good luck with it!! 👍👍 -

SLA S30 Front Suspension Conversion
Derek replied to baby_Carlton's topic in Brakes, Wheels, Suspension and Chassis
Threads like this make me realize just how ignorant I am when it comes to suspension geometry. I'll stick to castings Great work and welcome back. -
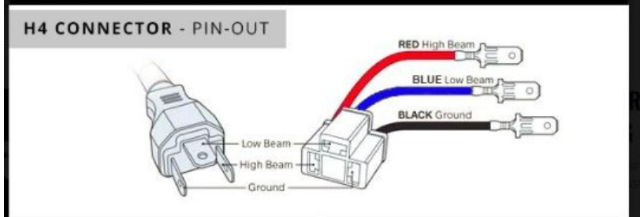
 What you're missing is that that the Holley lights have two +12v receptacles and one ground receptacle. The stock wiring harness supplies one constant +12v feed and two switched ground feeds. By using a simple wiring adapter you could make it work with either high or low beams, but the stock switch wouldn't work both High and Low beams properly because all it can do is switch ground on and off. If you didn't want to use his method of rewiring the light switch, you'd have to use two relays to supply 12v High and 12v Low to the LED bulbs, and the common terminal would go directly to Ground. Does that make sense?
 -
 bajajoas joined the community
 -
IMSA GTU vintage racer build
clarkspeed replied to clarkspeed's topic in S30 Series - 240z, 260z, 280z
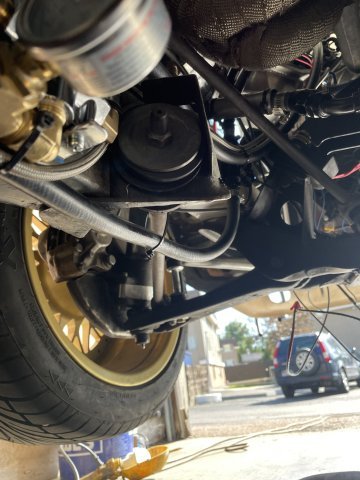
And clutch now finally working as intended. Needed to grind the bolt heads down to 0.200inch to keep from hitting clutch rivets. Now have an overheating problem. But I think it's just a sensor reading wrong. Hopefully easy fix. And a small leak in a water hose fitting. Keep thinking I am almost ready for testing but the hit list keeps getting bigger. More pics coming. -
Fast Floridian's 240Z Track Build
FastFloridian replied to FastFloridian's topic in S30 Series - 240z, 260z, 280z
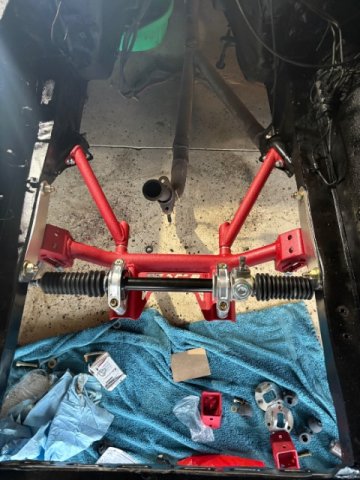
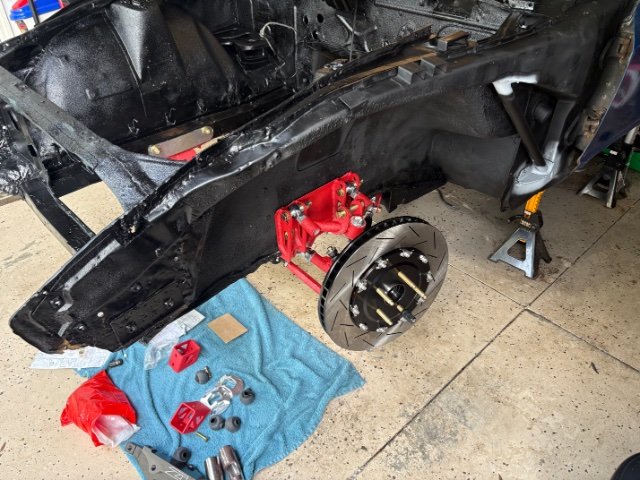
Took the day off to work on the car. Got the front suspension almost complete. Was going to do brakes, but I didn’t get the caliper bolts, thought they came in my BBK. Got those ordered, so should get them on next weekend.
-
TR's 260z L28 Build Thread
TrumpetRhapsody replied to TrumpetRhapsody's topic in S30 Series - 240z, 260z, 280z
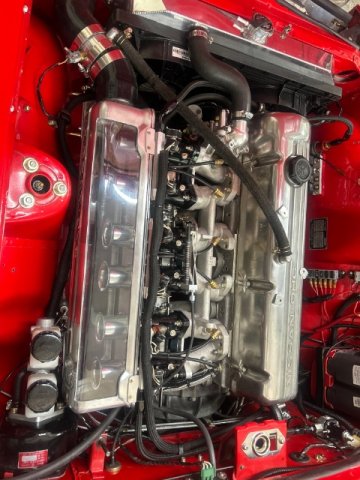
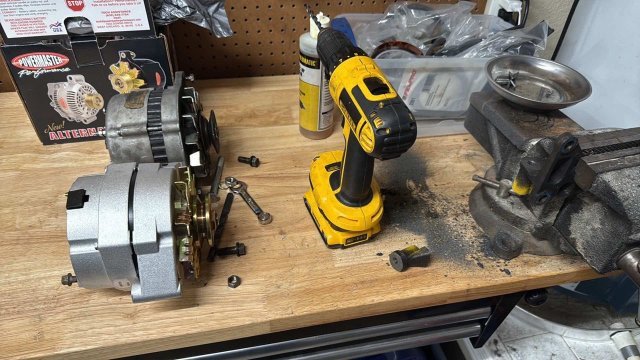
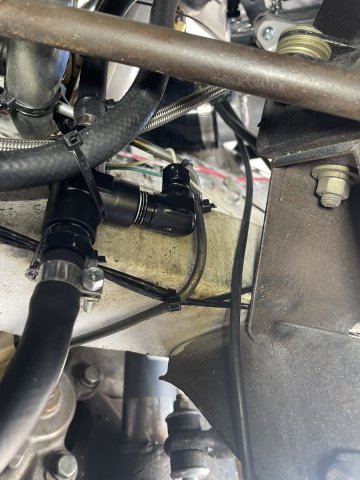
At long last I finally got my engine bay fuel lines replumbed. Working around the brake lines in a confined space was an adventure, but things look so much cleaner now. It's to the point I need to pull and paint my valve cover, and start dressing things up. It's been interesting watching my fuel temps. I'm definitely going to spend some time seeing how that affects my tune. I have a bit more dialing in to do on pump gas, then I'll swap to E85 and start cranking up the timing. I also got fed up with seeing my voltage go nuts once my alternator was heat soaked, so I decided to finally upgrade from the 280zx 60a to a Powermaster 7294 100a alternator. I went the route of cutting 1.5" off the front of the factory mount, drilling it most of the way for a 10mm bolt, and tapping the backside so I don't have to use a nut. I was already using a turnbuckle for the adjustment, so I'm running the stock belt. I still see a bit of a voltage drop below 800rpm, so I found a 2.125" pulley I'll swap on when it's not 100* out.
-
 THanks for the writeup and agree the headlights look great! I am wondering why you went through heavy modification when you could have just purchased the adapter wiring or am I missing something?
-
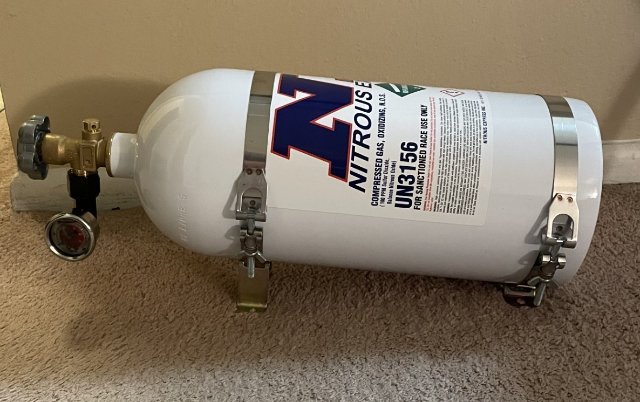
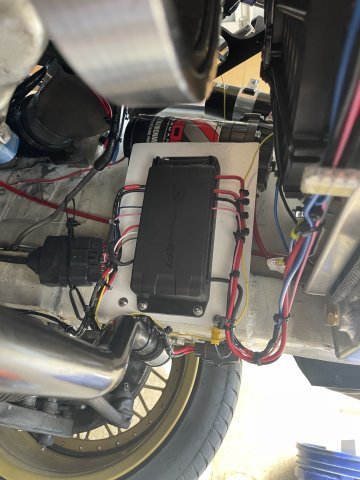
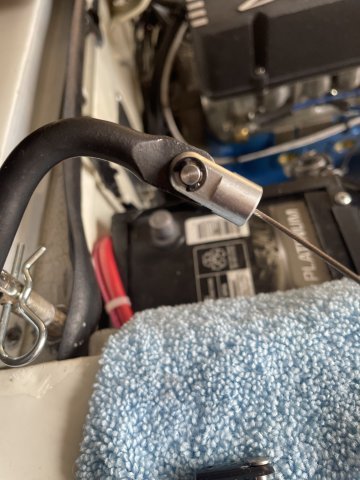
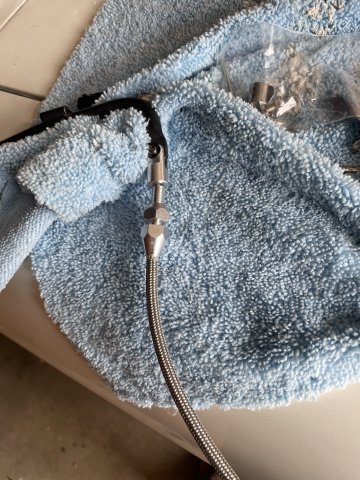
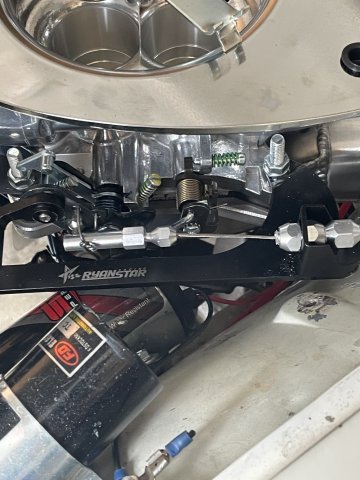
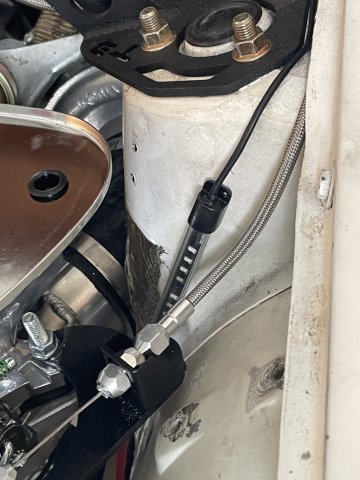
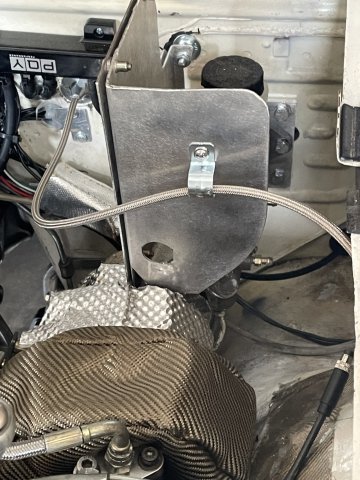
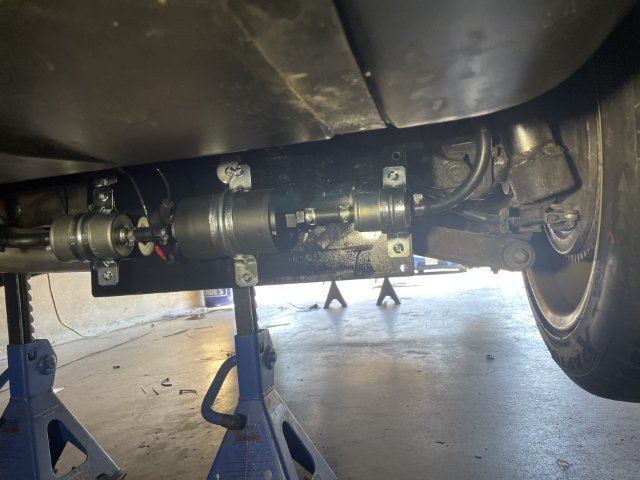
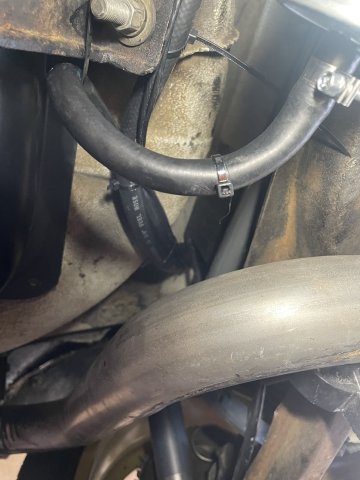
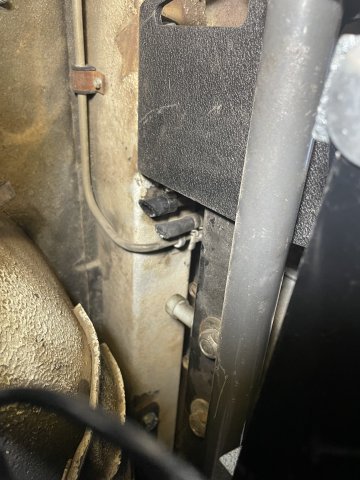
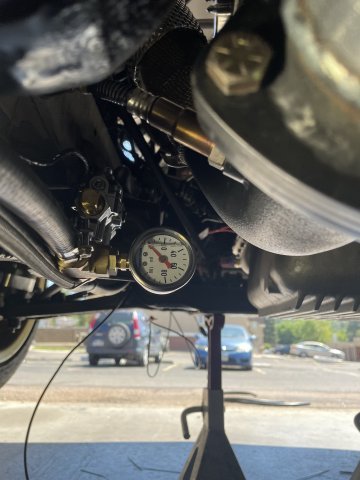
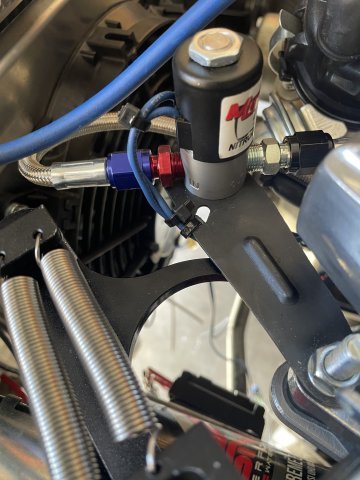
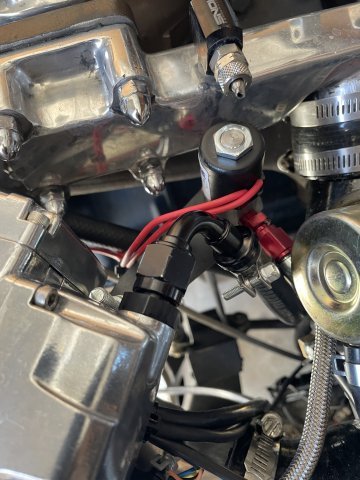
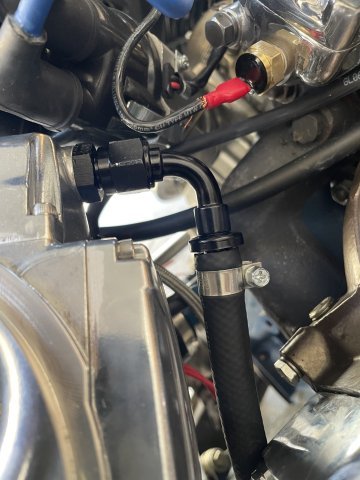
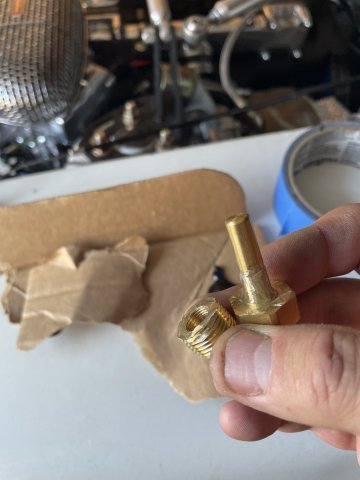
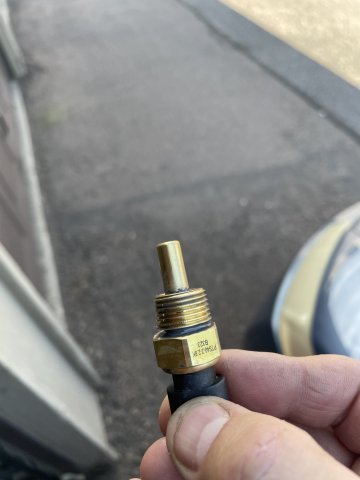
08-21-2025 Day 2 progress pics. Fuel system fully installed and wired up in the rear. Same for engine compartment. One pic you can see I abandoned in place the old fuel lines up in the trans tunnel. You can see the T fitting I installed where the nitrous line can be installed at a future date when I'm ready to melt my engine down. The temp sensor that comes with the Sniper 2 is too large, ONE other company makes one, and it's a very small one, smaller than the size I need to screw in. If I screwed it into a bushing there wouldn't be enough of the probe sticking into the stream of antifreeze to work right, so what I had to do was cut a bushing down on both sides. I tried to thread it on, but it wouldn't budge, so I ground down the threads on the smaller probe and got the bushing (which was now basically a sleeve) to fit over it. I JB Welded it together, and by tomorrow it should be ready to install. Wiring awaits me and some other little do-dad's, and the finish line is within sight. I had to change my air cleaner, as the round one was too high and hitting the hood. No one makes a thin air filter for it.......So I went with the tried and true Edelbrock foam one, and it clears. Here are some pics:
-

SLA S30 Front Suspension Conversion
calZ replied to baby_Carlton's topic in Brakes, Wheels, Suspension and Chassis
This is awesome. We haven't had a good engineering project on here in a while, so this is a good to see. -

Weber jets??All who live for their triples please read this
Weber replied to datfreak's topic in Nissan L6 Forum
Disclaimer: I haven't read all 42 pages of this post. However, I have read some posts by what seem to be very knowledgeable folks here. Most of what I've read indicates that the throttle plate adjusting screws shouldn't be used to set the idle (like most carburetors), rather the air bypass screws should be used. I'm very early in my Weber tuning path so I used this from the Redline site. Will someone with experience please comment on this? The car runs OK, no stumbles etc. but probably needs work. on mid to top end. Before I head down that path, I want to be sure the basic idle is set correctly. From the "Redline" site: DCOE Adjustment controls Tuning & Adjustment http://www.redlineweber.com/images/Tech/dcoe_a1.gif 1. Critical! Be sure for initial carburetor set up all air by-pass screws should be in closed position. These are not commonly used in standard carburetor adjustment. 2. Set the idle speed screw at ¼ to ½ turn in after contact with throttle lever. When doing multiple carburetors all linkage should be disconnected. All carbs should be bench adjusted to same setting.


-
Who's Online 0 Members, 0 Anonymous, 1578 Guests (See full list)
- There are no registered users currently online