BLOZ UP
-
Posts
1392 -
Joined
-
Last visited
-
Days Won
5
Content Type
Profiles
Forums
Blogs
Events
Gallery
Downloads
Store
Everything posted by BLOZ UP
-
Since I'm guessing it was a 1 car accident, the fault will most likely be 100% on the driver of the car, unless the tree can speak and say it jumped in front of him. So it's 10,000 - whatever deductible.
-
I'm having problems mounting my alternator like yours, it comes very close to the #1 exhaust port. I've been playing with an alternator positioned in reverse. That is, in front of the engine with the pulley side facing the engine. Braced to the frame rails.
-
I don't think I would want that back... that's a lot of pulling to do....
-
I dont spend money on them because it's not worth spending loads of cash on a bloated chassis with semi-trailing arms. I just bought the last one I had as a parts car, that also happened to run. I didn't anticipate finding the perfect s30 so quickly, but even when I did, I had no qualms about chopping up a perfectly good 88t for the drivetrain. Should have kept the brakes! They aren't that appealing to me anymore. I just see them as potential parts stores.
-
I'm running Linux on my laptop and have had no problems with serial or USB to serial communications with TunerStudio. I was at Fry's the other day and decided to try the GBS301, which from reading the MS forums, is hit or miss. I've paired with it and am "connected", but I can't get TunerStudio to respond or even a terminal for that matter. It opens the port but I get nothing. Anyone? Bueler?
-
Not exactly, I already have a collector, but they seem to have 2 bolt flanges in exactly the right size.... Oh well, ugly but it'll work.
-
All while I had my Z31s, I was jonesing for a (decent) S30. I finally found one and now I'm getting rid of the L dinosaur for the VG (dodo bird). I got rid of those Z31 boats.
-
I've gone through a few. They're okay.
-
I guess what I really want to know is if there are any flanges which fit that look better than just bolt flanges?
-
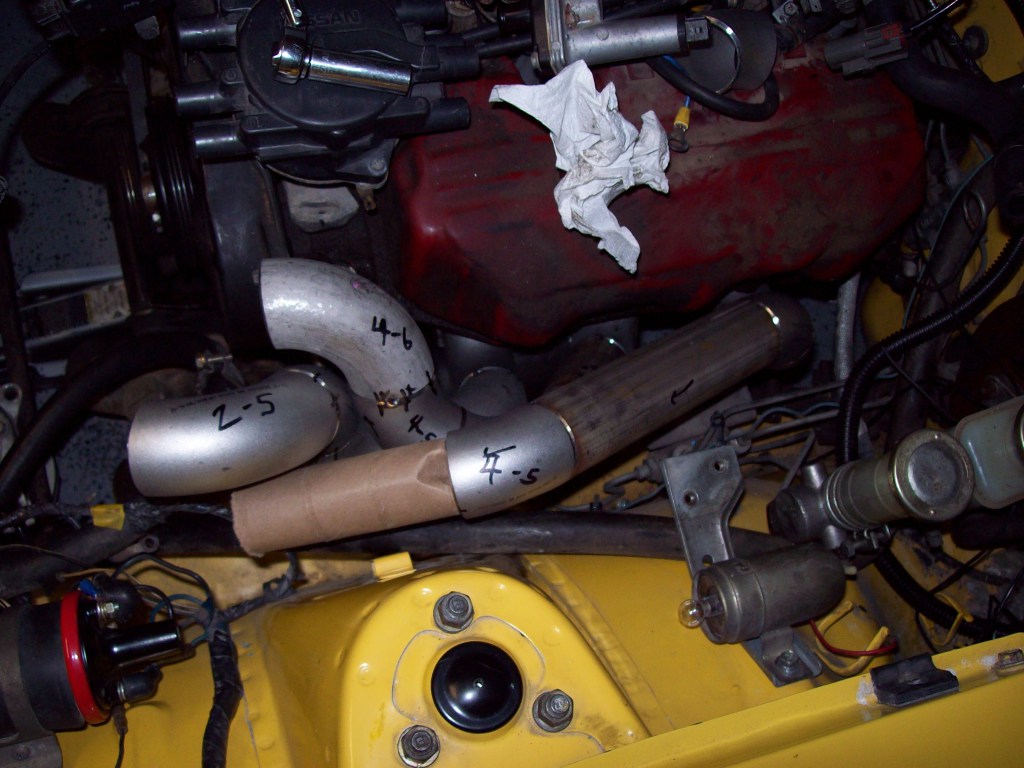
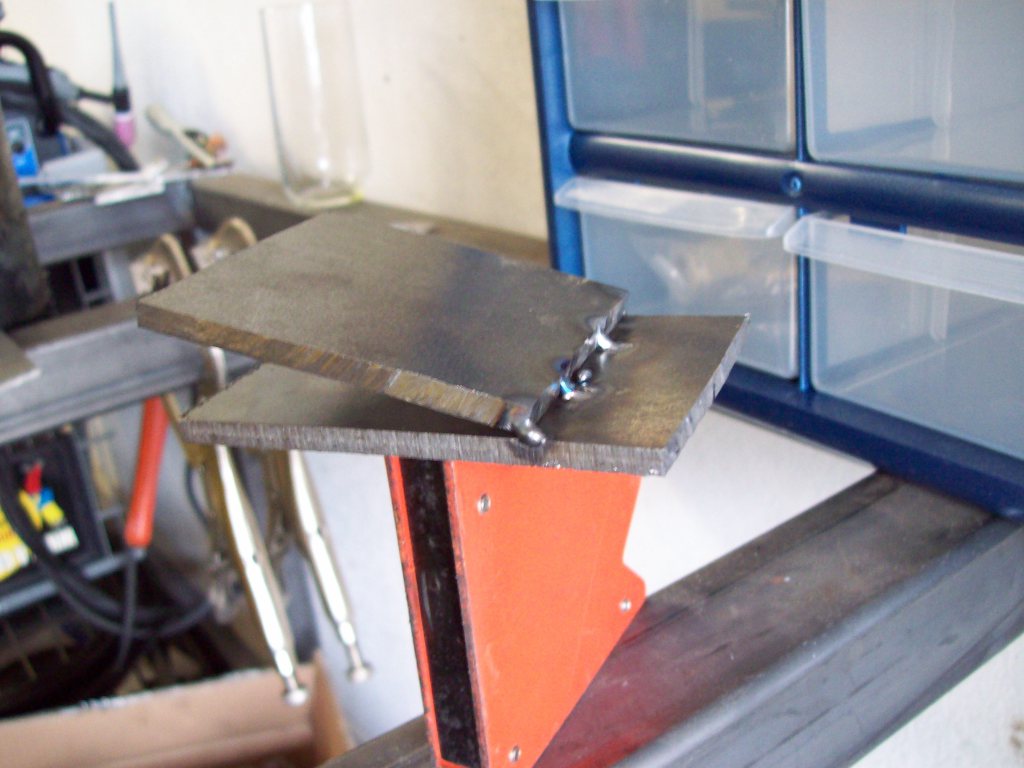
I'm making some manifolds and want some type of flange assembly to connect the 1-1/2" SCH10 butt weld pipes to each other, so as to make the left bank, right bank, and collector sections removable. What can/should I use to connect them? The OD is about 1.8" or so. I'd really like to use v-bands, but the smallest I can find is with a 2" ID. The plan was to use a 6-1 collector (I'm aware of its disadvantages), but should I just bite the bullet and do two 3-1 merges before the collector--placing some larger diameter pipe that has existing v-band assemblies inbetween? Would regular old 2-3 bolt flanges be a bad idea? What about just two 2-1 merges and a 4-1 collector (like a 2-1 on two cylinders with 480 degrees of separation)? The image below is the manifold so far.

-

77 ballast resistor part number please
BLOZ UP replied to mrcj280z's topic in S30 Series - 240z, 260z, 280z
The ballast resistor on a 77 is just to protect the transistor ignition in case the ignition is on, engine off, and the trigger is sitting on a ... trigger point. So, you can bypass it, just don't leave your key in with the ignition on and the engine off for more than a split second. -
A little more progress on the driver's side manifold. It's nice to have not only a spare head, but a spare engine to double check clearances. With any luck, number 6 (the back-most cylinder on this side) will cut under the other two and be the first to enter the collector. I'm "trying" to make them equal-length. Since I have at least 240 degrees of separation between any two cylinders on the same bank, I am doubtful this is actually worth the effort. The weird design is because a) I'm trying to avoid cutting any bends, mainly because I don't have a bandsaw, or room for one for that matter. To make the collectors I will need one; The downpipe needs to exit here--and the oil feed and drain are also on this side as well; c) they're my first manifolds completely designed and fabricated entirely by me (by "designed", I mean "eyeballed"), and, c) because I can. With solid mounts, bracing and supporting the turbo will be easy. The passenger side manifold has just now exceeded the stock cast manifold in weight. Not that the stresses on the flange are the same given the length of the runners. I have about 10" of length of free room in front of the engine. I intend to use it all. That's it for a while. I have a ton of school work I have to catch up on.
-
Started the manifolds. This is the driver's side. Initially I tried to sneak #6 close to the engine and below the other two primaries, but there wasn't enough room for a downpipe. So, everything has to go up and over to make sure that I can actually have a route for the downpipe to go through. The only mods to the engine bay (so far) to get this to fit, is to cut the brake heat shield in to two pieces, a lower and an upper. The passenger will be similar due to the alternator, but I will have more room to work with. I will need to pick up some ~2" pipe and vbands soon.
-
Somehow I don't think resorting to violence against them will help solve this problem.
-
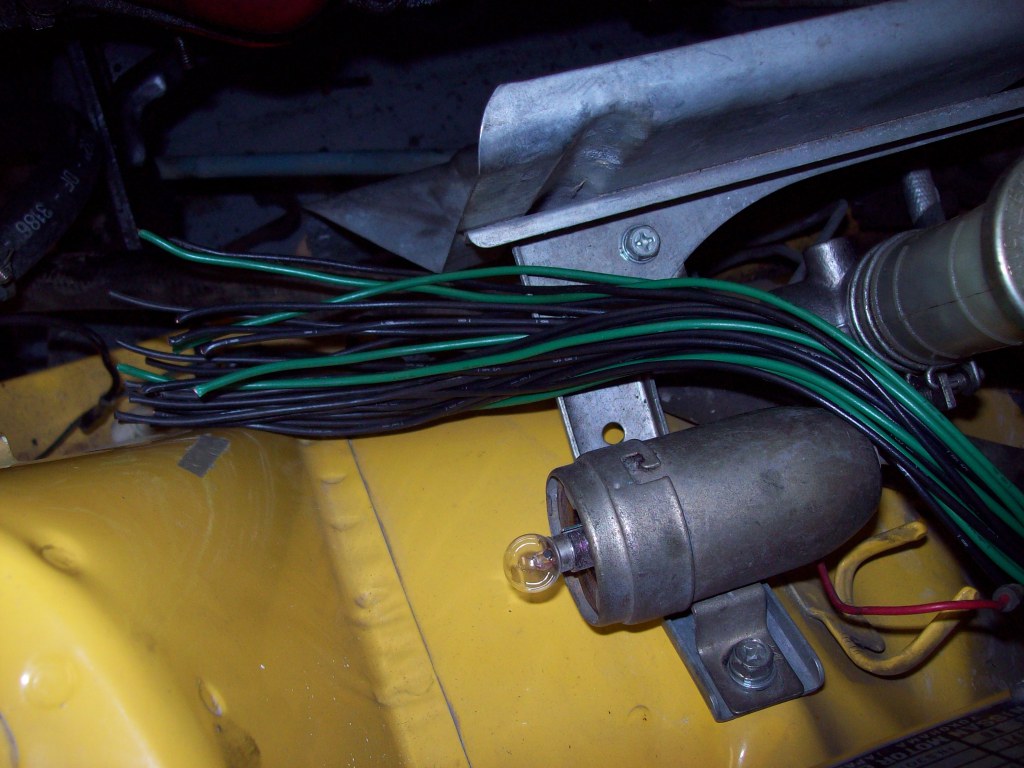
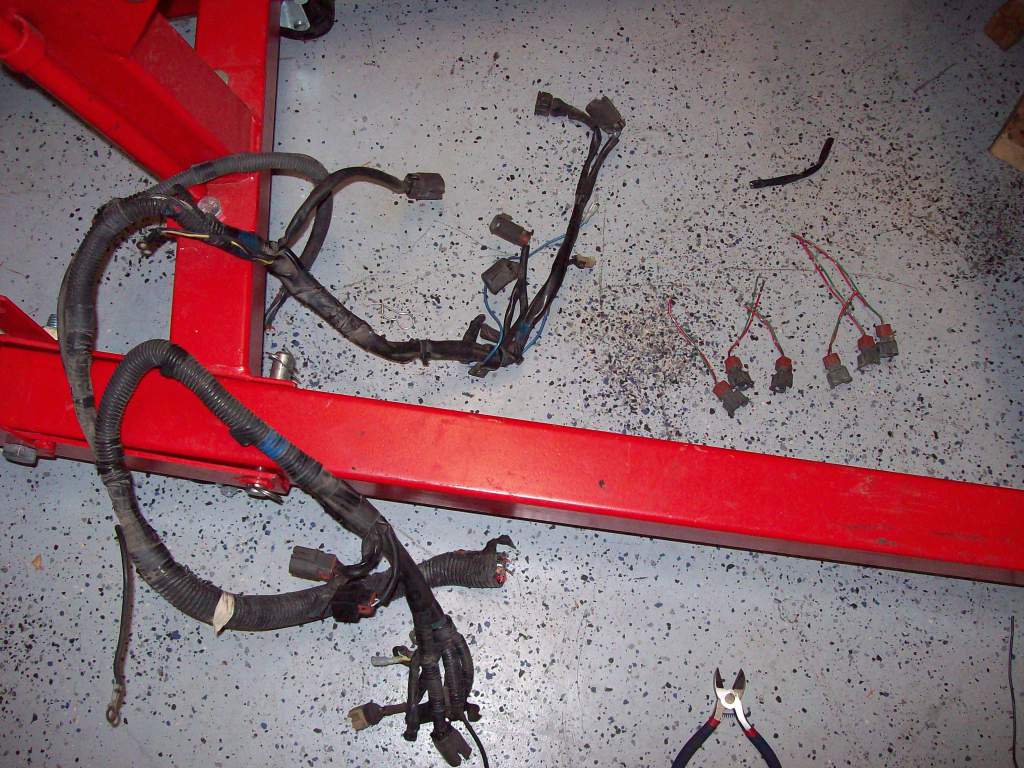
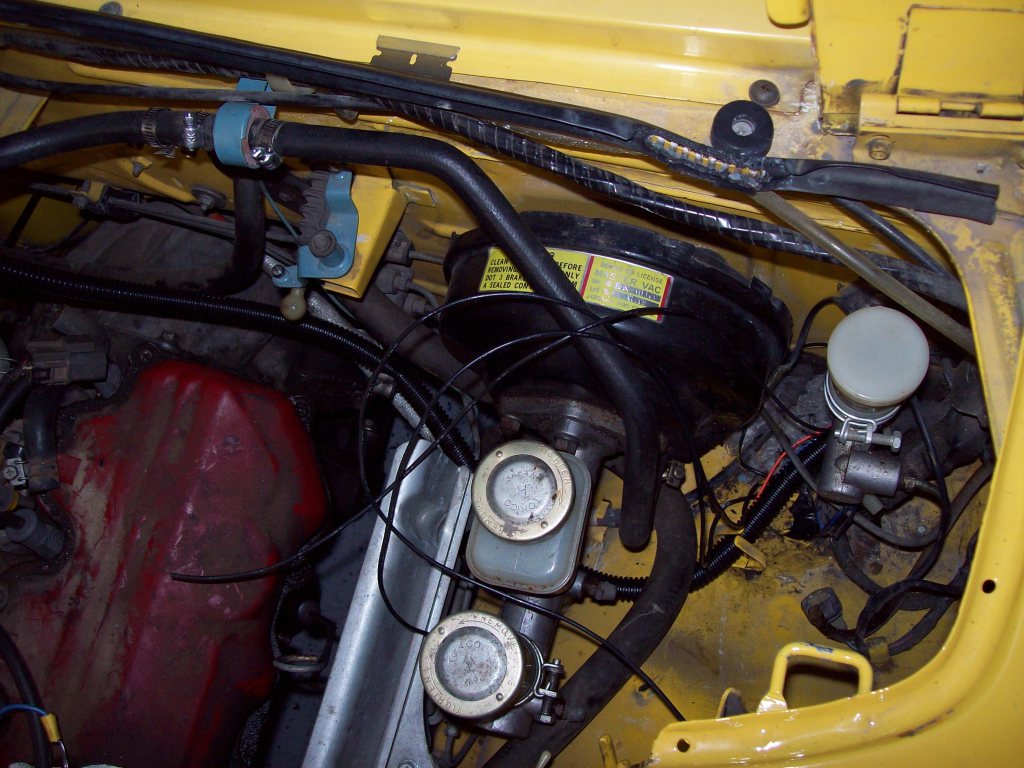
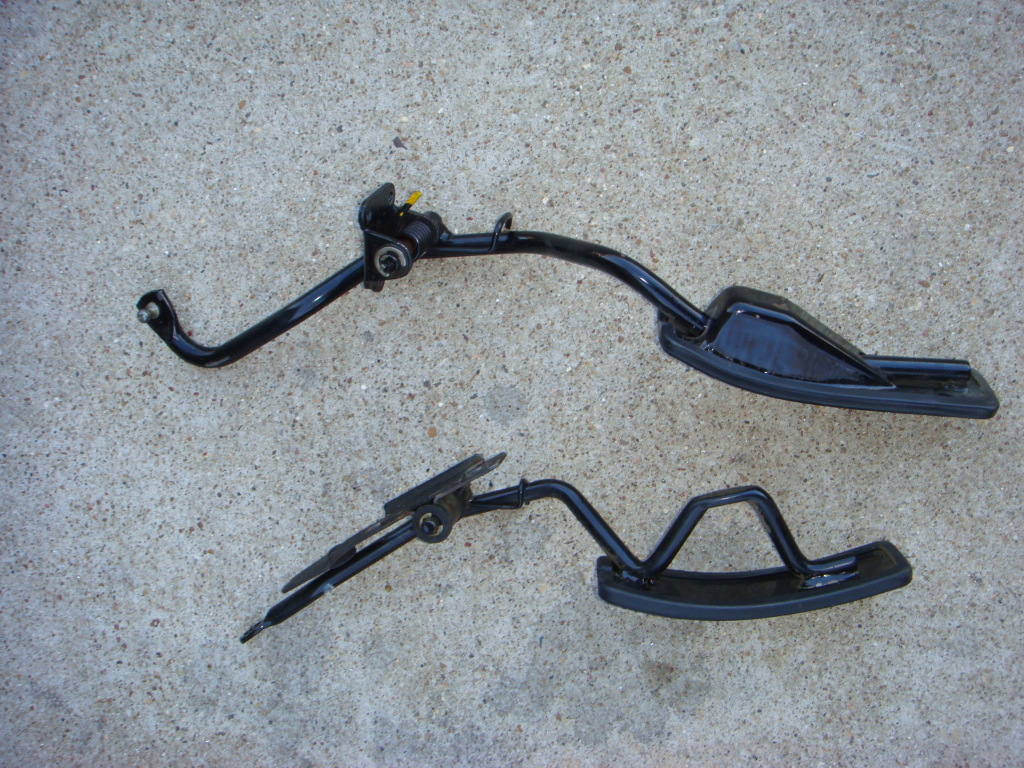
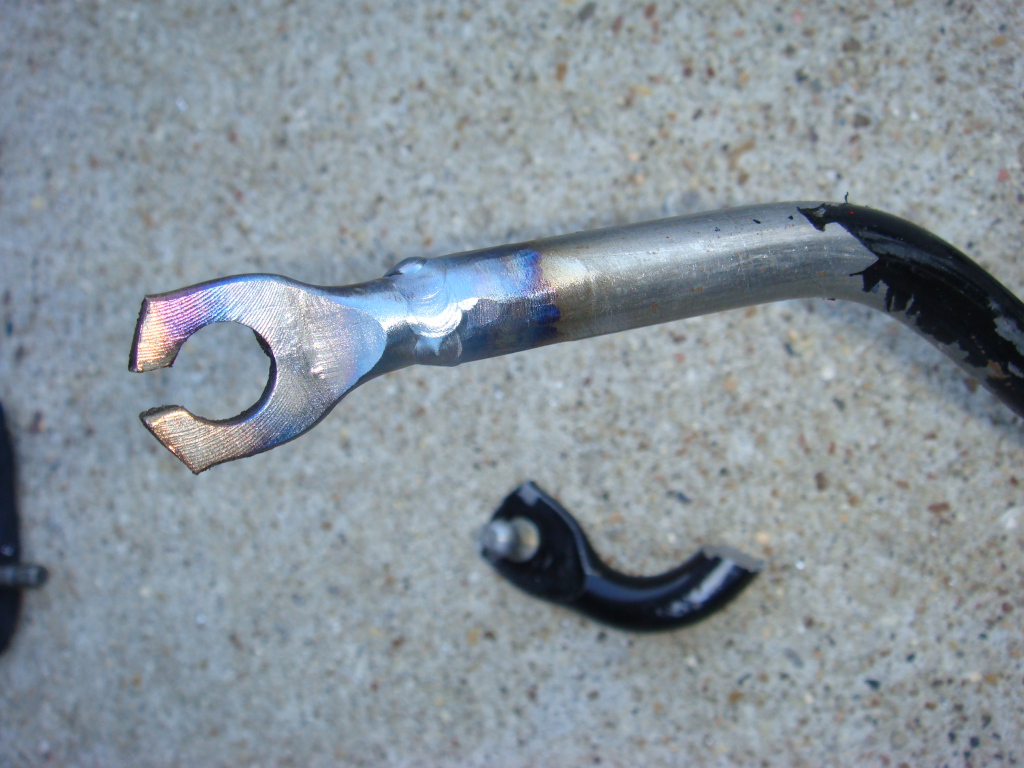
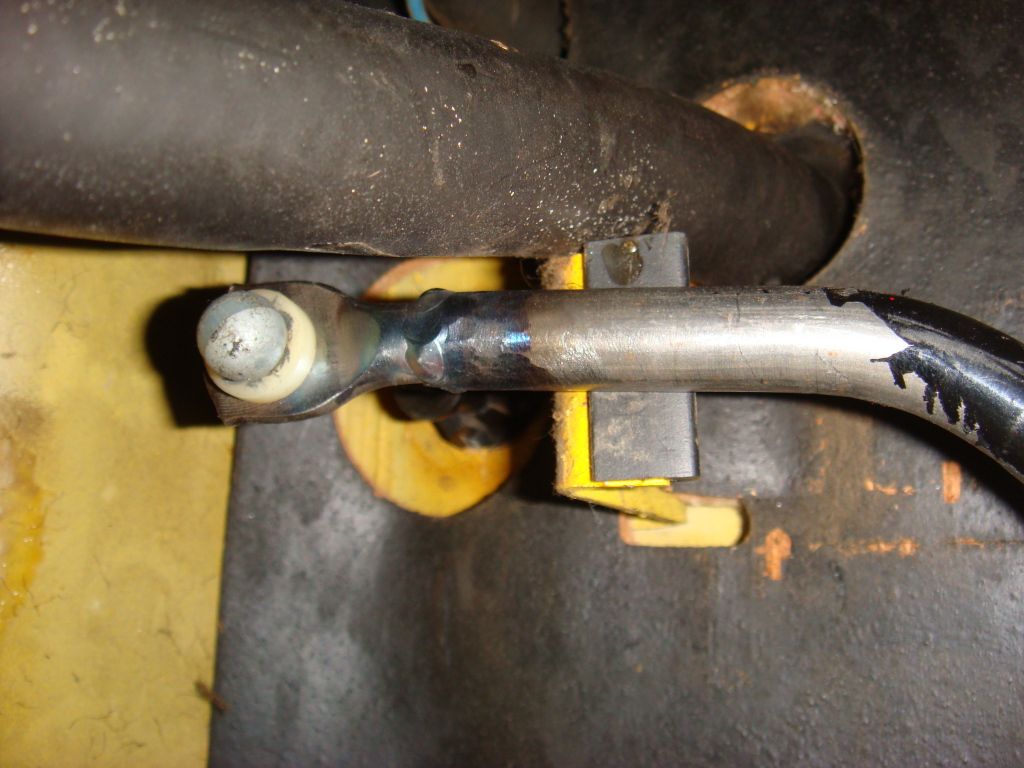
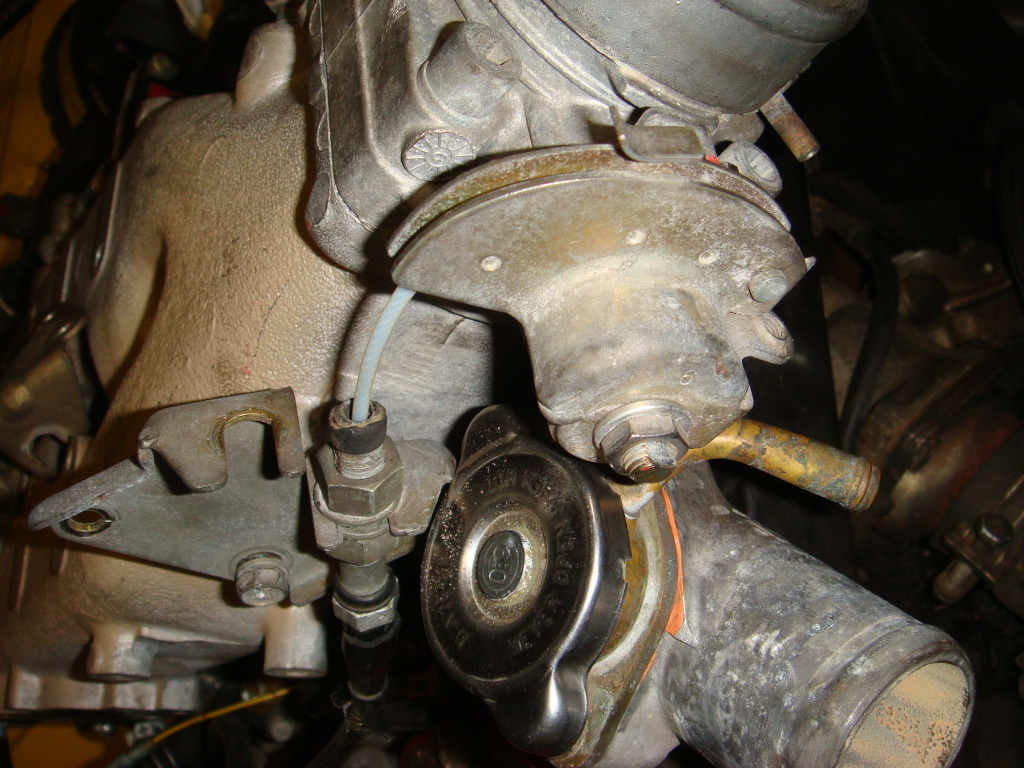
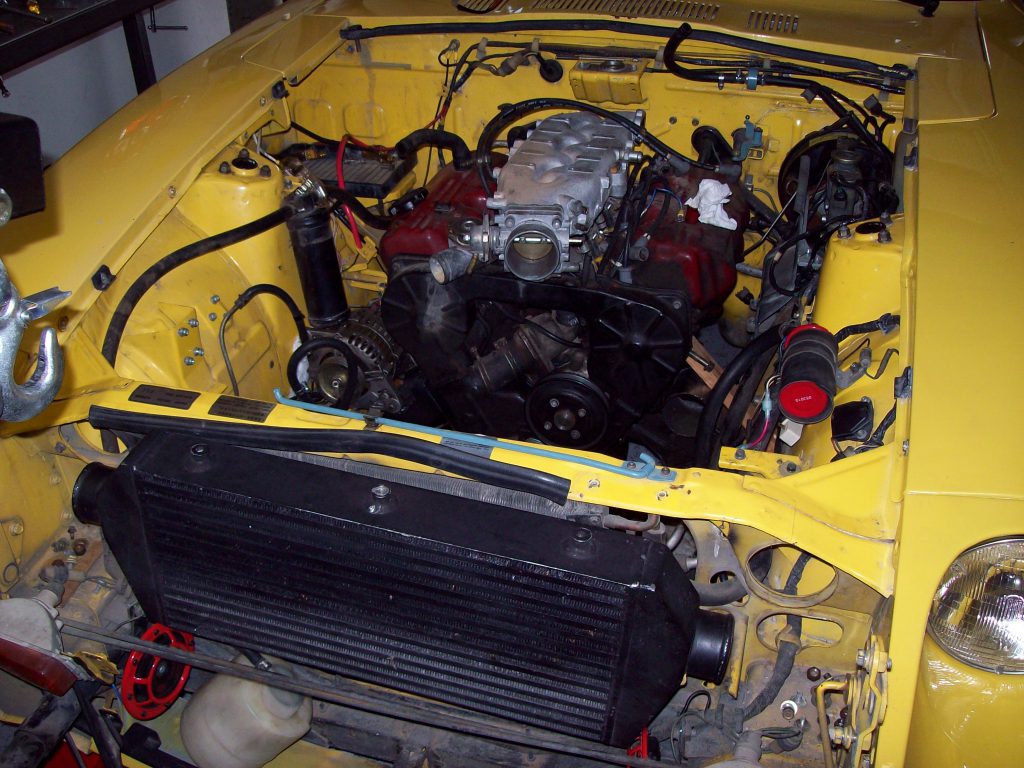
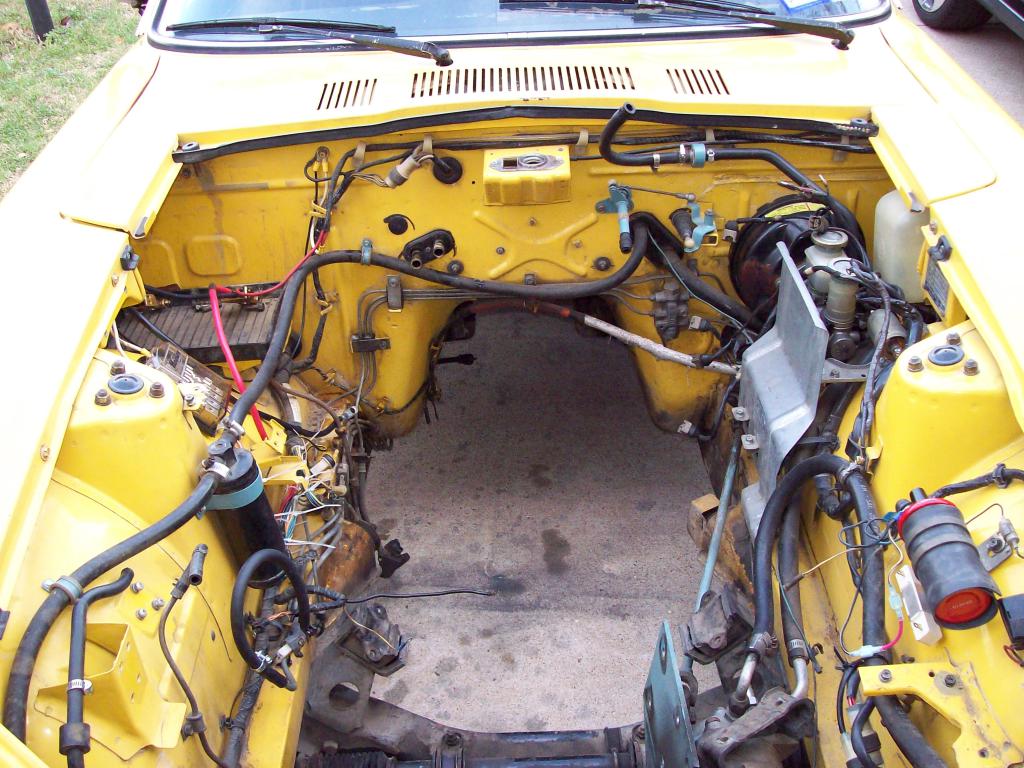
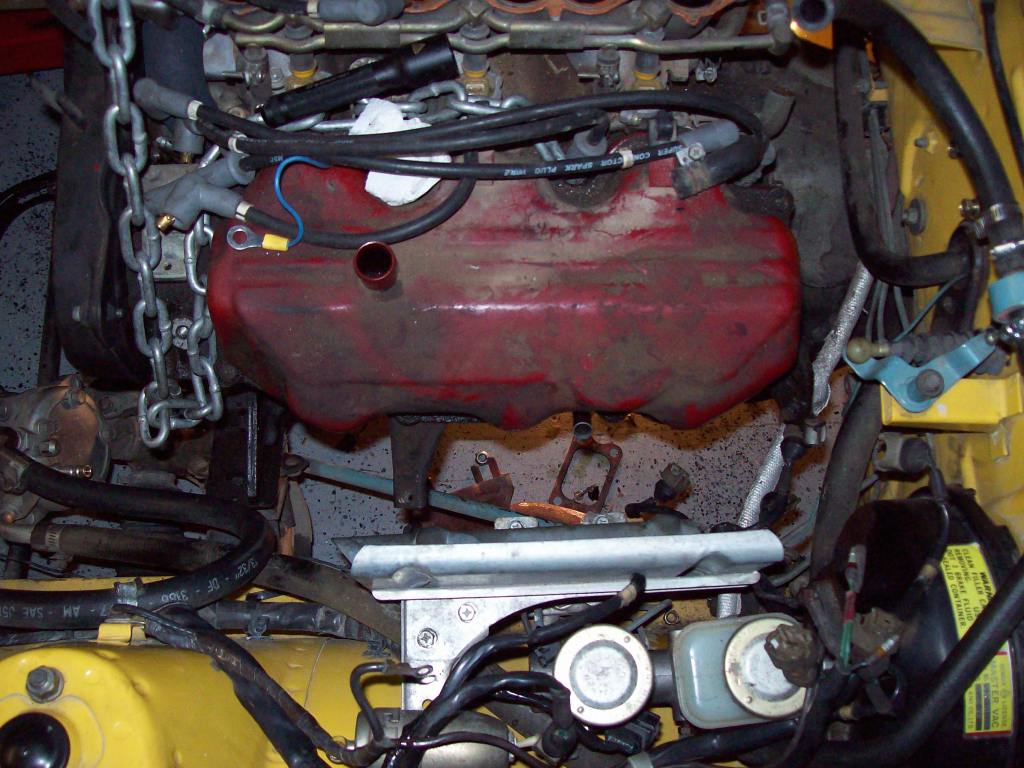
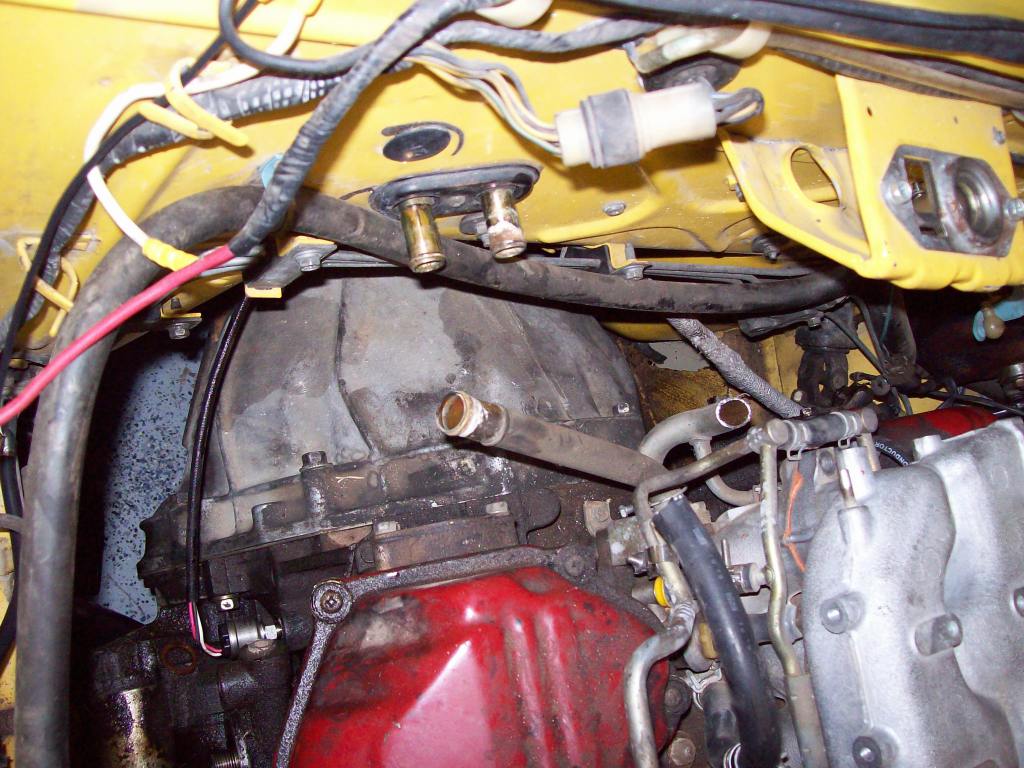
The engine sits about 1/2" or so too low, guessing from the angle of the driveshaft output, and the oil pan. Annoying, but not too difficult to fix. Except my hood clearance may be compromised and I may have to saw the throttle body off and reattach it at a downward angle. This has been done on Z31s, but I didn't expect to have any hood clearance issues with this swap. What I really need to do is measure... So, rather discouraged about that, I decided to hold off on mount modifications and work on some of the numerous other facets available. The L6 harness was cut and I removed the tape surrounding it. All black and green wires! My first--okay, and second--Megasquirt installs in Z31s used all yellow, red, and black wires. I don't feel so embarrassed about that anymore. Most of the Z31 engine harness. I don't feel like replacing crappy wires with somewhat less crappy wires. I just want the injector and a couple of other connectors. I will be replacing the other pigtails with weatherpaks. Snaking under the brake and clutch masters is my Megasquirt harness. 12' of color coded and labeled wiring, all pre-connected to a solid DB37 plug. Worth every penny from DIYAutotune.com. Quite a bit of extra wiring. Since I will have no (rear) crossover pipe, and exhaust primaries on the front, left, and right sides, the most logical place for the engine harness to jump is from behind. Will look a little cleaner too. ZR8ed said the Z31 pedal fits. I saw an easier way using the 280Z pedal... Problem solved: Since I have a few different intake manifolds laying around, I tried fitting the various throttle cable brackets on it. Turns out the one to use to keep the hood clearance the same is off of a later maxima. The one with the two throttle bodies side-by-side. Of course, it will have to be chopped nearly in half and another hole drilled, but it maintains a nearly perfect angle with the throttle: The radiator cap will need to be replaced. It cannot be removed with this intake. I may end up fabricating a plate with an offset bleed screw of some sort. The main cap will be on the radiator.
-
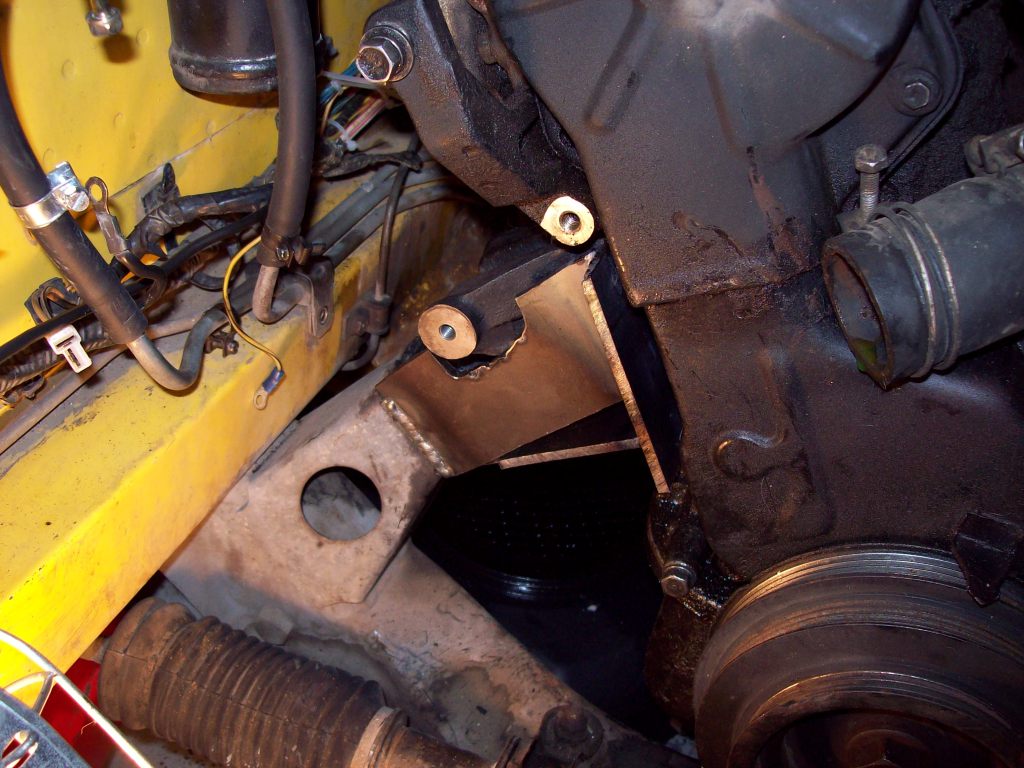
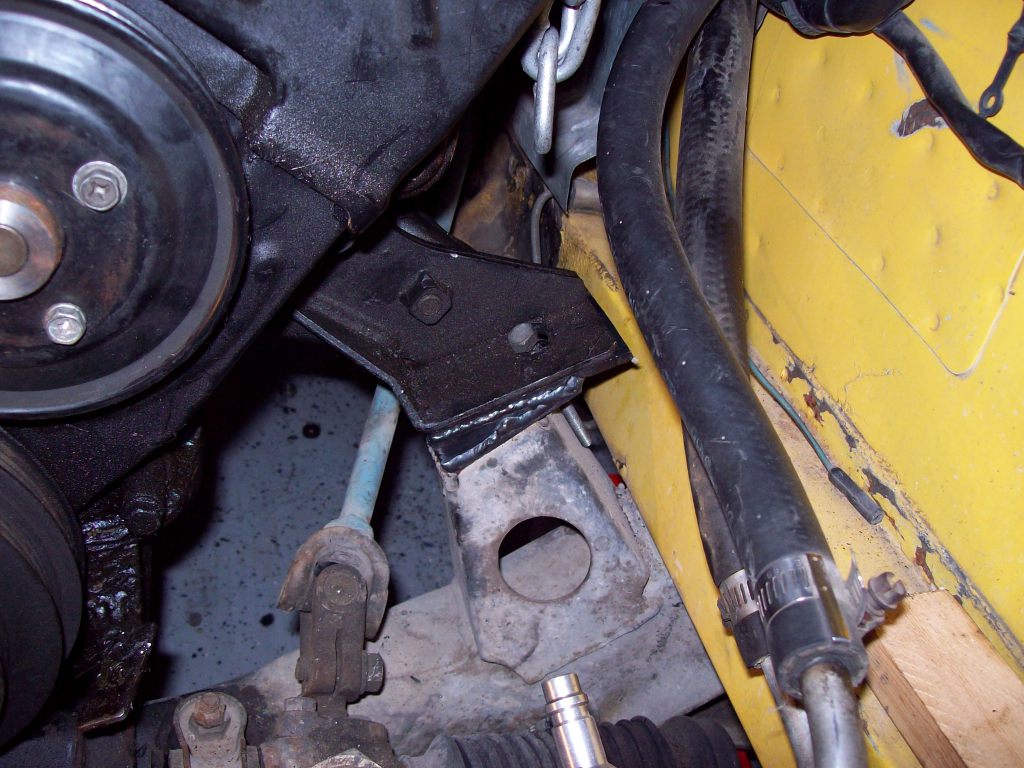
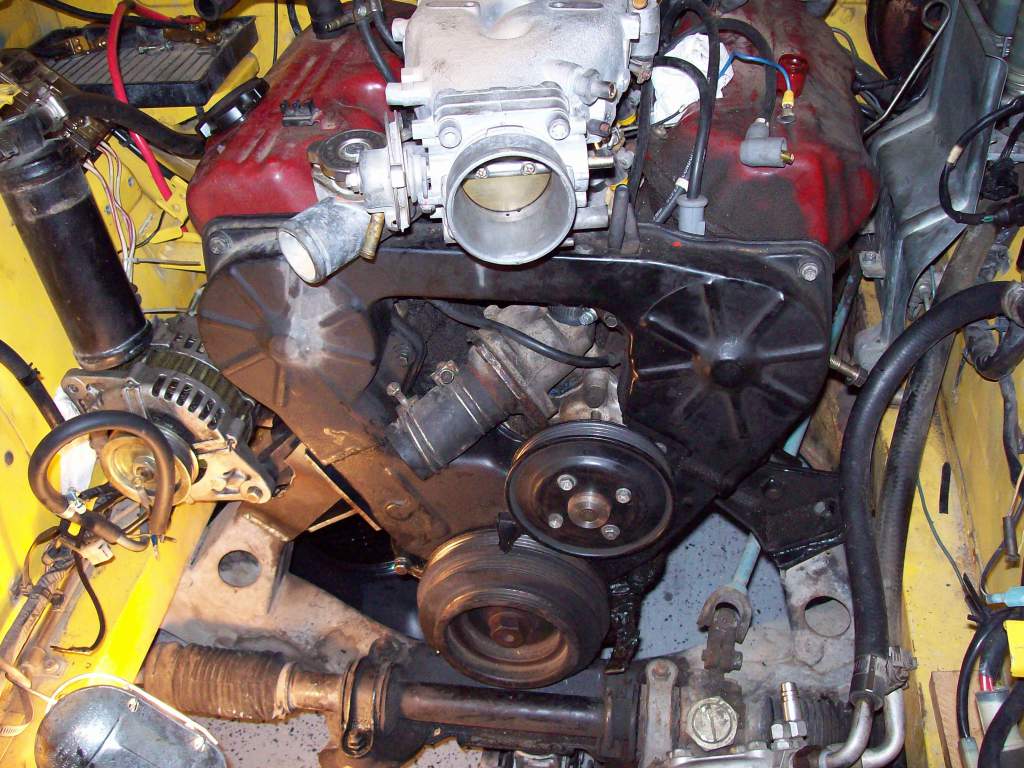
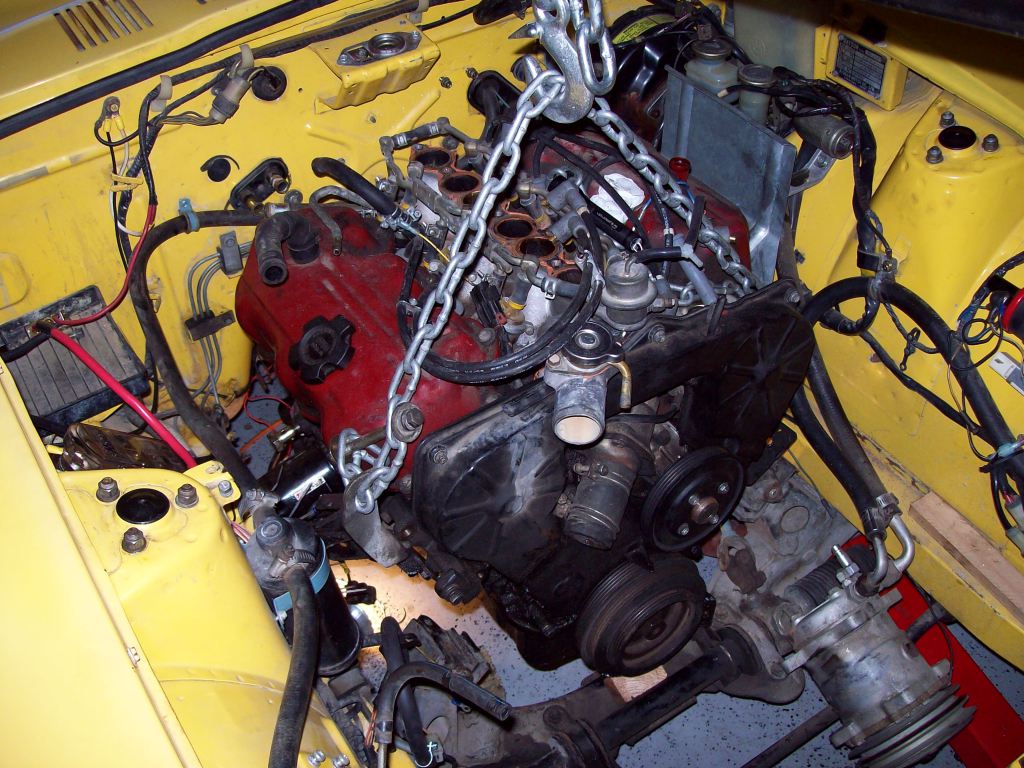
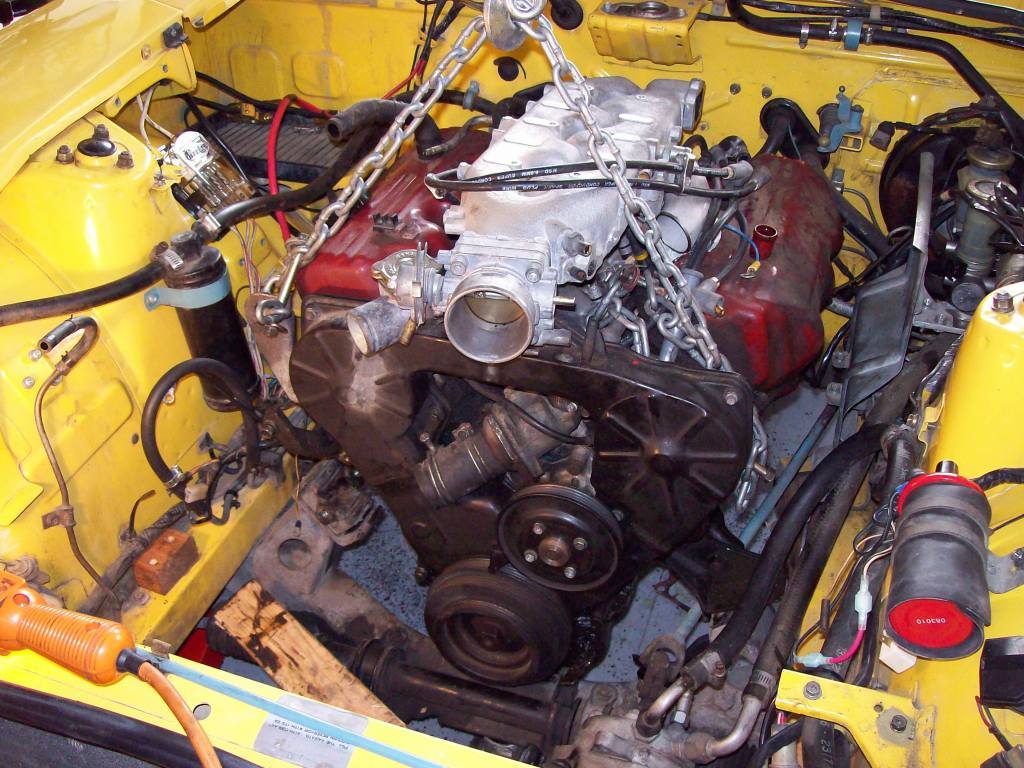
The engine is finally standing on it's own. Both batteries for the drill died while drilling the holes for the driver's side, but it's not going anywhere sitting in the garage: Close up of the passenger side mount. It can be lightened a bit, I make sure to cut larger and then I can grind down to the correct size. Driver's side: Alternator attached. I will have to grind down the mount a bit, since it won't go as close as I'd like it to the head. A custom thermostat outlet pipe will need to be made or found from one of the VG variants. The belt will hit. My GF removed the L ECU. Plenty of room for Megasquirt: Getting a little ahead of myself:
-
I hope you enjoy being arrested for trespassing, or worse...
-
I have the hard part of both motor mounts complete. I have almost completely welded the passenger side mount as well. I just need to finish welding and make a hole for the crossmember bolt. The driver's side needs to be closed on a couple more sides and welded. The stock ECU is out, and as soon as the car no longer needs an engine crane, I will be able to work more on the wiring. And perhaps later this week I might acquire a VG33. It would definitely be better than the Exxon Valdez here (or Deepwater Horizon? Too soon?).
-
Your ways of spending your TAX RETURN for your Z
BLOZ UP replied to MyLaDyZ's topic in S30 Series - 240z, 260z, 280z
I don't give my government interest free loans. -
best way to remove turbo cross pipe
BLOZ UP replied to juelz86turbogll's topic in Z31 Series - 300ZX
When I did it eons ago, I believe I unbolted the turbo, then unbolted the manifold and took the manifold out and then the turbo. Or some combination of that. It's a pain. Pull the engine. -
Yeah, sure, and your paypal account is suspended indefinitely while it is "under investigation". Once your account is flagged for "suspicious" behaviour you'll have all sorts of problems with paypal. http://www.paypalsucks.com/
-
best way to remove turbo cross pipe
BLOZ UP replied to juelz86turbogll's topic in Z31 Series - 300ZX
If you unbolt the passenger side manifold from the head, and the unbolt the 2 12mm nuts and 12mm bolt from the DRIVER'S side of the crossover pipe, you can weasel the entire thing out. Getting the bottom bolt out is a pain. -
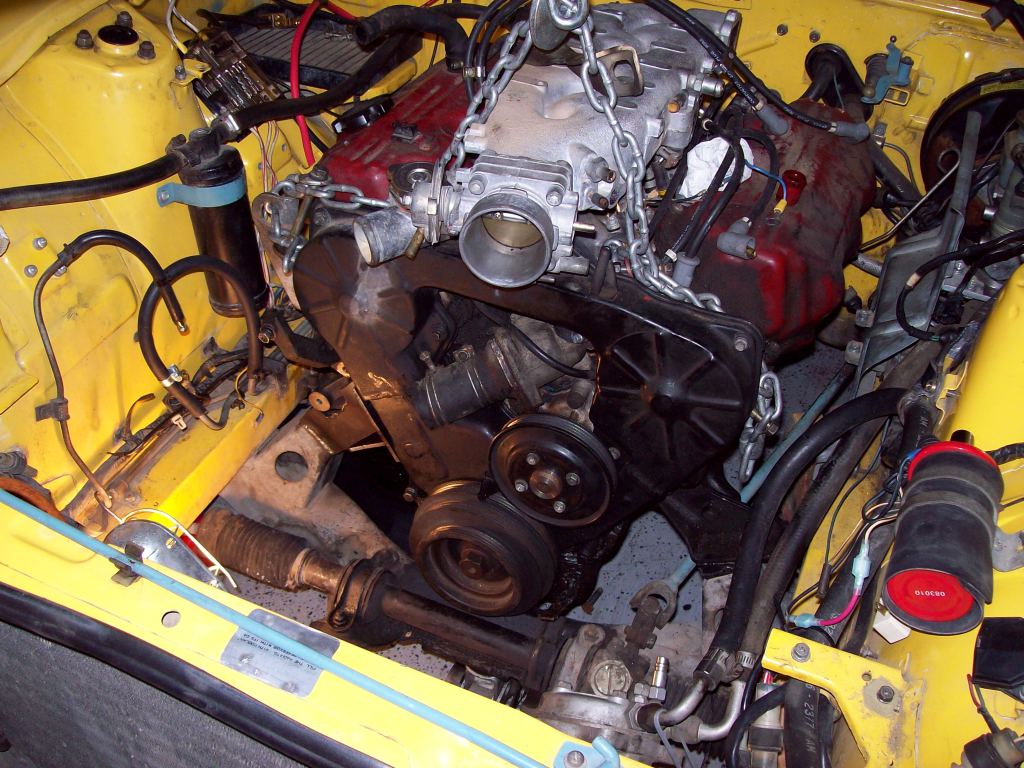
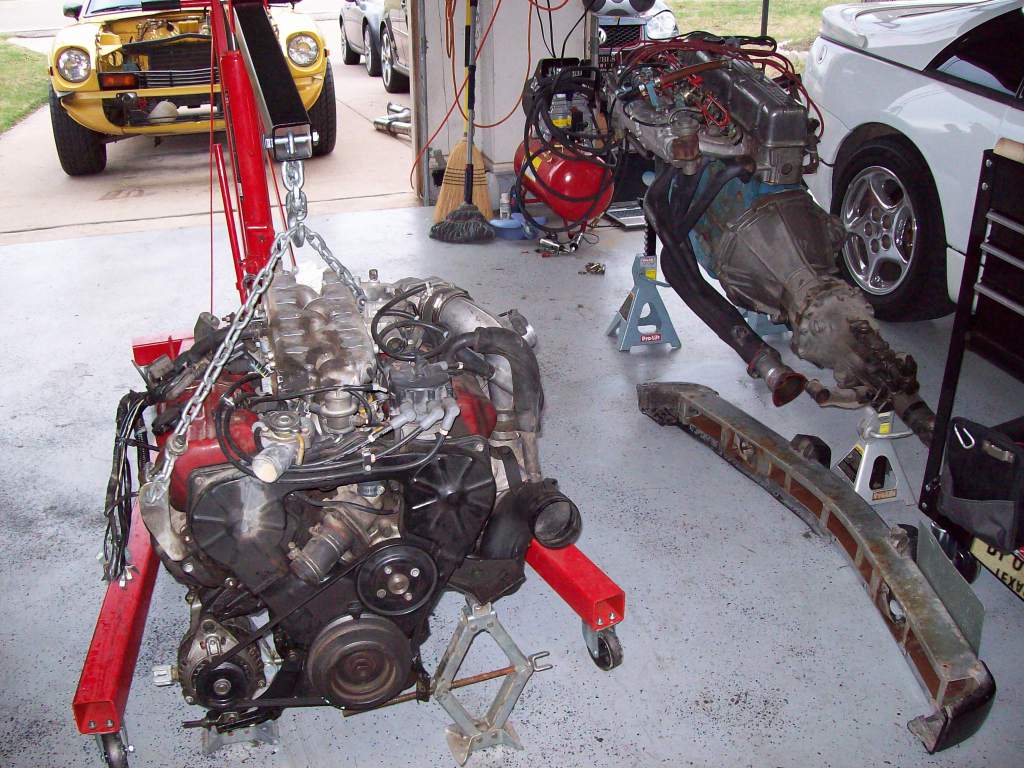
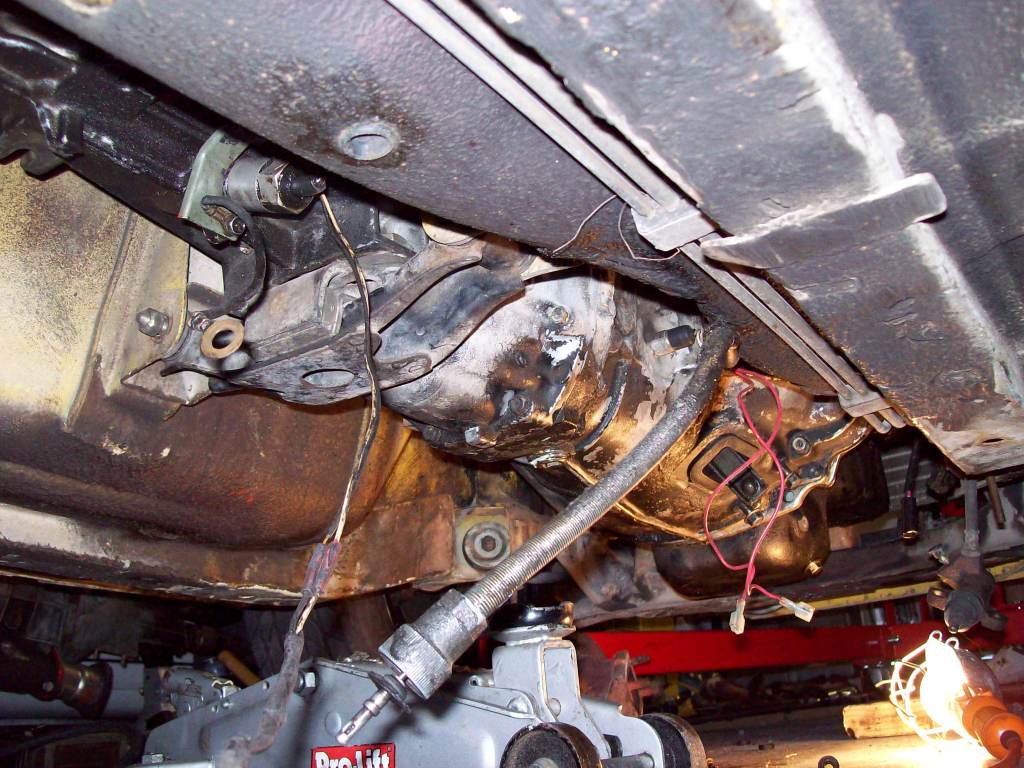
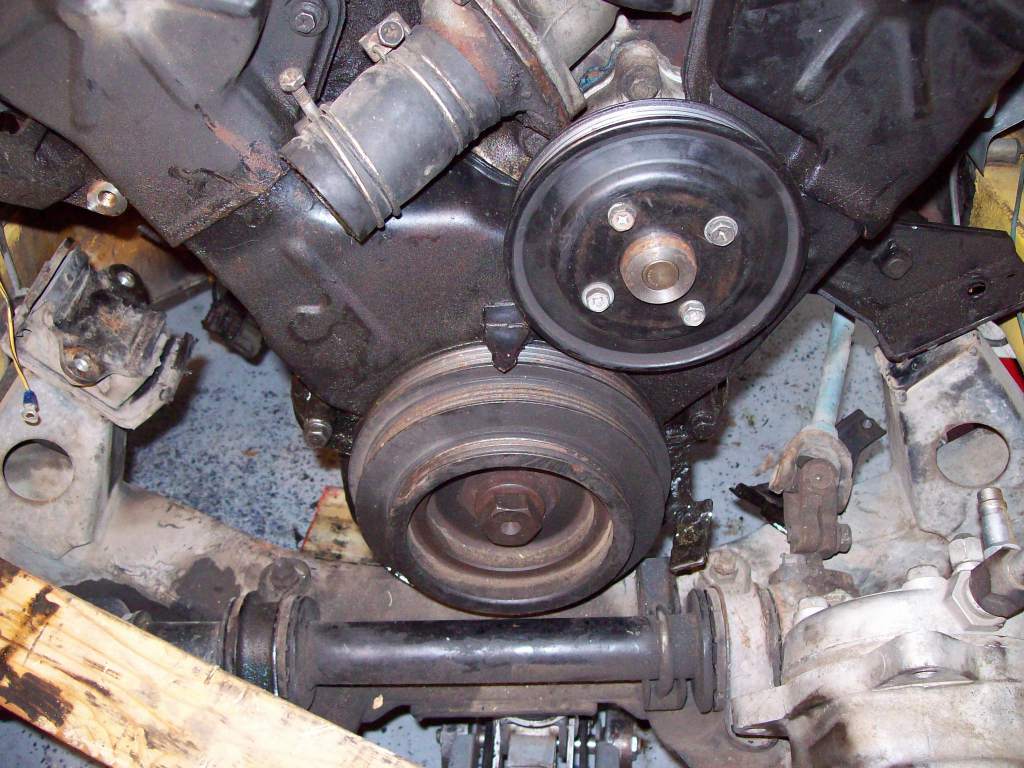
Spring break started so I got started on the VG S30 project. I took a perfectly good running L28 out, and started to put in an oil spewing compression missing hag of a VG. I decided to use another member (Dman) on the Z31Performance forums method for mounting the engine, with some modifications. Besides being completely solid, my motor has a forward mounted engine mount bracket that I can use, but the passenger side will be similar to his. The hardest part of this so far, is making the mounts and mounting the alternator. Dman's alternator bracket/engine mount seems ideal. I would like to have timing belt covers, so I will do mine a little different. I'm also trying to get my hands on a VG33, but hopefully I won't have to modify much from the VG30. I left the A/C components in, but it doesn't look like I will be able to retrofit (futurefit?) them to the VG--while keeping tubular manifolds and a front mount turbo--without anything short of a miracle. You can use the S30 transmission isolator and the S30 crossmember on the Z31 71C transmission: Maxima intake clears the hood. It's close though. Here you can see how close the driver's side is, but the passenger needs a little more fabrication: 1-1/2" S10 stainless butt welds will be used to construct the exhaust manifold primaries. As discovered by the other few people who've done this swap, the stock manifold and definitely the turbo do not fit. You either have to move the turbo, or move the steering arm. I'd like to modify/molest the least amount of stuff possible. The passenger side will require a down, up, down snake, for 2,4,6 respectively. 6 will need to go pretty low especially. I am curious as to how the 3" downpipe will fit. I'll cross that bridge when I get to it. Here you can see where the oil cooler sandwich (VG30ET was originally in an automatic Z31) plate makes the oil filter stick out too far. Perhaps it would "fit", but you would have to tilt the engine to do an oil change. This is not desirable. The oil cooler adapter will have to be removed. Exhaust primaries will fit here without much of a problem. In Z31s this isn't the case as the power steering pump is in the way (bracket still attached in this picture). Also note bashed fuel vapor and feed lines. Oops. Minimal damage though. The shifter is lined up quite well: And it looks like the 280Z 4 speed main drive shaft fits also: Got started on the driver's side mount: Plenty of room. The front ride height on my Tokico springs has been compromised. Can't do anything yet really until I have all the accessories and liquids in the car. The heater core and coolant send and return lines look rather easy to hook up. As is usually the case, I went a little overboard with the sawz-all. One of the heater pipes runs in to the firewall and needs to be cut. I will need to cut the unattached piece down and reweld.
-
I just looked at the manifolds on my VGs sitting in my garage, and you should be able to flip the manifolds 180 degrees to get the outlets facing forward. Or does this not apply to VG33s?
-
Autodarkening Welding Helmets - What do you recommend?
BLOZ UP replied to BLOZ UP's topic in Fabrication / Welding
I looked at it, but since it said it was only rated down to 20 amps, I decided to go a step up. I heard that 3-4 sensors are nice, and the extra low rating is ideal to me since I do a lot of ugly artwork that's low amperage. I've heard that the Pro-hobby can be used with <20 amps, but it's not rated so I just decided to play it safe since I was spending money.