Miles
-
Posts
2391 -
Joined
-
Last visited
-
Days Won
35
Content Type
Profiles
Forums
Blogs
Events
Gallery
Downloads
Store
Everything posted by Miles
-
I am looking for a water control valve that I can hook the original Datsun heater water control cable to.
-
I searched for this, but couldn't find an answer. I want to be able to control the flow of hot water off to the heater core after I do the V8 swap in my 240z. Three questions: 1. The flow of water to the heater core is from the outlet on the intake-correct? 2. The heater return line connects to the nipple on the SBC long style water pump-correct? 3. What heater water control valve works best with the engine swap? Any pictures? Thanks Miles
-
See the MSA mounts on my picture site below. Easy to install. Easy to set driveline angle. Starting my second 240z V8 swap using the MSA kit.
-
I am starting another 240 V8 swap. Is there any difference between the JTR and the MSA hood latch bracket design? I heard somewhere that the MSA hood latch moves it towards the driver's side. True/false? In my research I see that one member simply moved his stock bracket towards the driver's side a few inches. It looks like a good approach and would save some money too. With this approach I would try to move the latch about 1 inch more. Thanks Miles
-
see my thread http://forums.hybridz.org/showthread.php?t=126175 Miles
-
where did you get the rear floor mat with the z emblem? The PO of my son's v8 240Z made it. When we sold the v8 Z I kept the rear mat. Any upholstry shop could add a Z to a rear deck mat. Miles
-
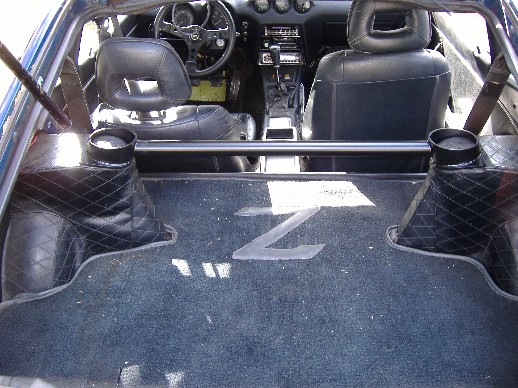
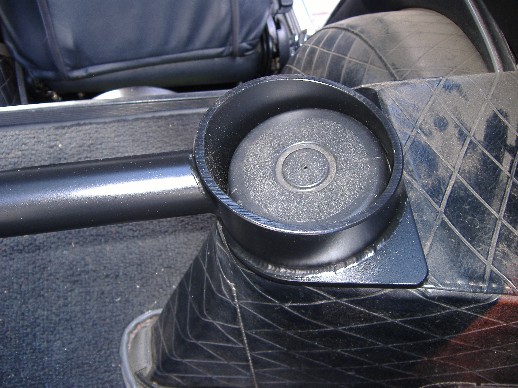
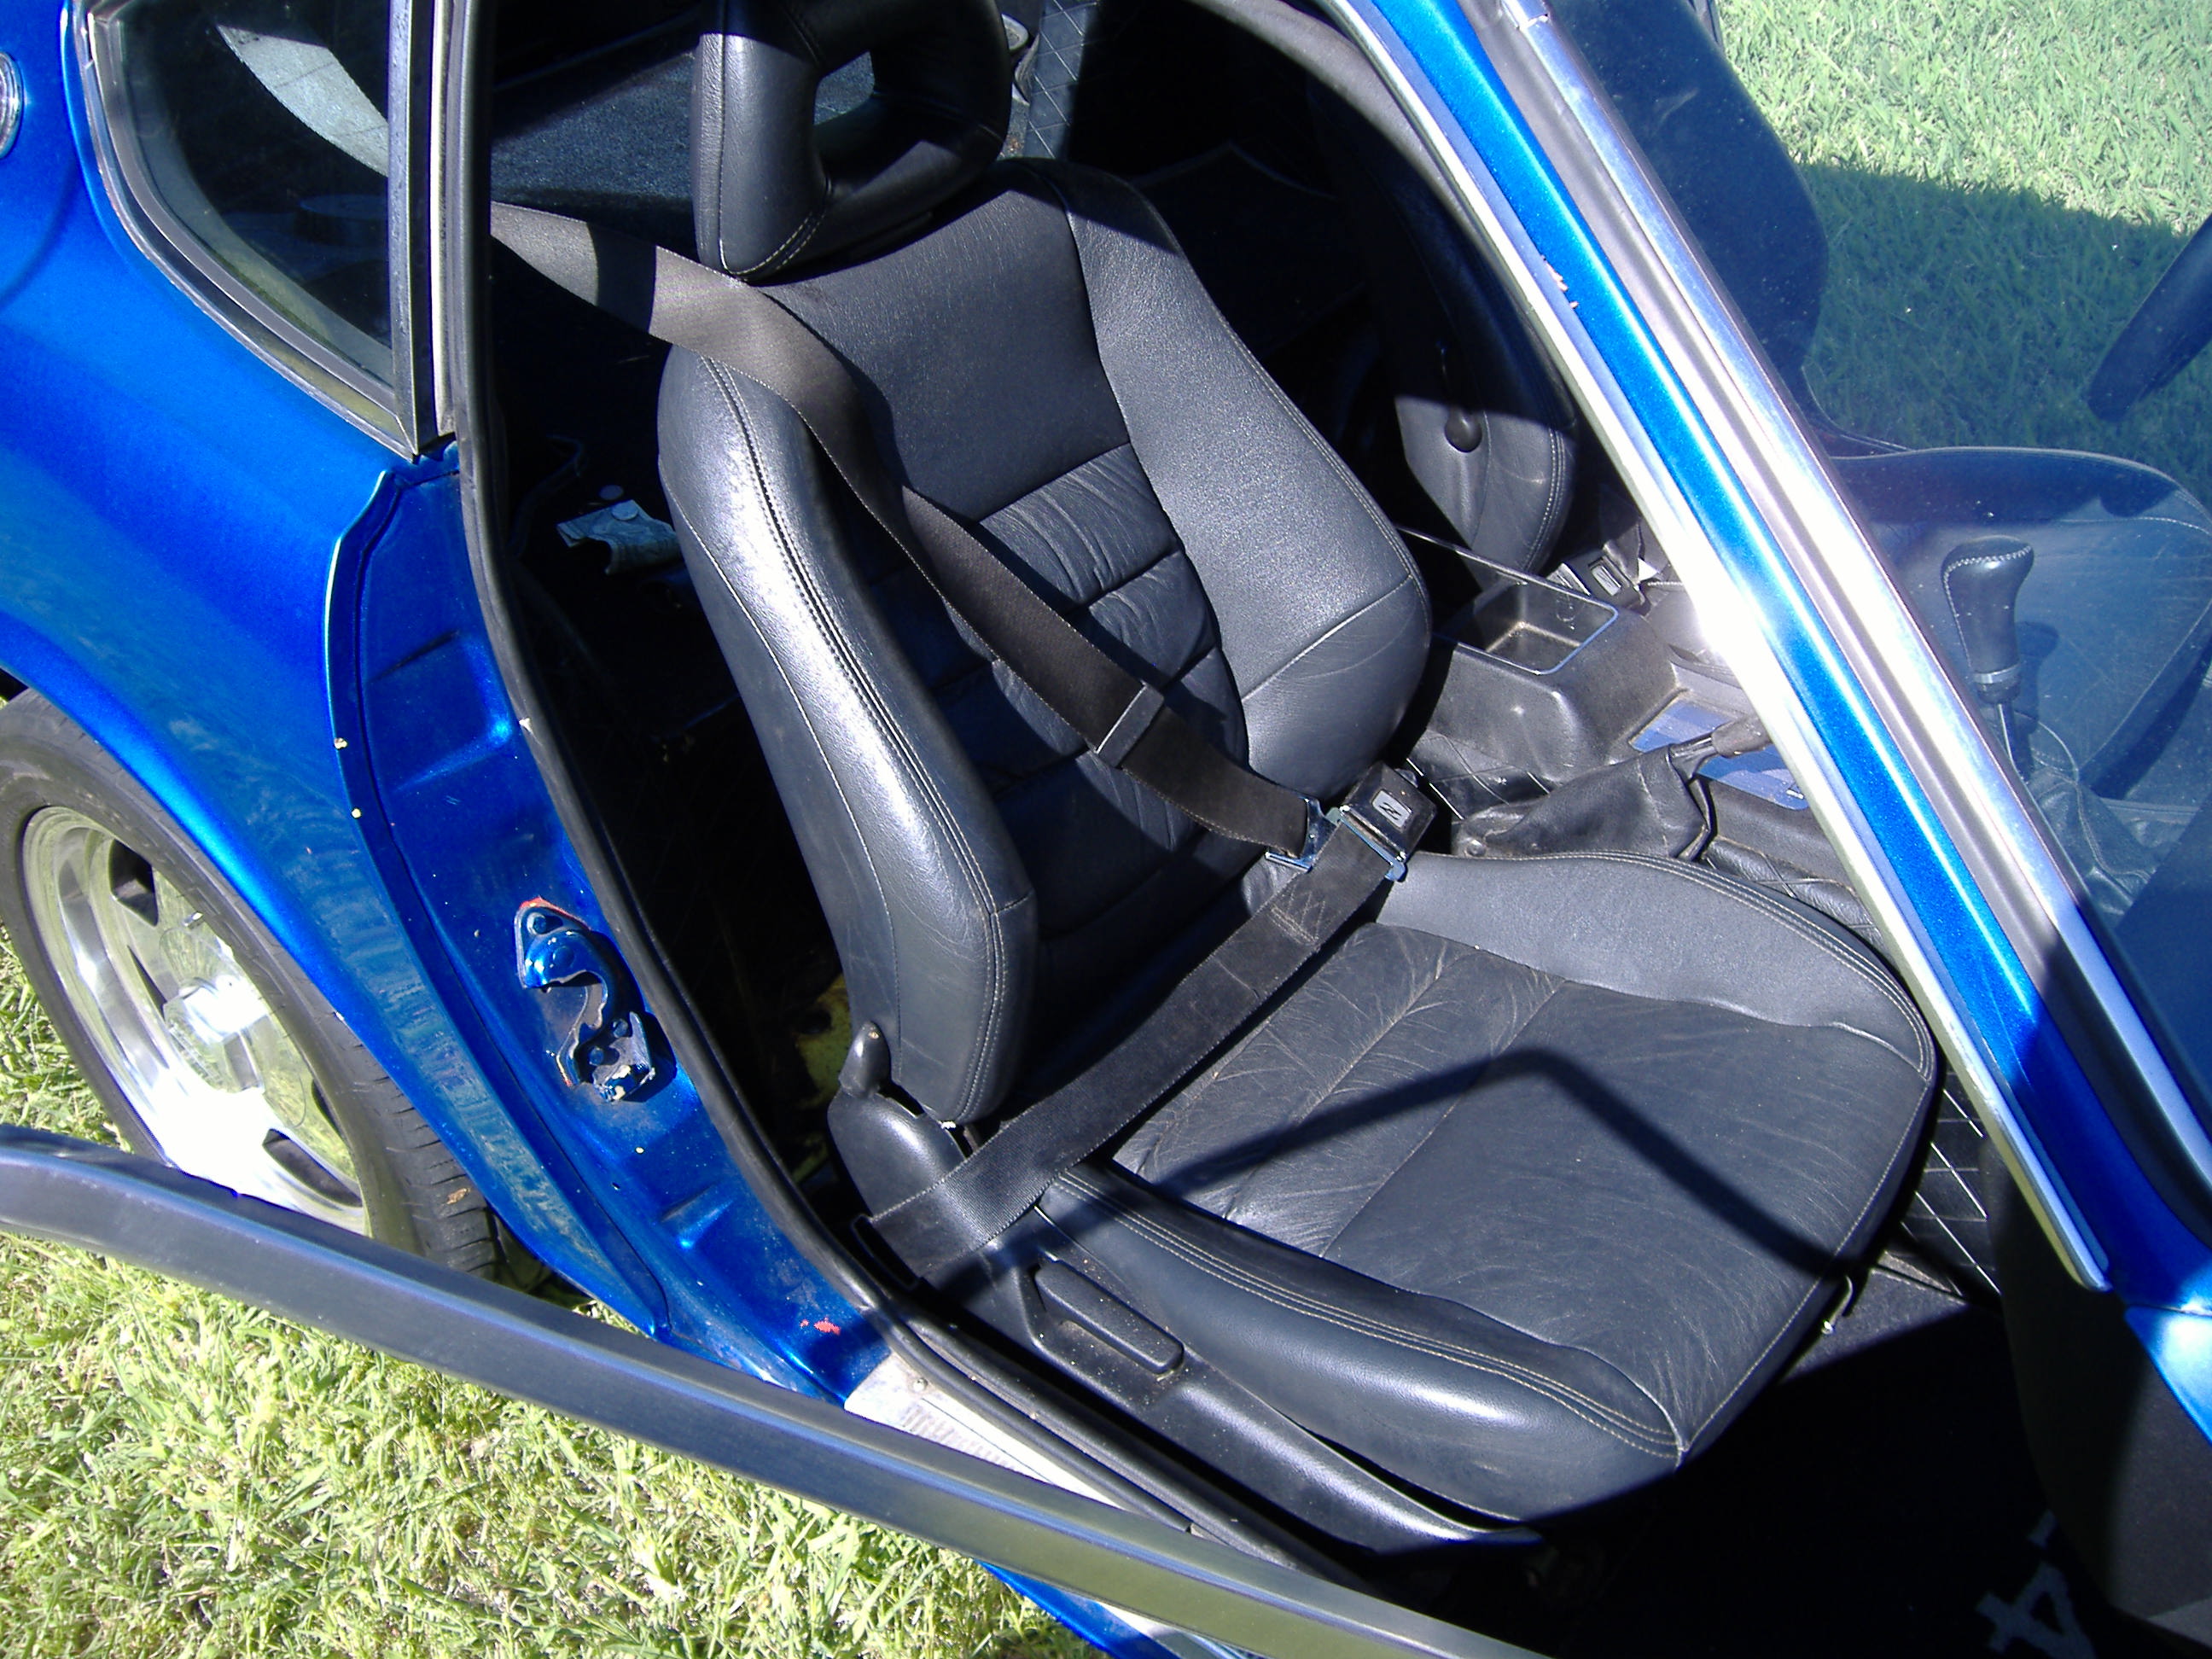
Check out my strut bar and shoulder harness install. The bar is very stout. http://forums.hybridz.org/showthread.php?t=126175 Miles
-
 Terry I bought three sets of rear bushings one from VB, another one from Summit and finally a set from MSA. I had new strut pins from Nissan so I measured each set and also test fitted the sleeves over the strut pin. Thet were all very loose. I also complained to ES and they said that the sleeve ID was too big and that it was a known problem to them so they sent me a new set of sleeves. The ID of the new sleeves was also too large and they were sloppy on the strut pin as well. All of the sleeve IDs were too large so I eneded up picking the tightest sleeves from my expanding bag of rear urethene bushings. I am now considering finding another manufacturer of urethane bushings and just replace all of the rear bushings again. Vendors: Prothane, Energy Suspension any others that make bushings for 240Zs? I want to get this finalized so I can move on to rear disk brake swap and, finally, move on to my next V8 swap. Thanks Miles
 -
Jason I'll try the Locktight. Thanks Miles
-
72 240Z: Approximately 6 months ago I replaced the stock rear control arm bushings with MSA urethane bushings because the outer passenger side pivit was clunking when shifting and going over bumps. The clunking went away with the new urethane bushings. Now the rear passenger control arm is clunking again when shifting. At least I think that I have narrowed it down to the control arm bushings. Last weekend I installed a tight 3.54 R200 with urethane mustache bushings, checked the U-joints and tightened all of the suspension bolts during re-assembly. And still I get a loud clunk from the passenger side. I also checked the stub axle flange and it is tight. The stub axles are new Nissan parts installed two years ago. What would cause new urethane bushings to act like the old stock worn out rubber bushings? Could the metal sleeves be defective? Could the sleeve ID too big allowing movement about the pivit pin? From searching the forum I know that the sleeves become locked in place once they are tightened down and the the bushing rotates around the sleeve, but it seems that if there was slop between the sleeve and the pivit pin the sleeve could move. Thanks Miles
-
240z Front Gland nut Issues
Miles replied to deadlydatsun240's topic in Brakes, Wheels, Suspension and Chassis
I have found that pipe wrenches don't grip the gland nut very well and they do not apply enough twisting force to budge a stuck gland nut. I have looked at buying a $100 dollar spanner from Snap-On, but found a cheaper home garage approach that works: If you can get a good bite on the stuck gland nut, place the gland nut in a vice and twist the strut housing. This gives allows a better grip on the gland nut and more twisting leverage. I have removed both front and rear stuck gland nuts this way. With some help I removed the rear strut with the control arm attached and placed the gland nut in a vice and cranked it down real hard. Then using the control arm as a lever, twisted the strut assembly. The gland nut released its grip with very little effort. It is all about getting a good grip on the gland nut and leverage. With the front strut I used the spindle and a pipe as a leverage point. Be careful not to dent the threaded end of the strut tube which I did do when trying to remove a stuck gland nut with a pipe wrench. Miles -
Lowdown I had the same problem on my first R200 install. I had the front mount flipped around. Are you using the stock 240Z half shafts? I am asking because I did this same swap 6 years ago in my son's 240Z v8 and had no problems, but recently became aware that the 240Z driver's side half shaft is too long to work well with the R200 and may bind the suspension. I also bought a R200 and a matching set of 78 280Z half shafts with the understanding that the left shaft is shorter to allow for the side bulge in the R200. Not so. I measured both left and right shafts fully collapsed and they are of equal length. Thanks Miles
-
Jon Sounds easy. Thanks Miles
-
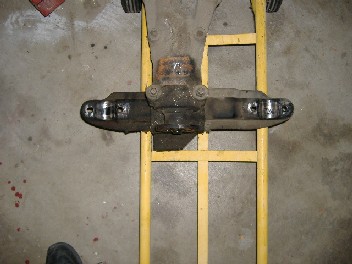
The R200 front differential mounting bracket has the differential offset to the passenger side. Can someone compare side by side the R180 and R200 front mount and the mustache bars. Here are some pictures of the R200 bolted to the front mount bracket. Could it be that Datsun offset the R200 mounts to the passenger side to compensate for the wider R200?

-
I have been researching this for hours and am not confident of my conclusions concerning the many opinions about needing the "shorter" 280Z driver's side halfshaft when doing the R200 swap. 240Z vs 280Z halfshaft length: There has been much debate about halfshaft length and the R200 swap with the concern being that the R200 driver's side halfshaft is shorter to compensate for the R200 which bulges to the driver's side. The point being that if you use the 240Z driver's side halfshaft it will be too long and will bottom out causing binding of the suspension. Also, I have read of complaints about the 240Z driver's side halfshaft not fitting during installation. I just measured a left and right 78 280z half shaft in the fully compressed position. They were both 12 1/2 inches center to center as measured at the fixed part of the yolk. I then measured the left and right halfshaft in the fully extended position and got 14 1/8 inches for the right side shaft and 13 7/16 inches for the left side shaft for a 11/16 inch difference. Is that enough to make a difference? Question: Has anyone who did the R200 swap using their 240Z halfshafts actually experienced the driver's side halfshaft bottoming out or any installation or suspension problems?
-
RE: Replacing the side shaft and pinion oil seals After reading this thread I have the following questions for a 78 R200: 1. How do you pull the side shafts off to access the side shaft seal? 2. For the pinion seal is there really a crush sleeve or can I just remove the nut and pinion to access the pinion oil seal and then re-tighten the nut to specs? 3. Do I have to buy a new nut for the pinion? Is the nut staked on like the stub axle nut? Thanks Miles
-
Try KVR. p/n m7069 for solid rotor $74.10/set. KVR phone 800-636-0854 Miles
-
Get the video tape from Z Therapy and then balance and adjust your carbs. Be sure to properly balance the carbs per the video. As for mixture I found that my carbs work best at about 2 1/4 turns out. Miles
-
Cost $230. It is stout so I can attach my shoulder harness.
-
Here are are some pictures of a rear strut bar I had a local fab shop make. It was built by Tolle Fab in Sacramento 916-524-5315. Having trouble getting the pictures to load. I'll try again....
-
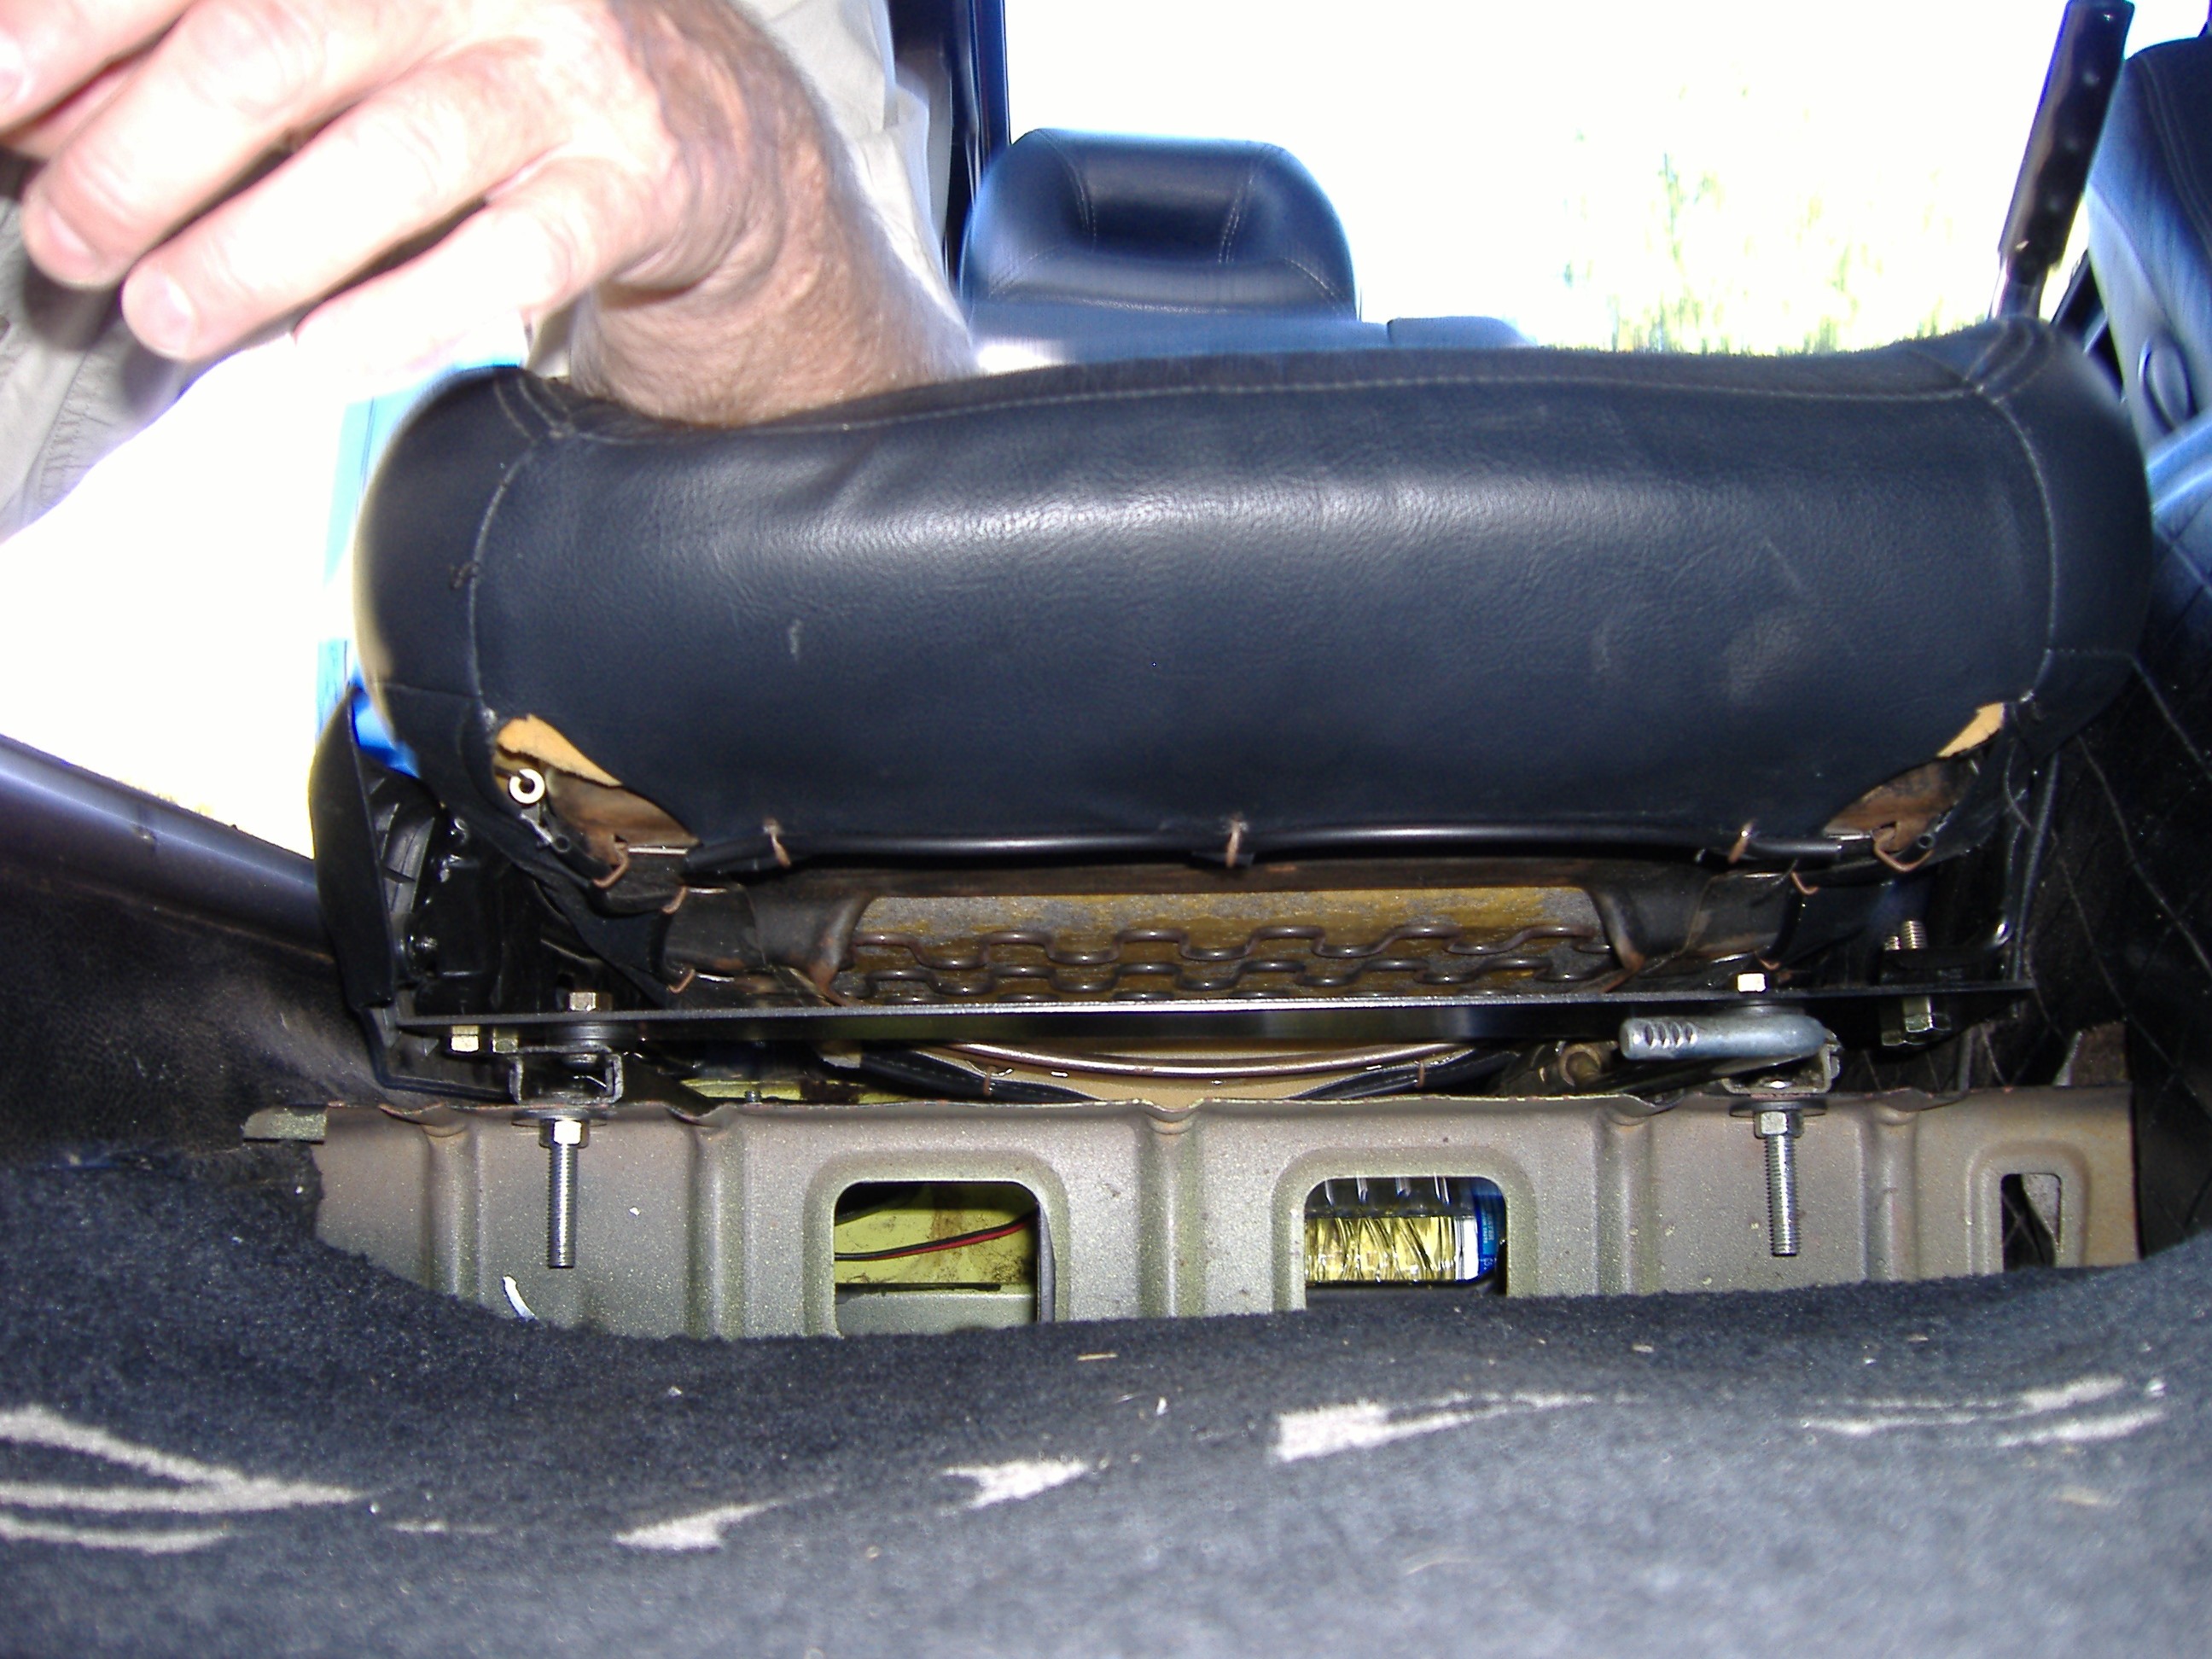
98 gsr seat pics:
-
I just bought a pair of 98 Integra GSR black leather seats for $240 and installed them. They fit perfectly, look like they belong on the car, and the stock seat belts are still usable without modification. Removing the GSR seat rails was a bit of a pain due to the many spot welds that I had to drill out. Once I got the seat rails off I installed two pieces of steel flat stock 1/8" x 4"W 18"L across where the GSR seat rails used to attach at the front and rear of the seat. Then I bolted the Z sliders to the flat stock after a test fit in the car. The GSR seats are much more supportive especially in the lumbar area. Miles
-
I just spent a day looking for seats at several auto wreckers. I found a set of 2003 Saab 93 seats that should fit in a 240Z. The width is just under 22 inches and the seat rails look like they would be easy to modify. The driver's side seat is powered. No air bags. Price for black leather is $400.00. Has anyone installed 2003 SAAB 93 seats in Z? Miles
-
I just spent a day looking for seats at several auto wreckers. I found a set of 2003 Saab 93 seats that should fit in a 240Z. The width is just under 22 inches and the seat rails look like they would be easy to modify. The driver's side seat is powered. No air bags. Price $400.00. Has anyone installed 2003 SAAB 93 seats in Z? Miles
-
I originally posted this question back in 2004 and I am now on my second JY R180 differential. Are there any shops in the Sacramento area that can rebuild a R180? I am considering having a MSA LSD installed at the same time. Also, are there any shops in Sacramento that can rebuild a L24 engine? I can take the engine to Rebello, but would prefer to find an engine builder in Sacramento if possible. Thanks Miles