walkerbk
Members-
Posts
227 -
Joined
-
Last visited
-
Days Won
10
Content Type
Profiles
Forums
Blogs
Events
Gallery
Downloads
Store
Everything posted by walkerbk
-
Pm sent.
-
I haven't had any problems with it so far and I have driven her around 10k miles across country and all. I also have a ls swap in mine so it holds the power just fine, no issues with anything breaking.
-
Had the same problem on mine and it was the windshield gasket that was leaking.
-
How is the build going? Any updates?
-
S12W/maxima calipers brake bias
walkerbk replied to mforget's topic in Brakes, Wheels, Suspension and Chassis
If you use the s12+8 calipers from the later years, they were machined to fit vented roters like the s12w ones but have smaller cylinders making for more of around 57% to 43%. This is what I run and am very happy with the setup. -
260z rear shock loose in tube
walkerbk replied to toddcripe's topic in Brakes, Wheels, Suspension and Chassis
Yep. Gland nut came loose. With that you probably have a nice clunking noise every time you hit a bump. That noise is the bottom of your strut bouncing around in the housing. With the gland nut coming off you probably screwed up the threads on the nut, the strut tube or both. You can try and clean the threads up and replace the nut, cross thread it and deal with it next time you replace the strut or just go coil overs. I had this exact thing happen to me and I cross threaded the gland nut back on and will replace with coil overs once I am done moving. -
280z ls1 cxracing engine mount/steering rod issue
walkerbk replied to mforget's topic in Gen III & IV Chevy V8Z Tech Board
Looking back at mine it has worn a nice ring around the shaft. So I think I'm going to end up notching mine after all. -
4L60E Crossmember Mounting points!! Consultation
walkerbk replied to Bo Jassim's topic in Gen III & IV Chevy V8Z Tech Board
I did something like the JCI design but made mine out of 1x2 and where it runs up for the exhaust cutouts, I kept going up the trans tunnel and added two more bolts. -
Amongst all the big project I do on the datsun over the weekends, I like to keep a small project going during the week to keep the progress up. This past week project was the steering wheel clamshell. Mine had long ago bit the dust and i pulled it off and through it in a box and left all the wires and such exposed. About 3 weeks ago as im packing and moving stuff around getting ready for a 3rd cross country move, i came across it. All the mounting points had been broken in one form or fashion but I figured it wouldn't hurt to try and repair it. I didn't take pictures of the progress as I am always forgetting to but I got the steps and the end results which turned out fantastic. Step one, the top. With the top side having all the screw mounting points broken away, I was not sure about exact locations and heights of each but I had the base locations. From that, I cut pieces of 1/2in pvc and formed it to fit on the clamshell. I then sealed it to the shell with play-off (I think clay would have been better as the play-do leaked a little). after that, I filled the pvc with fiberglass epoxy (not poly) and added some chopped fiberglass pushing it in with a tooth pick. This gave me strong "peers" as to attach the bottom side. Once dry, I made three cuts down the sides of the pvc and it popped right off. Step 2, the bottom side. I then filled the screw hole or "tubes" with play-do to keep the epoxy in and wrapped ductape around what was left of the tubes. This formed a mold that I could then pour epoxy into to build the tubes back up. The epoxy I used did not stick at all to the sticky side of the ductape nor did it have any chemical reactions. Step 3, matting the two peices. I thought it would be a little harder than it was but this was the easiest step. I just pushed the two sections together and then used the drimel where needed with a sanding drum. It only took about 15 min and made a nice amount of dust. I then drilled holes and inserted screws. I did drill slightly larger holes than needed just to make sure that it didn't recrack but it worked perfectly. Step 4, paint. I did a light sanding just to scuff the surface with some 220 grit and then hit it with plastic primer. I then used 2 coats of textured rustolium spray paint (each coat was 2 light coats so really 4 in total). Although I liked the look, it was slightly rougher than what i wanted so I took 2000 grit and just lightly did a once over just to knock down the high points. I then applied 2 coats of matte clear uv resistant non yellowing. Alternate step 4. I was going to use the primer, then texture (1 coat), then the hammer (1 coat). I figured this would give it a raised texture then a leather grain look. I didn't do this because I loved the look of the texture. I have tried every bed liner and texture coat and this is one of the best. I am very proud of the results and they speak for them selves. If there are any questions let me know.
-
Need quick reference for fuel tank nipples.
walkerbk replied to vleetv's topic in Gen III & IV Chevy V8Z Tech Board
I doubt that pump is going to keep up. Get an inline one or a in tank one that will supply the fuel needed. I swapped in the 02 camaro plastic tank and it has the inlet, outlet and then 3 random vents for expansion and such. Im guessing one goes to your expansion tank and the other to your charcoal canister. This alows for the tank to fill up and expand with heat. -
Need quick reference for fuel tank nipples.
walkerbk replied to vleetv's topic in Gen III & IV Chevy V8Z Tech Board
Not sure but your feed line should be bigger than your return line. -
280z ls1 cxracing engine mount/steering rod issue
walkerbk replied to mforget's topic in Gen III & IV Chevy V8Z Tech Board
Mine was close as well but fit... try bolting it all together loosely and then check fitment. -
The more i see them the more I like the look. I to would like to know how you finished the edge. I have heard of people welding a very small pipe on the outer edge to finish custom flairs but would like to see what you have planned. Also, how are you tying it into the airdam.
-
Traction controll on a Carburated Car?
walkerbk replied to Rusty Old Z's topic in Brakes, Wheels, Suspension and Chassis
I have been working on something like this for my lsz. It is an arduino controller that will have 4 wheel hall sensors. It will then have a knob to adjust how much traction is "desired" i.e. no traction to warm tires up in the box or 95% for launching. The arduino would then be able to cut both spark and fuel from a cylinder. I have about a 75% salution for the programming, I just have to get time to finish it. I'm sure something similar could be adapted for a carb engine that cuts spark at the dizzy if you are any good at programming. -
I might just be crazy because that's what I want to do in a similar way but I thought someone had made it fully out of 1x2 instead of straps... I'm going to just stick with that design I guess (with a little tweak here and there).
-
And if I can't figure something else out by this evening, that's what I will start doing with a extra front support.
-
I thought there was someone who had made a frame to go over and under the tank instead of using the 1x2 over and a strap under.
-
My ls swap has been running now for about 3 years but when I originally mounted the camaro gas tank I did a very poor job and had the mounting rails running front to back. I am now going back and cutting out all the old and doing it right but I can't seem to find the posts on how others have done it. My plan is to have mounting rails run left to right made of 1x2 and then make a 2 piece clam shale to mount it. Both pieces will be made of 1x2 and then weld to the mounting rails. I would like to see how some other people have mounted theirs however before I do this.
-
Wow... I never knew that there was something that went there. Now I kind of want them.
-
Brake indicator switch rebuild
walkerbk replied to walkerbk's topic in Brakes, Wheels, Suspension and Chassis
Got everything put back together and am happy that after owning the car for 6 years, the red brake light has finally gone out. Zx brake master 2+2 stock booster No prop valve S12+8 vented (multi size pistons) calipers in the front 240sx calipers in the back I like the red up. -
Brake indicator switch rebuild
walkerbk replied to walkerbk's topic in Brakes, Wheels, Suspension and Chassis
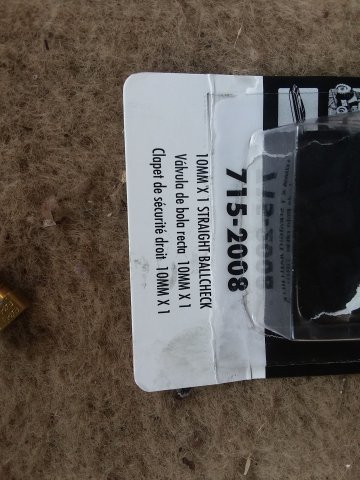
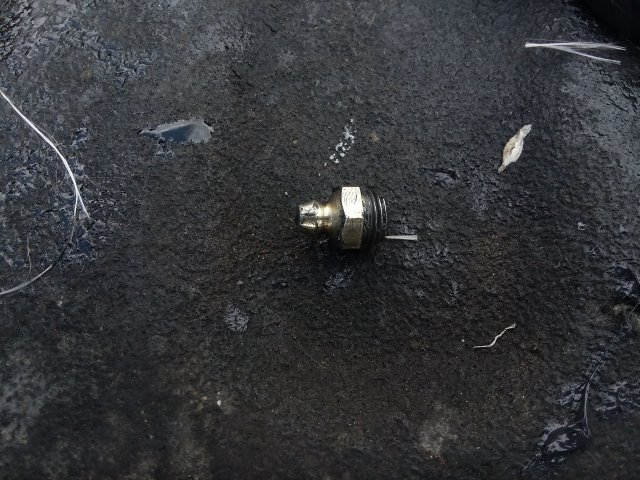
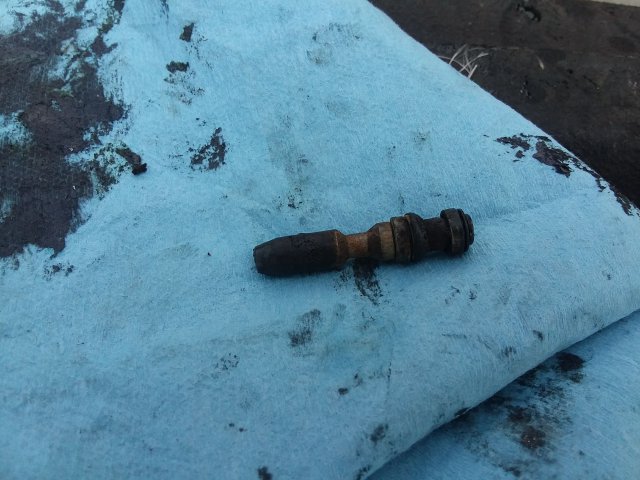
Well I got it... After a full day of heating and working at it, I figured it out. I tried going at it with compressed air but that had no effect. My next to last Idea was to attack it with the grease gun. Napa has 10x1.00mm grease zerks (part number 715-2008) that I was able to mount on the ends. after attaching the grease gun to it and pumping it a few times, the plunger shifted. After that, I applied the blow torch and continued to pump with the grease gun until the end popped out sending burnt grease everywhere. it is now going to soak in the cleaner overnight again and tomorrow, I will clean up the bore and hopefully replace the seals. 77, DATSUN!!! (for real, make???), 280z 2+2. -
Will a 280z 2+2 work as a donor car for a 280z?
walkerbk replied to nubkidZ's topic in S30 Series - 240z, 260z, 280z
Most everything on the back half of the 2+2 is different. The windshield, doors, hatch rear quarters and all interior panels plus more. However, if you do buy it and want, I will take those parts off your hands for free. -
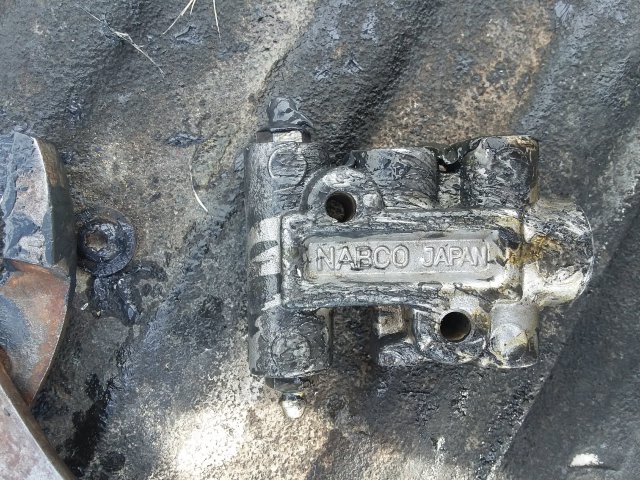
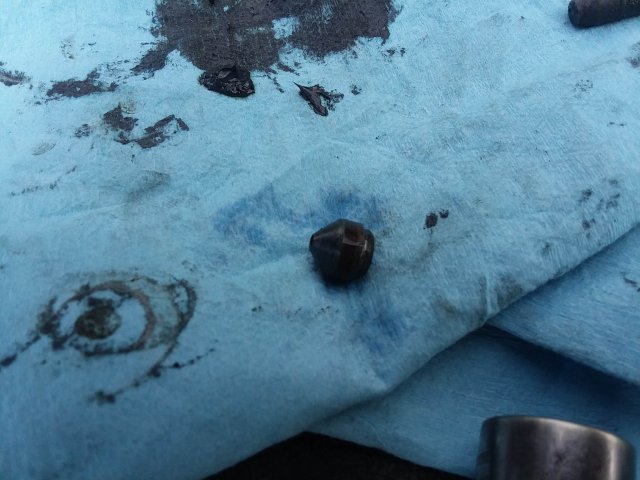
Does anyone know how to disasimble these? I have tried everything that I know of, wd40, heat, soaking in paint thinner... I can't get the cone out that goes to the front in order to get the plunger out.
-
I am still working on getting everything bolted up (work got in the way). The axles were still to long. Don't even try the rock auto, autozone axles because they won't work, they have to be the stock 300zx axle (others have talked on this). Even still they were to long and had to be shortened via someone else's idea. He only however shortened one side. I shortened both and got about 3/4 in space between the spacer and the axle giving plenty of travle.
-
I had the exactsame thing happen to me. Im not sure if the mms axles will fit, i wasnt even going to chance it since the tripod design is weaker. The Autozone ones are made by the same company so they won't work either. I ended up buying a OEM set used off Facebook marketplace. It took like 4 hours of me dragging a bubble around the U.S. to completely search for them, but I got them. I ended up buying them from Marcos autoworks located in Walkertown, NC (336-577-7128) for 175 shipped. I then shortened my axles per someone else's idea (see below). He however only shortened one end, I shortened both ends and flipped the cages... I have about 3/4 of an inch with it fully dropped and just over 1/3 an inch with the jack under the control arm. Hope everything works out.


