Dat73z
-
Posts
852 -
Joined
-
Last visited
-
Days Won
8
Content Type
Profiles
Forums
Blogs
Events
Gallery
Downloads
Store
Everything posted by Dat73z
-
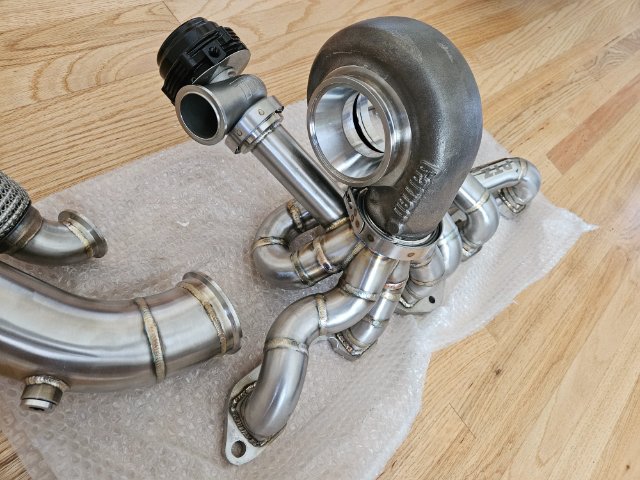
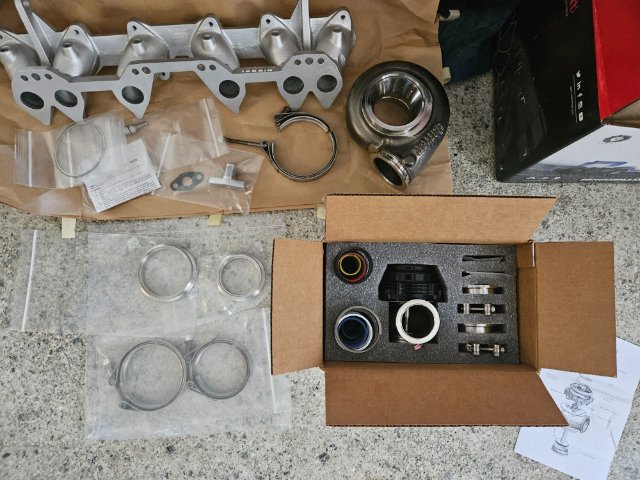
@Sean 83ZXT for my setup, I wanted the highest response setup with a powerband between 3-7k running at 15-21psi (OER/SK carbs can do ~16psi constant and 21+psi intermittent). I had also looked at the g30-770 but the 660 won out for my goals. ATP advised that the newer aero on the G series turbine wheel will flow enough to keep backpressure in check on the large 3.2L up to 7K without choking up but the key is to mate it to the .83 A/R housing. Also noted that on the g30 the 660 comp wheel is the most boost responsive configuration that is capable of providing the right amount of airflow for those required boost levels.
-
@DuffyMahoney yes the step up will be necessary to clear the turbo and manifold. I assume the HKS v2 surge tank was designed with the s130 in mind as fitting everything into the s30 poses some interesting challenges. Likely the cnc option would be between the Mik short runner and the FET mid, combining the best of both. @rossman after playing with boost adviser and staring at compressor maps for a while I narrowed it down to the g30-660 or 770. After discussing with ATP turbo I went with the g30-660, as it sounded like a good match we'll see how it goes. @AydinZ71 I looked at the g25 too but it seemed too small for the 3.2 8.5:1, perhaps it would be a good match for the l28ET. Post some pictures of the swain coating when you get it back, that sounds pretty sweet. I was considering that this time around but ATP inconel is on the table again as well.
-
Yeah I'm stoked to get this setup together! I suspect the 0.83ar will spool like the old .63 and provide a lot more. The v1 is really awesome. I wish there was a vintage option that checks all the boxes, but after some news today I may go with a custom billet cnc option. Mikuni length with proper clearance and porting for 50s.
-
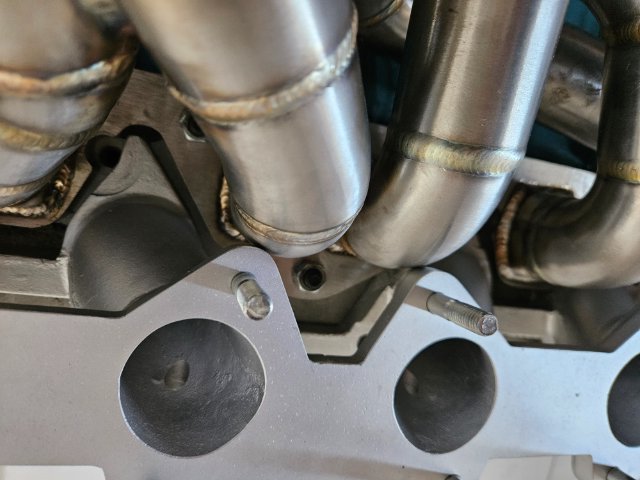
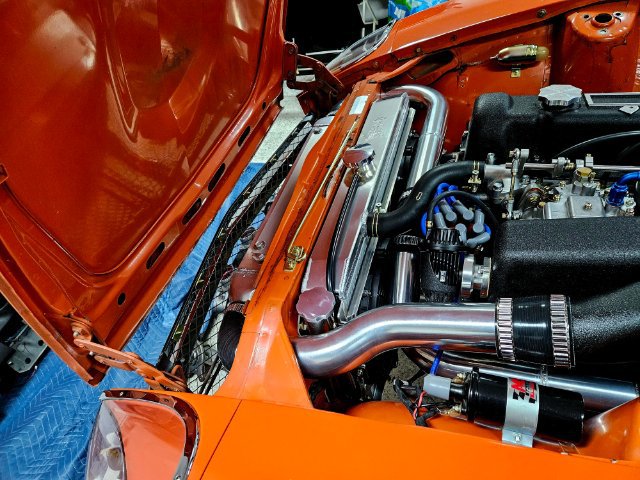
More mockup work with the new turbo setup. It would be pretty sweet if I can run this FET manifold, the clearances are actually pretty good. Perhaps if I machined a bit off the DCOE flange side. The downside to this manifold is it's pretty thin walled, so porting for 50s may require welding. Either way I can already see I will need to cut and weld the inlet on the new G series like I did with the old hybrid turbo.

-
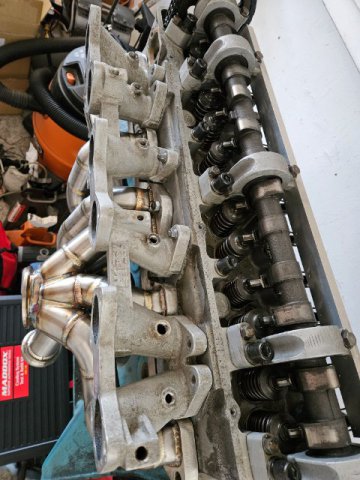
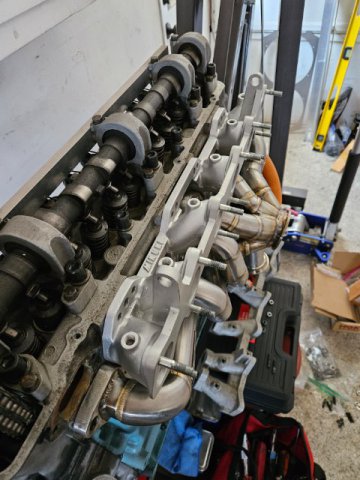
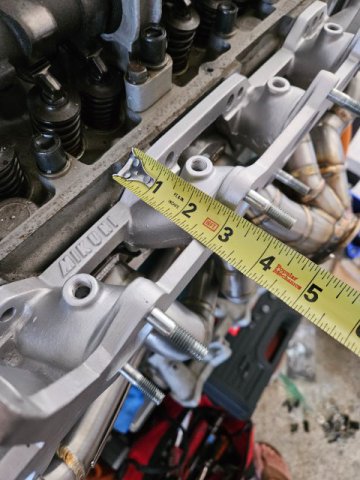
More mockup work on the #s matching spare motor. From past measuring I know the Harada/Kameari, Nissan Comp, etc. long runner manifolds put the v2 surge tank into the s30 shock tower so those were non starters. The Mikuni short runner will definitely need to be modified to clear the PTZ manifold for runners 3&4. The FET mid runner clears all but may be right at the shock tower. Also exploring a custom CNC manifold option. This is probably super niche but maybe someone can find this useful, I know I could've used this info yrs ago
-
To get a better idea of what modifications may be required, I compared 2 spare mid/short runner manifolds I have. The vintage Mikuni which is the shortest to my knowledge may require modifying runners 3 and/or 4. The vintage FET is mid length and may have just enough rise and run to clear, but I'll need to see if it puts the surge tank into the shock tower.
-
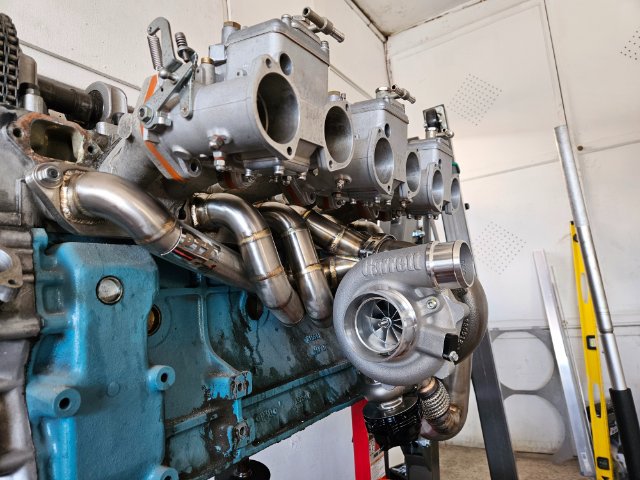
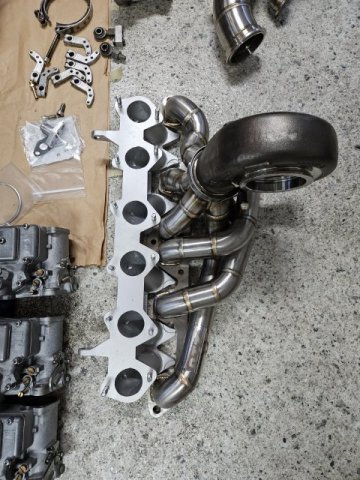
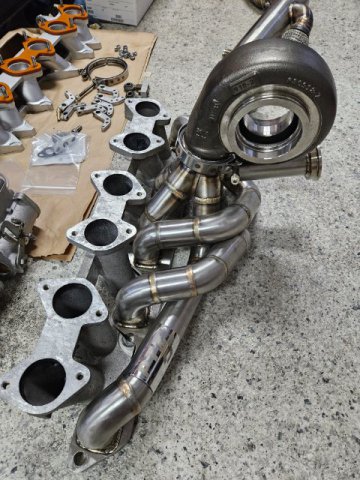
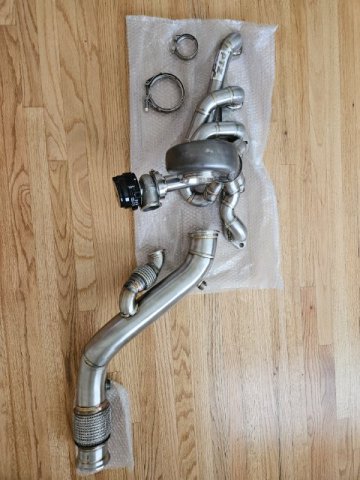
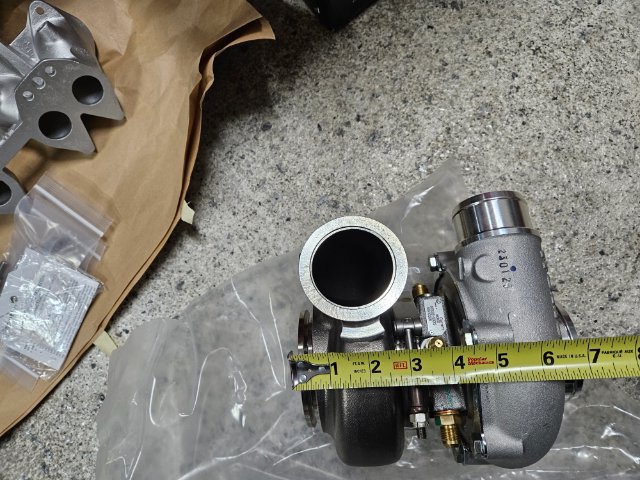
Still some delays, but parts are slowly trickling in. Pro TunerZ produced a custom manifold and downpipe for me, to run a Garrett G30-660 vband turbo. Huge shout out to Hussein on that, the workmanship is great. Once I get my 50s set up then I'll need to mock everything up on the car again and clearance or modify as necessary before heat shielding.
-
It's been a while but I'm still working on things in the background. Mostly I've been parts delayed but there should be several major components coming in this next week or two. Protunerz finished fabrication of my custom vband manifold and DP so that should be in soon and hopefully my Z Car Garage brakes will be in later this month. Tonight I started tearing back into the motor. I have some quick business to tend to in SoCal around Sept so hopefully if all of the parts and timing lines up I can get everything mocked up on the motor and drive the turbo setup down to ATP for inconel shielding.
-
Did they paint it in the prep bay with all of the trim on it? Just constructive feedback but I'm surprised you paid to paint it like that after you spent so many hours painting it in your garage. It's only a few hours to pull the trim and glass, certainly less than a day.
-
Apparently you can pre-order them here: https://milkfab-engineering.com/shop/ols/products/milkfab-l6-ultimate-intake-manifold?fbclid=IwAR2QU6NWyno4bkaHjMeclJE8GjibiUpXNflrK7zKtNn78XIMtKwqNsuRALg It would've been cool if they had a standard dcoe style pattern for the runners to open up itb options. Also I just realized in the description you inspired the design so I suppose that makes sense 😅
-
That plenum is a work of art. Have you seen the Milkfab engineering plenum? It looks like they're working on something similar, but I think your design looks much cleaner.
-
Looking forward to it and welcome back!
-
A musician's therapist (The $300 Z)
Dat73z replied to Zetsaz's topic in S30 Series - 240z, 260z, 280z
Your car looks really straight but was it ever in an accident or are the moustache bar studs off on the chassis? That spacing to the spare tire well looks really tight. I would think others with the same setup would be complaining about that. Did you ask T3 about what's going on? -
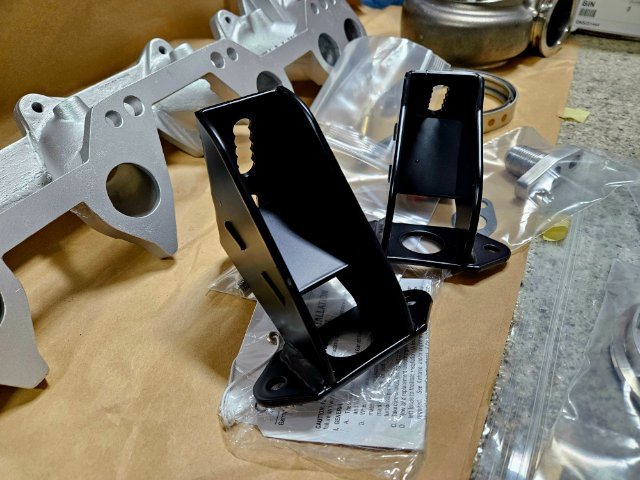
Also before I forget huge shoutout to Harold Burroughs @ https://www.stuffharrydoes.com/ He fabricated me some reinforced engine mount brackets which will allow me to fine tune the angle and tilt of the engine. In my case I want to optimize the balance between the required carb angles and height/tilt of the engine to get more clearance for a strut bar or whatever bracing will eventually go in the front.
-
Just some quick updates, the build has been going on in the background. Life has been busy so I've only been able to put a couple hrs here and there. Still waiting for parts, mainly the ZCG stoptech brakes. I'm also getting a tubular manifold and DP set up for a Garrett G30-660 0.83a/r turbo and Tial MVR 44 wastgate. Originally when I went with the t3/t4oe hybrid I thought I was going to be doing a l25/l28, but then life resulted in the 3.2 instead. Once that gets in I'll check clearances then off for inconel shielding again. The new turbo tech should provide better response/spool even with the larger sizing and it is also all vband in/out so hopefully the hardware stretch issues I had before won't be an issue anymore.
-
I'd think there'd be a lot of flex around the roof, I've seen the factory joints crack out on some s30s. Why JB Weld instead of panel bond adhesive?
-
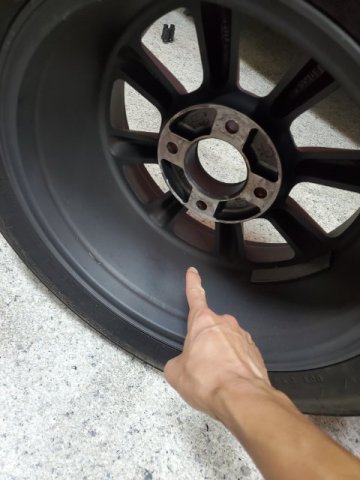
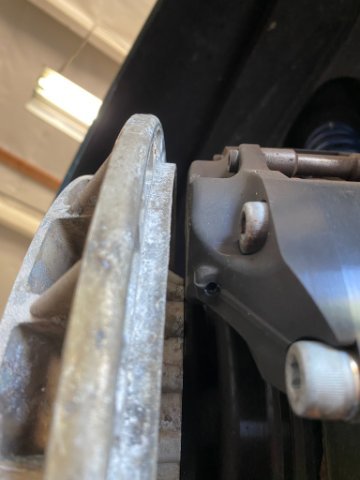
Thanks @Tank. That is what I suspected for the t3 micro bbk where the calipers sit proud of the hub/wheel mounting surface. It is more pronounced on the t3 large BBK which I just pulled off my car and sold. The ZCG Stoptech setup has the calipers basically flush with the hub.
-
@Tank did you ever get the T3 micro kit on? I'm curious how the clearances look. On the large t3 BBK the largest issue I found running small 15" wheels and lower clearance barrels like the R types was the calipers depth in relation to the rotor top hats. Wheels like the 15" Rota RKRs with good inner barrel clearance fit fine even with the large t3 BBK front and rear with the ebrake. The ZCG stoptech kit I thought was better all around in terms of size and packaging but it's a long wait for the kits.
-
Awesome build. Looking forward to your updates on the sound system and interior 👍
-
It's crazy how quickly time flies when you're busy but this weekend I'm getting back into the build again. I've been pretty on/off due to personal commitments but things have been moving forward. I have some buddies coming by this weekend to swap parts which will be nice to clear out my space then it'll be a few days of prepping and bolting on new parts. I feel like I've rebuilt the car a few times at this point, but the nice thing is you can basically shell swap a s30 over a weekend if you had everything prepared.
-
Based on your driving style it sounds like you'll be fine with sticky 245s. Fwiw I'm probably putting down half of what you are and on 225 r comps I can easily spin at speed if I don't roll into it when boost comes on so I've been eyeing 245 45 16.
-
Depends on your humidity. Where I am, things stored in the garage don't rust for years. If you're in an area where flash rust occurs quickly I'd oil it for storage and acetone wipe it all down before reassembly.
-
What tire compounds are you running and how do you drive the car? At those pwr and trq levels, I can imagine doing rolling burnouts on 245 R comps when the boost comes on
-
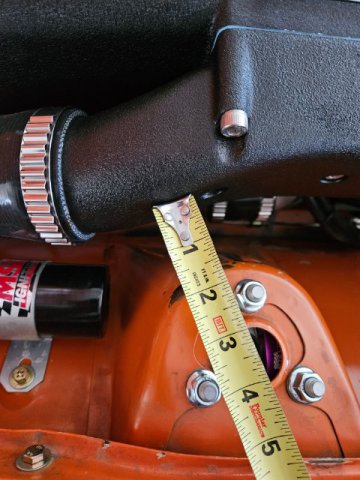
I was curious so I took a look at Godzilla Raceworks site and it looks like they sell a 24x12x3 intercooler with their kit which has the bent bracket above the rad support. My IC which is mounted below the rad support is 27x12x3, and I can actually fit a 4" core with both a large oil cooler + small ac condenser and retain the hood springs. If you remove the hood springs you can fit an even larger IC if you need it, but you'd likely need to angle it a bit. This is on a 240z so on a 280 with the taller support you can probably fit an even larger IC. The brackets are easy to make (couple bends and holes). Fwiw
-
I had the same thought years ago and decided to keep mine. The thought being that it would help channel more air through the coolers. You can still mount the intercooler below that lip and there is plenty of room for a large core, moreso with the 280 rad support. On the 240s I think they may have been 73 only and you can also put a rubber strip across the top to seal the area more. Curious what others think