AydinZ71
Members-
Posts
1073 -
Joined
-
Last visited
-
Days Won
27
Content Type
Profiles
Forums
Blogs
Events
Gallery
Downloads
Store
Everything posted by AydinZ71
-
eastwood sells a coating you can spray inside frame rails with a wand. It’s expensive, but the long tube is convenient and their products are very high quality IMO. im doing tons of panel replacement and rust repair myself. Feel free to scroll though the videos on IG @240z_restomod. You might see something that jogs your mind
-
Alright! order placed for the CV shafts with Fritz, and it seems I got one of two remaining February units. He helped me with some sources for the diff. Just purchased a 2017 3.545 Torsen model with 35k miles for $550 shipped to my home. I'm satisfied. Now I have upgraded a 71' from an R180 to an R200 20 years ago. Need to go in the opposite direction again. If I am reading correctly, I will need: R180 mustache bar R180 front diff mount Maybe R180 to 4spd driveshaft? I assume the curved rear transverse crossmember can remain the "bowed" one thats needed for the R200. Anything else come to mind? A friend of mine is parting out his 240z (body is in terrible shape), so I should be able to get what I need.
-
Thanks for the wealth of knowledge! I reached out to Fritz and he showed me another source for the LSD. Il be placing an order for his shafts shortly. I think this will be the best value overall, given the 20-30lbs weight savings and the LSD.
-
May yes! I recall something in the rule book about drivetrain components requiring “locking-type” fasteners (paraphrasing). I have had driveshaft bolts loosen on me, and ruin those pesky non-replaceable u-joints, so I have started a short torque wrench/ratchet. It’s hard to Get them tight enough on a 6” Long 12mm wrench alone. Not to mention the bolt/nut assembly can spin even with a lock washer sometimes. would love to hear his story on breaking a mustache bar! ... and here I was contemplating a lighter replacement using a rectangular steel tube with ribs. Not worth the effort at the moment.
-
I think I’m sold on the datsunrestomod CV’s! Only $500 more than the adapters from John. Thanks for letting me know about these! now to source the STI r180... Il look on FB marketplace as well. when you say flip, you mean relative to the companion mounting flange right? The other side of the shaft being the spline end of course, so no use flipping there.
-
I agree 100%! I think it’s important for us taking these cars to the next level, to know why they are the way they are. All a car manufacturer really cares about is how cheap, how fast, and how reliable the manufacturing process is (assuming the design/marketing actually creates a demand for the car). Therefore, stamped sheet metal spot welded together really fits the bill! Think about it... dozens of sheets of mild steel, stamped in a fury of Forges, transported with conveyors, assembled quickly with resistance spot welds. a race car and a production car have so little in common... I now have a much better appreciation for that restoring the race car. We start with a production car as a platform for many reasons, most importantly we can “add” to or modify something vs. starting from scratch. There are literally hundreds of dimensional decisions that Nissan has already made for us, for better or worse. Much more manageable then doing something from scratch and having to learn dozens of lessons the hard way.
-
Hey thanks for responding! Looks like the stub adapters are about $500 from a few sources. Having no idea where to look, I see some STI R180's on ebay for $600-1000. Not the cheapest way to an LSD, but lighter so more appropriate for an NA L24. Il look into the R160's as well. I have read a bit about how CV's have less rotational inertia, and have less vibration at higher speeds. First hand experience, I do get quite a bit of vibration from the rear-end over ~100mph. I have had the press-fit U-joints fail in the past, but it seems people are just giving away stock 240z shafts these days. Is the only reason you have not gone CV's yet because of the extra cost? appreciate your knowledge!
-
Hi there! Still preparing the car for group EP, although @clarkspeed has showed me a few other orgs./classes that could work with my base chassis modifications. Appreciate the help! The car (late series 1, titled 71') has been the drivetrain components swapped for an R200, and currently sits with a 3.545 open. A local friend of mine is parting out his 72', and im considering downsizing to an open R180. Searching forums, it looks to be a 20lb weight savings. Anyone else running an R180 for a low-torque racing application? SCCA class EP, ITS, vintage are all using the L24 with SU carbs. each allows various levels of modification to the engine, but in every case I don't see torque exceeding 170ft-lbs. If you also agree an R180 may be a good choice for relatively low torque racing applications, any idea on swapping out the open center section with an LSD? I'm looking at subie STI 180's, but when you add the CV shaft conversion and adapters on, it gets quite expensive. -Aydin
-
my old engineering professor used to call us “sophisticated Taylor’s”. Meaning, our job is to CUT material, not add unnecessarily. His point was, anyone can “guess” conservatively enough to make something work. Engineering is the process of adding just enough material, complexity, etc. to get the job done, and no more. He also taught us to not “fall in love” with a design, and be open to continuous improvement and criticism. That always Resonated with me.
-
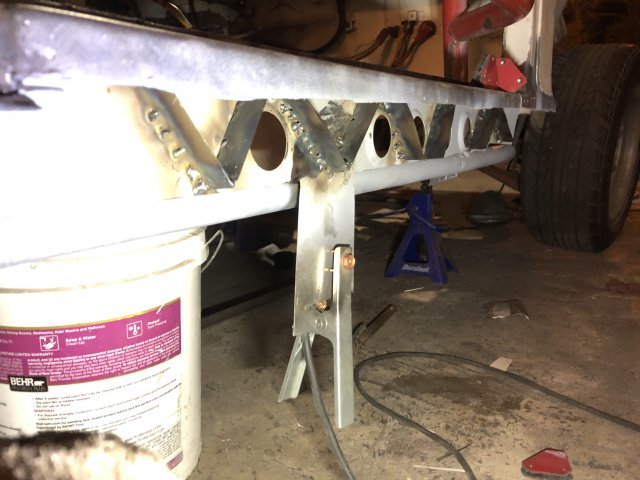
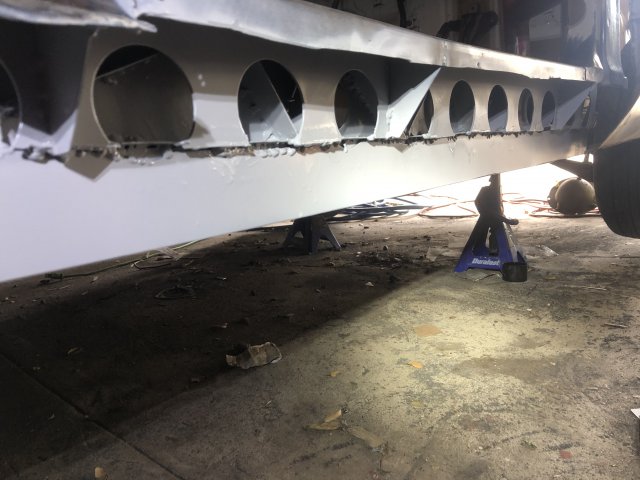
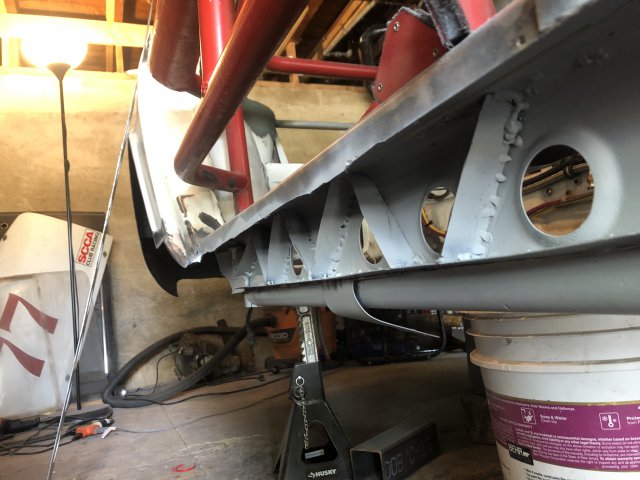
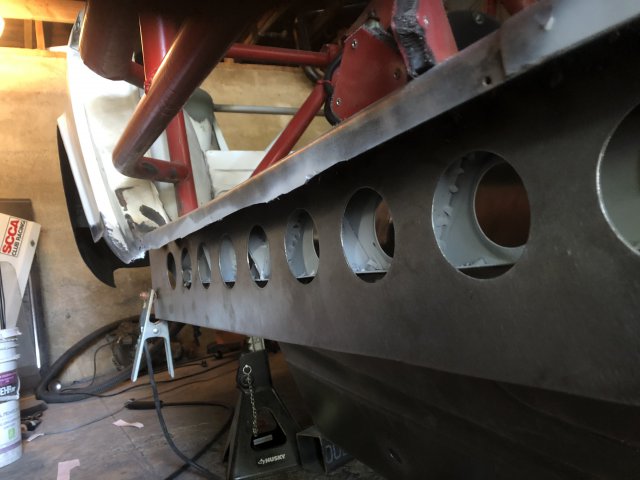
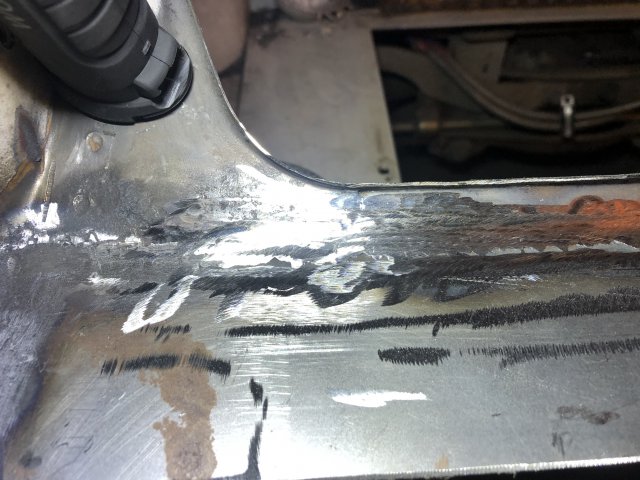
Hey thanks again for the Input! I will look into those racing classes/orgs you mentioned! I’m committed to restoring the car, but as I mentioned I may not race it. Therefore, I may sell the car but it would be as a “restored” race car. Given the quality of the suspension components I chose and head modifications (with exception of final CR), my hope is the car will be a good “platform” for myself or someone else to start as a base and work towards individual class compliance. I have made extra effort to ensure the permanent mods will not disqualify the car, but it all depends on the class of course. I’m also working on structural reinforcing (with weight in mind) using my engineering background. Here is a picture of the internal monocoque work I have done in the rocker, while replacing all the rust. I’m considering removing the roof structural support with a lighter solution as well, since it would lower my CG. if you may be interested in the finished product, or interested in general, feel free to shoot me a Message! If I found an interested buyer, I’d be happy to work towards a specific spec for that person. At a minimum, I assume anyone would want the rust replacement work Already underway to be competed. FullSizeRender.mov IMG_5199.MOV
-
The suspension had cut springs in the back and stiff front springs. I just sectioned my strut assemblies using ground control coil over sleeves, and purchased Koni racing shocks. Also purchased bolt-in camber plates in order to not cut into the body (another EP rule). Folks on here were really helpful in selecting parts. My springs are 350 in the front and 300 in the rear.
-
I purchased it as an old race car that seemed to have last been raced in 2002. I discovered quite a bit of rust that had not been clearly disclosed , after purchasing the car. I have been restoring and upgrading it since. I thought it may have been EP at first since it’s still an L24 and stock brakes, but you are making me reconsider. It does have SCCA “vintage racing” stickers in a few places. I am open to picking a less competitive class if I became familiar with other options. I don’t have experience racing. I purchased it with the initial plan to use it as a hotrod platform, but switched to restoring it as a race car after appreciating all the work that had already gone into it for a race application. I may never race it. I may sell it on BAT after eliminating all rust and making it track worth again. Just hoping to break even if I did. would you recommend a different racing series or class?
-
Drum brakes for a racing application
AydinZ71 replied to AydinZ71's topic in Brakes, Wheels, Suspension and Chassis
Makes sense. Can’t run anything but solid rotors at stock dimensions in this class so why not use a throw-way rotor. the ducting In the photos by Katman are certainly within my technical ability, so il play around with so sketches and see what y’all think. im definitely going to try cutting out some of the drum dust cover, as someone did further up on the post. My plan is to duct air to the lowest reasonable point, and leave the highest holes meshed open to exhaust the heat. Il have to read carefully on where I can pick-up the air stream from in the rear of the car. Pretty sure I can’t pull from below the floor pan. At this point, I’m just geeking-out. I really won’t understand the cause-effect of my mods until I start testing the car and breaking/warping stuff. i appreciate all the feedback from you learned folks! -
Hey someone responded!!! Thanks! Great point on the CR! My plan was to max-out the head this time around for pump gas, Then drop in domed pistons when I eventually rebuilt the bottom end. With the valve overlap, it will likely settle around 10:1 with the stock bottom end on this head rebuild. This is my first race car, so I still have a very steep learning curve. I don’t have any direct experience with E85 or race fuel, for example. it sounds like you have some experience, and at a minimum have read the EP spec line! I am definitely all-ears if you have anymore advice or tips for me! So far, it’s just the technical folks at SCCA I have been in contact with. -Aydin
-
Adding rigidity while restoring rusted metal
AydinZ71 replied to AydinZ71's topic in Fabrication / Welding
-
Hi all! I have been searching the forum and having trouble finding what I am looking for. Maybe I just don't have the right keywords. I am looking for an evaluation on individual engine components and how they effect/affected by racing applications, based on first-hand experience. For example: 1) What components are most likely to fail under high RPM's (7-8k), and in what likely order? 2) What components pose an issue on durability/longevity in a racing application? A quick update on my SCCA class EP car, specifically on the engine. Would love to get some of your feedback! The head is at Steves Machine Stop in Azusa, CA. They are working on it this week and should have it back by the end of the month. Here is what they are doing: 1) Ovate Beehive valve spring upgrade. Checked with SCCA to ensure legality. 2) head and SU carb manifold port match up to 1" into ports on either side. Limited by class rules to SU's and depth 3) valve seats being ported and unshrouded. Chamber polished and deburred to limit detonation risk. 4) stock N42 head as a core. exhaust valves being turned down to 33mm to meet class rules. 5) Cam lift set to .495. Class limited to .500. Duration and offset still being tinkered for a 3000-6000rpm optimal torque range. 6) head deck milled to increase CR. CR yet to be determined. will need to be optimized for cam specs and 91 octane. 7) Viton valve seals. These should last a bit longer than the stock rubber ones. The bottom-end was rebuild about 20k miles ago, but is otherwise stock. Read Frank Honsowetz book (how to mod OHC...) cover-to-cover. My take from his book is the stock bottom end should be OK for an NA racing application if additional measures have been taken to keep heat down (already have oil cooler) and is properly tuned. Going to give it a try and see. As long as I don't have a catastrophic failure like a lost rod, i can always rebuild the bottom end with Franks recommended changes when I rebuild. Distributor already has an AM electronic pick-up, but still using the diff head to distribute spark. Back to the topic of RPM's, I have no idea how my head mods will effect my prospective redline. I'm inclined to keep it at 7k, unless I can gather more research on what components may be limiting. Thanks again for reading!
-
Settling on two rear end options...
AydinZ71 replied to AydinZ71's topic in S30 Series - 240z, 260z, 280z
I ended up going with your system because you explicitly discuss and address high-torque applications. That's the big selling point. Since T3 makes no such claims, we have to assume their customers are the only ones that really know what it can handle. Looking forward to seeing your work when its done! No rush, my car is still in Michigan until March. -
Settling on two rear end options...
AydinZ71 replied to AydinZ71's topic in S30 Series - 240z, 260z, 280z
I have been thinking about this... my theory is they must not have much experience with high torque systems. The design/parts look like they would work for near stock torque, but I agree they do not look sufficient for 300+ lbs (maybe less, I don't own their parts). I think the key is, you have actually thought through how the torque reaction is applied to the unibody (which is in and of itself not capable of high torque on its own). It seems their parts focus on being bolt-on, with the same attachment points as you mentioned. Of course, having an engineering background does make some of us harsh critics. Doesn't take an engineer though. Breaking enough stuff gives one an intuition on where the weak-points in a design are. -
Meet the new spindle pin, same as the old spindle pin
AydinZ71 replied to JMortensen's topic in Drivetrain
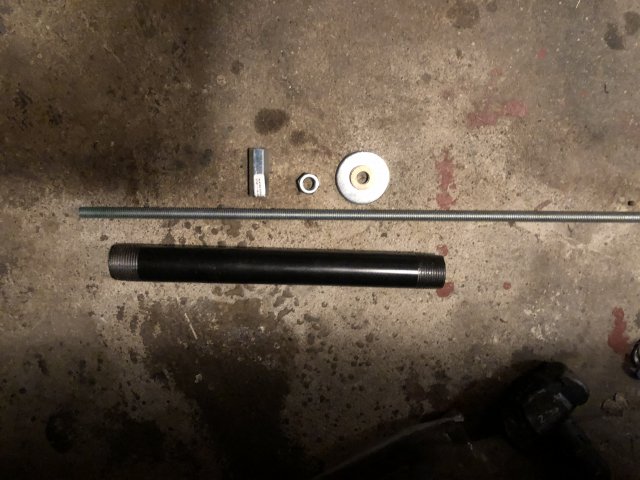
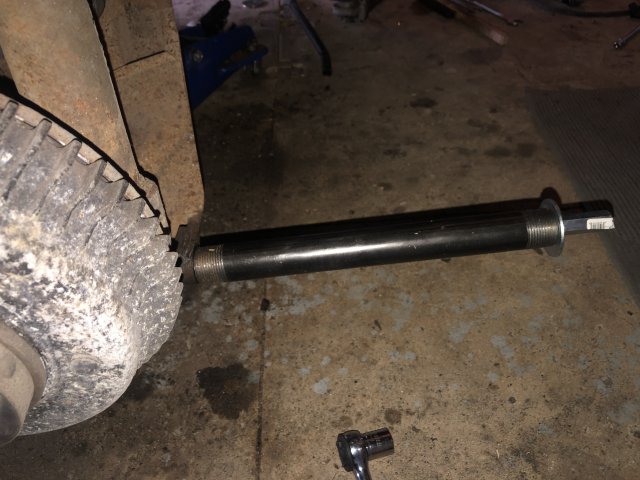
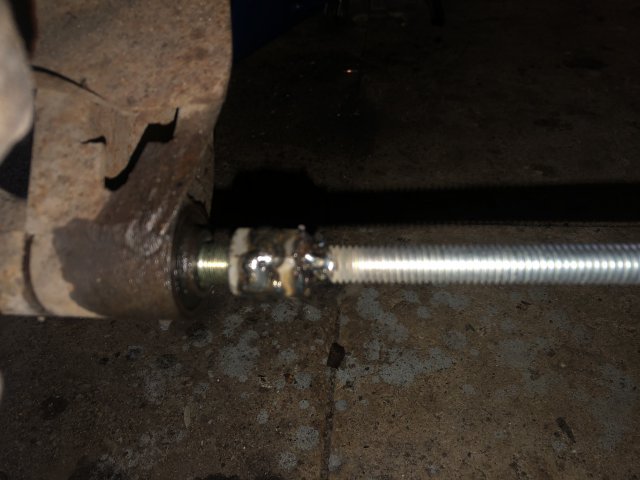
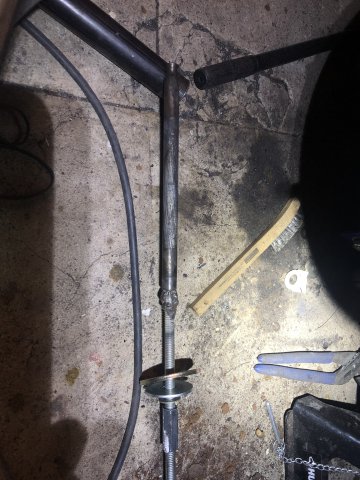
Ah! Gotcha. I made my own with parts from a hardware store, but in general it was the same description as the tool you are taking about. I believe the metric nut that screws onto the spindle end was M12X1.25. I stripped the spindle threads trying to pull it, so I had to weld the all thread directly to the spindle. Bought a new spindle from zcardepot. let me know if you need a full description. Mine did work flawlessly for one of the two sides before the spindle threads were stripped. -
It is satisfying, I agree. The tough part is when you “peel back the onion” and realize you have months of work before she will be back on the road 😂. That might just be me though. The thing with rust is when you go looking for it, you usually find much more than you thought you had. Kinda like roaches 🤷🏽♂️
-
Meet the new spindle pin, same as the old spindle pin
AydinZ71 replied to JMortensen's topic in Drivetrain
you can also try soaking it for several days in Phosphoric acid. It literally dissolves corrosion and is quite aggressive. Rust mort is a common brand. I too sheared my spindle threads. In the end, I had to use heat, pull with a welded-on nut, and hammer the other side. Every few hammers, I could feel the tension on the opposite side loosening up, so I knew it was moving microns. Did this for an hour, and finally got it out. Just an FYI, putting it back is also a PITA. I had spin the new spindle in some fine grit sand paper to get it in. I used a bore cleaner on the strut assembly, but after many minutes it still had not removed enough material for a “snug” fit. I opted for synthetic grease to reassemble. I figured the grease was least likely to disappear over time and keep the two metal surfaces from corroding again. Of course, they will... I guess il remove the spindle every few years and give them another greasing. IMG_4816.MOV -
Adding rigidity while restoring rusted metal
AydinZ71 replied to AydinZ71's topic in Fabrication / Welding
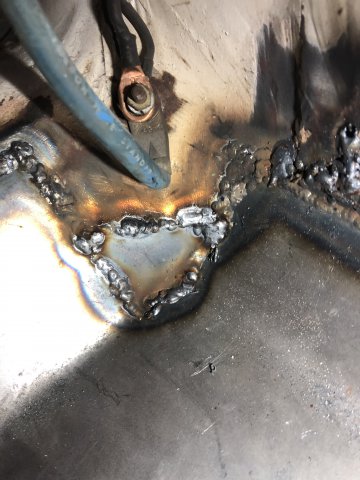
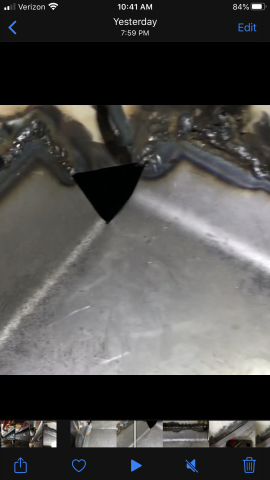
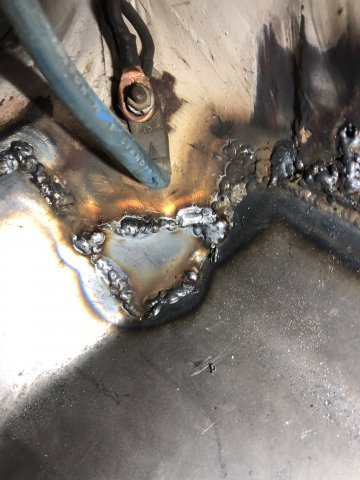
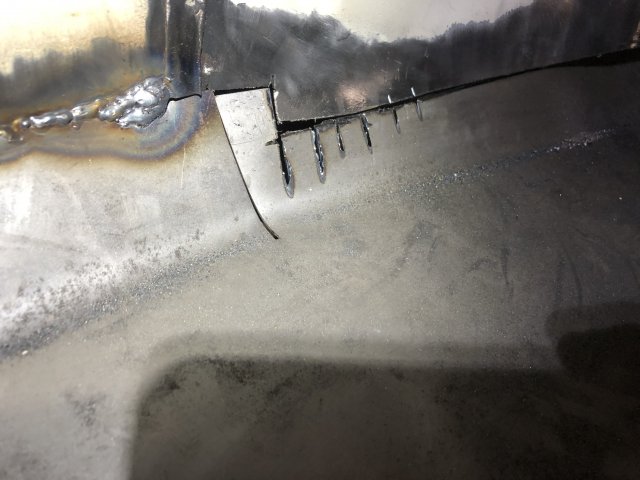
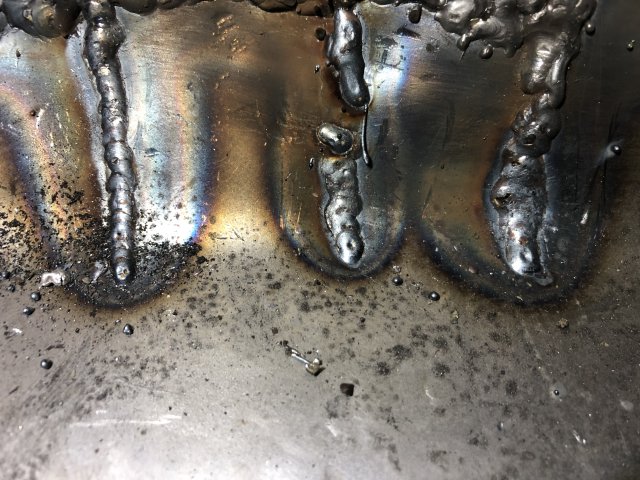
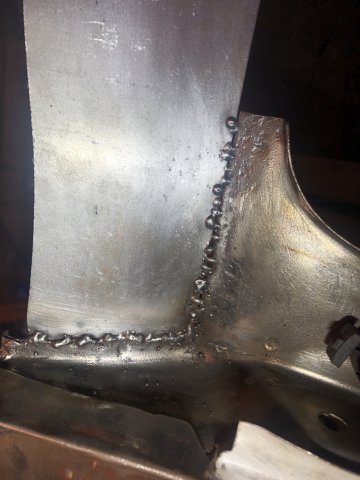
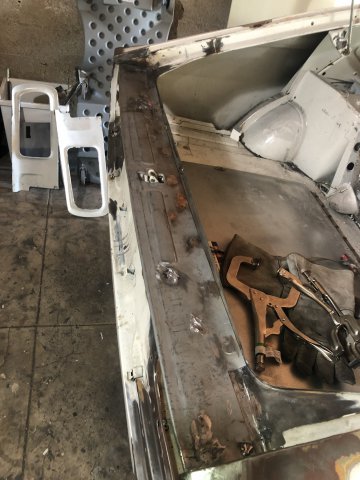
Hey thanks for the reply! I didn’t think anyone was interested 😂. I will look into what you did! smart to add the weight as low as you can. Moving the CG down by even half an inch will be noticeable when you corner hard. This is a race car so any additional rigidity without increasing weight is a win. You can use really thin metal (20 gauge) when under shear stress, so you don’t have to add a ton of weight if you are strategic about how you add it. Most of the rigidity I am adding is in the service of replacing rust, so the added time isn’t too bad when there isn’t much salvageable metal to start with. also, my full race cage is holding the whole body together while I geeked out on the rocker. Without the cage or carefully choosing how you suspend the weight of the car, you could twist the frame and have a permanent body warp. I have seen some people temporarily weld bracing while rebuilding frame rails. here are some more pics and vids of my progress this weekend. I have only been welding for four months so it ain’t the prettiest thing. FullSizeRender.mov FullSizeRender.mov IMG_5235.MOV IMG_5233.MOV IMG_5225.MP4 -
I completely agree.’I had to learn both of those lessons over lots of trial and error. I just did my floor pans with more success. I still have more to grind off than I’d like, but the two metals had dissimilar thicknesses so I felt more comfortable removing material with a flap wheel than trying to minimize the extra wire. I have only been welding for 4 months. IMG_5233.MOV
-
looking great! I had similar difficulties with heat and burn through. Mine was rusted out more than yours, so there is always something to be grateful for! Here is minE: IMG_4558.MOV
-
Removing door with engine installed..Ok to do?
AydinZ71 replied to brianZortiz's topic in Body Kits & Paint
I second this. The doors add some rigidity Between the hinge and latch when closed, but nowhere near enough to cause the surrounding metal to yield or experience plastic deformation if the door is removed.

